Scanning turns paper into a digital file you can store, email or sign. If you have an all-in-one printer, you already have a scanner. This guide covers how to scan from the printer itself, from Windows, from a Mac and from a phone, plus settings that give clean results.
If scanning fails, see what to do when a printer scanner is not working.
By the Reviewstook Editorial Team. Last updated: October 31, 2026.

Choose Your Method
- Scan from the printer: press Scan on the printer and send the file to a computer, email or USB drive.
- Scan from a computer: use a scan app to control the settings.
- Scan from a phone: use the printer maker’s app or a phone scanning app.
In this guide
Place the Document
For a single page, lift the lid, place the page face down on the glass aligned with the corner mark and close the lid. For multiple pages, use the automatic document feeder (ADF) if your printer has one; place the stack face up as shown by the markings. The glass gives the best quality for fragile or thick items.
Scan in Windows
- Install the printer driver and scanner software.
- Open the Windows Scan app (search for Scan in the Start menu), or the maker’s scan app.
- Select your scanner, the source (Flatbed or Feeder), the file type and the resolution.
- Click Preview, then Scan. Save the file.
Scan on a Mac
Open Image Capture or Preview. In Preview, choose File, then Import from Scanner, pick your scanner, set options and click Scan. In Image Capture, select the scanner, adjust the settings and click Scan.
Scan With a Phone
Open the printer maker’s app, choose Scan and follow the prompts. The app can save PDFs or send them by email. Phone scanning apps use the camera and are handy for receipts and quick copies.
Settings That Give Clean Scans
- Resolution: 200 to 300 dpi suits text documents. Use 600 dpi for photos you want to enlarge.
- File type: PDF for documents, JPEG for photos.
- Color mode: black and white or grayscale makes smaller files for text. Use color for photos.
- Clean the glass with a lint-free cloth to avoid lines.
Combine Pages Into One PDF
Choose a multi-page PDF option in the scan software, or scan each page and combine them in a PDF tool. The ADF scans a stack in one go.
Scan to Email or a Network Folder
Many all-in-one printers can send scans by email or to a shared folder. Set up the destination in the printer’s web page or the maker’s software. See how to find a printer’s IP address.
Choosing a Printer With a Good Scanner
See printers with a document feeder, document scanners and all-in-one printers. Read what is an all-in-one printer.
Feeder or Glass: Which to Use for Each Job
An all-in-one printer usually gives you two ways to scan, and picking the right one saves time and protects your originals. The glass, also called the flatbed, holds one item still while a scan head moves under it. It handles almost anything: single sheets, receipts, book pages, photos, small booklets and fragile or crumpled papers. Because nothing is pulled through a roller path, it is the safer choice for old, torn or valuable documents.
The automatic document feeder pulls a stack of sheets through one at a time, which suits long documents such as contracts, statements or homework packs. Check the product listing or manual for how many sheets the feeder holds, what paper weights it accepts and whether it scans both sides. Some feeders scan one side only, so a double-sided page needs to be flipped and scanned again. Others scan both sides in one pass, which is much faster for duplex documents.
- Use the feeder for: clean, flat, standard-size paper in stacks.
- Use the glass for: photos, stapled pages, folded or curled sheets, torn paper, sticky notes, thick cards and anything you do not want to risk jamming.
- Remove first: staples, paper clips and adhesive notes before using the feeder.
- Square the stack and adjust the feeder guides so pages enter straight and do not skew.
If a feeder jams, stop the scan, open the cover and remove the page in the direction the manual shows rather than pulling hard. Frequent jams usually point to dirty rollers or mixed paper types, and the maker’s care instructions explain how to clean the rollers. If you scan large stacks often, a feeder with duplex scanning is a feature worth looking for.
Text Recognition and Searchable PDFs
A basic scan is just a picture of the page. You can read it, but you cannot search it or copy text from it. Optical character recognition, usually shortened to OCR, analyzes the picture and adds a hidden text layer so the file becomes searchable. This is very useful for contracts, manuals, bills and school notes, since you can find a word in seconds instead of scrolling through pages.
Where you find OCR depends on your setup. Some printer maker apps include it as an option when you save a scan as a searchable PDF. Some computer scanning apps and PDF tools offer it, and some phone scanning apps do it automatically. Check which formats your scan software offers; the listing or manual should say. If your software cannot do OCR, you can scan to PDF and then run the file through a PDF tool that does.
OCR works best on clean, straight, high-contrast originals. Small or decorative fonts, faint print, handwriting and photocopies of photocopies can produce errors, so skim important results for mistakes before relying on them. A resolution around the 300 dpi mark is a common recommendation for text documents, and it is usually enough for recognition. Set the language in the OCR options if the tool gives you a choice.
- Straighten and crop pages before running OCR.
- Keep the original scan if the document is legally important, in case the text layer contains errors.
- Search a few known words to test that recognition worked.
File Size, Naming and Organizing Your Scans
Scans pile up quickly, and a messy folder is as frustrating as a pile of paper. A few simple habits keep them useful. Start with file size. High resolution and color make files large, which can be a problem when emailing or uploading to a form with a size limit. For plain text documents, grayscale or black-and-white at a modest resolution often gives a readable file at a fraction of the size. Keep color for pages where color matters, such as charts, signatures with colored ink or photos.
If a file is too large, rescan at a lower resolution or compress it in a PDF tool, and check that the result is still readable. Splitting a very long document into parts may also help when a site limits uploads.
Naming matters more than most people expect. Use a pattern that sorts well, for example the date in year-month-day order, followed by a short description. Avoid names like Scan0001, which tell you nothing six months later. Pick one folder system and stick to it: by year, by topic or by person all work, as long as you use it consistently.
- Set the scan software to save into a default folder so files do not scatter.
- Back up important scans to a second place, such as an external drive or cloud storage you trust.
- Delete failed or duplicate scans so the real ones are easy to find.
- Note in the filename if a scan is a copy of an original kept elsewhere.
Books, Photos and Fragile Originals
Special items need a gentler approach than a stack of office paper. For book pages, the spine often creates a shadow and a curved, blurry edge. Press the book gently on the glass if it is safe to do so, and if the scanner has a lid that does not close over a thick book, hold it down lightly with your hand or a clean cloth, taking care not to press hard on a fragile binding. Some scan software has a book or curl correction option that straightens text near the spine. Check the manual for the feature name.
For photos, use the glass and a higher resolution if you want to enlarge or print them, as the document text recommendation is too low for photographic detail. Clean the glass first and wipe any dust off the print with a soft, dry cloth. Save photos as image files rather than PDF unless you need them inside a document. If the photo is old or faded, scanning it as a master and keeping an unedited copy lets you adjust a duplicate without losing the original data.
For fragile or valuable originals, such as old letters, documents in sleeves or items with flaking surfaces, avoid the feeder entirely. Place them face down, close the lid gently, and consider a professional scanning service for irreplaceable items. For items too big for the glass, scan in sections and join them with software, or photograph them flat in even light with a phone app made for documents.
- Use a clean, dry cloth on the glass, not sprays that can leave streaks.
- Wear clean, dry hands or cotton gloves for old photos.
- Do not scan items with wet ink, glue or tape residue.
Privacy and Security for Sensitive Scans
Scans often contain sensitive information, including IDs, bank statements, medical forms and signed contracts, so treat the digital copies as carefully as the paper ones. Start with where the file goes. Scanning to a USB drive, a computer you control or a private folder is simpler to manage than scanning to a shared network folder or an email address that others can access. If you use email or cloud storage, check the account has a strong, unique password and, where available, two-step sign-in.
Some printers keep copies of recent jobs in memory or on internal storage. The manual or the maker’s support pages should explain whether your model does this and how to clear it. If you are selling, giving away or recycling a printer, use the factory reset option in the settings and follow the maker’s instructions for erasing stored data and saved network details.
Public and shared printers carry extra risk. Do not leave originals on the glass or in the feeder, and check that the scan has not gone to a shared destination. In an office, find out who can see scans in a shared folder.
- Delete sensitive scans from temporary folders and download locations when you are finished.
- Store sensitive files in an encrypted or password-protected location if one is available.
- Be cautious with scan-to-email addresses, which are easy to mistype.
- Keep printer firmware updated, since updates may include security fixes.
When you share a scan, send only the pages needed, and consider hiding or removing details that the recipient does not need to see.
Prepare Before You Press Scan: A Short Checklist
Most poor scans are decided before the lid closes. A few seconds of preparation removes the usual culprits, such as specks, folds and odd angles, and saves you from repeating the whole job. Run through this list whenever you scan something that matters.
- Wipe the glass with a soft, lint-free cloth, using only the cleaning method your printer manual recommends.
- Remove staples, paper clips and sticky notes, which can scratch the glass or jam a feeder.
- Flatten creases by running your hand across the page, or press it gently under a heavy book for a few minutes.
- Line the page up with the corner guide or the arrow printed on the scanner frame.
- Decide the final use first: a quick reference copy, an email attachment, or an archive file.
- Close the lid fully so outside light does not bleed into the edges.
Doing this once and building it into habit is easier than correcting problems in editing software afterwards. It also keeps your printer’s glass in better condition over the long run.
Troubleshooting a Scan That Looks Wrong
When the result is not what you expected, the fix is usually simple. Match the symptom to the likely cause below, then adjust one thing at a time so you can tell what actually helped.
| What you see | Likely cause | Try this |
|---|---|---|
| Faint lines running down the page | Dirt on the glass or feeder strip | Clean the glass and the narrow strip by the feeder |
| Page appears tilted | Paper not square to the guide | Realign and use a deskew option if your software has one |
| Text looks fuzzy | Resolution too low | Raise the setting and rescan |
| Washed-out colors | Wrong color mode or lid left ajar | Pick color mode and close the lid properly |
| Software cannot find the scanner | Connection or driver problem | Check the cable or network, then reinstall the driver from the maker |
If none of these changes help, check the maker’s support pages for your exact model, since scanner software and menus vary a lot between brands.
Deciding Where a Finished Scan Should Live
A scan that disappears into a random folder is almost as useless as the paper you began with. Before you begin, choose a home for the file and stick with it. Many people prefer a single folder with subfolders by year or by topic, while others rely on cloud storage that syncs across devices.
Write file names that you will understand in a year. A pattern such as the date, a short description and the sender works well and sorts neatly. Avoid names like scan1 or new document, because they tell you nothing when you search.
Keep the original paper if the document has legal or financial weight, and ask the issuing office or an official source whether a digital copy is acceptable for your purpose. Back up important scans in a second location so one failed drive does not erase them. Finally, if a file contains personal details, protect it with the folder permissions or encryption your computer or storage service offers.
Scanning a Batch Without Losing Your Place
Long stacks of paper invite mistakes. Pages get skipped, flipped or fed twice, and you only notice once the file is already saved. A little structure turns a tedious task into a calm one.
Sort the pile before you begin and remove anything that does not need to be kept. Scan in small groups, such as one folder or one month at a time, rather than one enormous run. After each group, open the file and flip through it quickly to confirm that the page count matches and nothing is upside down. If your printer has an automatic feeder, load only the number of sheets the maker says it can hold, and keep thicker or curled pages for the glass.
Keep the scanned originals in a labeled tray so you always know what is done and what remains. When a long session is finished, give the glass one last wipe and close the lid so dust stays out for next time.


Ready to Buy? Start Here
If this guide helped you decide what to look for, these products are a place to start.


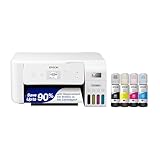
As an Amazon Associate we earn from qualifying purchases. Prices and availability are shown on Amazon.
What a Scanner Actually Sees: Resolution, Depth and Honest Expectations
A scanner translates a physical page into light measurements, and the settings in this guide are how you instruct that translation. Resolution decides how finely the page is sampled: at document resolutions the letters are captured with room to spare, while photographs and artwork reward finer sampling because their information lives in gradients rather than edges. The common beginner’s error is to scan everything at the finest setting the machine offers, producing enormous files that take minutes each and reveal nothing the document contains — a letter has no more information at an extreme resolution than at a sensible one, only more data describing its paper texture. The opposite error, scanning a photograph too coarsely, discards information that no later setting can invent. Match the sampling to the material’s actual information, and scanning becomes fast and faithful at once.
Color depth is the second translation choice. A text document scanned in grayscale is smaller and cleaner than the same document scanned in full color, because the scanner stops reporting the paper’s cream tint and the ink’s blue fringe as information. A document with a stamp, a signature in blue or a highlighted passage deserves color, because those marks are its content. Photographs deserve color and the gentlest handling the software offers, including the automatic corrections treated cautiously: an enhancement that pleases on a screen can clip the very shadows and highlights an archive exists to preserve. Scan photographs as honestly as the machine allows, and make your pretty versions as copies, keeping the honest one as the master.
Expectations complete the picture. A home all-in-one scanner is a superb reader of documents and a good keeper of family photographs; it is not a laboratory instrument for film or fine art, and judging it by that standard wastes a fine tool. Within its honest territory — the paperwork of a life, the photographs of a family, the records of a small business — its translations are faithful enough that the paper originals can retire to a box, which is the transformation scanning actually promises.
Building a Home Archive That Future You Can Search
Scanning without a system produces a folder of images named by a machine, which is a paper pile translated into a digital one. The system that prevents it has three parts, all cheap. First, a naming habit: every scan named at the moment of scanning with what it is and when it is from, in words a stranger could follow, because future you is a stranger. Second, a folder structure shallow enough to survive enthusiasm: a handful of categories by life area rather than a cathedral of subfolders, because deep structures collapse under their own cleverness while shallow ones get used. Third, text recognition applied to documents as a matter of routine, because a searchable archive answers questions — when did we buy that, what did the letter say — while an unsearchable one only stores answers it cannot find.
Add two protections and the archive becomes trustworthy. Keep a second copy somewhere that is not the same device — a cloud folder, a drive kept elsewhere — because an archive that exists once is a single accident away from being a memory. And scan the irreplaceable at the honest quality described above the first time, because originals fade, get borrowed and get lost, and rescanning is a privilege that expires without notice. Grandparents’ letters, children’s artwork, certificates, the documents of a house and a family: these are the archive’s crown jewels, and they deserve the evening it takes to capture them well.
The archive’s final virtue is that it changes behaviour. A household that can find any document in a minute stops keeping defensive paper copies of everything, stops dreading the form that asks for a record, and starts treating paper as what it now is — the input to a system, not the system itself. The scanner on the printer, so often the least-used feature in the home, becomes the household’s memory. That is a large return on the small disciplines of naming, filing and recognising, and it begins with the next document you scan.
Scanning Photographs and Fragile Originals With Care
Old photographs and fragile papers deserve a slower hand than office documents. Never send them through a document feeder, whose rollers and bends are designed for sturdy, replaceable pages; the flatbed exists for them, where they lie still and are read by light alone. Clean the glass first, because at photographic settings the scanner faithfully records the dust you did not notice, and handle originals by their edges, because the oils on a fingertip are a permanent addition to an old print’s surface. A photograph that has lived in an album for decades should be lifted, not slid, and returned to its place the same day.
Scan each precious original once, well: at a resolution generous enough for the prints you might one day make, in color even if the original is faded — because the fading is information a restorer, human or software, can work with — and saved in a format that does not throw information away. Then make your working copies from that master for sharing, framing and printing, and leave the master untouched. This is the archivist’s method reduced to household scale, and it means the family’s visual history gets exactly one careful handling and a lifetime of safe use.
Books and bound volumes ask for their own gentleness: support the spine rather than forcing the book flat, accept the shadow at the gutter as the price of the book’s survival, and scan in a consistent order with a marker for your place. A book scanned kindly can be read by grandchildren; a book scanned forcefully has been traded for its images, which is rarely a bargain the owner meant to make.
Scanning for Officialdom: Forms, IDs and Signatures
A growing share of household scanning is done for an audience of clerks and portals, and it has its own standards. The receiving end usually wants a complete document — every page, in order, in one file — legible at the size it will be read, and small enough to upload through a portal that was not designed generously. Scan forms in grayscale or color at a document resolution, combine the pages into a single PDF in the right order, and check the file the way the clerk will: open it fresh, zoom to reading size, and confirm that the smallest print and the faintest stamp survived. A form rejected for illegibility costs more time than the thirty seconds the check takes.
Identity documents deserve both care and caution. Scan them flat, complete and unedited — an ID with a cropped edge invites questions — and then treat the resulting file as what it is: a key to your identity, to be sent only where it is genuinely required, through the channel the institution specifies, and stored in the safest corner of your archive rather than in a photo stream. When an institution’s request for an ID scan arrives by an unexpected channel, verify the request before honouring it; the scan you make so carefully for officialdom is exactly the file a fraudster would ask for with a plausible story.
Signatures are the third official art. A signature scanned from a real, pen-made original — signed boldly on clean paper, scanned in grayscale, saved once and reused — looks like what it is, which is the point. Keep the master file private, use it on your own documents only, and remember that some institutions require the wet signature itself; the scan serves the many that do not. Done well, this small official toolkit — forms in order, IDs handled like keys, a signature on file — removes a surprising amount of friction from a household’s dealings with the world.
More Questions About Scanning Documents
Why is my scan a huge file that I cannot email?
Because resolution and color multiply quickly: a page sampled very finely in full color is a photograph of a page, with a photograph’s weight. Rescan documents at a document resolution in grayscale unless color carries meaning, and most portals and inboxes will accept the result. If the scan already exists, your scanner software or a PDF tool can usually save a lighter copy — keep the heavy master, send the light copy.
Can I scan a document that is larger than the glass?
In parts, yes: scan overlapping sections and combine them with software that stitches images, or use a phone’s scanning mode while moving along the original for a serviceable record. For a document that must be exact — a plan, a certificate — a copy shop’s large scanner earns its fee. Know which kind of exactness your document needs before choosing the method.
How do I scan a two-sided document if my scanner is one-sided?
Scan all the fronts in order, then flip the whole stack and scan the backs, and interleave the two sets with your PDF software — or, for short documents, simply scan each sheet twice on the flatbed as you turn it. Work slowly with a numbered stack; the only real difficulty in manual duplexing is losing the order, and a pencil number on a sticky note per sheet prevents it.
Should I keep paper originals after scanning?
Keep the ones whose originality is the value — certificates, signed agreements, anything an institution may one day demand in the flesh — and let the rest go once you have verified the scan and its backup. The verification matters: an archive of unread scans is not a reason to shred anything. Check first, store twice, then declutter with a clear conscience.
Why do my scans show the text from the other side of the page?
Thin paper lets the scanner’s light catch the reverse side’s print, especially at generous settings. A sheet of black paper laid behind the page while scanning absorbs the show-through and cleans the result dramatically — the oldest trick in the scanning trade. Reducing brightness slightly helps too, but the black backing is the fix that feels like magic the first time it works.
A Scanning Session, Run Like a Professional’s
Watch someone who scans for a living and you will see a session, not a series of improvisations. The documents are gathered and ordered before the machine is touched, sorted into the feeder’s work and the flatbed’s. The glass is cleaned once, at the start, rather than blamed repeatedly later. Settings are chosen per batch — the records at document settings, the photographs at theirs — because changing settings per page is where time and consistency both leak away. Each finished scan is glanced at immediately, at reading size, while the original is still in hand and a rescan costs seconds; the glance is the whole quality department, and it catches the skewed page, the clipped edge and the thumb in the corner at the only moment they are cheap to fix.
Naming and filing happen in the same session, not in a hypothetical later one, because a scan left unnamed is a scan half-lost. The session ends with the originals refiled or released, the archive backed up if the session added anything precious, and the machine left clean-glassed and ready. An hour of this professionalism clears a household’s paper backlog more completely than a month of occasional scanning, and it converts scanning from a reaction — something a form forces on you — into a practice. Most homes do not need the full ceremony weekly. They need it once, to clear the drawer, and then in miniature each time paper arrives: scan it on entry, name it, file it, and let the drawer stay empty. Paper handled at the door never becomes a pile, and piles, as every household knows, are where documents go to be lost in plain sight.
When Scanning Goes Wrong: A Symptom Guide
A vertical line down every scan, always in the same place, is dirt — on the glass for flatbed scans, or on the narrow strip the feeder reads from, for feeder scans. Clean the correct surface, gently, as the manual directs, and the line that looked like a failing machine vanishes like the smudge it was. A scan that is dark at one edge has a lid that is not closing evenly, usually because the original is thick or the book’s spine is holding the lid up; support the original and let the lid rest rather than forcing it. Colors that drift scan after scan suggest the machine needs its calibration routine, which lives in the maintenance menu and asks only for a few minutes and a blank sheet.
Skew that appears only in feeder scans points to the feeder’s guides or to mixed paper sizes in one stack; set the guides to the stack and keep batches uniform. Pages that arrive in the file out of order are a workflow injury, cured by the numbered-stack discipline described earlier. And a scan that looks perfect on screen but prints badly has usually been saved at a screen’s resolution and printed at a document’s size — rescan the original at a document setting if it still exists, and let the episode teach the household’s one unbreakable rule: scan once, at the quality the future might want, because originals have a way of leaving. Every symptom in this section is a sentence the scanner is speaking plainly. Learn its small vocabulary, and you will never again describe it as temperamental.
Take the measure of the whole subject and it comes to this: a scanner rewards the same virtues as a good filing clerk — order before speed, a glance before filing, names that a stranger could follow, and originals treated with respect on their one journey across the glass. None of it requires talent, and all of it compounds, because an archive built properly grows more valuable with every document added, while an archive built carelessly grows only heavier. Scan the next document the way this guide describes — matched settings, a checked preview, a real name, a safe home — and you have not merely digitised a page. You have started, or strengthened, the household memory that every family eventually wishes it had begun years earlier. Begin with the drawer. It is waiting, and it is smaller than you remember.
Scanning Children’s Artwork and School Life
One archive deserves special mention because it cannot be rebuilt if it is lost: the paper trail of childhood. Drawings come home in a glorious flood, most are fridge-worthy for a week, and the sheer volume forces a cruelty on every household — almost all of it must go. Scanning changes the arithmetic of sentiment. The flood can be captured entire, kept entire, and the physical keeping reduced to the pieces whose texture and size are the point. Scan artwork flat, in color, at a setting generous enough to print from later; name it with the child’s name, the year and any title the artist supplies, because the title, dictated at age six, is frequently the best part of the record.
School documents follow the same gentle logic: the certificates, the reports, the first story with the teacher’s comment in the margin. Scanned as they arrive, they form a school-life archive that the adult the child becomes will one day be astonished by. And the practice teaches the household’s youngest members the archive’s virtues by osmosis — that paper is precious and perishable, that a scan is a promise kept, and that the machine on the desk is not only a printer. It is the family’s memory, accepting deposits. Make them while the artists are still producing at full flood; no archive in this guide will ever be loved more.
Everything in this guide finally reduces to a single transfer of trust: from paper, which burns, floods, fades and gets lost in moves, to a file, which — named well, stored twice and made searchable — can outlive the house it was scanned in. That transfer deserves the few minutes of care each document asks for. Give them, and the scanner you already own becomes the most quietly valuable machine in the home: not the one that produces paper, but the one that makes paper safe to let go of.
A last, practical encouragement: do not let the perfect archive be the enemy of the started one. Scan the most important box first — the certificates, the letters, the photographs that exist nowhere else — even if the naming system is improvised and the folders are plain. An imperfect archive of the irreplaceable beats a perfect plan for everything, because time is the one input the archive cannot recover. Systems can be tidied later, files renamed in batches, folders reorganised on a quiet evening. The original that was lost in the meantime cannot be tidied back into existence. Start where the risk is, scan it this week, and let the rest of the system grow around that rescued core.
Frequently Asked Questions
What resolution should I scan at?
200–300 dpi for documents, 600 dpi for photos.
Why are my scans streaky?
The glass may be dirty.
Can I scan without a computer?
Yes, to a USB drive or email on many printers.
Why is the scan crooked?
Align the page with the corner mark, or use the feeder guides.
Should I scan to PDF or JPEG?
Use PDF for documents, especially multi-page ones, and JPEG or another image format for photos. PDFs are also easier to combine and to make searchable.
Why does my scan have a dark edge or shadow?
The lid may not be closing flat, the page may be curled, or you may be scanning a thick book. Press the item flat if safe, close the lid fully and check for a book or edge correction option in the software.
Can I scan both sides of a page automatically?
Only if the feeder supports duplex scanning. Check the product listing or manual. If not, scan one side, flip the stack and scan again.
What does OCR do?
It reads the text in a scanned image and adds a text layer so the file can be searched and copied. Accuracy depends on how clean and clear the original is.
Why are my scanned colors off?
Check the color mode setting and clean the glass. Different apps may use different default color settings, so try the maker's app and compare the result.
How do I make a scan smaller to email?
Lower the resolution, use grayscale or black and white for text and compress the PDF in a PDF tool. Check the result is still readable.
Is it safe to scan an ID?
It can be, if you keep the file in a protected place and only send it to people who need it. Delete extra copies from shared folders and email.
Do I need to keep the paper original?
For legal, tax and official records, keep originals unless the issuing body says a copy is acceptable. A scan is useful as a backup.
Bottom Line
Place the page on the glass or in the feeder, choose the scan app, set 200–300 dpi and save as PDF. Keep the glass clean. See best all-in-one printers.
Related Reading
- Types of Printers Explained: Inkjet, Laser, Ink Tank and More
- 7 Best Wireless Printers for Home Use
- Epson ES-C220 vs DS-530X: Compact or High-Volume Scanner?
- How to Calculate Printer Cost Per Page (With Examples)
- How to Check Printer Ink Levels on Windows, Mac and Phone
More Printer Guides
- Best Printers for Home Use
- How to Set Up a Wireless Printer on Mac
- How to Stop Inkjet Printer Ink From Drying Out and Clogging
- Ink Tank vs Laser Printer
- Inkjet vs Laser Printer for Home Use
- Printer Ink vs Toner

