Printing your own labels saves money for shipping, mailing, organizing and selling. The process is straightforward once you match the label sheets to your printer and set up the template correctly. This guide covers sheet labels on a regular printer, thermal label printers and the settings that prevent misaligned prints.
Always use label sheets rated for your type of printer (inkjet or laser). The wrong sheets can jam, curl or melt adhesive inside the printer.
By the Reviewstook Editorial Team. Last updated: October 31, 2026.

Choose the Right Labels
Check the packaging: sheets marked for inkjet printers use a coating that absorbs ink, and sheets marked for laser printers withstand heat. Glossy and waterproof labels need the matching ink type. Pick a size and layout from a standard label product code, which most label makers list on the pack.
In this guide
Step 1: Set Up the Template
Most word processors have a label tool. In Microsoft Word, go to Mailings, then Labels, choose Options, pick the label vendor and product number and click OK. In Google Docs, use an add-on or a template from the label maker. Enter your text and use the “Full page of the same label” option for repeating labels, or fill each label with different text.
Step 2: Print a Test on Plain Paper
Print the layout on plain paper first. Hold it behind a label sheet against a light to check alignment. Adjust the margins or the template if needed.
Step 3: Load the Label Sheet Correctly
Load labels in the paper tray or the rear feed, print side facing the way your printer requires. For laser printers, use the manual feed slot if you have one. Load one sheet at a time if the printer tends to pull more than one. Do not reuse sheets that have missing labels, since the exposed adhesive can stick to the rollers.
Step 4: Set the Paper Type and Print
In the print dialog, choose Labels or Heavy Paper as the paper type, and select the correct paper size. Print at normal or best quality. For inkjet labels, allow the ink to dry before handling.
Printing Shipping Labels
Many shipping carriers let you print labels directly from a website or app. Use full-page sheets with sticker backing, half-sheet labels or a thermal label printer. Check the label size the carrier requires, and print at 100% scale. See best label printers and best label makers.
Thermal Label Printers
Thermal printers use heat to darken special paper, so they need no ink or toner. They are fast and cheap per label for shipping and barcodes. Install the maker’s driver, choose the right label size in the software and calibrate the label roll when asked.
Common Problems
- Misaligned text: check the template, the paper size and the scale (print at 100%, not fit to page).
- Smearing: use inkjet-rated labels and let ink dry.
- Jams: use fresh sheets, avoid curled sheets and see how to fix a paper jam.
- Labels peel inside: use laser-rated sheets in laser printers and avoid old sheets.
Pick a Printer for Labels
See printers for Etsy sellers, printers for stickers and how to make stickers at home.
Label Materials and Finishes Compared
Not all label sheets behave the same, and the material you pick decides how the finished label looks and how long it lasts. Matte paper labels are the common default. They take ink or toner well, are easy to write on with a pen and suit address labels, folder tabs and pantry jars. Glossy paper labels give richer color and suit product stickers, but they usually need an inkjet-rated coating and a longer drying time. Clear or transparent film labels let the surface underneath show through, which looks neat on glass or plastic, though the printed color can look thinner on a dark container.
Waterproof or vinyl-style labels are meant for items that get wet, such as bottles, tools or outdoor bins. They are sold for either inkjet or laser use, never both, so read the pack carefully. Some labels use a permanent adhesive that is hard to remove, while others use a removable or repositionable adhesive for items you plan to relabel. Check which one you are buying before you print a whole sheet.
A few questions help you choose:
- Will the label face moisture, sunlight or handling? If so, look for a coated or film material rated for that.
- Is the surface smooth, curved or textured? Rough or curved surfaces need a stronger adhesive.
- Do you need to peel the label off later without residue?
- Is your printer inkjet or laser? The pack must name the matching type.
Specific durability claims differ by product, so rely on the wording printed on the pack or listing rather than assuming a finish is waterproof or fade-resistant.
Designing Labels That Are Easy to Read
A well-aligned label can still be hard to read if the design is crowded. Start with the size of the label itself. A small return-address label has room for only a few short lines, so keep the font simple and avoid decorative scripts that blur at small sizes. A clean sans-serif or serif typeface at a moderate size usually reads better than a fancy one.
Leave a small margin inside each label so text does not run to the edge. Printers have a built-in non-printable margin, and text placed too close to the border can be clipped or land on the cut line. If your label design includes a background color or image that reaches the edge, check whether your printer supports borderless printing. Many models do not, and the usual workaround is to extend the artwork slightly past the label edge so a small shift does not leave a white sliver.
For labels that will be scanned, such as barcodes or QR codes, keep the code large enough to scan, use dark ink on a light background and leave blank space around it. Print a sample and test it with a phone before you commit a full sheet. Avoid stretching or squeezing the code, because distortion can make it unreadable.
Finally, proofread before printing. A typo on a single label is easy to fix, but a typo repeated across a full-page sheet wastes the whole sheet, and partly used sheets are awkward to reload.
Mail Merge for Many Different Labels
If you send holiday cards, invitations or business mailings, typing each address by hand is slow and error-prone. A mail merge pulls names and addresses from a spreadsheet or contact list and fills a label template automatically. The general idea is the same in most word processors, though menu names differ, so check the help pages of the program you use.
The usual process looks like this:
- Prepare a spreadsheet with one row per person and clearly named columns, such as name, street, city, state and postal code.
- Start a label merge in your word processor and choose the same label product code you selected for the template.
- Select your spreadsheet as the recipient list.
- Insert the merge fields into the first label so the layout is correct, then update all labels so the pattern repeats.
- Preview the results and look for blank lines, extra spaces or names that are too long for the label.
- Print one test page on plain paper before using real label sheets.
Clean data saves time. Remove duplicate rows, fix inconsistent capitalization and make sure every address has the same set of fields. If some records have a second address line and others do not, a blank gap can appear in the label. Many merge tools let you skip empty lines, so look for that option. Keep a copy of the spreadsheet in case you need to reprint a few labels later.
Printer Settings That Affect Alignment
Even a perfect template can print out of place if the printer driver changes the page. The most common cause is a scaling option. Settings such as Fit to Page, Shrink to Fit or Scale to Paper Size resize the document slightly, which shifts every label a little further down the sheet. Set scaling to 100 percent or Actual Size, and turn off any automatic resizing.
Paper size matters too. Label sheets are usually letter or A4, so make sure the paper size in the print dialog matches the sheet in the tray. A mismatch between letter and A4 can move text by several millimeters, enough to cross label borders. If your printer or program offers a custom paper size, use it only when the label pack calls for it.
Other settings to check:
- Paper type: choosing Labels, Heavy Paper or a similar option can change how the printer feeds and how much heat or ink it uses.
- Print quality: a higher quality setting is slower but often gives sharper small text.
- Duplex: turn automatic two-sided printing off, since the sheet should only be printed once.
- Margins: keep the template margins at the values the label maker suggests.
If prints are still shifted by a consistent amount, many programs let you nudge the whole layout by adjusting the top and left offsets. Make small changes, test on plain paper and keep notes of the values that worked so you can reuse them.
Handling and Storing Label Sheets
Label sheets are sensitive to heat, humidity and rough handling, and poor storage is a hidden cause of jams and curling. Keep unused sheets flat in their original packaging or in a folder, away from windows, radiators and damp rooms. Sheets that sit in a hot or humid place can curl, and curled sheets are more likely to feed crookedly or catch on rollers.
Handle sheets by the edges. Fingerprints and skin oils on the printable surface can interfere with ink or toner, and bent corners can lift the labels. Before loading, fan the stack lightly if you are printing several sheets, then square it up so the edges line up. Do not load more sheets than the tray or feed slot is designed for, and follow the loading direction shown in your printer manual.
After printing, let inkjet labels dry fully before stacking or peeling. Laser-printed sheets may be warm as they come out, so let them cool before handling. Store printed sheets flat and avoid pressing them against other printed pages, which can transfer ink.
Old label sheets deserve caution. Adhesive can dry out, and labels may start to lift at the edges. If a sheet looks wavy, has loose labels or has been stored for a long time, test a few labels on something other than your printer first, or replace the sheet. A fresh pack costs less than cleaning sticky residue from the inside of a printer.
When a Dedicated Label Printer Makes Sense
A standard inkjet or laser printer handles occasional label jobs well, but some situations call for a different tool. If you print many shipping labels each week, a thermal label printer can save time because labels come off a roll, one at a time, with no sheet to align. There is also no ink or toner to replace, though thermal labels have their own supplies, and the right label size depends on the carrier and the printer.
Consider the trade-offs:
- Sheet labels on a regular printer: flexible for different sizes and colors, good for low volume, and you may already own the printer.
- Thermal printer: fast and tidy for shipping and barcodes, but typically printing in one color and needing compatible rolls.
- Handheld label makers: suited to short text labels for cables, shelves and files, but not for full-size address sheets.
Before buying, check whether the printer works with your operating system and the shipping platform you use, what label widths it accepts and what the roll supplies cost over time. Also think about where it will sit and whether you need Wi-Fi or USB.
If you only print labels now and then, a dedicated machine is often unnecessary. A good rule is to wait until sheet alignment, wasted sheets or print time becomes a regular annoyance, then compare options with your actual weekly volume in mind.

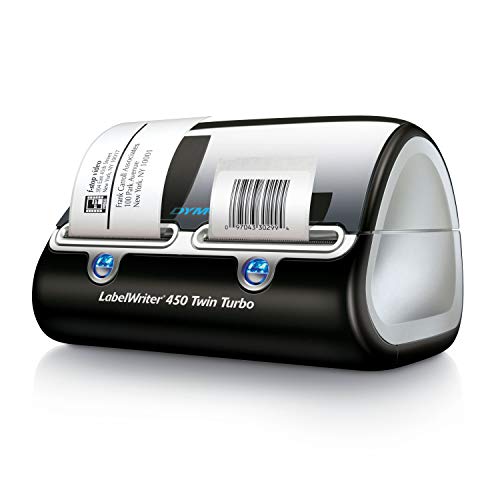
Ready to Buy? Start Here
If this guide helped you decide what to look for, these products are a place to start.


As an Amazon Associate we earn from qualifying purchases. Prices and availability are shown on Amazon.
Reading a Label Sheet Before You Buy or Load It
Label problems often begin on the packet, not at the printer. Sheets differ in size, layout, material and the way the adhesive is protected, and a mismatch between the sheet and the printer is behind many jams and smudges. Spend a minute reading the packaging.
- Check that the sheet is marked for your kind of printer, whether inkjet or laser, since the coatings and adhesives differ.
- Note the template code printed on the box and look for the same code in your software.
- Look at the sheet size, which may be the common letter or A4 format.
- Confirm the finish: matte, glossy, clear or kraft each take ink and toner differently.
- Read any warning about heat, since laser machines fuse toner with heat and some adhesives cannot take it.
- Keep unused sheets flat and sealed, away from humidity.
Never feed a sheet that has already lost a label. An exposed patch of adhesive can stick inside the printer and cause a stubborn jam. Throw away partly used sheets that look worn or curled rather than risking a repair.
Troubleshooting Misaligned or Smeared Labels
When the text lands in the wrong place or the ink rubs off, the cause is usually predictable. Match the symptom to the likely cause below, and change one thing at a time.
| Symptom | Likely cause | What to try |
|---|---|---|
| Text drifts down the page | Scaling turned on in the print dialog | Set scaling to 100 percent or actual size |
| Print sits too far left or right | Sheet loaded crooked or guides loose | Reload and snug the paper guides |
| Ink smears when touched | Wrong paper type setting for the sheet | Pick a label or heavy paper type, then let it dry |
| Labels peel inside the printer | Sheet not suited to the machine or too old | Stop, clear it following the maker’s steps, use fresh sheets |
| Rows fall between label edges | Template does not match the sheet | Select the exact template code from the box |
Always run a trial on plain paper and hold it behind a label sheet against a window to see whether the lines match. Use the manual feed or rear slot if your printer has one, since a straighter paper path suits stiff label stock. If a label ever peels loose inside the machine, switch it off, unplug it and follow the maker’s instructions for clearing the path, rather than pulling hard with tools.
Humidity affects labels more than most people realize. A sheet left in a damp room can curl, and a curled sheet is the single most common reason for a jam. Keep your supply in a drawer or a zip bag, and load only the sheets you plan to use within the hour.
Label Printing Is a Tolerance Problem, and That Is Good News
Almost every label frustration comes down to tolerances adding up. The sheet is a fraction different from the template, the printer feeds it a fraction off center, the design places text a fraction too close to the edge of each label, and the fractions accumulate until the last row on the sheet is printing half on the label and half on the backing. Understanding this is good news, because tolerances can be managed. Generous margins inside each label forgive small feed errors. A template built from the label maker measurements, or better, from measurements you verify against a real sheet, removes the largest error at the source. A test print on plain paper, held behind a label sheet against the light, reveals the accumulated error before a single real label is spent. Owners who respect tolerances print labels boringly well; owners who design to the very edge of every label are gambling on every sheet.
The printer contributes its own tolerance through how it grips and moves the sheet. Label sheets are thicker and stiffer than plain paper, and the adhesive layer makes them behave differently again in warmth. Feeding sheets one at a time, from the tray or slot the maker recommends for heavier stock, with the paper type set to a label or heavy option where one exists, keeps the feed as straight as the machine can manage. Loading a tall stack invites the slight skew that ruins the bottom rows, and re-feeding a sheet that has already been through the printer, to use its remaining labels, asks the adhesive to survive a second heating and bending, which is how labels come off inside printers. The economics are simple: a partly used sheet is cheaper than a service visit, so print full sheets where you can and keep partly used sheets for printers and jobs where the maker allows them.
Software contributes the final tolerance, and it is the one most often overlooked. The application, the printer driver and the operating system each have a say in scaling, and a document set to fit or shrink anywhere in that chain will quietly resize the carefully measured template. For label work, scaling must be off and the size must be actual or one hundred percent at every step, including in the PDF viewer if you print from a PDF, since viewers love to offer helpful fit options by default. Checking that one setting before a run is the difference between a template that stays true for years and one that mysteriously drifts between computers, applications and updates.
Designing Labels That Forgive and Communicate
A good label does one job: it communicates the right information to the right person at the right moment, whether that moment is a postal worker scanning a parcel, a family member opening a freezer, or a future version of yourself opening a storage box. Design backwards from that moment. The essential information gets the largest, clearest treatment; everything else is subordinate or omitted. Contrast does the heavy lifting, so dark text on a light label remains the reliable default, and fine decorative elements that look elegant on screen can vanish or blur at label size on paper. Leave breathing room around the text, not only for appearance but because that empty margin is your tolerance budget, the space that absorbs small alignment errors without letting text touch an edge. If a label needs a date, a contents list and a warning, give each its own line and its own emphasis rather than crowding them into a paragraph, and test the design at real size on paper before printing a sheet, since screens flatter small text that paper exposes.
Labels for the Whole House: A Room-by-Room View
In the kitchen, labels fight moisture, grease and cold. Freezer labels need adhesive that holds at low temperatures and a writing or printing surface that survives condensation when the container comes out; a label that falls off in the freezer turns dinner into a guessing game, so date and contents in large characters are worth more than elegance. Pantry jars benefit from labels that can be removed cleanly when the contents change, and spice jars from a consistent position and format so a row of jars reads like an index. In the workshop and garage, labels meet dust, vibration and solvents, and they earn their keep by identifying the contents of opaque boxes and the ratings of cables, chargers and parts that all look identical a year later. A label that records not only what a box holds but when it was packed prevents the archaeology of opening six boxes to find one cable.
In a home office, labels are a filing system made visible. Boxes of records labeled by year and category, cables labeled at both ends, and shelves labeled by owner turn tidying from a memory test into a sorting task anyone can help with. For children belongings, labels are a kindness to teachers and to the household laundry alike, and they need to survive washing, dishwashers or weather according to where they live, which is a material choice before it is a design choice. The thread connecting every room is that a label is a promise to the future: the person who finds the item later, often you, should learn what they need in two seconds without opening, guessing or asking. Print labels with that reader in mind and the house slowly becomes self-explaining.
Shipping Labels Deserve Their Own Discipline
A shipping label is the one label whose failure has a price, since a parcel with an unreadable or wrong label can be delayed, returned or lost. Print shipping labels at actual size, on the stock the carrier expects or on clean plain paper secured properly if labels are unavailable, and check the code with your own phone camera or the carrier application where that is possible, because a code you can scan at the kitchen table will scan at the depot. Keep the label area flat and unobstructed, avoid placing tape over the code where the carrier advises against it, and include any return information the service requires. If you ship regularly, the dedicated thermal printer discussed in this guide stops being a luxury: it removes ink, alignment and scaling from the equation entirely and turns the most consequential label in the house into the most routine one.
Mail Merge Without Tears
Merging a list of addresses or names into labels frightens people who have never done it and delights people who have, and the gap between the two experiences is preparation of the list. Clean the data first: consistent columns, no stray blank rows, postcodes in their own field, and names in the form you actually want printed. Proof the merged document on screen page by page, because merge errors are systematic, and one misplaced field repeats on every label with total confidence. Print the first sheet on plain paper and check it against the list before a label sheet goes near the printer. Keep the list file with the template, since the pair together are the mailing, and next time the same mailing is needed, for cards, renewals or club business, the work is an update rather than a reinvention. A merged label run done this way is one of the great quiet satisfactions of home office life: a sheet of perfect, individual labels from a list that was typed once and checked once.
Storing Sheets, Rolls and Finished Labels
Label stock ages. Sheets stored in a bent, damp or sunlit place will feed badly and adhere unpredictably, and adhesive weakens with time and heat. Store sheets flat in their packaging, in the room where the printer lives, and use older stock first. Thermal rolls should be kept away from heat, sunlight and contact with plastics and solvents that can darken or fade the coating, and finished thermal labels intended to last, such as box labels for storage, should be tested for your conditions or replaced with printed sheet labels, because some thermal papers fade in a warm attic within a season. A label that has faded to blank is worse than no label, since it looks like information and delivers none. Match the label technology to the lifetime the information needs, and the system will not betray you.
Worked Examples: Three Label Jobs Done Properly
Address Labels for a Family Mailing
Start with the list, not the printer. Put the addresses in a simple table with a column for each line exactly as it should appear, and read the whole list once for the errors that merges faithfully reproduce: the postcode typed into the town field, the name with a stray space, the one address that is really two households. Build the template from the label sheet measurements and set every margin inside the label generously. Merge, then proof the result on screen and print the first sheet on plain paper, holding it against a label sheet in front of a window or lamp to confirm that every address sits inside its label outline with room to spare. Only then load a label sheet, print one, peel one label and stick it on an envelope to judge it at real size in real light. If that single label looks right, print the rest of the run in small groups, checking the first label of each sheet, because alignment that is true on sheet one can drift by sheet five if a sheet feeds slightly differently. Keep the list, the template and one spare printed sheet together in a folder, and next year mailing becomes an edit rather than a project.
Freezer and Pantry Labels That Survive the Kitchen
Kitchen labeling succeeds or fails on material and timing. Choose labels made for cold and moisture where the container will be frozen, and write or print the contents and the date in characters large enough to read through a frosted door without removing the container. Label the container when it is dry and at room temperature, before filling and freezing, because adhesive applied to a cold, damp surface starts life compromised. Put the label where it will be seen in the way the container is actually stored, which for stacked tubs may be the lid rather than the side. In the pantry, consistency is the system: the same label position, the same format and the same date style on every jar lets a shelf be read at a glance, and a small label on the shelf edge for bulk goods that live in bins completes the picture. Review the system once a season, removing the labels of things that have been used up and correcting the ones that no longer describe their contents, because a wrong label is worse than a missing one.
Storage Box Labels for a Move or a Clear-Out
When boxes will be stacked, sealed and not opened for months, the label is the box only voice. Print two labels per box, one for the top and one for the side that will face outward in the stack, and make the headline the room and the category rather than a hopeful summary. Add a short contents list in smaller type, a note of anything fragile or heavy, and the date. Photograph each labeled box with your phone as you seal it, and the photographs become a searchable index when you are standing in a storage unit looking for one particular thing. Use a label technology that will still be legible when you return: for long storage in warm or sunlit places, a laser-printed or inkjet sheet label outlasts many thermal prints, and testing one label in the actual storage conditions for a few weeks before committing a whole move to it is the kind of small experiment that prevents a large regret.
Teaching the Household the Label System
A label system that only its creator understands decays within months. The fix is to make the system visible and simple: keep the label sheets and the templates in one known place, save the templates with names that say what they are for, and write the three settings that matter, actual size, the paper type and one sheet at a time, on a card kept with the stock. Show anyone who will print labels the plain-paper test once, in person, because that single habit prevents most wasted sheets. Agree the house conventions while you are at it: how dates are written, how freezer contents are named, where box labels go. Conventions feel bureaucratic for a household until the first time someone else labels a box exactly as you would have, and the system quietly becomes the household memory rather than one person chore.
Choosing Between Sheet Labels, Rolls and a Dedicated Printer
The three ways of producing labels at home suit three different rhythms of work, and choosing between them honestly prevents both overspending and daily irritation. Sheet labels through an ordinary printer suit variety: many sizes, occasional runs, color designs and one-off jobs such as a single mailing or a shelf of jars. Their cost is attention, since alignment, scaling and feeding all need the care this guide describes, and their strength is that the printer you already own becomes a label press for the price of a pack of sheets. Rolls in a dedicated thermal printer suit repetition: the same label, produced often, with no ink and almost no alignment to manage. Their cost is the machine itself and a dependence on thermal stock whose print can fade in heat and light, and their strength is speed and indifference to volume, which is why shipping and market sellers adopt them. Handheld label makers with tape cartridges suit mobility and durability in small quantities: the workshop, the fuse box, the cable bundle, the school kit. Their cost per label is the highest of the three and their designs are the simplest, and their strength is that the label is made at the place where it will live, in the size that fits, at the moment it is needed.
Many households end up with two of the three, and that is not duplication but sense. The ordinary printer handles the annual mailing and the pantry, while a small tape maker handles cables and tools. A seller adds the thermal printer when parcel volume makes sheet feeding the bottleneck of the working day. The mistake to avoid is buying for the label job you imagine rather than the one you have: count the labels you actually printed last year, honestly, and let that number, not enthusiasm, decide whether a dedicated machine earns its shelf space. Whichever combination you choose, the disciplines in this guide travel across all three: design with margins, proof before committing stock, store materials properly, and keep the template and the settings together so the next run starts from knowledge rather than from memory.
Environmental and Cost Habits for Label Printing
Label printing wastes material in predictable ways, and each has a cheap cure. Misaligned sheets are prevented by the plain-paper test. Half-used sheets are reduced by planning jobs together, printing the mailing, the jars and the boxes in one session on shared sheets where sizes allow. Backing sheets and release liners are not recyclable in many local schemes once the silicone coating is considered, so the honest saving is to spoil fewer of them rather than to hope they can be recycled. Thermal printing avoids ink cartridges entirely, which is a genuine saving, while tape cartridges produce a ribbon of waste with every label, which argues for drafting the wording on screen before printing. None of this requires sacrifice; it requires the same proofing and planning habits that make labels accurate, which is a recurring theme in this guide: in label work, care and economy are the same habit wearing two names.
Frequently Asked Questions
Can I print labels on any printer?
Most inkjet and laser printers can, with the correct label sheets.
Why is my text misaligned?
The template, paper size or scale is wrong. Print a test on plain paper.
Are thermal label printers better?
For shipping labels, yes, because there is no ink.
Can I reuse a label sheet?
Avoid it. Exposed adhesive can jam the printer.
What is a label product code and why does it matter?
It is a number on the label pack that identifies the sheet size, label size and layout. Word processors use it to build a template that matches the sheet exactly. Choosing the wrong code is a common cause of misaligned prints.
Can I print on labels that are only partly full?
It is best to avoid it. Missing labels expose the backing sheet's adhesive area and can leave sticky residue on printer rollers. If you must reuse a sheet, check that no adhesive is exposed in the path the sheet will take.
Should I use the rear feed or the main tray for labels?
Check your printer manual. Many printers have a straighter paper path through a rear or manual feed, which can be gentler on thicker label sheets. Others recommend the main tray, so follow the maker's guidance.
Why do my labels print slightly lower on each row?
This usually points to scaling. Make sure the print dialog is set to 100 percent or Actual Size, and that Fit to Page is off. A wrong paper size can cause the same drift.
Is it okay to print labels in black and white only?
Yes. Black-only printing is often cleaner for address and shipping labels and can use less color ink. Choose grayscale or black-only in the print dialog if your printer offers it.
How do I keep inkjet labels from smearing?
Use sheets rated for inkjet, let the ink dry before touching them and avoid stacking printed sheets right away. Waterproof finishes need compatible ink, so check the pack for notes.
Can I print labels from my phone?
Often yes, through the printer maker's app or a built-in feature such as AirPrint or Mopria. Label templates are easier to set up on a computer, so many people build the layout there and print from a phone only for simple jobs.
How can I tell if a label sheet is for inkjet or laser?
The packaging should say so clearly. If the pack does not state the printer type, do not guess, because using the wrong kind can cause jams or damage.
Bottom Line
Use label sheets for your printer type, set up the template, test on plain paper, load carefully and choose the label paper type. For high volume, consider a thermal printer. See best label printers.
Related Reading
- Types of Printers Explained: Inkjet, Laser, Ink Tank and More
- 7 Best Wireless Printers for Home Use
- How to Clear a Stuck Print Queue on Windows and Mac
- How to Print Envelopes at Home (Settings and Tips)
- How to Print From a Chromebook (Add a Printer Step by Step)
More Printer Guides
- Best Printers for Home Use
- How to Print on Both Sides of Paper
- How to Print on Cardstock at Home
- How to Print Photos at Home
- How to Refill an Ink Tank Printer
- How to Save Ink When Printing

