Disclosure: As an Amazon Associate, reviewstook.com earns from qualifying purchases. Links to Amazon on this page are affiliate links; they cost you nothing extra.
Designers and artists care about color accuracy, paper choice and print size. A printer that suits proofs may not suit gallery prints, so decide the job first.
This guide covers five printers for design and art work. It is built from published specifications and listings, not our own testing, so confirm ink type, paper support and media sizes on each product page.
New to printers? Start with our guide to the best printers for home use and how we pick printers.
By the Reviewstook Editorial Team. Last updated: October 31, 2026.

In this guide
Quick Picks
| Printer | Type | Best for |
|---|---|---|
| Epson Expression Photo XP-980 | Wide-format photo all-in-one | Home photo prints with scanning and copying |
| Canon PIXMA G620 | MegaTank photo all-in-one | Photo printing with refillable tanks |
| Epson EcoTank Photo ET-8550 | Wide-format photo tank all-in-one | Large photo prints with tank economy |
| Epson Expression Photo HD XP-15000 | Wide-format photo printer | Enthusiasts who print up to 13×19 inches at home |
| Canon PIXMA PRO-200S | Professional photo printer | Serious photo prints from a 13-inch printer |
5 Best Printers for Graphic Designers and Artists

Top pick
1. Epson Expression Photo XP-980
A wireless wide-format all-in-one from Epson’s Expression Photo line.
Good for: Hobbyists who want borderless photos and everyday documents from one machine. Strengths: Wide-format printing plus scanner and copier in one body. Weaknesses: Bigger and heavier than a standard all-in-one, and cartridge ink is not cheap per page. Skip it if you only print documents.


Best for photo hobbyists who print often and want low ink cost
2. Canon PIXMA G620
A wireless MegaTank all-in-one aimed at photo printing, with print, copy and scan.
Good for: Photo hobbyists who print often and want low ink cost. Strengths: Refillable tanks with a photo focus. Weaknesses: Pricey up front, and check the ink set it uses. Skip it if you print mostly black-and-white documents.

Best for photographers and crafters who print large photos regularly
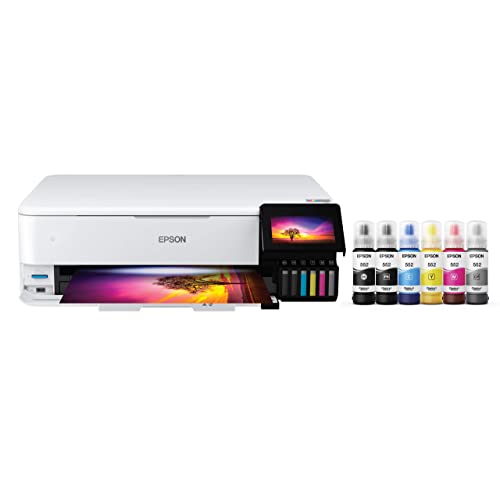
3. Epson EcoTank Photo ET-8550
A wireless wide-format all-in-one tank printer aimed at photo printing.
Good for: Photographers and crafters who print large photos regularly. Strengths: Wide-format printing with refillable tanks. Weaknesses: Expensive and large for a home printer. Skip it if you mostly print documents.

Best for hobbyists who print large photos and posters at home
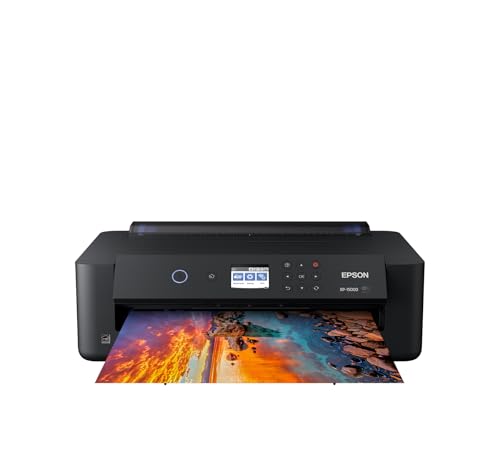
4. Epson Expression Photo HD XP-15000
A wireless wide-format inkjet printer built for prints larger than a standard letter page.
Good for: Hobbyists who print large photos and posters at home. Strengths: Wide-format output from a desktop machine, with no scanner to add bulk. Weaknesses: Single-function, so no scanning or copying; ink for large prints is a real expense. Skip it if you rarely print larger than letter size.

Best for photographers who want gallery-style prints at home
5. Canon PIXMA PRO-200S
A 13-inch wireless photo printer with an 8-color dye ink system, per the listing.
Good for: Photographers who want gallery-style prints at home. Strengths: An 8-color dye ink system aimed at photo quality. Weaknesses: Expensive to run, and not meant for everyday documents. Skip it if you mostly print text documents.

Printing Art and Design Work
Proofs versus finals
Use a standard printer for quick proofs and a wide-format photo printer for finals. See printers for canvas and art prints.
Paper profiles
Use the paper maker’s color profile and calibrate your monitor to get predictable color.
Ink longevity
Pigment inks usually resist fading better, which matters for prints you sell or exhibit.
Best Picks by Category
They summarize listing data and are not hands-on test results.
- Top rated: Canon PIXMA PRO-200S — check price on Amazon.
- Most reviewed: Epson EcoTank Photo ET-8550.
- Lowest price: Canon PIXMA G620 — check price on Amazon.
- Premium option: Epson EcoTank Photo ET-8550 — check price on Amazon.
Price, Rating and Review Comparison
Prices change often, so confirm the current price on Amazon.
| Product | Price | Rating | Ratings | Price tier |
|---|---|---|---|---|
| Canon PIXMA G620 | Check price on Amazon | — | — | Mid-range |
| Epson Expression Photo XP-980 | Check price on Amazon | — | — | Mid-range |
| Epson Expression Photo HD XP-15000 | Check price on Amazon | — | — | Mid-range |
| Canon PIXMA PRO-200S | Check price on Amazon | — | — | Premium |
| Epson EcoTank Photo ET-8550 | Check price on Amazon | — | — | Premium |
How Much Feedback Backs Each Rating
A high average from a handful of ratings is weaker evidence than a slightly lower average from thousands. Here is how the sample size looks for each pick.
- Epson Expression Photo XP-980: only a small number of ratings, so treat the average cautiously.
- Canon PIXMA G620: a large sample behind its average.
- Epson EcoTank Photo ET-8550: a large sample behind its average.
- Epson Expression Photo HD XP-15000: a large sample behind its average.
- Canon PIXMA PRO-200S: a moderate sample behind its average.
How to Choose
Decide on size
Letter-size proofs need a normal printer. 13×19-inch prints need a wide-format model.
Check the ink system
More ink colors usually improve gradients and color range. Dye and pigment inks suit different papers.
Think about color management
Calibrate your monitor and use the correct paper profile to get predictable results.
How We Chose These Products
We start from products sold on Amazon with a full product name and clear specifications, and we skip results that show only a brand name or a vague title. We then read the listing and any manufacturer information for each one and note the features that matter for printers: print technology, running costs, connectivity and size. We do not run our own lab tests, and this guide contains no hands-on measurements. Use it to build a shortlist, then check current prices, dimensions and return terms on the Amazon page before you buy.
Buying Guide: What to Check Before You Choose
Ink tank versus cartridge
Ink tank printers use refillable tanks and usually have a lower cost per page, with a higher purchase price. Cartridge printers are cheaper up front but ink can cost more over time. Check the page yield and the cost of refills.
Laser printers
Laser printers print text quickly and sharply and do not clog like inkjets. Color lasers cost more. Check the toner cost and the print speed.
Photo printing
Photo printers focus on color accuracy and paper handling. Check the number of inks, the paper sizes and the cost per print.
Quick Reference: Which Pick Suits Whom
- Epson Expression Photo XP-980: suits hobbyists who want borderless photos and everyday documents from one machine
- Canon PIXMA G620: suits photo hobbyists who print often and want low ink cost
- Epson EcoTank Photo ET-8550: suits photographers and crafters who print large photos regularly
- Epson Expression Photo HD XP-15000: suits hobbyists who print large photos and posters at home
- Canon PIXMA PRO-200S: suits photographers who want gallery-style prints at home
Common Mistakes to Avoid
- Judging a printer by its price without considering ink cost.
- Ignoring the starter cartridge size.
- Forgetting the paper types needed.
- Assuming all-in-ones are always better.
- Skipping the return window.
Setup and Care
- Install the maker’s app or driver.
- Connect to Wi-Fi.
- Run an alignment and nozzle check.
- Print regularly to avoid clogs.
Color Management From Screen to Paper
The most common complaint from designers who start printing at home is that the print does not match the monitor. This is rarely a printer defect. It is a color management problem, and understanding the chain helps you get consistent results from any of the printers in this guide.
A screen creates color by emitting light in red, green and blue, while a print creates color by absorbing light through cyan, magenta, yellow, black and sometimes additional inks. These two systems cover different ranges of colors, called gamuts, and neither fully contains the other. Bright, saturated blues and greens on a screen may be impossible to reproduce on paper, while some deep cyans and certain pale tones print well but cannot be shown by many monitors. The job of color management is to translate between them in a predictable way.
Four elements make that translation work.
- A calibrated monitor, ideally adjusted with a hardware colorimeter, so what you see is close to a known standard. Without calibration, you cannot trust your eyes.
- An ICC profile for each paper and ink combination. Paper makers publish profiles for common printers, and using the right one is the single biggest step toward accurate output.
- Soft proofing in your editing software, which simulates the print on screen using the profile, with a choice of rendering intent such as perceptual or relative colorimetric.
- Letting one program manage color. If both the application and the printer driver try to adjust color, you get doubled corrections and strange tones.
Printer drivers include their own color options, and the correct setting is usually to turn off the driver’s adjustments when the application handles the profile. The printer manuals and the paper maker’s instructions explain how to do that for each program. Test prints on a small sheet before you commit to a large piece of paper, and keep notes of the settings that worked so you can repeat them.
Lighting changes everything
Even a perfect profile cannot fix a bad viewing environment. Colors shift under warm bulbs, daylight and cool fluorescent light, so judge prints under neutral, consistent lighting that is close to the conditions where they will hang. Many designers use a daylight-balanced lamp near the monitor and print table. Let prints dry fully before assessing them, since some inks look slightly different when wet.
Ink Sets: Dye, Pigment and the Number of Channels
The inks in the printer determine what kinds of work it can do well, and they explain much of the price difference between models. Two properties matter most: the ink chemistry and the number of channels.
Dye inks dissolve in the carrier liquid and soak into the coating of photo paper. They tend to produce vivid, saturated color and smooth gradients on glossy and luster papers, and they are common in photo printers aimed at hobbyists. The Canon PIXMA PRO-200S in this guide uses an 8-color dye system, per its listing. The weakness of dye is that prints may be more sensitive to light, humidity and water over time, depending on the paper and storage.
Pigment inks use tiny solid particles that sit on or near the surface of the paper. They generally resist fading and moisture better, and they perform well on matte and fine-art papers, so they are popular with artists who sell or exhibit work. The trade-off can be a smaller color gamut on some glossy media and more attention to head maintenance. Whether a given model uses dye, pigment or a combination is listed on the maker’s page, and it is worth checking before you buy.
The number of channels is the other factor. Basic home printers use four inks, which can produce a wide range of color but may show banding or grain in smooth gradients. Printers with six, eight or more inks add light tones, gray, red or other colors, which improves gradients, neutral grays and skin tones. Gray inks in particular help black and white prints stay neutral without a color cast. More channels also mean more cartridges to replace, which affects running cost.
Matching the ink to the work
If you produce proofs for clients and rarely hang the prints, a four-color or tank system may be enough. If you sell prints, exhibit or make editions, a multi-channel pigment or high-quality dye system is the more suitable choice. For craft work, stickers and cards, other factors such as paper handling and borderless printing may matter more.
Paper Choice and Handling for Art Prints
Paper is half of the final print, and artists often spend more time choosing it than choosing the printer. Surface texture, weight, brightness and coating all change how an image looks.
- Glossy and luster photo papers give deep blacks and high saturation, and they suit photographs and vibrant illustration.
- Matte papers reduce glare and give a softer look, which suits drawings, typography and gallery-style prints.
- Cotton rag and fine-art papers have texture and a warm feel, and they usually need a pigment ink and a gentle paper path.
- Canvas and specialty media may require a rear feed or a straight path, since thick material cannot bend around rollers.
Check the printer’s specified maximum paper thickness and weight, and how paper is loaded. A front tray that bends the sheet sharply is a problem for heavy stock. Some printers have a manual rear feed for single sheets, which makes it easier to print on thick fine-art paper or board. Cut sheets in large sizes need to be stored flat, in their packaging, away from humidity and sunlight.
Handle paper by the edges, preferably with clean cotton gloves, because oils from fingers can show up in the ink. Let prints dry flat and, if the maker advises it, let them gas out before framing or stacking them. Use acid-free mats and UV-protective glass for display, which protects the print from fading.
File Preparation, Sizes and Resolution
A great printer cannot rescue a low-resolution file. For good detail on paper, aim for about 240 to 300 pixels per inch at the final print size. That means a 13 by 19 inch print needs a file of roughly 3,100 by 4,500 pixels at 240 ppi. Lower resolutions can still look acceptable at greater viewing distances, which is why posters can use less, but sharp detail at arm’s length requires more pixels.
Work in a color space that suits the job. Many designers work in Adobe RGB or sRGB for print and keep the original file in a wider space if the software supports it. If your printer takes CMYK conversion inside the driver, keep the file in RGB and let the driver convert. If you send work to a commercial print shop, ask what profile they prefer.
Remember bleed and margins. Borderless printing can crop the edges slightly, so keep important content inside a safe area. Save a copy of the final file along with notes about the paper, profile and printer settings, so a reprint matches the original. Print a proof at actual size to check text, line weights and sharpness before you print the final.
Cost per Print, Selling Work and Studio Reality
Designers and artists often start with a handful of test prints and end up printing in volume, so it pays to think about cost per print early. For each candidate printer, find the price of a full ink set, the stated yield and what paper you will use. Photo paper in large sizes is a major expense, often more than the ink, and fine-art papers cost more still. A tank printer lowers ink cost, while a cartridge photo printer may give better control over inks and gamut. Neither is automatically the right answer, and the better choice depends on whether you print many modest pieces or few high-value ones.
If you sell prints, consider what your customers expect. Limited editions, signed work and gallery pieces usually call for archival paper and pigment inks, careful storage and a record of the settings. For client proofs, speed and consistency matter more than longevity, and a cheaper machine used with plain or semi-gloss stock may be enough. Some artists use a home printer for proofs and a professional lab for the final large or high-value prints, which avoids owning a machine that is too large for the work.
Finally, think about the room. Wide-format printers need a stable surface and space to load large paper, and they benefit from a clean, dust-free location. Print heads can clog when the printer sits idle, so plan to print something regularly, and run the maker’s nozzle check before a critical job. Keep spare ink on hand before a deadline, because running out halfway through a large print wastes paper.
Graphic Designers and Artists: From Proof to Portfolio
Design and art printing is unforgiving in a specific way: the print is not a record of the work, it is the work, or the closest proof of it a client will ever hold. That changes what matters. A designer proofing a layout cares about whether type stays crisp at small sizes, whether a brand colour lands close enough that a client does not question it, and whether gradients step smoothly instead of banding. An artist selling prints cares about all of that plus permanence, paper feel, and whether the tenth print matches the first closely enough to belong to the same edition.
Work in layers of proofing. Proof layout and text on plain paper at full size, because scaling hides spacing problems. Proof colour on the actual paper you will deliver, but in a small crop of the most demanding area, a face, a shadow gradient, a saturated brand colour, rather than the whole image. Only then print the full piece. This sequence sounds slow, but it replaces the most expensive habit in art printing, the full-size reprint, with cheap, fast checks. Keep each proof, write the settings on the back in pencil, and you build a personal recipe book for your papers that no generic profile can match.
Lighting deserves as much attention as the printer. A print judged under a warm desk lamp will be approved or rejected for the wrong reasons. View proofs in the light where they will be seen, ideally consistent daylight-balanced light, and let a fresh print rest before judging it, because inkjet colours shift slightly as they dry down. Compare against the screen last, not first: a calibrated screen helps, but paper white, ink limits and finish mean the print is its own medium, and chasing an exact screen match on a matte fine-art sheet is a reliable way to waste an afternoon and a stack of expensive paper.
For selling work, consistency and records matter as much as beauty. Record paper batch, ink levels at the start of a run, and settings for every edition, and print editions in one session where possible. Handle finished prints by the edges, allow full drying time before stacking or sleeving, and store them flat, interleaved, away from light. A printer chosen from this guide gives you the capability; these habits are what turn capability into work you can confidently sign, ship and charge for, and they matter just as much when the client is a portfolio reviewer rather than a buyer.
Putting printers for graphic designers and artists Into a Real Weekly Workflow
The difference between a good choice and a frustrating one rarely shows up in the first test page. It shows up on the tenth ordinary day, when you are printing in your studio desk is covered with proofs, you are in a hurry, and the job has to come out right the first time because there is no spare paper, no spare cartridge and no spare half hour. That is why it helps to think about printers for graphic designers and artists in terms of a weekly workflow rather than a single impressive print. Walk through the jobs you actually repeat: the quick single page you need right now, the longer run you start and walk away from, the job you reprint because the first version had a typo, and the job that matters enough that you check it under good light before it leaves the house.
For each of those jobs, note what slows you down. Is it swapping paper types and remembering which tray or feed slot each one uses? Is it waiting for the printer to wake, connect and accept the job? Is it checking ink or toner levels and discovering a colour is low only when the print comes out striped? Writing these friction points down sounds trivial, but it turns a vague feeling that a printer is annoying into a list you can actually act on. You can tape a small note near the machine with the correct feed direction for your most-used paper, keep the paper you use most often loaded as the default, and set the driver preset for your everyday job so you are not re-choosing settings every time.
Batching is the simplest workflow improvement most people never use. Instead of printing one page at a time throughout the day, group similar jobs together: all the documents on plain paper in one run, all the work on heavier or glossier stock in another. Every paper change is a chance to load a sheet the wrong way round, leave the driver set to the wrong media type, or forget to move the paper guides back. Fewer changes means fewer of those small errors, and the errors are what waste supplies, not the printing itself. Batching also makes problems easier to diagnose, because if a fault appears you know it started with a particular paper or a particular setting rather than somewhere in a mixed pile of jobs.
Finally, build a two-minute end-of-job habit. Check the output while the printer still holds the settings you used, note anything odd such as a faint line, a colour shift or a page that fed slightly crooked, and deal with it then rather than discovering it next week on a job that matters more. Keep a small folder of reference prints from when everything was working well; comparing a new print against a known-good one is the fastest way to tell whether the printer, the paper or the file has changed. Good workflow is not about buying more features. It is about making the features you already have behave predictably, week after week.
A First-Week Test Routine That Tells You the Truth
Whatever you choose from this guide, give it a structured first week instead of judging it on the first page out of the tray. Start with a test file you will keep: one page of ordinary text at a normal size, one page mixing text with a simple chart or table, and one image or colour page if colour work matters to you. Print that same file on your everyday paper with the standard quality setting, label the print with the date, the paper and the settings, and keep it. That labelled page becomes your baseline. Every future question about whether quality has slipped, whether a new paper is better, or whether a replacement cartridge performs as well as the old one can be answered by printing the same file again and comparing the two side by side.
On the second or third day, deliberately test the edges of what you bought. Print the thickest paper you realistically plan to use, one sheet at a time, through the feed path the manual recommends for heavy stock. Print a multi-page document and watch whether pages stay in order, whether the second side aligns acceptably if you print double-sided, and whether the printer handles a longer run without pausing, misfeeding or producing a page with a crease. Try printing from every device you actually use, not just the computer next to the printer, and note how long each route takes and whether any device produces a different result because it is using a simplified mobile driver.
Also test the boring failures while they are still cheap to discover. Let the printer sit idle for two days and then print your test page to see how it recovers. Start a job with the paper tray nearly empty and see whether the last sheets feed cleanly. Open the ink or toner information the printer reports and compare it with what the maker promises in the manual, so you know where to find those figures later when a warning appears mid-job. If something performs badly, change one variable at a time: paper first, then the media-type setting, then the quality setting. Changing everything at once may fix the problem, but you will never learn which change mattered, and you will waste the most expensive supplies first.
By the end of the week you should be able to answer three questions honestly. Does this setup produce the quality you need on the paper you actually buy? Do you understand its settings well enough to reproduce a good result on demand? And is there any recurring annoyance, a slow connection, a noisy warm-up, a tray that is awkward to load, that will still be annoying in a year? If the answer to the last question is yes, that is worth more than any single specification, because specifications describe a printer on its best day and you have to live with it on all the others.
Ownership Costs: Looking Past the Purchase Itself
The purchase is only the first payment. What you spend over the life of printers for graphic designers and artists is dominated by supplies, wasted prints and, occasionally, your own time, and those costs behave very differently depending on how you print. A household that prints a few pages a month is mostly paying for readiness: ink that slowly gets used in cleaning cycles, paper that sits in the tray, and a machine that must simply work after weeks of doing nothing. A busy home office is paying for volume: every page carries a small cost, and a small difference per page multiplied by hundreds of pages becomes the biggest number in the whole calculation. Knowing which household you are is more useful than any single yield figure printed on a box.
Yield figures deserve a careful read. Cartridge and toner yields are measured on standard test pages with modest coverage, which resemble a business letter far more than they resemble a full-page photograph or a dense, colour-heavy document. If your typical page carries much more ink or toner than a plain letter, your real yield will be lower, sometimes dramatically lower, and that is not a defect in the product. It is a mismatch between the test and your work. The honest way to estimate your own cost is to note the date and page count when you install a cartridge, then note them again when it runs out. Two cartridges of your own data are worth more than any published average, because they reflect your paper, your coverage and your settings.
Waste is the hidden line in the budget. A misprinted page costs the paper, the ink or toner on it, and the time to print it again. Most waste comes from a short list of causes: the wrong media type selected, so ink pools or toner does not fuse properly; a file sent at the wrong size, so it prints cropped or tiny; a job started before anyone checked the levels; and test prints made on expensive stock when cheap plain paper would have answered the same question. A simple rule removes most of it: proof on plain paper first, check the preview at full size, and only load the good stock when the layout is confirmed. On expensive media, print one copy, inspect it, and only then run the rest.
There is also a decision to make about spares. Keeping one spare set of supplies on the shelf costs money up front but prevents the most expensive outcome of all, which is an urgent job that cannot print. Keeping too many spares is its own mistake, because cartridges age, opened paper absorbs moisture, and a printer replaced next year may not use any of it. One spare of the colour or cartridge you use fastest, stored sealed, upright and away from heat, is a sensible middle ground for most homes and small offices. Review that habit once a year, along with whether your print volume has changed enough that a different type of machine would now serve you better.
Care, Storage and the Small Habits That Prevent Big Problems
Most printing problems that feel like hardware failures are really housekeeping problems that built up slowly. Dust settles on paper and gets carried through the feed path. Paper left in an open tray absorbs moisture from the room, curls slightly, and starts feeding two sheets at a time or jamming at the same corner every run. A printer pushed back against a wall vents heat poorly and sits in a cloud of its own paper dust. None of this appears in a specification table, yet all of it decides whether a machine is still printing cleanly in its third year. The good news is that the countermeasures are cheap, quick and mostly about consistency.
Store paper the way the ream wrapper suggests: flat, sealed until needed, off the floor and away from radiators, kettles and sunny windows. When you open a new pack, fan the sheets lightly, square the stack, and load only roughly what you expect to use in the near term rather than filling every tray to its limit. Set the paper guides so they touch the stack without bending it; guides left loose let sheets drift and skew, and guides forced tight cause the buckling that turns into jams. If you switch between paper types often, keep each opened type in its own labelled envelope or resealable sleeve, because guessing which similar-looking white sheet is which leads to exactly the wrong-media mistakes that ruin prints.
Cleaning should be gentle and specific. Use the printer’s own utility for printhead or nozzle maintenance only when a test print shows a problem, because every cleaning cycle consumes ink and running cycles out of habit is one of the fastest ways to empty a cartridge without printing a single page. For laser machines, never reach inside near the fuser area while the machine is warm, and only ever remove toner dust with a dry, lint-free cloth as the manual describes. Keep the exterior vents clear, wipe the outside with a slightly damp cloth to lift dust before it migrates inside, and if your model has a scanner, clean the glass with a soft cloth, since a single fingerprint on scanner glass repeats as a line or smudge on every copy and scan you make.
Placement matters more than people expect. A printer needs a flat, stable surface that does not wobble when it prints, enough clearance for its doors and rear feed to open fully, and a power connection that is not shared with high-draw appliances that can cause dips. It also needs to be somewhere you will actually use and maintain it. A machine exiled to a damp garage or a dusty workshop corner will print worse and fail sooner than the same machine in a normal room. Finally, keep the manual, or at least its troubleshooting pages, findable. The first time a warning light pattern appears, the manual’s explanation of that exact pattern will save you more time than any general advice, including this guide.
Going Deeper: The Decisions People Usually Get Wrong
When readers write in about disappointing results with printers for graphic designers and artists, the cause is seldom that they bought a bad product. It is usually a mismatch in one of four places: the job they described to themselves, the paper or media they paired with it, the settings they left on default, or the volume they quietly grew into. The job mismatch is the subtlest. People describe their printing by its most impressive example, the portfolio page, the party invitation, the big document, when ninety percent of their real printing is something much more ordinary. A choice optimised entirely for the impressive ten percent can be slower, fussier and more expensive for the ninety percent, and the frustration builds in the ordinary work, not the showcase work. Before deciding, count a real fortnight of printing and let that count, not the showcase, lead the decision.
The media mismatch is the most fixable. Printers and papers are systems: the same machine produces a sharp, durable page on one stock and a dull, smudged one on another, and the difference is usually the media-type setting rather than the hardware. That setting controls how much ink is laid down, how long it is given to dry, or how much heat and pressure a laser applies to fuse toner. Selecting plain paper while printing on glossy or heavy stock is behind a large share of complaints about smearing, pooling, dull colour and pages that feel damp. It takes five seconds to change and it should change every time the paper does. Treat the setting as part of the paper, not as an optional refinement.
The volume mismatch cuts both ways. Printing far more than a light-duty machine expects shows up as slow output, frequent supply changes and feed problems that appear only on long runs. Printing far less than an ink-based machine expects shows up differently: idle weeks, clogged nozzles, cleaning cycles and cartridges that seem to empty themselves. Neither machine is faulty. Each is being used outside the rhythm it was designed for, and the honest fix is to match the rhythm, either by choosing the technology that tolerates your pattern or by changing the pattern, for example printing a small colour page weekly to keep an inkjet exercised. For art and design work, add one more check to that list: judge colour on the final paper, under final light, because no other mismatch disappoints as reliably or as expensively.
The last mistake is judging too quickly and changing too much. A new setup deserves a fair test on familiar work before it is declared a success or a failure, and a problem deserves a methodical check, paper, settings, levels, then hardware, before money is spent on replacements. Keep notes as you go: which paper, which setting, which file, what changed. Printing has many variables, and memory is the least reliable of them. A few written lines next to the printer will outperform guesswork every time, and they turn the next problem, whenever it comes, from a mystery into a short checklist.
Connections, Drivers and Printing From Every Device You Own
A printer rarely serves one computer any more. It serves a household or a small team: a laptop, a desktop that may be older, phones, a tablet, and occasionally a guest who needs one page right now. How smoothly printers for graphic designers and artists fits that reality depends less on the headline connection options and more on small details: whether the printer stays awake or needs waking, whether it rejoins the network after a router restart without help, and whether every device produces the same result or whether the phone version of a document quietly prints with different margins and a different font. Testing each device once, deliberately, in the first week is far better than discovering the differences during a deadline.
Frequently Asked Questions
What is the best printer for art prints?
Wide-format photo printers with multi-color ink systems, such as the Canon PIXMA PRO-200S or Epson photo models.
Do I need pigment ink?
Pigment inks tend to last longer on art paper. Check what each model uses.
Can I print on fine art paper?
Many photo printers can, within paper weight and path limits.
Which is cheaper to run, inkjet or laser?
Laser is usually cheaper per page for text, and ink tank printers are cheaper for color and photos.
How do I connect my printer to Wi-Fi?
Use the printer’s setup menu or the maker’s app. See our Wi-Fi guide.
Do I need genuine ink?
Not always, but some printers restrict third-party ink. Check the terms.
Why do my prints look different from my monitor?
Usually it comes from an uncalibrated monitor, a missing or wrong paper profile, or two programs both adjusting color. Calibrate the screen, use the ICC profile for your paper and printer, and let one application manage color. Viewing prints under neutral lighting also helps.
Do I need a calibrated monitor for printing art?
For predictable results, yes. A hardware colorimeter measures your screen and creates a profile so colors are closer to a known standard. Without it you may guess at brightness and color balance, and prints may look consistently darker or tinted compared with what you saw.
What resolution should an image be for printing?
About 240 to 300 pixels per inch at the final size gives sharp results for prints seen up close. Large posters viewed from a distance can use less. To check, multiply the print size in inches by the ppi, and compare the result with your file’s pixel dimensions.
Are pigment prints really more durable than dye prints?
Pigment inks generally resist fading and moisture better, which is why artists use them for editions. Dye inks can look vivid but may be more sensitive over time. Durability also depends on paper, light exposure, storage and framing, so check the maker’s claims and display prints behind UV-protective glass.
What is soft proofing?
Soft proofing is a preview in your editing software that simulates how a print will look on a particular paper and printer, using the ICC profile. It helps you adjust contrast and saturation before you spend ink and paper, though it is only as accurate as your monitor calibration.
Bottom Line
For serious prints, the Canon PIXMA PRO-200S is the high-end pick. For tank economy with wide-format photo output, look at the Epson EcoTank Photo ET-8550, and the XP-980 for an all-in-one.
Related Reading
- Types of Printers Explained: Inkjet, Laser, Ink Tank and More
- 7 Best Wireless Printers for Home Use
- 5 Best 11×17 Tabloid Printers for Home and Office
- 6 Best AirPrint Printers for iPhone, iPad and Mac
- 7 Best All-in-One Printers for Scanning and Printing
More Printer Guides
- Best Printers for Home Use
- Best Printers for Heat Transfers and Iron-On Paper
- Best Printers for Invitations, Greeting Cards and Business Cards
- Best Printers for Posters and Flyers at Home or Office
- Best Printers for Making Stickers at Home
- Best Sublimation Printers for Beginners and T-Shirts

