Where to buy
Check the latest price, availability and delivery on Amazon. Orders are placed on Amazon. We may earn a commission from qualifying purchases.
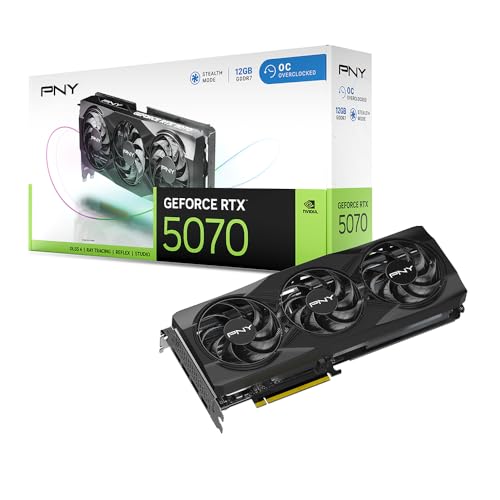
- Best overall build: Ryzen 7 7700X + RTX 5070 build, anchored on the PNY RTX 5070 OC Triple-Fan — Check on Amazon
- Best value build: Ryzen 7 7700X + RTX 4070 Super build, anchored on the Gigabyte RTX 4070 Super Eagle OC — Check on Amazon
- Best for high-refresh gaming: Ryzen 7 7800X3D + RTX 5070 build, anchored on the Ryzen 7 7800X3D — Check on Amazon
- Best for VRAM headroom: Ryzen 7 7700X + RX 9070 build, anchored on the Sapphire PURE RX 9070 — Check on Amazon
See 2 more Amazon options
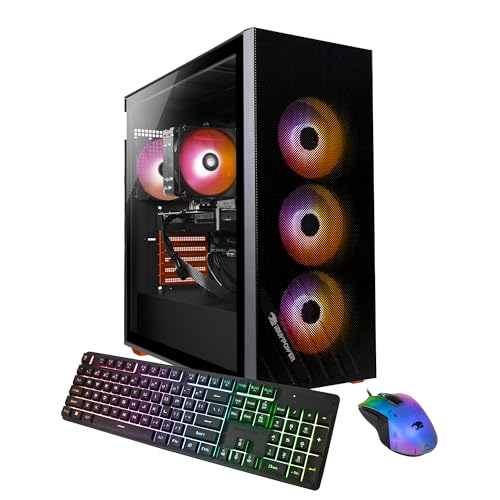
- The prebuilt that beats building: Skytech Omega, Ryzen 7 7700X, RTX 4070 Super, 32GB DDR5 — Check on Amazon
- The newest-GPU prebuilt: MSI Codex Z2, Ryzen 7 8700F, RTX 5070, 32GB DDR5, 2TB SSD — Check on Amazon
Read the full guide ↓
Disclosure: As an Amazon Associate, reviewstook.com earns from qualifying purchases. Links to Amazon on this page are affiliate links; they cost you nothing extra. Listing details such as price and availability change often, so check the current Amazon listing before you buy.
Here is the truth this angle has to start with: a $1,500 gaming PC is a tower. Not a mini, not something that hides behind the monitor — every route to this performance class shows up in a tower case that will occupy floor, desk-bay or desktop space for years. So instead of shrinking the machines on paper, this guide takes the six paths from our under-$1,500 build research and grades each one the way a small room grades things: the space the box claims, where its heat goes, where the cord ends up, how far the cables fall, and which placements are not on offer. A tower sealed inside a closed cabinet is refused for all six — that is not a compact setup, it is an oven with a graphics card in it.
Two rules govern the grading. First, measurements: where the base research puts a hard figure on record — 400mm of graphics-card clearance inside the specified DIY case, a 155mm-tall specified cooler — that figure appears here. Where none is documented, nothing is invented; picks are graded by form-factor class and you are sent to the live listing for the centimetres, because two centimetres decide whether a tower slides under a desk. Second, money: nothing has been substituted for this angle, and because listing prices move constantly, this guide does not print a fixed price for any product — check the current price on Amazon for each pick before you decide. The tier’s ceiling honesty also stands — an RTX 4070 Ti Super build does not fit the $1,500 budget, and an RTX 5070 Ti card alone sits above this tier, so neither appears as a build here.
In this guide
Quick Picks
Short on time, or comparing several options at once? Each row below names a builder type and the path that suits it, with a link to the listing for its defining part — or, for the two prebuilts, the whole machine. Check the current price on Amazon on the listing itself.
| Buyer type | Pick | Why it stands out | Link |
|---|---|---|---|
| Best overall build | Ryzen 7 7700X + RTX 5070 (PNY OC Triple-Fan) | Current-generation GPU with DLSS 4 in the shared mid-tower footprint — check price on Amazon | Check on Amazon |
| Best value build | Ryzen 7 7700X + RTX 4070 Super (Gigabyte Eagle OC) | Same performance class, same case, positioned as the value option in this tier when its listing is favourable — check price on Amazon | Check on Amazon |
| Best for high-refresh gaming | Ryzen 7 7800X3D + RTX 5070 | The strongest gaming CPU of its generation — but its premium positioning puts pressure on the rest of the budget | Check on Amazon |
| Best for VRAM headroom | Ryzen 7 7700X + RX 9070 (Sapphire PURE) | 16GB of VRAM, positioned at the accessible end of this tier, and a white finish that suits a visible placement | Check on Amazon |
| Best prebuilt instead | Skytech Omega (7700X, RTX 4070 Super) | A complete machine with Windows included — one box to place, no parts staged around the room for weeks; check price on Amazon | Check on Amazon |
| Best newest-GPU prebuilt | MSI Codex Z2 (8700F, RTX 5070, 2TB) | Double the DIY builds’ storage fitted from the start — no second drive to find room for later; check price on Amazon | Check on Amazon |
How These Picks Were Chosen
All six paths come straight from our base under-$1,500 build guide, with verified parts and deal rules carried over: four DIY builds itemised to nine lines each on one shared AM5 platform, plus two prebuilts admitted under the base guide’s strict condition — a factory machine belongs in a build guide only when it competes honestly with the DIY total for its class, Windows licence included. This variant changes the lens, not the list: it lays an installation grading over the base grading, because in a small room the purchase ends when the tower sits somewhere it can breathe.
The installation grading runs on five axes. Form-factor class: the four DIY builds share one specified case, a full ATX mid-tower, so they share a footprint class and a placement rulebook; the prebuilts are integrator towers with no dimensions documented in our research, their exact size left, deliberately, to their listings. Documented clearances: the specified case records 400mm of graphics-card clearance and the specified cooler stands 155mm tall — the only two hard installation numbers in this set. Airflow and heat: the specified case ships four 140mm fans and moves air front to back, which works only with open air at both ends; every path also dumps tower-class heat into the room. The power supply’s address: all six paths run internal supplies, so no external brick needs housing — the address is the wall socket, and the questions are cord reach and which way the case’s rear faces. Cable drop: the run from the rear panel to monitor, peripherals and router, graded on whether it falls naturally or stretches. One placement fails every axis for every pick: a closed, sealed cabinet, refused throughout this guide.
The order of the six is the base guide’s order, kept on purpose: installation grading cannot separate four builds that share a case, a board, a power supply and a cooler and differ only in graphics card and processor — reordering them on footprint would be theatre. Where the angle genuinely bites is between building and buying (one delivery, one placement decision, versus weeks of staged parts in a room short on spare floor) and in each review’s placement notes. Prices are left to the live listings rather than printed here, and the volatility section below explains why patience matters more than any single number in this tier.
The 6 Best Gaming PC Builds Under $1,500, Graded for Small Rooms
Build 1 — Best Overall: Ryzen 7 7700X + RTX 5070
Who it suits: The builder after the current-generation machine — Blackwell graphics, DLSS 4 with multi-frame generation, a platform ready for AMD’s next CPU generations — who has measured a tower-sized home for it.
The basket, line by line — check the current price on Amazon for the anchor card and each part before you total the build:
- Graphics card: PNY RTX 5070 OC Triple-Fan, 12GB GDDR7
- Processor: AMD Ryzen 7 7700X, 8 cores, up to 5.4 GHz
- Motherboard: MSI B650 Gaming Plus WiFi, AM5, DDR5
- Memory: 32GB (2×16GB) DDR5-6000 kit — the most volatile line in the basket; buy it when its listing is favourable rather than on a spike (see the volatility section)
- Storage: 1TB PCIe Gen4 NVMe SSD, in the WD Black SN850X class
- Power supply: Corsair RM750e 750W, 80+ Gold, fully modular, ATX 3.1
- Case: Montech AIR 903 MAX, four 140mm fans included
- Cooler: Thermalright Peerless Assassin 120 SE
- Operating system: Windows 11 Home (USB retail)
Position in the tier: this build is planned to sit inside the $1,500 budget with the licence counted, as long as the card and memory are bought when their listings are favourable — check price on Amazon for each line before committing. The pairing is built on balance: the RTX 5070 sits in the RTX 4070 Super’s raster neighbourhood while adding the DLSS 4 feature set, and the 7700X is the AM5 line’s value chip, because at 1440p the card, not the processor, sets frame rates in nearly every game. Around them, nothing is anonymous: a B650 board with WiFi 6E and 2.5Gb LAN, memory at the platform’s tuned speed, a 750W Gold supply with the native 12V-2×6 connector this GPU generation uses, and a dual-tower cooler that embarrasses pricier coolers.
Its installation grading is the platform’s grading, stated once here for all four DIY builds. Budget for a full ATX mid-tower footprint. Inside it the documented numbers are comfortable: 400mm of card clearance takes this build’s triple-fan card without drama, and the cooler’s 155mm height is an ordinary mid-tower fit. Airflow is the case’s selling point — four 140mm fans included — but it is conditional on placement, since the case breathes front to back: open air at the intake, a clear exhaust path, in practice beside or beneath the desk with the front unobstructed, never flush into a corner and never inside a shut cabinet. The supply is internal, so no brick needs a shelf; its address is the wall socket, and the case’s rear — cord, display cables, warm exhaust — should face open room so cables drop naturally and heat leaves. Floor placement with the rear to open air works in most small rooms.
- Current-generation GPU: DLSS 4 and multi-frame generation stretch the card’s useful life past its raw raster speed.
- Documented installation headroom: 400mm of GPU clearance and an ordinary-fit 155mm cooler in the specified case.
- Every part named — a 750W Gold PSU with a stated model, not a wattage rumour.
Honest limitation: The budget fit is a discipline, not a guarantee. The linked PNY card and the memory kit are both volatile lines; buy either while its listing is in spike territory and the build stops fitting this tier. The 12GB of VRAM is the class ceiling as well — a 1440p budget for today, not a 4K texture buffer. And the footprint is a full mid-tower’s: a genuinely small measured spot does not make this build smaller.
Choose it if you want the newest GPU feature set, can time the card and memory purchases to their favourable rotations, and have an open-air, tower-sized spot measured. Skip it if everything must be ordered this week regardless of where the listings sit, or your only placement is enclosed — the prebuilts below answer the first problem; nothing on this page answers the second.

Build 2 — Best Value: Ryzen 7 7700X + RTX 4070 Super
Who it suits: The performance-per-dollar shopper who would rather let a previous-generation card do current-generation work than pay for a badge — in the same measured spot.
The basket, line by line — check the current price on Amazon for the anchor card and each part before you total the build:
- Graphics card: Gigabyte RTX 4070 Super Eagle OC, 12GB GDDR6X — a buy-when-favourable pick; its listing swings widely
- Processor: AMD Ryzen 7 7700X
- Motherboard: MSI B650 Gaming Plus WiFi
- Memory: 32GB (2×16GB) DDR5-6000 kit — buy this volatile line only when its listing is favourable
- Storage: 1TB PCIe Gen4 NVMe SSD
- Power supply: Corsair RM750e 750W Gold, fully modular
- Case: Montech AIR 903 MAX
- Cooler: Thermalright Peerless Assassin 120 SE
- Operating system: Windows 11 Home (USB retail)
Position in the tier: planned as the value end of the NVIDIA paths here, with the licence counted — check price on Amazon before you rely on that positioning. The 4070 Super was its generation’s value peak: GDDR6X memory, DLSS 3 frame generation, and raster pace that swaps blows with the RTX 5070 that succeeded it. The newer card adds multi-frame generation and GDDR7 — real features that do not by themselves justify paying a premium for the same class of 1440p play. Gigabyte’s Eagle OC is the no-nonsense trim: triple-fan cooling, a factory overclock, no lighting surcharge. Its listing behaviour is the build in miniature — in an unfavourable week it is a poor buy; when its price rotates down it becomes this guide’s best value. Underneath, the platform is Build 1’s, unchanged on purpose: buy the platform once, and let the builds compete at the graphics card.
Sharing that platform hands this build Build 1’s installation grades — identical case, identical documented clearances, and the Eagle OC is a triple-fan card of the class the 400mm figure covers. What the small-spaces lens adds is a warning about the buying method: this build’s value exists only for a buyer who waits for the card’s favourable rotation, and waiting means parts landing across weeks in a room with no spare surface. Stage intelligently — assemble board, supply, cooler and case as they arrive and park them in the tower’s final spot, so the staging footprint stays the tower’s own. A half-built PC sprawled across a small room for a month is a genuine cost of the patient strategy.
- 4070 Super raster pace matches the class of the card that replaced it, without paying for the newest badge.
- Build 1’s named platform throughout — one measurement covers every DIY path in this guide.
- Positioned at the value end of the NVIDIA builds on this page.
Honest limitation: No build here is more hostage to timing. When the card’s listing sits in its higher range the build stops fitting this tier and stops being the value pick; its appeal belongs to buyers who wait for a favourable rotation. The card is also a discontinued generation — as stock thins and favourable rotations dry up, Build 1 becomes the more sensible route in the same case.
Choose it if you can watch the listing for a few weeks, pounce when it rotates down, and stage parts inside the case as they arrive. Skip it if you are buying against a deadline, or multi-frame generation is the specific feature you are shopping for — that belongs to the 50-series build above.

Build 3 — Best for High-Refresh Gaming: Ryzen 7 7800X3D + RTX 5070
Who it suits: Competitive and high-refresh players — the 240Hz-monitor crowd — whose games are CPU-limited at 1080p and 1440p, and who already own a Windows licence or keep a separate monitor budget.
The basket, line by line — check the current price on Amazon for the anchor processor and each part before you total the build:
- Processor: AMD Ryzen 7 7800X3D, 8 cores with 3D V-Cache
- Graphics card: PNY RTX 5070 OC Triple-Fan, 12GB GDDR7
- Motherboard: MSI B650 Gaming Plus WiFi
- Memory: 32GB (2×16GB) DDR5-6000 kit — buy this volatile line only when its listing is favourable
- Storage: 1TB PCIe Gen4 NVMe SSD
- Power supply: Corsair RM750e 750W Gold, fully modular
- Case: Montech AIR 903 MAX
- Cooler: Thermalright Peerless Assassin 120 SE
- Operating system: Windows 11 Home (USB retail) — and it does not fit alongside this processor inside the budget; see the positioning note
Position in the tier: the parts alone press against the top of this tier, and adding a fresh Windows licence pushes the build over the $1,500 budget. That is printed plainly because it is this review’s most useful fact. The 7800X3D’s stacked cache made it its generation’s defining gaming processor, and it is no longer an extravagance within this class. Where the processor is the ceiling — esports titles, simulation games — it is faster than the 7700X in a way no settings menu can imitate. It also carries a clear premium over the 7700X, and in GPU-limited 1440p play that premium purchases almost nothing — the card is the bottleneck and both chips feed it identically. Read this build as a specialist tool: inside the budget only for a builder carrying a licence over from an older machine, and for everyone else a build that sits above this tier wearing a badge it has not earned.
Its tower grading is identical to Builds 1 and 2 — same case, same clearances, same placement rules — so the small-spaces difference lives at the desk. This build exists to feed a high-refresh monitor, and in a small room the monitor is the installation’s other half: the tower must be placed to serve its cable run. Measure the pair as one system — tower spot first, then the drop from the rear panel to where the screen will sit. When the only tower spot forces the display cable into a long diagonal across the room, place the tower for the cable and arrange the desk around it; the other way round is how small rooms acquire a cable across a walkway.
- The strongest gaming CPU of its generation where the processor is the limit.
- Same platform, same footprint as the other DIY paths — the whole premium lands on the processor.
- The X3D’s premium over the 7700X is at its most defensible in this class.
Honest limitation: With a new licence the build goes over the $1,500 budget, without qualification. And where games are GPU-limited the extra CPU spend is close to invisible; the premium pays only where the processor is the ceiling.
Choose it if your titles are CPU-limited, your refresh rate is high, a licence is already in hand, and the tower can sit within a clean cable drop of a fast monitor. Skip it if the licence must come out of this budget, or your games are GPU-limited — Build 1 is the same machine in the same case for your purposes, without the processor premium.

Build 4 — Best for VRAM Headroom: Ryzen 7 7700X + RX 9070
Who it suits: Modders, texture-heavy-game players, and anyone who refuses to watch a VRAM counter — builders happy to trade NVIDIA’s feature stack for the most accessible positioning on the page.
The basket, line by line — check the current price on Amazon for the anchor card and each part before you total the build:
- Graphics card: Sapphire PURE RX 9070, 16GB GDDR6
- Processor: AMD Ryzen 7 7700X
- Motherboard: MSI B650 Gaming Plus WiFi
- Memory: 32GB (2×16GB) DDR5-6000 kit — buy this volatile line only when its listing is favourable
- Storage: 1TB PCIe Gen4 NVMe SSD
- Power supply: Corsair RM750e 750W Gold, fully modular
- Case: Montech AIR 903 MAX
- Cooler: Thermalright Peerless Assassin 120 SE
- Operating system: Windows 11 Home (USB retail)
Position in the tier: the most accessible positioning here, and the only path with genuine slack left over inside the $1,500 budget — check price on Amazon to confirm it still holds when you buy. The RX 9070 is AMD’s entry in the 4070 Super / 5070 class: comparable raster pace, FSR upscaling and frame generation, and the specification likeliest to age well here — 16GB of VRAM, a third beyond every NVIDIA card in the guide. Memory capacity is the one thing no later upgrade can add; read 12GB as a budget for today’s 1440p and 16GB as headroom across the machine’s life. The exchange is stated without varnish: DLSS stays NVIDIA’s, and it remains the better upscaling stack, while AMD’s ray tracing trails in this class.
Two graces make this the small-room build. One is the finish: a white card in a build assembled to look deliberate — a machine that looks intentional is an installation advantage, not a vanity. The other is the slack: with the licence counted, this is the only path positioned to leave part of the budget unspent, and in a small room placement itself costs money — a stand, a shelf honestly rated for a loaded tower, the longer cables a clean drop needs. No prices are quoted for those things, because our research documents none. The constraints are otherwise the platform’s own: same case, same documented clearances, same open-air rule, same refusal of the shut cabinet.
- 16GB of VRAM — the only capacity in this guide bought for the machine’s whole life.
- The most accessible positioning here, leaving real slack for the placement itself.
- A white-finished card from AMD’s most reputable board partner — the build that suits being seen.
Honest limitation: No DLSS, and ray tracing trails the NVIDIA class. Mind the family boundary, too: the faster RX 9070 XT stays outside this budget, so the non-XT card is the pick precisely because it fits.
Choose it if raster pace and VRAM headroom outrank ray tracing and DLSS in your library, and you want budget left over for the stand, shelf or cable run the room needs. Skip it if ray-traced titles dominate your play or you stream on NVIDIA’s encoder and software stack — Builds 1 and 2 are yours.

Pick 5 — The Prebuilt That Beats Building: Skytech Omega (Ryzen 7 7700X, RTX 4070 Super)
Who it suits: The comparison shopper who priced this page’s parts at unfavourable shelf listings and watched every total sail past the budget — and, under this angle, the buyer whose room cannot host a build in progress.
The machine: a complete Skytech Omega desktop — Ryzen 7 7700X, RTX 4070 Super 12GB, 32GB of DDR5, a 1TB NVMe Gen4 SSD, a published 750W Gold power supply, Wi-Fi, Windows 11 Home installed. That is Build 2’s specification, assembled and warranted as a single machine — check the current price on Amazon before judging it against a DIY cart. In today’s parts market the prebuilt can win on total price, because integrators buy memory and graphics cards at contract prices the retail market is not offering this year. Compare the live listing against your own DIY total on the day, not against any number printed in a guide.
Under the small-spaces lens, this pick’s strongest argument is process. A prebuilt is one box, one delivery, one placement decision — no parts staged for weeks, no build afternoon with components spread across the only table in the room. For a genuinely small home that can be the entire decision. On footprint the grading stays honest: the Omega is a tower with no exact dimensions documented in our research, so take them from the live listing and run the checklist below against them before ordering — an assembled machine is not a smaller machine merely because somebody else assembled it. Its supply is internal with wattage and Gold rating published, so the socket is its address and the tower rules apply. Building still wins what price cannot show: Skytech picks the motherboard model, memory timings and supply unit, the card’s board brand may vary, and the warranty is one company’s rather than per-part cover. The recommendation is conditional both ways: when its live price undercuts your DIY cart, buy it; when it sits in its higher range, build Build 2 instead.
- A complete machine with Windows included that can undercut its own DIY twin — check price on Amazon to verify on the day.
- One delivery, one placement: nothing staged around a small room for weeks.
- Published 750W Gold PSU and a full 32GB of DDR5 — no quiet 16GB downgrade.
Honest limitation: Its favourable pricing is not a standing condition, and its listing can sit far above its most competitive range. Its exact dimensions are not in our research — measure from the live listing, not from optimism. Component brands inside are the maker’s call, and the GPU brand may vary.
Choose it if its live price beats your DIY cart, or your room cannot host an in-progress build and a finished, warranted machine matters more than parts control. Skip it if the live price is sitting in its higher range — the DIY paths, patiently bought, win that comparison.

Pick 6 — The Newest-GPU Prebuilt: MSI Codex Z2 (Ryzen 7 8700F, RTX 5070, 2TB)
Who it suits: The buyer who wants Build 1’s current-generation card and twice its storage without assembling anything — and who can wait for one of this listing’s favourable rotations.
The machine: MSI’s Codex Z2 in its A8NVP-436US configuration — Ryzen 7 8700F, RTX 5070, 32GB of DDR5, a 2TB SSD, Windows 11 Home — check the current price on Amazon, because this listing is the most volatile in the guide. At its most favourable, the Codex competes directly with building Build 1 while storing twice as much; in its higher range it does not belong in this tier at all. Understand the 8700F before buying: an 8-core Zen 4 chip boosting to 5.0 GHz, close to the 7700X in games, but a former APU design carrying half the L3 cache and PCIe 4.0 graphics lanes instead of 5.0 — a small, real step down most 1440p players will never measure. MSI manufactures boards and cards itself; what the listing does not publish is the power supply’s wattage — precisely the omission the DIY paths exist to avoid.
Storage is this pick’s small-spaces argument. Every DIY path here ships 1TB and wants 2TB within its life, which in a small room means an external drive squatting on the desk or the tower pulled out of its spot for a second internal drive. The Codex arrives with 2TB fitted: no enclosure competing for desk space, nothing extra to place. That is the whole of its installation edge — the machine remains a tower whose dimensions our research does not document, measured by you from the listing. The unpublished supply wattage weighs slightly more here: an unspecified supply cannot be planned around for a future card swap without opening the case. Price discipline matters most of all: in its favourable range it beats building; in its higher range it is among the worst buys on the page. Set a tracker alert, confirm the model code A8NVP-436US at checkout — other Codex Z2 configurations share the name — and let the favourable rotation come to you.
- RTX 5070 with 2TB fitted from day one — no external drive to place later; check price on Amazon.
- 32GB of DDR5 fitted, in a class where several rivals quietly ship 16GB.
- Built by a maker that also manufactures the boards and cards inside it.
Honest limitation: The most volatile listing in this guide, so the recommendation holds only in its favourable range. The supply wattage is unpublished, the exact dimensions are undocumented in our research, and the 8700F’s cache and PCIe 4.0 lanes step down slightly from the 7700X.
Choose it if you want the 5070 class with 2TB and zero assembly, you can wait for a favourable rotation, and its listing dimensions pass your measured spot. Skip it if you are buying this week at whatever it costs — at unfavourable pricing, Build 1’s parts or the Skytech in its favourable range are the rational buys.

Comparison Table
| Path | GPU | CPU | Footprint class | Position in this tier | Windows | Link |
|---|---|---|---|---|---|---|
| Build 1 — Best overall (DIY) | RTX 5070 12GB | Ryzen 7 7700X | Full ATX mid-tower (specified case) | Planned inside the budget when volatile lines are bought favourably — check price on Amazon | Counted separately | Check on Amazon |
| Build 2 — Best value (DIY) | RTX 4070 Super 12GB | Ryzen 7 7700X | Full ATX mid-tower (specified case) | Value end of the NVIDIA paths when the card’s listing rotates down — check price on Amazon | Counted separately | Check on Amazon |
| Build 3 — High-refresh (DIY) | RTX 5070 12GB | Ryzen 7 7800X3D | Full ATX mid-tower (specified case) | Presses the top of the tier; over budget once a fresh licence is added | Pushes it over budget | Check on Amazon |
| Build 4 — VRAM headroom (DIY) | RX 9070 16GB | Ryzen 7 7700X | Full ATX mid-tower (specified case) | Most accessible positioning here, with slack left over — check price on Amazon | Counted separately | Check on Amazon |
| Pick 5 — Skytech Omega (prebuilt) | RTX 4070 Super 12GB | Ryzen 7 7700X | Integrator tower — measure from the listing | Can undercut its DIY twin in its favourable range — check price on Amazon | Included | Check on Amazon |
| Pick 6 — MSI Codex Z2 (prebuilt) | RTX 5070 12GB | Ryzen 7 8700F | Integrator tower — measure from the listing | Competes with Build 1 only in its favourable range — check price on Amazon | Included | Check on Amazon |
Measure Before You Buy: The Five-Step Checklist
Every path here is a tower, and a tower bought before the room is measured is a gamble with a return label attached. Run these five steps in order before ordering anything — ten minutes and a tape measure, and they are the difference between an installation and an imposition.
- Step 1 — Measure the spot. Pick where the tower will genuinely live — floor beside the desk, the bay beneath it, a shelf — and measure width, depth and height. Compare against the case dimensions on the live listing: the Montech AIR 903 MAX’s for the DIY paths, each machine’s own for the prebuilts. If the spot is a shelf, check it is rated for a loaded tower’s weight as well as its size. A spot that fits with zero margin does not fit — Step 2 decides how much margin it needs.
- Step 2 — Ventilation clearance. These cases breathe front to back — the DIY case’s four included 140mm fans assume exactly that — so the spot owes open air at the intake and a clear exhaust path: no rear panel pressed to a wall, no front panel an inch from a cabinet back. If the spot cannot offer air at both ends, it fails however neatly the box fits. And the standing refusal, plainly: if the only spot is inside a closed, sealed cabinet, nothing on this page is the right purchase — re-plan the room instead.
- Step 3 — Brick address. All six paths run internal power supplies, so there is no external brick to house — this class’s one small mercy. The supply’s address is the wall socket: find the socket the tower will use and confirm the run from the case’s rear is short, direct and clear of walkways. A tower placed for its looks with the cord at full stretch is a trip hazard carrying a warranty. When the socket sits far from every workable spot, the spot moves — the socket does not.
- Step 4 — Cable drop. Trace every run from the rear panel: display to the monitor, USB to the peripherals, Ethernet if you wire it. Each should fall naturally — down behind the desk, nothing spanning a doorway or crossing the chair’s rolling path. The display run rules the rest: place the tower so that cable is short and slack, because a taut display cable is the one kicked loose mid-game. A run that only works stretched means the placement is wrong, not the cable.
- Step 5 — Then order. Only with the spot measured, clearance confirmed, socket located and drops traced does the parts list come out. For DIY, check the current price on Amazon for each line and give the checklist the last word over the deal rotation — a card bought on a favourable rotation for a tower with nowhere to live is inventory, not a bargain. For a prebuilt, re-check the listing dimensions against your Step 1 numbers at checkout, and for the Codex confirm model code A8NVP-436US in the same pass.
How to Choose a Gaming PC Build Under $1,500 for a Small Room
- Total the whole machine before falling for a graphics card. A build is nine purchases, not one. List card, CPU, board, memory, SSD, PSU, case, cooler and Windows and check the current price on Amazon for each — a fast card inside an over-budget cart is an over-budget build, not a $1,500 build with a fast card.
- Buy the two volatile lines when their listings are favourable, in any order — and stage them inside the case. The graphics card and the DDR5 kit swing widely between rotations. Buy whichever becomes favourable first; in a small room, fit the stable parts into the case as they arrive so the staging footprint never exceeds the tower’s own.
- Never buy memory while its listing is in spike territory. The 32GB DDR5-6000 kit is the same kit in a favourable week and a spike week. Expense does not make it faster. If the memory line is sitting in spike territory, the correct purchase is patience — or the prebuilt, whose maker never paid retail for RAM.
- Name your power supply, or walk away from the build. The DIY advantage compressed to one line: a Corsair RM750e is a known 750W Gold unit with a native 12V-2×6 cable and a seven-year warranty. Any build whose supply is described by wattage alone — or not at all — is hiding the component most likely to cap the machine’s next GPU.
- Match the CPU to your bottleneck, not to a chart. In GPU-limited 1440p play the 7700X and 7800X3D feel identical despite the X3D’s premium positioning; in CPU-limited competitive titles the X3D earns its place. Know your library before paying the premium — in this tier it is paid out of the Windows budget, as Build 3 demonstrates.
- Read 12GB of VRAM as a 1440p budget and 16GB as a lifespan. Every NVIDIA card in this class carries 12GB, which covers high-refresh 1440p today. The RX 9070’s 16GB is the pick for texture mods, heavy titles and longer card life. Capacity is the one decision here that can never be revised.
- Grade the room’s heat, not just the machine’s. All six paths exhaust tower-class heat into the room they occupy, and a small room has nowhere for it to go. Exhaust aimed into open air — not a corner, not a curtained alcove — is the difference between a warm desk and a stuffy evening.
- Price the prebuilt before ordering a single part. Integrators buy components at contract prices, and both factory machines here can undercut honest DIY totals when their listings are favourable. For a small room, count the prebuilt’s second saving too: one box to place, no build in progress. If a specified prebuilt beats your cart on the day, what remains in favour of building is control and craft — honourable reasons, provided you name them.
- Budget the licence like a component. Windows 11 Home retail USB is a real line in the total, and a retail licence transfers to your next build while an OEM key does not. Fund it in the total — check the current price on Amazon.
The Late-2026 Parts Market: Why Prices Here Are Left to the Listings
Every total in this tier carries an asterisk; this section is the asterisk. Amazon’s component market in late 2026 is two markets sharing a storefront: a deal rotation, where parts pass through favourable pricing, and a spike shelf, where identical parts sit at prices that would have read as satire a year earlier. Memory is the extreme — the same 32GB DDR5-6000 kits swing between their favourable rotations and deep spike territory, and storage has followed the same curve. Graphics cards swing widest of all: a current-generation card can sit in a competitive range in one rotation and in unmistakable spike territory in the next.
That is why this guide prints no fixed product prices. Bought at spike shelf pricing, none of these builds fits this tier; bought patiently, when the volatile lines rotate into favourable territory, the same builds are planned to fit. That gap is not a discount; it is a method. Watch the card and the memory kit, buy the stable lines whenever, and accept that a build at this budget takes weeks on paper before an afternoon on a desk. Buyers who cannot shop that way are the prebuilt market, and Picks 5 and 6 exist for them.
Common Buying Mistakes
- Reading “small spaces” at $1,500 as “small PC.” Every path here is a tower; buyers who order expecting a mini discover the truth at the door, holding a tape measure they should have used first.
- Measuring the box and not the air around it. A case that fits a spot exactly, intake against a wall and exhaust into a corner, fits on paper and cooks in practice.
- Hiding the tower in a closed cabinet to keep the room tidy. The door conceals the machine and traps its heat around the intake; that placement is refused for every path in this guide, whatever the cabinet cost.
- Budgeting an RTX 4070 Ti Super or RTX 5070 Ti build at $1,500. A card from that class alone sits above this entire tier, before the other eight lines are even considered.
- Totalling a build without the licence, the cooler or the case, then discovering the real total has left the budget behind. Every path here counts all nine lines.
- Buying the DDR5 spike. A kit in spike territory is the same kit that rotates into favourable pricing; buying at spike prices turns a build planned for this tier into one that no longer fits it, to save a few weeks of patience.
- Letting the deal rotation outrank the room. A card snapped up on a favourable rotation for a tower spot that was never measured is inventory, not progress. Checklist first, cart second.
- Assuming the prebuilt is either the lazy overpay or the compact option. In their favourable ranges both prebuilts can undercut the DIY totals, and neither’s dimensions are documented in our research, so neither can be presumed small. Check the live price and dimensions before ordering parts — or a machine.
- Ordering a Codex Z2 by name alone. The name covers several configurations; this page’s pick is model A8NVP-436US with the RTX 5070 and the 2TB drive. Confirm the code at checkout.
Final Recommendation
- Most builders: Build 1 — Ryzen 7 7700X + RTX 5070, planned inside the $1,500 budget with Windows counted, in the shared mid-tower footprint — check price on Amazon.
- Value hunters with patience and staging room: Build 2 — the RTX 4070 Super build, at its best when the card’s listing rotates into favourable territory.
- High-refresh competitive players who already hold a licence: Build 3 — the 7800X3D build, pressing the top of this tier in parts alone, placed within a clean cable drop of a fast monitor.
- VRAM-first players who want budget left for the placement: Build 4 — the RX 9070 build, the most accessible positioning here with Windows counted.
- Rooms that cannot host a build in progress: Pick 5, the Skytech Omega in its favourable range — or Pick 6, the MSI Codex Z2, when the fitted 2TB matters more than the last dollar.
Two paths cover most buyers here. Build 1 serves the builder who can time a card and a memory kit to their rotations and wants the current-generation machine with every component named; the Skytech Omega serves the buyer who prices honestly and finds the factory machine cheaper on the day — in its favourable range, it can be — and who gains a quieter small-room advantage: one box to place instead of nine to stage. Either way, the room votes first — run the five-step checklist before the cart, not after the delivery. Builders on a tighter total should also see Best Gaming PC Build Under $1200; readers after a genuinely smaller machine class should start with Best Small Form Factor Gaming PC Under $1500 and Best Mini Gaming PC Under $1500; anyone skipping parts selection entirely can begin with Best Budget Gaming PC Under $1500 and Best Gaming PC Under $1500.
Frequently Asked Questions
Can you really build a gaming PC with an RTX 5070 for under $1,500?
Yes — for a patient buyer rather than a one-cart buyer. Build 1 is planned to fit inside the $1,500 budget with a Windows licence counted, from an RTX 5070 bought on a favourable rotation and a 32GB DDR5 kit bought the same way — check the current price on Amazon for each line before you commit. Price the same basket while the card and memory sit in spike territory and it leaves this tier behind. This page plans for the patient reality and names the spike reality.
Will any of these builds actually fit in a small room?
Yes, provided “fit” means a tower-sized spot — the honest version of the answer. The four DIY paths share a full ATX mid-tower case with 400mm of documented card clearance, its exact outer dimensions taken from its live listing; both prebuilts are towers with no dimensions documented in our research, so theirs come from their listings too. Any of the six sits happily in a normal under-desk bay or on the floor beside a desk with open air at both ends. None belongs on a bookshelf or inside a closed cabinet.
Can I put the tower inside a cabinet to keep the room tidy?
Not a closed one — and that holds for all six paths. Machines of this class exhaust real heat, and a sealed cabinet traps it around the intake until the machine throttles or worse. Open-backed, open-fronted furniture with genuine through-flow is a different question, judged by Step 2 of the checklist: open air at the intake, a clear exhaust path. Furniture that cannot pass that test is the problem to solve — not the PC.
Why is there no RTX 4070 Ti Super or RTX 5070 Ti build?
Because a card from that class alone breaks the budget — it sits above the entire $1,500 tier, and no verified new listing for a 4070 Ti Super leaves room beneath it for the other eight parts. This tier’s realistic ceiling is the RTX 4070 Super / RTX 5070 class plus AMD’s RX 9070, which is what the six paths here are built on.
Is it cheaper to build or buy a gaming PC at $1,500 right now?
It depends on the day, which is exactly why this guide prints no fixed prices. In their favourable ranges, both prebuilts here can undercut building the same specification yourself — the Skytech Omega with Windows included, and the MSI Codex Z2 with twice the DIY builds’ storage. Integrators buy memory and cards at contract prices, insulated from the retail DDR5 spike. Building still wins on specified parts, a power supply you chose yourself, and per-part warranties. Check the current price on Amazon for the prebuilt and for your DIY cart, and let that day’s comparison decide.
7700X or 7800X3D for a $1,500 build?
Your bottleneck decides, and the budget sharpens the answer. In GPU-limited 1440p play they perform alike and the X3D’s premium is better kept; in CPU-limited competitive and simulation titles the X3D is meaningfully quicker — except that in Build 3 the premium is precisely what pushes the build over the $1,500 budget once a fresh licence is added. Buy the X3D with open eyes, or with a licence already owned.
Is 12GB of VRAM enough, or should I get the RX 9070’s 16GB?
Twelve gigabytes is a workable budget for high-refresh 1440p — it is what every NVIDIA card in this class ships — and the RTX 5070 and 4070 Super builds here are planned around it. The 9070’s 16GB is the safer long-term specification for texture-heavy titles and modded installs, and Build 4 is also the most accessible path here, the one that leaves budget for the stand or shelf the tower will live on. The trade is DLSS and stronger ray tracing against capacity and positioning; capacity cannot be revisited later.
What should I upgrade first in a year or two?
Storage first, then the graphics card — which is why these builds defend the platform. A 2TB SSD is the upgrade every 1TB build wants earliest (and why the Codex Z2’s fitted 2TB earns its keep in a small room: no external drive to place), while the AM5 board, DDR5 kit and 750W Gold supply were specified so a future GPU or drop-in newer Ryzen needs nothing else replaced. Plan the logistics too: the tower must come out of its spot for the work, so a placement the case can slide out of beats one it is wedged into.
- Best Gaming PC Build Under $1500
- Best Gaming PC Build Under $1200
- Best Gaming PC Build Under $2500
- Best Gaming PC Build For Beginners Under $1500
- Best Gaming PC Build For Streaming Under $1500
- Best Gaming PC Build For 1440p Gaming Under $1500
- Best Gaming PC For Small Spaces Under $1500
- Best Small Form Factor Gaming PC Under $1500