Where to buy
Check the latest price, availability and delivery on Amazon. Orders are placed on Amazon. We may earn a commission from qualifying purchases.
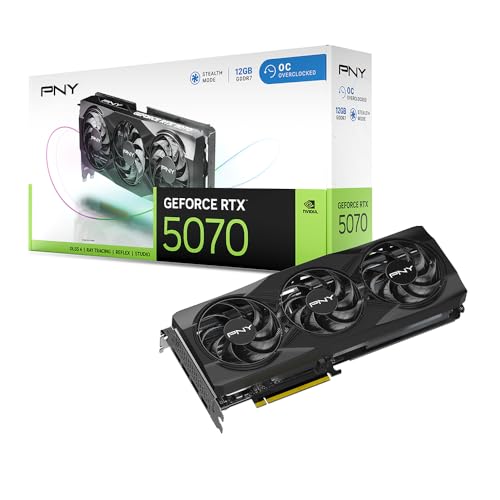
- Best overall build: Ryzen 7 7700X + RTX 5070 build, anchored on the PNY RTX 5070 OC Triple-Fan — Check on Amazon
- Best value build: Ryzen 7 7700X + RTX 4070 Super build, anchored on the Gigabyte RTX 4070 Super Eagle OC — Check on Amazon
- Best for high-refresh gaming: Ryzen 7 7800X3D + RTX 5070 build, anchored on the Ryzen 7 7800X3D — Check on Amazon
- Best for VRAM headroom: Ryzen 7 7700X + RX 9070 build, anchored on the Sapphire PURE RX 9070 — Check on Amazon
See 2 more Amazon options
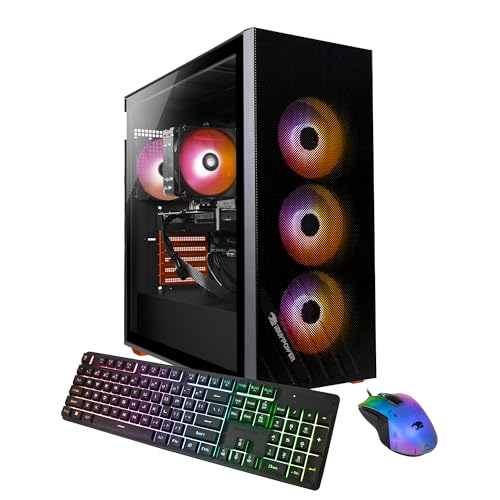
- The prebuilt that beats building: Skytech Omega, Ryzen 7 7700X, RTX 4070 Super, 32GB DDR5 — Check on Amazon
- The newest-GPU prebuilt: MSI Codex Z2, Ryzen 7 8700F, RTX 5070, 32GB DDR5, 2TB SSD — Check on Amazon
Read the full guide ↓
Disclosure: As an Amazon Associate, reviewstook.com earns from qualifying purchases. Links to Amazon on this page are affiliate links; they cost you nothing extra. Listing details such as price and availability change often, so check the current Amazon listing before you buy.
If this is your first gaming PC, welcome — and take a breath, because the honest version of this guide is friendlier than the internet usually is. Building a PC sounds like an exam, but it is closer to flat-pack furniture: about nine parts, each shaped to fit only where it belongs, assembled with one screwdriver. At $1,500 a first build can be a genuinely fast machine — a current-generation graphics card, a platform you can upgrade for years, and no mystery parts. Four of the six paths below are exactly that: complete parts lists covering every line a working PC needs, including the Windows license most guides quietly leave out — check price on Amazon for each linked pick before you buy.
Two things a beginner deserves to hear before any shopping happens. First, the warning that shapes this whole page: component prices in late 2026 swing wildly. The same 32GB memory kit can sit at the low end of this tier in one rotation and far higher in the current spike, and a graphics card in this class can move just as sharply. So treat this guide as a buying rule, not a promise — buy each part at the favourable end of its range, in whatever order the deals appear, and the build can land under $1,500. Pay spike prices for the card and the memory and nothing in this class fits. Second, the surprise: because factories buy parts at contract prices, two ready-made PCs earn places here by being cheaper than building the same machine yourself at the favourable end of their range. And one ceiling: the RTX 4070 Ti Super does not fit a $1,500 budget in any form; cards in its successor class sit above the whole budget for the card alone — check the current price on Amazon and the gap is plain. What $1,500 honestly buys is the RTX 4070 Super / RTX 5070 class, AMD’s RX 9070, and a strong platform underneath.
In this guide
Quick Picks
Short on time? Each row names a buyer type and the path that suits it, with a link to the listing for its defining part — or, for the two prebuilts, the whole machine.
| Buyer type | Pick | Why it stands out | Link |
|---|---|---|---|
| Best overall build | Ryzen 7 7700X + RTX 5070 (PNY OC Triple-Fan) | Current-generation GPU with DLSS 4, positioned to fit the budget with Windows included — check price on Amazon | Check on Amazon |
| Best value build | Ryzen 7 7700X + RTX 4070 Super (Gigabyte Eagle OC) | The same performance class for less, when the card is bought at the favourable end of its range | Check on Amazon |
| Best for high-refresh gaming | Ryzen 7 7800X3D + RTX 5070 | The strongest gaming CPU of its generation — but its premium eats the Windows budget | Check on Amazon |
| Best for VRAM headroom | Ryzen 7 7700X + RX 9070 (Sapphire PURE) | 16GB of VRAM and the most budget headroom on this page — check price on Amazon | Check on Amazon |
| Best prebuilt instead | Skytech Omega (7700X, RTX 4070 Super) | Complete with Windows and positioned below the equivalent DIY route when its listing is favourable — check price on Amazon | Check on Amazon |
| Best newest-GPU prebuilt | MSI Codex Z2 (8700F, RTX 5070, 2TB) | Positioned to fit the budget with double the storage of the DIY builds — check price on Amazon | Check on Amazon |
The Words on the Boxes, in Plain English
Twelve entries explain nearly everything on a parts list. Read these once and the rest of this guide — and every product page you open — gets much easier.
- Graphics card (GPU). The part that draws your games — the most expensive line in every build here, and the one that matters most for how games look and feel.
- Processor (CPU). The machine’s general brain: it runs the game itself, Windows and everything else, and hands drawing work to the graphics card. It matters most in competitive games chasing high frame rates.
- Motherboard. The big circuit board everything plugs into. It adds no speed; you are buying the right sockets, enough connectors, and features like Wi-Fi.
- Memory (RAM). The machine’s short-term workspace, in gigabytes (GB). 32GB is the comfortable amount for gaming in 2026. It arrives as sticks that click into motherboard slots — here, two of 16GB.
- Storage (SSD). Where games and Windows live permanently. An SSD is the fast modern drive; 1TB (roughly 1,000GB) holds a healthy library, 2TB a bigger one.
- Power supply (PSU). The box converting wall power into the voltages the parts need, in watts (W). A named model from a known maker — like the Corsair below — signals quality; an unnamed one is where cheap PCs cut corners.
- Case, and cooler. The case is the metal box everything lives in; beyond looks, its job is airflow over hot parts, and a standard mid-tower means future parts fit without drama. The cooler is the fan-and-metal-stack carrying heat away from the processor — some CPUs include one, but the Ryzen chips here do not, hence a cooler line in every parts list.
- Windows license. The operating system is a purchase, not a free extra — the retail USB version is the one to budget for. A retail license can move to your next build later; that is the version counted in the guidance below.
- VRAM. The graphics card’s own private memory, holding the textures a game paints its world with. 12GB is this class’s standard; 16GB ages better. It can never be added later — it is part of the card.
- Socket / platform (AM5). The socket is the shaped connector a CPU drops into; the platform is the family of boards and memory around it. All four DIY builds use AMD’s AM5 with DDR5, a platform with a documented upgrade future.
- Barebone. A half-finished mini PC sold without some combination of memory, storage and Windows, which you complete yourself. None of the six paths here is a barebone — the four builds are full-size desktops from standard parts, and the other two picks are complete machines.
- Renewed, and soldered. “Renewed” means refurbished second-hand hardware — none of the six picks here is renewed; every part and both machines are new. “Soldered” means permanently attached and unswappable — nothing here is soldered; every stick, drive and card in the DIY paths unplugs and can be replaced.
How These Picks Were Chosen
Beginners get hurt by a trick in build guides: a total that quietly leaves things out. Ours leave nothing out. Each self-build path covers all nine lines a working PC needs — card, processor, motherboard, memory, storage, power supply, case, cooler and a Windows 11 Home license. Where a path only fits under a condition, the condition sits in that review in plain sight: one build below fits in parts but is carried over the line once its license is added, and we flag that rather than dropping the license.
Nobody on our side assembled these machines. The work was done from manufacturer listings and spec sheets, cross-checked against retailer listings, and the figures that mattered were the ones that decide how a build ages: the card’s VRAM, whether the power supply’s wattage and certification are published, the memory speed, and the socket’s upgrade future. Prices change often, so each pick is described by its position in the tier — check price on Amazon on the day you buy. Two filters did the gatekeeping: named parts only, and one platform — every DIY path stands on AMD’s AM5 socket with DDR5.
The prebuilts had to pass a harder test than the builds: a factory PC earns a place here only when its complete package — Windows already inside — compares favourably with the honest DIY route for the same class. Both machines below pass.
The 6 Best Gaming PC Builds Under $1,500
Build 1 — Best Overall: Ryzen 7 7700X + RTX 5070
Who it suits: A first-time builder who wants today’s machine, not yesterday’s: the newest graphics features, a board that will take AMD’s coming CPU generations, and no part that needs an excuse made for it.
The parts — check price on Amazon for the anchor card and check the current price on Amazon for the rest before you buy:
- PNY RTX 5070 OC Triple-Fan graphics card, 12GB GDDR7 — the anchor card for this build; check price on Amazon
- AMD Ryzen 7 7700X processor, 8 cores, boosting to 5.4 GHz — the value pick in the AM5 line
- MSI B650 Gaming Plus WiFi motherboard, AM5, DDR5
- 32GB (2×16GB) DDR5-6000 memory kit — a line to buy only at the favourable end of its range (see the spike section below)
- 1TB PCIe Gen4 NVMe SSD — the WD Black SN850X class
- Corsair RM750e power supply, 750W, 80+ Gold, fully modular, ATX 3.1
- Montech AIR 903 MAX case, four 140mm fans included
- Thermalright Peerless Assassin 120 SE cooler
- Windows 11 Home, retail USB edition
Position in the budget: this build is designed to fit inside the budget with the license included, so long as the card and memory are bought at the favourable end of their ranges — check the current price on Amazon for each part before ordering. The RTX 5070 is this class’s current-generation card, with 12GB of its own memory and DLSS 4 — NVIDIA’s upscaling, which draws the game at a smaller internal size and rebuilds a sharper image. On a 1440p screen, Quality mode renders at roughly 1707×960 inside and Performance at roughly 1280×720; that is how a card of this size drives fast 1440p play. The 7700X beneath it is the AM5 line’s value pick; since the card settles frame rates in almost every 1440p game, the saving belongs in your pocket.
- Newest-generation card: DLSS 4 with multi-frame generation extends its useful life beyond raw speed.
- Nothing anonymous — the power supply is a stated model with a published rating, not a rumor.
- The AM5 board and DDR5 memory stay relevant for future Ryzen generations.
Honest limitation: That fit is a shopping discipline, not a guarantee at any moment’s listing. This card and the memory kit have both sat far higher in spike periods; pay spike money for either and the build moves well over budget. And 12GB of VRAM is this class’s ceiling — right for 1440p now, not a 4K texture reserve.
Choose it if the newest feature set appeals and you can let two purchases — card and memory — wait for their deal rotations. Skip it if everything must be ordered this week at whatever the listings say; the two prebuilts below exist for that buyer.

Build 2 — Best Value: Ryzen 7 7700X + RTX 4070 Super
Who it suits: A first-time builder who counts performance per dollar instead of collecting generation badges, and who is content to let last generation’s card do this generation’s work.
The parts — check price on Amazon for the anchor card and check the current price on Amazon for the rest before you buy:
- Gigabyte RTX 4070 Super Eagle OC graphics card, 12GB GDDR6X — strictly a buy at the favourable end of its range; check price on Amazon
- AMD Ryzen 7 7700X processor
- MSI B650 Gaming Plus WiFi motherboard
- 32GB (2×16GB) DDR5-6000 memory kit — a line to buy only at the favourable end of its range
- 1TB PCIe Gen4 NVMe SSD
- Corsair RM750e power supply, 750W Gold, fully modular
- Montech AIR 903 MAX case
- Thermalright Peerless Assassin 120 SE cooler
- Windows 11 Home, retail USB edition
Position in the budget: among the least expensive routes into this class with a license counted — check the current price on Amazon before ordering. The 4070 Super was its generation’s value peak: 12GB of quick memory, DLSS 3 frame generation — Build 1’s upscaling idea one generation back — and speed that trades punches with the 5070 that replaced it. The newer card’s additions, multi-frame generation and faster memory chips, do not by themselves justify a premium for the same tier of 1440p play. Its pricing behaviour is the whole plot: at the high end of its range it is a bad buy, while at the favourable end it is the page’s best value.
- At favourable pricing, 4070 Super speed matches the class of its successor — for less.
- Rides on Build 1’s named platform: same board, supply, cooler and case discipline.
- Among the most budget-friendly with-Windows routes of the NVIDIA paths here.
Honest limitation: No build here is more hostage to timing. Bought at the high end of its range, the card pushes the total out of fit; the favourable picture belongs only to a buyer willing to wait. The card is also a discontinued generation — when favourable rotations stop arriving, Build 1 is the better use of the budget.
Choose it if a few weeks of watching listings sounds like a fair trade for the saving. Skip it if you are shopping to a deadline, or if multi-frame generation is the feature you came for — that lives in Build 1.

Build 3 — Best for High-Refresh Gaming: Ryzen 7 7800X3D + RTX 5070
Who it suits: Competitive and high-refresh players whose games run into the processor’s limits rather than the card’s — provided a Windows license is already in hand or funded elsewhere.
The parts — check price on Amazon for the anchor processor and check the current price on Amazon for the rest before you buy:
- AMD Ryzen 7 7800X3D processor, 8 cores with 3D V-Cache — check price on Amazon
- PNY RTX 5070 OC Triple-Fan graphics card, 12GB GDDR7 — a card to buy on a favourable rotation
- MSI B650 Gaming Plus WiFi motherboard
- 32GB (2×16GB) DDR5-6000 memory kit — a line to buy only at the favourable end of its range
- 1TB PCIe Gen4 NVMe SSD
- Corsair RM750e power supply, 750W Gold, fully modular
- Montech AIR 903 MAX case
- Thermalright Peerless Assassin 120 SE cooler
- Windows 11 Home, retail USB edition — and it does not fit alongside the parts; the explanation below shows why
Position in the budget: the parts alone sit right at the edge of the budget — and adding a fresh Windows license pushes the build over budget. That gap is the lesson: budgets rarely die from one huge error, but from one premium part quietly eating the money set aside for something unglamorous. The 7800X3D’s party trick is a stack of extra fast memory — its 3D V-Cache — which made it the defining gaming processor of its generation, at the premium end of this tier. Where games are processor-limited — esports titles and simulators pushing frame rates into the hundreds — it beats the 7700X in a way no setting can imitate. But in graphics-limited 1440p play its premium buys nearly nothing: the card is the ceiling, and both chips feed it equally. The honest label is “specialist” — this build fits only for a builder carrying a license over from an earlier machine.
- For processor-limited, high-refresh play, the strongest gaming CPU of its generation.
- The premium goes entirely into the processor; the platform is the same named set as the other DIY paths.
- The X3D’s premium over the 7700X is at the narrower end of its usual range in this tier.
Honest limitation: Add a new Windows license and the build is past the budget, with no way to phrase it otherwise. Where the card is the bottleneck at 1440p, the extra processor money is close to invisible; it earns its premium only where the CPU sets the pace.
Choose it if your titles are CPU-limited, your monitor is fast, and a license is already yours. Skip it if the license must come out of this budget, or your games are GPU-limited — Build 1 is the same machine for that use, without the premium.

Build 4 — Best for VRAM Headroom: Ryzen 7 7700X + RX 9070
Who it suits: A first-time builder who mods games, plays texture-heavy titles, or never wants to think about a memory counter — and who accepts giving up NVIDIA’s feature stack for the most headroom in this budget on this page.
The parts — check price on Amazon for the anchor card and check the current price on Amazon for the rest before you buy:
- Sapphire PURE RX 9070 graphics card, 16GB GDDR6 — check price on Amazon
- AMD Ryzen 7 7700X processor
- MSI B650 Gaming Plus WiFi motherboard
- 32GB (2×16GB) DDR5-6000 memory kit — a line to buy only at the favourable end of its range
- 1TB PCIe Gen4 NVMe SSD
- Corsair RM750e power supply, 750W Gold, fully modular
- Montech AIR 903 MAX case
- Thermalright Peerless Assassin 120 SE cooler
- Windows 11 Home, retail USB edition
Position in the budget: the most headroom in the guide, and the only build with genuine slack — check the current price on Amazon before ordering. This is the AMD-graphics route: the RX 9070 aims straight at the 4070 Super / 5070 class, with speed in the same neighborhood, AMD’s own upscaling (FSR) with frame generation, and the specification that will age best here — 16GB of VRAM, a third more than any NVIDIA card on this page. VRAM can never be upgraded later, and it is the wall modded installs and texture-heavy games hit first. 12GB is a workable 1440p allowance today; 16GB is breathing room for the machine’s whole life. What leaves the table is DLSS, still the finest upscaling stack available, and ray tracing, where AMD trails in this class.
- 16GB of VRAM — the only genuinely future-proofed memory capacity here.
- The most budget headroom with Windows counted in the guide, with real slack remaining.
- Sapphire is AMD’s most trusted board partner; the PURE trim suits white builds.
Honest limitation: There is no DLSS here, and ray tracing sits a step behind the NVIDIA class. Mind the family boundary: the quicker RX 9070 XT does not fit this budget — it sits in a higher tier — so the non-XT card is the one on this list.
Choose it if outright speed and memory headroom matter more than ray tracing and DLSS. Skip it if you lean heavily on ray-traced titles or stream through NVIDIA’s encoder stack — Builds 1 and 2 were made for you.

Pick 5 — The Prebuilt That Beats Building: Skytech Omega (Ryzen 7 7700X, RTX 4070 Super)
Who it suits: The honest comparison shopper — including the would-be first-time builder who priced this page’s parts at spike levels and watched every total sail well past the budget.
The machine, first: a finished Skytech Omega desktop — Ryzen 7 7700X, RTX 4070 Super 12GB, 32GB of DDR5, a 1TB NVMe Gen4 SSD, a published 750W Gold power supply, Wi-Fi, and Windows 11 Home already installed. That is Build 2’s specification, assembled under a single warranty — check price on Amazon. Set that beside Build 2’s DIY route — itself dependent on catching the card and memory on favourable rotations — and at the favourable end of its range the factory machine compares ahead: in the present parts market, this prebuilt can win on price, because integrators buy parts at contract prices the retail market is not offering this year.
What building still wins is everything the invoice cannot show. Skytech picks the motherboard model, the memory timings and the power supply’s brand for you — publishing the wattage and Gold rating puts it ahead of most prebuilts, but the actual units are their call, and the card’s board brand may vary. Your warranty is one company’s promise over the whole machine, not a separate warranty behind each component. And its pricing is volatile: at the favourable end it can cost less than the DIY build it mirrors, while at the high end it costs more. Near the favourable end, buy this and skip building; at the high end, build Build 2 and wait for the card’s better rotation.
- At the favourable end of its range, complete with Windows, it undercuts building its own specification — check price on Amazon.
- A published 750W Gold supply and the full 32GB — no quiet 16GB downgrade inside.
- One box, one warranty, no assembly risk, no parts-timing discipline.
Honest limitation: Its favourable pricing is not a standing price; it often sits far higher. Component brands inside are the maker’s choice, and the GPU’s board brand may vary.
Choose it if you catch it at the favourable end of its range, or a finished, single-warranty machine matters more than choosing parts. Skip it if the live price has drifted into its higher range — there, patient DIY wins again.

Pick 6 — The Newest-GPU Prebuilt: MSI Codex Z2 (Ryzen 7 8700F, RTX 5070, 2TB)
Who it suits: A beginner who wants Build 1’s current-generation card and twice its storage without assembling anything — and who can wait for one of this listing’s deep rotations.
The machine is MSI’s Codex Z2 in its A8NVP-436US configuration: a Ryzen 7 8700F, an RTX 5070, 32GB of DDR5, a 2TB SSD and Windows 11 Home — check price on Amazon. Against Build 1’s DIY route with a 1TB drive, the Codex at the favourable end of its range compares well and stores twice as much. Two details deserve a beginner’s attention. First, the “F” in 8700F means the chip carries no integrated graphics whatsoever, so this machine can only ever produce a picture through its graphics card. That turns the walkthrough’s step 9 into law — the monitor cable belongs in the card, because the motherboard’s video sockets here are dead ports. Second, the omission: MSI’s listing nowhere publishes the power supply’s wattage, and that silence is precisely what the DIY paths exist to avoid.
Price discipline matters even more here than with the Skytech, because this listing is volatile — long stretches at the high end of its range are on record. Its value depends heavily on timing: at the favourable end it beats building; at its highs it is among the worst buys on the page. Set an alert, confirm the model code A8NVP-436US at checkout, and let the deal come to you.
- An RTX 5070 plus 2TB of storage, with Windows — positioned below Build 1’s route at the favourable end of its range; check price on Amazon.
- The full 32GB of DDR5, where plenty of rivals in this class quietly ship 16GB.
- Built by a maker that also manufactures the boards and cards inside it.
Honest limitation: This is the guide’s most volatile listing — stretches at the high end of its range are on record, so the recommendation holds only near the favourable end. The power supply’s wattage is unpublished, and the 8700F is a small step down from the 7700X’s specification.
Choose it if the 5070 class with 2TB and zero assembly appeals, and waiting for a rotation is acceptable. Skip it if you are buying this week at whatever it costs — at spike money, Build 1’s parts or the Skytech at the favourable end of its range are the rational purchases.

Comparison Table
| Path | GPU | CPU | Position in budget | With Windows | Link |
|---|---|---|---|---|---|
| Build 1 — Best overall (DIY) | RTX 5070 12GB | Ryzen 7 7700X | Fits the budget at favourable pricing | Fits with Windows included — check price on Amazon | Check on Amazon |
| Build 2 — Best value (DIY) | RTX 4070 Super 12GB | Ryzen 7 7700X | Fits the budget at favourable pricing | Fits with Windows included — check price on Amazon | Check on Amazon |
| Build 3 — High-refresh (DIY) | RTX 5070 12GB | Ryzen 7 7800X3D | Parts sit at the edge of the budget | Over budget with a fresh license | Check on Amazon |
| Build 4 — VRAM headroom (DIY) | RX 9070 16GB | Ryzen 7 7700X | Most headroom in the guide | Fits with Windows included — check price on Amazon | Check on Amazon |
| Pick 5 — Skytech Omega (prebuilt) | RTX 4070 Super 12GB | Ryzen 7 7700X | Fits at the favourable end of its range, complete | Included | Check on Amazon |
| Pick 6 — MSI Codex Z2 (prebuilt) | RTX 5070 12GB | Ryzen 7 8700F | Fits at the favourable end of its range, complete, 2TB | Included | Check on Amazon |
Your First Evening: From Boxes to a Running Machine
Here is the whole journey, in order, for the four DIY builds. Bought a prebuilt instead? Skip to step 8 — your machine arrives assembled, and everything from placement onward applies to you too.
- Check the delivery against your list. Nine parts: graphics card, processor, motherboard, memory kit, SSD, power supply, case, cooler, Windows USB. Match each model name to your order before opening anything — a wrong part is a five-minute return now, a mystery later.
- Seat the processor on the motherboard, outside the case. Set the board on its box, lift the socket’s lever, align the chip’s triangle marker with the socket’s, let the chip drop in under its own weight — never push — and close the lever. The step beginners fear most is hard to get wrong if nothing is ever forced.
- Fit the memory and the SSD while the board is still out. The two sticks click into the slots the manual marks for a pair (usually the second and fourth from the processor) — push until both end-clips snap. The SSD slides into its M.2 slot at a shallow angle, held by one small screw.
- Prepare the cooler. Fit its AM5 mounting brackets per the leaflet, and note the thermal paste — a pre-applied patch or a small tube. That grey layer carries heat from chip to cooler; it goes between them, once, untouched.
- Put the motherboard in the case, then mount the cooler. The case’s stand-offs should already match the board’s holes; lower the board in and fix it snugly, not forced. Sit the cooler over the processor, screw it down in a cross pattern a little at a time, and plug its fan into the header marked CPU_FAN.
- Add the power supply and the graphics card. The PSU slides into its bay, fixed with four screws; the RM750e here is fully modular, so connect only what you need: the 24-pin and the processor’s 8-pin to the board, and the modern 12V-2×6 cable to the card. The card clicks into the long slot nearest the processor, is screwed down, and — a classic first-timer’s miss — needs that power cable pushed fully home until it clicks.
- Connect the case’s own wires and do a last look. The thin front-panel wires (power button, front USB, audio) plug onto small pins at the board’s edge — the fiddliest five minutes of the build; the manual has the map. Then one look inside: every cable seated, no loose screw, nothing touching a fan.
- Place the machine, then power. Set the PC where air can move around it — clearance at the back and sides, never sealed in a closed cabinet. Connect power, flip the switch on the power supply itself (a classic miss — the case button does nothing until this one is on), then press the case’s power button.
- Plug the monitor into the graphics card — never the motherboard. The machine’s back has two clusters of video sockets: one on the motherboard, one lower down on the card itself. Your cable goes into the card’s cluster, always. On the MSI Codex Z2 this rule is absolute — its 8700F has no graphics of its own, so the motherboard’s sockets can never show a picture, and a screen plugged in there means a black display and a needless panic.
- Peripherals and a wired internet connection. Keyboard and mouse into any USB sockets. For the first evening, run a network cable from the router if you can, even draped across the floor: the downloads ahead are large, and a wired connection cannot drop mid-update like Wi-Fi can.
- Install Windows (builders), then let it update. Prebuilt owners skip the install — Windows is already loaded. Builders: boot with the Windows USB inserted and follow the prompts onto the SSD. Then everyone opens Windows Update and lets it run, restarting as asked, until it reports up to date. Immediately after, install the current graphics driver — NVIDIA’s app for the RTX cards, AMD’s software for Build 4’s RX 9070 — because the shipped driver is only a placeholder.
- Set the monitor’s real refresh rate. A fast monitor arrives set to a basic 60Hz until told otherwise. In Settings → System → Display → Advanced display, choose the highest rate your monitor offers. Skipping this is the most common way new owners pay for speed they never see.
- Verify the configuration you paid for. Open Settings → System → About and Task Manager’s Performance tab and read the machine back: processor name, 32GB of memory, graphics card model, drive size. Builders: each line should match your parts list exactly. Prebuilt buyers: check the spec lines against the listing — and for the MSI, confirm the model code A8NVP-436US, because other Codex Z2 configurations share the name with different parts inside. On the Skytech, the card’s board brand may legitimately vary; its model (RTX 4070 Super) and 32GB / 1TB specification may not.
- Install a game store and one game. Steam is the usual first stop; the Epic Games Store and the Xbox app cover most other libraries. Play one game you know well for twenty minutes and listen: fans should rise under load and settle after. That is a finished first build.
How to Choose a Gaming PC Build Under $1,500
- Add up the whole machine before falling for a graphics card. A build is nine separate purchases. Total card, processor, board, memory, SSD, supply, case, cooler and Windows — a premium card inside an over-budget cart is not a $1,500 build with a quick card; it is an over-budget build.
- Let the two volatile lines be bought on favourable rotations, in either order. Card and DDR5 kit each swing widely between rotations. Buy whichever moves to the favourable end first, shelve it, and purchase the stable lines whenever you like.
- Refuse spike pricing on memory. One and the same 32GB DDR5-6000 kit can sit at the low end of its range in one rotation and far higher in the present spike; expense does not make it faster. In spike territory, the right move is no purchase — or the prebuilt, whose maker never paid retail for RAM.
- Insist on a power supply you can name. The DIY edge in one sentence: the Corsair RM750e is a known 750W Gold unit with a native 12V-2×6 cable and a seven-year warranty. A build that describes its supply by wattage alone, or not at all, is concealing the part most likely to cap the next card.
- Match the processor to your bottleneck, not to a leaderboard. In GPU-limited 1440p games the 7700X and 7800X3D deliver an identical experience while the X3D carries a clear premium; in CPU-limited competitive titles the X3D earns its premium. Decide which games you play before paying the tax.
- Read 12GB of VRAM as a 1440p allowance and 16GB as a lifespan. Every NVIDIA card here ships 12GB, which covers high-refresh 1440p today. The RX 9070’s 16GB suits texture mods, heavy titles and keeping a card longer. Since VRAM can never be added later, buy it for the machine’s whole life.
- Protect the platform; let the card flex. The four DIY paths share one AM5 platform because boards and DDR5 are what you keep. If a total must shrink, drop the card a class and replace it later — never fund a card by shrinking the board, memory or supply.
What Else You Will Spend
The guidance above buys a working tower, not the whole desk, and a beginner’s budget should hear the rest now rather than at checkout. None of these extras is hidden inside a pick’s price — where a build has a catch, it is described as machine plus its fix, in the open.
- A monitor, first and above all. This class of machine is built to feed a 1440p screen. If your current display is an old 1080p 60Hz panel, the honest total is tower plus screen — and a buyer whose budget must cover both is often better served by the $1,200 tier in Best Gaming PC Build Under $1200 plus the better monitor. We quote no monitor prices here; screens are their own purchase.
- Keyboard and mouse, for builders. The four DIY paths are parts lists for the tower only — nothing to type or click with is in those boxes. Any basic set works to start; just know the line exists.
- Build 3’s catch, described as machine plus fix: the 7800X3D build’s parts sit at the edge of the budget, and its fix is the Windows license — the line from its own parts list — which takes the real total over budget. Buyers who already own a transferable license have no catch; buyers who do not should count the full picture or choose Build 1.
- The memory-spike catch, described honestly: every DIY route assumes the 32GB kit at the favourable end of its range. If the kit is in its spike range, the fix is not paying it: it is an alert and patience, or the prebuilt route, whose maker never paid retail for memory.
- The small tools. One Phillips screwdriver is the entire toolkit for these builds. If you do not own one, it is the smallest line in the project — and the only tool the walkthrough assumes.
Upgrades Later, in Plain Terms
The beginner’s real question is not “can I upgrade?” but “what, exactly, am I allowed to promise myself?” Here is the honest version, pick by pick, under one rule: a graphics-card swap is only promised where the base research documents a named power supply and a standard case.
- Builds 1–4 (the DIY paths): yes, promised. All four sit in the standard Montech AIR 903 MAX mid-tower — documented room for cards up to 400mm long — behind the named Corsair RM750e 750W Gold supply, a known unit with the modern connector current cards use. When a faster card arrives, the upgrade is: unplug, swap, install the new driver. The platform tells the same story on the processor side — AM5 boards accept newer Ryzen generations, so a future CPU drops into the same board with the same memory. Storage and memory use standard slots throughout; nothing is soldered.
- Skytech Omega (Pick 5): not promised outright. Its supply’s wattage and Gold rating are published — 750W — more documentation than most prebuilts offer,. But the specific unit is the maker’s choice rather than a model you can look up, so the promise is withheld: on upgrade day, read the delivered unit’s label, check its connectors and the case’s card clearance, and let those facts decide.
- MSI Codex Z2 (Pick 6): no graphics-card promise. MSI does not publish the power supply’s wattage at all, and a card swap planned around an unknown supply is a guess, not a plan. Treat this machine as the finished specification it is — a strong one, with 2TB already fitted — and if an upgrade becomes important, the delivered unit’s PSU label is the first thing to read.
Build or Buy at $1,500 — and the Price Spike Behind It
Every route here carries an asterisk, and this is it. Amazon’s component prices in November 2026 are two markets sharing one storefront: a deal market and a spike market, where identical parts sit at implausible levels. Memory is the extreme — a Corsair Vengeance 32GB DDR5-6000 CL30 kit can sit at the low end of its range in one rotation and far higher in a spike period; storage follows the same pattern, and cards swing widest of all. Bought at spike levels, these builds move well over budget; bought at the favourable end of each part’s range, the identical builds can land inside the budget. That gap is a method: alerts on the card and the memory kit, stable parts bought whenever, and a build assembled on paper over weeks.
Which is also why, on price alone, buying currently wins at the favourable end of the prebuilts’ ranges. The Omega at its favourable pricing undercuts its DIY twin with Windows included, and the Codex Z2 undercuts Build 1 while doubling its storage — integrators are insulated from the retail memory spike, and this year that insulation is worth more than their margin. On everything the invoice cannot show, building still wins: your supply is a named Corsair with a seven-year warranty rather than a wattage claim (MSI does not even publish the Codex’s), and every part carries its own warranty. Pay for those advantages knowingly and building is worth it; claim it also saves money this year, at spike prices, and it does not.
Common Buying Mistakes
- Planning a $1,500 build around an RTX 4070 Ti Super or RTX 5070 Ti. Cards in that class sit above the whole budget by themselves on Amazon US — the card alone swallows the budget before the other eight parts are even counted.
- Adding up a build with Windows, the cooler or the case missing, then discovering the real budget was well over the tier. Every route here counts all nine lines; hold any parts list to the same standard.
- Paying spike money for DDR5. A 32GB kit at spike pricing is the identical kit that sits at the low end of its range in a favourable rotation; buying at the spike turns a $1,500 build into an over-budget one in exchange for a few weeks of impatience.
- Leading with the graphics card and cheaping out on the platform. A bargain board with weak power delivery, a 16GB kit and an anonymous PSU will cap every upgrade that follows — the card is the easiest part to replace, so it should be the last place the budget is defended.
- Paying the X3D premium to play GPU-limited games. With the card as the bottleneck at 1440p, the 7800X3D’s premium buys almost nothing you can measure — and in this tier it buys it in place of a Windows license.
- Ordering a Codex Z2 by name and nothing else. Several configurations share that name; the machine reviewed here is model A8NVP-436US, with the RTX 5070 and the 2TB drive. Confirm the code at checkout.
- Plugging the monitor into the motherboard at first boot. Where the processor has no graphics of its own — the MSI’s 8700F is this page’s example — that socket can never produce a picture. The card’s ports are always the correct ones; the walkthrough puts this at step 9 because it causes more first-evening panic than any other error.
Final Recommendation
- Most first-time builders: Build 1 — 7700X + RTX 5070, designed to fit with Windows included — check price on Amazon.
- Value hunters with patience: Build 2 — the 4070 Super build, designed to fit with Windows when the card is at the favourable end of its range — check price on Amazon.
- High-refresh players with a license already: Build 3 — the 7800X3D build, with parts at the edge of the budget.
- VRAM-first and modded-game players: Build 4 — the RX 9070 build, with the most headroom with Windows counted — check price on Amazon.
- Anyone pricing parts at spike levels: Pick 5, the Skytech Omega at the favourable end of its range — or Pick 6, the MSI Codex Z2, if 2TB matters more.
Two paths stand at the top of this budget. Build 1 serves the beginner who can time a graphics card and a memory kit to their rotations and wants the current-generation machine with every part named. The Skytech Omega serves the buyer who prices honestly and discovers the factory machine is cheaper — at the favourable end of its range this year, it genuinely is. Beginners working to a tighter total should also see Best Gaming PC Build Under $1200; readers who would rather skip parts selection entirely can start with Best Budget Gaming PC Under $1500 and Best Gaming PC Under $1500; and anyone who wants this budget viewed purely as a finished machine can compare Best Gaming PC For Beginners Under $1500. Set the alerts before ordering anything, and check every live price on the day.
Frequently Asked Questions
Can you really build a gaming PC with an RTX 5070 for under $1,500?
Yes — provided the parts are bought at the favourable end of their ranges. Build 1 is designed to fit in parts and with a license, using an RTX 5070 on a favourable rotation and a DDR5 kit at the low end of its range — check the current price on Amazon for each part before you buy.
I have never built anything. Is a first build at this level realistic?
Yes, and this budget is a kind place to start: the parts are standard-sized, the case is roomy, and every connector is shaped to fit only where it belongs. The fiddly moments are the case’s small front-panel wires and two things to remember — the power supply’s own switch, and the monitor cable going into the graphics card, not the motherboard.
Why is there no RTX 4070 Ti Super or RTX 5070 Ti build?
Because the card alone breaks the budget. Cards in the RTX 5070 Ti class sit above the entire $1,500 budget on Amazon US — and no verified new 4070 Ti Super listing leaves room beneath it for a processor, board, memory, storage, supply, case, cooler and Windows.
Is it cheaper to build or buy a gaming PC at $1,500 right now?
Right now, buying — at the prebuilts’ favourable pricing. The Skytech Omega at the favourable end of its range, complete with Windows, compares below building its specification yourself, and the MSI Codex Z2 at the favourable end of its range offers twice the DIY builds’ storage. Building still wins on specified parts and per-part warranties — but in late 2026 it does not win on the invoice.
Is 12GB of VRAM enough, or should I get the RX 9070’s 16GB?
For high-refresh 1440p in current games, 12GB works — every NVIDIA card in this class carries it, and Builds 1 and 2 are planned around it. The RX 9070’s 16GB is the safer long-term specification for texture-heavy games, modded installs and keeping a card through more release cycles. The trade is DLSS and stronger ray tracing against capacity and price; VRAM is the one decision that can never be revisited.
What should I upgrade first in a year or two?
Storage first, then the graphics card — which is why these builds defend the platform. A 2TB SSD is the upgrade every 1TB build eventually wants, and the DIY paths specify an AM5 board, a DDR5 kit and a 750W Gold supply precisely so a future GPU, or a drop-in newer Ryzen, demands no other part be replaced. The prebuilts’ next GPU, by contrast, is limited by a power supply you did not choose — and, in the MSI’s case, one whose wattage was never published.