Where to buy
Check the latest price, availability and delivery on Amazon. Orders are placed on Amazon. We may earn a commission from qualifying purchases.
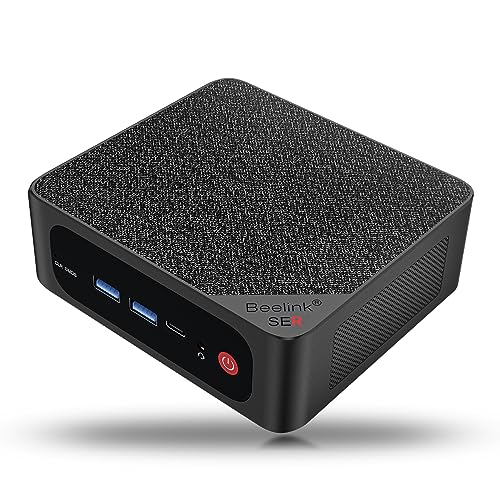
- Best overall build route: Beelink SER5 MAX Mini PC, Ryzen 7 5800H, 16GB RAM, 500GB SSD — Check on Amazon
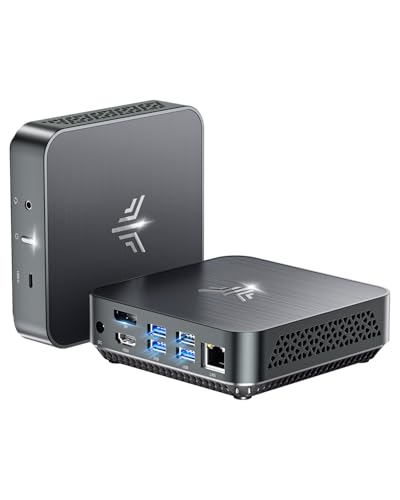
- GMKtec M5 Plus Gaming Mini PC, Ryzen 7 5825U, 32GB RAM, 1TB SSD — Check on Amazon
- KAMRUI E3B Mini Gaming PC, Ryzen 5 7430U, 32GB RAM, 512GB SSD — Check on Amazon
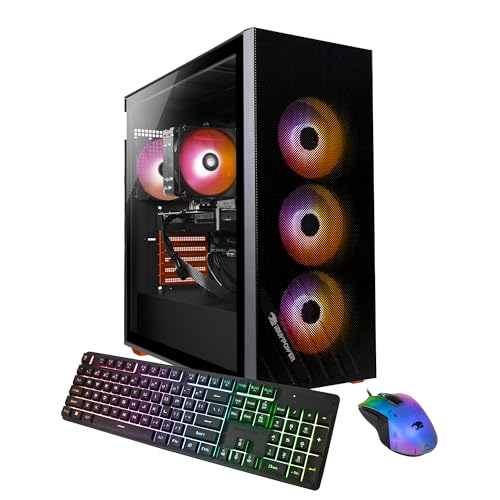
- Dell RGB Gaming Tower, Core i7 6th Gen, GTX 1050 Ti, 16GB RAM (Renewed) — Check on Amazon
See 2 more Amazon options
- AMD Ryzen 5 5600G Desktop Processor with Radeon Graphics — the from-parts build — Check on Amazon
- MINISFORUM UM870 Slim Barebone Mini PC, Ryzen 7 8745H, No RAM/SSD/OS — the salvage build — Check on Amazon
Read the full guide ↓
Disclosure: As an Amazon Associate, reviewstook.com earns from qualifying purchases. Links to Amazon on this page are affiliate links; they cost you nothing extra. Listing details such as price and availability change often, so check the current Amazon listing before you buy.
If this is your first gaming PC, welcome — and before anything else, you deserve the honest version of what a “$400 build” means right now, because the internet is full of parts lists priced for a market that no longer exists. In November 2026, memory and storage prices have jumped hard. A basic 16GB memory kit that older build guides priced as a cheap line item now costs far more on Amazon — check the live price before trusting any older worksheet. A modest 500GB SSD has climbed the same way, and the cheapest processor worth building around takes a large share of the budget all by itself. Add those three lines together and the whole budget is gone before a case, a motherboard or a power supply has even been mentioned — and independent builders pricing live Amazon carts say outright that a complete gaming PC from new parts does not fit this budget right now, memory prices being most of the reason. So this guide will not hand you a fantasy parts list with yesterday’s prices typed in.
Here is what $400 honestly buys — the six routes below. Three are small, complete computers with a processor, memory, storage and Windows already inside: the build someone else assembled for you, and at today’s parts prices they cost less than the parts would. One is a renewed full-size tower with a real graphics card in it — used, checked and resold with a short guarantee — and it is the only route that starts with a card in a slot. One is the genuine do-it-yourself build, printed below with its full parts list: at current prices it honestly lands well over budget, and we say so in big letters rather than burying it, because it remains the only route ending in a standard tower that a graphics card can move into later. And one is a “barebone” kit — the expensive brain fitted, but no memory, no storage, no Windows — which stays within this budget only if those parts come free off your own shelf.
In this guide
Quick Picks
Short on time? Each row names a first-time buyer type and the route that suits it.
| Buyer type | Pick | Why it stands out | Link |
|---|---|---|---|
| Best overall route | Beelink SER5 MAX Mini PC, Ryzen 7 5800H | Complete with Windows fitted — check price on Amazon; this is the complete-machine benchmark a real build has to beat, and right now none can | Check on Amazon |
| Best for maximum RAM and storage | GMKtec M5 Plus, Ryzen 7 5825U, 32GB / 1TB | The most fully loaded box here — check price on Amazon | Check on Amazon |
| Best for the lowest complete cost | KAMRUI E3B, Ryzen 5 7430U, 32GB / 512GB | A finished PC that plays games at a budget-tier price — check price on Amazon | Check on Amazon |
| Best for a real graphics card | Dell RGB Gaming Tower (Renewed), GTX 1050 Ti | The guide’s only separate graphics card — and only a pick when the live price sits at or under $400 | Check on Amazon |
| Best true DIY build | Ryzen 5 5600G from-parts build | The one route that ends in a standard tower — honestly over budget when bought all-new; check price on Amazon for the anchor processor | Check on Amazon |
| Best if you already own parts | MINISFORUM UM870 Slim Barebone | The strongest graphics here once finished — check price on Amazon for the kit, with memory and SSD still to come | Check on Amazon |
How These Picks Were Chosen
One rule runs this guide, and it is the rule that protects beginners: the budget counts against the finished, working PC — never against the biggest number on the box. Every route is totaled identically: take the main product, add every part it needs that it does not include — memory, storage, Windows — at the live prices those parts sell for on Amazon, and state the honest budget verdict in the review whether it flatters the route or not. That is why the barebone kit gets described here as a well-over-budget computer once completed with new parts: for anyone who does not already own its missing parts, that is what it takes. And it is why a complete box gets described as a complete, in-budget computer: because it is.
We did not assemble these machines ourselves. We read the makers’ listings and specification pages, listing records for these exact products, and independent build coverage that prices complete parts lists from live Amazon carts. Performance is described in plain class terms — which kinds of games, at which resolution, at which settings level — because that is what the documentation supports. The graphics fall into three honest classes: Vega 7 and Vega 8-class graphics built into the processor; the Radeon 780M in the barebone kit, a clearly stronger version of the same built-in idea; and one genuine separate card, the GTX 1050 Ti in the renewed Dell.
Two filters picked the final six. Completeness came first: a route had to reach a working, gaming-capable PC through purchases you can actually make, with every gap counted rather than waved away — routes that only work at stale-guide pricing were rejected, however famous the parts list. The second filter is the future: at $400, what a route leaves open matters almost as much as what it delivers on day one — an empty slot waiting for a graphics card, memory that can double, storage that can grow. Each review closes that account in plain words.
The Jargon, in Plain English
PC building has a vocabulary, and sellers speak it fluently precisely because beginners do not. Here are the thirteen terms this guide actually uses, translated.
- Processor (CPU). The computer’s brain; it runs the game, Windows and everything else. “Ryzen 7 5800H” and “Core i7” are model lines. What matters here: its core count (six or eight in this guide) and whether graphics are built in.
- APU. AMD’s name for a processor with reasonably strong graphics built into the same chip. Four of the six routes are built around APUs, and an APU machine needs no separate graphics card to play games — its whole appeal at this budget.
- Integrated graphics. Picture-making circuitry inside the processor, borrowing the machine’s memory instead of having its own. Vega 7, Vega 8 and Radeon 780M are integrated graphics names, weakest to strongest in that order. Because they live inside the processor, they can never be swapped on their own — when they feel too slow, the upgrade is a different route, not a part.
- Graphics card (GPU). A separate board with its own memory that does nothing but draw the game, plugged into a slot inside a tower. Only one route here — the renewed Dell, with its GTX 1050 Ti — has one. A card is the most upgradeable part in PC gaming, which is why an empty slot waiting for one matters.
- Barebone. A partly built PC sold without the parts left for you: typically no memory, no storage, no Windows. The price is real; it just is not a computer’s price. One route here — the MINISFORUM UM870 Slim — is a barebone, and its review counts the missing parts in full.
- Renewed. Amazon’s word for used equipment that has been inspected, cleaned and resold with a short refund-or-replacement window — here, 90 days. One route here — the Dell tower — is renewed: neither broken nor new, but a previous life at a discount, with a deadline by which you should test everything.
- Soldered vs. socketed. Soldered parts are melted onto the board forever; socketed (or slotted) parts sit in a holder and pull out for replacement. Stated plainly for this guide: none of the six routes has soldered memory — every route’s memory sits in slots and can be changed or grown. What is fixed forever in the small machines is the graphics, inside the processor. In the two tower routes, nearly everything is a replaceable standard part.
- Memory (RAM). The computer’s short-term workspace, measured in gigabytes (GB). 16GB is the workable gaming minimum; 32GB is comfortable. Integrated graphics borrow memory too, so its size and arrangement matter more than usual.
- Dual-channel. Memory fitted as two matching sticks instead of one, letting the processor fetch data through two lanes at once. Integrated graphics feed on that bandwidth, so two sticks genuinely play games better than one stick of the same total size. Every complete route here ships dual-channel, and the parts list is a two-stick kit for the same reason.
- Storage (SSD). Where games and Windows live permanently, measured in GB or terabytes (1TB is roughly 1,000GB). Every route here uses a fast SSD — the modern kind with no spinning parts. 500GB fills faster than beginners expect; 1TB is breathing room.
- Motherboard. The large board everything plugs into; it decides which processors, memory and drives a machine can take. You meet it directly only in the do-it-yourself route, where picking the right one (a B550 board, in that build) makes the other parts fit together.
- Power supply (PSU). The box converting wall power into the voltages parts use, measured in watts (W). Too small, and a future graphics card cannot be fed. It matters in exactly one place here: the do-it-yourself build specifies a named 650W unit so a card can be added later without buying a second supply.
- Operating system (OS). Windows, in most gaming PCs — the software everything else runs on. The three complete mini PCs and the renewed Dell include Windows 11 Pro. The parts build and the barebone include none, and this guide invents no license price for them: Linux is free and runs many games, and a Windows license is a separate purchase to price before you commit.
One more piece of plain speaking, because listings will not give it to you: in this guide, only the Dell is renewed, only the MINISFORUM is a barebone, and nothing has soldered memory. The three mini PCs are new and complete, and the Ryzen 5 5600G route is neither renewed nor barebone — it is a shopping list of new parts you assemble yourself. If a listing anywhere uses those words differently, it is using them wrong.
The 6 Best Gaming PC Build Routes Under $400 for Beginners
Beelink SER5 MAX Mini PC — Ryzen 7 5800H, 16GB RAM, 500GB SSD
Who it suits: First-time buyers who want the gaming to start this week and the building to be optional — anyone whose honest priority is a working machine for esports and older games at the lowest complete cost here.
Start with the machine every other route has to answer to. The SER5 MAX is a small complete PC built around the Ryzen 7 5800H, an eight-core processor with Vega 8-class integrated graphics, allowed a generous 54W of power — more sustained power than most laptop-derived chips get, which is graphics performance you can feel. The price also covers 16GB of memory, a 500GB SSD, Windows 11 Pro installed and activated, WiFi 6, Bluetooth 5.2, and three display outputs (HDMI, DisplayPort and Type-C). Check price on Amazon for the current listing. Set that against the parts market: the processor alone in the do-it-yourself route below takes a large share of this budget, before its motherboard, memory, storage, case or power supply. This complete, licensed, ready-to-play machine is a budget-tier complete PC, in the same territory as just a few of that build’s parts bought separately.
Its long-term character beats the “sealed mini PC” stereotype, up to a point. Memory sits in slots and grows to 64GB; the SSD swaps for one up to 2TB — both a screwdriver-and-ten-minutes job. What never changes is the graphics: part of the processor, no slot inside for a card, and a gaming ceiling — esports titles and older big games at 1080p on low-to-medium settings — that it keeps for life. Buy it the way you buy a console: superb value on day one, complete as bought, finished.
Total cost to a working PC: just the machine — check price on Amazon, with memory, storage and Windows already fitted. A monitor, keyboard and mouse are on you, as with every route here.
- Nothing to assemble and nothing to license — plug it in and it is a gaming PC.
- The eight-core 5800H at 54W is the strongest processor among the complete boxes here.
- Slots for memory (to 64GB) and storage (to 2TB) keep its two realistic upgrades possible.
Honest limitation: The graphics are permanent — no slot exists, so no card can ever be added — and a 500GB drive fills quickly once modern games move in.
Choose it if today’s gaming value is the priority and a finished machine is acceptable. Skip it if adding a graphics card one day is the entire reason for building — head for the 5600G route below.

GMKtec M5 Plus Gaming Mini PC — Ryzen 7 5825U, 32GB RAM, 1TB SSD
Who it suits: Beginners who keep lots of games installed at once and never want to open the box — the route that maximizes what is already inside.
If the Beelink is the price champion, the M5 Plus is the completeness champion. Its Ryzen 7 5825U is another eight-core APU with Vega 8-class graphics, but GMKtec fits 32GB of memory and a full 1TB SSD — twice the Beelink on both counts — plus two fast wired network ports, WiFi 6E and Windows 11 Pro. Check price on Amazon — this is arguably the most hardware for the money in the guide at its budget-tier positioning: the two components a mini PC owner would otherwise be pricing an upgrade for within the year already sit at upgrade level.
The memory size is a functional advantage, not just a bigger number, and it is worth understanding as a beginner. APU graphics own no memory; they borrow the machine’s. With 32GB fitted in dual channel, game and graphics stop competing for one small pool, and everything breathes easier. Storage is a two-slot design reaching 4TB total, and memory can reach 64GB, so even this most-finished box keeps room to grow. The fixed part matches every mini PC here: the 5825U’s graphics are its graphics forever, a Vega-class ceiling for esports and older titles at 1080p low-to-medium.
Total cost to a working PC: just the machine — check price on Amazon. There is nothing left to buy to make it work.
- 32GB of memory and a 1TB drive fitted from the factory — twice the Beelink’s allowance on both.
- Two storage slots (4TB ceiling) and memory headroom to 64GB leave room to grow.
- Dual 2.5GbE wired ports plus WiFi 6E make it the best-connected box here.
Honest limitation: The integrated-graphics ceiling is the same one every mini PC here lives under, and when it sits at the top of this budget tier the whole budget is spent — check the live price on Amazon before deciding.
Choose it if one purchase should need nothing and store everything. Skip it if it is sitting at the top of its tier while the Beelink is better priced — that gap buys a lot of patience.

KAMRUI E3B Mini Gaming PC — Ryzen 5 7430U, 32GB RAM, 512GB SSD
Who it suits: The strictest budgets — beginners who want a complete, credible gaming PC at the lowest budget tier and happily trade a little graphics strength for the lowest finished price here.
The E3B leads with value: check price on Amazon for this 32GB configuration. For that, the machine is genuinely complete: a six-core Ryzen 5 7430U, Vega 7 integrated graphics, 32GB of memory fitted properly as two matching sticks, a 512GB SSD, WiFi 6, Bluetooth 5.2, three display outputs and Windows — plus a mounting plate in the box, so the whole PC can live on the back of a monitor and take up no desk at all. This finished computer sits in a lower price tier than the do-it-yourself route’s processor and motherboard bought separately.
The trade is graphics class, stated plainly. Vega 7 sits one step below the Vega 8-class graphics in the two picks above it: esports titles and older games at 1080p on low settings are its home ground, and demanding games will ask you to lower the resolution sooner. Expansion is honest for the price — memory to 64GB, storage to 2TB — and the factory-fitted dual-channel memory is exactly right for an APU, whose graphics performance depends on memory bandwidth.
Total cost to a working PC: just the machine — check price on Amazon, with nothing further to buy. If the live price has climbed toward the top of this budget, the Beelink above becomes the better buy.
- The cheapest finished route here — a complete PC at the lowest budget tier here.
- 32GB fitted as two matching sticks, the arrangement APU graphics benefit from most.
- A mounting plate in the box lets it disappear behind a monitor entirely.
Honest limitation: Vega 7 is the weakest graphics in the guide, and six cores concede a step to the eight-core picks above.
Choose it if the lowest finished price leads and your library is esports, indie and older titles. Skip it if the strongest integrated graphics under $400 is the goal — that is the barebone route, provided you own its missing parts.
Dell RGB Gaming Tower (Renewed) — Core i7 6th Gen, GTX 1050 Ti, 16GB RAM, 512GB SSD
Who it suits: Beginners who want a real graphics card inside a real, openable tower — the only route starting with a card in a slot — and who are comfortable buying renewed and watching the price before pouncing.
Every other route here draws its games with graphics built into the processor. This one carries a GeForce GTX 1050 Ti, a proper separate graphics card with 4GB of memory of its own, sitting in a slot inside a full-size tower. That single fact changes the gaming character: a discrete card of this class plays 1080p games at low-to-medium settings in older and esports titles with a steadiness integrated graphics work harder to match, and it frees the system memory the APU routes must share with their graphics. Around the card sits a refurbished business-tower recipe: a 6th-generation Core i7 at 3.4GHz, 16GB of memory, a 512GB SSD, built-in WiFi and Windows 11 Pro, sold as Amazon Renewed in Refurbished – Excellent condition by STG USA, with a 90-day refund-or-replacement window.
Two disciplines come with it, and a beginner should hear both before ordering. Price first. For this exact listing, the price moves around a lot — sometimes inside this guide’s budget, sometimes above it. So the rule is printed plainly: check price on Amazon, and this pick only counts on days the live price sits at or under $400. On days it sits above, wait, or buy the Beelink. Platform second. A 6th-generation Intel processor sits on a finished platform — no meaningful processor upgrade lies ahead of it — and the tower’s refurbished power supply is an unpublished part whose headroom caps how hungry a future graphics card can be; modest, slot-powered cards are the realistic ceiling, and only after reading the label on the unit you actually receive. Accept all of that, and this is the only discrete graphics card this budget can honestly claim.
Total cost to a working PC: just the tower — check price on Amazon, Windows already fitted. It only qualifies at $400 or under.
- The guide’s only separate graphics card — a GTX 1050 Ti carrying 4GB of its own memory.
- A genuine tower: panels come off, the card sits in a slot, and memory and storage are standard sizes.
- Windows 11 Pro is fitted, and the 90-day Renewed refund/replacement window stands behind the machine.
Honest limitation: Renewed condition, a processor platform with nowhere to go, a power supply that caps future cards — and a price that lives above this budget about half the time.
Choose it if a discrete card today outweighs a platform future, and the live price is at or under $400. Skip it if the price has drifted up, or renewed condition is a deal-breaker — the complete mini PCs above are new.

The From-Parts Build — AMD Ryzen 5 5600G on AM4
Who it suits: Actual beginners at building — anyone whose goal includes learning how a PC goes together, who wants the destination to be a standard tower that can accept a graphics card later, and who can buy in stages.
This is the only route where you buy every part separately and assemble the computer yourself, and its review is the shopping list — check price on Amazon for each part before you commit. The anchor is the right one for a first build: the Ryzen 5 5600G is a six-core, twelve-thread processor with Vega 7 integrated graphics — so the machine plays games from day one with no graphics card at all — and a cooler in the box, one less part to buy. Around it goes a B550 motherboard (the board type fitting this processor, with the display outputs its graphics need), a two-stick 16GB memory kit, a 500GB NVMe SSD, a mid-tower case with fans included, and a power supply chosen deliberately oversized — a named, reputable 650W unit — so a future graphics card does not demand a second supply purchase. Assembled, this is the most upgradeable machine in the guide by a wide margin: the card slot waits empty, memory and storage are standard sizes, and every part can be replaced individually. Now the parts list — check the live price on Amazon for every line before ordering:
| Part | Choice | Price |
|---|---|---|
| Processor | Ryzen 5 5600G (cooler included) | Check price on Amazon |
| Motherboard | B550 micro-ATX (Gigabyte B550M K or MSI B550M PRO-VDH WiFi) | Check price on Amazon |
| Memory | 16GB (2×8GB) DDR4-3200 kit, Silicon Power | Check price on Amazon |
| Storage | Kingston NV3 500GB NVMe | Check price on Amazon |
| Case | Rosewill RWGC1 mid tower, four fans included | Check price on Amazon |
| Power supply | MSI MAG A650BN 650W | Check price on Amazon |
| Total, before operating system | Well over this guide’s budget — check price on Amazon for each part |
Read that verdict the way this guide promised verdicts would be read: the build does not fit this budget at current Amazon prices, and it is not close. The memory and storage lines alone now cost far more than both lines cost together in the calmer markets older build guides were written in. So this pick carries two honest labels. Bought all at once today, it is a well-over-budget build: over this guide’s budget, full stop. Bought the way budget builds actually happen — processor and board when they dip, memory when the market cools, a case or drive carried over — it is the only route whose second year can include a graphics card, and the only one that teaches you anything. Windows is excluded from the total because this guide uses no unverified license price; Linux costs nothing, and readers bringing an existing Windows license should confirm its transfer terms rather than assume them. The walkthrough further down covers the assembly order and the first evening step by step.
- The only standard tower here: an empty card slot and a 650W supply already waiting for a real graphics card.
- Every component is standard, slotted and individually replaceable — the widest upgrade future in the guide.
- The APU covers esports and older titles from day one, so the machine earns its keep between buying stages.
Honest limitation: The parts total well over this budget before an operating system at current Amazon prices — and the 5600G’s older PCIe 3.0 interface and smaller cache cap its ultimate ceiling.
Choose it if learning and upgrading are the point, and the purchases can be staged. Skip it if the finished PC must land at $400 this month — that need is exactly what the complete boxes above exist for.
MINISFORUM UM870 Slim Barebone — Ryzen 7 8745H, No RAM, No SSD, No OS
Who it suits: Beginners with a parts shelf — anyone already owning laptop memory and a spare SSD, who can therefore complete the strongest graphics here for the price of the kit alone.
The kit itself contains the best silicon in this guide. The Ryzen 7 8745H is an eight-core processor whose Radeon 780M integrated graphics are a clear class above the Vega graphics in every other pick — still integrated, still a 1080p part, but the strongest version of it — inside a slim chassis with two slots for DDR5 laptop memory, room for an M.2 2280 SSD, USB4, HDMI and DisplayPort outputs and fast 2.5GbE networking. Check price on Amazon for the kit. What that money buys is exactly what the listing title says: no memory, no storage, no operating system. This guide counts those missing parts rather than waving at them: a 16GB DDR5 laptop memory kit and a 500GB NVMe drive are both premium-priced lines right now, so completing this kit with new parts lands well over budget before an operating system. That is not an in-budget build, and this review does not call it one.
Exactly one buyer makes this route real: the one whose completion parts are already owned. DDR5 laptop memory sticks and a 2280 drive pulled from a dead or upgraded laptop are the classic donor parts, and for that builder the out-of-pocket cost is the kit alone — check price on Amazon — for the strongest integrated graphics discussed anywhere in this guide. Two checks before ordering, both easy to miss. First, donor memory must be DDR5 laptop memory (called SO-DIMM), not the DDR4 most older laptops carry — the wrong generation physically does not fit. Second, a Windows license tied to a donor laptop generally does not transfer to a new machine, so the operating system is free Linux or a new license, sorted separately either way. If you would be buying the memory and drive new, buy the SER5 MAX or the M5 Plus instead — the worksheet above is the whole argument.
Total cost to a working PC: check price on Amazon for the kit; add new memory and storage and the real total lands well over budget before an OS, while salvaged DDR5 and an SSD you already own make the kit the whole out-of-pocket cost.
- Radeon 780M graphics stand a class above the Vega graphics everywhere else in this guide.
- An eight-core 8745H, USB4 and two DDR5 slots ride in a slim, modern chassis.
- For a builder holding donor parts, nothing here matches its performance for the kit-only outlay.
Honest limitation: As sold it is not a PC — memory, storage and an operating system are all missing, and bought new they lift the real total well over this budget.
Choose it if compatible DDR5 memory and an NVMe drive are already sitting on your shelf. Skip it if they are not — more computer for less money waits in the complete boxes above.

Comparison Table
| Route | Type | Honest total cost | Link |
|---|---|---|---|
| Beelink SER5 MAX, 5800H | Complete mini PC | Budget tier, complete — check price on Amazon | Check on Amazon |
| GMKtec M5 Plus, 5825U, 32GB / 1TB | Complete mini PC | Budget tier, complete — check price on Amazon | Check on Amazon |
| KAMRUI E3B, 7430U, 32GB | Complete mini PC | Lowest budget tier, complete — check price on Amazon | Check on Amazon |
| Dell Gaming Tower, GTX 1050 Ti | Renewed tower | Moves in and out of budget; buy only at $400 or under — check price on Amazon | Check on Amazon |
| Ryzen 5 5600G from-parts build | DIY tower build | Well over budget all-new, before OS — check price on Amazon | Check on Amazon |
| MINISFORUM UM870 Slim | Barebone kit | Kit at a budget-tier price — check price on Amazon; well over budget completed with new parts | Check on Amazon |
Your First Evening: From Box to First Game
Whichever route you chose, the first evening follows the same shape — it just starts in a different place. Steps 1–2 are the assembly, which only the two build-shaped routes have; steps 3–10 are for everyone. Nothing needs tools beyond a basic screwdriver.
- Unpack and check everything against the paperwork. Parts build: lay the six parts out and match each box against the worksheet in its review — processor model, board model, memory size, drive size. Barebone: the kit plus your memory sticks and SSD. Complete boxes and the Dell: the machine and its power cable. Catching a wrong part now is free; catching it after assembly is a return.
- Assemble, if your route has assembly. Parts build, in order: the processor drops into the motherboard’s socket (the small triangles printed on chip and socket line up — it falls in with no force), the included cooler clips on top, the two memory sticks click into the paired slots the board’s manual names (usually the second and fourth), the SSD slides into its M.2 slot under one small screw, then the board goes into the case, the power supply goes in, and the board’s two power cables plug in. Barebone: your two DDR5 laptop memory sticks click into the kit’s slots at an angle, the SSD goes under its screw, the lid goes back on. That is the entire build — minutes, not hours.
- Place the machine where it can breathe. Every route makes heat and needs air moving past it: a tower stands upright with space around its vents, never sealed inside a closed cabinet; a mini PC sits on the desk, on a shelf, or — the KAMRUI — mounted behind the monitor on its included plate.
- Connect the power — and flip the hidden switch. Tower power supplies carry a small rocker switch on the back, beside the cable socket, and it ships in the off position. The classic first-evening “dead on arrival” panic is usually this switch. Cable in, switch on, then the power button.
- Plug the monitor into the right sockets — this step matters. On the renewed Dell, the monitor cable goes into the graphics card’s sockets — the horizontal row low on the back — and not the motherboard’s sockets higher up. The Dell’s processor has basic graphics of its own, so the wrong sockets still show a picture; they just quietly bypass the GTX 1050 Ti you paid for, and every game runs on the weak chip instead. On the parts build, the opposite holds for now: its graphics live inside the processor, so the motherboard’s display sockets are the graphics outputs — use them, and remember that the day a card goes in, the cable moves down to the card. On the mini PCs and the barebone, every display socket is driven by the processor’s graphics; there is no wrong choice. One reassurance: no processor here is a no-graphics model, so a black screen points at the cable, the monitor’s input selection or that power switch before it points at the machine.
- Keyboard, mouse and internet. Peripherals into any USB sockets. For internet, a wired Ethernet cable to the router beats WiFi for downloading games and for online play alike; use WiFi if the cable run is impossible.
- First boot, then updates before games. The complete boxes and the Dell arrive with Windows installed — follow the setup screens. The parts build and barebone need your operating system installed first (Linux is the free route; a Windows license is a separate purchase, as the reviews state). Then, before any game: run Windows Update, restart, and run it again until it finds nothing. Follow with the graphics driver — AMD’s software for every APU route, NVIDIA’s for the Dell — because the driver Windows installs by itself is a placeholder, and the real one holds a noticeable slice of game performance.
- Set your monitor’s real refresh rate. Many gaming monitors sit at a basic 60Hz in Windows no matter what the panel can do. In Windows display settings, under the advanced display options, pick the highest refresh rate your monitor lists.
- Verify you received what you paid for. Open Task Manager’s Performance tab: it names the processor, shows the memory size, and names the graphics. Settings → System → Storage shows the drive size. Compare all three against your listing or worksheet — the GMKtec’s exact combination, the KAMRUI’s 32GB configuration, the Dell’s card and 16GB, the parts build’s component names, the barebone’s fitted memory. Five minutes converts “I think they sent the right one” into knowing, while returning anything is still easy.
- Install a game store and play something. Steam is the usual first store; install it, claim one of its many free games, and play for an hour. This is the victory lap and the stress test in one: on the renewed Dell especially, an hour of gaming in the first days is how its 90-day window gets used properly.
How to Choose a Gaming PC Build Under $400
- Cost the finished PC, never the headline product. Add memory, storage and the operating system to anything missing them, at live prices, before routes get compared. By that arithmetic the barebone kit is a well-over-budget PC once completed, while a complete box stays a complete, in-budget PC.
- Re-price memory and storage before trusting any parts list. Those two lines take a large share of the DIY worksheet at current prices. A list priced from an older guide understates them badly, which is how fantasy in-budget builds are born.
- Two memory sticks, always, for integrated graphics. APU graphics run on system memory bandwidth, so a single stick taxes the very performance the build exists to deliver. Every complete pick here ships as a pair, and the DIY worksheet is a two-stick kit for the same reason.
- Decide your walk-away price before you shop. The renewed Dell is a buy at $400 or under and a pass above it; at this budget, patience pays.
What Else You Will Spend
The routes above are priced to a working PC, but a working PC is not a finished setup, and beginners deserve the rest of the list before ordering, not after. The big one is the monitor: if no screen exists yet, it comes first, ahead of any upgrade to any route — a 1080p monitor is the natural partner for everything here, and a TV you already own is a legitimate starting screen while you save. A keyboard and mouse are the other essentials; no route here documents them as included, so assume they are yours to provide, and start with whatever you have — they are the easiest parts of the whole setup to upgrade later.
Then come the catches, held the honest way: as machine + fix, counted before comparing. The renewed Dell’s catch is patience — its price moves in and out of this budget, so its real cost is the in-budget purchase plus your willingness to wait for it. The parts build’s catch is printed in its worksheet: the machine totals well over budget plus your operating-system decision — free Linux, or a license sorted separately. The barebone’s catch is completion: kit plus memory plus SSD lands well over budget with new parts, reading as an in-budget route only when memory and SSD arrive off your shelf at no new cost. The two 500GB-class complete boxes — the Beelink, and the KAMRUI at 512GB — carry the mildest catch: modern games are large, so a bigger SSD is a likely year-two purchase, the way the GMKtec’s fitted 1TB already answers it. Whatever budget the KAMRUI leaves unspent is, for many beginners, best spent on the games themselves.
Upgrades, in Plain Terms
Here is what each route can become, with promises made only where the documentation earns them. The parts build is the one route where a graphics-card swap is promised outright: it was specified for exactly that — a standard tower case and a named, reputable 650W power supply (the MSI MAG A650BN in the worksheet) with headroom for a real card — so when the day comes, the card goes into the waiting slot, the monitor cable moves down to it, and the machine changes class. The renewed Dell gets no such promise. Its power supply is an unpublished refurbished part; until the label on the actual unit you received has been read, the only honest statement is that modest cards in the low-power, slot-powered class are the realistic ceiling, and its processor platform is finished regardless.
For the three mini PCs and the barebone, the plain truth is that no graphics-card upgrade exists, at all, ever — no slot is fitted, and the graphics are part of the processor. What those machines do accept is memory and storage: the Beelink grows to 64GB of memory and a 2TB drive, the GMKtec to 64GB and 4TB of storage across its two slots, the KAMRUI to 64GB and 2TB, and the barebone’s first “upgrade” is simply completing it. Those are worthwhile improvements to how the machines feel — more games installed, more room to breathe — but none moves a game into a higher class. If a graphics card is anywhere in your future, the tower routes are the only doors opening that way, and day one is the right time to know it.
Common Buying Mistakes
- Mistaking a barebone kit’s sticker for a computer’s price. The UM870 Slim kit still needs memory, storage and an operating system; finished with new parts, it is a well-over-budget route.
- Trusting a parts list from a stale guide or video. Current memory and SSD prices make year-old worksheets badly wrong — check every line against live listings before ordering.
- Buying the cheapest power supply that boots the build. In a machine meant to gain a graphics card, that unit gets replaced at upgrade time — the most expensive supply is the one bought twice.
- Leaving the operating system out of the total, or assuming a laptop’s Windows license moves to a new machine. Read the license terms, and budget Linux or a license as its own line.
- Plugging the Dell’s monitor into the motherboard’s sockets. A picture appears, the graphics card idles, and every game runs on the weak built-in graphics. The cable belongs in the card’s sockets, low on the back panel.
- Buying a sealed box for its strong graphics and expecting to add a card later. Mini PCs have no slot to receive one. A card in your future means a tower route, full stop.
- Skipping the night-one basics: Windows updates, the proper graphics driver, the monitor’s refresh-rate setting, and the five-minute check that the delivered machine matches the ordered one.
Final Recommendation
- Most first-time buyers: Beelink SER5 MAX — the complete benchmark; check price on Amazon.
- Biggest library with zero assembly: GMKtec M5 Plus, arriving with 32GB and 1TB already fitted.
- The tightest budget: KAMRUI E3B — a finished PC at the lowest budget tier.
- A discrete card today: the renewed Dell tower, and only at $400 or under.
- Builders playing the long game: the Ryzen 5 5600G from-parts build, bought in stages.
- Builders holding donor parts: MINISFORUM UM870 Slim barebone.
For a beginner, our top two are the Beelink SER5 MAX — at its budget-tier pricing it delivers a complete, licensed, gaming-capable PC for less than the core parts of any build you can assemble today — and the GMKtec M5 Plus, whose 32GB of memory and 1TB of storage delete the two upgrades a mini PC owner would otherwise be pricing within a year. Together they cover this search’s two honest shapes — the cheapest way to a finished machine, and the most finished machine itself. Beginners whose real destination is a tower should read the 5600G worksheet twice — once for its total, and once for what the total buys that no sealed box can — and readers ready to spend a little more for a discrete card in a new machine should see Best Gaming PC Build Under $500 and Best Gaming PC Build Under $700.
Frequently Asked Questions
I’ve never built anything. Which route is actually for me?
One of the three complete mini PCs, most likely the Beelink or the KAMRUI. Their “build” is the first-evening walkthrough in this guide — placement, cables, updates, settings — with no assembly at all, and at today’s parts prices they are also the cheapest finished PCs here. Take the parts build when the learning and the future graphics card are themselves the point and the spending can be staged.
Can you really build a gaming PC for under $400 in 2026?
From new parts at November 2026 Amazon prices, no — the worksheet in this guide puts a basic APU build well over budget before an operating system, because memory and storage prices have spiked. What this budget buys in practice: a complete APU mini PC at a budget-tier price; a renewed tower with a discrete card on the days its price dips to the line; or stage one of a build finished over time.
What games can these routes actually play?
Esports titles, indie games and older big releases at 1080p on low-to-medium settings are the honest territory for the Vega-class integrated graphics in most picks. The 780M in the completed barebone is a class stronger within the same territory, and the GTX 1050 Ti in the renewed Dell adds a separate card’s steadiness in the same kinds of games. Modern big-budget titles at high settings, and native 1440p, sit beyond every route here — see Best Gaming PC Build For 1440p Gaming Under $400 for how that search reads at this budget.
Will any of these machines use DLSS?
No — and it is worth knowing why, because listings blur it. DLSS is NVIDIA’s upscaling technology, and it runs only on NVIDIA’s RTX graphics cards. No RTX card exists anywhere in this guide: the AMD machines use integrated Radeon graphics, and the Dell’s GTX 1050 Ti is an older GTX card from before DLSS existed. What the AMD routes can use is the upscaling built into games themselves — many titles include AMD’s FSR or simple resolution scaling, which runs on this hardware and trades a little sharpness for smoother play at 1080p.
Does the barebone UM870 Slim save money over the complete boxes?
Only when the memory and SSD are already yours. Completed with new parts — a 16GB DDR5 laptop memory kit and a 500GB drive are both premium-priced lines — it totals well over budget before an operating system, set against complete budget-tier machines that include Windows. Feed it donor DDR5 from a retired laptop, though, and the sums flip — it becomes the strongest route here.
Should I wait for prices to fall instead of buying now?
For a parts list, waiting has a real case: the memory line is the most inflated and the likeliest to cool, and this guide’s worksheet would shrink the most if it did. For a complete box, check price on Amazon — the SER5 MAX and the KAMRUI are both positioned like a calmer market today.