Where to buy
Check the latest price, availability and delivery on Amazon. Orders are placed on Amazon. We may earn a commission from qualifying purchases.
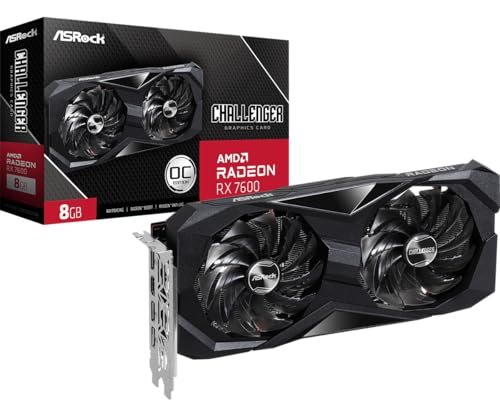
- Best build that fits the budget: ASRock Radeon RX 7600 Challenger 8GB OC — the card at the heart of Build 1 — Check on Amazon
- Build 2, the 12GB VRAM build: Sparkle Intel Arc B580 Titan OC, 12GB — Check on Amazon
- Build 3, the DLSS build: MSI GeForce RTX 4060 Ventus 2X Black 8G OC — Check on Amazon
- Build 4, the AM5 reality check: AMD Ryzen 5 7600X — Check on Amazon
See 2 more Amazon options
- Prebuilt that beats building: CyberPowerPC Gamer Xtreme VR (GXiVR8060A24), RTX 4060 — Check on Amazon
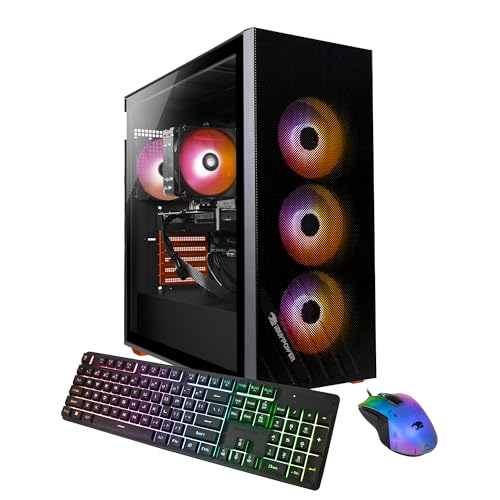
- Prebuilt AM5 under $800: iBUYPOWER SlateMesh (SlateMeshA5N4601), Ryzen 5 7600 / RTX 4060 — Check on Amazon
Read the full guide ↓
Disclosure: As an Amazon Associate, reviewstook.com earns from qualifying purchases. Links to Amazon on this page are affiliate links; they cost you nothing extra. Listing details such as price and availability change often, so check the current Amazon listing before you buy.
Start with the sentence most small-space guides skip: at $800 in November 2026, there is no genuinely small gaming PC build in this guide, and there is no honest way to pretend otherwise. The verified parts baskets and prebuilts at this budget are all tower-class machines. The mini-PC and small-form-factor routes that would actually shrink the footprint live in other guides and other budgets; this month’s component market — a memory spike that has pushed DDR5 kits sharply higher and lifted DDR4 kits as well, with graphics cards selling far above launch prices — has not left room for a verified small-case build under this line. What $800 does buy is a choice among towers, and for a small room that choice is not really about which tower is fastest. It is about which tower installs least badly in the space you actually have: where its intake breathes, where its heat goes, how far its cables have to fall, and whether it arrives as one finished box or as an afternoon of parts spread across the only table in a studio apartment.
So this guide grades installation as seriously as performance. Every pick below is the same six verified build paths from our main $800 build research — four itemized DIY parts lists and two prebuilts that currently beat building — judged here on footprint class, airflow, heat and cable reality, with the same deal rules carried over — check price on Amazon for every pick, as prices move constantly. One discipline runs through the whole page: we print only the dimensions the underlying research actually documents, and there is exactly one hard number — the 305mm graphics-card clearance the case listing states for the DIY builds’ case. Everything else is graded by form-factor class, and where a measurement would decide your purchase, we tell you to take it from the live listing rather than inventing one here. If your space is truly tiny — a shelf, a dorm desk, a media cabinet — read the verdict in the final section before you order.
In this guide
Quick Picks
Short on time, or comparing several options at once? Each row below names a builder type and the build that suits it, with a link to the listing.
| Builder type | Pick | Why it stands out | Link |
|---|---|---|---|
| Best build that fits | Build 1 — RX 7600 + Ryzen 5 5500 (AM4) | Parts basket can fit the budget — check price on Amazon; mesh-front case is the most forgiving intake here | Check on Amazon |
| Best for VRAM headroom | Build 2 — Arc B580 12GB + Ryzen 5 5500 (AM4) | 12GB of VRAM and AV1 encoding; a full-size card, so the case’s documented clearance decides it | Check on Amazon |
| Best for DLSS and streaming | Build 3 — RTX 4060 + Ryzen 5 5500 (AM4) | DLSS frame generation and NVENC — but check price on Amazon: its parts total sits over this budget | Check on Amazon |
| Best platform investment | Build 4 — Ryzen 5 7600X + B650 + DDR5 (AM5) | The upgradeable platform — check price on Amazon: all-in it is not an $800 build and we do not call it one | Check on Amazon |
| Best finished PC for the money | CyberPowerPC Gamer Xtreme VR, RTX 4060 | Check price on Amazon, with Windows included — one box, no build-day sprawl | Check on Amazon |
| Best AM5 under $800 | iBUYPOWER SlateMesh, Ryzen 5 7600 / RTX 4060 | Check price on Amazon; mesh-front case and AM5, finished the day it arrives | Check on Amazon |
How These Picks Were Chosen
The six picks are the verified build paths from our main under-$800 build guide, reused exactly: the same anchor listings, the same itemized parts lists with the Windows license shown as its own line, and the same deal rules — check price on Amazon for each pick, because listings move constantly. One build can fit under $800 as a parts basket when its parts are caught at favourable listings; one lands over the line however patiently you shop; the RTX 4060 build does not fit at all right now and says so; the AM5 build is a worked example of the newer platform’s real cost, both from scratch and as a reuse upgrade. The two prebuilts qualify when they are listed at or under the budget on Amazon, Windows included, undercutting the equivalent parts baskets in this component market.
What this variant adds is an installation grade, applied to each pick on the same evidence standard as the listings. We grade four things. Footprint class: every pick here is a tower; the DIY builds use a standard ATX case (the Montech X3 Mesh) holding a micro-ATX board, and the prebuilts are integrator towers of the same broad class — none is a mini, none mounts behind a monitor, and none is graded as if it were. Air path: where the research documents the intake design — a mesh front on the DIY case and on the SlateMesh — we say so; where it does not, we claim nothing and grade on placement discipline instead. Heat: all three DIY graphics cards are modest-draw 1080p cards, and the prebuilts carry the same RTX 4060 class, so no pick here is a space heater by gaming-PC standards — but every one exhausts warm air a small room will notice, and a sealed cabinet is refused for all six, without exception. Power and cables: all six picks use an internal power supply, so there is no external brick to house — the power question becomes the wall socket’s position and the cable drop from the case’s rear panel to the desk.
The dimension discipline deserves its own sentence, because small-space buying is where invented numbers do the most damage. The base research documents exactly one clearance figure — the X3 Mesh listing’s 305mm graphics-card clearance — and no case dimensions, volumes, VESA patterns or noise figures for any pick. So this guide prints that one figure, grades everything else by class, and routes you to the live listing for the measurements that decide whether a specific tower fits your specific shelf. We did not build these PCs ourselves; the price and performance research behind them is documented in the main guide.
The Footprint Truth at $800: Towers, All the Way Down
It is worth one short section to say plainly what “small spaces” can and cannot mean at this budget, because the phrase does real work in search boxes and very little work in this price tier. A small-form-factor build is a deliberate parts discipline — a compact case, a small board, careful card-length and cooler-height budgets — and in November 2026 that discipline costs money this budget does not have after the memory spike has taken its cut. The verified $800 baskets are built the opposite way: a roomy ATX case chosen partly because it is cheap and forgiving to build in, with a documented 305mm of graphics-card clearance that exists to swallow full-size cards, not to shrink anything. The two prebuilts are standard integrator towers. If the space you are furnishing is a shallow desk in a bedroom corner, a tower on the floor beside it is a perfectly good answer, and the rest of this guide is about placing it well. If the space is a bookshelf or a TV cabinet shelf, no pick in this guide belongs there — a tower’s intake and exhaust need open air, and furniture built for books does not offer it.
Two consequences follow, and both are priced into the reviews. First, installation quality at this budget is about placement, not product: the same tower is a good small-space machine standing on the floor with its mesh front facing the room, and a bad one wedged into a cabinet with its intake against a wall. Second, the build-versus-buy question changes shape in a small home. A DIY build needs a workspace before it needs a home — a table cleared for an afternoon, parts boxes, a sprawl of screws and cables — and in a studio or a shared room that temporary footprint can matter as much as the finished one. The prebuilts arrive as a single box that becomes a single tower; the builds arrive as seven boxes that become a tower plus a recycling pile.
The 6 Best Gaming PC Builds Under $800, Graded for Small Spaces
Build 1 — RX 7600 + Ryzen 5 5500 (AM4): The Build That Actually Fits
Who it suits: First-time builders with a hard $800 ceiling and a small room, who want a real 1080p gaming PC from new parts and can give a floor-standing tower a sensible spot beside the desk.
The parts — check price on Amazon for each one, as every listing moves: an ASRock Radeon RX 7600 Challenger 8GB OC, a Ryzen 5 5500, an MSI B550M PRO-VDH WiFi motherboard, a Silicon Power 16GB (2×8GB) DDR4-3200 kit, a Crucial P3 Plus 1TB NVMe drive, an MSI MAG A650BN 650W Bronze power supply and a Montech X3 Mesh case. Added up, this is the one basket in the guide that can fit under the budget in parts when the parts are caught at favourable listings — check the live total on Amazon before you rely on it. A new Windows 11 Home license is an extra cost on top of the parts, which is why the prebuilts further down exist in this guide at all.
The installation grade is the best a tower in this guide earns, and the reason is documented rather than vibes: the X3 Mesh is a mesh-front ATX case with six fixed RGB fans, so its intake is the entire front panel rather than a slot or a slit. In a small room that matters more than any other case fact, because a mesh front is the most forgiving intake when a tower cannot be given ideal surroundings — it breathes from the whole face, so a tower standing on the floor with its front to the room tolerates a nearby desk leg or a wall to one side better than a closed-front case would. The discipline it still demands is the standard one: front facing open air, never pushed back until the rear exhaust is kissing the wall, and never inside a cabinet. The board inside is micro-ATX in a full ATX case, which leaves the interior roomy — irrelevant to the footprint, but genuinely relevant to a first-time builder in a small flat, because a spacious case is the easiest kind to assemble on a kitchen table and to cable-manage neatly.
As a gaming machine it is a proper 1080p PC: the RX 7600 is a high-settings 1080p card with FSR upscaling for heavier titles, fed without drama by the 5500’s six Zen 3 cores. Two platform facts belong in the open. The 5500 is a PCIe 3.0 CPU and the RX 7600 uses an eight-lane connection, so the pairing gives up a few percent in some titles versus a PCIe 4.0 platform — real, measurable, and small next to the substantial platform saving over AM5. And AM4 is a finished platform: the meaningful in-socket upgrade is a Ryzen 5 5600 (check price on Amazon; it restores PCIe 4.0), not a next-generation part. Heat is modest — this is a low-draw card class — but modest is not zero: in a small bedroom the tower’s exhaust will warm the air around the desk over a long session, which argues for the floor spot beside the desk rather than the desktop itself.
- The only from-scratch build here whose parts basket can total under $800 — check price on Amazon.
- Mesh-front case: the most forgiving intake in the guide for an imperfect tower spot.
- The named 650W power supply leaves room for a mid-range GPU swap later.
Honest limitation: The under-$800 total depends on catching the parts at favourable listings — check price on Amazon for the whole basket — and a Windows license can take the total over the line. It is also, unavoidably, a full-size tower: nothing about this build makes it small.
Choose it if your budget is hard, your target is 1080p, and you have a floor spot with open air in front of the case. Skip it if your only available space is furniture — a shelf or cabinet — because no placement discipline makes a tower belong there.

Build 2 — Arc B580 12GB + Ryzen 5 5500 (AM4): The VRAM Build
Who it suits: Builders in small rooms who play texture-heavy modern games, want 12GB of VRAM from new parts, and are willing to do the one measurement this build genuinely depends on.
The platform mirrors Build 1 — Ryzen 5 5500, MSI B550M PRO-VDH WiFi, 16GB DDR4-3200, Crucial P3 Plus 1TB, MSI MAG A650BN 650W, Montech X3 Mesh — with one change: a Sparkle Intel Arc B580 Titan OC with 12GB of GDDR6 (check price on Amazon; it sells well above its launch pricing, stated rather than hidden). The basket sits over the budget line before a Windows license, however patiently you shop — check the live total on Amazon — included and labeled as such because it is the most accessible route to 12GB of VRAM from new parts.
The small-space story of this build is a single documented number and a single documented warning. The number is the X3 Mesh listing’s stated 305mm graphics-card clearance — the only hard dimension anywhere in this guide’s research. The warning is the base guide’s own: Sparkle’s Titan OC is a full-size card with a metal backplate, and its length must be checked against that clearance on the live listing before ordering. In a small-space purchase that check is the whole game, because a card that does not fit is not a small problem in a small flat — it is a returns process with nowhere to stage it. Do the check in the order the checklist below sets out: clearance figure from the case listing, card length from the card listing, then order. The installation otherwise inherits Build 1’s grade — same mesh-front case, same floor-spot discipline — with one addition: the B580 wants Resizable BAR enabled on the B550 board, a BIOS setting rather than a space issue, noted here because a build bound for a tight spot should be configured completely before it goes into it, not reopened afterward.
As a machine, the B580 trades blows with the RTX 4060 class in rasterized games while carrying half again as much memory — 12GB is the difference between high and medium textures in the most demanding current releases — with XeSS upscaling for entry-level 1440p and AV1 hardware encoding for a first streaming setup. Its costs are equally real: Intel’s drivers still stumble in some older and niche titles, and like the RX 7600 it is an eight-lane card on the 5500’s PCIe 3.0 connection, surrendering a few percent in some games.
- More VRAM than any new Nvidia or AMD card in this guide offers in this tier: 12GB.
- AV1 hardware encoding on board — a feature streamers usually have to pay a tier up for.
- Same mesh-front, forgiving-intake case as Build 1.
Honest limitation: It does not fit under $800 — check price on Amazon for the basket, and add Windows on top. And its full-size card makes the listing’s 305mm clearance check a condition of the recommendation, not a suggestion.
Choose it if textures and longevity matter most and you will verify the card length against the case clearance before ordering. Skip it if your library is mostly older or obscure titles, or your $800 cannot move at all.
Build 3 — RTX 4060 + Ryzen 5 5500 (AM4): The DLSS Build, Priced Honestly
Who it suits: Builders who specifically want Nvidia’s feature set — DLSS 3 frame generation, the NVENC encoder — and whose small room rewards the coolest, quietest-running card class in the guide.
Same platform again: Ryzen 5 5500, MSI B550M PRO-VDH WiFi, 16GB DDR4-3200, Crucial P3 Plus 1TB, MSI MAG A650BN 650W, Montech X3 Mesh — check price on Amazon for every part. The graphics card is an MSI GeForce RTX 4060 Ventus 2X Black 8G OC, and its pricing is the point this guide exists to make: new RTX 4060 listings on Amazon sit well above the card’s launch pricing, for a card that is out of production. The build therefore totals over this budget in parts, and higher still with a Windows license — check the live total on Amazon. It is not an under-$800 build, and this variant does not soften that: it is here because the CyberPowerPC prebuilt further down contains this same graphics card class, a faster CPU and a Windows license, and can undercut this parts list when it is on sale.
For a small space specifically, the RTX 4060’s documented character — efficient, cool, low power draw — is a genuine installation virtue, the strongest any pick in this guide offers on the heat axis. A tower in a small bedroom is a roommate: its exhaust warms the air its owner breathes. The base research makes no noise measurements and this variant invents none, but a card class known for sipping power is the right starting point for a machine that will live two metres from a bed, and the 650W named supply runs it with enormous headroom. The installation grade otherwise matches Build 1 exactly — same case, same mesh front, same placement rules — because the case, not the card, decides the footprint. If you find the card back in its old sale territory, this build’s math transforms and it becomes the obvious pick; the platform around it is identical to Builds 1 and 2 precisely so the GPU line can be swapped in the basket and the total watched.
- DLSS 3 frame generation and NVENC: the streaming and high-refresh feature set.
- The coolest-running card class here — the heat argument for a small bedroom.
- Shares the verified platform of Builds 1 and 2, so the GPU stays a one-line swap in the basket.
Honest limitation: At current listings this build is over budget in parts alone, and its 8GB of VRAM is the same ceiling as the more affordable RX 7600 build. You are paying for features, drivers and a cooler-running card — not memory, raster speed or a smaller box.
Choose it if you stream, or DLSS matters to your games, and your budget can stretch above this tier. Skip it if $800 is the ceiling — Builds 1 and 5 are your honest options.

Build 4 — Ryzen 5 7600X + B650 + DDR5 (AM5): The Platform Investment, at Its Real Price
Who it suits: Builders upgrading from an existing PC — reusing a case, power supply, storage and Windows license — who want the platform with a future, and whose small space already has a tower spot that works.
The new parts: a Ryzen 5 7600X (check price on Amazon — note it includes no cooler, so allow for a basic, budget-tier tower cooler as an extra purchase), a B650 motherboard (check price on Amazon; pricing varies by model), a 16GB DDR5 kit (check price on Amazon; name-brand kits sit higher still in this premium tier — this single line is the platform’s problem), and the ASRock RX 7600 Challenger from Build 1 (check price on Amazon). Reusing your case, power supply, SSD and Windows license still leaves a spend over this budget, and building entirely from scratch, with the P3 Plus, A650BN and X3 Mesh added, totals higher again — check the live total on Amazon. Neither route is under $800, and the pick exists to make that undeniable: the AM5 platform premium over AM4 is substantial at current listings, and nearly all of it is the DDR5 kit and the board, not the CPU.
The small-space reading of this build is different from the others, because its most likely buyer already owns the footprint. As a reuse upgrade it changes nothing about the room: the same case stays in the same spot, and the installation event is an afternoon of swapping a board, CPU and memory inside a box whose placement already works — no new furniture negotiation, no new cable runs. Read the other way, the from-scratch version inherits Build 1’s tower class with none of Build 1’s budget virtue: the same full-size case obligation at a premium-tier total. One installation note is specific to this build: the 7600X ships without a cooler, and the basic tower cooler the budget allows for adds a height consideration inside whatever case it lands in — check the cooler’s height against your case’s clearance on the live listings, the same measure-first discipline as Build 2’s card length, because the base research documents neither figure. What the premium buys is also real: AM5 takes Ryzen 7000, 8000 and 9000 processors today with years of socket support beyond AM4’s finished roadmap, so the board and memory can carry two more CPU generations — upgrades that, again, happen inside the same case in the same spot.
- The only pick whose motherboard and memory survive your next two CPU upgrades.
- As a reuse upgrade, the room does not change at all — same case, same spot.
- Full PCIe 4.0 for the graphics card’s eight lanes, no 5500-style asterisk.
Honest limitation: Premium-tier from scratch and over budget even as a reuse upgrade — check price on Amazon — by any honest accounting. The 7600X also needs a cooler the box does not include, whose height must be checked against your case.
Choose it if you are upgrading an existing PC and platform life matters more than this year’s total. Skip it if you are starting from an empty desk with $800 — that is Builds 1, 5 and 6.

Pick 5 — CyberPowerPC Gamer Xtreme VR (GXiVR8060A24): The Prebuilt That Beats Building
Who it suits: Buyers in small homes whose $800 is absolute, who need a finished, licensed, warrantied PC — and who do not have an afternoon’s worth of table to spare for a build.
The specification: an Intel Core i5-13400F, a GeForce RTX 4060 8GB, 16GB of DDR5, a 1TB PCIe Gen4 SSD and Windows 11 Home, assembled and covered by a system warranty. Check price on Amazon for this prebuilt — it qualifies for this guide only when it is listed at or under the budget, against a higher everyday list positioning. Set that beside Build 3: the same graphics card class, a CPU at least the 5500’s equal on a newer platform, DDR5 in place of DDR4, and Windows included instead of as an extra purchase — for less than the build’s parts basket when it is on sale. When component prices spike, integrators’ OEM pricing is a real consumer advantage, and the right move is to take it.
The small-space grade is about arrival as much as placement. This pick reaches a small home as one box containing one finished tower: no seven-part delivery trail, no assembly sprawl across the only table, no evening of the room being a workshop. For a studio apartment or a bedroom in a shared house, that is the strongest installation argument any pick in this guide makes. The placement grade itself is more cautious, and honestly so: the base research does not document this model’s case dimensions or intake design, so this variant claims neither — it grades the pick as a standard integrator tower, to be stood on the floor or a sturdy desk with open air at front and rear, its measurements taken from the live listing before ordering, and never sealed into a cabinet. The concessions from the main guide carry over unchanged: CyberPowerPC does not publish this model’s power supply wattage in the listing material — read the label on the unit when it arrives before planning a GPU upgrade — and integrators reuse model numbers across configurations, so confirm the live listing shows the i5-13400F, RTX 4060, 16GB and 1TB specification before ordering. And that qualifying price is a sale price, not an everyday price: at its higher list positioning the machine is merely competitive with Build 3 rather than cheaper, so the buy decision is price-dependent in a way the parts builds are not.
- Check price on Amazon — on sale it can sit under the parts cost of building its equivalent yourself.
- One box, finished and warrantied: no build-day footprint in a small home.
- Windows 11 Home included, plus DDR5 and a Gen4 SSD — no memory-crisis compromises inside.
Honest limitation: The qualifying price is a sale price; at its everyday list positioning the advantage shrinks to convenience. The unpublished PSU wattage makes it a weaker upgrade base than a self-build with a named 650W unit, and its case dimensions are not documented in our research — measure from the live listing.
Choose it if it is listed at or under $800 when you check, and you value finished-and-warrantied over specced-by-you. Skip it if it is sitting at full list and you enjoy building — Build 1’s basket is then the better spend.
Pick 6 — iBUYPOWER SlateMesh (SlateMeshA5N4601): AM5 Under $800, the Only Way It Exists
Who it suits: Buyers who read Build 4, want AM5’s future anyway, and would like it this year, under budget, finished — with the most small-space-friendly intake design among the prebuilts.
The specification: an AMD Ryzen 5 7600 on the AM5 platform, an RTX 4060 8GB, 16GB of DDR5-5200, a 500GB NVMe SSD, Windows 11 Home, and a bundled RGB keyboard and mouse, in iBUYPOWER’s mesh-front SlateMesh case. Check price on Amazon for this prebuilt — it qualifies only when it is listed at or under the budget, against a higher premium-tier list positioning. Now run Build 4’s comparison in reverse: the platform on its own — a 7600-class CPU, a B650 board, 16GB of DDR5 — costs a retail builder a substantial sum at current listings before any graphics card exists, yet the whole finished PC, card and license included, has sold under the budget on sale. That is the OEM memory-pricing advantage in its purest form, and the only honest way this guide can put “AM5” and “under $800” in the same sentence in November 2026.
Its installation grade starts with the one case fact the research documents: the SlateMesh is a mesh-front case — described in the main guide as the airflow-first design budget builders choose for themselves — which gives this prebuilt the same forgiving-intake virtue as the DIY builds’ X3 Mesh. A mesh front breathes across its whole face, so the tower tolerates the imperfect surroundings of a real small room — a floor spot with a desk to one side, a wall behind the exhaust — better than a closed-front tower with a decorative intake slit. The bundled keyboard and mouse finish the desk the day the machine arrives, though they do nothing for the tower’s own footprint, which remains standard tower class; the research documents no dimensions for this case either, so measure from the live listing before committing a spot to it. The compromises are the main guide’s, unchanged. The 500GB SSD is the smallest storage in this guide — with modern game installs running 70–150GB, a second drive is a planned purchase, not a someday thought, and the budget should allow for a budget-tier second drive; in a small space that second drive at least lives inside the case rather than adding an external box to the desk. The listing material reviewed did not confirm whether the 16GB arrives as one stick or two; a single stick costs real performance in memory-bound moments, so check the live listing and the slots on arrival, and treat a second matching stick as part of the true cost if it ships with one. And like the CyberPowerPC, its qualifying figure is a recurring sale price rather than a standing price — check price on Amazon — and at its higher list positioning, Build 4’s reuse route and a bigger budget become the better AM5 answers.
- AM5, RTX 4060 and Windows together under $800 — a combination no parts list in this guide can match.
- Mesh-front case: the forgiving intake a small room’s imperfect tower spot needs.
- Keyboard and mouse in the box; the desk is finished the day it arrives.
Honest limitation: 500GB of storage fills fast, the RAM stick configuration is unconfirmed in the listing material, and the qualifying price is a sale price against a higher list positioning.
Choose it if AM5 is your priority and you catch it at or under the budget — check price on Amazon. Skip it if you need storage headroom now or it is sitting at list price — Build 1 plus a future platform change is the calmer spend.

Comparison Table
| Pick | Type | Pricing | Installation grade | Link |
|---|---|---|---|---|
| Build 1 — RX 7600 + Ryzen 5 5500 | DIY parts list (AM4) | Check price on Amazon — parts basket can fit the budget; Windows extra | Mesh-front ATX tower; most forgiving intake here | Check on Amazon |
| Build 2 — Arc B580 12GB + Ryzen 5 5500 | DIY parts list (AM4) | Check price on Amazon — parts basket over the budget; Windows extra | Same case; full-size card vs the documented 305mm clearance | Check on Amazon |
| Build 3 — RTX 4060 + Ryzen 5 5500 | DIY parts list (AM4) | Check price on Amazon — parts basket over the budget; Windows extra | Same case; coolest-running card class in the guide | Check on Amazon |
| Build 4 — Ryzen 5 7600X + B650 + DDR5 | DIY parts list (AM5) | Check price on Amazon — premium-tier from scratch; over budget even reusing case/PSU/SSD/Windows | Reuse route changes nothing in the room; cooler height to check | Check on Amazon |
| CyberPowerPC Gamer Xtreme VR | Prebuilt (RTX 4060) | Check price on Amazon — qualifies on sale at or under the budget, Windows included | One finished box; case dimensions not documented — measure live | See Where to buy |
| iBUYPOWER SlateMesh | Prebuilt (AM5, RTX 4060) | Check price on Amazon — qualifies on sale at or under the budget, Windows included | Mesh-front tower; peripherals bundled | See Where to buy |
Measure Before You Buy: The Five-Step Small-Space Checklist
Every measurement mistake in a small room is made before the order, not after it. Run these five steps in order for whichever pick you are buying; they take ten minutes.
- Measure the spot. Decide where the tower will actually live — floor beside the desk, desktop, or a stand — and measure its width, depth and height with a tape, not an estimate. Then take the candidate case’s dimensions from its live Amazon listing (our research documents no case dimensions for any pick here, so the listing is the only honest source) and confirm the tower fits with room to spare on every side that has a vent or a cable. A tower that fits exactly does not fit: it cannot breathe and it cannot be cabled.
- Check the ventilation clearance. Identify which faces of the case breathe — the mesh front on the DIY builds’ case and on the SlateMesh is documented; for the CyberPowerPC, read the live listing’s photos and description — and confirm those faces will face open room air, with clear space behind the rear exhaust. If the only spot that fits the tower puts its intake against a wall or its body inside a closed cabinet, the spot is wrong for every pick in this guide. Change the spot, not the rule.
- Give the power supply its address. None of the six picks uses an external power brick — all six have internal supplies — so there is no brick to house, trip over or ventilate, a small genuine win in a small room. What replaces the brick question is the socket question: the tower’s power cable runs from the supply at the case’s rear to the wall, so confirm a socket is reachable from the chosen spot without the cable crossing a walkway or stretching taut, and plan the power strip’s position before the tower arrives.
- Walk the cable drop. Stand at the spot and trace every run the machine will need: the display cable from the graphics card’s ports up to the monitor, the keyboard and mouse runs, the network cable if you wire it — and you should, since in a small room the router is usually close enough that a cable is easy and better than Wi-Fi — and the power lead from step three. Confirm each cable reaches with slack to spare: a tower placed for its footprint but too far from the desk creates the cable-stretch mess that makes small rooms feel smaller. If a run falls short, move the spot now, while moving is free.
- Then order — and verify the fit-critical parts first. Only after steps one to four: place the order, and for the two picks with a documented fit check, do that check before anything ships if you have not already — Build 2’s B580 card length against the case listing’s stated 305mm clearance, and Build 4’s cooler height against your case if you are building from scratch. On arrival, dry-fit the tower in its spot before connecting anything.
How to Choose a Gaming PC Build Under $800 for a Small Space
- Cost the whole machine before you fall for a graphics card. CPU, board, memory, storage, card, power supply, case, cooler if needed, and the operating system. A build that fits only by forgetting Windows does not fit — and in this guide, only Build 1’s basket fits at all.
- Prefer a documented intake. A mesh front — documented on the DIY builds’ case and on the SlateMesh — is the intake design that forgives a real room’s imperfect tower spot. Where a case’s intake is not documented, as with the CyberPowerPC, read the live listing before assuming.
- Buy the power supply by name and number. A 650W unit with an 80 Plus rating and a maker’s name on it is upgrade headroom you can plan around. An unpublished PSU — in a parts list or a prebuilt — is a question you will end up answering with the side panel off.
- Price Windows honestly. Check price on Amazon for a new license, and check Microsoft’s own store as a comparison. An old PC’s retail license may transfer with you; an OEM license tied to a dead motherboard generally does not. The prebuilts fold the license into their price — count that included license as part of their total doing work.
Common Buying Mistakes
- Ordering a tower for a shelf, cabinet or dresser top it was never going to fit — then “solving” it by sealing the tower into the cabinet, where its intake and exhaust suffocate. No pick in this guide belongs in a closed cabinet, at any price.
- Trusting a parts list that totals under $800 by omitting the operating system, the cooler, or shipping — then discovering the real total at checkout.
- Skipping the one documented fit check this guide has: Build 2’s full-size B580 card against the case listing’s stated 305mm clearance. The check takes a minute on the live listing; the return takes a week.
- Budgeting from launch MSRPs for cards that are out of production. The RTX 4060 launched as a mid-range card; in November 2026 new listings sit well above that launch positioning. Work from live listings — check price on Amazon — not history.
- Drifting into the AM5 premium without meaning to — picking a 7600X and a B650 board for the future, then finding the DDR5 kit alone is a major part of the platform cost at current listings.
- Forgetting the 7600X’s empty cooler line — it ships without one — or expecting the Ryzen 5 5500 to give you integrated graphics for troubleshooting. It has none; without the card installed, the PC will not post.
- Buying the bargain prebuilt at its everyday price instead of its sale price. Listings in this tier swing widely between listings; whether it sits at or under the budget is the buy rule, not the product name.
- Speccing 500GB of storage against a modern game library. At 70–150GB per big install, that is three to five games and a juggling habit — the SlateMesh’s second drive is a planned purchase, not an optional extra.
- Assuming a prebuilt’s power supply will take your next graphics card. Where the wattage is unpublished, plan on “a new PSU too” until the label on the delivered unit says otherwise.
Final Recommendation
- Hard $800, building it yourself: Build 1 — RX 7600 + Ryzen 5 5500, bought when its parts are at favourable listings — check price on Amazon — in the mesh-front case that forgives a real room.
- VRAM and textures first: Build 2 — Arc B580 12GB, accepting its few dollars over the line and doing the clearance check.
- Streaming, DLSS and the coolest-running tower: Build 3 — RTX 4060, at its real over-budget total — check price on Amazon.
- Upgrading an existing PC: Build 4 — the AM5 kit, priced honestly, installed in the case and spot you already have.
- Best finished PC for the money, least disruption: CyberPowerPC Gamer Xtreme VR when it is on sale at or under the budget — check price on Amazon.
- AM5 under $800, finished: iBUYPOWER SlateMesh when it is on sale at or under the budget — check price on Amazon — mesh front and peripherals included.
Which of the two you should take depends on which kind of buyer you are, and this guide refuses to blur them. If the building is the point — your parts, your power supply, your upgrade path — Build 1 is the one: a Ryzen 5 5500, an RX 7600 and a basket of named parts that can dip under $800 when each is caught at a favourable listing on Amazon — check price on Amazon for the whole basket — in a mesh-front case that is the most placement-tolerant tower here. If the playing is the point and the $800 cannot move, the CyberPowerPC on sale at or under the budget is simply more computer than the parts market will sell you this month, and it arrives as one box instead of a workshop; the iBUYPOWER is its AM5 counterpart in the same budget tier. And the honest footnote for the genuinely small home: if the checklist above failed at step one — if the only spot you have is furniture a tower cannot breathe in — the right purchase is not any of these six, and the smaller-machine guides in this series are the better next read, starting with Best Gaming PC Build For Small Spaces Under $700 and Best Gaming PC Build For Small Spaces Under $1200. New builders should also see Best Gaming PC Build For Beginners Under $800, and resolution-first readers Best Gaming PC Build For 1440p Gaming Under $800. Recheck every price on the live listings before you order — in this market, the checking is not a disclaimer, it is the build.
Frequently Asked Questions
Can I put one of these towers inside a TV cabinet or a closed cupboard?
No. Every pick in this guide pulls air through its case and exhausts heat into the room; sealed inside furniture, the intake starves and the exhaust reheats the same trapped air, and the machine throttles or worse. An open-backed, generously oversized media unit with the tower’s vents facing free air is a different proposition — but that is a furniture modification, measured with the five-step checklist, not a placement any of these picks can simply be slid into.
AM4 or AM5 at this budget?
AM4, unless you are upgrading an existing PC. At current listings the AM5 platform — 7600X, B650 board, 16GB of DDR5, and a cooler the CPU’s box lacks — runs substantially above the AM4 platform of 5500, B550 board and 16GB DDR4 with its cooler included, and DDR5’s spike accounts for nearly all of that gap. AM5 is the stronger long-term platform and the weaker $800 one. If AM5 under $800 is non-negotiable, the iBUYPOWER SlateMesh prebuilt is the only honest route we found — and for a small space it has the side benefit of arriving finished in a mesh-front case.
Should I just buy one of the prebuilts instead?
If your budget is strict and your goal is playing games this month, yes — that is what the numbers say. When they are on sale at or under the budget — check price on Amazon — the two prebuilts include Windows, assembly and a warranty, and match or beat the DIY builds’ hardware. In a small home the case is stronger still: a prebuilt arrives as one finished box, while a build turns your only table into a workshop for an afternoon. Build instead when you want specific parts, a named power supply, or an upgrade path you chose yourself. Just make the decision with the prebuilts’ live prices on screen, because at their list prices the advantage flips back to building.
- Best Gaming PC Build Under $700
- Best Gaming PC Build Under $1200
- Best Gaming PC Build For Beginners Under $800
- Best Gaming PC Build For Streaming Under $800
- Best Gaming PC Build For Small Spaces Under $700
- Best Gaming PC Build For Small Spaces Under $1200
- Best Gaming PC Under $800
- Best Budget Gaming PC Under $800
- Best Prebuilt Gaming PC Under $800
- Best Gaming Desktop Under $800