Disclosure: As an Amazon Associate, reviewstook.com earns from qualifying purchases. Links to Amazon on this page are affiliate links; they cost you nothing extra.
Building your own gaming PC sounds intimidating, but it is closer to assembling furniture than to electronics engineering. The parts are designed to fit together, the connectors only go in one way, and the job takes a few hours. You choose each component, get exactly the performance you want for your budget, and learn how your machine works, which makes future upgrades and repairs much easier.
This guide walks you through the entire process: choosing and checking parts for compatibility, preparing a workspace, assembling the PC step by step, doing the first boot and BIOS setup, installing Windows and drivers, and fixing the usual problems. It is written from general PC building knowledge rather than testing of specific products, so always read the manuals that come with your parts, because layouts and connectors differ between models.
By the Reviewstook Editorial Team. Last updated: November 1, 2026.
Should You Build or Buy?
Building is not automatically cheaper or better. Prebuilt gaming PCs can be good value, especially during sales, and they come with one warranty and no assembly. Building gives you control over every part, a more upgradable machine and no hidden low-quality components. Our prebuilt vs custom PC guide compares the two in detail.
Building suits you if you enjoy tinkering, want to choose each part and are willing to spend a few hours reading and assembling. If you want to start playing immediately, buy a prebuilt and check its parts list carefully.
In this guide
The Parts You Need
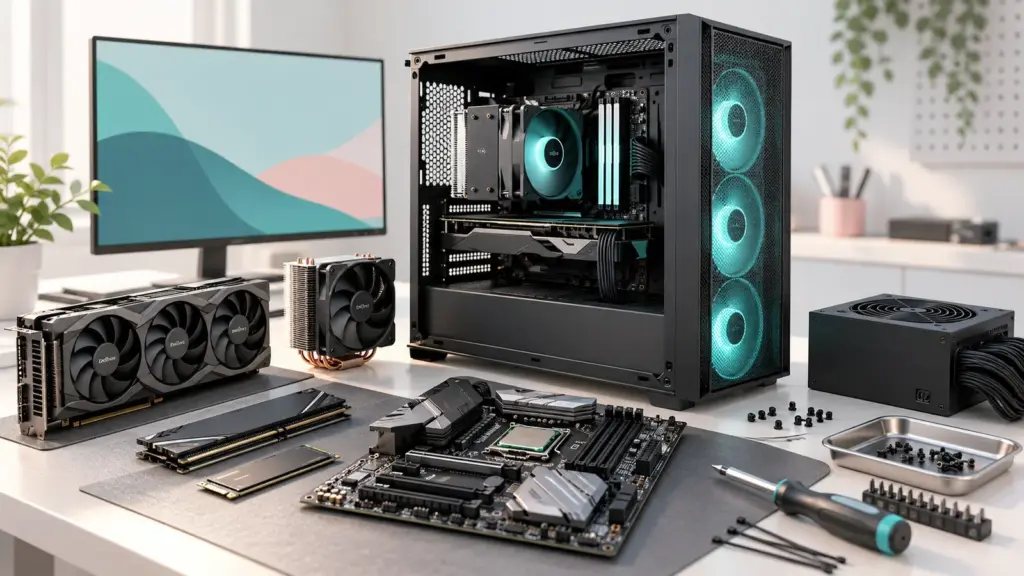
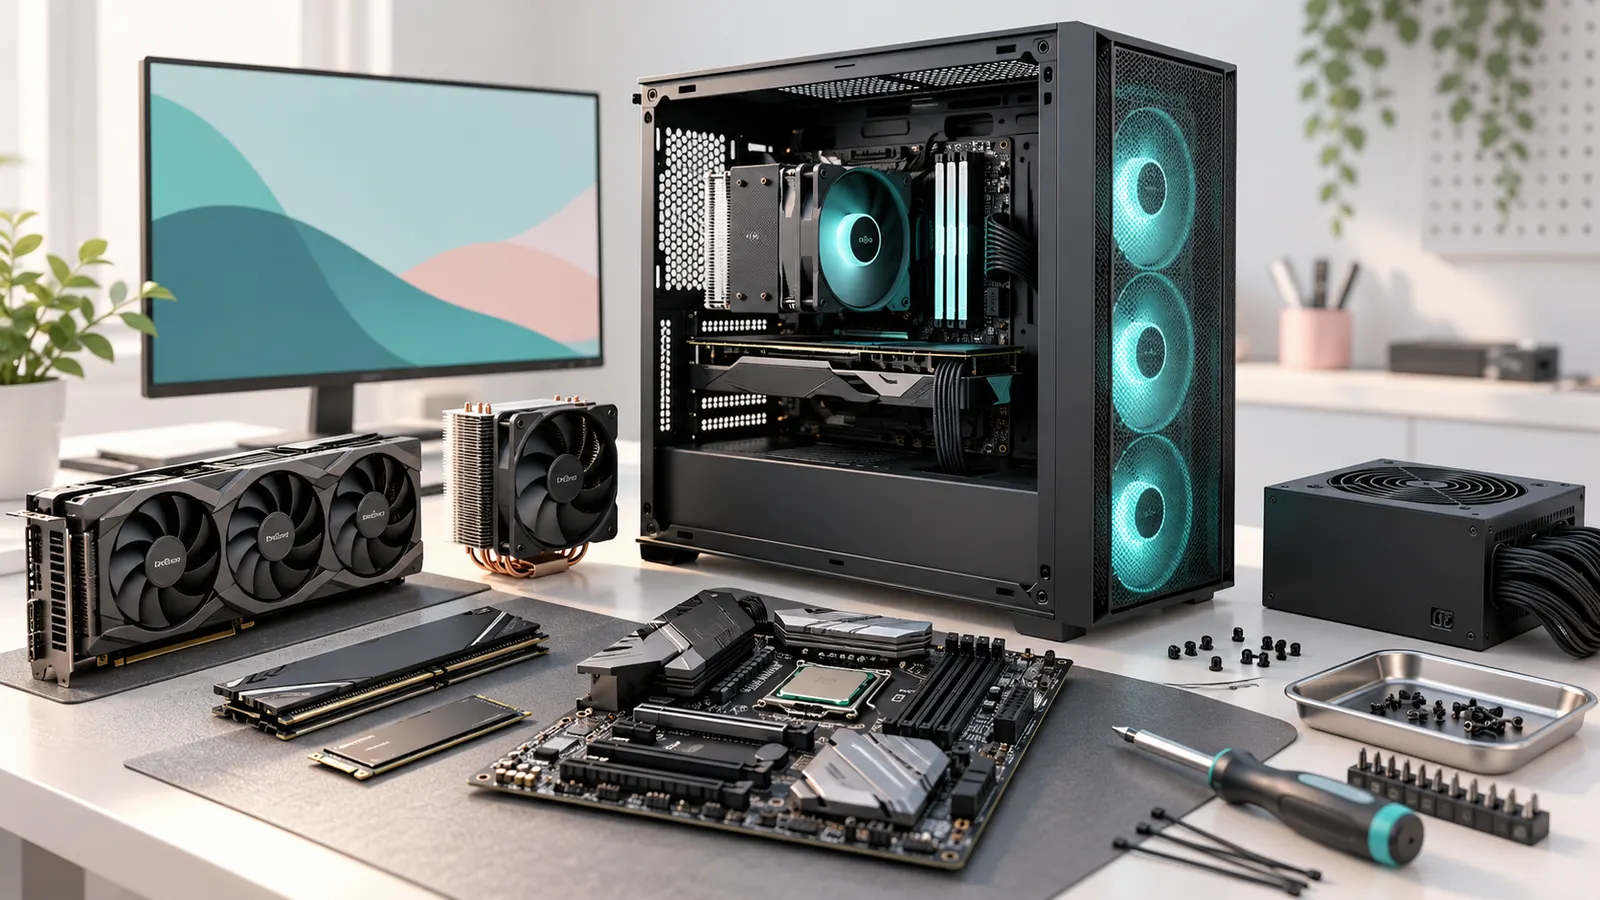
A gaming PC has eight main components plus a few small items.
| Part | What it does | What to check |
|---|---|---|
| Processor (CPU) | Runs the game logic and the system | Socket type and motherboard support |
| Motherboard | Connects every part | Socket, chipset, memory type, size, M.2 slots |
| Memory (RAM) | Temporary working space | DDR4 or DDR5 to match the motherboard, speed, capacity |
| Graphics card (GPU) | Draws the game | Length, power connectors, price for performance |
| Storage (SSD) | Holds the system and games | M.2 slot or SATA, capacity |
| Power supply (PSU) | Feeds power to everything | Wattage, connectors, efficiency, size |
| Case | Holds and cools the parts | Motherboard size, GPU length, cooler height, airflow |
| CPU cooler | Keeps the processor cool | Socket support, case clearance, noise |
You also need a monitor, keyboard, mouse and a copy of Windows (or another operating system) on a USB drive. Our guides to gaming CPUs, motherboards, DDR5 RAM, NVMe SSDs, graphics cards, power supplies and PC cases help you shop for each part.
Plan the Budget
For a gaming PC, the graphics card has the biggest effect on frame rates, so it usually takes the largest slice of the budget. A common approach is to spend roughly a third to a half of the total on the graphics card, then divide the rest across the processor, motherboard, memory, storage, power supply, case and cooler. Do not skimp on the power supply, because a weak unit puts every other part at risk. Do not overspend on the case or lighting at the expense of performance.
Decide your target resolution and refresh rate first. A PC for 1080p at 144 Hz needs less graphics power than a PC for 4K at 120 Hz. Our gaming monitor buying guide helps match the screen to the PC.
Check Compatibility Before You Buy
Most failed builds come from parts that do not fit or work together. Go through this checklist before ordering.
- CPU and motherboard socket. The processor must match the motherboard socket, such as AM5 or LGA1700. Also check that the motherboard’s BIOS supports your exact CPU. Our motherboard buying guide and gaming CPU buying guide explain the details.
- Memory type. Motherboards support DDR4 or DDR5, never both. Check the maximum speed and capacity.
- Motherboard size and case. ATX, micro-ATX and mini-ITX boards need cases that support them.
- Graphics card length and thickness. Compare the card’s length with the case’s maximum GPU length. Large cards also take two or three slots.
- CPU cooler height and radiator support. Air coolers must fit under the case panel and clear the RAM. Liquid cooler radiators must fit in your case.
- Power supply wattage and connectors. Check your graphics card maker’s recommended wattage and the connectors it needs. Our PSU sizing guide and power supply guide explain how.
- Storage slots. Count M.2 slots on the motherboard and drive bays in the case.
- Front panel connectors. Make sure the case’s USB-C or USB headers match what your motherboard provides.
Parts lists on retailer sites and online compatibility checkers can catch obvious errors, but they are not perfect. Read the manufacturer’s specification pages too.
Tools and Workspace
You need very little.
- A Phillips screwdriver, ideally magnetic. Our PC building tool kit list covers options.
- Cable ties or reusable straps for tidy cables.
- A clean table with good light, big enough to lay out the parts.
- The manuals for the motherboard, case and cooler.
- A small bowl for screws.
- Optional: isopropyl alcohol and a lint-free cloth for cleaning, and a flashlight.
Static electricity can damage parts, though modern parts are fairly robust. Touch a bare metal part of the case before handling components, avoid working on thick carpet, and hold parts by their edges.
Assembly: Step by Step
The order below makes the job easier by installing small parts on the motherboard while it is outside the case, where you have room.
Step 1: Unbox and lay out the parts
Open each box, check for damage and keep all the small bags of screws and cables. Read the motherboard manual for the locations of the CPU socket, RAM slots, M.2 slots and headers.
Step 2: Install the CPU
Place the motherboard on top of its box on a flat surface. Open the CPU socket lever, line up the triangle mark on the processor with the mark on the socket, and lower the CPU in gently without pressing. Close the retention arm. On some sockets, a protective cover pops off when you close the lever, which is normal. Do not touch the pins or contacts, and do not force anything.
Step 3: Install the RAM
Open the clips on the memory slots. Match the notch on each RAM stick to the slot and press down firmly at both ends until the clips click. If you have two sticks, use the slots recommended in the motherboard manual, usually the second and fourth from the processor, to run in dual channel mode.
Step 4: Install the M.2 SSD
Locate the M.2 slot, remove the heatsink if there is one, insert the SSD at an angle, push it down and secure it with the small screw. Place the thermal pad and heatsink back. Our SSD buying guide explains drive types.
Step 5: Install the CPU cooler
Follow the cooler’s instructions. Remove any protective film from the cooler base. Apply thermal paste if the cooler does not have it pre-applied, using a small pea-sized amount in the center of the processor. Mount the cooler with even pressure, tightening screws in a cross pattern, and plug the fan cable into the CPU fan header. For liquid coolers, many builders install the radiator in the case first and the pump block later. Follow the manual for your model. Our liquid cooler list compares options.
Step 6: Prepare the case
Remove the side panels. Check that the standoffs (small brass posts) match your motherboard size and are in the right positions. Install the I/O shield if your motherboard does not have it built in. Plan where cables will route and where the power supply will sit.
Step 7: Install the power supply
Mount the power supply in its bay with the fan facing the right direction, usually down if the case has a ventilated bottom. Route the main cables you will need through the cable cutouts, but do not connect them yet if you have a tight case.
Step 8: Install the motherboard
Carefully lower the motherboard into the case, aligning its holes with the standoffs. Secure it with screws, tightening gently and in a cross pattern. Do not overtighten.
Step 9: Connect the power cables
Plug in the 24-pin main power connector, the 8-pin (or 4+4-pin) CPU power connector near the top of the board, and connect the SATA power to any drives. Push connectors in until they click. These connectors are keyed and only fit one way.
Step 10: Install the graphics card
Remove the expansion slot covers on the case rear for the card. Open the PCIe slot latch, align the card with the top PCIe x16 slot, and press down until the latch clicks. Screw the card to the case bracket. Connect the PCIe power cables from the power supply. Use separate cables for each connector where possible, and push them in fully. If your card uses a 12V-2×6 connector, seat it fully and avoid sharp bends right next to it.
Step 11: Connect the front panel and case fans
Connect the front panel connectors: power switch, reset switch, power LED, HD audio and front USB headers. The motherboard manual shows the exact pin layout. Connect front USB 3 and USB-C cables. Connect case fans to the fan headers on the motherboard.
Step 12: Manage the cables
Route cables behind the motherboard tray where possible and tie them down. Good cable management improves airflow and makes future changes easier. Keep cables away from fans and out of the GPU airflow path.
Step 13: Final check before power on
- CPU power connector plugged in.
- 24-pin connector fully seated.
- GPU power connectors seated.
- RAM clicked in.
- No loose screws or tools in the case.
- Cooler mounted and its fan connected.
- Monitor cable plugged into the graphics card, not the motherboard.
First Boot and BIOS Setup
- Connect the power cable, monitor, keyboard and mouse. Switch on the power supply and press the power button.
- If fans spin and you see the BIOS or manufacturer logo, you are in good shape.
- Enter the BIOS by pressing the key shown on screen, often Delete or F2.
- Check that the BIOS sees your processor, memory amount and drives.
- Enable the memory profile (XMP or EXPO) so the RAM runs at its rated speed.
- Check CPU temperatures at idle. Very high values suggest the cooler is not mounted correctly.
- Set the boot order so the USB drive with the Windows installer is first.
- Save and exit.
If the PC does not boot, power off, unplug it, and check the troubleshooting table below.
Install Windows and Drivers
- Create a Windows installer on a USB drive using the official tool on another computer.
- Boot from the USB drive and follow the installer. Choose the new SSD as the destination.
- After installation, connect to the internet.
- Install the chipset drivers from the motherboard maker, then the graphics driver from the graphics card maker.
- Run Windows Update to catch other drivers.
- Set the monitor to its native resolution and highest refresh rate. See our refresh rate guide.
- Update the BIOS if the motherboard maker recommends it for stability or new CPUs.
- Install your games and tools.
Test and Tune
After setup, check that everything works as it should.
- Run a game or benchmark for 15 to 20 minutes while watching temperatures.
- Check that the fans ramp up sensibly and the case does not get too hot. If temperatures are high, see our guide to fixing stuttering for how to spot throttling.
- Make sure the RAM is running at its rated speed and in dual channel mode.
- Check the monitor refresh rate in Windows display settings.
- Set fan curves for a balance of noise and cooling.
- Back up important settings and create a recovery drive.
Troubleshooting a New Build
| Symptom | Likely cause | What to check |
|---|---|---|
| Nothing happens when you press the power button | Power supply switch off, front panel connector wrong, or 24-pin loose | Check the power supply switch, power switch header and 24-pin connector |
| Fans spin but no display | Monitor plugged into the motherboard, RAM not seated, or GPU not seated | Use the graphics card output; reseat RAM and GPU |
| Boots but the monitor says no signal | Wrong input or cable | Check input source and try another cable |
| Beeps or error lights on the motherboard | RAM, CPU or GPU issue | Check the motherboard manual for the code meaning |
| CPU temperature very high | Cooler not mounted, film left on, or pump not running | Reseat the cooler and check the fan or pump header |
| PC restarts under load | Power supply too small, loose power cable, or overheating | Check connectors and temperatures; compare PSU wattage |
| Only part of the RAM shows | RAM not fully seated or wrong slots | Reseat the sticks and use the recommended slots |
| The SSD is missing in Windows | Drive not initialized or seated badly | Check BIOS, reseat the drive, initialize it in Disk Management |
| Front USB or audio does not work | Header not connected | Connect the front panel cables to the correct headers |
If you are stuck, remove everything except the CPU, one RAM stick and the graphics card, and test with that minimal setup. Add parts back one at a time.
Common Mistakes First-Time Builders Make
- Plugging the monitor into the motherboard instead of the graphics card.
- Forgetting the 8-pin CPU power connector.
- Leaving the protective plastic film on the cooler.
- Putting RAM in the wrong slots and losing dual channel.
- Installing the I/O shield after the motherboard, or forgetting it.
- Using too many standoffs or one in the wrong place, which can short the motherboard.
- Over-tightening screws or forcing connectors.
- Buying a case that cannot fit the graphics card or cooler.
- Not updating the BIOS for a new CPU on an older motherboard.
- Skipping XMP or EXPO so the RAM runs slow.
- Using one power cable with a split for a power-hungry graphics card.
- Poor airflow from fans pointing the wrong way.
Upgrade Path and Maintenance
One of the best parts of a custom PC is easy upgrading.
- Plan for a graphics card upgrade by choosing a power supply with headroom.
- Pick a motherboard socket with future CPU support.
- Leave free M.2 slots and drive bays for more storage.
- Clean dust filters and fans every few months.
- Check cable connections after a few weeks, as vibrations can loosen them.
- Keep the BIOS and drivers up to date, but do not update during an important project.
Ready to Buy? Start Here
If this guide helped you decide what to look for, these links take you to the next step.
Gear for this guide
- Thermal paste on Amazon
- PC screwdriver kits on Amazon
- Anti-static wrist straps on Amazon
- Cable ties for PC builds on Amazon
As an Amazon Associate we earn from qualifying purchases. Prices and availability are shown on Amazon.
Anti-Static and Workspace Habits for a Calm Build
A clean, organised table makes assembly far less stressful. Set these habits up before you open the first box, and the later steps flow more smoothly.
- Work on a large, flat, non-carpeted surface with good light. A wooden table or a bare floor tile suits better than a rug.
- Keep the parts in their anti-static bags until you need them. Touch an unpainted metal part of the case now and then to discharge static, or use a wrist strap if you own one.
- Hold boards by the edges, and never press on chips or the gold contacts.
- Use a small tray or a magnetic dish for screws, and sort them by size. Case, motherboard and drive screws often differ.
- Keep the manuals for the board, case and power supply within reach. Their diagrams show header positions that vary between models.
- Take photos as you go. A picture of the cable layout before you close the side panel helps later if something needs to be fixed.
Avoid working while a drink sits on the same table, and keep pets and small children away from loose parts. None of this is complicated, but these small habits remove most of the avoidable accidents.
A Short Glossary of Build Terms
Parts lists and guides throw many abbreviations at newcomers. Here are the ones that appear most often.
- Socket: the slot on the motherboard that holds the processor. The socket type must match the processor exactly.
- Chipset: the group of controllers on the board that decides which ports and features are available.
- Form factor: the size standard for a board or case, which decides what fits inside what.
- Headers: small pin groups on the board for front-panel buttons, fans and USB ports.
- Thermal paste: the material between the processor and cooler that helps heat move across. Many coolers arrive with some applied, so read the cooler’s instructions.
- BIOS or UEFI: the low-level setup screen you reach when the machine powers on, where you check that the parts are recognised.
- Modular power supply: a unit with detachable cables, so you connect only what you use.
- Bottleneck: one part limiting the performance of another.
If the instructions from a part maker disagree with a general guide, follow the maker. They know the exact torque, orientation and connector layout of their product. For anything involving mains power, such as opening a power supply or working on a wall outlet, leave it to a qualified person and never open the supply case yourself. Keep the build unplugged from the wall whenever you handle internal parts, and switch the supply off before moving any cable.
Frequently Asked Questions
Is it hard to build a gaming PC?
It is manageable for most people who follow instructions carefully. The parts are keyed so they fit in one way. Take your time and check the manuals.
How long does it take to build a PC?
Most first-time builders need two to four hours for assembly, plus time for Windows and drivers.
Is building cheaper than buying a prebuilt?
Not always. Sales can make prebuilts competitive. Building gives you control over parts quality and upgrade paths.
Do I need thermal paste?
Many coolers come with paste pre-applied. If not, apply a small amount between the CPU and the cooler.
Which part should I buy first?
Choose the graphics card and processor first, then pick a compatible motherboard, memory, power supply and case around them.
What if my PC does not turn on?
Check the power supply switch, the 24-pin and CPU power cables, and the front panel power switch connector. Then reseat the RAM and graphics card.
Do I need to update the BIOS?
Only if your motherboard needs it to support your CPU, or the maker recommends a stability update. Some boards have BIOS flashback for updates without a CPU.
Can I reuse parts from my old PC?
Yes, if they are compatible. Storage drives, cases and power supplies are common reuse candidates, but check the age and connectors.
Planning the Build Around Your Actual Games
The parts list in this guide is balanced on purpose, but your build should start from the games on your own screen, because different titles lean on different hardware. A sprawling open-world game with long draw distances asks the processor to feed the graphics card a constant stream of world data, and it punishes slow storage with texture pop-in as you travel. A competitive shooter at high refresh rates is often limited by the processor once the graphics settings are sensible, because the card finishes each small frame quickly and waits for the next simulation step. Simulation and strategy titles — the ones with thousands of units or a physics-heavy world — can spend most of their budget on the processor and memory while the graphics card idles. Before you finalise a list, name your three most-played games, check what hardware they stress, and let that order your spending. It is the difference between a balanced spreadsheet and a machine that feels fast where you actually play.
Resolution and refresh rate decide the graphics budget
The single most useful planning question is what your monitor shows, or what the monitor you intend to buy will show. Driving a high-refresh esports display is a different job from driving a large, sharp 4K panel, and the graphics card that is generous for one is merely adequate for the other. Decide the target first — resolution, refresh rate, and the settings level you honestly care about — and size the card to that target with a little headroom, rather than buying the strongest card in reach and discovering the display cannot show what it renders. The same logic runs in reverse for upgraders: if a new card is planned alongside a future monitor, say so in your notes, because it changes which purchase should come first and how much power supply and case clearance to leave for it.
Where the money quietly leaks
First-time builders rarely overspend on the famous parts; they overspend on the invisible ones. A premium motherboard whose extra features never get used, a power supply far beyond the build’s needs bought out of vague anxiety, decorative extras purchased before the core is proven — each is small, and together they can equal the price step between graphics card tiers. The discipline that works is a two-column list: parts the game feels, and parts that support them. Fund the first column properly, buy the second column sensibly from reputable makers, and let appearance upgrades wait until the machine has booted, played and proven itself. A build finished a month later with extras you chose calmly beats a build that arrives all at once with a weaker card inside a prettier case.
Assembly Judgement Calls the Steps Do Not Cover
Step-by-step assembly looks mechanical, and mostly it is, but a handful of judgement calls separate a calm build from a frustrating one.
Cable routing is a cooling decision
Route cables as if air were a part you had to install, because it is. A bundle of cables parked in front of an intake fan, or a graphics card power lead draped across a heatsink’s airflow, will not stop the machine working — it will simply run warmer and louder for its entire life, and you will never quite know why. Take the extra ten minutes while the side panel is off: use the case’s channels and tie points, keep the main chamber as empty as you can, and check from the front that each fan has a clear path. Future you, swapping a drive at midnight, will also appreciate a machine whose cables were routed by someone who expected to return.
How tight is tight enough?
New builders fear both directions: screws left loose and screws forced. The honest rule is snug, then stop. Motherboard standoffs, cooler mounts and card brackets need firm, even contact, not leverage. Cooler mounting pressure in particular should be applied in a cross pattern, a little at a time on each corner, so the cold plate settles flat on the processor rather than tilting. If a screw resists from the first turn, back it out and start it again — cross-threading a standoff is a small mistake that becomes a large one only when it is forced. And when a connector refuses to seat, look before you push: most PC connectors are keyed, and resistance is usually the parts telling you the orientation is wrong.
Test outside the case when access is tight
In a small case, or with a large cooler that will block half the board once fitted, a brief bench test is worth the effort: processor, cooler, one memory stick, graphics card and power on a non-conductive surface, connected to a display. Two minutes of proof that the core posts and shows an image is far cheaper than diagnosing the same fault through a keyhole after full assembly. It also separates assembly faults from part faults cleanly, because a core that booted on the bench and fails in the case has an installation problem — a standoff in the wrong place, a cable unseated during the move — and you can hunt it with confidence instead of suspicion.
The First Week With a New Build
A successful first boot is the start of the build, not the end. The first week is when you learn whether the machine is merely working or genuinely well.
Burn-in without the drama
Run the games you actually play for real sessions, and keep an eye on temperatures and fan behaviour while you do. You are looking for patterns, not records: a processor that spikes briefly is normal, one that climbs and stays at its limit while the fans roar suggests a cooler seating or airflow question worth answering now rather than in summer. Check that the machine sleeps and wakes cleanly, that every USB port you care about works, that audio lands on the right device, and that the front-panel connectors you wired in a hurry all do their jobs. Small faults found in week one are a five-minute reseat; the same faults found in month three have become folklore you live around.
Fan curves: the cheapest quality-of-life upgrade
Default fan behaviour is set to be safe, not pleasant, and it often produces a machine that surges audibly at every small load. Ten minutes in the BIOS or the maker’s utility can reshape it: a gentle floor speed that keeps air moving silently, a gradual rise through the temperatures your games actually produce, and full speed reserved for genuine heat. Tie case fans to a sensor that reflects real load rather than one that jumps with every brief processor spike, and the surging stops. This is also the moment to decide what the machine should sound like at your desk at midnight, because a gaming PC you can hear thinking is a gaming PC you will quietly resent.
Backups and recovery before you need them
While the install is clean, make the recovery tools future you will want: a system image or at least a restore point after drivers and core software are in, your game libraries’ locations noted, and screenshots or exports of your BIOS settings once tuned. Store the motherboard’s driver essentials and a bootable installer on a spare USB stick that lives in a drawer, labelled. None of this is exciting, and all of it converts a future bad evening — a failed update, a dying drive — from a rebuild into a restore.
Upgrading Later: The Sensible Order
A good first build is a platform, and upgrades land best when they follow the bottleneck. Storage is the easiest early win: adding a second drive for the game library removes the delete-and-redownload shuffle without touching anything delicate. Memory is next when multitasking or newer titles press the original capacity — match the existing kit’s speed and timings, and remember the dual-channel lessons from the planning stage. A graphics card upgrade is the headline act and the one that demands homework: check physical clearance, power supply capacity and connector types, and whether your processor will hold the new card back at your resolution. Processor upgrades sit last in the order, because they may tie you to the same socket’s generation or force a motherboard and memory change with it — which is really a new build wearing the old one’s case. Whichever step you take, change one thing, test the games, and only then judge. Builders who swap three parts at once and meet a fault have bought themselves a mystery; builders who swap one have bought an answer.
More First-Build Questions
How long should a first build take?
Plan for an unhurried afternoon rather than a race. Experienced builders assemble quickly because they have made their mistakes already; a first build done slowly, with the manual open and each cable checked twice, commonly takes a few hours including software. Fatigue causes more errors than ignorance does, so a build paused overnight with the panel on is better than a build finished at 2 a.m. by a tired pair of hands.
Do I need to buy extra cables or thermal paste?
Usually not. Cases, power supplies and coolers arrive with the cables and thermal material the standard assembly needs, and most coolers come with paste pre-applied or included. The exceptions are extra storage drives in some cases and unusually long cable runs in large cases. Read what is in each box before ordering duplicates; a drawer of unneeded spares is a rite of passage you are allowed to skip.
What should I do with the boxes and spare parts?
Keep the motherboard, graphics card and power supply boxes at least through the warranty-friendly early months, along with spare cables, screws and brackets in one labelled container. Returns and warranty claims are smoother with original packaging, and the small parts you keep are exactly the ones a future upgrade will ask for. Photograph your parts’ serial labels before assembly if reaching them later means dismantling the machine.
Is it normal for a new PC to smell or sound different at first?
A faint warm-electronics smell in the first sessions is common as materials heat for the first time, and fan behaviour settles once curves are set and dust filters are in place. What is not normal is a burning smell, a grinding or clicking fan, or repeated shutdowns under load — power off, open the panel, and look for the obvious: a cable resting against a fan blade explains more new-build noises than any component fault.
Teaching Yourself to Diagnose, Not Just to Assemble
The skill that pays for the whole life of the machine is not assembly — it is calm diagnosis. Parts fail rarely; connections, settings and software cause most faults, and they announce themselves in patterns. A machine that fails only under game load is telling a different story from one that fails at the desktop: load faults point at heat, power delivery or an unstable setting, while idle faults point at drivers, memory training or a device misbehaving on wake. A fault that began the day something changed almost always belongs to the thing that changed, however unrelated it seems. Keep a tiny log — date, symptom, what you altered — in a text file on the machine itself. Three entries across a year will teach you your own PC’s habits better than any forum thread, and they turn a support question from a vague worry into a story an experienced helper can actually answer.
Learn also to love the minimum boot: processor, one memory stick, integrated or single graphics, nothing else. Reducing a sick machine to its smallest working form, then adding parts back one at a time, is the entire method of professional troubleshooting compressed into one habit. It feels slow. It is, in practice, the fastest road to certainty, and it works on a machine you built because you know exactly how it comes apart — which was, quietly, one of the best reasons to build it yourself in the first place.
A closing habit: document your own machine
Before the build fades from memory, write its biography on one page: the parts and when they were bought, the BIOS settings you changed and why, the fan curve you settled on, the cable you had to route twice. Store it with the machine’s files and a photo of the tidy interior. Upgrades, warranty claims and troubleshooting all start from that page, and the builder who wrote it — past you, who knew this exact PC better than anyone — becomes the most helpful expert you will ever consult about it.
Building With Another Person — or Teaching a Child
Many first builds are shared projects, and the two-builder version has its own technique. Agree on roles before the first box opens: one pair of hands inside the case, one person reading the manual aloud, fetching parts and keeping the screws sorted. Two pairs of hands in a small case cause more dropped screws and crossed cables than any single mistake. Swap roles between stages so both people learn, and let the less experienced person seat the memory and the graphics card — the two satisfying, decisive moments of the build — with the other watching and talking them through it. If the second builder is a child, the build doubles as a wonderful lesson in how computers actually work: name each part by the job it does, let them hold the processor by its edges like a tiny city, and insist on the same careful habits you would use alone. The machine that results will be remembered as much for the afternoon as for the frame rates, and a young builder who seated the RAM themselves will never again think of a computer as a sealed magic box.
Photograph as you go
Whichever way you build, take phone photos at each stage: the empty case, the board populated, the cabling before the panel closes. Photos cost seconds and pay out twice — once when a cable’s original home is forgotten during later cleaning, and once when a support forum or a friend asks the single most useful diagnostic question there is: what does it look like inside? A builder with photographs answers questions in minutes that otherwise take days of description.
Finally, resist judging the build on its first evening. A new machine needs its updates finished, its libraries installed, its fan curves shaped and its owner settled before it shows its true character. Give it the first week described above, keep the notes, and then decide what — if anything — deserves changing. Most first builds judged fairly at the end of that week turn out to need nothing at all, which is the quiet success this guide has been aiming at from the first parts list: a PC that simply plays, built by someone who now understands exactly why.
That understanding compounds. The second machine you build — for a friend, a sibling, a child of your own — will take half the time and twice the confidence, and the upgrade you attempt in three years will feel like maintenance rather than surgery. Every expert builder you have ever watched on a video started with a first afternoon, a manual, and a small pile of screws they were afraid of losing. You have now done the same thing they did, and the machine humming beside you is the proof.
Keep the one-page biography somewhere you will actually find it, keep the spare-parts container labelled, and keep the habit of changing one thing at a time. Do those three small things and this build will not just serve you well — it will keep teaching you, calmly and cheaply, for every year it sits under your desk.
And when a friend inevitably asks whether building was worth it, you will have the honest answer ready: the savings were real but modest, the performance per part was better than a shelf machine, and the true return was knowing your own PC — every cable, every setting, every sound it makes — well enough that no fault it ever develops can frighten you for long.
So close the case, tidy the desk, and load the game you built it for. Everything in this guide — the planning, the patience, the testing — was in service of that ordinary, wonderful moment.
The next time you open the panel, it will be as an owner maintaining a machine you understand, not a beginner hoping for the best — and that shift in confidence is the real product of a first build.
Enjoy it — you built it.
Bottom Line
Building a gaming PC comes down to preparation. Choose your target resolution and refresh rate, spend most of the budget on the graphics card, pick a quality power supply, and check compatibility on every part before ordering. Assemble the motherboard components outside the case, connect every power cable, plug the monitor into the graphics card, and set up the BIOS and drivers. If something goes wrong, strip the build down to the minimum and add parts back one at a time. The first build is the hardest, and every later upgrade becomes easy.
Related Reading
- Prebuilt vs Custom Gaming PC
- How Many Watts Does a Gaming PC Need?
- Gaming CPU Buying Guide
- Motherboard Buying Guide
- SSD Buying Guide
- Best PC Building Tool Kits
- All Desktop PC guides