Where to buy
Check the latest price, availability and delivery on Amazon. Orders are placed on Amazon. We may earn a commission from qualifying purchases.
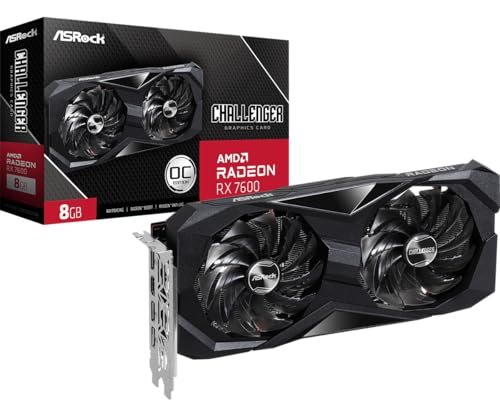
- Best first build: ASRock Radeon RX 7600 Challenger 8GB OC — Build 1’s anchor card — Check on Amazon
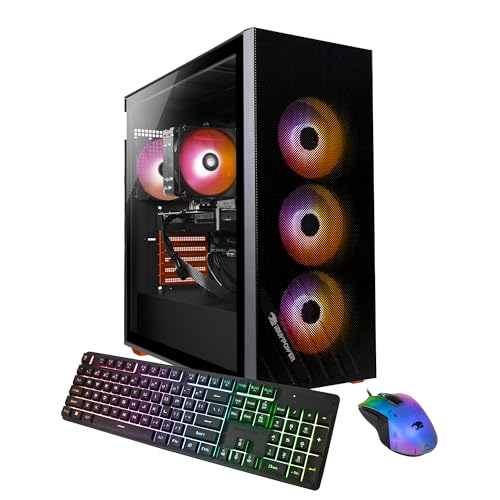
- IPASON Gaming PC Desktop, Ryzen 5 5600 and RTX 3060 12GB (the ready-made benchmark) — Check on Amazon
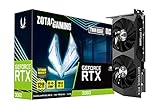
- ZOTAC Gaming GeForce RTX 3060 Twin Edge OC 12GB (the anchor card for the upgrader’s build) — Check on Amazon
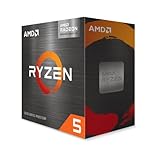
- AMD Ryzen 5 5600G with Radeon Graphics (the anchor chip for the start-now build) — Check on Amazon
- Intel Core i5-14400F build — linked via Build 1’s RX 7600 card — Check on Amazon
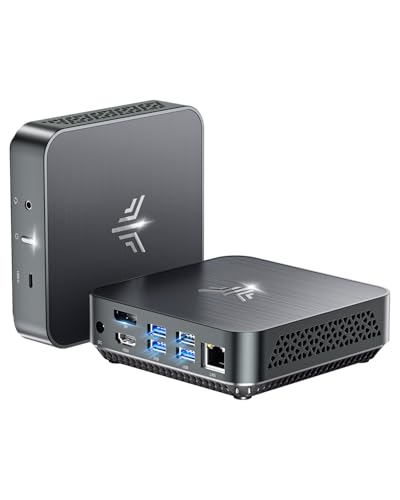
- ZER-LON Gaming PC, Ryzen 5 5500 and RTX 4060 (the ready-made machine to watch for a sale) — Check on Amazon
Read the full guide ↓
Disclosure: As an Amazon Associate, reviewstook.com earns from qualifying purchases. Links to Amazon on this page are affiliate links; they cost you nothing extra. Listing details such as price and availability change often, so check the current Amazon listing before you buy.
Building your first gaming PC is mostly a confidence problem, and this guide is written to remove it. The parts below are ordinary, standard components that slot, screw and click together in a predictable order — no soldering, no specialist tools beyond a screwdriver, and nothing a careful first-timer cannot assemble in one evening. What a beginner needs protection from is not the screwdriver work; it is the shopping. So before the picks, the plain truth about this year’s market: parts prices are inflated by a shortage, even a basic 16GB memory kit sits in a noticeably higher tier than it used to on Amazon, and the classic first build from older guides — built around a new RTX 3060 12GB — does not fit under $700 when checked honestly, part by part, before Windows. This guide will not pretend otherwise by quietly swapping in a weaker card.
Here is what does fit, and every path is complete — nothing here is a barebone box waiting for parts it doesn’t mention, nothing is a renewed or refurbished unit, and nothing is soldered shut against future upgrades. Four of the six picks are parts lists you assemble yourself: an RX 7600 build that can fit this budget when you check price on Amazon for the card on a good day, a 5600G build that games today and accepts a card later, and two builds — the RTX 3060 build and the Intel build — that only duck under $700 if you carry over a memory kit, SSD and case from an older PC, which the reviews explain openly. The other two picks are finished prebuilts: an IPASON machine that currently beats building on value, and a ZER-LON machine worth buying only when a sale brings it into this budget. If you have never built before, read the glossary and the first-evening walkthrough as carefully as the reviews.
In this guide
Quick Picks
Short on time? Each row names a kind of first-time buyer and the path that suits them. Each review itemizes the hardware and its budget fit; Windows is handled openly in each build, and linked picks point you to check price on Amazon.
| Buyer type | Pick | Why it stands out | Link |
|---|---|---|---|
| Best first build | RX 7600 + Ryzen 5 5500 parts build | The only all-new build with a proper graphics card at the ceiling — check price on Amazon | Check on Amazon |
| Best value, zero assembly | IPASON Gaming PC (Ryzen 5 5600, RTX 3060 12GB) | Windows included — a ready-made value pick that can undercut the parts to match it; check price on Amazon | Check on Amazon |
| Best if you own an old PC | RTX 3060 12GB + Ryzen 5 5600X parts build | Well above this budget all-new, but it can fit under $700 if your old memory, SSD and case carry over — check price on Amazon | Check on Amazon |
| Best start-now build | Ryzen 5 5600G parts build | A lower-cost start today, plays esports and older games, PSU already sized for a future card — check price on Amazon | Check on Amazon |
| Best for gaming plus streaming | Intel Core i5-14400F + RX 7600 parts build | Ten cores so game and stream don’t fight; it can fit this budget if you bring your own DDR4 and SSD | GPU listing under Build 1 |
| Best sale watch | ZER-LON Gaming PC (Ryzen 5 5500, RTX 4060) | A newer-generation machine that enters this budget only on sale — buy only when it falls under $700, never above | Check on Amazon |
How These Picks Were Chosen
Every pick in this guide was chosen on hardware, platform and upgrade path first. Each review names the exact parts so you can check the current total yourself, and because listing prices change often, each linked pick points you to check price on Amazon before you buy. Where a build only fits this budget in a specific situation — reusing parts you already own, or waiting for a sale — the review says so plainly instead of presenting it as an everyday fit.
Three accounting rules apply to all six picks, and a beginner should know them because most build guides break at least one. First, a build’s total means the whole machine: processor, motherboard, memory, storage, power supply, case, and a cooler wherever the processor doesn’t bundle one. A parts list that “forgets” the power supply is how a build in this budget quietly becomes a much more expensive checkout. Second, Windows is treated as its own open line. Check the current price for a new Windows 11 Home license at Microsoft’s store or on Amazon before you buy; the two prebuilts include it, and a do-it-yourself build either transfers an eligible license from a PC you are retiring, runs Windows unactivated with the watermark and locked personalization that involves, or pays that line. Third, performance is described in plain class terms — 1080p high settings, 1080p low, upscaling territory — because those are claims the hardware tiers genuinely support; no per-game frame-rate figures are printed, because we did not measure any.
One platform decision shapes the whole guide: every parts build sits on a DDR4 platform — AMD’s AM4 socket or Intel’s LGA1700 with a DDR4 board — because DDR5 memory has inflated even harder and sits in a much higher tier than DDR4. No honest $700 build survives that DDR5 memory premium, so DDR5 is not in this guide.
The Words You Will See, in Plain English
Thirteen terms explain nearly everything in the reviews below.
- Graphics card (GPU). The part that draws the game. In most of these builds it is a separate card that clicks into the motherboard; it does more for game performance than any other part, and your monitor plugs into it.
- Processor (CPU). The part that runs the game itself — the logic, the physics, the instructions — and everything else the PC does. It sits under a small cooler on the motherboard.
- Integrated graphics. A small graphics capability built into some processors, enough for esports and older games at low settings. A processor with it can show a picture through the motherboard’s sockets; one without it shows nothing until a graphics card is installed. The 5600G in Build 4 has it; the 5500, 5600X and 14400F in Builds 1, 3 and 5 do not.
- Motherboard. The board everything plugs into. It decides which processors and memory type fit, so it is bought to match the processor.
- Memory (RAM). The PC’s short-term workspace, sold as sticks that click into slots beside the processor; these builds use DDR4. Buy it as a matched pair — two 8GB sticks rather than one 16GB — because a pair runs in “dual-channel” mode and is faster, a difference integrated graphics feel most of all.
- Storage (SSD). Where games and Windows live permanently. Every build here uses a 1TB NVMe SSD, a small stick that screws directly onto the motherboard — no cables, far faster than an old spinning drive.
- Power supply (PSU). The box that turns wall power into the voltages the parts need, measured in watts. A named unit with a published wattage — like the 650W Gold unit in the parts builds — is also your upgrade headroom: it decides whether a stronger card fits later.
- VRAM. The graphics card’s own private memory, separate from system RAM. More of it (the RTX 3060’s 12GB against the RX 7600’s 8GB) buys staying power as games’ textures grow.
- PCIe slot. The long slot the graphics card clicks into. Newer generations are faster; the beginner rule is that the card and board in each list below are already matched.
- BIOS. The motherboard’s built-in starter software. Occasionally a board needs a BIOS update to recognize a newer processor — Build 5 flags the one case here where it matters.
- Upscaling (DLSS and FSR). A trick where the card renders the game at a lower resolution and reconstructs a sharper picture — DLSS on NVIDIA cards, FSR on AMD cards. One honest example of the scale: DLSS’s Quality mode showing a 1440p picture is actually rendering about 1707×960 internally and rebuilding the rest. A legitimate way to gain smoothness.
- Prebuilt. A finished desktop assembled by a company, with Windows installed — Builds 2 and 6 here. You trade choosing your own parts for skipping the assembly.
- Barebone, renewed, and soldered. Three labels worth knowing precisely because none of the six picks here carries any of them. A barebone is a half-finished machine sold without memory, storage or Windows; a renewed unit is refurbished second-hand; soldered parts are fixed to the board and can never be upgraded. Every pick here is a complete parts list of standard, replaceable components or a complete new prebuilt — deliberate, because all three labels are poor places for a first-timer to start.
The 6 Best Gaming PC Builds Under $700 for Beginners
Build 1: The RX 7600 Build — Ryzen 5 5500 (Best First Build)
Who it suits: A first-time builder starting from an empty desk who wants a complete, all-new gaming PC at the ceiling — and who can buy the graphics card on its good day rather than a fixed day.
If you build one machine from this guide, build this one. The ASRock Radeon RX 7600 Challenger 8GB OC is a dual-fan card from AMD’s current budget generation, with a 2,695 MHz boost clock and 8GB of its own memory, and at 1080p it plays in the same class as the RTX 3060 — quicker in many traditional games, behind once ray tracing and DLSS enter the picture, with FSR as its own upscaling reserve. The Ryzen 5 5500 — check price on Amazon — includes its cooler in the box, deleting a line from the budget. Its compromises are stated, not hidden: the older PCIe 3.0 connection and half the 5600X’s cache cost a few percent in processor-heavy games, and the RX 7600’s narrower PCIe x8 connection is why the list pairs it with the PCIe 4.0-capable B550 board below rather than a cheaper older board.
- Graphics card: ASRock Radeon RX 7600 Challenger 8GB OC — check price on Amazon
- Processor: AMD Ryzen 5 5500 (Check on Amazon) — cooler included in the box
- Motherboard: MSI PRO B550M-P
- Memory: TEAMGROUP Elite DDR4-3200 16GB (2x8GB)
- Storage: Crucial P3 Plus 1TB NVMe
- Power supply: MSI MAG A650GN II 650W 80+ Gold
- Case: Antec NX200 M
- Budget fit: an all-new build that can fit under $700 when the card’s live price cooperates — check price on Amazon before you buy
- Windows: check the current price for a new license, or transfer an eligible license at no extra cost
This is a build in this budget on the days the card’s live price cooperates, and it can slip above the budget on the days it doesn’t. The beginner-friendly way to shop it: decide your walk-away ceiling for the card before you open the listing, check price on Amazon, and let that purchase wait for a day when the live price fits the budget. In exchange you get a balanced machine: high settings at 1080p in mainstream games, high-refresh esports play, and a power supply with real headroom for a stronger card later.
- The only all-new build here with a proper graphics card at the ceiling — full 1080p performance class.
- Every part is a named, standard component you can replace or upgrade individually.
- The included cooler and 650W Gold power supply keep the budget and the upgrade path simple.
Honest limitation: The budget fit holds only when the card’s live price cooperates; when the RX 7600 is priced in a higher tier, the same list moves above this budget, and 8GB of VRAM will age faster than the 3060’s 12GB.
Choose it if you are building new and can time the graphics card purchase. Skip it if you must order everything today at whatever price is showing — that buyer is better served by Build 2’s finished machine.

Build 2: The Benchmark — IPASON Prebuilt with RTX 3060 12GB (Best Value, Zero Assembly)
Who it suits: A beginner whose real goal is the most gaming for $700 or less, happy to let a factory do the assembly.
Think of this machine as the control group the other five picks are measured against — and the reason a build guide is recommending something you don’t build. Inside is a Ryzen 5 5600, a stronger gaming processor than Build 1’s 5500 with the faster PCIe 4.0 connection and the full cache, alongside an RTX 3060 12GB, 16GB of DDR4-3200 memory, a 1TB NVMe SSD, a named 550W power supply and Windows 11 Home already installed. Check price on Amazon for this ready-made machine. Hold that against Build 3’s arithmetic, where the same class of card priced from parts reaches well above this budget before Windows: this finished machine delivers the tier’s reference card, a better processor than our top build, and an operating system, for less than the parts to match it — because prebuilt makers buy memory and cards at contract prices the retail market is not offering you.
What you give up is choice. The listing notes the GPU brand may vary, so the specific 3060 inside is the maker’s pick, not yours. The motherboard and case are the maker’s choice too, which matters in two years when you want to know whether a bigger card fits or the board supports a faster processor — questions a parts list answers in advance, a prebuilt only when you open it. There is also documented drift on this listing family: the same product code has appeared wearing an RTX 4060 headline in a reseller’s specification sheet, so check the configuration in your cart and again on the box when it arrives. None of that overturns the arithmetic; it defines its cost.
- RTX 3060 12GB with a Ryzen 5 5600 — the reference graphics card of this tier with a full-strength processor.
- Windows 11 Home included, which is a separate license cost every parts build in this guide has to answer separately.
- A named 550W power supply and a full 1TB SSD — no silent downgrades in the fine print.
Honest limitation: GPU brand may vary, the board and case are unspecified, and its value depends on the live price you find — when it is priced in a higher tier, the advantage over Build 1 shrinks to the Windows license and skipped assembly.
Choose it if performance for the money is the whole question and building is a means, not the hobby. Skip it if picking your own parts and knowing exactly what is inside are the point — that is what Builds 1, 3 and 5 sell, and in this market you pay for it.

Build 3: The RTX 3060 12GB Build — Ryzen 5 5600X (Best If You Own an Old PC)
Who it suits: The beginner who isn’t quite starting from zero — someone with an aging DDR4 desktop whose memory, SSD and case are still good.
This is the build older guides promise in this budget, and the headline is one a beginner deserves before ordering rather than after: from all-new parts, it does not fit. The ZOTAC Twin Edge OC is a compact dual-fan RTX 3060 12GB — check price on Amazon. Other new RTX 3060 12GB cards on Amazon, such as an ASUS Phoenix card mentioned here without a link, sit in a similarly high tier for a card of this class. Check price on Amazon for the Ryzen 5 5600X as well. Add Build 1’s platform parts and the all-new total sits well above this budget. Any guide showing this machine under $700 with all-new parts is pricing a card from a market that has closed.
- Graphics card: ZOTAC GeForce RTX 3060 Twin Edge OC 12GB — check price on Amazon (other new RTX 3060 12GB cards on Amazon sit in a similarly high tier)
- Processor: AMD Ryzen 5 5600X (Check on Amazon)
- Motherboard: MSI PRO B550M-P
- Memory: TEAMGROUP Elite DDR4-3200 16GB (2x8GB)
- Storage: Crucial P3 Plus 1TB NVMe
- Power supply: MSI MAG A650GN II 650W 80+ Gold
- Case: Antec NX200 M
- Budget fit: well above this budget all-new; it can fit under $700 when you reuse your DDR4 kit, SSD and case — check price on Amazon
- Windows: check the current price for a new license, or transfer an eligible license at no extra cost
That reuse fit is why this build is here. A DDR4 memory kit, an NVMe SSD and a case are exactly the parts that survive from a 2019-era gaming PC — and exactly the lines this shortage has inflated the most. Keep yours, buy the card — check price on Amazon — plus the processor, board and power supply, and the reuse total can land under the ceiling, with the strongest gaming processor and the most VRAM in this guide. Two beginner cautions belong to this pick. Some 5600X listings include a cooler and some don’t; check yours, and if none is included, budget separately for a basic budget-tier tower cooler on top of the build above. And be sure the premium buys what you want — 12GB of VRAM and DLSS matter more in three years than in three months, so a year of esports is served as well by Build 1 for less.
- The tier’s reference card: 12GB of VRAM, DLSS upscaling and the class’s strongest ray-tracing support.
- The 5600X is the strongest gaming processor in this guide, on a PCIe 4.0 platform.
- For anyone reusing memory, storage and a case, it is the best machine here under $700.
Honest limitation: From new parts it misses this budget by a wide margin, full stop. It earns its place because the reuse path is real and common — not because the all-new total can be wished down.
Choose it if you have DDR4 memory, an SSD and a case worth keeping, or you value the 12GB card enough to pay this market’s price. Skip it if your desk is empty — Build 1 or the IPASON will game as well at 1080p for far less.
Build 4: The Start-Now Build — Ryzen 5 5600G, Graphics Card Later (Best on a Split Budget)
Who it suits: A beginner whose budget arrives in two installments — some now, the rest in a few months — who wants a working, gameable PC from the first.
The 5600G is the one processor here with graphics worth the name built in: six cores plus Radeon Vega 7 integrated graphics that handle esports titles and older games at 1080p on low settings, with a cooler in the box. Check price on Amazon for it — stock is thin and it is sometimes unavailable from Amazon itself, with third-party sellers carrying it, so check availability on the live listing rather than assuming it is in stock. The build around it spends properly on everything a future card will want: the same B550 board, 1TB SSD and 650W Gold power supply as Build 1 — roughly double the wattage this machine needs today — exactly what an RX 7600 or RTX 3060 will want tomorrow.
- Processor: AMD Ryzen 5 5600G with Radeon Vega 7 graphics — cooler included; check price on Amazon
- Motherboard: MSI PRO B550M-P (pick a board with an HDMI or DisplayPort socket; integrated graphics need one)
- Memory: TEAMGROUP Elite DDR4-3200 16GB (2x8GB); the matched pair matters doubly here, because the integrated graphics share this memory
- Storage: Crucial P3 Plus 1TB NVMe
- Power supply: MSI MAG A650GN II 650W 80+ Gold
- Case: Antec NX200 M
- Budget fit: a lower-cost start today that fits well within this budget; the all-in cost rises above this budget once a graphics card joins it — check price on Amazon
- Windows: check the current price for a new license, or transfer an eligible license at no extra cost
The honesty note lives in that second total. Staging is a financing decision, not a saving: the finished machine costs more than Build 1 bought in one go, because the 5600G carries a premium for graphics you will eventually stop using, and its compromises stay after the card arrives — half the 5600X’s cache and a PCIe 3.0 connection that slightly constrains a narrower-link card like the RX 7600. What the premium buys is time: a working PC now instead of no PC for four months. One shopping rule is specific to this build — buy the memory as a matched 2x8GB pair even though a single stick looks cheaper, because integrated graphics run on memory bandwidth, and a single stick is the one false economy that visibly slows this exact machine.
- A complete, usable gaming PC today at the lowest entry cost in this guide — check price on Amazon.
- Board, storage and power supply are already final; the graphics card is the only staged part.
- The integrated graphics keep working as a backup display output even after a card is installed.
Honest limitation: Integrated graphics mean 1080p low settings in undemanding games, not the high settings of Builds 1 to 3 — and the completed machine costs more in total than Build 1 bought in one go.
Choose it if your budget genuinely arrives in stages. Skip it if you already hold the full budget; splitting a budget you have only adds cost.
Build 5: The Intel Build — Core i5-14400F and RX 7600 (Best for Gaming Plus Streaming)
Who it suits: A beginner who plans to game and stream, record, or keep a second workload running beside the game — the buyer who feels core count.
Intel’s answer at this tier is shaped differently: the Core i5-14400F runs six performance cores and four efficiency cores — ten cores, sixteen threads — boosting to 4.7 GHz, with a stock cooler in the boxed version. For gaming alone it trades blows with the Ryzen processors here; with a stream, a browser full of tabs and a recording alongside, those extra cores are the difference between a machine that notices and one that doesn’t. The board is the one part a beginner must get exactly right: LGA1700 accepts either DDR4 or DDR5 depending on the motherboard, and this build specifies the MSI PRO B760M-P DDR4, because the near-identically named DDR5 version would force a DDR5 memory kit from a much higher tier that sinks the budget. Read the listing title for “DDR4” before you order.
- Processor: Intel Core i5-14400F, 10 cores (6P+4E), up to 4.7 GHz — a mid-range pick for this tier; check the live listing price before you buy
- Motherboard: MSI PRO B760M-P DDR4 (the DDR4 version; the DDR5 board of the same name breaks the budget)
- Graphics card: ASRock Radeon RX 7600 Challenger 8GB OC — check price on Amazon
- Memory: TEAMGROUP Elite DDR4-3200 16GB (2x8GB)
- Storage: Crucial P3 Plus 1TB NVMe
- Power supply: MSI MAG A650GN II 650W 80+ Gold
- Case: Antec NX200 M
- Budget fit: above this budget all-new; it can fit under $700 when you reuse your DDR4 kit and SSD — check price on Amazon
- Windows: check the current price for a new license, or transfer an eligible license at no extra cost
Intel’s platform premium — a board dearer than the B550 and a processor dearer than the 5500 — pushes the all-new total past Build 1’s and past the ceiling. The reuse path fixes it for DDR4 upgraders: bring your memory kit and SSD and the build can fit this budget with the strongest multitasking processor in the guide. Two platform notes. A B760 board that has sat in a warehouse may need a BIOS update before it boots a 14th-generation chip, and this board has no BIOS flashback button, so buy from a seller whose listing states current firmware, or be ready to borrow a processor for the update. And the F in 14400F is literal: no integrated graphics at all, so the machine shows nothing until the graphics card is installed and the cable is plugged into the card — not the motherboard. It is the most common “my new PC is dead” panic there is, and it is just a cable in the wrong socket.
- Ten cores and sixteen threads: the only build here that shrugs at game-plus-stream workloads.
- An LGA1700 DDR4 board keeps a foot in Intel’s current platform without the DDR5 memory bill.
- Same card, power supply and storage as Build 1, so the upgrade path is identical.
Honest limitation: All-new, it is an above-budget build in an under-$700 guide — it earns its place on the reuse path and the streaming use case, and all-new buyers without old DDR4 should take Build 1 instead.
Choose it if you stream or multitask heavily and own DDR4 worth reusing. Skip it if you only game and are buying every part new; the Ryzen build gives the same frames for less.
Build 6: The Sale Watch — ZER-LON Prebuilt with RTX 4060 (Best If You Can Wait for a Dip)
Who it suits: A patient beginner who wants the newest graphics generation here and will let a price alert do the shopping.
The RTX 4060 is the card a $700 guide would lead with in a normal market: a generation newer than the 3060, more efficient, and the cheapest route into DLSS 3 frame generation. As a standalone card it does not rescue a parts list at current prices — but inside a prebuilt it periodically falls into this budget, and the ZER-LON AOV4060 is the machine to watch: a Ryzen 5 5500, an RTX 4060 8GB, 16GB of DDR4, a 1TB NVMe SSD, Wi-Fi 5 and Windows 11 Home. Its pricing tells the story plainly: it usually sits above this guide’s ceiling, with sale dips that reach it. So the recommendation is a rule rather than a shrug — buy this machine only when it falls under $700, and do not buy it above that ceiling — because above the ceiling the IPASON’s 12GB card and stronger processor are the better purchase.
Two fine-print items travel with this pick. The listing does not publish the power supply’s wattage, the number that decides whether a stronger card can be fitted later; when the machine arrives, open the case, read the label, and let that number — not optimism — plan your upgrades. And the 4060’s 8GB of VRAM is its generation’s standing trade: faster and cleverer than the 3060, with less memory for textures, which is why the IPASON stays the value pick even when this machine dips below it. Set the alert and hold the line at $700.
- The newest graphics architecture in the guide, with DLSS 3 frame generation.
- A complete machine with Windows included — no separate license line when the dip comes.
- A full 1TB of NVMe storage rather than the 500GB that sale machines often hide.
Honest limitation: At its usual higher-tier pricing it is not a machine in this budget at all; this pick is a price alert with a hard ceiling, and the unpublished power supply wattage caps your certainty about upgrades.
Choose it if you can wait for a sale and will genuinely walk away above $700. Skip it if you are buying this week at the showing price — that week belongs to the IPASON or Build 1.

Comparison Table
| Build | Graphics | Budget fit | Best use | Link |
|---|---|---|---|---|
| Build 1: Ryzen 5 5500 + RX 7600 | RX 7600 8GB | All-new; can fit under $700 — check price on Amazon | The true first build, bought with a little timing | Check on Amazon |
| Build 2: IPASON prebuilt | RTX 3060 12GB | Windows included — check price on Amazon | Most performance for the money, no assembly at all | Check on Amazon |
| Build 3: Ryzen 5 5600X + RTX 3060 | RTX 3060 12GB | Well above budget all-new; can fit under $700 reusing parts | Beginners upgrading a DDR4 machine | Check on Amazon |
| Build 4: Ryzen 5 5600G staged | Vega 7 integrated, card later | Lower-cost start today — check price on Amazon | Budgets that arrive in two installments | Check on Amazon |
| Build 5: Core i5-14400F + RX 7600 | RX 7600 8GB | Above budget all-new; can fit under $700 reusing parts | Gaming plus streaming and multitasking | GPU listing under Build 1 |
| Build 6: ZER-LON prebuilt | RTX 4060 8GB | Buy under $700 only, on a sale dip | Newest architecture, bought on a dip | Check on Amazon |
Your First Evening: From Boxes to a Running PC
For the four parts builds, assembly follows the same order whichever one you chose, because the order is dictated by access: parts go in while you can still reach them. Work on a table and keep the screws sorted. Bought a prebuilt? Skip to step 6.
- Prepare the motherboard outside the case. Set the board on its box. Open the socket lever, align the processor’s marked corner with the socket’s mark, and let it drop in — it fits one way only and needs no force. Fit the cooler that came with the processor (or the one you bought for Build 3’s 5600X), then click the two memory sticks into the slots the manual marks for a pair, usually the second and fourth from the processor. Finally, the SSD: the NVMe drive slides into its slot at a shallow angle and is held by one tiny screw — no cables. On Build 4, also confirm your board has an HDMI or DisplayPort socket; the 5600G’s integrated graphics will use it.
- Fit the board into the case. Clip the rear port shield into the case opening first, lower the board in, and drive the screws snug rather than forced. Connect the case’s front-panel wires — power button, USB, audio — following the board manual’s diagram; these small plugs are the fiddliest part of a first build and the least consequential to get wrong, since a misplaced one just means a button to reseat later.
- Install the power supply and route its cables. The PSU screws in at the case’s rear, fan facing its vent. Run the thick 24-pin cable and the processor power cable to the board, and leave the graphics card’s power cable loose for the next step.
- Fit the graphics card last. It clicks into the long PCIe slot nearest the processor and screws to the case’s rear; connect its power cable. Installing it last keeps it out of the way during earlier steps. Build 4 skips this step — the slot stays empty until your second installment.
- Place the finished PC where air can reach it. On or under a desk with open space around the vents — never sealed inside a closed cabinet, where its own warm air recirculates.
- Connect the power and the monitor — into the graphics card. Wall power to the PSU, switch on at the back. Then the monitor cable, the step that catches more first-timers than every other combined: plug the monitor into the graphics card’s sockets, down by the card’s bracket — not into the motherboard’s sockets higher up. On Builds 1, 3 and 5 the processors (5500, 5600X, 14400F) have no integrated graphics at all, so the motherboard sockets are dead by design and a cable there means a black screen on a healthy PC; the same applies to both prebuilts, whose processors likewise carry none. Only Build 4, before its card arrives, uses the motherboard’s socket — and once a card is fitted, it switches to the card’s sockets like everything else.
- Add peripherals and a wired internet connection. Keyboard and mouse into any USB sockets. Run an Ethernet cable to your router for setup evening even if you plan to use Wi-Fi later — the big first downloads go faster on a wire.
- First boot: install or start Windows, then let it update. On a parts build, install Windows from a USB stick and answer the license question the way your budget decided — new, transferred, or unactivated for now. Then run Windows Update until it stops finding things, and install the current graphics driver for your card (NVIDIA’s for the RTX cards, AMD’s for the RX 7600 and the 5600G).
- Set the monitor’s real refresh rate. A 144Hz monitor runs at 60Hz out of the box until you tell Windows otherwise — open the display settings and set the number you paid for. Skipping this is the quietest waste of money in gaming.
- Verify what actually arrived. Before the return window closes, check the processor and memory Windows reports against your parts list. On the IPASON, check the graphics card model against the listing’s style name, because that listing family has shown drift; on the ZER-LON, do the same, plus read the power supply’s wattage label inside the case, since the listing doesn’t publish it. On Build 3, confirm whether your 5600X listing included a cooler.
- Install a game store and one game. Steam, or whichever store your library lives on. Download one game you know well — the best smoke test there is.
What Else You Will Spend
The $700 in the title buys the PC itself. A beginner starting from an empty desk should budget honestly for the ring of things around it, in this order. First is the monitor: these machines are built to feed a 1080p display, ideally a high-refresh one, and pairing a new PC with an ancient dim screen wastes the purchase — if the total budget has to stretch, it is better spent here than on any upgrade inside the case. We don’t print a price for one because this guide’s research didn’t verify monitor listings; treat it as a real line in your budget, and remember step 10. After the monitor come a keyboard and mouse, which any basic set covers, and the Windows license if your parts build needs one: check the current price for a new license, or pay nothing extra with an eligible transfer. The one pick-specific catch is handled the same way throughout: if Build 3’s 5600X arrives without a cooler, the fix is a basic budget-tier tower cooler, on top of the build itself. Anything beyond this list is an upgrade, not a requirement.
Upgrades, in Plain Terms
The promise worth making to a beginner is narrow and specific: a graphics card swap — unclick the old card, click in a stronger one, update the driver — is genuinely easy only where the power supply is a named unit with published wattage and the case is a standard one you can open and measure. That is true of the four parts builds (Builds 1, 3, 4 and 5), which all use the named MSI MAG A650GN II 650W 80+ Gold unit and the standard Antec NX200 M case: in those machines, a future card the 650W unit supports is a one-evening job, and Build 4 is designed around exactly that moment. It is deliberately not promised for the two prebuilts. The IPASON’s 550W supply is named, but its case and motherboard are the maker’s unspecified choices, so whether a bigger card fits is a question to answer by measuring your own unit. The ZER-LON doesn’t publish its wattage at all, so no swap can be promised until you’ve read the label inside your own case. Beyond the card, memory and storage upgrades are simple in all four parts builds; processor upgrades on these finished platforms are bonuses, not plans.
How to Choose a Gaming PC Build Under $700
- Price the whole machine, never the headline parts. Processor plus graphics card is the number every forum post quotes; the PC you can actually switch on adds a board, memory, storage, a power supply, a case, possibly a cooler, and possibly Windows. Those “extras” add up fast, and they are where builds in this budget quietly become much more expensive ones.
- Treat memory as the swing line. A 16GB DDR4 kit is the most affordable new memory tier a gaming build can use, and DDR5 sits in a much higher tier that is disqualifying at this budget — which is why every build here is AM4 or LGA1700-with-DDR4. If you already own a desktop DDR4 kit (full-size sticks, not laptop memory), reusing it is the single largest saving available.
- Give the graphics card a walk-away ceiling. Card prices in this tier swing widely between listings and weeks. Decide the ceiling the build works at — the under-$700 budget for the ZER-LON, and a card price that keeps Build 1’s total inside this budget for the RX 7600 — check price on Amazon, and let the purchase wait until the live price fits.
- Buy the power supply for the next card, not this one. The 650W Gold unit costs little more than a bargain 450W unit and removes the power supply from every future upgrade conversation. Never carry a no-name supply of unknown wattage into a machine you plan to keep.
- Answer the Windows question before you order. The choices are a fresh license (check the current price at Microsoft or on Amazon), a transferred retail license from the PC you are retiring (an old prebuilt’s OEM license usually won’t move), or running unactivated at no cost with a watermark and some settings locked. All three are defensible; pretending the line doesn’t exist is not.
- Mind the board’s firmware and its exact name. A B760 board may need a BIOS update for a 14th-generation processor, and Intel boards come in near-identical DDR4 and DDR5 versions. Both mistakes are free to avoid and expensive to make.
Common Buying Mistakes
- Copying a build list from a guide written before the memory shortage, then discovering at checkout that the memory line has tripled.
- Budgeting the processor and graphics card and forgetting the board, power supply, case and Windows — the often-overlooked gap between a parts pile and a PC.
- Buying a DDR5 motherboard for a budget Intel build because the name matched, and inheriting a much pricier DDR5 memory kit with it.
- Plugging the monitor into the motherboard on a build whose processor has no integrated graphics, then troubleshooting a “dead” PC that is showing its picture nowhere. Card sockets, always.
- Pairing an RX 7600 with an old PCIe 3.0 board to save a little, and paying for it in performance every day instead.
- Buying one 16GB memory stick to save money — worst on the 5600G build, where integrated graphics live on memory bandwidth, but a false economy everywhere.
- Paying the ZER-LON’s usual above-budget price because a headline said “under $700”. The pick is the dip, not the listing.
- Assuming the processor includes a cooler — or assuming it doesn’t and buying one twice. Read the listing.
- Reusing a laptop’s memory in a desktop build. Same DDR4 generation, physically different sticks; they do not fit.
Final Recommendation
- Building new, first time: Build 1, the RX 7600 and Ryzen 5 5500 — the only all-new build with a proper graphics card at the ceiling.
- Most performance for the money: the IPASON prebuilt — the benchmark every parts build here is judged against, with no assembly at all.
- Upgrading a DDR4 machine: Build 3, the RTX 3060 12GB and 5600X — it can fit under $700 once your memory, SSD and case carry over.
- Budget in two installments: Build 4, the 5600G start-now build — the lowest-cost start today; check price on Amazon.
- Gaming plus streaming: Build 5, the i5-14400F build — it can fit this budget if your DDR4 carries over.
- Patient and alert-driven: the ZER-LON RTX 4060 machine — under $700, never above.
Our top two are Build 1 and the IPASON, because between them they state this market’s whole truth for a beginner: the best first build under $700 right now is an RX 7600 machine bought with a little timing and discipline, and the best value under $700 is a finished machine that undercuts the parts market entirely. If your ceiling is lower, Best Gaming PC Build Under $500 applies the same honesty with smaller numbers; if you can stretch, Best Gaming PC Build Under $800 is where the RTX 3060 build starts to fit without conditions. Set your walk-away ceiling before you open a listing, itemize every line including Windows, and check the card’s live price last — that order is the difference between a build that fits this budget and an expensive surprise.
Frequently Asked Questions
I’ve never built a PC. Can I actually do this?
Yes — the four parts builds here are forgiving first assemblies: standard parts, included coolers on three of the four processors, no exotic steps. The realistic shape of the job is an evening, a screwdriver, and the walkthrough above. The two genuine beginner traps are both shopping traps, not assembly traps: the DDR4-versus-DDR5 board name confusion in Build 5, and monitor cables in the wrong sockets at first boot. Both are covered, in bold, where they occur.
Can you really build a gaming PC with an RTX 3060 for under $700?
Not with every part bought new at today’s prices. Checked line by line, that machine lands well above this budget before Windows — the card alone sits in a high tier for its class, and the memory kit adds a further inflated line. It turns into a true sub-$700 build in two situations: you carry over a DDR4 kit, an SSD and a case from an older PC, or card prices sink back toward their old levels. A guide showing the all-new version under $700 is quoting a market that no longer exists.
Why is memory so expensive in these builds?
Because a shortage has pushed the whole memory market up at once. On Amazon right now a new 16GB DDR4 kit sits in a much higher tier than it used to, a 32GB DDR4 kit sits higher still, and 16GB of DDR5 sits in the highest tier of the three — check price on Amazon for the current figures. Every build in this guide sits on a DDR4 platform for exactly that reason — and it is why reusing a kit you already own beats every other saving on the list: it deletes the most inflated line outright.
Do I have to buy Windows for a build?
You must answer it, but paying is only one of the answers. Check the current price for a fresh Windows 11 Home license at Microsoft’s store or on Amazon before you buy. If the PC you are replacing carried a retail license, that license may move across; an OEM license that came with an old prebuilt generally cannot. Doing nothing is also an option — Windows installs and works unactivated, watermark and locked personalization included. Both prebuilts in this guide sidestep the question by including a license.
Should I start with the 5600G build and add a card later?
Only if your money genuinely arrives in two installments. The finished machine costs more than Build 1 bought in one go once the card joins, and the 5600G’s compromises (half the cache, the older connection) stay with the machine. What staging buys is a working, gameable PC in the interval, which for some beginners is the difference between starting and not starting. If you already hold the full budget, Build 1 is the better purchase.