Disclosure: As an Amazon Associate, reviewstook.com earns from qualifying purchases. Links on this page are affiliate links at no extra cost to you; prices and availability change frequently, so check Amazon for the latest.
How to Set Up a Small Form Factor Gaming PC: From Box to Best Performance
Knowing how to set up a small form factor gaming pc properly is worth real performance, because small machines live closer to their limits than towers do. A tower forgives a blocked vent, a forgotten display setting or a lazy fan curve; a 3-litre mini or a compact Mini ITX desktop answers the same oversights with heat, noise and frame rates that sag twenty minutes into a session. The good news is that a small PC needs no more setup than any other computer — it just needs the setup done in the right order, with attention to the handful of steps that matter more at this size.
This walkthrough assumes your machine has just arrived, whichever kind it is: a sealed mini PC built on laptop hardware, or a small desktop with full-size components inside. We will use six current machines as running examples — each verified against Amazon’s product data before inclusion — because the details differ in instructive ways: the sub-3-litre ASUS ROG GR70 going under a television, the MINISFORUM G1 Pro on a streaming desk, the GMKtec K12 being prepared for a future external GPU, and the Cooler Master NR2 Pro, a Mini ITX desktop that needs its liquid cooling treated with respect. If you are still at the choosing stage, How To Choose A Small Form Factor Gaming PC comes before this page; if the machine is already on your desk, start below and work down. The model-by-model comparisons live in Small Form Factor Gaming PC Buying Guide.
Set aside about an hour. Most of it is downloads and updates running while you arrange cables, and at the end of it your small PC will be configured the way reviewers configure theirs before testing — which is to say, performing like the machine you actually paid for.
In this guide
Key Takeaways
- Placement is a performance setting: vents need clear air on every side, and a closed TV cabinet without ventilation will throttle any small PC.
- Set the monitor’s refresh rate in Windows before anything else — high-refresh displays very often sit at 60Hz out of the box.
- Update the graphics driver, the system firmware and Windows itself on day one, then set updates to stay out of your gaming hours.
- Choose the fan or power profile for your room: balanced for bedrooms and living rooms, performance for ventilated desks.
- Verify with a one-hour session in your most demanding game. Sustained performance after an hour is the machine’s real performance.
- Put the game library on the largest drive, and plan storage before the first 100GB download finishes, not after the drive fills.
Where to Buy
The six example machines used through this walkthrough are listed here. Each setup section names the models it applies to most directly, but the steps themselves are universal to the category.
- Living-room example machine: ASUS ROG GR70 Gaming Mini PC (RTX 5070) — check the latest price on Amazon from the product page.
- Desk and streaming example machine: MINISFORUM G1 Pro Gaming Mini PC (RTX 5060) — check the latest price on Amazon from the product page.
- Mounted mini example machine: ASUS ROG NUC 16 Gaming Mini PC (RTX 5070 Ti) — check the latest price on Amazon from the product page.
- Expansion-ready example machine: GMKtec K12 Gaming Mini PC (Radeon 780M, OCuLink) — check the latest price on Amazon from the product page.
- Budget desktop example machine: Rmatamini SFF Gaming PC (i5-14400F, RTX 5060) — check the latest price on Amazon from the product page.
- Mini ITX desktop example machine: Cooler Master NR2 Pro Gaming PC (Ryzen 7 9800X3D, RTX 5070 Ti) — check the latest price on Amazon from the product page.
Every machine named on this page was checked against Amazon’s own product data before it was included, and the links above go to the listings on reviewstook.com’s retail partner, Amazon, where you can confirm the exact configuration, current availability and delivery options before you spend anything.
Step 1: Where Should a Small PC Sit? Placement and Airflow
Unbox onto a clear surface and resist plugging anything in for two minutes while you decide where the machine will live, because moving a wired PC later means redoing every cable. The rule is air: every small PC breathes through its case panels, and each vent needs several centimetres of unobstructed space. A mini like the GR70 can stand on a TV unit shelf, sit beside a console, or mount behind a display where a mount is supplied or supported — but check that a monitor-mount position does not place the PC directly in the warm exhaust path of the display panel itself.
For a Mini ITX desktop such as the NR2 Pro, identify the radiator’s intake and exhaust before placing it; a liquid-cooled case pushed flush against a wall on its exhaust side will recycle its own heat. Desktops also deserve a hard, flat surface — never carpet — and minis with downward vents need their feet on something solid. In a TV cabinet, either leave the door open during play, choose an open-backed compartment, or accept that you have built a small oven with a games console inside. A quiet USB fan exhausting the compartment is a legitimate, inexpensive fix that home-theatre PC owners have used for years.
Finally, think about ears. The distance between the machine and the nearest listener decides how much fan noise matters: under a TV across a room, almost none; on a desk beside your monitor, a great deal. Place the machine as far from the listening position as the cables reasonably allow, and never inside a resonant wooden cabinet that amplifies vibration into a hum.
Step 2: How Do You Connect Displays and Peripherals Correctly?
Connect the display first, and connect it to the right port. On any machine with a discrete graphics card — the GR70, the G1 Pro, the NR2 Pro, the Rmatamini — the monitor cable belongs in the graphics card’s outputs, not the motherboard’s, or you will be gaming on integrated graphics and wondering where the performance went. Machines with several display outputs, like the G1 Pro’s quad 4K capability or the K12’s HDMI 2.1, reward a moment’s thought about which port serves which screen: give the primary gaming display the highest-bandwidth connection, especially a high-refresh 4K television that needs HDMI 2.1 to run at its full rate.
Use the cables in the box or known-good cables of the right standard; a surprising share of ‘my new PC will not do 4K at high refresh’ is an old HDMI cable being asked to do a new job. Then peripherals: keyboard and mouse, headset, controller receiver. Plug wireless receivers into a short USB extension cable and position them away from the case and from USB 3 storage devices, whose radio interference is a well-documented cause of stuttery mice and dropping controllers in compact setups where everything sits close together. A small powered hub on the desk keeps a mini’s limited ports from becoming a daily annoyance and turns the whole setup into a two-cable machine. Shooter players finishing a desk setup should also read Best Gaming Mouse For Fps — the mouse is the other half of how a setup feels.
Wired networking deserves its cable run now, while you are behind the furniture anyway. The G1 Pro’s 5-gigabit Ethernet and the K12’s dual 2.5-gigabit ports are wasted on Wi-Fi, and even an ordinary gigabit connection beats wireless for download speed and connection stability in shared housing. If the machine’s home makes cabling impossible — the classic living-room case — that is what the Wi-Fi 7 in machines like the GR70 is for; position the router’s side of the link as kindly as you can and test the actual connection speed from the PC’s chair, not from beside the router.
Step 3: What Should You Do at First Boot?
Power on, complete the Windows setup with your account, and then pause before installing a single game. The first-boot order that pays off is: Windows updates first, including optional driver updates; then the manufacturer’s support page for your exact model, for BIOS or firmware and chipset drivers; then the current graphics driver from NVIDIA or AMD directly. Small PCs ship with whatever software was current when the box was sealed, and the gap between that and today is where early bugs live. Machines like the ASUS minis and the NR2 Pro have vendor utilities worth installing at this stage for fan control and lighting; budget machines may offer little beyond the drivers, which is fine.
While updates run, set the unglamorous options that protect your future evenings. Set Windows’ active hours so updates and restarts stay out of your gaming time. Decide where games will install — the largest drive, in a dedicated library folder — and set that location as the default in each game platform before the first download starts, because moving a library later is a chore nobody enjoys. Turn off the startup clutter you do not need, set a restore point now that the machine is clean and current, and make sure sleep and wake behaviour suits the room: a living-room PC should wake fast and sleep reliably, while a desk PC you use for work may be better set to never sleep at all.
Remove trial software you will not use, but do not uninstall the vendor’s thermal or fan utility in the purge — on a small PC that utility is load-bearing. If the machine came with a game subscription trial, as the ROG NUC line does with PC Game Pass, activate it only when you are ready to use the weeks it gives you.
Step 4: How Do You Set the Display, Graphics and Fan Profile?
Now the three settings that decide how the machine actually performs. First, the display: open Windows display settings, select your gaming monitor, and set its refresh rate to the panel’s maximum. This is the single most skipped step in PC setup — high-refresh monitors routinely sit at 60Hz for months — and on a new gaming PC it silently wastes the hardware you bought. Confirm the resolution is native, and if you game on a 4K television, decide now whether you will run games at native resolution with upscaling or at a lower output resolution; for laptop-GPU minis, upscaling from a 1440p-class internal render is the setting that makes TV gaming sing.
Second, the graphics defaults. In the NVIDIA or AMD control software, confirm the discrete GPU is the preferred processor for games, set the power mode to favour performance while plugged in, and enable the platform’s upscaling in each game’s settings rather than globally. Leave per-game quality tuning for after your first sessions; the goal today is a correct baseline, not a tweaked one.
Third, the fan or power profile, the setting unique to small machines. In the vendor utility or BIOS, choose the profile for your room: balanced or quiet for a bedroom or living room, performance for a ventilated desk where noise carries less. Do not choose a silent profile and then demand maximum performance — in a small chassis those are opposite instructions, and the machine will obey physics by throttling. The GR70 and NUC’s QuietFlow systems and the NR2 Pro’s liquid loop all have real headroom, but every profile is a trade you are making consciously.
Step 5: How Do You Verify the Setup With a Real Test?
Install your most demanding game — not your favourite lightweight one — and play it for a full hour. The first ten minutes tell you almost nothing about a small PC; the sixtieth minute tells you everything. Watch for the three signatures of a setup problem: frame rates that drift downward as the session warms, fan noise that ramps in waves rather than settling, and stutter that appears only after the machine is hot. Any of those points back to placement or profile, not to a defective PC, in the overwhelming majority of cases.
Use the hour productively. Note the frame rate range in the areas you actually play, confirm the monitor is reporting the refresh rate you set, check that a controller and headset behave at your real playing distance, and look at the storage the install consumed — then project it across the library you intend to keep. If the numbers say the drive fills by Christmas, now is the moment to add the second M.2 drive machines like the K12 make so easy, while the machine is new and the job is clean.
If the hour runs clean — stable frame rates, settled fans, no dropouts — your setup is done in every way that matters, and the remaining sections of this guide are about keeping it that way. If it does not, the troubleshooting section below works through the causes in the order they actually occur.
Setup Notes for the Six Example Machines

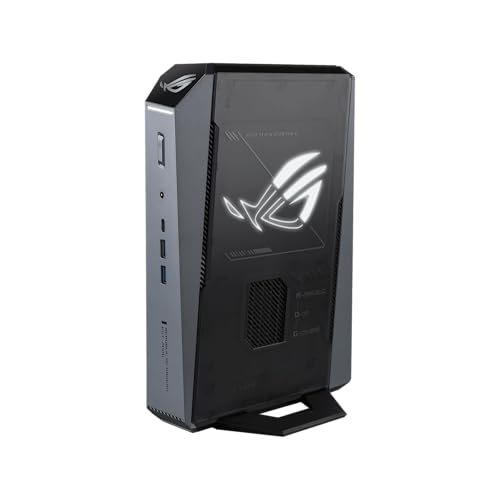
Living-Room Setup Notes — ASUS ROG GR70 Gaming Mini PC (RTX 5070)
Strengths
- Sub-3-litre size fits a TV unit shelf with room to breathe
- Wi-Fi 7 removes the cable problem most living rooms have
- 2TB storage delays the delete-a-game ritual for a long time
Trade-offs
- Laptop RTX 5070 means TV gaming should be set up around upscaling, not native 4K maximum settings
- ARGB lighting may want toning down in a dark viewing room
- Sealed design: get placement and profile right, because you cannot add cooling later
| Processor | AMD Ryzen 9 9955HX |
|---|---|
| Graphics | NVIDIA GeForce RTX 5070 (laptop GPU) |
| Memory | 32GB DDR5-5600 |
| Storage | 2TB SSD |
| Chassis | Sub-3-litre |
| Cooling | Triple-fan QuietFlow |
| Networking | Wi-Fi 7 |
| Operating system | Windows 11 Home |
| Warranty | 3 years (per listing title) |
Set the GR70 up as an appliance. Place it on an open shelf or an open-backed compartment, connect the television with a certified high-bandwidth HDMI cable, pair a controller, and set Windows to sign in and open your game platform without a keyboard ever being needed. In the fan utility, choose the balanced profile — at sofa distance its QuietFlow cooling should be inaudible over game audio. Set the games to render with upscaling toward the TV’s 4K panel, and schedule updates for the small hours. Configured this way it behaves like a console that happens to run a PC library, which is precisely the job. Our category verdict on machines like this is at Small Form Factor Gaming PC Review.
Best for: living-room setups under a television / Not suited for: desk setups where internal expansion is planned

Desk and Streaming Setup Notes — MINISFORUM G1 Pro Gaming Mini PC (RTX 5060)
Strengths
- Quad 4K display output makes multi-monitor desk layouts simple
- 5GbE wired networking rewards a proper cable run at setup time
- 16-core processor handles game plus stream plus chat without breaking stride
Trade-offs
- 245W compact cooling will be audible on a desk under full load — profile choice matters
- 8GB graphics memory: set texture levels thoughtfully in the heaviest games
- Display abundance invites cable clutter without a hub or dock plan
| Processor | AMD Ryzen 9 8945HX, 16 cores / 32 threads, up to 5.4GHz |
|---|---|
| Graphics | NVIDIA GeForce RTX 5060 8GB GDDR7 |
| Memory | 32GB DDR5 |
| Storage | 1TB SSD |
| Networking | 5GbE LAN, Wi-Fi 7 |
| Displays | Quad 4K output |
| Power | 245W (per listing title) |
On a desk, the G1 Pro should be wired, not wireless: run the Ethernet cable during setup and let its fast networking do the downloads and the stream upload. Arrange its multiple displays deliberately — gaming panel on the strongest output, side panels for chat and stream tools — and place the machine where its exhaust does not blow across your mouse hand, a small indignity compact desktops specialise in. Choose the performance fan profile if the desk is ventilated and you play with a headset; choose balanced if the room is shared. With 32GB of memory and sixteen cores, this is the example machine that needs the least compromise between playing and everything else.
Best for: desk setups that mix gaming, streaming and work / Not suited for: silent-room setups where fans must never be heard


Mounted Mini Setup Notes — ASUS ROG NUC 16 Gaming Mini PC (RTX 5070 Ti)
Strengths
- 3-litre chassis mounts behind many monitors for a genuinely clean desk
- DDR5-6400 memory and flagship mobile CPU need no setup compromises
- Three-year warranty: register it during setup week, while the paperwork is in hand
Trade-offs
- 1TB drive: set the library location deliberately and watch the first big installs
- Laptop GPU: apply upscaling defaults for 1440p panels
- All the ports live on a small box — a hub turns mounting from tidy to practical
| Processor | Intel Core Ultra 9 290HX Plus |
|---|---|
| Graphics | NVIDIA GeForce RTX 5070 Ti (laptop GPU) |
| Memory | 32GB DDR5-6400 |
| Storage | 1TB SSD |
| Chassis | 3-litre, black |
| Cooling | Triple-fan QuietFlow |
| Operating system | Windows 11 |
| Warranty | 3 years (per listing title) |
The NUC’s party trick is disappearance: mounted behind a monitor or tucked under a desk shelf, it leaves a workspace that looks like it has no computer at all. Achieve it properly by routing its cables once, carefully — power, one display cable, and a single USB run to a desk hub for everything else. A wireless keyboard and mouse complete the illusion. Set the QuietFlow profile to balanced, set the monitor’s refresh rate before you mount anything and lose easy access to buttons, and register the warranty the same week. The result is the cleanest setup in this guide, bought with the least reconfigurability, which its owners uniformly consider a fair trade.
Best for: minimal desks, mounted displays and tidy shared spaces / Not suited for: setups that will need internal upgrades within a year or two

Expansion-Ready Setup Notes — GMKtec K12 Gaming Mini PC (Radeon 780M, OCuLink)
Strengths
- Three M.2 slots: fit the second drive during initial setup, not during a storage crisis
- OCuLink port should be kept accessible, not buried behind cable management
- Dual 2.5G LAN makes it a natural network citizen from day one
Trade-offs
- Radeon 780M graphics: set games to 1080p and modest settings until an external GPU arrives
- 512GB fitted drive makes the storage plan urgent, not optional
- Integrated graphics share system memory — leave memory settings at their defaults
| Processor | AMD Ryzen 7 H 255 |
|---|---|
| Graphics | Radeon 780M integrated graphics |
| Memory | 32GB DDR5 |
| Storage | 512GB SSD, 3x M.2 2280 expansion slots |
| Expansion | OCuLink, USB4 |
| Networking | Dual 2.5G LAN |
| Displays | HDMI 2.1 |
Set the K12 up for the machine it will become. If a second M.2 drive is in the budget, install it before the first game download, and make it the library drive from the start. Route cables so the OCuLink port stays reachable for the future GPU dock, and resist hiding the box so thoroughly that its big day requires excavation. In games, configure honestly for integrated graphics: 1080p, sensible settings, and the platform’s upscaling where offered. The K12 rewards owners who set it up as a platform on day one rather than discovering its expansion options in year two.
Best for: staged setups that will add storage and an external GPU over time / Not suited for: setups needing maximum game settings immediately

Budget Desktop Setup Notes — Rmatamini SFF Gaming PC (i5-14400F, RTX 5060)
Strengths
- Desktop RTX 5060: connect the monitor to the card’s outputs, and this machine punches at its proper weight
- Standard desktop architecture makes the first storage upgrade a ten-minute job
- i5-14400F needs no exotic configuration — defaults are genuinely fine
Trade-offs
- 512GB SSD: the library-location decision from Step 3 is critical here
- 16GB DDR4: close background applications before demanding games
- Basic case airflow: give it more clearance than you think it needs
| Processor | Intel Core i5-14400F |
|---|---|
| Graphics | NVIDIA GeForce RTX 5060 8GB (desktop GPU) |
| Memory | 16GB DDR4 |
| Storage | 512GB M.2 NVMe SSD |
| Form factor | Ultra small form factor desktop |
The Rmatamini’s setup is about respecting two numbers: 512GB and 16GB. Set the game library up with discipline from the first install, keep only the current rotation on the internal drive, and plan the larger SSD as the machine’s first upgrade — its desktop architecture makes that upgrade simple. Connect the display to the RTX 5060’s own outputs, choose whatever fan behaviour the BIOS offers toward cooling rather than silence, and give the small case generous clearance on every side. Configured with that honesty, the budget machine delivers exactly what its specification promises, which is all any setup can do.
Best for: budget desk setups with a planned storage upgrade / Not suited for: setups that need a large library installed permanently
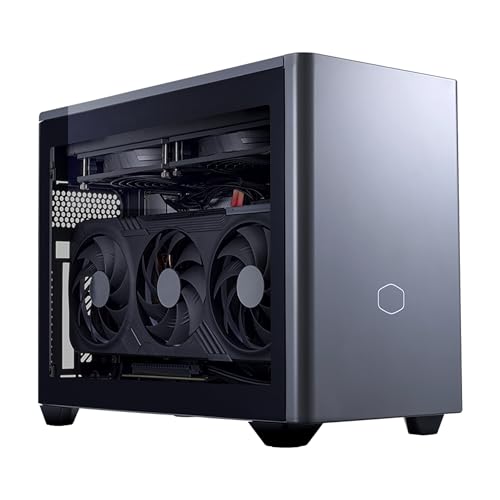
Mini ITX Desktop Setup Notes — Cooler Master NR2 Pro Gaming PC (Ryzen 7 9800X3D, RTX 5070 Ti)
Strengths
- 280mm liquid cooler: check the radiator’s fans are connected and its airflow direction is unobstructed at first boot
- Desktop RTX 5070 Ti 16GB deserves the best display cable and port you own
- 2TB drive removes storage from the setup conversation entirely
Trade-offs
- Liquid cooling and transport do not mix — set it down gently and avoid moving it casually
- Its performance invites maximum settings, which invite heat: placement discipline still applies
- Largest machine here: confirm the desk position before the cable work begins
| Processor | AMD Ryzen 7 9800X3D |
|---|---|
| Graphics | NVIDIA GeForce RTX 5070 Ti 16GB (desktop GPU) |
| Memory | 32GB DDR5 6000MHz |
| Storage | 2TB M.2 SSD |
| Cooling | 280mm AIO liquid cooler |
| Form factor | Mini ITX |
| Operating system | Windows 11 |
Treat the NR2 Pro’s setup like a desktop’s, because it is one. Seat it finally and firmly before cabling — liquid-cooled machines should not be shuffled around a desk weekly. Verify at first boot that the pump and radiator fans respond to load, set the display to its full refresh rate, and let the machine’s headroom do the rest: this is the one example where maximum in-game settings are the correct starting point rather than an aspiration. Give the radiator clean air, keep the case off carpet, and the desktop-class cooling will hold its performance indefinitely.
Best for: performance desk setups that stay in one place / Not suited for: travel setups and shelf spaces under 8 litres
Troubleshooting: The Five Problems Every Small PC Owner Meets
Problem: games run at a fraction of the expected frame rate -> fix: check the display cable is in the graphics card’s output rather than the motherboard’s, confirm the discrete GPU is selected in the graphics control software, and verify the monitor’s refresh rate setting. One of those three is responsible almost every time, and all three are five-minute fixes.
Problem: performance fades after twenty to forty minutes of play -> fix: this is heat, and the cure is placement and profile, in that order. Move the machine into open air, clear the vents, switch from a silent profile to balanced, and retest with the same game for the same duration. If a liquid-cooled desktop fades, check the radiator fans are actually spinning under load.
Problem: the wireless mouse or controller stutters or disconnects -> fix: move the receiver onto a short USB extension cable, away from the case and especially away from USB 3 storage devices, whose interference in compact setups is notorious. A front or desk-level receiver position cures most cases instantly.
Problem: the television shows no high-refresh or HDR option -> fix: suspect the cable and the port before the PC. Use the TV’s designated high-bandwidth HDMI input, a certified cable of the right standard, and enable the TV’s enhanced or gaming mode for that input, which many sets keep off by default.
Problem: the drive is full within the first month -> fix: audit the library defaults in every game platform — each may have chosen the small drive independently — move the library to the largest drive, and uninstall the launchers’ bundled extras you never opened. Then add storage while the machine is young if a slot is free; it never gets easier than now.
How Do You Keep a Small PC Running Well?
Maintenance on a small PC is light but not optional, because compact cooling has less margin for dust. Every few months, power down, take the machine to a ventilated spot, and clear its vents and intake filters with short bursts of compressed air, holding fans still while you do. Check that placement has not drifted — small PCs migrate into clutter, boxes get stacked beside them, and airflow quietly disappears. Once or twice a year, revisit the fan profile and the storage situation with fresh eyes, and glance at the manufacturer’s support page for firmware you may have missed.
One more habit separates tidy small-PC owners from frustrated ones: keep a short setup note for your own machine. Record which display output you used and why, the fan profile you settled on, where the library lives, and any BIOS setting you changed from default, in a document you can find in six months. Small PCs accumulate small decisions — a hub here, a profile there — and when something changes, that note turns a mystery into a checklist. It takes five minutes on setup day, when every answer is in front of you, and it saves the whole diagnostic process the first time a cable gets swapped or a setting gets reset by an update.
Software hygiene matters as much. Keep the graphics driver reasonably current, especially around big game releases, let Windows update on its own schedule within your active-hours settings, and resist the accumulation of background utilities that every peripheral wants to install. A small PC’s processor is rarely its limit, but a dozen resident updaters nibbling at it helps nothing. Do those few things and a well-set-up small PC stays a well-performing one for years — the setup work in this guide is front-loaded precisely so the ownership is not. For evenings when the setup extends to the sofa, How To Choose A Small Form Factor Gaming PC can help a household member choose a second machine to match yours.
How Do You Set Up a Small PC for Streaming and Recording?
A small PC that games and streams from the same box needs its setup done with both jobs in mind, because the encoder settings that cost a tower nothing can cost a thermally limited mini real frame rates. Start by choosing hardware encoding in your streaming software — the GPU’s built-in encoder on any discrete-GPU machine here, such as the G1 Pro or GR70, handles the stream with minimal impact on the game, while software encoding steals processor cores the game wants. On a many-core machine like the G1 Pro, with its 16-core Ryzen 9, you have more freedom; on a smaller mini, hardware encoding is not a preference but a requirement.
Set the recording and the stream to write to a different drive from the game where the machine allows it — another argument for fitting that second M.2 early on machines that offer the slot. Position the microphone before you tune anything else: in a compact desk setup the PC often sits closer to the mic than a tower would, and fan noise that a listener across the room never hears will be faithfully broadcast if the machine’s exhaust points at the microphone. A balanced fan profile, the machine placed low and to the side rather than behind the monitor at head height, and a first test recording listened back on headphones will teach you more than any setting copied from a forum.
Finally, test the full load together before your first real session: game running, stream encoding, voice chat open, browser up. That combined load is the streaming setup’s equivalent of this guide’s one-hour test, and it is the only configuration that tells the truth about a small machine’s thermals. If frame rates sag only under the combined load, the fixes are the familiar ones — air, profile, encoder choice — applied in that order.
How Do You Travel With a Small Gaming PC?
Portability is half the reason this category exists, and travelling well with a small PC is mostly a packing discipline. The machine itself goes in a padded bag with its vents protected from compression — a mini crushed against soft luggage vents-down can arrive with a blocked intake and no visible damage. Keep the power brick, one display cable, a compact wireless keyboard and mouse or a controller, and any hub you rely on in the same bag, as a kit; a small PC that arrives without its one essential adapter is a paperweight with excellent specifications. Photograph your home cable arrangement before the first trip and reassembly becomes a two-minute job at both ends.
Two machine-specific cautions apply. Liquid-cooled desktops like the NR2 Pro should travel upright, gently, and as rarely as the design invites — which is to say, treat moves as events, not commutes. And any machine travelling between households with different networks should be tested on the new Wi-Fi before the gaming session depends on it, because a mini’s small internal antennas reward a kind position in the room more than a tower’s external aerials do. At the destination, the setup sequence shrinks to its essentials: air around the vents, display cable into the graphics output, refresh rate checked on the unfamiliar screen. Ninety seconds of discipline, and the travelling PC performs like the home one.
Which Advanced Settings Are Worth Touching — and Which Are Not?
Once the basics are proven, a few advanced settings genuinely earn their place on a small PC. Resizable BAR should be enabled if the BIOS offers it and it is not already on, as modern graphics cards use it for a small, free performance gain. Memory profiles — XMP on Intel systems, EXPO on AMD — are worth confirming on desktop-family machines, because a Mini ITX desktop can ship with its DDR5 running at a safe default speed rather than the rated figure in its specification; the NR2 Pro’s DDR5-6000 kit only runs at that speed with its profile loaded. On minis with unified or shared memory, leave memory allocation at the manufacturer’s default; the automatic setting handles the balance between system and graphics better than a fixed guess.
Power limits are the tempting lever and the one to treat with most respect. Raising a mini’s power ceiling can buy performance, but in a chassis engineered around a specific thermal budget it buys heat and noise at a worse exchange rate than the specification suggests, and on some machines it voids the maker’s assumptions about the power brick itself. Undervolting, where a maker’s utility supports it, is the smarter direction for a thermally limited box — the same performance for less heat — but it is an afternoon of testing for owners who enjoy it, not a setup requirement for owners who do not.
What to leave alone: fan curves you do not understand, on a machine whose cooling was tuned as a system; registry tweaks and debloating scripts from forums, which trade stability for folklore; and any overclock on a sealed mini, whose cooling has no spare capacity to pay for it. A small PC rewards conservative configuration and punishes bravado faster than a tower does, because every margin in it is thinner by design.
Common Mistakes
- Plugging the monitor into the motherboard output on a machine with a discrete GPU, and gaming on integrated graphics.
- Never setting the monitor’s refresh rate, and playing at 60Hz on a high-refresh panel indefinitely.
- Sealing the machine in an unventilated cabinet, then blaming thermal throttling on the hardware.
- Choosing a silent fan profile and maximum game settings simultaneously, and being surprised by the physics.
- Installing the whole library to the smallest drive because each platform defaulted there independently.
- Skipping firmware and driver updates on day one, then troubleshooting bugs that were fixed months ago.
Final Recommendation
Set up in the order this guide walks: place for air, connect to the right ports, update everything, set the display and the fan profile consciously, then prove it with an honest hour in your hardest game. That sequence converts any small form factor gaming PC from a promising specification into a configured machine, and it costs an evening at most. Owners who skip it spend months vaguely dissatisfied with PCs that were never given the chance to perform as bought.
Keep the six example machines’ lessons in mind as archetypes: the GR70’s appliance discipline under a TV, the G1 Pro’s wired desk, the NUC’s clean mount, the K12’s forward planning, the Rmatamini’s storage honesty and the NR2 Pro’s desktop respect. Whichever archetype is yours, the machine on your desk deserves the same care at setup that you gave to choosing it — and if choosing is still ahead of you, Small Form Factor Gaming PC Buying Guide is the place to finish it.
Frequently Asked Questions
How long does it take to set up a small form factor gaming PC?
About an hour for the full sequence in this guide, most of it waiting on updates and a first large download. The hands-on work — placement, cables, settings — is twenty minutes. The verification hour in a demanding game can overlap with your first real play session, so the honest total is one evening, once, for years of correct behaviour.
Why is my new small gaming PC only showing 60Hz?
Because the monitor’s refresh rate must be selected in Windows display settings, and panels very often default to 60Hz regardless of their capability. Open Settings, System, Display, Advanced display, and choose the highest refresh rate listed. Also confirm the cable and port support that rate at your resolution — an older HDMI cable can cap it silently.
Should I use the balanced or performance fan profile?
Match it to the room and the distance to your ears. Balanced suits bedrooms, living rooms and any machine within arm’s reach of where you sit. Performance suits ventilated desks, headset users and anyone chasing maximum sustained frame rates from a Mini ITX desktop. Avoid silent profiles for gaming sessions; in a small chassis, silence is bought with throttling.
Do I need to update the BIOS or firmware on a new mini PC?
Check the manufacturer’s support page for your model during setup and install anything marked as a stability, thermal or fan-control improvement. Small PCs receive meaningful early firmware fixes because their cooling behaviour is software-governed. Follow the maker’s instructions exactly, keep the machine on mains power throughout, and never interrupt the process.
Can I mount a mini PC behind my monitor?
Many minis support VESA-style mounting with a supplied or optional bracket, and it is one of the great pleasures of the category — the ASUS NUC in this guide is built with that life in mind. Check the monitor’s own heat: a hot panel exhausting into the PC’s intake is the one arrangement to avoid, and keep cables strain-free with a little slack at every connector.
How often should I clean a small gaming PC?
A light vent and filter clean every few months suits most homes; homes with pets or carpets should halve that interval. Small cooling systems have less dust capacity than a tower’s, so the schedule matters more, but the job itself is five minutes with compressed air and the machine powered off. Placement drift — clutter gathering around the vents — is worth checking at the same time.
What is the first upgrade I should plan after setup?
Storage, for almost every owner. It is the upgrade nearly all small PCs accept, it is the limit nearly all owners meet first, and machines with a free M.2 slot — the GMKtec K12 has three slots in total — make it a ten-minute job. Set your library defaults to the new drive as soon as it is fitted. Memory is second on the list where the machine allows it; graphics, on a sealed mini, is not on the list at all.