Disclosure: As an Amazon Associate, reviewstook.com earns from qualifying purchases. Links on this page are affiliate links at no extra cost to you; prices and availability change frequently, so check Amazon for the latest.
How to Set Up a Budget Gaming PC: The Complete First-Day Walkthrough
Knowing how to set up budget gaming pc hardware properly is worth real performance — on a budget machine, the gap between a default setup and a tuned setup can be the difference between a game that stutters and the same game running smoothly on the same hardware. Budget PCs ship with conservative defaults, outdated drivers, memory running below its rated speed, and monitors idling at their lowest refresh rate. None of that is broken; all of it is fixable in about an hour, for free, with this walkthrough. We will go in the right order: physical setup, first boot, updates, the BIOS change that matters most, display and power configuration, per-game tuning, and the small habits that keep a budget machine feeling fast for years.
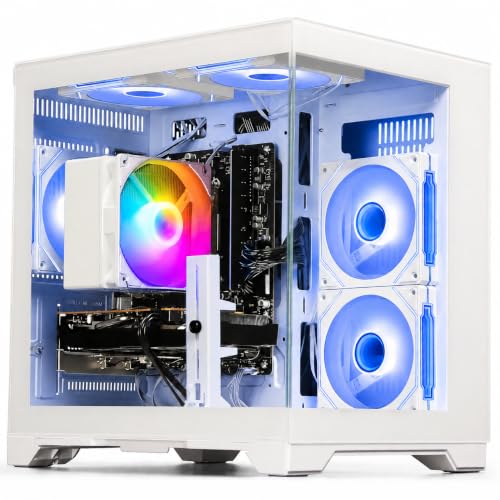
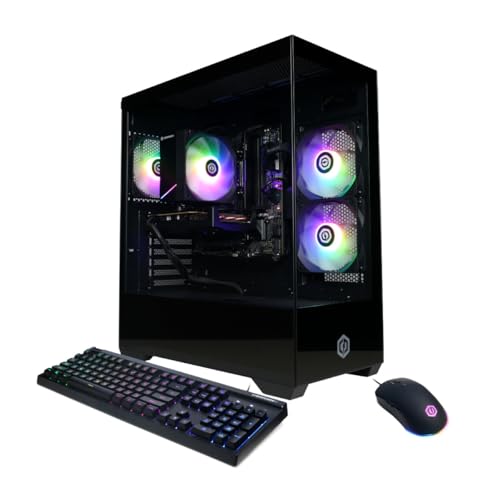
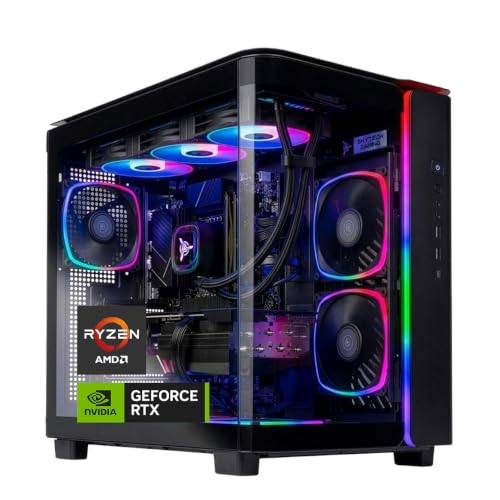
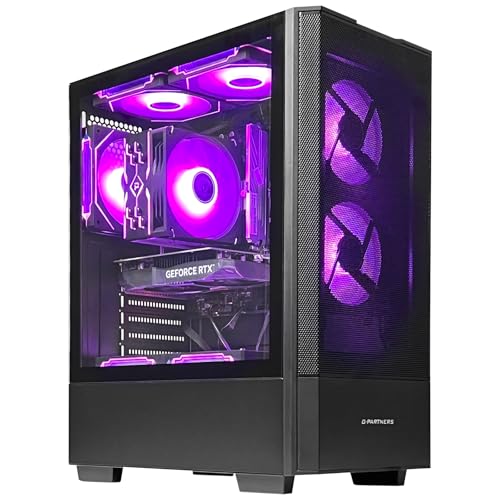
The steps apply to any Windows 11 budget tower, including the verified machines referenced throughout — the ZYNEEX Prebuilt Gaming Desktop (RTX 3050), YAWYORE Gaming PC (Ryzen 5 5600GT), CyberPowerPC Gamer Master (RX 6500 XT), Volt X3 V1.2 Gaming PC (GTX 1070), OKAMUS Pre-Built PC, and CyberPowerPC Gamer Master (RTX 5060 Ti) from our current pick sheet, each verified against Amazon’s catalog data on 2026-11-20.
In this guide
Key Takeaways
- Update Windows fully, then install the graphics driver from AMD or NVIDIA directly — never game on the shipped driver.
- Enable XMP/EXPO in the BIOS. On integrated-graphics PCs this single setting is the largest free performance gain available.
- Set the monitor’s refresh rate in Windows, or your high-refresh display silently runs at 60Hz.
- Assign games to the high-performance GPU and use the High Performance power plan.
- At 1080p, upscaling (DLSS or FSR) on Quality is close to free performance — use it in every game that offers it.
- On 8GB machines, closing background apps before gaming is not optional housekeeping; it is a performance setting.
Where to Buy
If you are reading this before buying, the machines this walkthrough was tested against are available on Amazon: start with the ZYNEEX Prebuilt Gaming Desktop (RTX 3050) for a discrete-card setup or the YAWYORE Gaming PC (Ryzen 5 5600GT) for an integrated-graphics platform, and check the latest price on Amazon since budget-tier pricing shifts constantly. reviewstook.com verified each configuration against catalog data before listing it here. Already own the PC? Skip straight to step one.
Step 1: Physical Setup — Airflow Before Everything
Unbox on a clear surface and remove every internal packing material before powering on — some towers ship with foam inside the case, and a first boot with packing foam against a fan is a bad first hour. Place the tower where air can move: clearance on every vented side, never inside a closed cabinet, and off thick carpet if the case breathes from the bottom (a board or stand underneath solves it). Connect the monitor to the graphics card’s ports if your machine has a discrete card — the ports on the card itself, horizontal and lower — not to the motherboard’s ports above them. Plugging into the motherboard on a discrete-card machine routes you to integrated graphics and is the single most common setup error in budget gaming; if your PC has no card, the motherboard ports are correct. Connect peripherals, and if you are still choosing them, Best Gaming Keyboard And Mouse Combos covers sensible budget pairings.
Use a wired Ethernet connection for the first day if one is reachable — the update phase below moves a lot of data, and even the WiFi 6 machines here, like the OKAMUS and Qehi-class towers, will finish faster wired. Power on, and resist installing games until step three is done.
Step 2: First Boot and Windows Setup
Windows 11 will walk you through region, account, and privacy choices. Two recommendations: decline the optional extras and trial offers bundled into setup (budget PCs often carry preinstalled trials you will never open — note them for step seven’s cleanup), and do not skip the account step by inventing workarounds; a normal sign-in keeps the Microsoft Store and game services trouble-free. Once at the desktop, give the machine ten idle minutes: fresh Windows installs index files and finish background configuration, and judging performance during that window will scare you unnecessarily. Check that your storage shows its expected size in File Explorer — a 1TB drive reporting roughly its full capacity, a 500GB likewise — and that Settings > System > About shows the RAM you paid for. Discrepancies at this stage are what return windows are for; the configurations we verified, from the 8GB OKAMUS to the 16GB ZYNEEX, should match their listings exactly.
Step 3: Updates — Windows First, Then the Driver That Matters
Open Windows Update and run it repeatedly until it reports you are up to date, restarting when asked. Then stop trusting Windows with the most important driver on the machine. Download the current graphics driver directly from NVIDIA (for the ZYNEEX’s RTX 3050, the Volt’s GTX 1070, and the CyberPowerPC RTX machines) or AMD (for the RX 6500 XT, the RX 560, and the integrated graphics in the YAWYORE’s Ryzen 5 5600GT and the OKAMUS’s i5). Choose the clean-install option where offered. Graphics drivers are where game performance is actively maintained: new releases routinely gain stability and frames from driver updates, and the driver a budget PC ships with can be many months old. While downloads run, update your game launchers too, and set each to download game updates only when you say so — an 8GB machine does not need a 40GB patch landing mid-session.
Problem: a driver install fails or the screen flickers afterward. -> Fix: reboot once; if problems persist, reinstall choosing the clean/factory-reset option, which clears the shipped driver’s remnants. Problem: Windows Update seems stuck for an hour. -> Fix: on a first day this is usually real work, not a hang — check again after a restart before intervening.
Step 4: The BIOS Setting Worth Real Frames — XMP/EXPO
Restart and enter the BIOS (usually by tapping Delete or F2 during the first seconds of boot; your motherboard’s splash screen names the key). Find the memory profile setting — XMP on Intel platforms, EXPO or DOCP on AMD — and enable Profile 1. Save and exit. This tells the RAM to run at the speed printed on its box; without it, memory defaults to a slower safe speed, and you paid for performance you never receive. On discrete-card machines the gain is modest but real. On integrated-graphics machines — the YAWYORE and OKAMUS above all — it is the largest free upgrade in this entire guide, because integrated graphics render using system memory: faster memory is quite literally a faster graphics card. While in the BIOS, confirm the boot order starts with your SSD and leave everything else alone; budget-PC BIOS adventures beyond the memory profile are how stable machines become projects.
Problem: the PC fails to boot after enabling the profile. -> Fix: it will typically retry and recover on its own after a couple of attempts; if not, clear CMOS per the motherboard manual and run the memory at the next profile down — a small speed concession beats instability. This is rare with the matched kits prebuilts ship.
Step 5: Display, Power, and GPU Assignment
Right-click the desktop > Display settings > Advanced display, and set the refresh rate to your monitor’s maximum. Windows defaults many displays to 60Hz, and a budget PC feeding a high-refresh monitor at 60Hz is paying for frames it never shows. Next, Settings > System > Power: choose Best Performance. Then Settings > System > Display > Graphics: add your main games and set each to High Performance, which forces the discrete card — or the strongest integrated graphics — rather than letting Windows guess. In the NVIDIA Control Panel or AMD Software, confirm the global setting prefers maximum performance, and turn on the in-game overlay’s frame counter in whichever suite you use: you cannot tune what you cannot measure, and the next step is tuning. Round out input with Best Windows Mouse Settings For Gaming — enhanced pointer precision off, sensitivity set deliberately — because a budget PC with a well-set mouse feels a tier faster than its specs.
Step 6: Per-Game Settings That Respect Budget Hardware
Launch your most-played game and set it up with a method, not vibes. Resolution: your monitor’s native 1080p. Preset: start one notch below your hope — Medium on discrete cards, Low-to-Medium on integrated — then raise individual settings while watching the frame counter, rather than starting at High and suffering. Turn on upscaling where offered: DLSS on the RTX machines (ZYNEEX, CyberPowerPC 5060-class), FSR on everything else, Quality mode first. Upscaling at 1080p Quality renders internally at a lower resolution and reconstructs — on budget hardware it is the closest thing to a free graphics tier. Shadows, volumetric effects, and reflections are the expensive settings; textures are comparatively cheap if video memory allows, which is where the Volt X3’s 8GB GTX 1070 quietly shines against 4GB cards. Cap the frame rate a few frames below your monitor’s maximum for stability, enable any low-latency mode your driver offers for competitive titles, and then — this matters — stop tuning and play for a week before changing anything. Chasing the settings menu is the budget gamer’s most expensive hobby, and it is free to quit. The reasoning behind these tiers is covered in Budget Gaming PC Buying Guide.
Step 7: Cleanup and the Security Pass
Open Settings > Apps and uninstall the trials and duplicate utilities the PC shipped with — keep the graphics suite, remove the third-party antivirus trial in favor of the built-in Windows Security, and clear out anything you do not recognize after a quick search of its name. Then set startup apps: Task Manager > Startup, disable everything that does not need to launch with Windows. On the 8GB machines — the OKAMUS Pre-Built PC and the entry CyberPowerPC Gamer Master (RX 6500 XT) — this step is performance, not tidiness: every background app is RAM your game does not get. Set a restore point now, while the machine is clean and working, and confirm Windows Security shows a recent scan. Finally, create the folder structure you will thank yourself for: games on the SSD with the most room, downloads routed somewhere you will actually clear, and a note — physical or digital — recording what you changed in steps four through six, so future-you can undo it.
Step 8: The One-Week Check-In
After a week of real use, revisit three numbers: free storage (modern games grow; the 256GB OKAMUS and 500GB CyberPowerPC need library discipline the 1TB machines do not), memory pressure during your heaviest game (Task Manager’s Performance tab — sustained use near the ceiling on an 8GB machine confirms the second stick as your first upgrade), and temperatures and noise under load (a free hardware monitor tells you; sustained very high CPU temperatures mean checking that case vents are unobstructed before anything exotic). This check-in is also when to decide the upgrade order if one is coming: RAM first on 8GB machines, a graphics card first on the YAWYORE-class platforms with power headroom, storage when the library demands it. The full upgrade logic lives in How To Choose A Budget Gaming PC and the worth-it analysis in Is A Budget Gaming PC Worth It.
Troubleshooting the Classic First-Week Problems
Problem: games run far below expected frame rates. -> Fix, in order: monitor cable in the graphics card, not the motherboard; correct GPU assigned in Windows graphics settings; memory profile enabled; current driver installed. One of these four is responsible in the overwhelming majority of cases.
Problem: stutter in games that benchmarks say should run well. -> Fix: check memory pressure — close the browser and launchers; on integrated graphics, confirm dual-channel memory and the XMP/EXPO profile, since both directly govern rendering speed.
Problem: the PC is loud. -> Fix: verify clearance around vents, confirm internal packing material was removed, and set a less aggressive fan curve in the BIOS only after temperatures are known-good. Budget cases are honest about airflow; give them air.
Problem: WiFi drops or lags in games. -> Fix: wired Ethernet is the real answer for competitive play; short of that, use the 5GHz band, move the router or PC for line of sight, and update the wireless driver from the PC maker’s site.
Problem: a game will not launch or crashes to desktop. -> Fix: verify game files in the launcher, confirm the graphics driver is current, and check the game’s video-memory demands against your card — 4GB cards need texture settings lowered in the newest releases before anything else is suspected.
Common Mistakes in Setup
Installing games before updating. First impressions formed on shipped drivers and half-configured Windows have unfairly condemned many good budget PCs. Updates first, judgment after.
Skipping the memory profile. It is five minutes in the BIOS and, on integrated graphics, the difference between two graphics tiers. There is no step in this guide with a better return.
Plugging the monitor into the wrong port. It happens to experienced builders too. If performance is inexplicably poor, look at the back of the PC before touching a single setting.
Maxing every setting to “test” the PC. Budget hardware evaluated at ultra settings fails a test it was never taking. Set for your tier, as in step six and Budget Gaming PC Pros And Cons.
Never creating a restore point. The clean first-day machine is the reference state every future problem gets compared against. Capture it while it exists — and if you are still deciding whether the category suits you, Budget Gaming PC Review shows what a properly set-up budget PC actually delivers.
Understanding Your Monitoring Tools: What the Numbers Mean
Step eight mentioned checking temperatures, memory pressure, and frame rates; this section makes those checks literate, because a budget PC owner who can read three numbers can diagnose nearly everything this guide’s troubleshooting section covers. Frame rate and frame time: your driver overlay (NVIDIA’s performance overlay or AMD’s metrics) shows both — the rate is the average you know, but stutter lives in frame time spikes, so a game reporting a healthy average while feeling rough is telling you to look at consistency, which usually traces back to memory pressure or background work. GPU and CPU utilization: if the GPU sits near full utilization while the CPU loafs, you are graphics-bound and settings or upscaling are your levers; if one CPU core is pinned while the GPU idles, you are CPU-bound and the levers are draw-distance and crowd-density settings; if neither is busy and frames are low, suspect a frame cap, a refresh-rate mismatch, or the wrong GPU entirely. Memory: Task Manager’s Performance tab shows committed memory against your total — sustained commitment near the ceiling on an 8GB machine is the second stick’s purchase justification, printed in your own data. Temperatures: under gaming load, CPU and GPU temperatures in the 70s and low 80s Celsius are ordinary working numbers for budget air cooling; sustained readings climbing through the high 80s and beyond mean airflow first (clearance, dust, an exiled tower breathing against a wall) before any exotic conclusion. None of this requires expertise — it requires looking, once, while a game runs, and remembering roughly what healthy looked like for the day something feels wrong.
Network Setup for Gaming: The Unglamorous Tier Upgrade
Budget guides obsess over internal hardware and ignore the connection the games actually travel through, which is a mistake: for online titles — most of the budget library — network quality is a performance spec. The hierarchy is absolute: wired Ethernet first, and if the PC’s home is not near the router, a long cable run or a powerline adapter still beats wireless for stability. If WiFi it must be, use the 5GHz band for gaming (shorter range, far less congestion), position the PC for the fewest walls between it and the router, and make sure the router’s firmware and the PC’s wireless driver are current — the WiFi 6 support in machines like the OKAMUS earns its keep only with a router that speaks it. In Windows, set your connection’s DNS deliberately if your provider’s is sluggish, and in each launcher, schedule downloads for your off-hours: nothing in this guide will save a match whose bandwidth is being consumed by a 60GB patch your own PC decided to fetch. Finally, learn your connection’s honest numbers with a speed and latency test at your usual gaming hour — congestion is a time-of-day phenomenon — so that when a game lags you can tell in one minute whether the fault is your network, your PC, or the game’s servers, and stop fixing the wrong one.
Storage Management for Small SSDs
Owners of the 256GB and 500GB machines — the OKAMUS and entry CyberPowerPC among them — should treat storage as a system to set up once, not a crisis to meet monthly. Route the launchers’ libraries deliberately: keep the two or three games in current rotation on the internal SSD, and let each launcher’s library-folder feature move cold titles to an external drive rather than uninstalling them (moving beats re-downloading by hours). Point Windows’ Downloads, and your browser’s, at a folder you review monthly. Turn on Storage Sense so temporary files clear themselves. And learn the one number that matters: SSDs slow down as they approach completely full, so keep a working margin — roughly a tenth of the drive — free, and treat the red capacity bar as a performance warning, not an aesthetic one. Owners of the 1TB machines can adopt the same habits lazily and benefit anyway; library discipline is a skill that transfers to every future machine.
Peripheral and Audio Setup
The desk deserves the same deliberateness as the tower, at budget scale. Mouse: set sensitivity in the game, not by cranking Windows’ pointer speed; disable enhanced pointer precision for consistent aim; and match DPI to your games using the principles in our linked settings guides — on a budget setup, input tuning is free performance exactly as driver tuning is. Keyboard: any honest board serves; spend your attention instead on the keybinds you will actually use, set once in each game rather than relearned per title. Audio: plug headsets into the rear panel jacks where possible for a cleaner signal than front-panel wiring sometimes gives, set the game’s audio mode to match what you are wearing (headphone modes on speakers and speaker modes on headphones both flatten the sound you paid for), and position the microphone — boom or desk — consistently, then test it in your voice app of choice before the first group session rather than during it. None of this costs money. All of it is the difference between a setup and a pile of equipment, and budget gamers, whose hardware margins are thinner, feel setup quality more than anyone — which is precisely why this walkthrough treats the desk as part of the PC.
Backups and the Boring Safety Net
One setup task has nothing to do with frames and everything to do with keeping the machine: a backup habit proportionate to what the PC holds. Game saves increasingly live in the cloud through the launchers — verify that sync is actually on for your main titles rather than assuming it. Everything else the machine accumulates — schoolwork, photos, projects — deserves one external copy, and Windows’ built-in File History or any simple scheduled copy to an external drive covers it. Set it up on day one, while the machine holds nothing you would mourn, because backup systems configured after a loss are configured by sadder, wiser people. Pair it with the restore point from step seven and your budget PC has a safety net that many expensive machines lack — set up, characteristically, for free.
Game Library Setup: Launchers, Accounts, and Downloads Done Right
With the system tuned, the library deserves the same one-time deliberateness. Install your launchers, sign in, and before downloading anything, set each one’s library folder to the drive and directory you intend — moving a library later is possible everywhere and pleasant nowhere. Enable cloud saves and verify the setting rather than assuming it; a budget PC’s owner who loses a hundred-hour save to an unverified checkbox has learned the most expensive lesson in this guide at the usual tuition. Configure downloads deliberately: cap bandwidth if your connection is shared, disable auto-updates during your gaming hours in every launcher that offers the scheduling, and set downloads to pause while a game runs. Then install in priority order — tonight’s game first, the backlog while you play it — because a budget machine’s storage fills by enthusiasm and the discipline of a queue beats the regret of a full drive mid-install. Finally, pin down the social layer while you are in settings: voice chat push-to-talk configured and tested, overlay keybinds set to keys you will not hit mid-game, and notifications tuned so the machine serves the session instead of interrupting it. The library setup is the last step of the first day and the first thing your future self will thank you for, usually around the second week, when everything is simply where it belongs.
Accessibility and Comfort Settings Worth Your Ten Minutes
Setup guides rarely mention that modern Windows and modern games carry accessibility options that improve the experience for everyone, and budget setups — assembled from varied parts — benefit disproportionately from a pass through them. In Windows: text scaling matched to your actual viewing distance (a budget monitor at arm’s length often wants a step up), night light scheduled for evening sessions, and pointer options set for control rather than decoration. In games: subtitle defaults on (they rescue dialogue under any audio setup), colorblind modes where the palette genuinely reads better, aim and camera sensitivity copied deliberately between titles rather than relearned, and hold-versus-toggle choices set to your hands’ preference in every game that offers them. Add the physical layer: monitor at eye height on whatever stable stack of books or stand the budget allows, chair and desk arranged so a long session is a posture you can keep, and the tower’s glow — RGB is charming until it is the brightest object in a dark room at midnight — dimmed or scheduled in its control software if it has one. Comfort is a performance setting over any horizon longer than a match; set it up once, on day one, with the same seriousness as the drivers.
Setting Up for Streaming and Recording on a Budget Machine
Many budget PCs are bought with a quiet second ambition — streaming, recording, clipping the good moments — and the setup differs enough from pure gaming to deserve its own pass. Start with the encoder: on the RTX machines, use the GPU’s hardware encoder (NVENC) in your streaming software, which offloads the broadcast from the CPU almost entirely and is the single reason budget RTX systems stream above their class; on AMD discrete cards, the AMF encoder serves the same role; on integrated machines, expect to stream light titles at modest output settings, with the CPU’s encoder as a fallback that will tax gaming performance. Set your output resolution and bitrate for your actual upload speed — test it, do not guess it — and prefer a stable, slightly softer stream over an ambitious one that drops frames, because viewers forgive resolution and never forgive stutter. Record locally at higher quality than you stream if storage allows, and route recordings to the drive with room, since an hour of footage is a large file and the small-SSD machines will feel a recording habit quickly. Test the whole chain — game, encoder, microphone, alerts — in a private session before the first public one, and keep a known-good settings profile saved; streaming setups have a way of breaking the night they matter, and the restore point philosophy from step seven applies to software configurations exactly as it does to Windows.
The Maintenance Calendar: Keeping It Fast in Months 2–24
Setup is an event; maintenance is the subscription that keeps its benefits. A light calendar suffices. Monthly: glance at storage headroom and clear the downloads folder; confirm Windows and the graphics driver are current (set a recurring reminder, because “check for updates” is a habit nobody forms by accident); and blow the dust from case vents and filters with the machine off — budget cases collect dust at the same rate as premium ones and have less thermal headroom to spare. Quarterly: review startup apps again, since every installed program nominates itself; check the restore point situation; and run the one-minute health check from step eight — temperatures under a familiar game, memory pressure, fan behavior — comparing against your day-one notes so drift is visible before it is audible. Yearly: consider the physical deep clean, re-seat nothing that is not misbehaving, and re-run this guide’s step one against your library, because the machine’s job changes as your games do and the first upgrade decision should be made from data, not vibes. None of this is burdensome; all of it is the difference between a budget PC that feels new in year two and one that feels old in month nine despite identical hardware.
Setting Up a Second User, a Guest Account, and Family Controls
Budget PCs are disproportionately shared PCs, and a shared machine set up as a single-user one becomes a small daily negotiation. Spend twenty minutes on the social configuration while the machine is new. Create separate Windows accounts for each regular user — separate libraries, separate saves, separate desktops, no one’s settings overwriting anyone’s — and make exactly one account the administrator, held by whoever maintains the machine. For younger players, a Microsoft family account brings play-time scheduling, content filtering, and activity reporting that are genuinely well-built and entirely free; set them up before the first session rather than retrofitting rules onto habits. A guest account, standard and unprivileged, covers visitors without exposing the household’s files. Then the storage diplomacy: agree the library rule while the drive is empty — whose games live where, what happens when the drive fills — because the 256GB and 500GB machines will test any household that skips the conversation. None of this is gaming performance, and all of it determines whether the gaming PC is a household asset or a household argument; setup, done completely, is the difference.
When Setup Is Not Enough: Recognizing a Hardware Problem Early
This walkthrough fixes configuration; it should also teach the boundary where configuration ends and a warranty claim begins, because budget buyers are sometimes gaslit — by forums, by sellers, occasionally by themselves — into troubleshooting hardware faults as if they were settings. The tells: crashes or freezes in multiple unrelated games and applications, especially under light load; visual artifacts — flickering textures, colored speckles, geometry tearing in patterns — that persist across driver versions; the machine failing to boot intermittently, or losing its storage drive from the BIOS’s view; temperatures climbing into shutdown territory with clear vents and audible fans. Any of these in the return window means stop optimizing and use the window; the same symptoms later mean the warranty, and both paths start with documenting the fault (dates, games, screenshots of artifacts) rather than with another evening of settings. The machines in this guide were chosen partly so that this section stays theoretical for their owners — but a complete setup guide owes its readers the map of where its own territory ends.
Setting Up Game-Specific Profiles: One Configuration per Title
Advanced but genuinely useful on budget hardware: stop treating your settings as global. Modern drivers and launchers let you keep per-game profiles, and budget machines benefit disproportionately because their optimal configuration varies more by title than a flagship’s does. Build the habit with your three most-played games. For the competitive title, the profile is performance-purist: upscaling aggressive, effects low, frame cap matched to the monitor, low-latency mode on. For the cinematic title, the profile inverts the priorities: upscaling on Quality, textures as high as VRAM allows, frame cap lower and steadier. For the older or indie title, the profile is mostly about leaving things alone — native resolution, no upscaling artifacts, perhaps a frame cap to keep the machine silent. Name the profiles, note them in the setup document from step seven, and revisit them only when a driver update or a new game changes the landscape. The deeper benefit is psychological and real: per-game profiles end the era of the global settings compromise, in which every game ran at the settings negotiated for the most demanding one. On hardware with margin to spare that compromise costs little; on a budget machine it costs exactly the performance this guide has been recovering step by step.
Ergonomics and Session Health: The Setup Nobody Sells You
A complete setup guide owes a paragraph to the component that cannot be upgraded: the player. Budget setups are often assembled on whatever furniture exists, which makes deliberate ergonomics more valuable, not less. Screen top at or slightly below eye level, at arm’s length; feet supported; the chair’s height set so forearms rest level with the desk. Lighting behind the monitor — any soft source — reduces eye strain in dark rooms more than any display setting. Session rhythm matters on any hardware: a short break each hour is the oldest performance advice in gaming and the most ignored, and a budget PC’s owner, who has just learned to think in systems and margins, is well placed to treat their own stamina as one more resource to manage rather than spend blindly. Set the machine’s night light schedule, set your own stopping rule for ranked nights, and let the setup’s final step be the one that makes all the others sustainable.
Setting Up for the Games Themselves: A Genre-by-Genre Cheat Sheet
Close the walkthrough where it cashes out: the settings philosophy per genre, because budget hardware rewards genre literacy more than any single tweak. Competitive shooters: everything serves frame rate and clarity — low effects, upscaling performance-leaning, shadows minimal (they cost frames and hide nothing you need), frame cap at the monitor’s ceiling, low-latency mode on; your aim settings live in the linked mouse guides and matter more than any of this. Open-world and story titles: protect textures and draw distance within VRAM, sacrifice shadows and volumetrics first, upscaling on Quality, and cap frames at a number the machine can hold in the busiest city rather than the emptiest field — consistency is immersion. Strategy and simulation: the CPU and RAM are the stage; keep background apps closed, let the simulation breathe, and spend graphics settings freely since the genre rarely stresses them. Racing and sports: motion clarity first — motion blur off by preference and by performance, frame rate prioritized over crowd detail. Older titles: the budget machine’s victory lap — raise settings with joy, add the community’s graphical mods where they exist, and if a very old game misbehaves, compatibility modes and community patches are a right-click away. Genre by genre, the principle repeats: know what the game is actually rendering, spend the hardware there, and starve the rest. That literacy, installed on day one, is the setup’s true final step.
The Setup Audit: A Fifteen-Minute Verification Pass
End the first day by auditing your own work — the same discipline this site applies to listings, applied to your desk. Walk the list: packing material out and vents clear; monitor cable in the correct port and the display running at its full refresh rate (verify in the advanced display panel, not by feel); Windows fully updated and the graphics driver confirmed as the current vendor release; memory profile enabled and the BIOS showing the rated speed; power plan on High Performance and your main games assigned to the high-performance GPU; upscaling available and set per game; startup apps pruned and a restore point created; cloud saves verified on, downloads scheduled, library folders where you intended them; microphone tested in your voice app; backup configured. Fifteen minutes, eleven checks, and any miss found now is a thirty-second fix — while the same miss found in month three arrives disguised as a mysterious performance problem with a forum thread attached. The audit is the setup’s signature: it converts a sequence of tasks into a verified state, which is the entire difference between a machine that was set up and a machine that merely had things done to it.
Your Setup, Documented: The One-Page Machine Biography
The walkthrough’s final artifact takes ten minutes and pays out for years: a one-page biography of your machine, kept as a document on the PC itself and a copy wherever your important files live. Record what you bought (the exact model and configuration, with the order confirmation’s date), what you changed in setup (memory profile on, driver versions as installed, per-game profile notes, accounts created), what the machine’s numbers looked like when healthy (temperatures under your main game, memory pressure, free storage), and what its planned future is (the first upgrade, the warranty’s end date, the seller’s support contact). Every future troubleshooting session — yours, a friend’s, a support agent’s — begins with questions this page answers instantly, and every upgrade decision starts from its baseline rather than from memory’s flattering revisions. Machines that come with biographies get maintained; machines that do not get replaced at the first mystery. You have spent an hour making this budget PC fast. Spend ten more minutes making it legible, and the setup is truly finished.
Frequently Asked Questions
How long does it take to set up a budget gaming PC properly?
About an hour of your attention spread across a longer window of downloads and restarts. The hands-on steps — BIOS profile, display and power settings, per-game configuration — are quick; Windows Update on day one is the slow part, and it runs itself.
What is the first thing I should do with a new budget gaming PC?
Remove any internal packing material, connect the monitor to the graphics card if it has one, then run Windows Update to completion before installing anything. Every later step builds on a fully updated system.
Does enabling XMP or EXPO void my warranty or risk damage?
It is a manufacturer-provided profile designed to run your memory at its advertised speed, exposed in the BIOS by the board maker for exactly this purpose. On prebuilt machines it is a standard, supported setting — and the performance gain, especially for integrated graphics, is the largest free one available.
Why is my high-refresh monitor only showing 60Hz?
Windows defaults many displays to 60Hz. Fix it in Settings > System > Display > Advanced display by selecting the monitor’s maximum refresh rate — and confirm the cable supports it (use the cable that came with the monitor).
Should I use DLSS or FSR on a budget PC?
Yes — Quality mode in any game that offers it. On RTX graphics (the ZYNEEX and CyberPowerPC RTX machines) DLSS is the sharper option; FSR works on everything else, including integrated graphics, and at 1080p the Quality preset buys meaningful frames for a small image cost.
How do I know if my game is using the right graphics?
Task Manager’s Performance tab shows which GPU is active while the game runs. If the wrong one is working, assign the game to High Performance in Settings > System > Display > Graphics, and double-check the monitor cable is in the graphics card.
What should my first upgrade be after setup?
On an 8GB machine, the matching second RAM stick. On a 16GB integrated-graphics platform with power headroom like the YAWYORE, a mid-range graphics card when budget allows. On discrete-card machines, storage is the usual first need. Our Budget Gaming PC Vs Entry Level Gaming PC comparison explains how these paths differ by tier.