Disclosure: As an Amazon Associate, reviewstook.com earns from qualifying purchases. Links to Amazon on this page are affiliate links; they cost you nothing extra.
A trail camera is only as good as its placement and settings.
Last updated: November 1, 2026.
A trail camera is only as good as its placement and settings. A well-chosen unit set up badly records empty frames, while a modest one in the right spot can document animal activity for weeks. Planning how it will be used guides which features matter.
Types
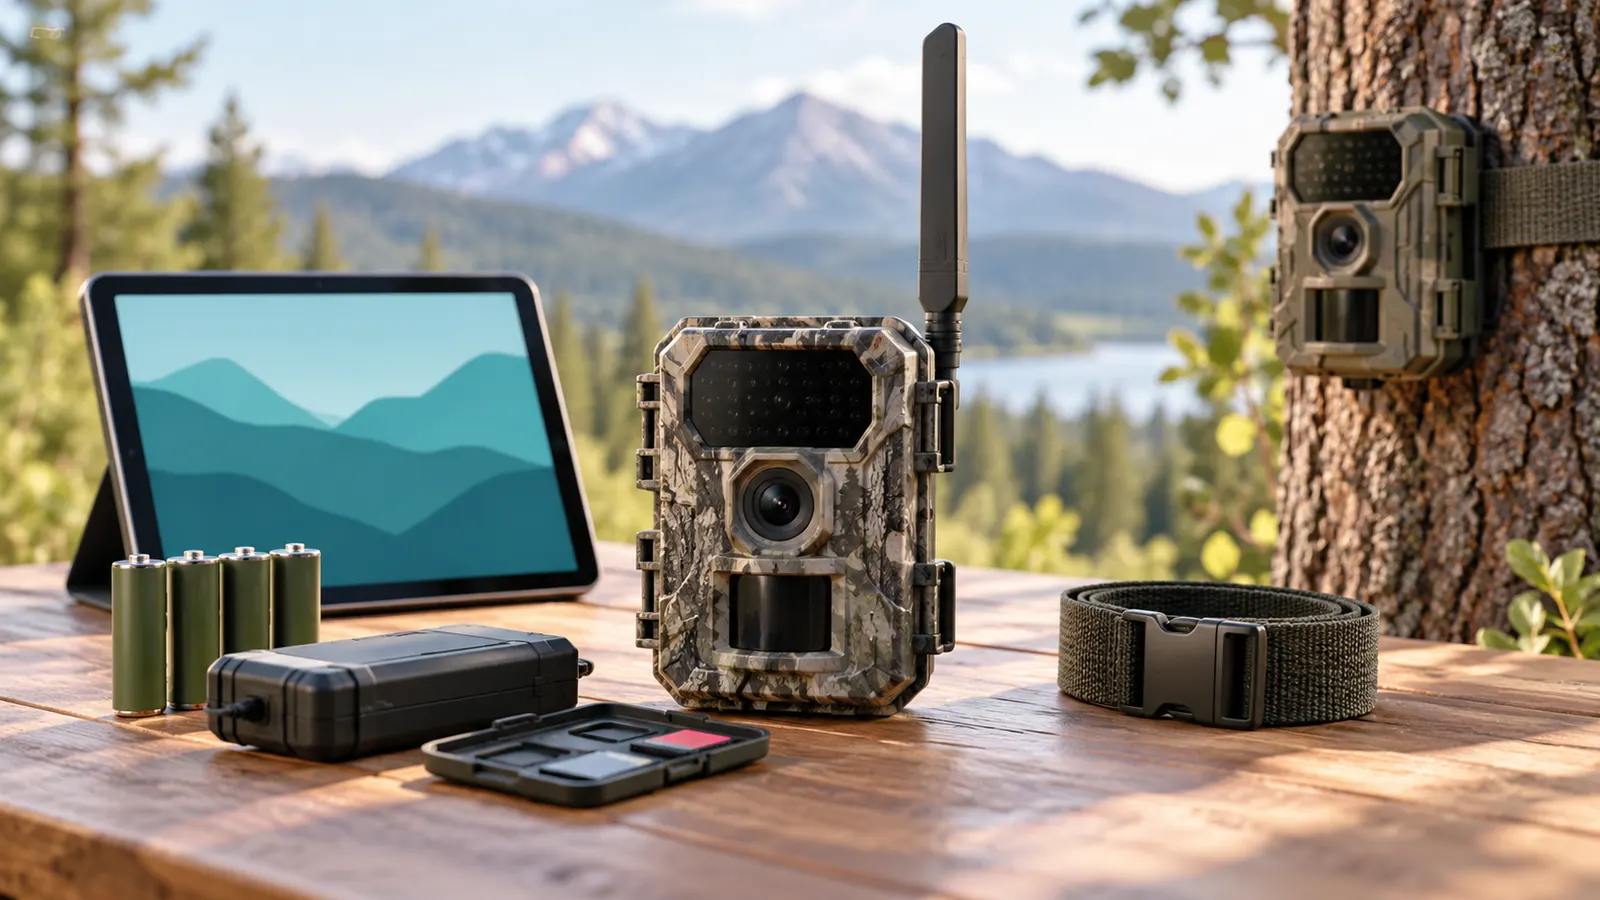
Trail cameras fall into a few broad groups, differing mainly in how footage reaches you:
- Standard (card-only): records to a memory card, which you collect in person. Simple and usually the most affordable.
- Cellular: sends pictures to your phone over a mobile network, so you do not need to visit. It needs a service plan and signal coverage.
- Wi-Fi or Bluetooth models: connect to your phone at close range for setup and reviewing images without removing the card.
- No-glow or low-glow flash: uses infrared lighting that is less visible to animals.
Also compare detection range, trigger speed and recovery time between shots. A quick trigger helps catch animals moving through the frame. Higher resolution can look sharper, but file sizes grow, so balance picture quality against card space.
See cellular and 4K trail cameras.
In this guide
Cards
Use a card of the type and maximum size the camera supports, and format it in the camera. Reliable cards matter because a camera left in the field for weeks cannot be easily checked. Carry spare cards so you can swap and review at home.
Check how the camera behaves when the card is full. Some stop recording, while others overwrite old files. Label cards, and keep a note of locations and dates so images can be matched to places.
See SD cards.
Placement
Mount the camera at about chest height, aimed slightly down, and avoid pointing it at sun glare. Sunrise or sunset facing the lens causes false triggers and washed-out images.
Choose where animals actually move, such as trails, feeding areas or water. Clear branches and tall grass in front of the sensor to reduce false triggers. Secure the camera to a sturdy tree with a strap, and use a lock or cable if theft is a risk. Always follow the rules for the land you are on, and get permission where required.
Power and settings
Batteries are the most common cause of failure in the field. Cold weather shortens battery life, so choose batteries recommended by the maker and consider an external power option if offered. A solar panel can extend running time where it gets enough light.
Set the date and time, picture or video mode, and trigger delay before you leave. Test the camera by walking in front of it, then check the images at home. Adjust sensitivity if you get too many empty frames.
Flash Type, Night Images and Animal Behavior
Most of the activity you want to record happens at dawn, dusk and at night, so how the camera lights the scene is one of the most important choices. Trail cameras generally use one of a few approaches. A white flash gives color images at night but is highly visible and can startle animals or attract attention from people. Standard infrared flash uses LEDs that give black and white night images, and some people can see a faint red glow. No-glow or low-glow infrared uses a wavelength that is much harder to see, which is useful when you do not want to disturb animals or advertise the camera.
These choices involve trade-offs. Low-glow models can offer a shorter flash range or a bit less image detail than those with brighter infrared. Brighter flash lights up more of the scene but may cause animals to avoid the area, and it can cause reflective eyes or washed-out close-ups. Check what the listing says about flash range and the number of infrared LEDs, and treat range claims as best case. Real range depends on the surroundings, since open land and dense woods reflect light differently.
Also consider how fast the camera can record at night. A camera that triggers quickly in daylight may slow down in the dark if the exposure is long, causing blur on moving animals. Look for reviews or sample images that show night shots of moving subjects. If you want to identify individual animals, color daytime images and sharp close range night images are helpful. If you only want to confirm presence, a black and white infrared image may be enough. Choose the flash type that matches your goal, the animals in your area and the risk of theft.
Detection Range, Trigger Speed and Sensitivity
A trail camera does not record continuously. A motion sensor, usually passive infrared, detects heat and movement, then wakes the camera to take a picture or video. Three related specifications matter: detection range, trigger speed and recovery time. Detection range is how far the sensor can notice an animal. Trigger speed is how quickly the camera takes a picture after the sensor fires. Recovery time is how long the camera needs before the next shot. A fast trigger with a slow recovery can miss the rest of a group walking through.
The detection zone is not the same as the field of view of the lens. If the sensor sees wider than the lens, the camera may trigger when an animal is outside the frame, resulting in empty pictures. If the sensor is narrower than the lens, the animal may be in the frame but not detected until it is close. Reviews and test images often show how well these match for specific models.
- Sensitivity setting: lower it in windy or sunny conditions to reduce false triggers, and raise it for small animals or cold weather, when the heat difference may be less obvious.
- Burst mode and multi-shot: useful for fast-moving animals, but they fill the card faster.
- Time-lapse mode: takes pictures at set intervals regardless of motion, which is helpful for watching a feeder, a field or a stream over time.
- Trigger delay setting: controls the pause between triggers to prevent hundreds of pictures of the same animal.
Test your settings before leaving the camera. Walk across the frame at different distances and speeds, and review the images. Make small adjustments rather than changing everything at once.
Image and Video Quality in Practice
Resolution numbers on listings are often large, but they do not guarantee a good picture. A higher number can mean more detail, but small sensors and low-quality lenses limit what you actually see, and some cameras increase resolution through software interpolation. Look at sample images, especially at night, to see detail, noise and color. Pay attention to how the camera handles bright sunlight, shade and contrast. A camera with good dynamic range will show detail in both bright and dark areas.
Video features deserve similar scrutiny. Check the video resolution, frame rate, maximum clip length and whether the camera records sound. Longer clips use battery and storage quickly. If your goal is to identify animals, short clips or photo bursts may be enough. If you want to study behaviour, longer clips may be useful. Also check the data stamp, which can print date, time, temperature and moon phase on the image. It is helpful for keeping records, but it covers a small part of the picture.
Consider file size and storage. Higher quality files fill cards faster and take longer to review or transmit by cellular. If you use a cellular model, images are usually reduced in size before sending to save data. That is a normal trade-off, so check how the camera handles full-size images and when they are available. Review your images after the first week, and adjust the settings if animals are cut off, too far away or blurred. Quality in the field often depends more on distance, angle and stable mounting than on the resolution number.
Security, Theft and Weather Protection
A camera left in the field is exposed to people, animals and weather. Planning for these risks can save the camera and the images. For theft prevention, mount the camera so that it is not obvious from trails, use a lock or a security cable if the model has a loop or port, and consider a protective box made for your model. Some cameras have password protection or a PIN to protect the data if stolen. Check the listing for such features and for a built-in lock port.
Weather protection starts with sealing. Check that the door gasket is clean and that the latch closes firmly. Look at any ingress rating or weather-resistant claim and check the wording. A rating does not protect against a cracked housing or an open latch. Put a small desiccant pack inside if the manual allows it, and check the camera for condensation, which can damage electronics and fog the lens. Dust and spider webs can trigger false images, so clean the lens and sensor window with a soft cloth.
Animals can damage cameras too. Bears, deer and rodents may chew straps, knock cameras down or lick the lens. Mount the camera high enough to avoid contact but not so high that the angle is off. Use sturdy straps and trim vegetation that could grow into the frame. Wasp nests and ants near the camera can cause problems. After storms, check the position and the housing. If you work on land owned by others, follow local rules on camera placement, signage and privacy, and ask for permission when needed.
Maintenance, Field Routine and When to Replace
A simple routine keeps a trail camera reliable. Before each season, inspect the camera for cracks, damaged seals and corrosion on battery contacts. Clean the lens and sensor window. Update the firmware if the maker provides updates, install fresh batteries and format the card in the camera. Set the date and time, and take a test picture. Label each camera and card with a code so you can tell them apart.
- Visit the camera as seldom as practical, because every visit leaves scent and noise. Approach quietly and from the downwind side when possible.
- Take a spare card, spare batteries, a cloth, a strap and a small note pad when you go to check the camera.
- Back up images soon after collecting them and keep notes about location, date and conditions.
- Remove batteries before long storage to prevent leakage, and store the camera in a dry place.
Check battery performance across the season. If a set of batteries that used to last weeks now lasts days, the cause may be low temperature, too many triggers, high-resolution video or a weak battery tray contact. Reduce the number of triggers, turn off features you do not need and use fresh high-quality batteries. If the camera takes many blank images, review the placement before blaming the hardware.
Signs it is time to replace a trail camera include repeated failures to wake or save, a damaged lens window, corrosion in the battery compartment, trigger times that are much slower than before and a housing that no longer seals. When replacing, think about what you wish the old camera did better, whether it was range, night image quality, battery life or connectivity, and prioritize that. Check the warranty and the support offered, and keep your old camera as a spare if it still works.
Matching a Camera to Your Goal
Trail cameras serve very different purposes, and the right choice begins with your reason for owning one. Hunters scouting a deer trail care about quick trigger response and a flash that does not spook animals. Landowners checking property want dependable coverage and a simple way to read the pictures. Wildlife watchers may prefer clear daytime images and a quiet design that does not disturb the area.
Write down the main use, then rank your priorities: image detail, battery life, ease of use, or discretion. No single model excels at everything, so knowing your top two priorities helps you read a listing with a clear purpose.
A Quick Comparison of Common Setups
| Goal | What matters most | Features to check |
|---|---|---|
| Scouting game trails | Fast trigger, low-glow flash | Trigger time, flash type, detection range |
| Watching a feeder or garden | Clear close-range pictures | Resolution, focus distance, video length |
| Monitoring a remote property | Long battery life, wireless sending | Cellular options, power source, storage |
| Casual backyard wildlife | Simple setup and quiet operation | Menu ease, mounting, weather sealing |
Check the maker’s specifications and any support pages for each camera so that figures like range and speed are taken from the source and not from guesswork.
Setting Up Your First Camera Properly
A good camera placed badly gives poor results. Take time over the setup, and do a short trial run before leaving it in the field.
- Insert fresh batteries and a memory card of the size the maker supports.
- Set the date, time and image options on the camera before it goes outside.
- Mount it on a sturdy tree or post, angled slightly down so the frame covers the trail.
- Clear branches and tall grass in front of the lens, as moving plants can set off the sensor.
- Walk in front of the camera to confirm that it triggers, then check the saved pictures.
- Close and latch the case firmly to keep out moisture.
Repeat the walk-through whenever you move the camera to a new spot.
Respecting Land, Law and Neighbors
Using a trail camera comes with responsibilities. Place cameras only where you have permission, whether that is your own land or property whose owner has agreed. Rules about cameras on public land, baiting and sharing images vary by region, so consult your local wildlife agency or the landowner for current guidance before you set one up.
Think about privacy as well. Point the lens away from neighbors’ yards and shared paths so that people who are not part of your project are not recorded. Delete images that include people unintentionally, and store the rest securely. A thoughtful setup protects relationships as well as wildlife.
Reading Specification Claims With a Careful Eye
Trail camera listings are full of impressive numbers, and many of them describe best-case conditions. A stated detection range, for instance, may apply to a large animal in a clear setting, while smaller creatures or cluttered backgrounds can shorten it. Image resolution figures can describe an enhanced output rather than what the sensor captures, so look for a clear statement of the true sensor size when one is offered.
Battery life claims depend heavily on how many pictures the camera takes, the temperature and the kind of batteries you use. Cold weather drains power faster, and night flash use drains it faster still. Treat any figure as a rough guide, and plan to check the camera more often during the first weeks to learn its real habits.
Finally, compare warranty length and support options, since a field device lives outdoors and eventually meets rain, insects and curious animals. A brand with clear instructions and responsive support can save plenty of frustration.
Reading a Site Before You Hang a Single Camera
The best trail camera work happens before the camera leaves your bag. Walk the ground the way the animal does, not the way you would choose to walk it. Look for the compressed grass of a run, the mud polished at a crossing, droppings, rubs and the places where a fence, a ditch or a fallen tree funnels everything through one gap. Animals are creatures of least resistance, and a camera placed on a natural funnel records in a night what a camera on a random tree records in a month. Note the direction of travel too: a camera aimed along a trail catches animals approaching and leaving, while one aimed across it catches the broadside moment that shows size and condition best.
Light decides the rest. A camera facing into the rising or setting sun will produce flared, washed images at exactly the hours animals move most, and its sensor can be triggered by the moving shadows of a bright morning. Where you can, face the camera north or south rather than east or west, keep it out of direct low sun, and clear the grass and twigs in front of the lens that will wave in the wind, catch the flash at night and fill your card with portraits of vegetation. Spend ten minutes with a pruning saw at setup and you will save hours of deleting empties later.
Height and angle for different quarry
The standard advice of waist height suits deer-sized animals on level ground, but it is a starting point, not a law. For smaller animals — foxes, badgers, rabbits, birds at a feeder or a nest site — the camera needs to come down and tilt to match, or your images will be a procession of ears and backs. On a slope, aim along the contour rather than up or down it, so the detection zone matches where feet actually land. And think about the second user of your images: if you want to judge an individual animal across weeks, a consistent camera position at a consistent height is what makes those comparisons honest, because an animal photographed from above one week and below the next looks like two different animals.
A Season-Long Plan Instead of Random Checks
Trail cameras reward patience organised into a rhythm. In the first fortnight, check more often, because setup errors — the wrong sensitivity, a card formatted badly, a view full of waving fern — are all visible early and cheap to fix. Once a camera is producing clean runs of images, stretch the interval: every check disturbs the site, leaves scent and teaches wary animals your routine, and the camera’s whole advantage is watching without you. Match the check to the batteries and card you chose, and keep a simple log per camera: date placed, settings, battery type, and what the site produced. After a season, that log is worth more than any single photograph, because it tells you which sites, heights and settings actually work on your ground.
Move cameras with intent rather than restlessness. A quiet week at a good site is information, not failure — animals shift with food, weather and pressure, and a camera that stays put records the return as faithfully as the departure. When you do move, change one variable at a time where you can: a new site with the same settings teaches you about the site, while new settings at the same site teach you about the camera. Owners who change everything at once learn nothing except that something worked, once, for reasons they cannot repeat.
Using two cameras as a pair
Two cameras used together answer questions one cannot. Place one on the approach and one on the destination — the trail and the feeding area, the crossing and the wood edge — and the pair tells you direction, timing and how long animals stay, which is the difference between knowing a place is visited and knowing how it is used. For security use, pair a visible camera with a concealed one watching it, because the visible unit is the one a thief will approach. For wildlife watching at home, a garden camera paired with one at a boundary hole in the fence shows you the whole nightly route of your visitors, and the pair together turns random sightings into a story you can follow across the year.
Interpreting What You Get: Patterns, Not Just Pictures
The beginner scrolls for the best photograph; the experienced user reads the whole card. Times matter as much as images: a run of visits in the first hour after dark describes different behaviour from visits spread through the night, and a sudden shift in timing often means pressure, weather or a food source changing nearby. Weather notes turn your log into a tool — a camera that produces in frost and fails in mild weeks is telling you about feeding patterns, not about itself. Count the blanks honestly too, because a rising share of empty triggers means vegetation, light or sensitivity needs attention before the card fills with nothing during the week that matters.
Manage your expectations about identification. A night image at distance can establish species, rough size and direction with confidence while leaving individual identity genuinely uncertain, and claiming more than the image shows leads to bad decisions, whether the decision is about a hunt, a lost pet or a neighbour dispute. Where identification matters, shorten the distance, improve the angle and let numbers help you: one ambiguous image is a guess, but the same animal across twelve images is a pattern. The cameras linked in this guide are all capable of that patient work; the skill is in the placement and the reading, and both improve quickly once you treat every card as data rather than as a photo competition.
More Questions Worth Asking
Should I use video or photo mode on a trail camera?
Photos are the efficient default: they use less card and battery, review faster, and capture the moment of the trigger cleanly. Video earns its cost when behaviour is the question — how an animal feeds, interacts or reacts — or for security, where a few seconds of movement is more persuasive than a still. Many users run photo mode for routine monitoring and switch a camera to short video clips at a site that has earned closer study. Decide by the question you are asking the site, not by which mode feels more advanced.
How do I stop my trail camera triggering on moving branches and grass?
Start with placement, not settings: clear the vegetation in the detection zone, or move the camera so the waving growth sits outside it. Then lower the sensitivity a step at a time, testing between changes, because a camera desensitised too far starts missing the animals you bought it for. Aiming slightly downward can also help, since it shrinks the zone to the ground where animals actually are. Expect to spend two or three checks dialling a new site in; that is normal, not a fault.
Can I use a trail camera to watch my home or allotment?
Yes, and many people do, because the same qualities that suit wildlife — battery life measured in months, no wiring, night images — suit an unpowered shed, a gate or an allotment. Two cautions apply. First, check local rules about filming beyond your own boundary, and aim the camera at your property rather than a neighbour’s. Second, secure it properly and consider a no-glow model where a visible flash would advertise the camera’s presence to exactly the person you hope to record.
Why are my night pictures bright in the middle and dark at the edges?
That is the flash pattern doing what it can: infrared light is strongest in the centre of the frame and falls away toward the edges, and it also reflects hard off anything close to the lens. An animal very near the camera can blow out to white while one at the edge of range barely registers. The fixes are distance and angle — give subjects room to be fully in the lit zone, keep close vegetation out of the flash path, and accept that the useful night range is shorter than the detection range printed on the box.
How long should I leave a camera in one place before deciding it is a bad site?
Longer than feels natural. A full cycle of weather and at least a couple of weeks is a fair trial for most wildlife sites, because animal movement runs in patterns that a few days cannot reveal. If the camera has produced nothing and your sign reading said the site was active, suspect the setup — height, angle, sensitivity — before you condemn the site. Move a proven camera reluctantly and a new camera thoughtfully, and let the log you keep make the decision with you.
Batteries, Cards and Cold Mornings: The Unglamorous Details
Most trail camera disappointment is really power disappointment wearing a disguise. A set of batteries that reads fine on a warm afternoon can sag badly on a frosty night, which is when the camera is busiest, and the result is a camera that takes daytime pictures happily and misses the night entirely. Lithium cells handle cold far better than alkaline ones and are the honest choice for winter sets, while rechargeable cells vary and sit at a slightly lower voltage that some cameras tolerate and others sulk about. Whatever you choose, replace batteries as a set, note the date in your log, and treat a sudden change in a camera’s behaviour as a power question until proven otherwise.
Cards deserve the same respect. Format the card in the camera it will serve, not on a computer, because the camera builds the file structure it expects. Use modest, genuine cards from sellers you trust — trail cameras are a classic target for counterfeit storage — and retire any card that has ever produced a corrupted run of images. A card is the cheapest part of the whole setup and the only part holding the evidence of weeks of patience; it is the worst place in the system to save money. Carry a spare in a sealed bag, because the day you hike out to a camera with a full card and no spare is a day you will only make that mistake once.
Security and Kindness: The Two Duties of a Camera in the Wild
A trail camera watches a place when you are absent, and that brings two duties with it. The first is to the camera itself, and it is more than theft prevention. A camera that is found by the wrong person can be smashed, its card taken, or — more subtly — its position noted by someone whose activities it was recording, whether that is fly-tipping, poaching or simple trespass. Camouflage helps, height helps, and discretion helps most of all: a camera nobody notices is a camera that keeps working. Check yours from the likely approaches, not from your own path in, because you will always approach from the direction you expect; a stranger will not.
The second duty is to everyone and everything the camera records. Other walkers, neighbours and landowners all have a reasonable expectation that a camera in a shared landscape is there for a legitimate purpose and aimed with restraint. Keep the view on your ground or your quarry, respect the rules of the land you are on, and be ready to explain the camera cheerfully to anyone who finds it and asks — a note on the back with a name and a purpose has defused more suspicion than any lock. Wildlife deserves the same restraint at sensitive times: a camera at a nest or a den should inform, never disturb, and if your visits to change a card are changing the animals’ behaviour, the camera has stopped being an observer. Move it, lengthen the interval, or accept the gap in the record. The best trail camera users are invisible twice over — to the animals and to everyone else — and that invisibility is a skill worth as much as any setting in the menu.
The Patience Dividend
There is a benefit to trail cameras that no specification sheet lists, and regular users mention it more than any photograph. A camera on a familiar piece of ground teaches you the ground itself: which nights the badgers take the long way round, when the first frogspawn follows the first warm rain, how the seasons move through a wood you thought you knew. People buy these cameras for a season or a single question and keep them for years because the questions keep renewing themselves. Set yours up with the care this guide describes, keep the log, read the whole card, and the modest box on the tree becomes something closer to a correspondence with a place — one that continues, faithfully, on all the nights you are somewhere else.
Troubleshooting a Camera That Suddenly Goes Quiet
When a proven camera at a proven site suddenly produces nothing, work the problem in the order of likelihood rather than the order of worry. First, power: swap in a fresh set of batteries even if the indicator claimed life remained, because indicators are optimists in cold weather. Second, the card: format it in the camera and confirm the camera writes a test image when you walk in front of it. Third, the view: vegetation grows, fences fall and a branch that was not in the frame in spring can own it by midsummer, so stand at the camera and look at what it looks at. Fourth, the site itself: check for the sign you originally read — tracks, droppings, wear — because animals reroute for reasons of their own, from a fallen tree to a new food source to a neighbour’s new dog. Only after those four should you suspect the camera, and by then you will usually have found the cause, because trail cameras are simple devices and the world around them is the complicated part.
One Sentence to Remember
If everything else in this guide fades, keep this: a trail camera does not find animals — placement finds animals, and the camera merely proves you were right. Put your effort into reading the ground, give the camera time to do its quiet work, and the card will reward you in proportion to the patience you invested in both.
Choosing Your Very First Site: A Worked Example
Suppose your ground is an ordinary mixed wood with a stream, and you have one camera and one free afternoon. Walk the stream first, because water concentrates everything: look where the bank is worn smooth by crossings, where a log or a shallow gravel bar makes the easy passage, and where tracks gather in the mud. Hang the camera back from that crossing, angled slightly downstream along the bank rather than straight across it, at a height matched to the animals you expect, with the lens clear of the ferns that will grow into it by next month. You have just applied every principle in this guide at once — a funnel, a travel line, honest light, a clear detection zone — and the chances are strong that your first card will contain more animal life than a month of cameras hung on hopeful trees. That is the whole method: read, place, wait, read again.
A Closing Note for Garden Watchers
Not every reader hunts or manages land, and the garden watcher deserves the last word, because a camera by a back fence operates under the friendliest rules of all: short distances, familiar visitors and the freedom to experiment weekly. Use that freedom. Try the low angle by the pond, the week pointed at the bird table, the month along the hedge line, and keep the results the way a gardener keeps a diary. Within a year you will know your garden’s night population better than you know its day one — the hedgehog’s route, the fox’s hour, the cat from three doors down — and you will have learned every skill in this guide on the easiest ground there is, ready for the wood, the hill or the allotment whenever you want them.
Before Your First Night Out
One final practical word: test the camera at home tonight, in the garden, on the cat, the family, the wheelie bins — anything that moves. A night spent learning its flash reach, its trigger manners and its menu in the warm will save the first precious week in the field from being a lesson in the manual. Then hang it, walk away, and let the woods keep their own hours.
The Short Version
Read the ground, hang the camera on the funnel, keep the lens clear and the batteries honest, and then be patient: the animals are already doing their part of this arrangement every single night.
Quick Answers
What is the difference between no-glow and low-glow infrared?
Low-glow flashes are faintly visible as a dim red light, while no-glow uses a wavelength that is hard to see. No-glow can reduce disturbance, but it may offer less night range or detail, so check reviews for sample images.
Why does my trail camera take pictures with nothing in them?
Common causes are wind moving branches, sun heating vegetation, too high a sensitivity setting or an obstruction in front of the sensor. Clear the area, aim the camera away from the sun and lower the sensitivity.
How high should I mount a trail camera?
Chest height is a common starting point, angled slightly down, but adjust for the animals you want to record. Test by walking in front of it and reviewing the images.
Can I use rechargeable batteries in a trail camera?
Only if the manual says they are suitable. Some rechargeable types provide a different voltage and can cause shorter run times or errors, so check the maker's recommendation.
How do I protect a camera from theft?
Place it out of sight from trails, use a lock or cable if the model has a lock point, and consider a protective box. Some cameras also offer a password or PIN for the data.
Do I need a separate memory card for each camera?
It is helpful. Label cards by camera, format them in that camera and keep spares so that you can swap cards and review images at home.
How often should I check my trail camera?
As seldom as practical, since visits can disturb animals. Check battery and card capacity before you leave and plan visits according to how often you expect them to fill.
Bottom line
Choose connectivity, then power. Decide whether you need pictures delivered remotely, then make sure the batteries and memory will last between visits. Good placement and a short test do more for your results than a longer feature list.
Common questions
How many cameras should I start with?
Start with one. Learn how it behaves, where animals travel and how often you need to check it, then add more if you need wider coverage.
How far does the Wi-Fi reach?
Typically only a short distance, enough for setup and reviewing photos when you stand near the camera. It is not a remote monitoring solution.
Does solar power help?
It can extend battery life if the panel receives enough sunlight, but shaded woodland may limit the benefit. Check the placement before relying on it.
More Cameras Guides
- Which Type of Camera Should You Buy?
- Best Dual Dash Cams for Cars
- Best 4-Channel Dash Cams for Rideshare and Taxis
- Best Premium Dash Cams
- Best Truck Dash Cams
- Best Cellular Game Cameras for Remote Photos
- Best WiFi Game Cameras with Apps
- Best 4K Game Cameras for Hunting


Ready to Buy? Start Here
If this guide helped you decide what to look for, these products are a place to start.


As an Amazon Associate we earn from qualifying purchases. Prices and availability are shown on Amazon.

