Disclosure: As an Amazon Associate, reviewstook.com earns from qualifying purchases. Links to Amazon on this page are affiliate links; they cost you nothing extra.
Mirrorless cameras give you interchangeable lenses, a larger sensor than a phone and excellent video features in a body smaller than a traditional DSLR. Choosing one is mostly about the lens system you are buying into. This guide explains sensor sizes, lens mounts and the accessories that matter.
This guide is built from product listings and general photography knowledge, not our own testing.
By the Reviewstook Editorial Team. Last updated: October 31, 2026.
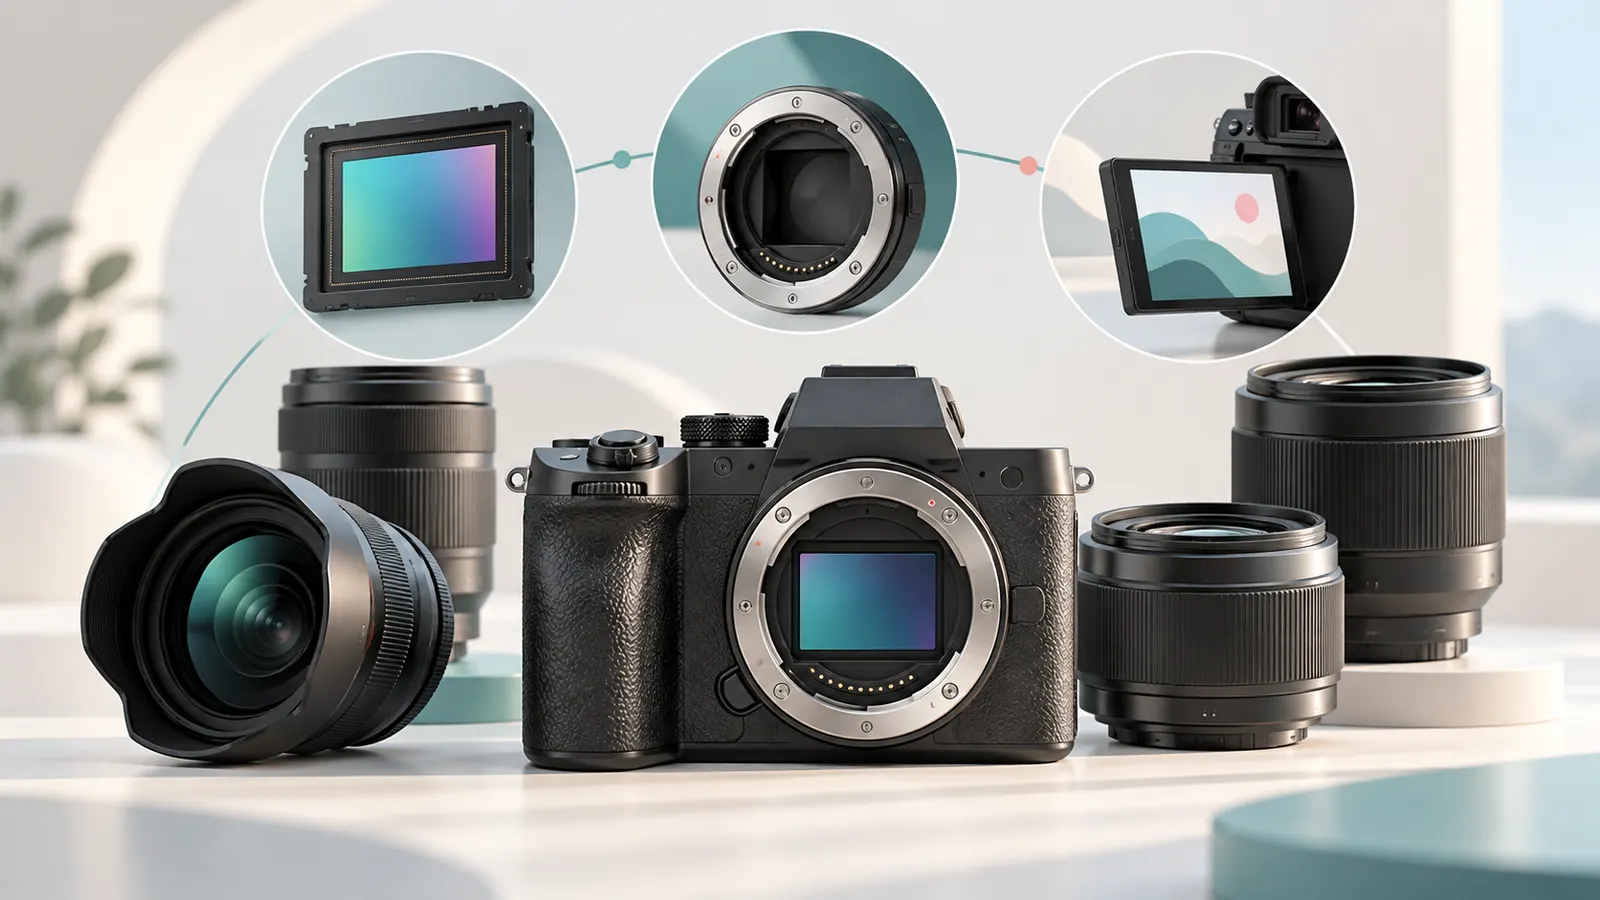
Why Choose Mirrorless
Mirrorless cameras use an electronic viewfinder and have fewer moving parts than a DSLR. Autofocus and video features are strong, and bodies are smaller. Lens choice and ecosystem are the real investment.
In this guide
Sensor Size
Full-frame sensors offer the best low-light performance and shallow depth of field but cost more and need bigger lenses. APS-C sensors are smaller and cheaper, with lighter lenses. Micro Four Thirds is the most compact. Choose by how much you value quality versus size and cost.
The Lens Mount Is the Real Decision
Lenses are the long-term investment. Each maker has its own mount, so check the range of lenses, including third-party options, before choosing a body. See our lenses for Sony E-mount for an example.
Autofocus and Video
Modern autofocus tracks faces and eyes, which helps portraits and action. For video check resolution, frame rates, stabilization and heat management. Microphones help sound; see shotgun mics for cameras.
Stabilization
In-body stabilization helps in low light and handheld video. Lens stabilization also exists. Check which the camera has.
Essential Accessories
Cards, batteries, a bag and a tripod complete the kit. See our lists for SD cards, camera bags, tripods, lens filters, batteries and chargers, straps, flashes and cleaning kits.
Compact Alternatives
If you want something simpler, consider a compact camera or an action camera: compact digital cameras and action cameras.
Understanding Crop Factor and Lens Equivalence
When you move between sensor sizes, lens numbers stop meaning the same thing, and this confuses many first-time buyers. A lens marked with a focal length gives the same angle of view on the same sensor size, but a smaller sensor sees a narrower slice of the same image. This is described by the crop factor. On an APS-C or Micro Four Thirds camera, a lens frames a tighter view than the same lens on full frame, so a standard lens on a smaller sensor behaves like a short telephoto in full-frame terms.
Photographers use equivalence to compare lenses across systems. It applies to angle of view and also to depth of field and light gathering. A smaller sensor with a lens at a given aperture produces deeper focus than a larger sensor with the same angle of view and aperture. That is one reason full frame is associated with blurred backgrounds, and why smaller formats suit travel and long reach in a smaller package.
- Check the crop factor for the system you are considering, as listed by the maker.
- Convert lens focal lengths to see whether you are getting the wide or long view you want.
- Remember that a wide lens on a smaller sensor may need a shorter focal length than you expect.
- Look at sample photos taken with the lens you plan to buy, not just the body.
The takeaway is practical. Think in terms of the view you want to capture, and then find the lens and sensor combination that provides it at a size, weight and cost you accept. If you plan to shoot wildlife or sport, a crop sensor can give extra reach in a small lens. If you plan to shoot interiors or portraits with soft backgrounds, a larger sensor may suit you better.
Viewfinder, Grip and Controls That Suit Your Hands
Specifications do not tell you how a camera feels. Ergonomics decide whether you enjoy using it, and so whether you take it out. Hold a camera before you buy if you can, with a lens you would actually use. Check whether your fingers wrap around the grip, whether the buttons fall under your thumb and whether the weight balances with a larger lens. A tiny body can feel fiddly with large hands and heavy lenses, while a larger body may be less convenient to carry.
The electronic viewfinder is a major part of the experience. Look at its size, clarity and how it handles fast movement or low light. If you wear glasses, check the eye relief so you can see the whole frame. A rear screen that tilts or flips out helps with low angles, vlogging and awkward positions. A touchscreen speeds up focus point selection and menu navigation, though some people prefer physical dials.
- Check how many custom buttons and dials there are and whether they can be reassigned.
- Look at the menu system, since a confusing menu slows you down.
- Check the weather sealing description on the product page if you shoot outdoors.
- Check for a headphone or microphone port if you make video.
- Look at the card slots, as dual slots are useful for backup on important jobs.
Controls matter most when you shoot quickly. If you often photograph events or children, you want to change settings without taking your eye from the viewfinder. Try to find a body whose layout makes sense to you, since the best camera is the one you are comfortable carrying and using.
Battery Life, Storage and Running Costs
Mirrorless cameras use their screens and viewfinders constantly, so battery life is often shorter than on a DSLR. The manufacturer’s stated figure is based on a standard test, and real use, especially with video, will vary. Plan to buy at least one spare battery, and check whether the camera can charge over USB, which is handy while travelling. Read the listing to see whether a charger is included or whether charging is only possible in the body.
Memory cards are the other recurring cost. Check which card type your camera uses and which speed class it needs. High-resolution video and fast burst shooting need cards that can write data quickly, while casual stills are less demanding. The manual or product page often recommends specific card standards, so follow those rather than buying the cheapest card available. Also consider the storage side of your workflow, since large files fill computers and drives quickly.
- Buy cards from reputable sellers to avoid counterfeit products.
- Format cards in the camera, not on a computer.
- Back up files in at least two places before clearing a card.
- Carry a spare card on important shoots.
Also think about heat. Some cameras shut down or limit recording time when they get warm during long video sessions, and small bodies are more prone to this. If you shoot long takes, check the maker’s notes and independent reviews about recording limits. Considering these running costs early gives a more realistic idea of the true price of the system.
New, Used and Adapted Lenses
You can lower the entry cost of a mirrorless system by buying used or by adapting lenses. Used bodies and lenses are common, and many are in good condition, but you need to check them carefully. Look for scratches, fungus and haze in lenses, test autofocus and the aperture, and check the shutter count and sensor for dust on bodies if the seller provides it. Buy from sellers with a return policy, and ask what is included.
Adapters let lenses from other mounts fit on a mirrorless body, including older manual lenses. This can be an inexpensive way to get unusual character or specific focal lengths. The caveats are that autofocus and stabilisation may not work properly, adapters add length and cost, and not every lens and body combination is supported. Check the maker’s compatibility notes, and read user reports for the exact lens and body you plan to pair.
- Check that the mount is current and that the maker still supports it.
- Look for third-party lens options in the system and compare them with the maker’s own.
- Consider a body that has been on the market for a while, since prices of older models often drop when newer ones arrive.
- Check firmware update availability for the body you choose.
A balanced approach is to buy a body that fits your budget and add lenses gradually. Lenses usually outlast bodies, so put priority on quality glass over the latest body features. If you can only afford one upgrade, a better lens usually improves your photos more.
Common Buying Mistakes and Signs to Upgrade
A few errors come up often. Buyers fixate on megapixels, although for most uses the resolution of any modern body is plenty. They buy the highest-spec body but cannot afford good lenses. They ignore the size and weight of lenses, then leave the camera at home. They overlook the cost of cards, batteries, a bag and a tripod. And they choose a system without checking whether it has the lenses they will want in a year or two.
A sensible approach is to list your real subjects first, for example family, travel, sport, video or landscapes, and rank what each needs. Then match the body to those needs, and look at the lens range for your top two subjects. Decide how much weight you will carry on a normal day. Use the return window to test autofocus on your own subjects and check the battery on a real day out.
- Do not buy features you will not use, such as high frame rates for landscape work.
- Do not skip a camera bag, a strap and a lens cleaning kit.
- Do not ignore firmware updates, which can improve autofocus and stability.
Signs that it is time to upgrade include missing shots because autofocus or burst speed cannot keep up, repeatedly hitting low-light limits with good lenses, or needing video features the body does not provide. If the limitation is the lens, upgrade that first. A body upgrade is best made when you can name the specific problem it will solve.
Decision Guide by Type of Photographer
The best mirrorless camera for a traveler is not the best one for a sports shooter, and a vlogger has different priorities again. Instead of ranking bodies on a single scale, begin with what you want to make. Picture the pictures or clips you hope to create over the next two years, and let that picture guide the checklist below.
| You mostly shoot | Prioritize | Can compromise on |
|---|---|---|
| Travel and street | Small body, compact lenses, good battery | Top burst speed |
| Family and kids | Reliable autofocus tracking, easy menus | Extreme resolution |
| Portraits | Eye autofocus, fast prime lenses | Video features |
| Landscapes | Dynamic range, resolution, weather sealing | Autofocus tracking |
| Sports and wildlife | Burst rate, buffer, long lens options | Compact size |
| Video and vlogging | Stabilization, flip screen, microphone input | Viewfinder size |
Many people shoot a mix, so choose the top two rows that describe you and ignore the rest. That keeps you from paying for features you will not use.
Why the Lens Matters More Than the Body
A camera body is replaced every few years, but lenses can stay with you much longer. For that reason, look at the lens range for each system before you commit. A system with many lenses, from compact primes to long zooms, will keep you supplied as your interests grow. Check also what third-party makers offer for the mount you are considering, because options widen choice.
- Check whether the system has the focal lengths you want.
- Look for compact prime lenses if you value small size.
- Consider adapters for older lenses, and read the maker notes about autofocus support.
- Think about the size and weight of lenses you will carry.
Buying a kit lens with a body is often a sensible first step, but be aware that the lens you want later may cost as much as the body.
Reading a Spec Sheet Without Getting Lost
Camera pages are full of numbers. A short guide to the ones that matter helps you avoid being swayed by the biggest figure.
Sensor size
Larger sensors gather more light and offer shallower depth of field, but bodies and lenses grow bigger. Smaller sensors are lighter and often simpler to build around.
Resolution
More megapixels allow larger prints and cropping, but files are heavier. Many shooters do not need the highest number.
Autofocus
Look for descriptions of subject detection, such as people, animals or vehicles. How well it works in practice varies between models, so read multiple sources.
Stabilization
In-body stabilization helps with handheld shooting and works with many lenses. Some lenses add their own.
Battery life
Figures are usually based on standard test conditions. Real use, especially with video, can differ, so plan to carry a spare.
Video Features to Check If You Film
If video matters, read the video section of the spec carefully. Look at the maximum resolution and frame rates, whether recording has time limits, and how the camera handles heat. Check for a microphone input, headphone jack, flip-out screen and clean HDMI output if you plan to use external gear. Log profiles and higher bit depth give editors more flexibility, though they demand more storage and learning.
- Decide the resolution and frame rate you really need.
- Check recording limits and heat management descriptions.
- Confirm that the screen articulates in a way that suits you.
- Look at available audio inputs and accessories.
Handling, Menus and Everyday Comfort
Specs do not tell you how a camera feels. Grip size, button placement and menu layout affect your enjoyment far more than a slight difference in resolution. If you can, hold the camera in a shop. Pay attention to the viewfinder, which differs in size and clarity, and to the screen. Some cameras have more physical dials, which suit people who like direct control, while others rely on touch screens.
Weather sealing is another point. If you shoot outdoors, check what the maker says about dust and moisture resistance, and remember that lenses need to be sealed too.
Accessories and Costs Beyond the Body
Plan for memory cards, a spare battery, a bag, a strap and perhaps a tripod. Check the card type your camera uses, as some use faster cards for video. Think about software for editing and storage for files. Over time, lenses and bags often cost more than the body, so factor that into your decision.
A Short Checklist Before You Choose
- Write down your top two subjects.
- Check lens availability for your needs.
- Hold the camera and test the menus if possible.
- Read the maker warranty and support details.
- Decide on a spending limit that includes accessories.
Glossary for Camera Shoppers
- Mount: the lens connection on the body. Lenses must match the mount or use an adapter.
- Crop factor: how a smaller sensor changes the apparent field of view compared with a full-frame one.
- EVF: the electronic viewfinder, a small screen you look into.
- Burst rate: how many frames per second the camera can capture in a row.
- Buffer: the memory that holds a burst before it is written to the card.
- Raw file: an image that keeps maximum data for editing.
Mistakes to Avoid
New buyers sometimes chase megapixels and overlook handling. Others buy the body without looking at what lenses cost, then find the system stretches the budget. Some pick a camera for features they never use, such as extreme video modes, while neglecting basics like grip comfort. Finally, many forget that firmware updates and support matter, so check how the maker supports older models.

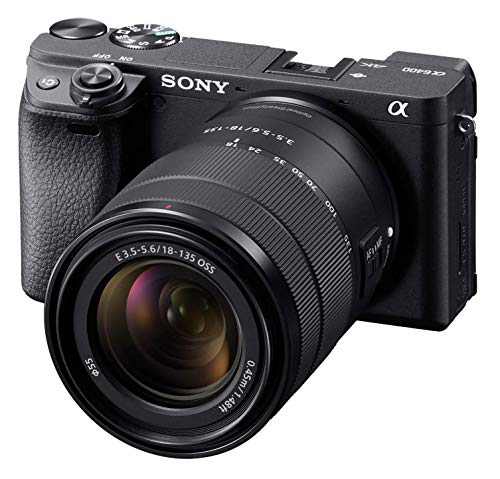
Ready to Buy? Start Here
If this guide helped you decide what to look for, these products are a place to start.

As an Amazon Associate we earn from qualifying purchases. Prices and availability are shown on Amazon.
Going Deeper: Choosing the Right Mirrorless camera
The shortlist above gives you the headline differences. This section slows down and looks at the decisions underneath them, because with a mirrorless camera the wrong choice is rarely a bad product; it is a good product matched to the wrong routine. Work through the four considerations below in order. By the end, one or two of the picks should stand out clearly, and the rest can be set aside without second-guessing.
Sensor size and the lenses it commits you to
Sensor size shapes low-light performance, depth of field and, most importantly, the lens system you will buy into for years. Full-frame offers the widest lens choice and low-light headroom; cropped sensors give smaller, lighter kits with reach advantages for wildlife. Judge the system, not just the body deal in front of you.
Lens mount and future upgrade path
Bodies are replaced; lenses stay. Check that the mount has the lenses you want at prices you accept, including third-party options, before choosing a body. A slightly older body in a strong system usually serves longer than a newer body in a system you will outgrow or cannot afford to expand.
Video features you will genuinely use
Resolution headlines matter less than recording limits, heat behaviour, stabilisation and microphone and headphone sockets. If you film long events, test or research thermal limits carefully. If video is occasional, stills handling and autofocus deserve your budget instead.
Handling, menus and the viewfinder
You use controls and menus every shoot, so ergonomics are a performance feature. A bright viewfinder, a screen that articulates the way you work, and dials that fall under your fingers all affect results. Where possible, hold the camera with your largest intended lens before deciding.
Setup, Workflow and Getting Consistent Results
First setup and handling basics
Fit and test everything at a table before you go anywhere. Charge batteries, format cards in the camera, and update nothing on the morning of an important shoot. Handle the gear the way you will in the field: if a control, mount or connector annoys you at home, it will defeat you in gloves, rain or darkness. Keep the small parts, caps, cables and tools that belong to this kit together in one pouch, so the system travels as a system rather than as scattered pieces you must hunt for.
Building a repeatable routine
Consistency is what turns accessories into results. Use the same order every time: power, storage, settings, then the accessory itself. A short personal checklist, written once and kept in the bag, prevents the classic failures: the flat battery, the full card, the accessory left in the car. After each shoot, reset everything to your defaults while the memory of the day is fresh, so the kit is ready the next time you pick it up.
Testing before it matters
Every new accessory deserves one low-stakes outing before real work. You learn its handling, its failure modes and whether it truly suits your camera, while nothing is lost if it disappoints. Photographers who test at home blame their gear less, because they have already separated genuine faults from unfamiliarity.
Real-World Scenarios: Matching the Pick to the Situation
Abstract advice only goes so far, so here are the situations readers describe most often, and how the thinking in this guide applies to each. Find the scenario closest to your own life and weight its advice heavily; the others are there for the day your routine changes.
First serious camera for a beginner
Start with a body and one versatile zoom, learn exposure and composition, and let your frustrations, not advertisements, choose the second lens. The buying mistakes in this guide are mostly about buying a full system on day one. A mid-range body with money reserved for lenses beats a flagship body with none.
Upgrading from a phone
Phone photographers notice the biggest gains in low light, shallow depth of field and real zoom reach. Keep the kit small at first so the camera actually leaves the house; a large kit that stays home loses to the phone in your pocket every time.
Hybrid photo and video work
Creators shooting both stills and video should weigh stabilisation, flip screens, clean high-ISO video and audio sockets as heavily as megapixels. Test the workflow end to end: a camera whose files your computer struggles to edit will slow every project, whatever its specifications promise.
Wildlife and sports on a budget
Reach and autofocus tracking dominate this use case. A cropped-sensor body multiplies the reach of affordable telephoto lenses and modern tracking autofocus has filtered down to mid-range models. Spend on the lens; a modest body with a long, sharp lens outperforms a premium body with a short one.
Troubleshooting and Avoiding the Usual Disappointments
When something underperforms, change one variable
Disappointing results with camera accessories usually trace to setup, not defects. Work through the chain in order: power, connection, settings, then the accessory itself. Change one thing at a time and note what fixed it. Randomly swapping parts teaches nothing and can introduce a second fault while you chase the first.
Keep firmware and contacts in mind
Modern cameras and electronic accessories communicate constantly. Clean contacts gently, keep firmware reasonably current, and re-check accessory behaviour after a major camera update. Many mysterious incompatibilities are simply an old accessory meeting a new camera body for the first time.
Know when to stop troubleshooting
If a fault follows the accessory across cameras and cables, it is the accessory. If it stays with one camera, it is the camera or its settings. That simple swap test, done early, saves days of forum searching and is the first thing a repair technician will ask about.
More Questions Worth Asking Before You Decide
The main FAQ below answers the questions every buyer asks. These additional ones come from owners a few months in, when the newness has worn off and the real characteristics of a mirrorless camera have made themselves known.
How many megapixels do I actually need?
For prints at normal sizes and online use, the resolution of any current mirrorless camera is ample. Higher counts help heavy cropping and very large prints but enlarge files and can expose lens or technique limits. Choose resolution for your output, not as a status figure.
Should I buy the kit lens or body only?
A kit zoom is the cheapest way to learn which focal lengths you use, and its weaknesses teach you what your next lens must fix. Experienced photographers with a clear plan can skip it. If you are unsure, that uncertainty itself argues for the kit lens first.
Is in-body stabilisation essential?
It helps with unstabilised lenses and video, and can rescue several stops in low light for static subjects. It does nothing for subject movement, which needs shutter speed. Treat it as a strong convenience rather than a reason to choose an otherwise unsuitable system.
How long will a mirrorless camera stay current?
Bodies improve incrementally now; a well-chosen camera takes excellent photos for many years. Lenses, lighting and skill age far more slowly than bodies. Buy the system you can grow in, and expect the body to serve until your needs, not the market, say otherwise.
What else must I budget for beyond the camera?
At minimum: a memory card, a spare battery, a bag and a cleaning basics. Over the first year, a second lens and a tripod are the common additions. Reserving part of the budget for these from the start prevents the classic trap of an expensive body and nothing to support it.
Field Notes for Mirrorless camera Owners
One habit separates photographers who love their accessories from those who accumulate them: everything earns its place by solving a named problem. Before any future purchase, write down the shot you lost or the frustration you felt. If the new item does not answer that sentence, it is decoration. This discipline keeps a kit small, light and genuinely capable, and it is why the best guides, including this one, organise choices by use case rather than by novelty.
Budget is a real constraint for every photographer, so sequence purchases by impact. The accessory that removes your most frequent frustration comes first, even if a more glamorous item tempts you. Borrow or hire specialised gear for rare needs before buying it. Money saved on rarely used equipment funds the lenses and trips that actually improve a portfolio, and a small kit mastered beats a large kit merely owned.
Look after the small interfaces: mounts, threads, contacts and zips. Most accessory failures begin there, not in the headline component. A thread that is kept clean does not seize; a contact wiped occasionally does not corrode unnoticed; a zip brushed free of grit does not jam on the day you are rushing. Five minutes of attention after a wet or dusty outing prevents most of the repairs photographers pay for.
Learn to evaluate your own results honestly. When an accessory seems to disappoint, compare like with like: same subject, same light, with and without it. Photographers often credit or blame equipment for differences made by light, distance or their own settings. A simple side-by-side test at home settles arguments that weeks of opinion cannot, and it teaches you the true operating envelope of everything you own.
Finally, remember that accessories serve the photograph, not the other way round. The best setup is the one you carry without thinking and operate without looking. If a new addition makes you slower or more anxious, simplify, even if the addition is objectively excellent. Confidence and familiarity are photographic qualities too, and they compound with every outing in a way specifications never will.
Keep a simple log for a month: what you carried, what you actually used, and what you missed. Most photographers are surprised by the gap between the first two lists. That log is the most honest buying guide you will ever read, because it describes your photography rather than the photography you imagine. Let it steer the next purchase and the next clear-out alike, and your kit will quietly converge on exactly what you need.
Second-hand markets change the economics of accessories. Well-made mechanical items, supports, bags and cases lose little in used condition and can be inspected before buying. Electronic items deserve more caution and a returns window. Buying used also lets you test a category cheaply: live with the idea for a season, and only then decide whether the premium version earns its place in your bag.
Weather deserves a plan rather than hope. Know which parts of your kit tolerate rain, which need a cover, and which should stay in the bag when conditions turn. A cheap shower cap, a microfibre cloth in a sealed bag and a dry place to work transform a wet day from a kit-threatening event into a minor inconvenience. Photographers in changeable climates build these habits once and benefit for years.
Teach yourself to pack by scenario, not by inventory. Lay out the two or three configurations you actually shoot, such as a light walking kit and a full working kit, and pack to those patterns. Scenario packing is faster, lighter and far less likely to leave the one essential item at home than emptying the whole cupboard into the largest bag you own.
When you lend or borrow accessories, agree the basics first: condition, return date and what happens if something breaks. Most friction between photographers comes from unspoken assumptions, not from damage. A photograph of the item’s condition on the day it changes hands protects both sides and keeps friendships, and collaborations, intact.
Accessories interact with each other, so judge a purchase by the whole kit’s behaviour, not the item alone. A heavier accessory changes how a bag carries; a bulkier one changes which bag you need; a power-hungry one changes your battery budget. Lay the kit out before buying and ask what else changes. This systems view prevents the common pattern where one good purchase quietly forces three more.
Renting or borrowing before buying is underused for camera accessories. A single weekend with the real item answers questions no review can: whether it fits your hands, your bag and your patience. Many photographers discover that the accessory they researched for weeks solves a problem they have twice a year, while a humbler item would have served every single week.
Keep receipts, boxes for major items, and a note of serial numbers somewhere safe. Accessories are stolen, fail under warranty and get resold, and in all three cases paperwork decides how painful the process is. A single folder, physical or digital, created today, saves real money and time across the life of a kit.
Photography rewards those who review their own work. Once a season, look back at your favourite and most frustrating outings and ask which accessory earned its place and which stayed in the bag. Sell or pass on the passengers. A leaner kit is not a lesser kit; it is a kit whose every item has proven itself in your hands.
Ergonomics deserve the same respect as optical quality. If an accessory makes your hand ache, your shoulder complain or your setup slower, you will unconsciously shoot less. Comfort is not a luxury feature in equipment you may carry for ten hours; it is the feature that decides whether the rest of the features get used at all.
Finally, build slowly. One considered addition at a time lets you learn each item properly and notice its effect on your photographs. Rapid accumulation hides cause and effect, and leaves photographers unsure which purchase actually helped. Slow, deliberate kit building is cheaper, lighter and, in the long run, far more satisfying.
A Worked Decision: Three Buyers, Three Different Right Answers
Buying guides fail when they pretend one camera suits everyone, so here are three realistic buyers worked through the framework of this guide. Notice that each ends with a different kind of camera, and that in every case the lens plan, not the body specification, drives the decision.
The parent upgrading from a phone
This buyer photographs children indoors and on playing fields, and films school events. Their honest constraints are a modest budget, little patience for menus, and a camera that must be ready instantly. The right pattern is a mid-range body with strong subject-detection autofocus, the kit zoom for everyday use, and money reserved for a fast prime for indoor birthdays and a modest telephoto for sports days. A flagship body would consume the lens budget and deliver less, because the missed indoor shots were a lens-aperture problem, not a body problem.
The traveller who carries everything
This buyer walks all day in unfamiliar cities and prints a handful of favourites each year. Weight is their binding constraint, so a smaller-sensor system with compact lenses serves them better than a full-frame kit they would leave at the hotel. They should choose the body with the viewfinder and grip they enjoy most, one versatile zoom, and a small fast prime for evenings. Every gram saved is a photograph taken at the far end of a long day when a heavier kit would have stayed in the bag.
The aspiring hybrid creator
This buyer records video for an audience and shoots stills for pleasure, so the decision runs through recording limits, stabilisation, audio sockets and file formats their computer can handle. They should shortlist bodies on those practical grounds first, then check that the lens system offers the wide and standard zooms their work needs. For this buyer a slightly older body in the right system, plus a proper microphone and a tripod, produces visibly better videos than a newer body used bare.
Frequently Asked Questions
Is mirrorless better than DSLR?
Mirrorless is the direction the market has moved, with strong autofocus and video features, but both can take great photos.
Full-frame or APS-C?
Full-frame is better in low light; APS-C is cheaper and smaller.
Do I need a kit lens?
A kit lens is a good starting point, and you can add better lenses later.
Do more megapixels mean better photos?
Not necessarily. More resolution helps with large prints and cropping, but it also means bigger files. For most online and print use, current sensors have enough resolution.
How many batteries should I buy?
At least one spare is a sensible start, and more if you shoot video or travel. Check the listing for battery type and charging options.
Is a weather-sealed body necessary?
It is helpful if you shoot in rain, dust or on beaches. Sealing needs a sealed lens too, so check both on the product pages.
Can I use my old DSLR lenses on a mirrorless camera?
Often with an adapter, but autofocus and stabilisation support varies. Check compatibility with your specific lens and body before buying.
Should I buy a used mirrorless camera?
It can be a good value if you check condition and buy from a seller with returns. Ask about the shutter count, and test the sensor, screen and ports.
What card speed do I need for video?
It depends on the resolution and bit rate. Check the camera manual or product page for the recommended card standard.
Is image stabilisation in the body or in the lens better?
Both help, and some cameras combine them. Body stabilisation works with any lens, while lens stabilisation can be tuned for that lens. Check what the camera and lens offer.
Bottom Line
Pick a lens system you can grow into, choose the sensor size that matches your budget and size needs, and budget for cards, batteries and a bag. See our best mirrorless cameras.
More Camera Guides
- Best Mirrorless Cameras
- Best Lenses for Sony E-Mount Cameras
- Best Tripods for Mirrorless Cameras
- Best Camera Bags for Mirrorless Cameras
- Best SD Cards for Mirrorless Cameras
- Best Shotgun Mics for Cameras
- Best Camera Straps
- Best Lens Filters for Mirrorless Cameras
- Best Camera Cleaning Kits
- Best Camera Flashes
- Best Camera Chargers and Dummy Batteries
- Best Camera Cubes and Dry Boxes
- Best Compact Digital Cameras
- All camera guides


