Disclosure: As an Amazon Associate, reviewstook.com earns from qualifying purchases. Links to Amazon on this page are affiliate links; they cost you nothing extra.
Speaker wire is easy to overthink. The right gauge keeps power loss low, and in most home setups the answer is simple. This guide explains gauge numbers, length and what to buy for typical systems.
This guide draws on general audio knowledge and product information, not our own testing.
By the Reviewstook Editorial Team. Last updated: October 31, 2026.

What Gauge Means
Wire gauge is a number: the lower the number, the thicker the wire. Thicker wire has less resistance, so it loses less power over distance. Common speaker wire gauges are 12, 14, 16 and 18 AWG.
In this guide
Choosing a Gauge by Distance
For short runs of up to about 10 feet (3 m) to typical 8-ohm speakers, 16 AWG is fine. For runs up to about 25 feet (7.5 m), 14 AWG is a safe choice. For longer runs or low-impedance (4-ohm) speakers, use 12 AWG. These are guidelines, not hard rules.
Impedance Matters
Lower-impedance speakers draw more current, so they need thicker wire over the same distance. Check your speakers’ impedance in the manual or the listing.
Copper, CCA and Oxygen-Free Copper
Pure copper conducts better than copper-clad aluminum (CCA). CCA is cheaper but has higher resistance and is more brittle, so use a thicker gauge. Oxygen-free copper claims are mostly marketing for home use.
In-Wall Rated Wire
If you run wire inside walls, buy wire rated for in-wall use (CL2 or CL3). See our in-wall speakers and in-ceiling speakers for speakers that mount in walls.
Connectors and Installation
Use banana plugs or clean stripped ends. Make sure positive and negative are matched on both ends, and avoid stray strands touching. Keep runs tidy and away from power cables.
Car and Outdoor Use
For car systems see amplifiers and our car speaker guide. For outdoor use choose wire rated for direct burial or UV exposure.
The Math Behind Wire Gauge
Every wire has resistance, and resistance wastes some of the amplifier’s power as heat and reduces how well the amplifier controls the speaker. Thinner wire (a higher gauge number) and longer runs have more resistance. A rule of thumb is to keep the wire’s resistance below about 5% of the speaker’s impedance. For 8-ohm speakers that means under 0.4 ohm of wire resistance. Copper 16 AWG wire has roughly 4 ohms per 1000 feet per conductor, so a 10-foot run (20 feet of wire with both conductors) adds about 0.08 ohm, which is well within that limit. Over a 50-foot run the same wire adds about 0.4 ohm, so a thicker 14 AWG wire is wiser. These figures are approximate, so check the manufacturer’s specification.
A Simple Length Table
| Run length (each speaker) | 8-ohm speakers | 4-ohm speakers |
|---|---|---|
| Up to 10 ft (3 m) | 16 AWG | 14 AWG |
| 10 to 25 ft (3 to 7.5 m) | 14 AWG | 12 AWG |
| 25 to 50 ft (7.5 to 15 m) | 12 AWG | 12 AWG or thicker |
| Over 50 ft (15 m) | 10 or 12 AWG | 10 AWG |
These are cautious guidelines. In practice, many home systems use 14 or 16 AWG wire without audible loss.
How to Connect Speaker Wire
- Turn off and unplug the amplifier.
- Cut the wire to length, leaving a little slack.
- Strip about 10 to 12 mm (a half inch) of insulation from each conductor.
- Twist the strands tightly so no loose strands remain.
- Connect to the terminals, red (positive) to red and black (negative) to black on both the amplifier and the speaker.
- Tighten and tug gently to check that the connection is secure.
Polarity Matters
Connecting one speaker with reversed polarity makes bass thin and the stereo image vague. Many speaker wires have a stripe or print on one conductor, which makes it easy to keep polarity consistent.
Banana Plugs and Spade Connectors
Banana plugs make connections quick and tidy and prevent stray strands from touching. Spade connectors suit screw-type terminals. Choose connectors that fit your terminals.
Safety and Installation
Do not let bare conductors touch, which can short the amplifier. Keep speaker wire away from mains power cables. For in-wall runs use wire rated for walls; see in-wall speakers and powered vs passive speakers.
Stranding, Jackets and Flexibility
Gauge is only one part of what makes speaker wire easy or hard to live with. Two wires of the same gauge can behave very differently depending on how many fine strands they contain and what kind of jacket covers them. A wire with many thin strands is generally more flexible, which makes it easier to bend around furniture and corners, to push through a tight gap and to tuck behind a skirting board. A wire with fewer, thicker strands tends to be stiffer and can resist sharp bends.
The jacket matters for handling and for where the wire can go. A smooth jacket slides through a conduit or behind a wall more easily, while a textured one grips and can snag. Clear or colored jackets may be easier to see against a skirting board, but they can show wear faster in sunlight. Some wires have a printed stripe or a ridge on one conductor to mark polarity, which is helpful when you connect several speakers.
Look at how the two conductors are joined. A zip-cord style pair can be pulled apart to separate the conductors for a short distance, which makes stripping and connecting simple. A round jacketed cable keeps both conductors together and looks tidy on a visible run.
Check the product listing for the jacket rating, the gauge and the conductor material. If the listing does not state the gauge clearly, treat that as a reason to look elsewhere. The wire should also be easy to cut cleanly, so check that you have a decent wire cutter and stripper before you start.
Bi-Wiring and Bi-Amping in Plain Terms
Some speakers have two pairs of terminals on the back, usually joined by small metal links. These are meant for bi-wiring or bi-amping, and many people wonder whether they must use them. Most do not. With the links in place, a single pair of wires to the speaker works as intended, and that is the normal way to connect a typical home system.
Bi-wiring means running two pairs of wire from the same amplifier output, one to each pair of terminals, with the links removed. Bi-amping means feeding the two pairs from separate amplifier channels. Both are optional ideas, and a speaker designed to be connected this way will say so in its manual. Whether the change is audible in your room is debatable, and the safest advice is to start with the simple connection and only experiment if you have a reason.
If you do remove the links, be careful. Do not leave a section of the speaker unconnected unless the manual says it is acceptable, because that can leave part of the speaker silent. When you reinstall the links, make sure they sit tightly against the terminals.
If your amplifier or receiver has terminals for more than one pair of speakers, read its manual to learn how impedance is handled when both pairs are used. Some receivers expect a higher minimum impedance in that situation, which can affect the gauge and the speaker choice.
Matching Wire to Your Terminals
Before you buy, look at the terminals on both the amplifier and the speakers. Binding posts are the most common on better equipment. They have a colored cap you unscrew, and they accept bare wire wrapped around the post, a spade connector or a banana plug that goes into the end of the post. Spring clips are common on small systems and compact speakers. You press a lever, insert the stripped wire and release it.
Spring clips often take thinner wire only. If your plan is to use thick wire for a long run, check that the opening will fit it. It is better to use a thick wire for the long part of the run and a thinner jumper where it enters a small clip, if the manual allows it, than to force a wire into a clip that is too small. Pushing too hard can damage the terminal and fray the strands.
Also check the wire ends. Twist the strands tightly, and trim stray strands that could touch a neighboring terminal. A single loose strand that bridges the positive and negative terminals can cause a short and may trigger the amplifier’s protection or damage it.
- Use a connector that matches the post style on both ends.
- Leave a little slack so the speaker can be moved without pulling on the terminal.
- Label each end by room and channel before you hide the run.
Subwoofers and Powered Speakers
Not every speaker connection uses speaker wire, and mixing them up is a common mistake. A passive speaker takes the amplified signal through speaker wire. A powered or active speaker has its own amplifier inside, and it needs a power cable plus a line-level audio connection from your source, such as RCA, balanced or digital. Using speaker wire for that connection will not work.
Subwoofers add another variation. Many powered subwoofers connect to a receiver with a single RCA cable, often marked as the subwoofer output, and they plug into the wall for power. That cable is a shielded audio cable, and it is not the same as speaker wire. Some subwoofers also have speaker-level inputs that accept speaker wire, which can be useful with an amplifier that lacks a subwoofer output. Read the manual to learn which connections your model has.
For wireless speaker systems, there is usually no speaker wire between the source and the speaker, though the satellites may still need power cables. In a home theater package with a wireless rear pair, the rear speakers often still need power and sometimes a wired link to a small receiver module, so check the setup guide.
When you plan a room, work out which of your devices are passive, which are powered and where the outlets are. That prevents buying the wrong cable and helps you decide where to hide the runs.
Troubleshooting and When to Replace Wire
If a speaker is silent, work through simple checks before blaming the wire. Confirm that the amplifier is set to the correct speaker output and that the balance control is centered. Check that both ends of the wire are secure and that no stray strand is touching the opposite terminal. Swap the suspect speaker to another channel to see whether the problem follows the speaker or the wire. A thin or crackling sound may point to a loose connection or damaged strands.
Turn the volume down before you change anything, and switch the amplifier off while you move wires. If the amplifier shuts itself off or gets very warm, it may be reacting to a short or to a load it was not designed for, so stop and check the connections and the speaker impedance.
Wire does not wear out on a schedule, but it can be damaged. Replace it if the jacket is cracked, the copper has turned green or black at the ends, the wire has been pinched by a door or furniture, or it has been chewed by a pet. Cutting off a short length and stripping fresh copper often fixes corroded ends. Use a gauge that suits the run, keep wire away from heat sources and avoid running it under rugs where it can be trodden on and damaged.
A Plain Glossary of Wire Terms
Product pages for speaker cable use a handful of terms that can look intimidating. Here is what they generally mean.
- AWG: American Wire Gauge. A lower number means a thicker conductor.
- Conductor: the metal core that carries the signal, often copper.
- Strand count: how many fine wires are twisted together, which affects flexibility.
- Jacket: the outer coating that protects the cable.
- In-wall marking: a label showing the jacket suits installation inside walls, per local code.
- Impedance: the electrical load a speaker presents, listed in ohms.
Knowing these terms helps you compare listings fairly instead of being swayed by marketing language.
Choosing Gauge by Run Length and Speaker Load
Longer runs and lower impedance speakers call for thicker wire, because resistance builds along the cable. Short runs to ordinary bookshelf speakers are less demanding. The table gives a general idea only; check your amplifier and speaker manuals for their own recommendations.
| Run length | Typical direction |
|---|---|
| Short, in the same room | Mid-range gauge is often enough |
| Medium, across a large room | Consider stepping up to a thicker gauge |
| Long, between floors or outdoors | Thicker gauge and a suitable jacket |
Installation Notes Worth Knowing
Keep polarity consistent by matching the marked conductor to the positive terminal on both the amplifier and the speaker. Strip only as much insulation as the terminal needs, twist strands neatly and avoid stray whiskers touching the other terminal.
Turn the equipment off while connecting. If cables must go inside walls, follow local building codes and consider hiring a licensed installer, since in-wall work involves fire stopping and code rules that vary by region.
Common Mistakes When Choosing and Connecting Cable
Wire choice attracts a lot of opinion, yet the practical mistakes are fairly simple. The first is picking a gauge without checking how long the run will be. A thin cable that works fine across a desk may be a poor fit for a living room with speakers on opposite walls. The second is neglecting the connectors, since a thick wire with a loose connection will not do you any favors.
- Mixing up positive and negative at one end, which can leave speakers out of step.
- Letting stray strands touch neighboring terminals.
- Running cable under rugs where it can be crushed or worn.
- Coiling excess length tightly right behind the equipment.
- Buying far more length than needed, then dealing with a tangle.
A Decision Guide by Situation
Think about the room before the spec sheet. A desktop pair, a bedroom shelf system, a full surround setup and an outdoor patio each have different needs, and the right gauge follows from the distance and the speaker load rather than from marketing claims.
| Situation | What to focus on |
|---|---|
| Desktop speakers | Short length and neat routing |
| Living room stereo | Medium length and secure terminal connections |
| Rear surround speakers | Longer run, so a thicker gauge may help |
| Outdoor speakers | Jacket suited to outdoor use and sealed connections |
When in doubt, read the speaker and receiver manuals, which often list a minimum gauge for given distances. A listing for cable should state the gauge clearly, the number of conductors and the length. If any of these details are missing, look for a page that gives them.


Products Worth a Look
As an Amazon Associate, Reviews Took earns from qualifying purchases. These picks come from our guide: 6 Best 14 Gauge Speaker Wire (October 2026).
-
Amazon Basics 14-Gauge Audio Speaker Wire Cable
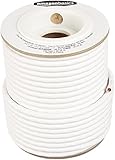 Amazon Basics 14-Gauge Audio Speaker Wire Cable for Audio Applications
-
GEARit 14 Gauge Speaker Wire 100FT
 GEARit 14 Gauge Speaker Wire 100FT,14/2 Speaker Cable for Home & Car Audio
-
14 AWG Gauge Speaker Wire (100 Feet) Car or
 Install Link 14 AWG Gauge Speaker Wire (100 Feet) Car or Home Theater (CCA)
Measuring a Run Honestly Before You Buy Any Wire
Most wire mistakes begin with a guessed length. The route wire actually takes is never the straight-line distance between amplifier and speaker: it drops to the floor or rises to the ceiling, follows skirting or joists, bends around door frames, and needs slack at both ends for connections and for the speaker to be moved during cleaning. Measure the real route with a tape or a piece of string, then add a comfortable margin at each end. A run that looks like a short hop across a room is routinely half as long again once it goes down, across and up. Buying wire for the guessed distance is how people end up with one run under tension and a join they never wanted to make.
Measure each run separately, because the two sides of a stereo pair are rarely equal. The speaker on the far side of a fireplace, doorway or bay window may need considerably more wire than its partner, and that longer run is the one that decides the gauge you should buy. It is perfectly normal to install the same gauge on both sides for consistency while cutting different lengths from the same spool. What you should not do is coil the excess of the shorter run tightly behind the speaker and forget it; a loose, gentle surplus tucked neatly is fine, a tight coil under tension at the terminals is not.
If you are wiring during a renovation, measure and photograph the routes before walls and floors close. Note where the wire passes, what else shares the space, and where the ends emerge. That record is gold months later when you add a speaker, move a rack, or chase a fault. Label both ends of every run with its destination while you install it. Future you, lying behind a cabinet with a torch, will be grateful.
Voltage Drop and Damping, Explained Without the Mathematics Degree
Every length of wire resists the signal a little. The amplifier pushes, the wire takes a small share of that push for itself, and the speaker receives slightly less than the amplifier sent. With short runs of sensible gauge the share is so small that nobody hears it. As runs grow longer or wire grows thinner, the share grows, and two things happen. First, the speaker plays marginally quieter for the same volume setting, which is harmless. Second, and more importantly, the amplifier’s control over the woofer’s movement softens, because the wire’s resistance sits between the amplifier and the voice coil it is trying to command. Bass is where that loss of grip shows first, as a slightly looser, less defined low end.
This is why the guidance in this article pairs gauge with both distance and speaker impedance. A low-impedance speaker draws more current, more current through the same resistance wastes more of the signal, and so demanding speakers on long runs deserve thicker wire sooner than easy speakers on short ones. It is also why obsessing over tiny differences on a two-metre desk run is wasted worry. The physics is real but its scale matters: wire choice is about keeping losses negligible for your actual run, not about chasing an ideal that only instruments could detect.
A practical test follows from this. If you move a system and one speaker ends up on a much longer, thinner run than before, and the bass seems less tidy than you remember, the wire is a legitimate suspect. Swap in a shorter or thicker temporary run across the floor, ugly as it looks, and listen. If the tidiness returns, you have found your answer and can plan a permanent installation with confidence.
Planning Wire for Awkward Rooms and Whole-Home Runs
Older houses, rentals and open-plan spaces each punish wire in different ways. In an older house, routes may involve fireplaces, thick walls and floors you cannot lift, so surface trunking painted to match the skirting is often the honest solution. In a rental, everything must be removable: flat wire under rugs, adhesive-backed covers along skirting, and no holes you cannot justify. In open-plan rooms the challenge is distance and tidiness together, because a long visible run across a living space will annoy you daily even if it sounds fine.
For runs to other rooms, such as kitchen or dining speakers fed from a main system, treat each as a long run from the start and choose gauge for the full distance, not the distance to the wall between the rooms. Where several pairs of speakers share one amplifier through a selector or volume controls, remember that the wiring arrangement changes the load the amplifier sees, and follow the selector maker’s guidance for your exact layout. This is the one area of home wiring where reading the manual before buying anything saves real money.
Outdoor and outbuilding runs add weather and burial to the problem. Use wire whose jacket is made for the exposure it will get, protect it where it passes through walls, and give it a route that sheds water rather than collecting it. A run that survives electrically but perishes physically in two winters was not a bargain at any gauge.
Terminating, Labelling and Testing Like a Professional
Installers who do this daily share three habits that home users can copy for free. First, they strip wire cleanly, exposing just enough conductor to fill the terminal or plug and no more, so no bare copper invites a short and no insulation gets trapped under a screw to loosen later. Second, they twist strands neatly and in the direction that tightens under the terminal rather than splaying out of it. Third, they tug-test every connection: a firm pull that the joint survives means it will survive being nudged by a vacuum cleaner in six months.
Polarity testing deserves its own moment because it is the fault that hides best. A pair wired out of phase still plays, still sounds superficially complete, yet the bass thins and the stereo image wanders because the woofers are fighting each other. The simple battery test described earlier in this guide, or a test track with a clear centre image and strong bass, settles it in a minute. Test every pair after installation and again after any change, even a change you are sure could not have affected polarity. Certainty is cheap here; living with thin bass for a year is not.
Finally, leave the system documented. A note behind the rack listing each run, its length, its gauge and where it goes turns every future upgrade into a short job. Professionals label because they know they will not remember; home users should label for exactly the same reason.
Worked Examples: Matching Gauge to Three Common Systems
Consider a compact desk system where the amplifier sits between two speakers on the same unit. The runs are short enough to measure in a couple of paces, the speakers are ordinary bookshelf models, and almost any sensible gauge serves, because the resistance of such a short length is negligible. This is the system where owners most often overspend on wire, seduced by the idea that thicker must be better. It is not better here in any way a listener could detect; it is merely stiffer, harder to dress neatly behind a desk, and more likely to drag on the terminals. Spend the saving on music.
Now consider the classic living-room pair, with the amplifier in a rack to one side and speakers flanking a fireplace or television. One run is modest, the other noticeably longer once it has travelled around the hearth and up to the speaker. This is the territory where stepping up a gauge for both runs is cheap insurance: the cost difference across a spool is small, the installation is semi-permanent, and the longer run’s losses stay negligible for any speaker the household is likely to own. It is also the system where in-wall or under-floor routing tempts people, which brings the rating and planning points from earlier in this guide into play.
Finally, consider the long run to a second zone: kitchen, dining room or a covered outdoor area fed from the main amplifier. Distances here are the ones that genuinely punish thin wire, and they are also the runs people measure worst, because the route through walls and ceilings bears no resemblance to the walk between the rooms. Choose gauge for the true routed length with margin to spare, use wire rated for wherever it passes, and label everything. Of the three systems, this is the one where wire choice is a real engineering decision rather than a tidiness preference, and it deserves the most careful reading of the guidance in this article.
When Wire Is Not the Problem: A Short Diagnostic
Because wire is cheap and visible, it gets blamed for faults that live elsewhere, so it is worth knowing the usual impostors. A crackle that comes and goes when you wiggle a connector is a connection fault, not a gauge fault. Distortion that appears only at high volume belongs to the amplifier running out of power or a speaker being driven beyond its comfort, not to the wire between them. A channel that drops out entirely and returns when the volume knob is exercised points at the amplifier’s controls. Thin, phasey bass across everything points at polarity, which is a wiring error but a free one to fix, with no purchase required.
The wire itself is guilty in a narrower set of circumstances: a run far longer or thinner than the guidance allows, visible damage such as crushed or nicked sections, green or blackened corrosion at the ends, or a joint made by twisting and taping that has worked loose inside a wall. Even then, the fix is methodical rather than expensive: remake the ends first, because ends fail before middles do, and only replace a run when the ends were not the story. Diagnosing before buying is the whole spirit of this guide, and wire, of all components, rewards it best.
Buying Wire Well: Spools, Cuts and Avoiding the Classic Wastes
Speaker wire is usually sold by the spool or by the cut length, and the right way to buy depends on the job. For a single stereo pair with measured runs, cut lengths or a modest spool leave little waste. For a house being wired room by room over time, a larger spool of one good gauge is almost always the economical answer, because every future run comes off the same reel at no extra shopping cost, and consistency of gauge and material across the house makes later troubleshooting simpler. What you should not do is buy several short bargain lengths in different gauges and join them into long runs; the joins, not the wire, become the story of that system.
Read listings with a cold eye. The gauge claim is the one that matters, and it should describe the conductor, not the conductor plus a thick jacket dressed up to look substantial. Some inexpensive wire achieves an impressive outside diameter mostly with plastic. Weight is a rough tell: copper is heavy, and a spool that feels suspiciously light for its claimed gauge and length is telling you something. None of this requires paranoia; it requires buying from sellers who state the conductor honestly and accepting that wire which seems impossibly cheap for its specification usually is.
Keep the offcuts. A labelled coil of the same wire in a cupboard is the perfect material for a future centre speaker, a moved subwoofer or a repaired end, and it guarantees any addition matches what is already installed. Throwing away two metres today and buying ten tomorrow is the classic false economy of cable shopping.
One more habit separates tidy installations from frustrating ones: buy the connectors at the same time as the wire, sized for the gauge you chose. Banana plugs, spades and pins all have a conductor size they grip properly, and a plug bought for thinner wire will not clamp thicker wire securely no matter how hopefully it is tightened. A connection that is mechanically sound on day one stays sound; one that was improvised begins its slow loosening immediately.
And when the job is done, resist upgrading the wire as a first response to any disappointment with the system. Speaker position, room surfaces and the speakers themselves each outweigh wire differences by an order of magnitude once the gauge is adequate for the run. Wire’s job is to disappear, electrically and literally. Buy it well, install it carefully, and then forget it for a decade, which is the highest compliment a length of cable can earn.
A Note on Subwoofer and Centre Channels
Two speakers in a home system are routinely forgotten when wire is planned. The centre channel in a surround setup usually sits close to the receiver, so its run is short, but it carries dialogue and works harder than its length suggests; give it the same gauge as the front pair for consistency rather than whatever offcut remains. Surround speakers, by contrast, often have the longest runs in the house, travelling around or across the room, and they deserve the same honest measurement and gauge decision as any long run, even though their content is less demanding moment to moment.
Powered subwoofers are a separate case entirely: they connect with a line-level cable, not speaker wire, and the guidance in this article does not apply to them. Passive subwoofers and speakers with high-level inputs do use speaker wire, and because low frequencies draw the most current, those runs repay a generous gauge more than any other in the system. Sorting which kind of subwoofer connection you have, before buying anything, prevents the classic mistake of a spool of speaker wire bought for a subwoofer that never needed it.
Frequently Asked Questions
What gauge speaker wire do I need?
16 AWG for short runs, 14 AWG for medium runs and 12 AWG for long runs or low-impedance speakers.
Does expensive speaker wire sound better?
Not in typical home setups, provided the wire is the right gauge and is well connected.
Can I use extension cord as speaker wire?
It works in a pinch, but proper speaker wire is better.
Do I have to remove the metal links on my speaker terminals?
No. If you use one pair of wires per speaker, leave the links in place. Remove them only if the manual describes bi-wiring or bi-amping and you choose to try it.
Is speaker wire the same as an RCA cable for a subwoofer?
No. Speaker wire carries an amplified signal to a passive speaker, while an RCA subwoofer cable carries a low-level signal to a powered subwoofer. They are not interchangeable.
Can I use thick wire with spring-clip terminals?
Often not. Spring clips usually accept thinner wire, so check the terminal opening in the manual. Do not force wire in, because it can damage the terminal.
How do I tell which conductor is positive?
Look for a stripe, a ridge, printed text or a colored strand on one conductor. Keep the same marked conductor on the positive terminal at both ends.
Should I tin the ends of the wire with solder?
It is generally not recommended for screw terminals because solder can compress over time and loosen the connection. Twisting the strands or using a connector is the usual advice.
What happens if a stray strand touches the other terminal?
It can cause a short circuit. The amplifier may cut out to protect itself or, in the worst case, be damaged. Twist the strands tightly and trim any that stray.
Can I join two pieces of speaker wire?
You can, using a proper connector or a terminal block, but a single continuous run is better. Avoid twisting bare ends together and wrapping them in tape.
How should I hide speaker wire in a rented home?
Use paintable cable covers, run the wire along skirting boards or under carpet edges with a flat cable cover. Avoid drilling or stapling through the wire, and check what your lease allows.
Can speaker wire be too thick for a system?
Electrically, no: a thicker conductor simply has less resistance, and there is no penalty for having less than you need. The limits are practical. Very thick wire is stiff, hard to route around corners, awkward in small spring-clip terminals, and more likely to lever itself loose with its own weight. Choose the thickest gauge that your terminals accept comfortably and your route allows you to dress neatly, rather than the thickest gauge you can find.
Does speaker wire wear out or go off with age?
The copper itself lasts for decades, but the ends are where age shows. Bare copper oxidises in air and the surface darkens, which can make an old connection less reliable even though the wire along its length is fine. The remedy is simple: cut back a short piece at each end to reach bright, clean copper and remake the connection. Wire that has been crushed under furniture, nicked during installation or soaked should be replaced along the damaged section rather than trusted.
Can I run speaker wire alongside mains power cables?
Speaker wire carries a relatively strong signal and is far less prone to picking up interference than the delicate cables before the amplifier, so brief parallel contact with a power cable is rarely a disaster. As a habit, though, keep long parallel runs apart where you can, and cross power cables at a right angle rather than alongside them when routes meet. If you ever hear a hum that changes when other appliances switch on, revisit the routing before blaming the equipment.
What should I do differently for a run to an outdoor speaker?
Choose wire with a jacket made for outdoor or burial use, because indoor jackets crack under sunlight and moisture. Keep joints outdoors to an absolute minimum, protect any joint in a suitable weatherproof enclosure, and enter the building in a way that lets water drip off the cable rather than run along it into the wall. Treat the run as a long run for gauge purposes, since outdoor speakers are usually further from the amplifier than they first appear.
Should both speakers in a pair use exactly the same wire length?
They do not need to match to the centimetre, and small differences in length make no audible difference at the gauges and distances in this guide. What matters is that the longer run still meets the gauge guidance for its length. Many tidy installations deliberately cut both runs to the longer measurement so the system can be rearranged later without rewiring, and coiling the gentle surplus of the shorter side neatly behind the rack is harmless.
Bottom Line
For most home systems, 14 or 16 AWG copper wire is enough; go thicker for long runs and low-impedance speakers. See our best bookshelf speakers to pair with it.
Related Reading
- Soundbar Buying Guide: Channels, Atmos, HDMI ARC and Subwoofers
- 6 Best Soundbars for TV
- 6 Best 2.1 Computer Speakers with Subwoofer: PC and Gaming