Disclosure: As an Amazon Associate, Reviews Took earns from qualifying purchases. Links to Amazon on this page are affiliate links; they cost you nothing extra.
Three filters cover most needs.
Last updated: November 2, 2026.
Three filters cover most needs: one for protection, one for controlling reflections and color, and one for slowing the shutter. Each solves a different problem, so the best approach is to buy only the one that addresses a limitation you have actually met.
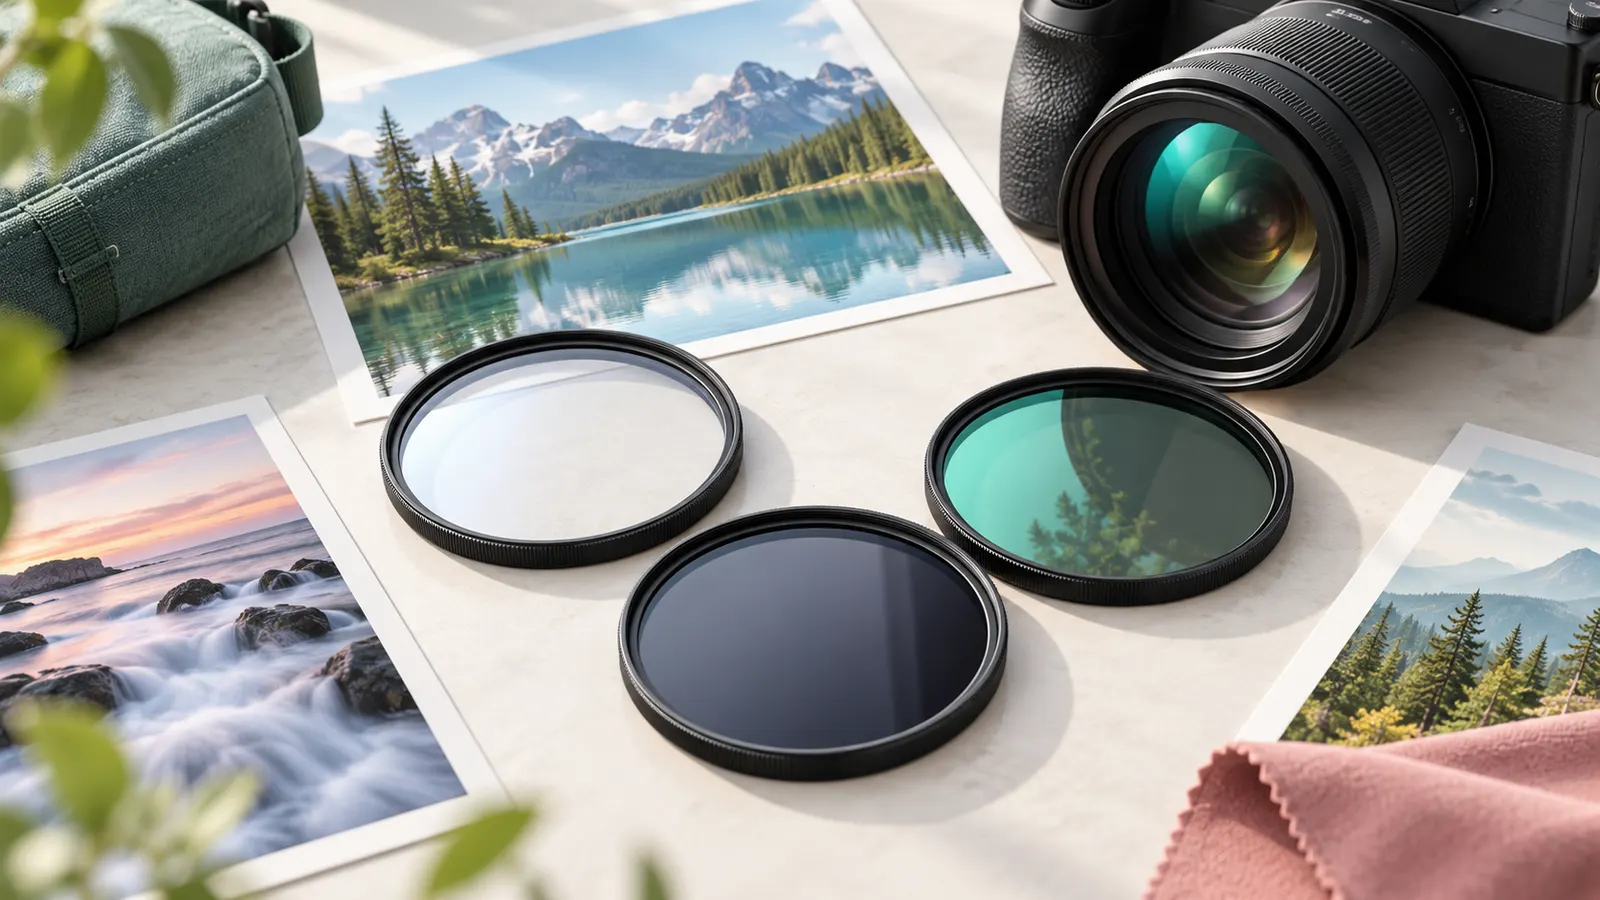
Protection
A UV or clear protection filter sits on the front of the lens and shields the glass from dust, fingerprints and minor knocks. On modern digital cameras it does not change the picture much, so its main purpose is protection, not image improvement.
Some people prefer to rely on a lens hood and careful handling instead. If you shoot in sand, spray or rough conditions, a filter is cheaper to replace than a lens element. Choose a well-made one, since poor glass can add flare and reflections, particularly when shooting toward bright lights.
See UV filters.
In this guide
Polarizing
A circular polarizer reduces reflections from surfaces like water, glass and wet leaves, and can deepen blue skies. You rotate the filter to change the effect, and the result depends on the angle between the camera and the sun.
It works best when the light comes from the side. It reduces the light reaching the sensor, so you may need a slower shutter or a higher ISO. On very wide lenses, the sky can darken unevenly, so check the frame before shooting.
See CPL filters.
Long exposure
A neutral-density filter reduces light without changing color, allowing slower shutter speeds in bright conditions. This is useful for smoothing water, blurring clouds or using a wide aperture in daylight.
Filters come in different strengths, and the right one depends on how much you want to slow the exposure. You will usually need a tripod, and focusing is easiest before the filter is fitted. Some strong filters add a slight color tint that you can correct with white balance.
See ND filters.
Fitting and care
Practical points to consider before buying:
- Thread size: match the filter to the front thread of your lens, or use a step-up ring to share one filter across lenses.
- Slim frames: thinner rings reduce the chance of cutting into the corners on wide lenses.
- Screw-in or square: screw-in filters are convenient, while square systems offer flexibility but need a holder.
- Coatings: good coatings help repel dust and water and reduce reflections.
- Cleaning: use a blower and a clean microfiber cloth, and avoid pressing hard on the glass.
Choosing the Right ND Strength
Neutral-density filters are sold in different strengths, often described in stops, optical density numbers or filter factors, and the labeling varies by maker. A stop is a halving of the light, so a filter that cuts a few stops lets you use a shutter speed several times longer than normal in the same scene. A stronger filter permits much longer exposures, enough to smooth moving clouds or turn a busy waterfall into silk. The first step is to decide what effect you want, then choose a strength that gives it in your usual light.
For smoothing water in shade or at dawn, a light to moderate strength can be enough. For flowing water in bright daylight, or to blur clouds and crowds, you will need a stronger one. For using a wide aperture in bright sun, such as for portraits or video at a fixed shutter speed, a lighter filter is typically more practical. Check the labeling on the filter and the maker’s conversion chart so you know how to adjust exposure.
Many photographers carry two strengths rather than one very dark filter. A lighter one covers everyday use, and a strong one handles dramatic long exposures. Variable ND filters offer an adjustable range in one unit, which is convenient, but they have drawbacks. At the strongest settings, some variable filters can show uneven darkening or color shifts, particularly on wide lenses, so test yours before relying on it.
- Light strength: wide apertures in sun, gentle motion blur.
- Moderate strength: water and general long exposures.
- Strong strength: dramatic cloud and crowd effects.
Use exposure calculators or an app, since the camera meter may not read correctly through very dark glass.
Getting the Most From a Circular Polarizer
A circular polarizer is simple to use but easy to misuse. Attach it, then rotate the front ring while looking through the viewfinder or at the screen. The effect changes as the ring turns, so stop where the reflections or sky look best. The strongest effect usually appears when the camera points at roughly right angles to the sun. Pointing directly toward or away from the sun reduces the benefit.
It is good for removing glare from water, glass and foliage, which reveals color and detail beneath the surface. Landscape shooters use it to deepen blue skies and add contrast to clouds. But it can be overdone: a heavily polarized sky can look unnatural, and on wide lenses the sky may darken in a band across the frame. Keep the effect moderate and check the edges of the frame.
Because a polarizer reduces light, expect to lose some stops of exposure. Raise ISO or slow the shutter, and check that your shutter speed remains safe for handheld shooting. Make sure the filter is a circular type, as the camera’s autofocus and metering systems usually work properly with those. Combining a polarizer with another filter can lead to vignetting on wide lenses, so avoid stacking unless necessary.
Some polarizers are paired with a slim frame to reduce vignetting. Also remember to remove the filter indoors or in low light, where it only subtracts light. Taking a quick test shot with and without the effect helps you judge whether it is adding value. Clean it carefully, as the front glass is rotatable and the ring can collect dust.
Stacking, Vignetting and Flare Problems
Every piece of glass in front of the lens is a chance for trouble, and stacking filters multiplies it. Vignetting, which appears as dark corners, is the most common issue when wide lenses are fitted with thick filter rings or multiple filters. Slim-frame filters help, and using only the filters you need helps more. Check results at your widest focal length, since that is where the corners are most exposed.
Flare and ghosting occur when bright light bounces between the filter and the lens elements. You may see washed-out contrast, bright spots or color patches when shooting toward the sun or at night lights. Good coatings reduce these effects, though no filter removes them completely. If you see ghosting at night, try removing the protective filter and compare. Many photographers remove the UV filter for night and backlit work.
Color casts are another risk. Very dark ND filters can introduce a tint, and some budget filters cause noticeable shifts. Shooting in raw and setting a custom white balance can correct this. Test any new filter on a neutral subject.
Fit matters. A filter that is cross-threaded or loose can damage the lens thread. Screw filters on gently and stop when they feel snug. Do not overtighten, as stuck filters are difficult to remove. A filter wrench or a rubber grip can help, but do not force it.
If image quality is crucial, keep the glass clean, avoid stacking and remove the filter when it adds no value. Compare images with and without the filter to see whether it affects sharpness or contrast on your lens.
Deciding What to Buy First
With three kinds of filter, it helps to rank them by your actual needs. If you shoot in rough environments, such as beaches, dusty trails or crowded events, a clear protective filter is a reasonable first purchase. If you mainly photograph landscapes with water, sky or foliage, a polarizer provides an effect that is hard to reproduce in editing. If you want to experiment with motion blur or shoot video in bright light, an ND filter is the tool that solves that problem.
Build the collection around the lens you use most. Filters have a thread size that matches the front of the lens, so check the diameter printed on the lens or in the manual. If you have several lenses with different sizes, buy for the largest thread and use step-up rings for smaller lenses. This saves money and keeps a single filter set usable across lenses. Note that step-up rings can cause vignetting on wide lenses.
Consider quality tiers qualitatively. Entry-level filters may be fine for casual use but can add flare or color shifts, while higher-tier options typically use better glass and coatings. Because the filter sits in front of the lens, it is not the place to cut corners if image quality matters. Look for a good return policy and try the filter on your lens right away.
Signs that a filter should be replaced include scratches that show up in photos, coating damage, a stuck rotating ring on a polarizer, cracked glass and persistent haze. Keep filters in a case, and carry a lens cloth and blower. Buy as the need arises, rather than buying all three at once.
Square Systems Versus Screw-In Filters
Screw-in filters are the simplest to use. They thread onto the front of the lens, hold securely and fit in a pocket. Their limitation is that each is tied to a specific thread size, and graduated effects, which darken only part of the frame, are not possible with a round filter in the same way. They are a good fit for protection, polarizing and basic ND work, especially for travel and walking around.
Square or rectangular systems use a holder that attaches to the lens, and slide-in filters of various types can be positioned and adjusted. This flexibility lets you move a graduated filter up or down to match the horizon, stack different strengths and reuse the same filters on lenses of different sizes with a suitable adapter ring. The price is bulk, more things to carry and a more careful workflow, including keeping the filters clean and handling the holder properly.
Holders can cause vignetting on very wide lenses, so check the maker’s compatibility notes for your focal length. Light leaks can appear with long exposures if light enters between the holder and the filter, so many systems include a cover or recommend a hand or cloth to block it. Practice outdoors before relying on a holder in an important shoot.
For most people starting out, screw-in filters are enough. Consider a square system if you shoot landscapes regularly, use several lenses and want graduated filters. Whichever you pick, buy for the lens you use most and keep spare caps and cases to protect the glass. Check compatibility with your lens hood and any other accessories.
A Quick Checklist Before You Buy Any Lens Filter
Filters are small, simple looking pieces of glass, yet buying the wrong one is easy. Run through this list first to avoid the usual mix ups.
- Find the thread size. Look at the front rim or inside the lens cap for a number with a diameter symbol. That number, in millimeters, is the filter size your lens takes.
- Check the lens front. Some lenses have a front element that rotates when focusing, which affects how a polarizer behaves in use. The lens manual explains this.
- Think about your lens collection. If your lenses use different thread sizes, a filter for the largest one plus step up rings may save you from buying several of the same type.
- Decide on the job. Protection, glare control and long exposure effects are different jobs, and each needs a different filter.
- Look at the frame. A slim frame helps avoid dark corners on wide lenses.
- Check the coating description. Makers describe coatings that reduce reflections and make cleaning easier.
- Keep a case. Bare glass in a pocket scratches quickly.
Read the lens and filter manuals together, because each may mention limits on stacking or fitting.
Which Filter for Which Situation: A Decision Table
Different scenes call for different tools. The table below is a general starting guide, and you should adjust to your own camera and taste.
| Situation | Filter that often helps | What it does |
|---|---|---|
| Lake or river with surface glare | Circular polarizer | Reduces reflections on water and wet surfaces |
| Blue sky with scattered clouds | Circular polarizer | Deepens sky color and adds contrast |
| Waterfall in bright daylight | Neutral density | Allows a slower shutter for smooth water |
| Wide aperture portraits in sunlight | Neutral density | Lets you keep a wide aperture without overexposure |
| Dusty beach or windy trail | Clear protective filter | Adds a layer in front of the lens glass |
| Window reflections in photos of shops | Circular polarizer | Cuts glare from glass |
No single filter solves every scene. Many photographers carry one polarizer and one neutral density filter and add more as their interests grow.
Understanding the Numbers on a Filter
Filter packaging uses numbers and abbreviations that can be confusing at first. A neutral density filter may be labeled with a number of stops, a density figure or a factor, depending on the maker. All describe how much light is blocked, just in different ways, so look for a conversion chart on the maker’s page.
A polarizer label usually shows the diameter and the word circular. Circular polarizers suit modern cameras that rely on autofocus and metering, while linear types can interfere with those systems. Check your camera manual if you are unsure.
Coating names such as multi coated indicate that several layers have been applied to the glass. These reduce unwanted reflections, which helps when shooting toward bright lights. They do not replace careful cleaning and sensible handling.
Building a Simple Starter Kit Over Time
You do not need every filter at once. Begin with the one that solves a problem you already notice in your photos. If glare bothers you, add a polarizer. If your daytime water shots look harsh, add a neutral density filter. If you carry gear into rough environments, consider a clear protective filter.
Keep a log of the shots where a filter made a difference. Over a few weeks you will see which ones you reach for most, and that tells you where to invest next.
Store filters in a padded pouch, label each case with its thread size and keep a lens cloth in your bag. A small kit that you actually use is more helpful than a large one that stays at home.
A Short Glossary
- Stop. A doubling or halving of light.
- Thread size. The diameter of the lens mount where a filter screws on.
- Step up ring. An adapter that lets a larger filter fit a smaller lens thread.
- Vignetting. Darkened corners caused by a filter or hood intruding on the image.
- Coating. A thin layer on glass that reduces reflections.
Quick Answers
Which filter should I buy first?
Buy the one that solves a problem you already face. A clear filter suits rough conditions, a polarizer suits water and skies and an ND filter suits motion blur in bright light.
Can I use a polarizer and an ND filter together?
Yes, but stacking increases the risk of vignetting, flare and light loss. Use slim filters and check the corners at your widest focal length.
What does a variable ND filter do?
It lets you adjust the darkness by rotating the ring. It is convenient, but at strong settings some show uneven darkening or color shifts, so test yours before relying on it.
Why does my polarizer not seem to work?
The effect depends on the angle to the sun, and it is strongest at roughly right angles. Rotate the ring while looking through the viewfinder and check that you are using a circular polarizer.
Should I leave a UV filter on all the time?
It is a personal choice. It protects the front element, but can add flare in backlit or night scenes. Many photographers remove it when shooting toward bright lights.
How do I find my lens filter size?
The thread diameter is usually printed on the lens barrel or inside the lens cap, and it is listed in the manual. Match it to the filter listing.
How do I clean filters safely?
Blow off loose dust, then use a clean microfiber cloth with a lens-safe cleaner if needed. Avoid pressing hard or wiping dry grit across the glass.
Bottom line
Buy the filter that solves a real problem. If you want protection, choose a clear filter. If reflections and skies bother you, try a polarizer. If you want motion blur in daylight, consider a neutral-density filter.
Putting Each Filter to Work: Field Workflows
Knowing what a filter does and getting the photograph you imagined are separated by workflow. This section walks through the three filter families in the order you would actually deploy them on a landscape shoot, because landscape work is where UV, CPL and ND filters most often share a single lens on a single morning. You arrive before sunrise with a tripod, a wide or standard lens, and a scene containing water, sky and foreground interest — the full test of a filter kit.
The polarizer pass: reflections and sky first
Fit the circular polarizer first and rotate it while watching three things in turn: the sky’s depth, reflections on any water or wet rock, and glare on foliage. These three effects peak at slightly different rotations, so choose the rotation for the element that matters most to your composition rather than spinning for maximum effect overall. Maximum polarization is frequently too much: skies can go unnaturally dark at the frame’s centre with wide lenses, and water stripped of all reflection can look dead. Experienced landscape photographers often back the rotation off a fraction from the strongest effect. Note also the polarizer’s light cost — it absorbs a meaningful amount of light, which lengthens exposures and can be used deliberately as a mild neutral density effect for gentle water movement when a full ND is too strong.
Adding neutral density for motion
When the goal shifts to motion — a waterfall’s flow, waves smoothing over rocks, clouds streaking — the ND filter takes over the exposure plan. Decide the shutter speed the motion needs first, then choose the ND strength that delivers it at a sensible aperture and your base ISO. Longer is not automatically better: water turns to featureless fog at very long exposures and keeps its texture and energy at moderate ones, so bracket shutter speeds across a range and judge on a larger screen later. Watch for the practical gremlins: light leaking through a viewfinder during long exposures on some cameras, tripod stability in wind or flowing water, and focus — set focus before fitting a dark ND, because autofocus cannot see through a filter that dark, and neither can you.
Filter Problems Diagnosed: Colour Casts, Softness and Vignetting
A colour cast that appears only in filter shots has a short list of suspects. Strong ND filters are the usual source, leaning warm or cool depending on their construction; the fix in the field is a custom white balance or a reference frame, and in editing a white-balance correction applied to the filtered frames. Cheap filters of any type can cast colour too, which is one of the real differences between budget and quality glass in this category. Softness blamed on filters is often actually a dirty filter — a smeared front surface that nobody notices because it is transparent — so clean the filter with the same blower-and-cloth discipline as a lens before concluding anything about its optics. Genuine optical softness from a poor filter does exist, and the test is simple: photograph fine detail with and without the filter at your most-used aperture and compare at full magnification.
Vignetting and stack discipline
Dark corners that appear with a filter fitted are usually geometry, not optics: the filter ring intrudes into the field of view of a wide lens, and stacking two filters doubles the intrusion. The cures are slim-profile filters for wide lenses, stacking only when the effect genuinely needs both, and testing any new combination at your widest focal length before a real shoot. A polarizer plus ND stack is the common landscape case, and it deserves a home test because the combination also multiplies reflections between surfaces; angle the stack away from direct sun where possible and check for ghost images of bright light sources in test frames.
Filters for Subjects Beyond Landscapes
Portraits and people
Portrait photographers use filters more selectively. A polarizer tames shiny skin and reflections on glasses outdoors, though it must be used gently to avoid a flat, waxy look. ND filters earn their place in flash work outdoors, opening apertures for shallow depth of field in bright sun while keeping shutter speeds within flash sync limits when combined with the right technique. UV or clear protectors are common on portrait lenses simply because portrait work happens around people, food, children and weather, and a sacrificial front surface makes sense.
Street, travel and everyday shooting
For street and travel, the protector is the workhorse: it guards the lens through crowds, markets, coastlines and cafés, and it never needs removing for the shot. A polarizer lives in the bag for the reflective city subjects — shop windows, wet streets, car paint, museum glass where photography is permitted — and comes out for specific frames rather than living on the lens. Many travel photographers skip ND entirely unless long-exposure water or crowd-blur effects are a planned part of the trip, because every filter carried is weight, cleaning and one more surface to smear at the wrong moment.
Video work
Video shooters lean on ND more heavily than stills photographers, because video shutter speeds are constrained by frame rate conventions: to keep motion looking natural in bright light, exposure must come down, and aperture and ISO have creative limits. Variable ND filters dominate video kits for their speed of adjustment, with the caveat that cheap variable designs can introduce colour shifts and cross-pattern artefacts at their strongest settings. A polarizer serves video for the same reflection control as stills, with the warning that panning across a sky with a polarizer fitted can make the sky’s brightness visibly pulse as the angle to the sun changes.
Buying Filters Without Wasting Money: Sizes, Systems and Sequencing
The most expensive filter mistake is buying the same filter repeatedly in different sizes as your lens collection grows. Filter thread sizes vary across lenses, and a photographer with three lenses can face three different threads. Two strategies prevent the churn. The first is to buy filters for your largest thread and use inexpensive step-up rings to adapt them to smaller lenses; rings cost very little, add a small amount of stack height to watch on wide lenses, and turn one good polarizer into a polarizer for every lens you own. The second is a square filter system, where one holder takes plates that serve all lenses via adapter rings — the route heavy landscape users take, at the cost of a bulkier, slower setup that makes little sense for walk-around shooting. Decide which photographer you are before buying the second filter, not the sixth.
Sequencing purchases by usefulness
If budget forces an order, most photographers get the most photographs from a polarizer first, because its effects — reflection control and sky depth — cannot be reproduced in editing software. A protector comes alongside it if your shooting environments are risky for front elements, or first if protection is your actual concern. ND filters follow when long-exposure work becomes a real interest rather than an aspiration, and the sensible first ND is a mid-strength filter that covers common waterfall and seascape conditions, with stronger or variable options added when specific projects demand them. This sequence mirrors how often each filter is used by working photographers, and it prevents the common outcome of a drawer containing a full ND set and no polarizer.
Reading filter specifications honestly
Filter marketing leans on coating counts and transmission percentages that are hard to compare across brands. The specifications that predict your experience are more mundane: the exact thread size and whether the mount is slim profile, the stated ND strength in stops rather than a marketing density number, whether a variable ND marks its range usefully, and the material and coating reputation of the maker as reported by photographers who shoot into the sun with it. Flare behaviour is the real-world test that separates filters, because a filter sits in front of your lens’s carefully designed optics; a poor one adds ghosting and veiling flare precisely in the backlit conditions landscape photographers love. Where possible, test a new filter on a backlit scene during its returns window.
Care, Storage and Field Habits
Filters live harder lives than lenses: they are handled by their edges, swapped in wind, and wiped more often. Store them in their cases or a filter wallet rather than loose in a bag pocket, where grit accumulates exactly where you least want it. In the field, the habit that saves images is a five-second inspection every time a filter goes on: hold it to the light, blow off dust, and check for smears, because a fingerprint on a filter softens every frame until you notice it, and photographers have lost whole mornings to a smear they kept attributing to haze. When swapping filters at the coast or in dusty conditions, turn your back to the wind and work over your bag, not over rocks or water — a dropped filter is usually a written-off filter.
Salt spray deserves special mention because it dries into a stubborn film and tempts photographers to scrub. Rinse the filter under clean water first if it has heavy salt deposits, then clean normally; scrubbing dry salt across a coating is how filters get their first scratches. At home, a filter that will not come clean with a blower and microfibre usually responds to a drop of lens fluid on the cloth — never flood the filter, because fluid wicks into the ring. Finally, keep a simple inventory habit: note which filters fit which lenses in your phone. On a cold dawn shoot, knowing your polarizer needs a step-up ring for the lens you packed is the difference between using it and leaving it in the car.
More Questions Answered
Do filters reduce image quality?
A clean, well-made filter in normal conditions has an effect on image quality so small that most photographers cannot identify it in blind comparisons of real photographs. A dirty, smeared or poor-quality filter absolutely can reduce quality, mainly through flare and contrast loss in backlit scenes rather than simple softness. The practical conclusion is not to avoid filters but to keep them clean and buy decent ones for the lenses and conditions you use most, especially any filter that will live on the lens permanently.
Can software replace a polarizer or ND filter?
Only partly, and the distinction matters. Software can darken a sky and boost saturation in a way that imitates a polarizer’s sky effect, but it cannot remove a reflection that the sensor recorded or recover detail hidden behind glare, because that information was never captured. For ND effects, software can blend multiple frames to simulate long exposures — a technique that works well for some subjects — but it cannot reproduce true long-exposure behaviour for moving water and crowds in a single capture, and it fails when frames misalign. Filters change the light before capture; software rearranges what was captured. They are complements, not substitutes.
Why does my polarizer make the sky uneven with a wide lens?
Polarization strength depends on the angle between your lens, the sun and the sky, and a wide lens sees a broad span of angles at once. The part of the sky at the strongest polarization angle darkens much more than the edges, producing a banded, uneven sky. The remedies are to rotate the polarizer back from its strongest setting, compose so the sky occupies less of the frame, or accept the effect at narrower focal lengths where the angle span is smaller. It is a property of physics, not a faulty filter.
Should I remove a protector filter at night or for long exposures?
Many photographers do, and there is logic to it: bright point lights — street lamps, fireworks, the moon — can reflect between a flat filter and the lens’s front element, producing ghost images. For night cityscapes and long exposures with strong point sources, removing the protector eliminates one reflective surface. In daylight and general use the protector’s benefits outweigh this edge case, so treat removal as a situational habit for specific scenes rather than a rule that protectors harm images.
A Filter Field Kit, Assembled by Genre
Guides list filters one by one; photographers carry them in kits shaped by genre, and seeing the kits assembled helps a buyer skip purchases their photography will never use. The landscape kit is the fullest: a polarizer, a mid-strength ND for water in ordinary light, a strong ND for bright conditions and deliberate long exposures, a protector that lives on the lens between deliberate filter work, step-up rings for the second lens, a cloth and blower, and a wallet that keeps the glass separated and findable in dawn light. The travel kit is deliberately smaller: protector on the lens, polarizer in the bag, and nothing else unless the trip has a named long-exposure subject — a coastline, a waterfall route — in which case one ND earns its ticket. The portrait kit is mostly a protector plus a polarizer for outdoor work, with ND appearing only for the flash-in-sunlight specialists. The video kit inverts the stills order: variable ND first and always, polarizer second, protector by preference. Reading these kits against your own last hundred photographs tells you which genre you actually practise, which is the only honest basis for a shopping list.
Filter Habits of Photographers Who Never Struggle
Experienced filter users are distinguished less by what they own than by small rituals. They fit the polarizer when they arrive at a scene, not when they notice reflections in a review screen. They rotate it for every composition change, because polarization is a function of angle and yesterday’s rotation is meaningless after the tripod moves. They check the front surface with a glance against the light every time a filter comes out of the wallet. They keep one cloth for filters and lens glass only, replaced often, never the cloth that wipes everything else in the bag. They note, in the phone note that serves as their field log, which ND strength suited which waterfall, so the second visit starts from knowledge. And they remove filters when the shot does not need them — the protector debate aside, a polarizer left on at dusk costs light and can colour a scene nobody asked it to change. None of these rituals costs money; all of them are visible in the consistency of the results, and they are available to a beginner with a single polarizer from the first morning out.
More Questions Answered
How tight should a filter be screwed on?
Finger-snug and no more. Filters seize through over-tightening and through temperature changes after being wrenched on, and a stuck filter invites the kind of force that endangers the lens. If one does stick, grip the ring evenly with a rubber band or a filter wrench for distributed pressure rather than pinching two points, which flexes the ring and binds it harder. A filter that seats smoothly and is removed after the shoot rarely sticks at all — another argument for the habit of removing filters you are not using.
Can I leave a polarizer on as my everyday filter?
You can, but you would be paying its light cost on every photograph and risking uneven skies on wide shots for a benefit most everyday scenes do not need. The protector is the everyday filter by design; the polarizer is a deliberate tool fitted for scenes with reflections, glare or sky to deepen. Keeping the polarizer in a pocket or wallet, instantly available, gives you its benefits on the photographs that want it and none of its costs on the rest.
Filters and Weather: Shooting in Rain, Dust and Salt Air
Harsh environments are where the protector filter stops being a debate and becomes the plan. In rain, a filter gives you a surface you can wipe a hundred times without a thought for the coating beneath it — and wiping is constant, because a single droplet in the wrong place ruins frames in a way no editing fully rescues. Work with the hood on, wipe with a dry section of cloth each time rather than smearing water around with a soaked one, and keep a second cloth in a pocket that stays dry. In dust and sand, the filter’s job is to stand between abrasive grit and your front element during every wipe; blow first, always, because the first wipe of a sandy filter is the one that scratches, and a scratched filter is a consumable while a scratched element is a repair bill. At the coast, salt spray builds invisibly and dries into the film described earlier; rinse the filter at day’s end rather than letting salt sit on coatings overnight, and expect to clean more often than the scene seems to demand, because spray travels further than intuition says.
Cold, heat and condensation
Temperature transitions fog filters exactly as they fog lenses, and a filter can be an asset here too: the fog forms on the outermost surface, which is the filter’s, and a wiped filter restores the shot while an element inside a sealed lens barrel is still clearing. Moving from air-conditioned interiors to tropical exteriors, give the whole camera a few minutes in a bag to equalise before shooting, and accept the first minutes’ softness as physics rather than fault. In extreme cold, filters become brittle-handling exercises — metal rings contract, fingers fumble — so fit the filter you expect to need before going out, rather than planning swaps with numb hands. None of these situations requires special equipment; they require the ordinary filters in this guide, handled with an understanding of what the environment is doing to them.
When Not to Use a Filter
A buying guide for filters should close the loop honestly: there are photographs that filters hinder. Precision macro and technical work at the highest level sometimes removes everything removable from the optical path, because the last fraction of contrast matters and the environment is controlled. Night photography with bright point sources argues for removing protectors, as the questions below discuss. A polarizer works against you when you want reflections — the shop window display, the wet street’s neon, the portrait in sunglasses that should mirror the scene — and against skin rendered with life in some portrait light. A strong ND is simply the wrong tool when the subject’s motion is the story’s energy rather than its blur. The mark of a mature filter user is not the size of the wallet but the speed of the decision: which filter, if any, serves this frame — made at the tripod, in seconds, from understanding rather than habit. Everything in this guide exists to build that decision; the glass itself is the easy part.
Common questions
Do cheap filters reduce image quality?
They may soften images or add flare, since the filter sits in front of the lens. If you use one, choose a well-made option and check your results.
Are step-up rings useful?
Yes. They let you use one larger filter on several smaller lenses, which saves money and carrying space.
Do square filters need a holder?
Yes. A holder attaches to the lens and positions the filters. Make sure it suits your lens and use it carefully.
More Cameras Guides
- Beginner Photography Lighting
- Best 100-400mm Telephoto Zooms for Wildlife
- Best Super Telephoto Zoom Lenses for Birding
- Best Macro Lenses for Close-Up Photography
- Best 14mm Ultra-Wide Lenses for Mirrorless
- Best 50mm f/1.8 Lenses for Mirrorless
- Best 85mm f/1.8 Portrait Lenses on a Budget
- Best 135mm Portrait Primes for Mirrorless

Ready to Buy? Start Here
If this guide helped you decide what to look for, these products are a place to start.

As an Amazon Associate we earn from qualifying purchases. Prices and availability are shown on Amazon.

