Disclosure: As an Amazon Associate, Reviews Took earns from qualifying purchases. Links to Amazon on this page are affiliate links; they cost you nothing extra.
You do not need much gear to start lighting well.
Last updated: November 2, 2026.
You do not need much gear to start lighting well. One soft, controllable light and a way to shape it will improve most photos and videos more than a bag full of equipment. The aim is to learn what light does before adding more of it.
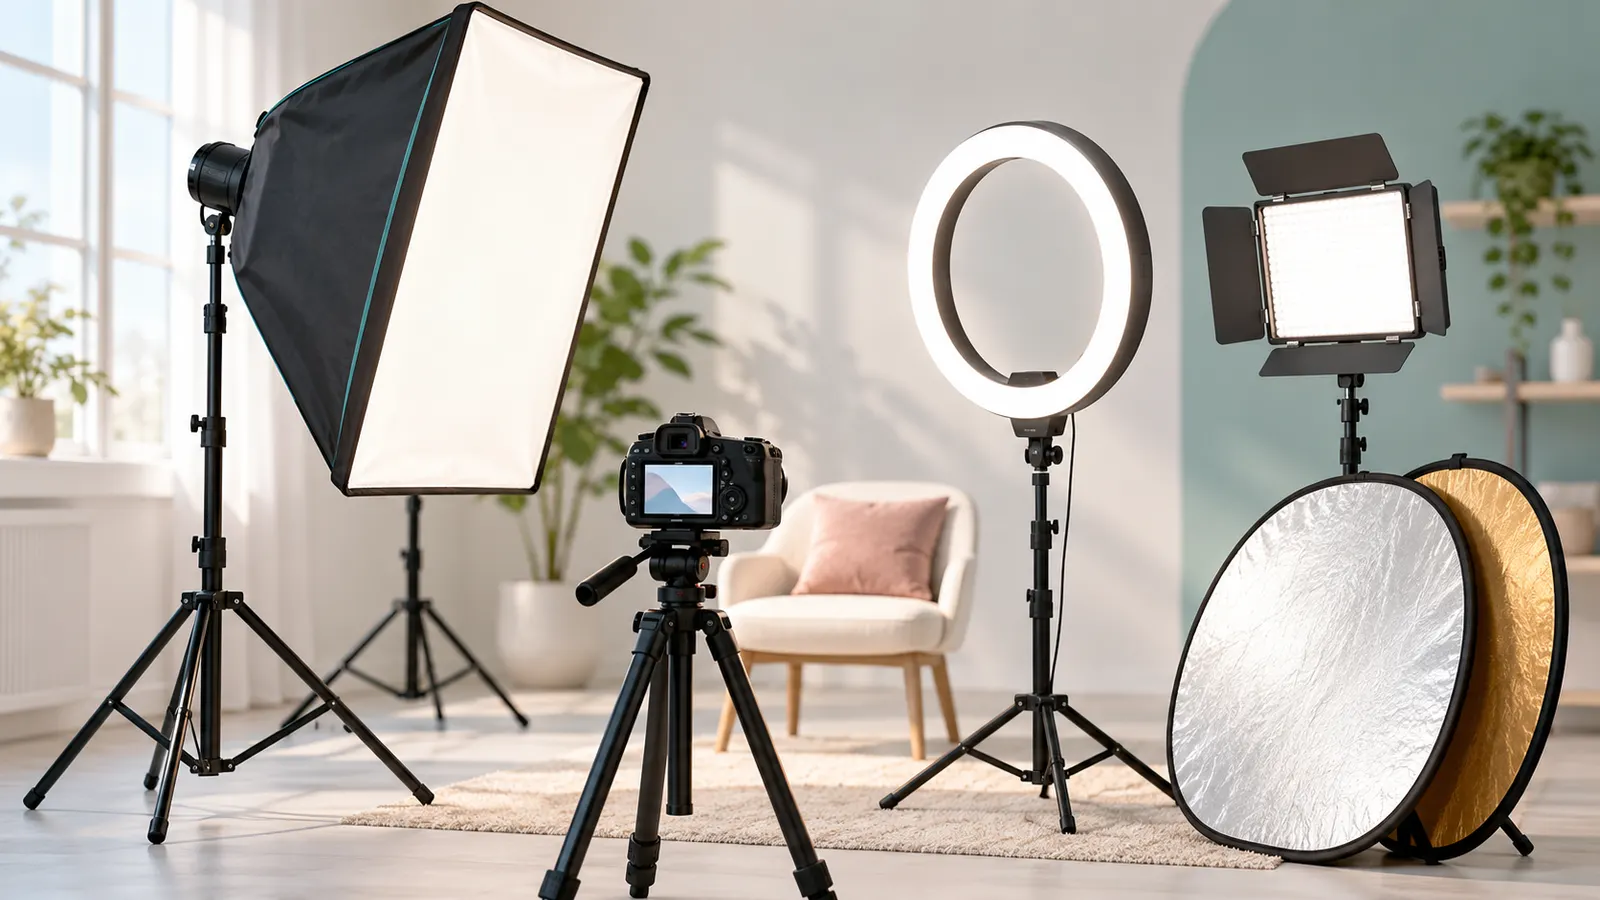
Starter
A single soft light source is the best first purchase. A softbox spreads light over a larger area, giving gentle shadows that flatter people and products. Place it to one side and slightly above the subject, and move it closer for softer, brighter light.
Check how the kit is powered and how quickly it sets up. Bulbs that suit continuous lighting let you see the effect as you work, which helps beginners. Look at the stability of the stand, the size of the softbox and whether the color of the bulbs is consistent.
See softbox kits.
In this guide
Video
For video, continuous light is essential, and LED panels are popular because they stay cool and can often be adjusted. Look for adjustable brightness and, where offered, adjustable color temperature, which lets you match daylight or warm room light.
Consider how the light is powered, whether by mains or batteries, and how long it runs. A small panel can serve as a key light for talking-head videos, while a second one can add a fill or background glow. Avoid mixing light colors unless you mean to.
See LED lights.
Shape light
Once you have a source, shape it. A reflector bounces light back into shadows and costs little. White gives soft fill, while other surfaces give different effects. Diffusion material placed between the light and subject softens harsh light.
Flags, cards or simple pieces of black fabric can block light and add contrast. Foam board, white sheets and household items can do the same job at first. Experiment with distance, angle and height, since small changes are easy to see and cheap to make.
See reflectors.
Stands and safety
Support and safety deserve attention:
- Sturdy stands: a wide base and secure locks stop lights tipping over.
- Weights: a small bag on the base legs adds stability, especially with a softbox acting like a sail.
- Cable management: tape cables down or route them away from walking paths.
- Heat: keep hot bulbs away from fabric and diffusion material, and follow the maker’s guidance.
- Distance from the subject: keep lights at a comfortable distance for people.
Hard Light, Soft Light and Direction
Before buying anything, it helps to understand two qualities of light: how hard or soft it is, and where it comes from. Hard light comes from a small or distant source, such as bare midday sun or a bare bulb. It makes crisp, dark-edged shadows and strong contrast. Soft light comes from a large source relative to the subject, such as an overcast sky, a window or a softbox placed close. It wraps around the subject, with gentle shadow edges.
The size of the source relative to the subject is what matters, not its absolute size. That is why moving a light closer makes it softer even though the light itself has not changed. It is also why a small lamp across a room produces harsher results than the same lamp near the subject with diffusion in front.
Direction changes the mood just as much. Try placing a light in each position and compare the results:
- Front, near the camera: even and flat, with few shadows. Safe, but it can look dull.
- Side, about 45 degrees: adds shape and texture, which is often the most flattering starting point for portraits.
- Directly to the side: dramatic, with half the face or object in shadow.
- Above: can create deep eye sockets on people if too steep, so lower it slightly.
- Behind the subject: makes a glowing edge or silhouette, and usually needs fill from the front.
Spend an hour moving one light around a single object, taking a photo at each position. This simple exercise teaches more than reading a long list of settings, and it shows you what a second light or reflector would need to do.
Color Temperature and White Balance
Light has color. Daylight tends to look cooler and bluer, while household bulbs often look warmer and more orange. Cameras compensate through white balance, and getting it right makes skin tones and whites look natural. Color temperature is usually described in degrees Kelvin, with lower numbers warmer and higher numbers cooler. Check the product listing for the range or fixed value of any light you buy.
The common beginner problem is mixed light. A window casting daylight and a warm lamp in the same room give two colors in one frame, and the camera can only correct for one of them. Skin may look blue in one area and orange in another. The fix is simple: turn off the competing sources, or match your light to the dominant one.
- Set white balance manually or use a preset that matches your light, instead of leaving it on automatic when colors shift between shots.
- A neutral gray or white card photographed in the scene gives you a reference for correcting color later.
- Shoot in a raw format, if your camera supports it, because color is easier to adjust afterward.
- Check how consistent the color is across bulbs in a kit, since cheap batches can vary.
- Some lights list a color accuracy rating; if a listing mentions one, read what it means, and do not assume a higher claim is better without context.
For video, consistent color across clips matters even more, since a sudden shift is obvious when edited together.
Window Light as a Free First Light
A window is the largest, softest and cheapest light most people own. Placing a subject near a window and turning off the room lights gives clean, directional light that flatters faces and products. Many beginners learn more from one window than from a first kit, and it shows what artificial light is trying to copy.
Position matters. Place the subject beside the window so the light falls from the side, then turn the face slightly toward the glass. A white sheet, a curtain or a thin shower liner over the window diffuses direct sun. If shadows on the far side are too dark, put a reflector or a piece of white foam board opposite the window to bounce light back.
- North-facing or shaded windows give steadier light through the day, depending on where you live.
- Direct sun changes quickly as clouds and the sun move, so check your exposure often.
- Close any other lights to avoid mixed colors.
- Keep the camera and your body from blocking the window light.
The weakness of a window is control. You cannot move it, and light changes with time and weather. When you find yourself repeatedly stuck by that, you have found the reason to buy your first light. Until then, practice with the window and learn to read the direction and softness of what you already have.
Continuous Light or Flash: Choosing for Your Needs
Continuous lights stay on, so you see the effect immediately. That makes them the friendlier option for beginners and the necessary one for video. Their limit is power: they can struggle to overpower bright rooms or freeze fast movement, and a strong one can be warm or bulky.
Flash delivers a very short, powerful burst. It can freeze motion, balance a bright background and work at lower sensitivity settings, but you cannot see its result until the picture is taken unless the unit has a modeling lamp. It also needs a trigger or compatible hot shoe connection, and some learning of power settings.
- Choose continuous if: you shoot video, products on a table, or want to learn by watching the light.
- Choose flash if: you photograph people in motion, work in bright rooms, or need more power from a compact unit.
- Consider both later: many photographers end up using each for different jobs.
Before buying either, check what your camera needs, such as a hot shoe, a sync port or wireless triggers, and read the listing to confirm compatibility. Check, too, how the light is powered, how long it runs, and whether the modifiers you want, like softboxes, fit its mount. A matched system is easier to expand than a mix of parts that do not connect.
Common Lighting Mistakes and Practice Exercises
Most beginner problems come from a few habits. Placing the light directly beside the lens flattens faces. Using a small bare source at a distance gives harsh shadows. Forgetting the background leaves it too dark or too bright. Pointing a light straight at a shiny surface bounces glare back into the camera. And adding more lights too soon often makes the picture worse, since each extra source adds more shadows to manage.
Practice makes these visible. Try a short sequence of exercises with one light and one reflector:
- Photograph the same object with the light at three distances and compare shadow softness.
- Move the light from front to side to back and note how texture and mood change.
- Add a white card on the shadow side and see how much fill you actually want.
- Place a person near a plain wall and move them closer to and further from it to see how shadows on the wall change.
- Turn the light off and use only a window, then compare.
When reflections annoy you on glossy products or glasses, try moving the light to the side or raising it, instead of adding more equipment. Keep notes on which positions you liked, so you can repeat them. Once you can predict what a light will do before turning it on, you are ready to decide what to buy next.
Softbox or Umbrella: Choosing a Light Shaper
Once you own a light, the next question is how to soften and direct it. Two common accessories do this in different ways, and neither is automatically better. The table below compares them in general terms. Confirm sizes, fittings and folding details on the product listing for whatever you consider.
| Feature | Softbox | Umbrella |
|---|---|---|
| Light control | More directional, less spill on walls | Broader, spreads around the room |
| Setup effort | Slower to assemble | Quick to open and close |
| Portability | Bulkier when packed | Folds compactly |
| Look in eyes | Square or rectangular catchlight | Round catchlight |
| Small spaces | Often easier to control | Can bounce light everywhere |
If you shoot in a small room with light-colored walls, a softbox keeps the light where you want it. If you travel or change locations often, an umbrella is easier to pack.
Setting Up a Small Room for Photos or Video
Many beginners work in a spare bedroom, a corner of a living room or a home office. The challenge is usually space, not gear. Clear a patch of floor roughly large enough for you, your subject and one light on a stand. Place the subject a short distance from the wall so shadows fall softly and do not form a dark outline behind them.
Turn off overhead lights that clash in color with your main light, or you will end up with mixed color tones. Close the curtains if daylight changes quickly, or use it deliberately as your main source. Keep cables taped down or routed along walls, and keep light stands on a flat surface.
- Mark the floor with tape for subject and stand positions so you can repeat the layout.
- Use a plain wall or a simple cloth backdrop if the room is cluttered.
- Keep a white card or foam board nearby to bounce light into shadows.
- Leave a clear path to the door while the lights are up.
How to Read a Lighting Kit Listing
Kits bundle stands, bulbs, modifiers and sometimes backdrops, and listings tend to emphasize big numbers. Look past the headline and find the specifics that affect results. Check the maximum stand height and the folded length, so you know it will fit your space and your bag. Look for whether the bulbs are continuous lights or flash heads, and whether the color temperature is fixed or adjustable.
See what mount the softbox uses, since fittings differ across brands and a mismatch means an adapter. Check the cable length and whether the kit includes a carrying bag. Read the maker’s notes about maximum load on stands, and keep heavier modifiers within those limits. If a listing is vague on any of these points, ask the seller before buying.
Which Setup Fits Your Situation
- Video calls and streaming: a single soft light placed slightly above eye level and to one side flatters most faces and is easy to adjust.
- Portraits of friends and family: one softbox plus a white reflector on the opposite side creates a gentle, natural look.
- Small product photos: two lights placed at angles, or one light and a bounce card, keep reflections under control on shiny surfaces.
- Food at a table: a window to the side with a bounce card can be enough without buying anything at all.
- Travel or events: pick compact folding gear with a bag, and keep the setup simple so you can pack up quickly.
Care and Safety Notes for Lighting Gear
Lights are easy to take for granted until something tips or overheats. Always set stands on flat ground, extend the legs fully and add a sandbag or weight on the base when using larger modifiers. Keep cables out of walkways so nobody trips on them.
Follow the maker’s instructions about bulb types, wattage limits and ventilation. Let bulbs and heads cool before packing them away, and do not cover them while they are on. Unplug gear before changing bulbs or modifiers. For any electrical concern, such as frayed cords or odd smells, stop using the item and consult the maker or a qualified technician.
Wipe fabric modifiers with a dry cloth, store them flat or in their bag, and keep the kit in a dry spot so it is ready whenever inspiration hits.
A Few Practice Ideas for the First Weekend
New gear teaches the most when you play with it. Set a simple subject, such as a mug or a friend sitting on a chair, and move one light through four positions: front, side, above and behind. Take one picture at each spot and compare how the shadows change. This quick drill shows you more about direction than any article can.
Next, change the distance. Move the light closer and then farther away, and watch how the edge of the shadow softens or hardens. Add a white card on the shadow side, then take it away. Keep notes about which combination you liked and why. Within an hour you will have a personal map of what each position does, and you can return to it whenever a new project comes along.
Quick Answers
Do I need a second light to start?
Not at first. One light plus a reflector or white card is enough to learn direction, softness and fill. Add a second light when you can say what the first one cannot do.
How do I stop glare on glasses?
Raise the light a little and angle it slightly so the reflection does not bounce straight into the lens. Having the person tilt their head down a small amount can also help.
What is the difference between a key light and a fill light?
The key light is your main source and sets the overall look. The fill is a weaker light or reflector that lightens the shadows the key creates.
Can I use household lamps for photography?
Yes, for practice. Household bulbs can differ in color from one to the next, so use matching bulbs and set white balance carefully. Keep them away from fabric and follow the lamp's wattage limit.
Why do my photos look flat with the on-camera flash?
A flash close to the lens lights the subject from the front and removes shadows that show shape. Bouncing it off a ceiling or wall, if there is one nearby and it is white or neutral, gives softer and more directional light.
Is a bigger softbox always better?
A larger one gives softer light when placed close, but needs more room and a sturdier stand. Match its size to your space and your subject, and check that the stand can carry it safely.
How far should the light be from my subject?
There is no fixed distance. Closer gives softer, brighter light with faster fall-off, while further gives harder, more even light. Test a few positions and keep the one that looks right.
Bottom line
Begin with one soft source. Learn how its position changes the look, add a reflector, and only then think about a second light. Practice with it before you spend more.
Learning to See Light Before You Buy More of It
Every lighting purchase works better after a short period of deliberate observation, because lighting gear answers questions you can only phrase once you have noticed how light behaves in your own rooms and photographs. Spend a week looking before you spend anything. Notice how window light changes character across a day in the room where you shoot: the hard, directional light of a clear morning, the soft wrap of an overcast afternoon, the way a north-facing window stays consistent while a south-facing one swings wildly. Photograph the same object — a mug, a plant, a person’s patient face — at three times of day and from three angles to the window, and study which versions flatter and which merely illuminate. That small exercise teaches the core vocabulary of lighting — direction, hardness, colour — more durably than any product description, and it tells you what your first purchase needs to do: imitate the window you wish you had, at the hours it refuses to cooperate.
The one-light apprenticeship
When you do buy, buy one light and learn it completely before adding a second. A single light, moved through every position around a subject, teaches the classical patterns: front light that flattens and forgives, side light that models and dramatises, back light that separates and glows, and the short walk between a flattering portrait setup and a horror-film one. Photographers who start with a three-light kit often freeze in front of its combinations; photographers who start with one light develop judgement, and then find a second light obvious — it fills, or it accents, or it lights the background — because they know precisely which problem it is solving. The starter kits discussed in this guide can be used this way: unpack one light, master it for a fortnight, then earn the rest of the box.
Lighting Portraits: A Beginner’s Working Method
Set up in this order and portrait lighting stops being mysterious. First, position the subject relative to the background, far enough that the background can fall darker or be lit separately. Second, place the main light roughly forty-five degrees to one side of the subject and a little above eye level, angled down — the arrangement that produces the familiar, flattering modelling in most portrait photography. Third, set the light’s distance: closer means softer and more dramatic falloff, further means harder and more even. Fourth, take a test shot and judge only the shadows: if the shadow side of the face is too deep, you need fill — a reflector, a white wall, or a second light at lower power — and if it is too flat, move the main light further to the side or reduce the fill. Fifth, check the eyes for catchlights, because a portrait without light in the eyes looks lifeless however good the exposure is.
Common portrait lighting faults and fixes
Light placed too high carves deep eye sockets; lower it until the catchlights sit comfortably in the upper part of the eyes. Light placed dead centre and on the camera axis flattens faces and creates the snapshot look beginners are trying to escape; move it off axis. Light too far away in a small room bounces off every wall and ceiling and becomes directionless — flag it, move it closer, or accept the room as a softbox and lean into the softness. Skin looking shiny is usually a hard, small source; enlarge the apparent source with a softbox or umbrella, or bounce the light. Each fault has a physical cause and a physical fix, which is the encouraging truth about lighting: it is learnable, repeatable craft rather than talent.
Lighting for Video, Calls and Streaming
Continuous light serves video, and the priorities shift from power to comfort and consistency. You will sit in this light for hours, so a light that runs cool, quiet and flicker-free at the frame rates you use matters more than raw output. Position the main light just above and beside the camera, raise it enough to avoid the interrogation-room look of a light at face height pointing straight on, and use the largest modifier the space allows, because soft light forgives skin, movement and imperfect makeup or none. A dim practical light or a gently lit background behind you adds depth that separates a considered setup from a webcam in a cave. Colour discipline matters on camera: mixed light sources — a warm lamp, a cool panel, daylight from a side window — produce mixed colour on skin that no white balance setting can fully reconcile, so choose one colour temperature for the lights you control and either match the rest or exclude them.
Avoiding flicker and banding
Some inexpensive LED lights flicker at rates that cameras catch as banding or pulsing, especially at higher frame rates or certain shutter speeds. Test any new light by recording a short clip at your usual settings and at a higher frame rate, watching for moving bands. Buy lights described as flicker-free for video work, keep dimming in moderate ranges where some designs behave worst at extremes, and remember that a light can be excellent for stills — where a single exposure averages the flicker away — and still disappoint for video. This is one of the few areas where the video-first buyer should genuinely spend differently from the stills-first buyer.
Product and Food Lighting on a Beginner Budget
Small subjects forgive small lights, which is why product and food photography are such satisfying places to learn. A single light with a softbox, placed to one side and slightly behind the subject, creates the directional modelling that makes food look appetising and products look three-dimensional; a white card or reflector opposite returns just enough fill to open the shadows. Backlight and side light reveal texture — steam, crumbs, condensation, brushed metal — while flat front light erases it. Work with the camera on a tripod and the subject still, adjusting the light in small moves and photographing each one; the sequence of test frames is a lighting education in itself. Turn off the room’s other lights while you learn, because mixed ambient light hides what your light is actually doing, and add background control early: a plain sweep of paper or a board behind the subject does more for a professional look than a second light does.
Care, Safety and Longevity of Lighting Gear
Lighting equipment fails and injures through the same mundane causes: heat, weight and cables. Give continuous lights ventilation space and never drape modifiers or fabrics over a housing that is meant to shed heat. Treat light stands with the respect due to tall objects holding weight above head height: legs fully spread, heaviest section lowest, weight hung low when working outdoors or around children, and cables taped or routed so a foot cannot find them. LED panels and COB lights have made home lighting far safer than the hot lights of the past, but a falling softbox rig is still a falling object, and sandbags remain the cheapest insurance in the whole lighting category. Store modifiers clean and dry, let lights cool before packing them into cases, and check cables and connectors periodically — most electrical problems announce themselves as intermittent flickers long before they become failures, and a cable replaced early is a shoot saved.
Your First Month With Lights: A Practice Plan
New lighting equipment tends to produce a burst of experimentation, a drawer of confusion, and then a retreat to automatic habits. A structured first month prevents that arc. In the first week, shoot only with window light and one reflector or white card, photographing the same subject at different hours; the goal is a personal reference set of what free light does in your space. In the second week, add your single artificial light and repeat the same subject at the same position, moving only the light through a circle of positions — front, forty-five degrees, side, behind — and keep every frame. The comparison set you build in that week is worth more than any tutorial, because it is your light, your room, your subject.
In the third week, introduce a modifier and repeat the circle: softbox or umbrella on, same positions, same subject. Watch what the modifier changes — shadow edges, falloff speed, catchlight shape — and write down, literally, the two setups you like best and the distances involved. In the fourth week, shoot real subjects with stakes: a family portrait, a product for an actual listing, a video call setup you will keep. By the end of the month you own something no kit can sell: a small repertoire of setups you can reproduce on demand, with distances and settings you have measured rather than guessed. Every later purchase then has a job description written by your own practice, which is the difference between a lighting kit that grows by intention and one that grows by hope.
Keeping notes that future-you can use
Photographers resist notes and regret it. A phone note per shoot — light position described in clock terms relative to the subject, distance estimated in steps, power setting, modifier used — takes ninety seconds and converts each session into a reproducible recipe. Photograph the setup itself with your phone before striking it; a wide shot of the room with lights in place is the most useful lighting diagram ever invented, and it costs four seconds. When a portrait succeeds, that setup photo is the reason you can do it again in six months for a different person in a different room.
Renting, Borrowing and Second-Hand Lighting
Lighting is one of the kindest categories for the cautious buyer. Studios and rental houses let you hire a proper kit for a weekend project, which answers the continuous-versus-flash question with experience instead of arguments, and tells you whether the kind of work you imagine actually wants doing. Borrowing works similarly among photography friends, with the etiquette of returning gear cleaner, charged and with any breakage reported and repaired at your cost. Second-hand lighting is abundant because photographers upgrade along predictable paths; the checks that matter are consistency of output across a burst or a long video take, the condition of stands and locking mechanisms — the parts that actually fail — and whether modifiers and mounts for the system remain available, because a bargain light orphaned from its ecosystem stops being a bargain the first time you need a softbox that fits it.
Troubleshooting Beginner Lighting Results
My portraits look harsh even with a softbox
The softbox is probably too far away or too small for the subject distance. Softness comes from the light’s apparent size from the subject’s position: move the modifier closer — just out of frame — before buying a bigger one. Also check that the light inside the modifier is not creating a hot centre; diffusion panels exist to even that out, and a second layer of diffusion softens further at the cost of output.
My room looks orange on one side and blue on the other
That is mixed colour temperature: warm household bulbs against daylight or a daylight-balanced panel. Choose one source family per shot. Turn off the lamps you are not using, close the curtain on the window you are not using, or gel and match the lights you control to the light you cannot. The camera’s white balance can only honour one temperature; everything else is negotiation.
My video flickers when I dim the light
Some LED lights dim by pulsing, and certain dim levels collide with camera shutter and frame rate combinations. Test your light across its dimming range at your recording settings before an important session, note the levels that stay clean, and work within them, adjusting exposure with distance and camera settings instead. If a light flickers at every useful level, it is a stills light in your kit now, whatever its listing promised.
Shadows are too dark but the highlights are already bright
Your scene’s contrast exceeds what one light placement can hold, which is a fill problem, not an exposure problem. Add reflected fill — a white board, a wall, a reflector — on the shadow side rather than raising the main light’s power, which would blow the highlights further. This is the oldest move in lighting, and the reflector you may already own from daylight work does the job indoors unchanged.
Lighting Small Spaces: Flats, Spare Rooms and Corners
Most beginner lighting happens in rooms that were designed for living, not photography, and the constraints of a small room change the craft in specific, solvable ways. The first is that walls and ceilings become participants: a white ceiling is a giant softbox waiting to be used by bouncing a light upward, which produces the forgiving, directionless light that flatters groups and video calls, at the cost of drama. A coloured wall tints everything bounced from it, which can be a warm feature or a colour-correction chore depending on the paint. The second constraint is distance: in a small room you cannot move a light far away, so inverse-square falloff works in your favour — a close light drops off quickly, letting a subject stand out against a background that falls naturally darker, which is the small room’s signature look and a genuinely professional one.
The third constraint is clutter, and the answer is subtraction: one plain backdrop, a curtain, or even a well-chosen blank wall converts a lived-in room into a studio corner for the duration of a session. Work vertically where floor space is scarce — lights on stands occupy a small footprint, and a subject seated rather than standing needs less of everything: less backdrop, less light spread, less room. Many successful home creators shoot entire channels from a single corner arranged once and left standing, which removes setup friction entirely; if your space allows one permanent corner, that arrangement is worth more than a second light. Finally, mind the household: agree the session’s duration, keep cables out of walkways, and strike the set when you finish — lighting gear that colonises shared space generates opposition that no photograph justifies, and the photographer who tidies up gets to shoot again next week.
What to Buy Second, Third and Never
After the first light and modifier, the highest-value second purchase for most beginners is not another light but control: a reflector and a piece of black foam board between them give you fill and shadow-shaping for very little money, and they work with window light too. The genuine second light earns its place when you can name its job — background separation, hair and rim light, or fill that a reflector cannot reach in your space. A background light transforms portrait depth more than any other single addition once the main light is understood. Third purchases follow your genre: product shooters want a small light and diffusion material for tabletop work; video creators want a practical lamp and colour-matched bulbs for set dressing; portraitists want a grid to control their softbox’s spill.
The “never” list is shorter than marketing suggests. Never buy a multi-light kit whose lights you cannot also use individually and well — three lights used badly lose to one used deliberately every time. Never buy power you cannot control: a light too strong for your small room, dimmed to its unstable bottom range, is worse than a modest light in its comfortable middle. And never buy a second copy of a problem — if your first light’s colour is unreliable on video, its twin will be too. The thread through all of this guide’s advice is that lighting rewards sequence: observe, one light, control, then expand by named need. Photographers who follow the sequence end up with small kits they understand completely, which is a description of most professionals’ actual working gear.
Lighting Children, Pets and Other Uncooperative Subjects
Beginners often learn lighting on still life and then discover that their real subjects move, blink, wander and have opinions. The adaptations are practical. Favour continuous light over flash for children and animals, because they can see and settle into it, and because you can shoot freely without each frame being an event. Build a light setup with a wide tolerance — a large soft source, generous depth of field — rather than a precise dramatic arrangement that only works if the subject holds a mark they will never hold. Place lights and stands with safety doubled: sandbagged, cables taped, nothing balanced where a small person or a large dog can bring it down, and never leave a child alone in a lighting setup. Then work fast and warmly, in short bursts, accepting the frames the session offers. The technical lesson underneath the chaos is real: lighting that forgives movement is a design choice, made in advance, and the photographers whose family pictures look professionally lit have usually chosen forgiveness over drama — big source, close in, modest contrast — and let the subject’s life supply the interest that a still life would need lighting to create.
Reading Your Own Results: A Lighting Review Habit
Skill in lighting compounds when every session ends with ten minutes of structured review. Sort the session’s frames into three piles — the light worked, the light fought the subject, and the accidents worth repeating — and for each pile ask the physical question: where was the light, how big was it relative to the subject, and what did the room contribute? Patterns emerge within a month: a distance you always prefer, a direction you avoid without noticing, a modifier you reach for and one you carry pointlessly. Photograph your setups, as advised earlier, so the review can connect results to arrangements precisely. This habit is also the honest cure for gear restlessness, because the review usually shows that the next improvement is a position change, a distance change or a subtraction — a lamp turned off, a curtain closed — rather than a purchase. Lighting is the branch of photography where knowledge most completely substitutes for equipment, and the review habit is how the knowledge accumulates. Beginners who keep it for a season stop describing themselves as beginners, accurately.
Common questions
Should I get a ring light or a softbox?
A ring light suits close-up faces and video calls, while a softbox suits general portraits and products. Pick based on what you shoot most.
How much should I spend?
Start small. A modest kit is enough to learn the principles, and you can upgrade when you know what you need.
Are stands important?
Yes. A stable stand protects both the light and your subject, so choose a sturdy one and keep it weighted.
More Cameras Guides
- Best 100-400mm Telephoto Zooms for Wildlife
- Best Super Telephoto Zoom Lenses for Birding
- Best Macro Lenses for Close-Up Photography
- Best 14mm Ultra-Wide Lenses for Mirrorless
- Best 50mm f/1.8 Lenses for Mirrorless
- Best 85mm f/1.8 Portrait Lenses on a Budget
- Best 135mm Portrait Primes for Mirrorless
- Best Camera Teleconverters for Telephoto Lenses


Ready to Buy? Start Here
If this guide helped you decide what to look for, these products are a place to start.


As an Amazon Associate we earn from qualifying purchases. Prices and availability are shown on Amazon.

