Disclosure: As an Amazon Associate, reviewstook.com earns from qualifying purchases. Links on this page are affiliate links at no extra cost to you; prices and availability change frequently, so check Amazon for the latest.
How to Set Up a High End Gaming PC: From Delivery Box to Full Performance
Knowing how to set up a high end gaming PC matters more than most buyers expect, because a flagship machine can leave a surprising amount of its performance switched off on day one. Monitors default to 60Hz. Memory runs below its rated speed until its profile is enabled. Displays get plugged into the motherboard instead of the graphics card. Drivers arrive months out of date. None of these mistakes damages anything, but together they can make a brand-new high end gaming PC feel eerily similar to the machine it replaced. This guide takes you from the sealed box to a fully verified, fully performing system in one evening, in the right order, with checks at each stage so that when you sit down to play, you are getting every frame you paid for.
Allow roughly ninety minutes for the full routine, not counting game downloads. Most of that time is updates running in the background; the hands-on work is closer to half an hour.
In this guide
Key Takeaways
- Remove internal transit packaging before the first power-on, and plug the display cable into the graphics card — never the motherboard.
- Finish all Windows updates before installing anything else, then install the current graphics driver directly from NVIDIA or AMD.
- Set the monitor’s native resolution and full refresh rate manually; Windows rarely does it for you.
- Enable the memory profile (EXPO on AMD, XMP on Intel) in the BIOS so DDR5 runs at its rated speed.
- Verify the whole system under an hour of real gaming load while the return window is wide open.
What Should You Do Before the PC Even Arrives?
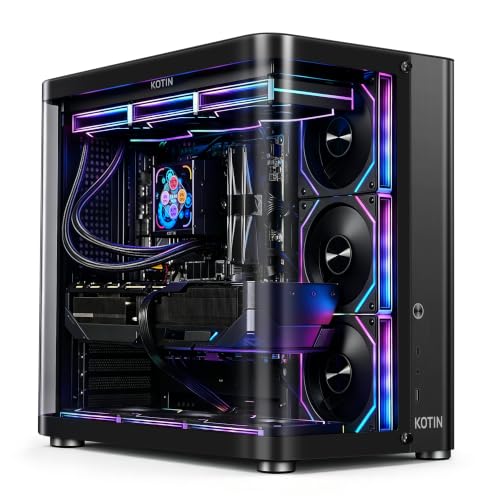
Prepare the space. A high end tower needs ventilation clearance on every side that breathes — plan for several inches behind and above the case, and never seal a liquid-cooled flagship inside a closed cabinet. Decide on wired Ethernet if at all possible; machines like the KOTIN Gaming PC with Ryzen 7 9850X3D and RTX 5080 include Wi-Fi 7, and it is genuinely good, but a cable still wins on latency consistency for competitive play and on download speed for 150GB installs. Gather a surge protector with real capacity, your Microsoft and game-launcher credentials, and a USB stick for a recovery drive. If your desk is due an upgrade to match the machine, this is also the moment readers typically sort the pointing half of the setup with something from Best Gaming Mouse For Fps.
Step 1: How Do You Unbox and Inspect a Prebuilt Safely?
Open the box on a table and lift the tower out with two hands under its base — flagship GPUs and liquid coolers make these machines heavy and top-heavy. Before touching the power button, open the side panel and look inside. Many builders ship towers with expanding foam packs or plastic supports inside the case to protect the graphics card in transit; every piece of that material must come out, and forgetting it is the most consequential unboxing error there is, because it blocks airflow and can foul fans. Check that the GPU sits firmly in its slot, that the thick power cable (or cables) to the card is fully seated, that the AIO’s radiator fans are unobstructed, and that memory sticks are clicked into their slots. Photograph the interior as received: if anything has visibly shifted in shipping, that photo is your evidence for the support conversation.
Compact high end designs deserve the same discipline in miniature. A small-form system such as the GMKtec NEO-X1 PRO — a 14.6L metal chassis pairing a Ryzen 9 9955HX3D with an RTX 5070 and liquid cooling — has less internal slack by design, so confirm its external power brick and cables are the correct ones and that its vents sit unobstructed on the desk rather than against a wall.
Step 2: Which Cables Go Where?
One rule governs this step: the display cable goes into the graphics card. On a tower, the GPU’s HDMI and DisplayPort sockets sit horizontally low on the back panel; the motherboard’s video outputs sit up near the USB ports and belong to integrated graphics. Prefer DisplayPort for high-refresh gaming monitors. Connect Ethernet if you are running it, then peripherals, then power last. Do not daisy-chain a flagship tower off a bargain power strip shared with a space heater and a laser printer — a 5080- or 5090-class machine under load is a serious electrical citizen, and the 1200W-supplied flagships discussed in High End Gaming PC Buying Guide deserve a circuit that is not already busy.
Step 3: What Happens at First Boot?
The first boot on a prebuilt usually lands in Windows setup or straight at a pre-imaged desktop. Either way, resist installing games immediately. Connect to your network, then run Windows Update repeatedly until it reports nothing left — including the optional driver updates section, though you will replace the graphics driver manually in the next step regardless. Expect several restarts. While updates run, create your recovery drive on that USB stick and confirm the machine’s storage layout in Settings: a 2TB system should show roughly that capacity across its drives, and a mismatch here is the earliest sign you received the wrong configuration variant — a real risk on multi-variant listings, and one worth catching in hour one rather than week three.
Step 4: How Do You Install Graphics Drivers Properly?
Download the current driver directly from NVIDIA’s or AMD’s site — not from a driver-updater utility, and not whatever version shipped on the machine months ago. During installation, choose the clean-install option where offered, so remnants of the shipping image’s driver do not linger. Reboot when prompted even if the installer seems finished. Then open the driver’s control panel and confirm three things: the GPU is correctly identified, the display is running at its native resolution, and G-SYNC or FreeSync is enabled for your monitor if it supports it. This ten-minute step is the highest-value action in the entire setup; a striking share of “my new PC underperforms” reports trace back to stale or generic display drivers.
Machines arrive with different driver ages depending on when their image was built, so treat this as mandatory regardless of brand. A current listing such as the Alienware Aurora ACT1250 with RTX 5070 and 2TB SSD will still reward a fresh driver install on day one, because driver development moves faster than warehouse inventory.
Step 5: How Do You Unlock the Monitor’s Real Refresh Rate?
Open Windows Settings, go to System, Display, Advanced display, and set the refresh rate to your panel’s maximum. Then verify it took: the same screen reports the active rate, and the difference between 60Hz and a high-refresh setting is visible the moment you drag a window across the desktop. Next, open your most-played game and check its own settings — many titles carry an independent frame-rate cap or default to the wrong display mode on first launch, and some will have imported cloud settings from your old PC that cap them at yesterday’s hardware limits. While you are in display settings, enable HDR if your monitor supports it properly, and calibrate it with the Windows HDR Calibration app rather than trusting defaults.
Step 6: What BIOS Settings Are Worth Touching?
Exactly one, for most owners: the memory profile. Enter the BIOS (usually by tapping Delete or F2 during boot) and enable EXPO on AMD systems or XMP on Intel systems, so DDR5-6000 memory actually runs at DDR5-6000 rather than a safe fallback speed. Builders usually enable this, but “usually” is doing heavy lifting — verify it in Task Manager’s Performance tab, which reports the running memory speed. While in the BIOS, confirm the boot drive order is sane and that Resizable BAR is enabled (it nearly always is on current systems). Then leave everything else alone. A prebuilt’s warranty-friendly stability is worth more than experimental overclocking, and the honest performance left on the table by stock settings is small. If the concept of choosing between configurations is still fresh, How To Choose A High End Gaming PC explains why these settings exist in the first place.
Step 7: How Should You Organize Games, Launchers, and Storage?
Install your launchers, then think before the download queue forms. On a 2TB machine, keep the operating system and your two or three most-played titles on the primary drive and let the library grow around them; on systems with a second drive or an empty M.2 slot, future-you will appreciate a dedicated games volume. Set each launcher’s download region correctly and schedule big installs overnight if your connection is metered or shared. Turn off the launchers’ “start with Windows” options except the one you live in — a flagship machine boots fast, and there is no reason to spend that advantage on five storefronts idling in the tray. Machines with showpiece extras, like the Horizon Autherium Dragon with its 64GB of memory and 5TB of storage, tempt owners to install everything at once; resist until the verification step below is done, so a return — if it comes to that — is not preceded by a weekend of downloads you have to abandon.
Step 8: How Do You Verify the System Is Truly Healthy?
Play your most demanding game for a full hour with a monitoring overlay or the builder’s software visible. You are checking four things. Temperatures should settle rather than climb indefinitely. Fans should be audible under load but not frantic at idle. The frame rate should match your expectations for the GPU tier and settings — the impressions in High End Gaming PC Reviews give a sense of what these tiers feel like in practice. And nothing should crash, stutter rhythmically, or disconnect. Test every USB port with a peripheral, confirm Wi-Fi and Bluetooth pair correctly even if you plan to run wired, and check that all case lighting zones respond to their software. Log anything odd with dates and screenshots. A fault found now is a replacement; the same fault found after the return window is a repair.
Troubleshooting: The Five First-Night Problems
Problem: the game runs at slideshow speed despite the flagship GPU. → Fix: check the display cable’s location first — motherboard port means integrated graphics. Then confirm the correct driver is installed and that the game’s settings did not inherit a low render scale or frame cap from a cloud profile.
Problem: the desktop feels like 60Hz even though the monitor is high-refresh. → Fix: set the rate in Advanced display settings, use DisplayPort rather than an older HDMI cable that cannot carry the bandwidth, and check the monitor’s own on-screen menu — some panels gate their top rates behind an “overclock” toggle.
Problem: memory shows a lower speed than advertised. → Fix: enable EXPO or XMP in the BIOS. If the system fails to boot afterward, it will recover to safe settings; update the BIOS once, calmly, following the builder’s instructions, and try again — or leave it and raise it with support, since rated memory speed is part of what you bought.
Problem: fans are loud at idle. → Fix: check for leftover transit material, confirm nothing blocks the intakes, and look for a background process (a first-day Windows indexing pass is the usual suspect) pinning the CPU. Fan curves can be softened in the builder’s software once you know the noise is a curve, not a symptom.
Problem: Wi-Fi speeds are far below your plan. → Fix: screw in the external antennas — the most forgotten objects in the box — and position them upright. Then test wired once to establish whether the limit is the wireless link or the connection itself.
Common Mistakes During Setup
- Installing games before updates and drivers. You will end up troubleshooting performance on a foundation that was never finished.
- Leaving the monitor at 60Hz for months. It happens constantly, and it silently wastes the entire point of a high-refresh pairing.
- Discarding the box and internal packaging immediately. Keep them through the return window; a return without packaging is a negotiation you do not want.
- Signing into everything on day one. Verify hardware first, migrate accounts second — especially before enabling any two-factor prompts tied to the new machine.
- Overclocking a brand-new prebuilt. Establish a stable, verified baseline first; you cannot diagnose a fault on a machine you have already modified.
Final Recommendation
Set up in the order given: space and cables, inspection, updates, drivers, display, memory profile, library, verification. Ninety minutes of discipline converts a delivery into a known-good system, and every check doubles as protection inside the return window. If you are setting up a machine you have not yet chosen, pair this routine with High End Gaming PC Buying Guide before ordering and High End Gaming PC Review for what to expect once it is running. One example of a machine that rewards this routine is the Skytech King 95 configuration with Ryzen 7 9800X3D and RTX 5070 Ti — enable its memory profile, feed it a DisplayPort cable, and it is precisely the kind of system this guide was written for. And if you are still deciding whether the tier itself justifies the outlay, Is A High End Gaming PC Worth It makes the case both ways.
Frequently Asked Questions
How long does it take to set up a high end gaming PC?
About ninety minutes including update time, of which roughly thirty is hands-on. Game downloads extend the evening as far as your connection dictates, but the machine is fully configured and verified before the first large install finishes.
Do I need to install Windows myself on a prebuilt?
No. Every system referenced in this guide ships with Windows 11 installed and licensed. Your job is updates, drivers, and settings — not installation media. Creating a recovery USB afterward is still wise insurance.
Why is my new gaming PC running at 60Hz?
Because Windows defaults conservatively. Set the refresh rate manually under Settings, System, Display, Advanced display, confirm your cable can carry the bandwidth (DisplayPort is the safe choice), and check the monitor’s own menu for a high-refresh or overclock toggle.
What is EXPO or XMP, and should I enable it?
They are stored memory profiles — EXPO for AMD platforms, XMP for Intel — that run your DDR5 at its advertised speed rather than a slower fallback. Yes, enable the profile in the BIOS and verify the speed in Task Manager; it is the configuration the memory was sold as.
Should I remove the software the builder pre-installed?
Selectively. Keep the builder’s hardware-monitoring and lighting tools and anything tied to warranty diagnostics. Remove trial software you will never use. Avoid aggressive “debloat” scripts on a new machine; they create problems that masquerade as hardware faults during your verification window.
Is it normal for a new PC to be loud during the first day?
Somewhat. Windows indexing, update passes, and shader compilation make the first day the hardest-working of the machine’s life. Judge the noise again on day three, under a game load, with setup complete — that is the acoustic character you actually bought.
What should I do if something fails the verification step?
Document it, contact the seller inside the return window, and do not open the machine beyond the side panel or attempt component-level repairs. A documented fault on a new system is the seller’s problem to solve, and early contact preserves every option including outright replacement.
Step 9: Which Windows Settings Should a Gamer Actually Change?
Windows arrives configured for the average laptop, not for a flagship desktop, and a short list of settings closes that gap. Turn on Game Mode in Settings under Gaming; on current Windows versions it is a net positive that suppresses background interruption during play. Enable hardware-accelerated GPU scheduling in Graphics settings if it is not already on, then reboot. Set the power plan to Balanced — counterintuitively, the modern scheduler does its best work there, and the old “Ultimate Performance” habit mostly buys fan noise. In the same Graphics settings page, add your main games and set their preference to the high-performance GPU, a belt-and-braces step that matters most on systems with integrated graphics present. Turn off the Xbox Game Bar’s background recording if you use another capture tool, and leave it on if you do not — it is the simplest clip recorder most players will ever configure. Finally, visit Privacy settings once: a new machine is the cheapest moment to decide what telemetry and app permissions you are comfortable with, before the ecosystem of launchers and utilities makes the question academic. Listings verified through reviewstook.com research for this cluster all ship the same Windows 11 foundation, so this routine applies regardless of which builder’s badge is on the case.
Step 10: How Do You Set Up Accounts, Security, and Backups?
A new flagship is a new identity anchor, and the first evening is when its security posture is cheapest to build correctly. Sign in with your Microsoft account, confirm Windows Hello is configured, and turn on device encryption if it is not already active. Enable two-factor authentication on the accounts that matter — Microsoft, Steam, your email — and treat the authenticator migration as part of the setup, not an afterthought for the day the old phone dies. Install exactly one reputable antivirus posture: Windows Security, kept current, is sufficient for most users, and layering multiple real-time scanners is a classic cause of the mysterious stutter new owners blame on hardware. Then make the backup that future-you will either thank you for or never know they needed: a system image or at minimum a recovery drive plus your irreplaceable files — saves, configurations, documents — synced somewhere that is not this machine’s only drive. A high end PC concentrates a household’s digital life onto very fast storage; speed is not redundancy, and the setup is not finished until the machine can fail without taking your library of saves with it.
Step 11: How Should the Network Be Configured for Play?
Run Ethernet if the room allows it — that sentence carries more competitive value than any setting in this section. If the machine must live on Wi-Fi, connect to the 5GHz or 6GHz band rather than 2.4GHz, position the router’s and the PC’s antennas with line-of-sight kindness, and in the router’s settings give the gaming machine a reserved address so port and QoS rules survive reboots. Test with a wired connection once, even temporarily with a long cable across the floor, to learn your connection’s honest baseline; every later wireless disappointment can then be diagnosed as the link or the line, rather than guessed at. Set Steam and the other launchers to schedule bulk downloads outside your play hours if your connection is shared, because a 150GB install at full line speed will win any fight against your match’s latency. On machines with modern wireless — Wi-Fi 7 appears across several systems in this cluster — confirm the router is broadcasting the bands the card can use; the fastest radio in the world negotiates down to whatever the access point offers.
Step 12: What About Audio, RGB, and the Builder’s Software?
Audio first, because it is functional: set your headset or speakers as the default device in both Windows and your chat application — they do not always follow each other — and run the microphone test before your first squad session rather than during it. If your headset ships with surround software, enable it in exactly one place; double-processed audio is worse than none. RGB and builder utilities come next, with a philosophy: install the one application that controls your machine’s lighting and fans, configure it once, and decline the rest of the bundled ecosystem. Set a fan curve that privileges quiet at idle if the default is excitable, save the profile, and check the box that stops the utility from launching a storefront at boot. The goal by the end of setup is a machine whose software footprint is a short list you can recite — driver, one control utility, your launchers, your chat — because every resident program is a future variable in some troubleshooting session you have not had yet.
Day Two and Beyond: The First-Week Optimization Pass
Setup ends; calibration begins. After a day of real use, revisit four things with fresh eyes. First, per-game settings: now that the foundation is verified, spend ten minutes in your main title’s graphics menu raising settings to what the hardware actually sustains, because most games auto-detect conservatively on first launch and will happily leave a flagship rendering like a mid-range machine until told otherwise. Second, mouse and input: set your pointer’s sensitivity in one place — the mouse software or the game, not both fighting — and confirm Windows pointer acceleration is off for gaming profiles, since consistent aim is built on raw input. Third, storage triage: decide which drive hosts the operating system and the current rotation of games, and move the archive — last season’s titles, the capture backlog — off the primary NVMe before it fills by accident. Fourth, temperatures revisited: a day of shader compilation and indexing is behind you, so the idle and load readings you take now are the machine’s true character, and they become the baseline every future “is it running hot?” question gets compared against. Write those numbers down somewhere; baselines are the difference between diagnosing and guessing, six months from now, when something changes.
Setting Up for Streaming and Recording From Day One
If the machine will broadcast or capture — a primary reason many buyers choose this tier — configure it during setup week, while every setting is fresh. In your streaming software, select the GPU’s hardware encoder rather than CPU encoding; the RTX 50-series encoder exists precisely to keep gameplay frames and broadcast frames from competing. Set the recording path to a drive with room to grow, and cap your clip buffer to a length you will actually review. Run one private test stream or local recording at your intended settings and watch it back critically: audio balance between game and microphone is the flaw every new setup has and no new streamer checks. Configure push-to-mute, a scene for breaks, and your chat overlay now, calmly, rather than live. The machines in this cluster with flagship X3D or Core i9 processors were chosen by their makers with exactly this dual life in mind, and an evening spent configuring the second job properly is what separates a gaming PC that can stream from a streaming rig that happens to game.
Keeping the Setup Alive: A Light Maintenance Rhythm
A good setup decays without a rhythm, so adopt a small one. Monthly: glance at case filters and clear the dust that flagship airflow inevitably collects; check the system drive’s free space; let the graphics driver update if a release has proven itself for a week or two. Quarterly: re-verify the memory speed and refresh rate survived any BIOS or major Windows update — both are known to reset silently — and prune the startup list of whatever the last three installs added. Annually: revisit the backup, confirm the recovery drive still boots, and take stock of temperatures against your day-two baseline. None of this requires expertise, and all of it is cheaper than the troubleshooting it prevents. The reward is a machine whose fifth year feels like its first, which — at high end prices — is not a bonus. It is the product you bought.
Step 13: How Do You Calibrate the Display Beyond Refresh Rate?
Refresh rate gets a machine feeling fast; calibration makes it look right, and a high end panel deserves the ten minutes. Begin with the monitor’s own menu: choose its standard or sRGB picture mode as your baseline rather than the vivid showroom preset it likely shipped with, set brightness for your room rather than for a shop floor, and disable dynamic contrast features that pump brightness scene by scene. In Windows, run the ClearType tuner once — text rendering on a new display at a new scaling factor benefits immediately — and set display scaling deliberately: at 4K on a desktop panel, a scaling factor that keeps interface text comfortable will also keep you from squinting through your first month. If your panel supports HDR, calibrate it with Microsoft’s HDR Calibration app and then be selective: enable HDR for the games and media that master for it, and do not force it across the desktop, where it washes out the interface it was never graded for. Streamers should also set the capture source to the calibrated display profile, so the audience sees the colors the player sees. A flagship GPU feeding an uncalibrated panel is the visual version of the 60Hz mistake — the hardware performing, the experience rationed — and it is entirely optional.
Step 14: How Should Peripherals Be Set Up to Match the Machine?
The tower is configured; the input chain is not, and at high refresh rates the input chain is where performance becomes feel. Set the mouse’s polling rate to its highest stable setting in its software — flagship sensors support rates that only matter because your monitor can now display their benefit — and store the profile on the device where the option exists, so it survives software reinstalls. Disable Windows’ pointer precision enhancement for gaming, as covered in the day-two pass, and set one sensitivity in one place. Keyboards ask for less: confirm the actuation or polling settings if yours offers them, and update its firmware once, now, rather than mid-season. Audio completes the chain: position speakers or configure the headset’s virtual surround in exactly one layer of software, set sample rates consistently between Windows and your chat application to avoid the robotic-voice gremlin that mismatched rates produce, and record a ten-second microphone test in your actual room, with the PC’s fans at gaming speed, because that is the acoustic environment your squad will hear you in. The principle unifying the step is symmetry: every component in the chain should be configured to the same standard as the tower, or the chain’s weakest setting becomes the machine’s effective specification.
Step 15: What Does a Sensible Power and Surge Setup Look Like?
A flagship machine is a significant electrical load and a significant asset, and its power feed deserves the same deliberateness as its driver stack. Connect the tower to a surge protector with a genuine protection rating — not a power strip with delusions — and give the protector its own wall socket rather than a chain of adapters. Consider what else shares the circuit: a flagship under load, a high-end monitor, and a space heater are a combination that older wiring may vote against at the breaker, and discovering that mid-raid is a poor diagnostic method. If your area’s power is unreliable, an uninterruptible power supply sized for the tower and monitor buys the minutes needed to save and shut down cleanly; at flagship wattages, choose the UPS by its watt rating rather than its headline VA figure, and test it once by pulling the plug at idle so its behavior is known rather than hoped. Cable-manage the result so the power path is as considered as the airflow path: a machine this expensive should not be one tripped-over cord away from a hard shutdown, and a setup is only finished when it is safe to live around.
Setting Up a Shared or Family High End PC
When the flagship serves a household, setup gains a layer of diplomacy. Create separate Windows accounts for each regular user from day one — games, saves, and settings stay personal, and one user’s experimental software never becomes everyone’s problem. Decide the storage treaty early: whose library lives on the fast drive, what the shared media folder’s budget is, and who may delete what, because a 2TB drive shared by three gamers fills on a schedule nobody chose. Parental or housemate considerations — quiet hours for fan-heavy sessions, a headset norm for voice chat in shared rooms — are setup decisions too, and they are cheaper to agree at installation than to negotiate at midnight. Place the machine where its heat and light suit the household, not merely where its owner first imagined it; a flagship in a shared living space with a television is a different citizen than one in a dedicated study, and its fan curves and lighting profiles should be configured for the room it actually got. The machine’s performance will be identical either way. Its welcome in the home will not be, and a setup guide that ignores the welcome has only done the electronic half of its job.
Documenting Your Setup: The Page You Will Thank Yourself For
Finish the setup by writing it down — a single page, kept with the machine’s documents, recording what you configured while you still remember configuring it. Note the BIOS settings you touched and the memory profile you enabled; the driver version you installed and where you got it; the monitor’s refresh rate, picture mode, and HDR decision; the fan curve you chose; the network arrangement, wired or wireless, and the router settings you changed; the backup method and where the recovery drive lives. Add the baseline temperatures and the date of the verification session. This page converts every future troubleshooting session from archaeology into lookup, and it converts a warranty conversation from recollection into evidence. Owners of high end machines keep them for years, across driver eras and Windows generations; memory is the least reliable storage in the entire system, and the page is its backup. Setup, properly understood, ends not when the machine performs but when its performance is reproducible — and reproducibility is a document, not a feeling.
Setting Up Game Libraries Across Multiple Launchers
The modern flagship is a citizen of five storefronts, and setup is when their coexistence gets organized rather than merely accumulated. Install the launchers you actually use and decline the rest; each resident launcher is a background process, an updater, and a notification source competing with your games for the machine’s attention. Unify the library view if fragmented installs bother you — several reputable library managers present every storefront’s games in one shelf — or embrace the fragmentation deliberately and assign each launcher a genre or a purpose so the sprawl has a logic. Set a single download directory convention per drive and teach every launcher the same folder names; the day you migrate drives or reinstall Windows, consistent structure is the difference between an afternoon and a weekend. Configure cloud saves per game rather than globally, because the one title whose cloud implementation conflicts with mods or multiple household players will otherwise choose your worst moment to demonstrate it. Finally, resist the completionist download: a flagship’s fast storage invites installing the entire library at once, but a curated rotation of a dozen installed titles loads faster, updates faster, and — the real benefit — gets played more. Setup is curation performed once, at the moment of maximum leverage, and the library you organize tonight is the library you will still be thanking yourself for in year three.
Ergonomics: The Setup Step With the Longest Shadow
No setting in this guide will be felt in year five more than the physical ones, so the setup is incomplete until the desk itself is configured. The monitor’s top edge should sit at or slightly below eye level, at a distance where the full panel is readable without head movement — at 4K sizes that distance is further than instinct suggests, and the flagship’s clarity is wasted on a panel parked at reading distance. The tower’s placement serves two masters, airflow and acoustics: off the carpet, out of the footwell’s dust and kicks, and far enough from the seated ear that its load noise reads as room tone rather than as a presence at your shoulder. Chair, desk height, and input positions follow the ordinary ergonomic canon, with one gaming-specific addition — the mouse’s range of motion should be unobstructed across the full pad at your chosen sensitivity, because a flagship’s frame rates make large, fast aim movements ordinary and a desk edge mid-flick is the setup’s fault, not the player’s. Cable the result so that nothing tugs, nothing drapes across an intake, and the machine can be slid out for its filter rhythm without a disconnection ceremony. Performance got the budget; ergonomics gets the years. Configure both like you mean it.
Setting Up for Guests, Kids, and Borrowed Sessions
A flagship in a real home gets borrowed — by guests who want to try the racing rig, by younger relatives whose own machines cannot run the new release, by a partner curious about the hobby the tower represents. Setup can make those sessions graceful instead of anxious. Create a guest account with standard privileges, its own small storage allowance, and access to a curated shelf of installed games, so a borrowed session never wanders through your saves, your mods, or your settings. Pin the two or three titles guests actually ask for, set the guest profile’s games to sensible default settings rather than your tuned ones, and keep a second, inexpensive controller paired and charged for exactly these occasions. Agree the house rules while the machine is new — food and drink geography, session lengths for younger players, who may install what — because rules set at installation are housekeeping, while rules set after an incident are grievances. None of this diminishes the machine’s purpose; it recognizes that a high end PC in a household is a shared venue as much as a personal instrument, and venues are configured for their audiences. The owner who sets up the guest path in week one never has to choose, in month six, between generosity and their save files.
Setting Up Voice Chat and Communications Properly
For most players the flagship is also a communications device, and its voice setup deserves the same deliberateness as its display pipeline. Choose one primary voice platform and configure it completely rather than three platforms superficially: set the input and output devices explicitly instead of trusting defaults, because Windows updates have a career-long habit of reassigning defaults to whatever was plugged in most recently. Run the platform’s echo and noise tests in your actual room, with the PC under a light gaming load so its fans contribute their real background, and position the microphone for that environment rather than for a silent studio that exists only during setup. Enable push-to-talk or a well-tuned voice-activity threshold — the squad will judge your entire setup by this single setting — and bind a hardware mute you can reach without looking. If you stream, route game, chat, and music through separable channels now, while the mixer is empty, rather than after your first broadcast teaches you why. Finally, keep a wired headset or a charged wireless one within reach as the backup path; communications fail at the worst moments by a law older than gaming, and the setup that includes the fallback is the setup that survives contact with a tournament night, a raid night, or a family call. The machine’s performance will get the compliments. Its voice clarity will get the invitations.
When to Call Support Instead of Troubleshooting
A setup guide should end by marking its own boundary, because the most expensive setup mistake is treating a hardware fault as a configuration puzzle. Call the seller — inside the return window, with your documentation open — when any of the following survives the basic checks in this guide: temperatures that climb without settling under ordinary gaming load; a fan, pump, or drive that makes a new mechanical noise; a machine that fails to detect its own advertised hardware after a driver-clean reinstall; random shutdowns under load that a different wall circuit does not cure; or any smell, scorch mark, or visible damage, which ends the conversation immediately and unplugs the machine. Everything else — refresh rates, profiles, drivers, defaults, libraries — is yours to configure with confidence and this guide’s company. The distinction is not skill but warranty: configuration is the owner’s joy, and faults are the seller’s job, and confusing the two in either direction costs somebody money. Set up boldly, document honestly, and escalate without hesitation when the machine, rather than its settings, is the problem. That judgment, exercised in week one, is the final step of a professional setup.