Disclosure: As an Amazon Associate, reviewstook.com earns from qualifying purchases. Links on this page are affiliate links at no extra cost to you; prices and availability change frequently, so check Amazon for the latest.
How to Set Up a 1080p Gaming PC: From Delivery Box to First Game
Knowing how to set up a 1080p gaming PC properly is worth real performance — not a few percent, but in the worst common case, the difference between using your graphics card and not using it at all. Every support forum in PC gaming is full of the same first-evening disasters: the monitor plugged into the wrong port so the expensive GPU sits idle, the high-refresh display quietly running at 60Hz for a year, the protective foam still inside the case strangling the airflow, the graphics driver never updated since the factory image was made. This guide walks the whole setup in the order we do it ourselves, from the moment the box arrives to the settings we check inside the first game, so that the machine you bought is the machine you actually experience.
The process takes most people one to two unhurried hours, including downloads. You need nothing beyond what comes in the box, a screwdriver you will probably not use, and a little patience during Windows Update. The steps apply to any modern prebuilt tower — the examples referenced along the way are verified current machines such as the WIWB Ryzen 5 5500 tower at the entry tier and the KOTIN Ryzen 7 8700F machine at the premium end — and if you are still at the choosing stage rather than the unboxing stage, start with How To Choose A 1080p Gaming PC and come back when the box is on your desk.
In this guide
Key Takeaways
- Remove all internal shipping protection before first power-on, and inspect for loose cables or a displaced graphics card after transit.
- Plug the monitor into the graphics card’s ports — never the motherboard’s — or your games will run on weak integrated graphics.
- Set the monitor’s refresh rate in Windows; high-refresh displays commonly default to 60Hz until you change it.
- Install the latest graphics driver from NVIDIA or AMD directly, then let Windows Update finish completely before judging performance.
- Enable your monitor’s variable refresh (FreeSync or G-Sync) and, in games, use DLSS or FSR where offered.
- Place the tower where it can breathe: open air at the front and rear, never sealed inside a closed cabinet.
Where to Buy a 1080p Gaming PC Mentioned in This Guide
If you are reading this guide before buying, the four machines below span the tiers we reference in the setup examples, from an entry-level esports tower to a premium high-refresh system. Each was verified against Amazon’s product data before inclusion; use the links to check the latest price on Amazon for the exact configuration. reviewstook.com may earn a commission on qualifying purchases, at no extra cost to you, and it does not influence the setup advice that follows — the steps are identical whatever you buy.
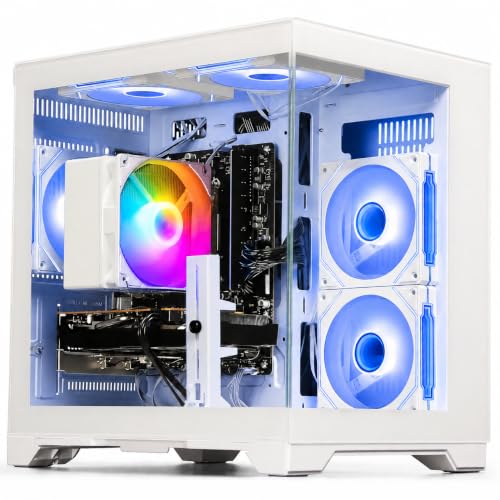
WIWB Gaming PC Desktop (Ryzen 5 5500, RX 6500 XT) — AMD Ryzen 5 5500, Radeon RX 6500 XT, 16GB DDR4, 512GB SSD. Check on Amazon
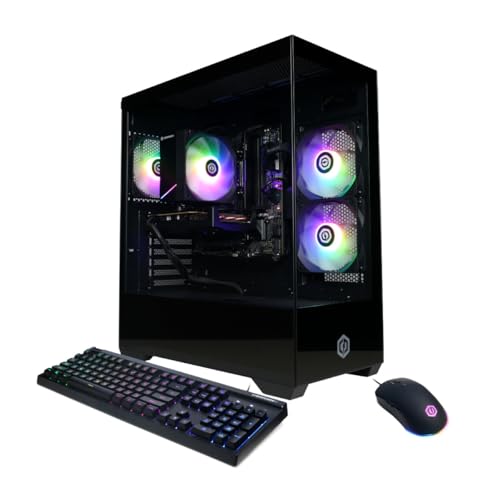
ZOTAC MEK Gaming PC (Ryzen 5 5500, RTX 5060) — AMD Ryzen 5 5500, GeForce RTX 5060 8GB, 16GB DDR4, 1TB NVMe SSD. Check on Amazon
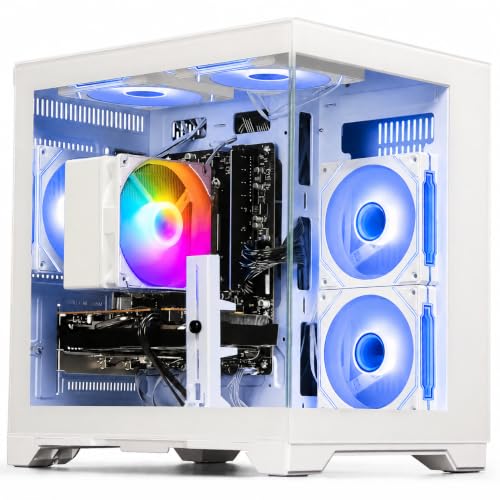
Skytech Azure 3 Gaming PC (Ryzen 7 5700, RTX 5060) — AMD Ryzen 7 5700, GeForce RTX 5060, 16GB DDR4 3200, 1TB NVMe SSD. Check on Amazon
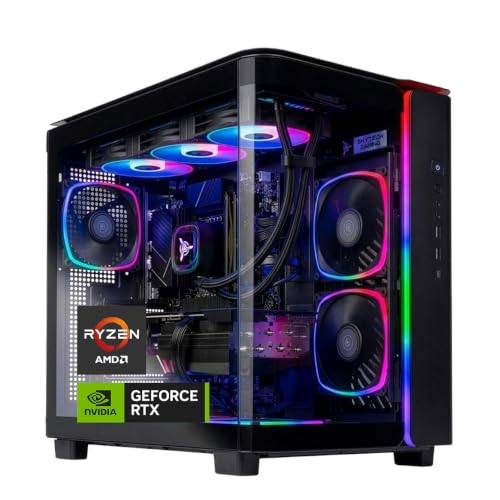
KOTIN Gaming PC Desktop (Ryzen 7 8700F, RTX 5060 Ti) — AMD Ryzen 7 8700F, GeForce RTX 5060 Ti 8GB, 16GB DDR5, 1TB SSD. Check on Amazon
Step 1: Unbox and Inspect Before You Plug Anything In
Open the box on a clear surface and keep every bag, manual and cable until the machine has survived its first week. Lift the tower out by its base, not by the front panel. Before connecting a single cable, open the side panel — most prebuilt cases use thumbscrews or a simple latch — and look inside. Builders commonly ship towers with expanding foam or air pillows inside the case to protect the graphics card in transit. Remove all of it. This step is not optional: foam left inside blocks airflow and, in the worst case, melts against hot components. While the panel is open, gently confirm that the graphics card is fully seated in its slot, that its power connector is firmly attached, and that no cables were shaken loose in shipping. Reseat anything that looks doubtful with a firm, even push; modern connectors click or sit flush when they are home.
Check the exterior too. Photograph any shipping damage before you power on, because a photograph taken at unboxing is worth a great deal if you need support later. Confirm the accessories match the listing: power cable, any included keyboard and mouse, WiFi antennas if the machine uses them — several towers in this category ship with screw-on antennas that live in a small bag, and WiFi performance without them is miserable, which has convinced more than one new owner that their machine is faulty. Screw the antennas on now, while you are thinking about it. Close the case, and you are ready to place the tower.
Step 2: Place the Tower Where It Can Breathe
A gaming PC is a small space heater that thinks. Under load, a mid-range tower converts several hundred watts into warm air that has to go somewhere. Place the machine on or under the desk with open space at the front intake and the rear exhaust — a hand’s breadth minimum, more if you can manage it. Never seal a gaming tower inside a closed media cabinet while it runs; temperatures climb, fans roar, and the processor and graphics card throttle themselves down to survive, which feels exactly like a machine that is mysteriously slower than its reviews. Carpet is the other enemy: a tower sitting directly on thick carpet can smother a bottom-mounted power-supply intake, so use a board, a stand, or the desk surface itself.
Think about cables while placing it. You need reach to the monitor, power, and ideally an Ethernet cable — a wired connection remains the single best upgrade for online gaming stability, beating any WiFi generation, and every tower in this category includes an Ethernet port. If the router is in another room, WiFi 6 machines like the examples in this guide will serve you well, but position the tower so its antennas are not buried behind a metal desk or inside a cubby. Small placement decisions made now prevent the two most common “my PC underperforms” mysteries: thermal throttling and a strangled wireless signal.
Step 3: Connect Everything — and Get the Monitor Cable Right
Connect in this order: power cable from tower to wall or a surge protector; keyboard and mouse; Ethernet if you are using it; and finally the monitor. The monitor connection is the most consequential cable in the entire setup, so slow down for it. On the back of the tower there are two clusters of display outputs. One cluster sits on the motherboard, near the USB ports — those outputs run on the processor’s integrated graphics, if it has any. The other cluster sits lower, on the graphics card itself, a horizontal row of HDMI and DisplayPort sockets on the card’s bracket. Your monitor cable goes into the graphics card. Full stop. Plugging into the motherboard is the classic first-PC mistake: the machine works, Windows appears, and games run at a fraction of their proper speed on integrated graphics while a perfectly good GPU idles beneath them.
Prefer DisplayPort for high-refresh 1080p gaming when both ends offer it, because it handles high refresh rates and variable refresh most reliably; HDMI is fine for 1080p at typical refresh rates and is the only option on some monitors. Use the cable that came with the monitor where possible, since bargain cables are a quiet cause of flicker and dropped signals at high refresh. If your setup includes a second monitor for chat, guides or streaming tools, it also belongs on the graphics card’s outputs. And if you are choosing peripherals to complete the desk, a mouse matched to your grip style matters more than its lighting — the comparisons at Best Gaming Mouse For Fps and the pad advice in Best Cloth Gaming Mouse Pads are sensible places to start.
Step 4: First Boot, Windows Setup and Removing the Clutter
Power on and follow the Windows setup: region, keyboard, account, privacy choices. Take the privacy screens seriously rather than clicking through — the defaults share more than most people would choose deliberately. When the desktop appears, resist the urge to install a game immediately. First, run Windows Update, restart when asked, and repeat until it reports you are up to date; a new machine’s factory image can be months old, and half-installed update queues are a leading cause of stutter and strange behaviour in a PC’s first week. Let it finish completely.
Next, tidy the software. Prebuilt machines often arrive with trial antivirus suites, promotional utilities and duplicate “game booster” tools. Uninstall the trials you will not pay for — Windows Security is a competent built-in antivirus — and keep the builder’s own control software only if you use it for lighting or fan control. Create a restore point once the machine is clean and updated; it takes a minute and gives you a way back from any future driver or software mishap. Finally, sign into your game launchers, start your library downloading in the background, and move to the two steps that unlock the performance you paid for: the display settings and the graphics driver.
Step 5: Set Your Monitor’s Refresh Rate and Enable Variable Refresh
This step takes ninety seconds and is skipped by a shocking number of owners for the entire life of their PC. Right-click the desktop, open Display settings, scroll to Advanced display, and set the refresh rate to the highest your monitor offers — 144Hz, 165Hz, 240Hz, whatever you bought. Windows does not always default to the maximum, and a high-refresh monitor left at 60Hz delivers exactly 60Hz of smoothness no matter what your PC renders. The difference when you fix it is not subtle: mouse movement, camera pans and general desktop motion all become visibly smoother, and you will wonder how it ever looked acceptable before.
While you are in settings, enable variable refresh. If your monitor supports FreeSync or is G-Sync compatible, turn it on in the monitor’s own on-screen menu first, then confirm it is active in your graphics control panel. Variable refresh synchronises the display to the game’s frame rate, eliminating screen tearing without the input lag of traditional V-Sync. In games, the standard recipe is: variable refresh on, V-Sync off in the game menu (or on in the driver, per your GPU maker’s guidance), and a frame-rate cap a few frames below the monitor’s maximum. Follow that recipe and 1080p gaming feels the way the reviews promised. Our criteria guide, 1080p Gaming PC Buying Guide, explains the monitor-pairing logic in full if you are still choosing a display to match the machine.
Step 6: Install the Latest Graphics Driver — From the Source
Your tower shipped with a graphics driver that was current when the factory image was built, which may be many months ago. Game performance, especially in new releases, depends heavily on driver updates that include per-game optimisations. Download the latest driver directly from NVIDIA’s or AMD’s official site or through their apps — never from third-party driver sites — and install it, choosing the clean-install option if offered. Restart when prompted. While you are there, explore the control panel: confirm your resolution and refresh rate are recognised, check that variable refresh is enabled, and leave the exotic settings alone until you know what they do.
A word of calm about drivers generally: update them when a game you play receives a optimised release, or every month or two, rather than chasing every version the day it drops. Occasionally a new driver has issues with a specific title; if a game suddenly misbehaves after an update, rolling back one version is a legitimate, quick fix, and your restore point from step four makes it painless. What you should never do is run a gaming PC for years on its factory driver and then blame the hardware for performance that software would have fixed. On the premium machines in this guide — the RTX 5060 Ti systems such as the KOTIN — current drivers also unlock the latest DLSS features, which are a genuine part of the product you paid for.
Step 7: Configure Your Games for 1080p Done Right
Now install or launch your first game and set it up deliberately rather than accepting defaults. Confirm the resolution is 1920 by 1080 and the display mode is fullscreen or borderless as you prefer — borderless is convenient for multitaskers, fullscreen can be marginally more efficient. If the game offers DLSS (on NVIDIA cards) or FSR (on any card), enable it at its quality setting: at 1080p it converts spare rendering headroom into higher frame rates with minimal visible cost, and on entry-tier machines it is the difference between medium and high settings in demanding titles. Set textures as high as your card’s memory comfortably allows — texture quality affects memory more than frame rate — and treat shadows, volumetric effects and ray tracing as the expensive dials to lower first if performance disappoints.
For competitive titles, invert the priorities: lower the cosmetic settings, chase the highest stable frame rate your monitor can use, and cap it just below the refresh ceiling. Then tune the unglamorous settings that decide matches — mouse sensitivity and polling, field of view, and Windows’ own pointer settings; the walkthrough at Best Windows Mouse Settings For Gaming covers the Windows side properly. Save or screenshot your working settings per game. It takes minutes, and it means a reinstalled game or a new driver never costs you an evening of re-tuning. Finally, benchmark honestly: play your most demanding game for twenty minutes and watch temperatures and fan noise as much as frame rates, because a setup problem that heat causes will appear exactly then, not in a menu screen.
Problem: Something Is Wrong — the First-Evening Troubleshooting List
Problem: games run far slower than reviews suggest. First fix: check where the monitor cable is plugged in — motherboard instead of graphics card is the cause more often than everything else combined. Second fix: confirm the refresh rate and that the game is actually running at 1920 by 1080. Third fix: update the graphics driver. Problem: the screen shows nothing at all. Fix: reseat the monitor cable at both ends, try the other output on the graphics card, and confirm the monitor is set to the correct input source. Problem: WiFi is terribly slow. Fix: screw on the antennas from the accessories bag, and move the tower out from behind metal furniture.
Problem: fans are loud and performance drops after twenty minutes of play. Fix: check for internal shipping foam you missed, confirm the tower has open air at front and rear, and never run it inside a closed cabinet. Problem: stutter in the first days despite good frame rates. Fix: let Windows Update finish entirely, including restarts — background updating is the most common cause of first-week stutter — and confirm your games are installed on the SSD, not on any secondary storage. Problem: a new game crashes while others are fine. Fix: verify the game files in its launcher, update the driver, and lower ray tracing first if the game offers it. Nearly every first-evening problem is on this list, and none of them requires returning the machine. If you want the deep-dive on a single representative system’s behaviour, 1080p Gaming PC Review documents one in detail.
Keeping It Fast: The Monthly Ten-Minute Routine
A gaming PC stays fast with embarrassingly little effort. Monthly: glance at storage and keep the SSD below roughly eighty-five percent full, because nearly-full SSDs slow down and games keep growing; check for a graphics driver update if you play new releases; and blow dust out of the intake filters and fans with the machine off — dust is a slow thermal problem that becomes a loud, hot one. Quarterly: confirm Windows and your launchers are healthy, uninstall the games you genuinely no longer play rather than hoarding them across the drive, and glance at startup programs for anything that has quietly added itself. That is the whole routine. Towers are forgiving machines, and the examples in this guide — from the WIWB entry system to the Skytech Azure with its Gold-rated power supply — are built to run for years on exactly this level of care.
Common Mistakes During Setup
- Leaving shipping foam inside the case. It blocks airflow and can damage components. Open the panel and remove every piece before first power-on.
- Plugging the monitor into the motherboard. The most expensive free mistake in PC gaming. The cable belongs in the graphics card, always.
- Never changing the refresh rate. A 144Hz monitor at 60Hz settings is a 60Hz monitor. Ninety seconds in Windows settings fixes it for the life of the machine.
- Judging performance during Windows Update. A new PC updating in the background will stutter. Let it finish, restart, then evaluate.
- Installing driver “updaters” from the web. Drivers come from NVIDIA, AMD or Windows Update only. Third-party driver tools range from useless to malicious.
- Sealing the tower in a cabinet. Heat is performance. Give the machine open air at the front and back, permanently.
Final Recommendation
Setup is not the boring prelude to owning a 1080p gaming PC; it is where a meaningful share of the performance lives. Remove the shipping protection, place the tower where it can breathe, put the monitor cable in the graphics card, finish Windows Update, set the refresh rate, enable variable refresh, install a current driver, and tune each game’s upscaling and settings with intent. Ninety focused minutes, once, and the machine will deliver everything its specification promises for years, needing only the monthly ten-minute routine to stay that way. If you are still deciding which machine deserves this treatment, the honest pros and cons of the category are in 1080p Gaming PC Pros And Cons — and when the box arrives, you now know exactly what to do with it.
Step 8: Check the Memory Profile and BIOS Basics
One setting separates a correctly configured machine from a merely assembled one, and it lives in the BIOS: the memory profile, called XMP on Intel systems and EXPO on AMD systems. Memory kits are rated for speeds above the default baseline, and the profile is what actually applies that rated speed. Most reputable prebuilt builders enable it before shipping — but “most” is not “all”, and a machine running its memory at baseline speed is giving away performance in CPU-sensitive games for no reason. Checking takes two minutes: restart, enter the BIOS with the key shown on screen (commonly Delete or F2), and look at the memory section. If a profile exists and is disabled, enable it, save and exit. If the machine becomes unstable afterwards — rare, but possible — disable it again and contact the builder, because memory that cannot run at its rated profile on a new machine is a warranty conversation, not a setting to live with.
While you are in the BIOS, verify two more things and change nothing else. Confirm the boot order starts with your SSD, and confirm that resizable BAR — a feature that lets the processor access the graphics card’s memory efficiently — is enabled, as it should be on any modern build. Then leave. The BIOS rewards restraint: every other setting in there is a factory decision you paid the builder to make, and the setup goal is a correct machine, not a personalised firmware adventure on day one.
Step 9: Peripherals, Controllers and Audio — Finishing the Desk
With the tower performing, finish the human side of the setup. If you play with a controller, pair it now and test it in a game before you need it mid-session: Bluetooth controllers pair through Windows settings on machines with Bluetooth built in, while others need a cable or a USB adapter — discover which situation you are in during setup, not during a match. Set your headset as the default output and your microphone as the default input in Windows sound settings, then check the same settings inside Discord or your chat app of choice, because Windows defaults and app defaults disagree often enough that “my mic doesn’t work” is the most common sentence in gaming. Position the microphone close and off-axis if it is a desk mic; the difference in how you sound to teammates is larger than any software filter.
Mouse and keyboard deserve ten deliberate minutes. Set the mouse’s DPI in its software if it has any, then set Windows pointer speed to the middle setting and turn off “enhance pointer precision” for gaming, because consistent, unaccelerated input is what builds aim — our dedicated guide at Best Windows Mouse Settings For Gaming covers the reasoning and the per-game sensitivity method in full. Learn your keyboard’s lighting and macro software only as far as you will actually use it. The principle for all peripherals is the same as for the PC itself: configure deliberately once, write down what you chose, and then stop visiting settings menus. A setup is finished when you forget it exists.
Step 10: Verify the Setup With a Simple Benchmark Routine
Trust, but verify. Before declaring the setup complete, run a short verification routine that confirms the machine is delivering what its specification promises. First, open Task Manager during a game and glance at the Performance tab: the graphics card should be doing the work, which confirms the monitor cable is in the right port and the game is on the right GPU. Second, use your graphics app or an in-game overlay to watch frame rates in your most demanding title for ten minutes of real play — not menus — and compare the experience to your monitor’s refresh rate: a mid or premium machine at 1080p should be meeting or approaching it in most titles at sensible settings. Third, watch temperatures in the same overlay: exact numbers vary by hardware and room, but the pattern to trust is stability — temperatures that level off and stay level — and the pattern to investigate is a steady climb paired with falling frame rates, which points back to placement and airflow.
Record the results somewhere — a note on your phone is fine. Those first-week numbers are your machine’s fingerprint: if performance ever disappoints in the future, comparing against them tells you instantly whether the machine changed or the game did. This five-minute habit is the difference between owners who say “my PC got slower” and owners who can say “this title’s new patch halved my frame rate”, and only the second group gets useful help from anyone.
Step 11: Security, Backups and Accounts — the Boring Twenty Minutes That Save You
A gaming PC holds your game libraries, your accounts and increasingly your whole digital life, so finish setup with the unglamorous protections. Confirm Windows Security is active and its first full scan has run. Turn on Windows’ built-in backup or sync for your documents and save-game folders — many games cloud-save automatically, but the ones that do not are always the ones you care about. Enable two-factor authentication on your game platform and email accounts, because a gaming account with a decade of purchases is a genuine asset and is targeted accordingly. Store your Windows licence details, the builder’s warranty information and your order confirmation together somewhere you will find them in three years. None of this is exciting, and all of it is the difference between an inconvenience and a catastrophe on the one bad day it matters. Setup is complete when the machine is fast, verified, and boring to administer — which is to say, ready to be a gaming PC rather than a project.
Step 12: Game Library Organisation and Storage Strategy
With a verified, tuned machine, the last setup task is organising the library before it organises itself into chaos. Decide your storage strategy now: your most-played games live on the internal SSD where load times and texture streaming are fastest; large, rarely played titles can be archived to a second internal drive if you add one, or simply uninstalled and re-downloaded in the age of fast connections — the honest truth is that most players rotate through a handful of games, and a terabyte holds that rotation comfortably. Set your launchers to download and update overnight if your connection is shared, and turn off automatic updates for games you are mid-campaign in if a surprise patch day would annoy you — some launches rewrite saves’ compatibility, and control over timing is control you will one day be glad of. Create one folder, one cloud note, or one text file that records your per-game settings, your sensitivity, and your key bindings as you settle them; new PCs, reinstalled Windows and corrupted configs all become twenty-minute inconveniences instead of lost evenings when that file exists.
Accessibility and Comfort: the Setup Steps Nobody Mentions
A gaming setup is a physical place where a person sits for hours, and the final steps are ergonomic rather than electronic. Set the monitor so its top edge is near eye level and roughly an arm’s length away; at 1080p this also happens to be the distance where the resolution looks its best. Enable Windows’ night light schedule if you play late, not because the science is settled but because most players subjectively sleep better for it, and use the in-game brightness calibration screens once, properly, in a darkened room — crushed blacks and blown highlights are settings errors, not artistic choices, and they are free to fix. Set text scaling in Windows to a size you can read without leaning in; leaning in is a posture, and postures compound. Route cables so the desk can be cleaned and the tower can be slid out for its quarterly dust check without disconnecting the world. None of this will appear in a benchmark, and all of it will appear in how you feel at hour three of a session — which is, in the end, the performance metric the whole purchase was for.
Step 13: Your First Game Session — a Deliberate Shakedown
Treat the first real session as a shakedown cruise rather than a celebration lap, and it will repay you for years. Pick your most demanding game, not your favourite, and play it for a solid hour with the overlay visible: frame rate, temperatures, and GPU utilisation tell you whether the whole preceding setup — placement, cables, drivers, settings — has actually assembled into the machine you bought. Note the numbers and the feel. Then switch to your most-played game and tune it properly: settings, sensitivity, key bindings, audio levels, the works, while the machine’s behaviour is fresh in your mind. Finally, deliberately do the ordinary things — alt-tab to a browser, take a clip, join a voice channel mid-game — because a gaming PC lives in the transitions as much as in the games, and discovering a microphone or overlay problem tonight, calmly, beats discovering it in front of friends. At the end of the session, shut down properly, glance at the restore point and backup settings one last time, and write down anything you changed. The machine is now set up in the full sense: verified under load, tuned to its owner, and documented well enough that future-you can maintain it in minutes.
Ongoing Optimisation: What to Revisit at Three Months
Setup has a long tail, and a short revisit at three months catches what the first evening cannot. By then you will know which games you actually play, so revisit storage honestly: uninstall the launch-day experiments, move the keepers to the fastest drive, and confirm the SSD still has breathing room. Revisit fan behaviour with real knowledge of your room’s seasons — a curve or placement that was silent in a cool month may deserve adjustment in a warm one. Revisit the driver, particularly if a major game has launched since setup, and revisit your per-game settings for the title you now play most, because your eye has calibrated and the settings you chose as a stranger to the machine can usually be improved by the owner you have become. Check the backup and restore point are still healthy, blow the first dust out of the filters, and glance at startup programs for the quarter’s accumulation. Thirty minutes, four times a year, is the entire maintenance contract of a modern gaming PC — and owners who keep it are the ones whose five-year-old machines still feel new.
Step 14: Windows Settings Worth Changing for Gaming
Windows arrives configured for the average office user, and a handful of its defaults are worth a gamer’s deliberate attention. Turn on Game Mode in Windows settings — it suppresses background update activity during play and is worth having, even though its effect on a modern machine is modest. Under graphics settings, enable hardware-accelerated GPU scheduling if it is offered and off; on current hardware it is the modern default path and reduces latency slightly. Set your power plan to Balanced rather than any vendor’s “ultimate” profile — modern processors manage their own clocks intelligently, and the aggressive plans mostly generate heat at idle. Disable the full-screen optimisation overrides only if a specific old game misbehaves; the modern default is correct for current titles. Turn off mouse acceleration, as covered in the peripherals step, and set your display’s scaling to the value that makes text comfortable rather than the one that makes it smallest. Finally, visit the startup tab in Task Manager and disable the launchers and updaters you do not want resident from boot — not because they are heavy, but because a gaming PC should start as a gaming PC, not as a trade show of every vendor whose software you have ever installed. Each of these is a one-time, two-minute decision; together they are the difference between a Windows installation that serves the games and one the games have to negotiate with.
Network Setup for Online Play: the Last Performance Frontier
Once the machine itself is fast, the network becomes the remaining variable in online games, and it rewards the same deliberate setup. Start with the hierarchy: Ethernet first, always, when a cable can reach; a wired connection’s latency and stability beat every wireless generation, and a long cable costs less than any other upgrade in this guide. If wireless is unavoidable, place the router and the tower with as few walls and as little metal between them as your home allows, prefer the 5GHz or 6GHz band for gaming — shorter range, far less congestion — and confirm in Windows that you are connected on that band rather than the far-reaching but crowded 2.4GHz. Set your games’ regions correctly in their settings or launchers; playing on a distant region’s servers adds more latency than every other setting on this page combined. Keep the router’s firmware updated, restart it occasionally rather than only when it fails, and if your household streams video while you play, look for the router’s quality-of-service settings and prioritise the gaming machine — a five-minute configuration that ends the “who is using the internet” argument permanently. Finally, measure honestly: use the in-game network statistics that most competitive titles provide, note your typical ping to your region’s servers, and treat that number, recorded during setup, as another fingerprint to compare against if online play ever degrades. Local performance you control completely; network performance you control mostly — and mostly, set up once, is enough.
The Setup, Compressed: Your First-Evening Checklist
For the reader standing in front of a sealed box, here is the entire guide as a checklist. Unbox on a clear surface; photograph any damage. Open the case; remove every piece of shipping protection; confirm the graphics card and its power cable are seated. Fit the WiFi antennas. Place the tower with open air front and back, off thick carpet. Connect power, peripherals, Ethernet if possible — and the monitor to the graphics card, never the motherboard. Power on; complete Windows setup thoughtfully. Run Windows Update to exhaustion, restarting as asked. Uninstall trial clutter; create a restore point. Set the monitor’s refresh rate in Windows; enable variable refresh in the monitor menu and the graphics panel. Install the current graphics driver from NVIDIA or AMD directly. Check the memory profile in the BIOS. Pair controllers, set audio defaults, disable mouse acceleration. Install your most demanding game; enable DLSS or FSR; verify frame rates, GPU use and temperatures over twenty minutes of real play. Record your settings and your numbers. Turn on backups and two-factor authentication. Twelve groups of actions, one evening, five years of dividends — that is the whole discipline of setting up a 1080p gaming PC, and every item on the list exists because its absence has ruined someone’s first week. Yours will not be among them.
When to Call the Builder: Knowing the Boundary of DIY Setup
A setup guide should end by marking its own boundary honestly. Everything in the preceding steps is normal ownership: cables, settings, software, placement, verification. The boundary is crossed when a new machine shows hardware symptoms — failure to power on at all, repeated crashes under load after updates and drivers are correct, visible physical damage, burning smells, or a component that is simply absent from the system’s own reporting. Those are warranty events, not setup challenges, and the correct action is to stop, document the symptom with photographs and notes, and contact the builder while the return and warranty windows are at their widest. Do not open a dispute with your own machine by attempting repairs that give a support department a reason to hesitate. A well-set-up PC and a well-documented warranty claim are the same virtue — methodical attention, applied early — and the owner who practises the first is perfectly equipped for the second, on the rare occasion it is needed at all.
Frequently Asked Questions
How long does it take to set up a new gaming PC?
Plan on one to two hours including Windows setup, updates and driver installation, most of which is waiting for downloads. The physical setup — unboxing, inspection, cables — takes about twenty minutes if you work methodically.
Why is my new gaming PC slower than expected in games?
The three usual causes are the monitor cable being plugged into the motherboard instead of the graphics card, an out-of-date graphics driver, and Windows Update still running in the background. Check them in that order before suspecting the hardware.
Do I need to install anything before playing my first game?
At minimum: finish Windows Update, install the latest graphics driver from NVIDIA or AMD, and set your monitor’s refresh rate in Windows display settings. Everything else can follow, but those three directly determine performance.
Should I use HDMI or DisplayPort for 1080p gaming?
DisplayPort is the safer choice for high-refresh 1080p and variable refresh, and most gaming monitors include a suitable cable. HDMI works well at 1080p for typical refresh rates. Use a quality cable — cheap ones cause flicker and dropouts at high refresh.
Is it better to connect by Ethernet or WiFi?
Ethernet, whenever it is practical: it is faster, more stable and lower-latency than any WiFi generation. If cabling is impossible, WiFi 6 machines placed with their antennas unobstructed are a perfectly good second choice for online play.
How do I know if variable refresh is working?
Enable it in the monitor’s menu and the graphics control panel, then play a game with an uncapped or capped-just-below-maximum frame rate: tearing should be absent and motion smooth even as frame rates fluctuate. Many monitors also show the current refresh rate in their on-screen display, changing in real time.
What should I do first if a game crashes on my new PC?
Verify the game’s files in its launcher, confirm your graphics driver is current, and restart the machine. If the crashes began right after a driver update, rolling back one driver version is a standard and safe diagnostic step.