An overhead book scanner points a camera or sensor down at an open book, so you can digitize pages without cutting the spine or pressing them flat on glass. Most flatten curved pages in software, hide fingers in the image and run OCR to make searchable text. Capture size matters for large pages, maps and sheet music.
The six scanners below range from a long-running ScanSnap model to A3 and A2 camera-based units. Specs come from each listing page and are the makers’ own claims. We have not used these scanners ourselves. Several listings contradict themselves on resolution and weight, and we note those below.
As an Amazon Associate we earn from qualifying purchases. Links below are affiliate links, and they do not change the product information we give.
What to Look For
| Feature | Why it matters |
|---|---|
| Capture size | A4 covers a normal page; A3 and A2 cover spreads and posters |
| Flattening | Software or laser lines correct the curve near the spine |
| Finger removal | Hides the fingers that hold pages down |
| OCR and software | Languages and export formats decide how useful the text is |
In this guide
Specs at a Glance
| Scanner | Capture and sensor | Key features | Notes |
|---|---|---|---|
| ScanSnap SV600 | CCD sensor; USB | Auto book correction; page turn detection | 6.14 x 15.08 x 8.27 in; 6.6 lb; Windows 10/11 and macOS 12+ |
| IRIScan Desk 6 Pro | A3; 13MP in the title | AI flattening and finger hiding; 4 LEDs | OCR in 138 languages; USB powered |
| NetumScan 13MP | A3 and A4; 13MP CMOS | One-key skew fix; 6 LEDs; OCR | 2 year warranty; works with Windows, macOS and Linux |
| Joyusing V320pro | A3; 16MP | Four laser lines for flattening; finger removal | Maker says 40 pages per minute; 1.8 kg |
| VIISAN DL16 | A3; 16MP; 300 DPI | Anti-glare LED lighting; OCR | 3 lb; 1 year warranty |
| VIISAN S21 | A2 and A3; 26MP | Foldable hinge; software-enhanced 600 DPI | 594 x 420 mm capture; not for ARM PCs |
The 6 Best Overhead Book Scanners

Top pickBest for books and magazines scanned without damage
1. ScanSnap SV600
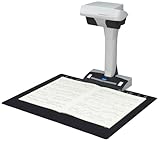
An overhead scanner with a CCD sensor and LED light, listed at 6.14 by 15.08 by 8.27 inches and 6.6 pounds. It has Auto Book Correction that flattens curve distortion, page-turn detection that starts a scan as you turn the page, a Point Retouch function that removes fingers, and multi-document detection for cards and clippings. It needs Windows 10 or 11, or macOS Monterey 12 or later.
Suits: books and magazines scanned without damage. Strengths: page-turn detection and a known brand. Weaknesses: an older design with OS limits. Skip it if you need A3 spreads.
Best for a3 pages and many OCR languages
2. IRIScan Desk 6 Pro
An A3 camera scanner with AI flattening, auto scan and finger hiding, four LEDs, OCR in 138 languages, text-to-speech and USB power, with Readiris PDF included. The title says 13MP, while a bullet says 21MP extrapolated and a 4160 by 3120 pixel maximum. The spec table shows a resolution of 3600 and a weight of 400 g, so treat the numbers with care.
Suits: A3 pages and many OCR languages. Strengths: USB power and AI finger hiding. Weaknesses: inconsistent resolution data. Skip it if you want precise specs.
View IRIScan Desk 6 Pro A3 Book Scanner on Amazon
Best for a scanner that doubles as a classroom camera
3. NetumScan 13MP
A 13MP CMOS camera scanner for A3 and A4 pages with six LEDs, a one-key skew correction, batch scanning and OCR that exports to Word or text. It also doubles as a document camera for teaching. The listing shows 800 dpi, 0.5 kg and a sheet capacity of 300, which looks odd for a camera and may be a template entry. NetumScan gives a two-year warranty.
Suits: a scanner that doubles as a classroom camera. Strengths: six LEDs and cross-platform support. Weaknesses: questionable spec fields. Skip it if you need verified dpi.
View NetumScan 13MP A3 Book Scanner on Amazon

Best for fast batch capture
4. Joyusing V320pro
A 16MP fixed-focus scanner for A3 and A4 pages with an auxiliary LED, four laser lines that guide book-curve flattening, finger removal, and OCR to PDF, Word, text or Excel on Windows (PDF only on Mac). The maker claims 40 pages per minute. The spec table says 260 dpi, which does not match 16MP.
Suits: fast batch capture. Strengths: laser-guided flattening and many formats. Weaknesses: a conflicting dpi figure. Skip it if you use a Mac and need more than PDF.

Best for libraries and home archives
5. VIISAN DL16
An A3 overhead scanner with a 16MP camera, up to 300 DPI, anti-glare LED lighting, auto page flattening and OCR for Windows and Mac. VIISAN positions it for books, sheet music, artwork and large documents, and lists 3 pounds and a one-year warranty.
Suits: libraries and home archives. Strengths: anti-glare lighting. Weaknesses: 300 DPI is modest. Skip it if you want higher DPI.
View VIISAN DL16 A3 Book Scanner on Amazon
Best for maps, newspapers and large journals
6. VIISAN S21
A large-format overhead scanner with a 594 by 420 mm A2 capture area, a height-adjustable A2/A3 design with a 90 degree foldable hinge, and up to 26MP (5888 by 4522 pixels) with software-enhanced 600 DPI. The bundled OfficeCam software does not support ARM-based PCs. The spec table reads like a camera, with video at 1080p and an LCD viewfinder, which does not describe a scanner.
Suits: maps, newspapers and large journals. Strengths: A2 size and 26MP. Weaknesses: bulky and no ARM support. Skip it if you only scan books.
View VIISAN S21 A2 Book Scanner on Amazon
Care and Setup
- Place the scanner on a stable, matte desk.
- Avoid glare from windows and lamps.
- Calibrate the page size in the software before a long job.
- Name and back up files as you scan.
Mistakes to Avoid
- Buying A3 capacity when A4 covers every page.
- Assuming OCR works equally well in all languages.
- Trusting megapixels alone as image quality.
- Skipping a check that the software runs on your computer.
Planning an Archiving Project
Before you buy a scanner, decide what the finished archive should be. A family history scrapbook, a stack of out-of-print paperbacks, a set of music books and a box of large maps all need different tools. Count the items, measure the largest page, and note any that are fragile, tightly bound or oversized. Those details will tell you whether a small capture area is enough or whether you need a large one.
Think about the outputs you want. Searchable PDF is the most common, since it keeps the page image and adds a text layer for search. Plain text or word-processor files are useful if you plan to edit the content, though they take more correction. Picture-heavy items may be better saved as image files at a resolution you can print from.
Estimate the time. Overhead scanning is faster than flatbed scanning for bound books, but turning pages, adjusting the book and checking each capture still takes effort. A project of a few books is easy, while hundreds of volumes need a workflow, a steady desk and a plan for file naming.
Finally, think about storage. Image files add up, and a good archive has at least two copies, one of them in a separate place. Planning folders by title, year or topic before you begin saves a lot of cleanup later.
Resolution, Megapixels and Real Image Quality
Camera-based scanners advertise megapixels, but the number alone does not describe quality. What counts is the effective resolution on the page, which depends on the sensor, the capture area and the lens. A higher megapixel camera spread over a larger area can give a similar density to a smaller sensor over a smaller area. Software enhancement can also raise the stated resolution without adding real detail, so look for notes about interpolation.
For ordinary text, a moderate resolution is enough for OCR and comfortable reading. Fine print, small footnotes and maps with thin lines benefit from more detail. Photographs and artwork may need higher quality if you plan to print them. Check what resolution the listing gives, and treat conflicting figures as a reason to ask the seller.
Lighting matters as much as resolution. Even, glare-free light gives sharper text and better OCR than a high-resolution capture under uneven light. Glossy pages can create reflections, so look for diffuse lighting or an adjustable lamp, and turn off nearby lamps and windows that cast shine across the page.
Focus is another factor. A fixed-focus scanner has a set distance, so you need the book at the right height. Autofocus models adapt but may hunt on low-contrast pages. Test with a sample page of the type you scan most.
Flattening, Finger Removal and Page Handling
Software that flattens curved pages is one of the main reasons to buy an overhead scanner. The software either detects the curvature in the image or uses projected guide lines, then stretches the image to appear flat. It works best with books that open reasonably well. Tightly bound books with a narrow gutter may still show distortion near the spine, so if your collection includes many of them, ask whether the listing explains how it handles them.
Finger removal tools hide the fingers that hold pages down, using a second image or software processing. They save editing time, but check the results on a few pages. If a finger overlaps text, the software may leave artifacts, so keep your fingers on the margin where possible.
Good habits protect the books. Use a book cradle or a foam wedge to support the spine, and avoid forcing a book flat. Turn pages gently, and avoid creasing the paper or placing heavy weights on fragile paper. For valuable or brittle items, consider whether scanning at home is right, because a conservator may offer better advice.
If a scanner can detect page turns, it automates the process, but it needs a steady hand and a consistent rhythm. If you have multiple people helping, agree on the process so every page is captured in order, and mark your place after any interruption.
OCR Quality and Document Formats
Optical character recognition turns images into text, and its quality depends on the image, the language and the font. Clean, high-contrast pages with common fonts do well. Old typefaces, faded ink, handwriting and stained paper cause errors. A long language list in a listing is a good sign for variety, but accuracy for each language may differ, so check any sample documents.
Know the formats you need. PDF with a text layer is a flexible archive format. Word and text files help with editing but may lose layout. If you work with sheet music, maps or art, OCR is less useful, and you will want a high-quality image format instead. Some software supports only PDF on certain operating systems, as one listing in this guide notes, so confirm the formats for your computer.
Proofreading is part of the job. Search for common words and check that they are found, then skim a sample of pages for errors such as misread numbers. If accuracy matters, plan a review step. Keeping the original image files makes it possible to rerun OCR later with better software.
Compatibility is also a practical concern. Verify that the software runs on your operating system version and processor type, and check how long the maker supports updates. An older scanner with limited software support may become hard to use after an operating system change.
Workflow, Storage and Deciding Between Scanner Types
A consistent workflow turns a scanner into an archive. Set up the desk with a matte surface, steady light and a comfortable chair. Calibrate the page size, check a test page, then scan in batches. Name files with a pattern you can sort, such as title and volume number, and save to a working folder before moving finished files into the archive.
Back up as you go. A common approach is to keep the original images, the searchable PDFs and a second copy on another drive or storage service. Check files periodically for corruption, and consider a simple spreadsheet that logs what has been scanned and what remains.
Other scanner types may suit your project better. A flatbed gives excellent quality for single sheets and loose photographs but needs the book pressed on the glass, which strains bindings. A sheet-fed document scanner is fast for loose pages but cannot handle bound books without cutting them. A phone-based method is cheap and flexible but harder to keep consistent. Overhead scanners fit bound books, magazines and large pages best, and they are a good compromise if you want speed without damage.
Ask yourself a few questions before buying. How large is the biggest page? How many items are there? Will you need to rescan? Is the software supported on your computer? Answer those, and the choice becomes clearer.
Preparing Books Before a Scanning Session
A scan is only as good as the material under the camera. Gather the books you plan to digitize and sort them by size and condition. Fragile volumes with loose bindings need a gentler approach than modern paperbacks, and some may not be suitable for flattening at all. When in doubt, ask a librarian or conservator for advice before opening a delicate item all the way.
Wash and dry your hands, clear the desk and remove food and drinks. Use a clean, lint-free cloth to wipe the scanner glass or the base mat. Work in a room with steady lighting, and avoid direct sunlight that creates glare on glossy pages.
A Folder and Naming Plan for Your Digital Archive
Scanning dozens of books without a system leads to a mess. Decide on a structure before you begin, and apply it from the first file.
- Create one folder per book, named with author, short title and year.
- Keep the original scans in one folder and edited copies in another.
- Use consistent page numbering, such as three or four digits, so files sort properly.
- Add a small text file for notes about condition, edition and any pages that need re-scanning.
- Back up to at least two different locations, one of them off-site or in cloud storage.
Choose a file format with long-term use in mind. Common choices include PDF for reading and TIFF for archival masters, and the software’s manual will describe the options available.
Settings to Decide Ahead of Time
| Setting | Why it matters | Planning tip |
|---|---|---|
| Resolution | Affects detail and file size | Higher for illustrations, moderate for plain text |
| Color mode | Changes accuracy and storage | Color for images, grayscale for text pages |
| Page flattening | Reduces curved text near the spine | Use software correction when available |
| Text recognition | Makes the archive searchable | Run it after you finish checking the images |
Run a short trial with one book. Check readability, crop edges and file size before scanning the rest of the shelf.
Respecting Copyright and Handling Rules
Scanning books for personal backup or study is treated differently from distributing copies. Rules vary by country and by the status of the work, so check official guidance from your local copyright office or library before sharing scans with anyone. Archival projects for family documents, personal notes and out-of-copyright works are the safest first projects.
Troubleshooting Poor Scan Quality
If your scans look dull, skewed or uneven, work through the likely causes one at a time before blaming the device.
| Problem | Likely cause | What to try |
|---|---|---|
| Curved text near the spine | Page not flat | Use a cradle or glass plate and enable software correction |
| Glare or bright patches | Glossy paper and direct light | Move lamps, use matte conditions or turn off overhead lights |
| Fingers in the image | Hands near the page | Use the software’s finger removal tool, or hold only at the edges |
| Crooked pages | Book shifted between shots | Mark the position on the mat and align each time |
| Blurry text | Focus or vibration | Let the desk settle and refocus before each page |
Set up a checking routine. After every ten pages, open the images at full size and look at a few lines of text. Catching a problem early saves a long re-scan of a whole book.
Keep the software updated according to the maker’s instructions, and read the manual for steps on calibration. If a problem persists, contact the maker with sample images and your model code, as that speeds up the answer.
Building a Realistic Scanning Routine for a Whole Shelf
Most archiving projects fail not because the scanner is wrong but because the routine around it is unrealistic. A single book is easy. A whole shelf, scanned a few pages at a time between other jobs, is where projects stall. The fix is to design a routine you can repeat on an ordinary evening, not an ideal one. Start by deciding how a session begins and ends. A good session starts with the same few steps every time: clear the desk, check the lighting, open the folder for the book you are working on, and scan a single test page before you commit to a long run. It ends with a quick look through the pages you just captured, a note of the last page scanned, and the book placed back in a consistent spot so you know exactly where to resume.
Work in batches that match your patience rather than the size of the book. Many people find that one chapter, one section, or a fixed number of spreads per session keeps momentum without turning scanning into a chore. If you stop mid-chapter, leave a plain sheet of paper as a bookmark at the stopping point and write the page number on it. That small habit removes the guesswork that otherwise makes you reluctant to start the next session. Momentum matters more than speed: a project that moves a little every few days finishes, while a project saved for one heroic weekend often never gets that weekend.
Keep the books themselves in a simple three-pile system. One pile is waiting to be scanned, one is in progress, and one is finished and checked. Physical piles sound old-fashioned, but they give you an honest picture of progress that a folder of files cannot. When the finished pile grows, you also get a natural moment to decide what happens to the physical copies — kept, stored elsewhere, or passed on — instead of letting that decision pile up at the end.
Setting up the desk so every session starts fast
Overhead scanners reward a permanent or semi-permanent setup. If you have to rebuild the whole station each time, you will scan less often. Keep the scanner in its working position if space allows, or store it in one piece with its mat so setup is a single move. Keep a microfibre cloth, a soft brush for dusty page edges, and any page weights you use within arm’s reach. Check that cables do not cross the capture area, and that nothing reflective sits where the camera can see it. Two minutes of setup discipline saves far more than that in rescans.
How the Picks in This Guide Suit Different Archive Jobs
The six scanners above overlap a lot, and the differences that matter depend on the job in front of you rather than on a single headline specification. The ScanSnap SV600 is the natural reference point for a mixed home archive: it is the established option for people scanning a combination of family books, documents, and keepsakes, and it suits a project where reliability across many small sessions matters more than any one specialist feature. If your archive is mostly standard paperbacks and hardbacks that you want searchable, this is the kind of all-rounder the rest of the list is measured against.
The IRIScan Desk 6 Pro and the camera-style models from NetumScan, Joyusing, and VIISAN lean toward flexibility and desk convenience. A compact desk scanner makes sense when the same device also handles everyday documents, receipts, and the occasional book, because it earns its desk space every day rather than only during an archiving push. The two VIISAN models, the DL16 and the S21, are worth comparing against each other on capture area and how you prefer to trigger scans, since the right choice between near-identical-looking camera scanners usually comes down to the largest item you scan regularly and how the software fits your habits.
A useful way to choose is to write down your three most common items — for example, a standard novel, a large cookbook, and a stack of loose letters — and check each pick against those three. The scanner that handles your actual three items comfortably beats the scanner with the most impressive specification for items you never scan. If one pick handles two of the three well and the third awkwardly, ask how often that third item really appears. Occasional awkwardness is fine; daily awkwardness is a reason to choose differently.
Who should skip an overhead scanner altogether
An overhead scanner is the wrong tool if your project is mostly loose sheets, because a sheet-fed scanner moves through those far faster. It is also the wrong tool if you are happy to destroy the binding and want the absolute fastest bulk conversion, since a cut-spine workflow with a document feeder is quicker per page. And if you only have two or three books to preserve, a careful phone-scanning app session may be all the project justifies. Choosing the overhead route makes sense when the books must stay intact, there are enough of them to justify a dedicated device, and you will scan in sessions over weeks rather than in one sitting.
Quality Control: Checking Scans While You Can Still Fix Them
The cheapest time to fix a bad scan is while the book is still open in front of you. Build a light quality check into every session rather than saving it all for the end. At minimum, flip through the pages you just captured at reading size and look for the four failures that overhead scanning produces most: a page edge cut off, a finger left in the frame, text blurred near the gutter, and a page so curved that lines bow noticeably. Any of those is a thirty-second rescan now and a genuine problem later, when the book may be back on a high shelf or no longer in the house.
Zoom in occasionally rather than trusting the thumbnail view. A page that looks fine small can hide soft focus, and soft focus is exactly what defeats text recognition later. Check one dense page per session at full size, ideally a page with small print or a footnote, since that is where weakness shows first. Also check the first and last page of each session carefully: those are the pages most often disturbed by setup changes, a moved scanner, or fading daylight changing your lighting between sessions.
Keep a simple log as you go. A plain text file in the book’s folder noting the date, the page range scanned, and anything unusual — a torn page you skipped, a fold-out you scanned separately, a page that was already missing — turns confusion months later into a quick answer. When you return to an archive after a break, that log is the difference between trusting what you have and feeling you must recheck everything.
Handling fold-outs, inserts, and odd pages
Real books contain awkward pages: fold-out maps, glossy inserts printed on different paper, translucent sheets, and pages with handwriting in the margins. Decide your approach before you meet one mid-session. Fold-outs usually scan best opened fully, even if that means a separate capture you later keep alongside the main sequence with a clear file name. Glossy inserts may need the lighting adjusted or the book angled slightly to keep reflections off the text. Handwritten margins deserve a second look at higher quality settings, because handwriting is harder for recognition software than print and benefits from the cleanest capture you can give it. Whatever you choose, note it in the log so the treatment is consistent across the whole book.
Looking After the Archive After the Scanning Is Done
A finished scan is not yet an archive. The archive is the scan plus the organisation and backup habits that keep it findable and safe for years. Keep one master copy that you never edit, and do your cropping, straightening, and recognition work on a copy. That way a bad edit or a software experiment can never damage the only version of a page. Store the masters in the folder structure you set up at the start, with the naming pattern you chose, and resist the urge to reorganise halfway through a project — consistency across the whole collection is worth more than a slightly better system applied to only half of it.
Back up on the simple rule that one copy is no copy. A second copy on a separate drive, and ideally one copy away from the house, protects the hours you spent scanning against the ordinary accidents of life: a failed drive, a spilled drink, a stolen laptop. Test your backup once by actually opening files from it. A backup you have never opened is a hope, not a backup. While you are at it, glance at file sizes across a finished book; a page that is dramatically smaller than its neighbours is often a blank or failed capture hiding in the sequence.
Finally, add the small amount of information future-you will want: what the book is, whose it was, roughly when it was scanned, and anything about its condition. A short note in the folder does this well. Archives are usually kept for family reasons, and the story around a book — a grandparent’s cookbook, a school textbook with names inside the cover — is often the part worth preserving most. The scanner captures pages; a few written sentences capture the rest.
Reviewing the archive once a year
Once a year, open a handful of older scans at random and read a page or two. Formats and software change slowly, but checking keeps you aware of the state of the collection and catches early signs of trouble, such as a drive reporting errors or files that no longer open cleanly. It is also a pleasant reminder of why you did the work. If you find a book you scanned at low quality in your early sessions, before your routine settled, that is the moment to decide whether it deserves a rescan while the physical copy is still at hand.
Scanning Books With Tight Bindings and Fragile Pages
Some books resist overhead scanning more than others. Thick hardbacks with tight bindings do not open flat, old paperbacks crack if you force them, and genuinely fragile volumes should not be pressed or flattened at all. The overhead design is already the gentlest mainstream option, because nothing feeds the pages through rollers and nothing requires the book to lie completely flat, but technique still matters. Support both covers so the book rests in a shallow, natural opening rather than being pushed wide. A pair of soft supports or even two other books of similar thickness under each cover can hold a volume at a comfortable angle and take strain off the spine.
Work more slowly with fragile material, and accept a little page curve in the capture rather than fighting it with pressure. The flattening tools in the software can correct gentle curve; they cannot repair a cracked spine. Turn pages from the outer corner with a clean, dry hand, and avoid licking a finger to grip, since moisture and old paper are poor companions. If a page is torn, scan it as it lies rather than trying to align the tear perfectly; a faithful capture of a damaged page is worth more than a prettier capture that damages it further.
Know when to stop. A book that is valuable, very old, or already shedding fragments of paper may belong with a specialist or a library digitisation service rather than on a home desk. Part of archiving well is recognising which items your setup serves and which it risks. For everything short of that line, patience and support will get a good capture without harm.
Turning Scans Into Books You Will Actually Read
Many people archive with two different goals that are easy to confuse: preservation and reading. A preservation copy wants completeness and fidelity — every page, including covers, endpapers, and blank pages, captured cleanly and kept unedited. A reading copy wants comfort: pages cropped evenly, text recognised so it can be searched, and a file that opens happily on whatever device you read on. Trying to make one file do both jobs usually produces something mediocre at each. The cleaner approach is to keep the preservation copy untouched, as described above, and generate reading copies from it whenever you need them.
For a reading copy, the steps that matter most are even cropping, a consistent page order, and recognition good enough that searching for a phrase finds it. Add bookmarks or a simple contents list for longer books if your software makes that easy; it transforms a long document from a scroll into a book. Test the result on the device you actually read on — a tablet, an e-reader, a phone — before processing the rest of your collection the same way, because a file that behaves well on a computer screen can be clumsy on a smaller display.
Keep the reading copy in the same folder as the master, with a name that makes the relationship obvious. If you later improve your process, you can regenerate reading copies from the masters without ever rescanning a page. That is the quiet payoff of the whole system: scan once, carefully, and every future format is just an export.
A short pre-flight checklist for every book
Before the first page of any book, run through the same short list. Confirm the folder exists and is named the way the rest of the collection is named. Confirm the scanner sees the whole capture area with the book in place. Take one test page and inspect it zoomed in, not as a thumbnail. Check that the language setting for recognition matches the book, especially for older books or ones with mixed languages. Note the starting page in your log. Five small checks, done every time, prevent nearly all of the large frustrations that make people abandon archiving projects halfway through a shelf.
What Good Archiving Habits Look Like After the First Month
The first books anyone scans are usually the slowest, and that is normal. You are learning the software, finding where glare appears on your desk, and discovering how much curve correction your books need. By the end of the first month, the goal is not raw speed but a routine that feels boring in the best sense: the same setup, the same checks, the same filing, every time. Boring routines produce consistent archives. If your later books look noticeably better than your earliest ones, that is a sign the routine has settled — and a reason to consider rescanning one or two early favourites while the physical copies are still easy to reach.
Keep an eye on the small frustrations, because they point at the fixes that matter. If you keep rescanning pages for the same reason, change the setup rather than your luck: move a lamp, add a support, adjust where the book sits on the mat. If filing feels like a chore, simplify the folder pattern until it does not. If sessions keep being postponed, shorten them. A twenty-minute session that happens is worth more than the two-hour session that exists only in your intentions. Archiving a collection is a long, quiet project, and the people who finish are the ones who make each session easy to start.
It also helps to keep the purpose visible. Put one finished book’s scan on the device you read on, and actually read from it. Cook from the scanned cookbook. Look up something in the scanned reference book instead of walking to the shelf. Each small use proves the archive is alive rather than a folder of good intentions, and that proof carries the project through the shelves that are less exciting than the first one. When the last book is done, you will have something genuinely valuable: a personal library that cannot be lost to water, fire, moving house, or simple decay, built one unhurried session at a time.
Sharing scans with family, sensibly
Family archives naturally get shared, and a little thought keeps sharing simple. Share the reading copies rather than the masters, so your originals stay untouched no matter what happens to the copies in circulation. Send a whole book as one file where you can, rather than a loose bundle of page images that can be separated and lost. If several relatives are building collections from the same family books, agree on who scans what, so two households do not spend evenings duplicating the same work. And keep the log and notes with your masters: the story of whose book it was, and why it mattered, is the part of the archive that no scanner can recreate once it is forgotten.
Deciding What to Scan First When the Shelf Is Large
When a collection is big enough that you cannot scan it all soon, order matters. Start with the books that are most at risk and most wanted: the ones with loosening bindings, fading print, or brittle paper, and the ones family members actually ask about. A rare, sturdy book in good condition can wait safely; a crumbling family cookbook cannot. After the fragile and the beloved, move to the books you reach for most often, because those give you the daily payoff that keeps the project alive. Reference books you consult weekly become more useful scanned than almost anything else on the shelf, since searching beats thumbing through an index you only half remember.
Leave the books you are unsure about keeping until last. Scanning is also a form of attention, and working through a shelf often clarifies what deserves a place in the house. Some books you will scan and keep, some you will scan and pass on with a clear conscience, and a few you will realise nobody needs in any form. Letting that sorting happen as part of the project is a benefit, not a delay. By the time you reach the doubtful pile, your routine will be fast and your judgement settled, and the whole collection — physical and digital — will end up smaller, better organised, and genuinely used.
Keeping children and helpers involved without risking the books
Archiving goes faster and feels lighter with a second pair of hands, and family projects often draw in relatives who have their own memories of the books. Give helpers the safe jobs: carrying books to and from the desk, checking finished pages on screen against a checklist, updating the log, and reading out page numbers. Keep page-turning of fragile volumes and the final quality judgement with whoever has the most practice. Agree the folder and naming pattern in writing before anyone files anything, because two people filing by two slightly different systems creates exactly the muddle the system exists to prevent. Done well, help turns a solitary chore into the kind of shared project where stories about the books get told — and those stories, written into the notes, become part of the archive too.
Deciding when a rescan is worth it
Not every imperfect page deserves a rescan, and chasing perfection is how projects stall. Rescan when the flaw affects use: text that recognition software will misread, a cropped line, a missing page, or an illustration that lost its detail. Leave alone the flaws that only bother you at full zoom on a screen nobody will read at that size — a faint shadow at the gutter, a slightly soft corner on a decorative initial. A practical rule is to ask whether a reader of the finished file would ever notice. If they would not, the page is done and the next book deserves your time more. Archives are finished by people who can tell the difference between a defect and a detail.
Book Scanner FAQ
Do I need to cut the spine?
No. Overhead scanners capture an open book, so the spine stays intact.
What is OCR?
Optical character recognition turns a scanned page into searchable, editable text.
How much detail do I need for ordinary book pages?
A moderate resolution is usually enough for readable pages and OCR. Maps, small print and artwork may benefit from more detail, so choose based on the finest feature you want to preserve.
Why do megapixel figures sometimes disagree within one listing?
Makers may quote the sensor, an interpolated value or a maximum figure in different places. Treat inconsistent numbers as a reason to ask the seller or read the manual before buying.
Can I scan fragile or old books safely?
Overhead scanners avoid pressing the book onto glass, which is gentler, but fragile items still need careful handling and support. For very valuable or brittle books, consider advice from a conservator.
What file format should I use for an archive?
Searchable PDF is a common choice, and keeping the original image files as well gives you flexibility for future OCR. Use a lossless or high-quality image format for artwork and maps.
Why is my OCR full of errors?
Poor lighting, low contrast, unusual fonts, faded ink and the wrong language setting all reduce accuracy. Improve the lighting, pick the right language and proofread important pages.
Do I need an A3 scanner for ordinary books?
Not usually, because A4 covers a single page, but a larger area helps with open spreads, music books and big magazines. Match the capture size to your largest regular item.
How do I reduce glare on glossy pages?
Use diffuse lighting, turn off lamps and window light that reflect on the page, and avoid placing the scanner under direct overhead light. Some scanners have anti-glare lighting, which you can check in the listing.
The Short Version
For page-turn detection, the ScanSnap SV600. For OCR languages, the IRIScan Desk 6 Pro. For a classroom camera that scans, the NetumScan. For laser-guided flattening, the Joyusing V320pro. For anti-glare lighting, the VIISAN DL16. For A2 pages, the VIISAN S21.