Disclosure: As an Amazon Associate, reviewstook.com earns from qualifying purchases. Links on this page are affiliate links at no extra cost to you; prices and availability change frequently, so check Amazon for the latest.
How to Set Up Gaming PC Hardware: From Sealed Box to First Match, Done Properly
Learning how to set up gaming pc hardware correctly is the difference between a machine that feels fast on day one and a machine that still feels fast in year three. A prebuilt gaming PC arrives with the hard assembly work already done, but the setup work — placement, cabling, first-boot checks, driver updates, display settings, storage layout and security — is entirely yours, and most performance complaints we hear from new owners trace back to one of these steps being skipped rather than to the hardware itself. This guide walks through the whole process in the order that actually matters, using verified current prebuilt machines as worked examples, and it flags the small mistakes — a monitor cable in the wrong socket, a refresh rate left at its default, packing foam left inside a case — that quietly cost people the performance they paid for.
Key Takeaways
- Unbox slowly, remove every piece of internal packing material, and inspect connectors before the tower ever meets power.
- The monitor cable goes into the graphics card, never the motherboard — this single step decides whether your games use the GPU at all.
- Set your monitor’s full refresh rate in Windows on day one; most displays default to a lower rate out of the box.
- Update the graphics driver before installing a single game, and let Windows Update finish completely before judging performance.
- Put games on the fast internal SSD, keep at least a fifth of the drive empty, and turn on a backup habit in the first week, not after the first scare.
In this guide
What You Need Before You Start Setting Up
Setting up a gaming PC takes about an hour of unhurried work and almost no tools. You need a desk or table with enough depth for the tower and monitor, a power outlet you can reach without stretching cables tight, a pair of scissors for packaging, and a phone or second screen for following instructions while the new machine is mid-setup. A small torch helps when you are peering at rear-panel labels in poor light. If your desk sits on carpet, find a hard, flat board or stand for the tower before you begin: many cases breathe through the bottom, and thick pile carpet can smother a bottom-mounted power supply intake completely.
Decide the tower’s home before you unbox it. A gaming PC wants clearance on every vented side — a hand’s width at the back for exhaust air, nothing pressed against side intakes, and no enclosure with a closed door unless you plan to leave that door open during play. Heat is the long-term enemy of every component in this guide, and placement is the one cooling decision you make for free. While you are thinking about the room, check your seating and screen position too. The best time to fix monitor height and viewing distance is before the cables are dressed and the desk is loaded, not a month later with a stiff neck.
This guide references verified prebuilt machines throughout because they are what most readers are unboxing. The reference point for most steps is the Gaming PC Review subject class of tower — a modern mid-range prebuilt such as the CyberPowerPC Gamer Master — but every step applies equally to the other machines named here and to a tower you assembled yourself. Product recommendations follow the same rule as the rest of reviewstook.com: only machines verified against the publisher’s catalogue get links, and everything else is discussed in plain prose.
Which Prebuilt Machines This Setup Guide Uses as Examples
Every setup step below is illustrated with a real, currently listed prebuilt so the advice stays concrete. These six span the sensible range from an honest entry-level tower to a premium high-refresh machine, and each one is linked so you can check the latest price on Amazon rather than trusting any number printed on a page like this.
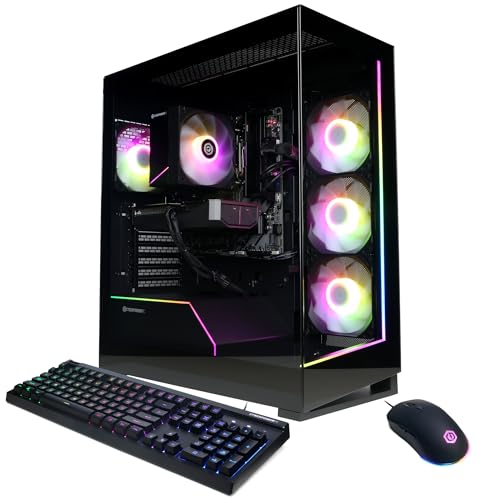
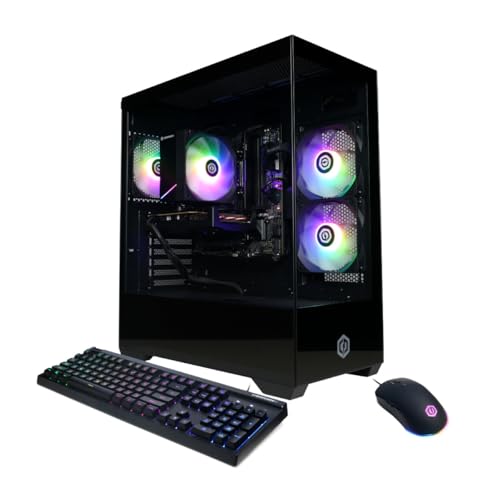
The reference build for most steps — CyberPowerPC Gamer Master
Listing: CyberPowerPC Gamer Master — Check on Amazon for current availability.
Strengths
- Ryzen 7 8700F and RTX 5060 Ti is the current mid-range sweet spot
- 16GB DDR5 and 1TB PCIe 4.0 SSD cover games and Windows comfortably
- WiFi ready out of the box for desks far from the router
Trade-offs
- 16GB of memory is adequate now but the first upgrade most owners will want
- No USB Type-C headline port on the listing if that matters to your peripherals
- WiFi is convenient, but wired Ethernet still wins for competitive play
| Processor | AMD Ryzen 7 8700F |
|---|---|
| Graphics | NVIDIA GeForce RTX 5060 Ti 8GB |
| Memory | 16GB DDR5 |
| Storage | 1TB PCIe 4.0 SSD |
| Connectivity | WiFi Ready |
| Operating system | Windows 11 Home |
| Model | GMA2900A3 |
Most of this guide was written with a machine of exactly this class in mind. The Ryzen 7 8700F gives you eight modern cores, the RTX 5060 Ti handles high-refresh 1080p and honest 1440p, and the 1TB PCIe 4.0 SSD is fast enough that load screens stop being a topic of conversation. When a step below says ‘your graphics card’s outputs’ or ‘your rear USB ports’, this is the layout to picture.
As a purchase, it suits the first-time prebuilt buyer who wants one machine that does everything well without a speciality. Its honest limitation is memory headroom: 16GB is fine for gaming alone, but streamers and heavy multitaskers will feel the ceiling sooner than the processor or graphics card impose one, so budget for a memory upgrade in year two rather than pretending the question will never come up.
See the current listing for the CyberPowerPC Gamer Master: Check on Amazon.
Best for: readers who want the reference build for most steps in a verified prebuilt / Not suited for: buyers whose needs the trade-offs above rule out

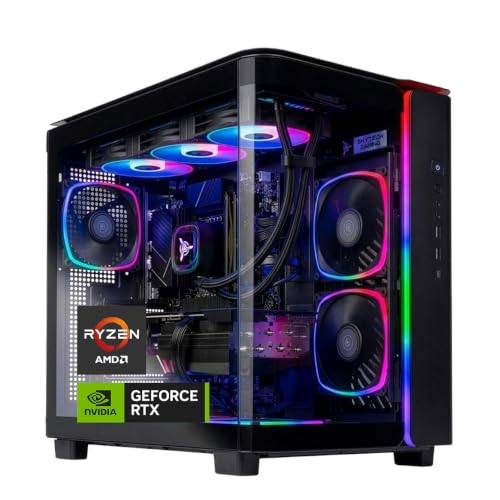
Best for buyers who want USB Type-C and VR headroom — MSI Codex Z2 (RTX 5060 Ti)
Listing: MSI Codex Z2 (RTX 5060 Ti) — Check on Amazon for current availability.
Strengths
- Same Ryzen 7 / RTX 5060 Ti core with USB Type-C included
- Explicitly VR-ready, which simplifies headset setup
- MSI’s board-making heritage shows in a tidy internal layout
Trade-offs
- Specification nearly mirrors the CyberPowerPC, so choose on price and ports
- Still 16GB of memory and 1TB of storage
- VR-ready does not include the headset — budget for it separately
| Processor | AMD Ryzen 7 8700F |
|---|---|
| Graphics | NVIDIA GeForce RTX 5060 Ti |
| Memory | 16GB DDR5 |
| Storage | 1TB SSD |
| Ports | USB Type-C |
| VR | VR-Ready |
| Operating system | Windows 11 Home |
| Model | A8NVM-671US |
The MSI Codex Z2 earns its place in a setup guide for one practical reason: ports. USB Type-C on a prebuilt removes a whole category of dongle frustration when you connect modern headsets, fast external drives and newer peripherals, and the VR-ready designation means the graphics and connectivity baseline for tethered headsets is already met. The setup steps for VR in the troubleshooting section below were written with this machine in mind.
Choose it if your desk hosts more than a keyboard and mouse — a headset, a capture device, a fast external SSD. Skip it if your peripherals are all conventional USB-A, because then its advantage over the near-identical CyberPowerPC narrows to brand preference, and the sensible move is to take whichever is better priced on the day you buy.
See the current listing for the MSI Codex Z2: Check on Amazon.
Best for: readers who want best for buyers who want usb type-c and vr headroom in a verified prebuilt / Not suited for: buyers whose needs the trade-offs above rule out

Best Intel-based value pick for a first setup — CyberPowerPC Gamer Xtreme
Listing: CyberPowerPC Gamer Xtreme — Check on Amazon for current availability.
Strengths
- Core i5-14400F is a proven, cool-running gaming processor
- RTX 5060 covers 1080p high-refresh and lighter 1440p play
- Same 1TB PCIe 4.0 SSD and WiFi readiness as pricier siblings
Trade-offs
- A clear step below the Ti machines in demanding titles
- 16GB memory ceiling arrives under streaming workloads
- Fewer bragging rights — and fewer upgrade headlines — than the Ryzen 7 builds
| Processor | Intel Core i5-14400F |
|---|---|
| Graphics | NVIDIA GeForce RTX 5060 8GB |
| Memory | 16GB DDR5 |
| Storage | 1TB PCIe 4.0 SSD |
| Connectivity | WiFi Ready |
| Operating system | Windows 11 Home |
| Model | GXiVR8060A47 |
The Gamer Xtreme is the machine we recommend to readers setting up their first gaming PC on a controlled budget, because its setup experience is identical to the expensive towers — same Windows 11 first boot, same driver routine, same display checks — while the hardware asks less of your wallet. The Core i5-14400F runs cool, which also makes it forgiving of the imperfect desk placement new owners often start with.
Its limitation is honest and predictable: the plain RTX 5060 gives up ground to the Ti in the heaviest games, so owners chasing high settings at 1440p will compromise sooner. At 1080p, which is where most of these towers will actually live, that compromise is small and the money saved buys a better monitor — the trade this guide keeps recommending.
See the current listing for the CyberPowerPC Gamer Xtreme: Check on Amazon.
Best for: readers who want best intel-based value pick for a first setup in a verified prebuilt / Not suited for: buyers whose needs the trade-offs above rule out

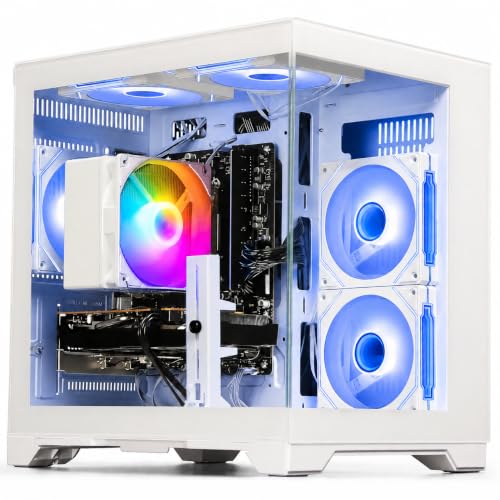
Best entry-level tower for learning the ropes — ZYNEEX Prebuilt (Ryzen 5 5500, RTX 3050)
Listing: ZYNEEX Prebuilt (Ryzen 5 5500, RTX 3050) — Check on Amazon for current availability.
Strengths
- A real discrete graphics card — the RTX 3050 — at an entry price tier
- 16GB of memory and a full 1TB NVMe SSD, no corner cut on storage
- Simple ARGB air cooling that is easy to understand and maintain
Trade-offs
- Built on the older DDR4 / AM4 platform, so the upgrade path is shorter
- RTX 3050 is a 1080p card; 1440p means lowered settings
- Air cooling needs the dust routine in this guide followed faithfully
| Processor | AMD Ryzen 5 5500 |
|---|---|
| Graphics | NVIDIA GeForce RTX 3050 6GB |
| Memory | 16GB DDR4 3200MHz |
| Storage | 1TB NVMe SSD |
| Cooling | ARGB air cooling |
| Connectivity | Wi-Fi |
| Platform | DDR4 / AM4 |
Do not let anyone tell you a first gaming PC must be expensive to be worth setting up properly. The ZYNEEX pairs a Ryzen 5 5500 with an RTX 3050 — a genuine graphics card that plays modern games at 1080p — and, unusually for its tier, refuses to skimp on the 1TB drive. Every step in this guide applies to it unchanged, which is precisely why it is a good teacher: you learn the same habits on this tower that you will use on a flagship later.
The platform is the compromise. DDR4 memory and the AM4 socket mean the easy processor upgrades of the DDR5 machines are not available, so this is a buy-it, enjoy-it, replace-it tower rather than a five-year evolving project. For a first setup, a spare-room machine or a younger player’s first PC, that is a perfectly respectable deal — as the fuller discussion in Gaming PC Reviews makes clear.
See the current listing for the ZYNEEX Prebuilt: Check on Amazon.
Best for: readers who want best entry-level tower for learning the ropes in a verified prebuilt / Not suited for: buyers whose needs the trade-offs above rule out

Best for a setup you do not want to reopen for years — MSI Codex Z2 (RTX 5070, 32GB, 2TB)
Listing: MSI Codex Z2 (RTX 5070, 32GB, 2TB) — Check on Amazon for current availability.
Strengths
- RTX 5070 graphics with 32GB of memory — headroom everywhere
- 2TB SSD ends the install-delete shuffle for a long time
- USB Type-C and VR-ready, like its smaller Codex sibling
Trade-offs
- Premium tier pricing buys performance a 60Hz monitor cannot show
- 2TB tempts messy storage habits; organise from day one anyway
- Overkill for purely esports play at 1080p
| Processor | AMD Ryzen 7 8700F |
|---|---|
| Graphics | NVIDIA GeForce RTX 5070 |
| Memory | 32GB DDR5 |
| Storage | 2TB SSD |
| Ports | USB Type-C |
| VR | VR-Ready |
| Operating system | Windows 11 Home |
| Model | A8NVP-436US |
Some buyers want setup to be a one-time event, and this is the machine for them. With an RTX 5070, 32GB of memory and a 2TB drive, the MSI Codex Z2 in this configuration removes every near-term reason to open the case: no memory upgrade looming, no storage anxiety, and graphics headroom that survives the next monitor upgrade. The setup steps are the same as any tower here; what changes is how long the results last.
The caution is about matching, not quality. Pairing this tower with an old low-refresh monitor wastes its best trick, so if you buy at this tier, the display section of this guide stops being advice and becomes a shopping requirement. Owners who follow it get the most complete out-of-box experience on this page.
See the current listing for the MSI Codex Z2 RTX 5070: Check on Amazon.
Best for: readers who want best for a setup you do not want to reopen for years in a verified prebuilt / Not suited for: buyers whose needs the trade-offs above rule out

Best for high-refresh and Wi-Fi 7 households — Acer Nitro 85 (Ryzen 9 9900X, RX 9070 XT)
Listing: Acer Nitro 85 (Ryzen 9 9900X, RX 9070 XT) — Check on Amazon for current availability.
Strengths
- RX 9070 XT is the strongest graphics card among these examples
- Ryzen 9 9900X gives twelve cores for gaming plus creation
- Wi-Fi 7 suits new routers and busy wireless households
Trade-offs
- 16GB of memory is the one modest figure in a flagship spec
- Big-brand support channels differ from boutique builders — know your warranty route
- Its performance ceiling demands a monitor that can display it
| Processor | AMD Ryzen 9 9900X |
|---|---|
| Graphics | AMD Radeon RX 9070 XT |
| Memory | 16GB DDR5 |
| Storage | 1TB Gen 4 SSD |
| Connectivity | Wi-Fi 7 |
| Operating system | Windows 11 Home |
| Model | N85-100-UR37 |
The Acer Nitro 85 closes the example list because it changes two setup conversations. First, its RX 9070 XT graphics push you toward the high-refresh display settings covered below — this machine is wasted at default settings. Second, its Wi-Fi 7 radio is the one case where wireless setup genuinely rivals wired for many homes, provided your router speaks the same language; the networking step below explains how to check.
Treat its 16GB of memory as the planned first upgrade and everything else as finished. Buyers who want a big-brand tower with flagship graphics and the newest wireless standard, and who are willing to add memory later, will find this the most future-facing setup on the page — a point the value analysis in Is A Gaming PC Worth It returns to.
See the current listing for the Acer Nitro 85: Check on Amazon.
Best for: readers who want best for high-refresh and wi-fi 7 households in a verified prebuilt / Not suited for: buyers whose needs the trade-offs above rule out
Step One: How Do You Unbox and Inspect a Gaming PC Safely?
Open the box on a table, not the floor, and keep every bag and foam block until the machine has run happily for a week. Lift the tower out with two hands under the chassis — never by a front panel or a glass side. Before anything else, look through the side panel: many prebuilts ship with an expanding foam pack or air pillows inside the case to support the graphics card in transit. That packing must come out. Leaving it in is the most common and most embarrassing setup error there is; it blocks airflow and, in the worst cases, melts against warm components. The side panel usually releases with two thumbscrews and slides backward.
With the panel off, do a calm visual inspection. Every cable should be seated: the thick motherboard power lead, the smaller processor power lead at the top corner, and the graphics card’s power connector. The graphics card itself should sit level in its slot with its retaining clip closed. Memory sticks should be fully clicked into their slots with both end latches shut. You are not rebuilding anything — you are confirming that transit did not loosen what the builder seated. If a connector is visibly hanging free, reseat it with a firm, straight push until it clicks. Photograph anything that looks wrong before you touch it; that photo is gold if you need support later.
Check the accessory box while the panel is off. You should find a power cable, WiFi antennas if your machine uses screw-on aerials, and usually a keyboard and mouse on bundled models. Screw the antennas onto the gold posts on the rear panel now and angle them upright — forgetting them is why half of all ‘my new PC has terrible WiFi’ complaints exist. Finally, peel any protective film from glass panels and vents, and confirm the power supply’s rear switch exists and is currently off. Then refit the side panel. The tower is ready to meet the desk.
Step Two: Where Should the Tower Sit, and What Plugs In First?
Place the tower where you decided during preparation: hard surface, vents unobstructed, back panel accessible. Connect in this order — monitor, keyboard and mouse, Ethernet if you have it, then power last. The order matters because the monitor connection is where the classic mistake lives. Your graphics card occupies a horizontal bank of outputs low on the rear panel, usually DisplayPort and HDMI sockets in a row. Your motherboard has its own video outputs higher up, near the USB ports. The monitor cable must go into the graphics card. Plugged into the motherboard, many systems will still show a picture — powered by the processor’s basic display path or a fallback — while your expensive graphics card sits idle in games. This one cable decides whether game performance matches the box’s promise.
Prefer DisplayPort for a high-refresh gaming monitor; it is the connection most consistently able to carry high resolutions at high refresh rates with the cable included in the box. HDMI is fine for many setups, but check that both the port and the cable support the rate your monitor advertises. Use the cable that came with the monitor where possible — display makers include a cable rated for the panel’s full specification, while the random spare in a drawer may not be.
Keyboard and mouse go into any rear USB ports; save the front ports for temporary things like controllers and drives. If you can run an Ethernet cable to the router, do it, even temporarily for setup day: the first-boot update process downloads gigabytes, and wired networking makes it faster and immune to the WiFi password dance on a machine whose antennas you may not have fitted yet. Power goes last: cable into the power supply, switch on the wall, then flip the supply’s own switch to on. You are ready for the first boot.
Step Three: What Should You Do at the First Boot and Windows Setup?
Press the power button and watch. Fans should spin, lights should wake, and within a minute the Windows 11 setup should appear. If the screen stays black for more than two minutes, do not panic and do not keep restarting: check the monitor is set to the input you actually used, confirm the cable is in the graphics card, and give a first boot the patience it sometimes needs while it configures hardware. The troubleshooting block later in this guide covers the full no-display routine.
Work through Windows setup deliberately. Choose your region and keyboard layout, connect to your network, and decide on the Microsoft account question with your eyes open: signing in enables automatic backup of settings, easy app reinstalls and device-finding features, while a local account keeps the machine more self-contained. Either works for gaming. When the desktop arrives, resist the urge to install a game immediately. The next thirty minutes of updates and checks are what separate a clean setup from a month of mysterious stutters blamed on innocent hardware.
First, let Windows Update run — all of it, including the restarts — until it reports you are up to date. Then open your graphics driver’s home: NVIDIA App for GeForce machines such as the CyberPowerPC and MSI towers above, or AMD Software for Radeon machines such as the Acer Nitro 85. Install the latest driver it offers. The driver a prebuilt ships with can be months old, and game performance, stability fixes and features like upscaling support all ride on this software. Restart once more after the driver lands. Only now is the machine actually the machine you bought.
Step Four: How Do You Set the Display, Sound and Controls Correctly?
Right-click the desktop, open Display settings, and find the refresh rate control under Advanced display. Set it to the highest rate your monitor offers. This step is not optional decoration: a large share of gaming monitors run at a reduced default rate until told otherwise, and owners play for months at a fraction of the smoothness they paid for. While you are there, confirm the resolution is the panel’s native one, and set scaling to whatever keeps text comfortable without blurring. If you run two monitors, arrange their positions in this same panel so the mouse crosses between them the way your desk says it should.
Sound deserves two minutes. Set your headset or speakers as the default output and your microphone as the default input, then open your voice app of choice and confirm it is using those same devices rather than a monitor’s feeble speakers or a webcam microphone. Test a recording. Nothing ruins a first squad night like being the person whose mic sounds like a drive-through intercom, and the fix is always in these menus, never in the game.
Controls come last. In your mouse software or Windows settings, find a sensitivity that lets you turn comfortably without lifting your wrist off the desk, and leave acceleration-style ‘enhance pointer precision’ off for gaming consistency — the detailed reasoning lives in our linked mouse guides. Keyboard users should check that Windows repeat settings feel right and that any keyboard software is set to a sane lighting and macro profile. None of this is glamorous. All of it is the difference between a setup and a pile of connected parts, which is why experienced owners — the ones whose Gaming PC Pros And Cons ledger leans positive — never skip it.
Step Five: How Should You Organise Storage, Launchers and Your First Games?
Your prebuilt’s internal SSD is both your Windows drive and your games drive, and it wants a simple rule: keep games and Windows on it, keep bulk media elsewhere, and never let it fill to the brim. Solid-state drives slow down as they approach completely full, and Windows itself needs breathing room for updates and temporary files. A fifth of the drive kept empty is a good lifelong habit. On a 1TB machine that still leaves generous room for a healthy library; on the 2TB MSI configuration above, the rule is pure luxury.
Install your launchers — Steam, and whichever others your library needs — and point each one’s library folder at a single clearly named games folder on the SSD. Future you, migrating to a bigger drive or reinstalling Windows, will be grateful for one folder instead of five scattered defaults. Turn on each launcher’s automatic update setting, but schedule game updates for hours you are not playing if your connection is shared with a household.
Install two or three games first, not twenty. Play each for twenty minutes while watching how the machine behaves: fan noise, temperatures if you open the driver’s overlay, and general smoothness. This shakedown is your baseline. If something is wrong — a stutter, a crash, a roar — you want to discover it with one game installed and a fresh memory of the setup steps, not buried under a terabyte of downloads. The balanced verdict on which of these machines suits which player is covered in Gaming PC Review, and it is worth a read before your return window closes.
Step Six: What Security and Backup Habits Should Start in Week One?
Windows Security is genuinely sufficient protection for most gaming PCs, provided it is actually on and updated — open it once and confirm every shield shows green. Turn on Windows Firewall if it is not already, and let SmartScreen do its job on downloads. The real security risk to a gaming PC is not exotic malware; it is the modified game file, the ‘free’ cheat and the too-good peripheral utility from a random forum. Download drivers and tools only from the component maker’s own site, and treat any download that asks you to disable your antivirus as a hard no.
Enable OneDrive backup of your Documents and Pictures folders, or set up your own equivalent, before you create anything you care about. Save files, screenshots, configuration files and the documents of ordinary life accumulate on a gaming PC exactly as they do on any computer, and gaming PCs get reinstalled, upgraded and occasionally dropped more often than office machines do. A backup you set up in week one is invisible; a backup you meant to set up is a story people tell with regret.
Finally, record your machine’s identity while everything is new: photograph the rear-panel label and the spec page of your order, and keep the invoice somewhere backed up. Warranty conversations, insurance questions and resale listings all go faster with those two images. Setup is not finished when the first game launches. It is finished when the machine is placed, updated, tuned, protected and documented — which, if you followed this guide in order, is right about now.
Troubleshooting: Problems New Owners Actually Meet
Problem: The monitor shows ‘no signal’ on first boot -> fix: Confirm the cable is in the graphics card’s outputs, not the motherboard’s. Set the monitor’s input manually to the port you used. Reseat the cable at both ends, then try the monitor’s other input type. Only after those checks should you open the case and reseat the graphics card and memory.
Problem: Games feel no faster than your old PC -> fix: Check the refresh rate setting first, then the monitor cable location, then the graphics driver date. Those three account for nearly every case. Also confirm the game itself is set to your native resolution and is not running in a power-saving mode in the driver panel.
Problem: WiFi is slow or missing entirely -> fix: Fit the antennas. Then check the router’s distance and band: the faster band has shorter range, so a distant desk may do better on the longer-range band or on Ethernet. The Wi-Fi 7 machine above helps only with a Wi-Fi 7 router; standards must match at both ends.
Problem: Fans are loud during games -> fix: Some noise under load is normal. Check the tower’s vents are unobstructed, the internal packing is out, and the case is not inside a closed cabinet. In the BIOS or builder software you can usually choose a quieter fan profile at the cost of slightly warmer components — a fair trade for many living-room setups.
Problem: The PC will not wake or boots to a black screen after updates -> fix: Give an update ten full minutes before intervening. If it persists, boot into Windows recovery from a forced restart cycle and use the restore point Windows created before the update. This is also why the backup habits above matter from week one.
Common Mistakes When Setting Up a Gaming PC
The honour roll of setup errors is short and entirely avoidable. Leaving shipping foam inside the case. Plugging the monitor into the motherboard. Never changing the refresh rate. Skipping the graphics driver update and benchmarking the machine on its shipping driver. Filling the SSD to the last gigabyte in the first weekend. Installing every utility that came on a bundled disc or download page, including the ones that duplicate what Windows already does. And the quietest mistake of all: never testing the machine under real load until the easy return window has closed. Run your games in week one, while every option is still open to you.
A subtler mistake is treating setup as a single afternoon rather than a short bedding-in period. Fan curves, desk ergonomics, update schedules and storage organisation all reveal their flaws over the first fortnight of real use. Keep a small note of annoyances as they occur and fix them in one sitting at the end of week two; owners who do this end up with machines that feel personally tuned, while owners who fix nothing end up in forums describing their PC as ‘fine, I guess’. The honest balance of owning one of these machines at all is laid out in Gaming PC Pros And Cons, and setup quality is one of the biggest weights on the positive side of that scale.
Final Recommendation
Set up slowly, in order, and completely: inspect, place, cable into the graphics card, update Windows and the graphics driver, set the refresh rate, organise the SSD, and start your backup habit before the first game download finishes. Do that and any of the six verified towers above — from the entry-level ZYNEEX to the flagship Acer Nitro 85 — will feel like the machine its specification promises. Rush it, and even the best hardware on this page will feel strangely ordinary. If you are still choosing which tower to unbox, start with the deep dive in Gaming PC Review and the roundup in Gaming PC Reviews, then come back here with the box in front of you.
Step Seven: How Do You Maintain the Setup After Week One?
A setup is not a single afternoon; it is the starting condition of a machine you will maintain in small, regular touches. The monthly routine takes minutes. Let Windows and your launchers update on their own schedules, and check the graphics driver deliberately once a month rather than chasing every release the hour it lands — stability matters more than novelty once a machine works. Glance at your SSD’s free space when you install a large game, and uninstall something finished in the same sitting. That single pairing of habits — install one, remove one — keeps the drive in its fast, healthy zone for the life of the machine.
Every few months, with the machine off and unplugged, clean the dust filters if your case has them and blow the worst of the dust from the intake fans and the graphics card’s heatsink with short bursts of compressed air, holding fan blades still with a finger so they do not spin freely. Dust is insulation, and insulation is heat, and heat is the slow tax on every component’s lifespan and every fan’s noise level. While the panel is off, glance at the cables you seated on day one; a connector that was marginal in November can be visibly loose by spring, and catching it at a cleaning is free.
Twice a year, revisit the decisions you made at setup with fresh eyes. Is the refresh rate still correct after any monitor or cable change? Did a Windows update quietly reset a sound default? Is your backup actually running — open it and confirm a recent file exists, because a backup that silently stopped in March is a story nobody wants to star in? These checks sound fussy written down. In practice they are a ten-minute ritual that separates owners whose machines feel new in year three from owners shopping for replacements in year two.
What About Peripherals, Chairs and the Rest of the Desk?
The tower is the heart of the setup, not the whole of it, and the final layer of setting up a gaming PC is arranging everything your body touches. Set the monitor so its top edge sits near eye level and roughly an arm’s length away; your future neck is the stakeholder here. Your keyboard should let your elbows rest at a relaxed right angle, and your mouse deserves a surface large enough that you are not repositioning it mid-game — the mouse-pad and grip guides linked from this site’s gaming-mouse library go deeper on both points than this guide can.
Cable management is the last cosmetic step with a functional core. Route cables so none are stretched tight, none cross the tower’s exhaust path, and the power cable can be reached without moving furniture. Leave a little slack behind the monitor for height adjustments. A tidy desk is not about photographs; it is about being able to swap one component on a tired evening without dismantling the entire station to reach a plug. Set the station up once, properly, and it will quietly serve every machine you ever connect to it — which is the real endpoint of learning how to set up a gaming PC well.
A Note on Firmware, BIOS and Leaving Well Alone
Sooner or later a forum will tell you to update your BIOS or tune a memory profile, so here is the setup guide’s position: on a new prebuilt that is working correctly, leave the firmware alone. BIOS updates fix specific problems and occasionally add support for newer processors; they are not routine maintenance like driver updates, and interrupting one is among the few ways to genuinely harm a healthy machine. If a builder’s support team directs you to update, follow their instructions exactly, on stable power, without multitasking. The one BIOS visit worth making on day one is a look — not a change: confirm the memory is running at its rated profile and the boot order starts with your SSD. If both are true, exit without saving and never think about it again until an upgrade gives you a reason.
Frequently Asked Questions
How long does it take to set up a gaming PC properly?
About an hour of active work, plus update download time that depends on your connection. Unboxing and inspection take fifteen minutes, cabling ten, and the Windows and driver updates run largely unattended. The display, sound and storage steps add another twenty minutes. It is an afternoon’s light work at worst, and it repays itself for years.
Does the monitor really need to plug into the graphics card?
Yes. The graphics card’s outputs are the horizontal bank low on the rear panel. The motherboard’s outputs bypass the card for gaming purposes on most prebuilts, leaving your games to run on far weaker display hardware or a fallback path. It is the single most consequential cable in the whole setup.
Should I use WiFi or Ethernet for a gaming PC?
Ethernet whenever it is practical: it is faster to set up, immune to interference and the most consistent option for competitive play. Modern WiFi — especially a matched Wi-Fi 7 router and machine — is entirely respectable for most homes, but fit the antennas and test both bands before deciding your desk is too far from the router.
Do I need to install antivirus software on a new gaming PC?
For most owners, the built-in Windows Security suite, kept updated, is sufficient, and it has the advantage of never fighting with games or launchers. What matters more is download discipline: drivers and tools from makers’ own sites only, and nothing that asks you to disable protection to install it.
How much free space should I leave on the SSD?
Around a fifth of the drive. Solid-state drives lose speed as they fill completely, and Windows needs room for updates and temporary files. On a 1TB drive that habit still leaves ample room for a rotating library; uninstall finished games rather than hoarding everything you own.
When should I upgrade a new prebuilt gaming PC?
Only when a real workload asks for it. The usual first upgrade is memory — 16GB machines that take up streaming or heavy multitasking feel it first — followed by additional storage. A well-chosen prebuilt like the mid-range towers above should not need a graphics upgrade for several years of play at its intended resolution.
What should I do if my new gaming PC will not display anything?
Work the checklist in order: monitor input selection, cable in the graphics card rather than the motherboard, cable reseated at both ends, then internal reseating of the graphics card and memory with the power off. Most no-display cases are the first two items. If none of it works, contact the seller with your inspection photos while the machine is brand new.