Disclosure: As an Amazon Associate, reviewstook.com earns from qualifying purchases. Links to Amazon on this page are affiliate links; they cost you nothing extra.
A new camera needs a few accessories before you shoot seriously.
Last updated: November 1, 2026.
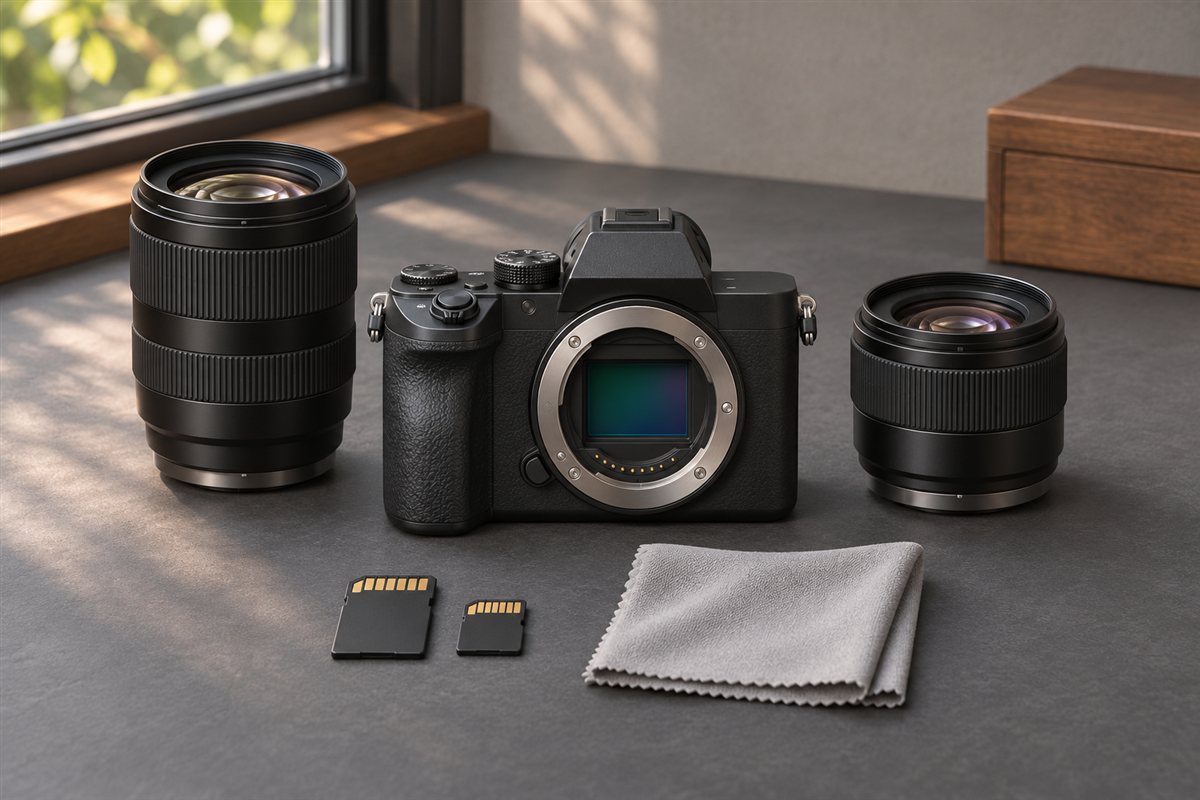
Memory and power
Start with SD cards and spare batteries; see Sony chargers.
In this guide
Carry and protect
A bag, sling, strap and case. See straps and wrist straps.
Stability
A tripod, ball head or fluid head, and a remote.
Care and extras
Cleaning kit, filters and hoods.
Lens Protection: Filters, Hoods and Caps
The front of a lens is the part most exposed to fingerprints, dust, rain and knocks, so a few small accessories protect a large investment. A lens cap keeps dust and scratches off the glass when you are not shooting, and a rear cap protects the back of the lens and its contacts when it is off the camera. Always check you have both for every lens you own. Caps are cheap to replace and easy to lose, so keeping spares in the bag is sensible.
A lens hood blocks stray light that can cause flare and low contrast, and gives physical protection against bumps. Many lenses come with a hood, but some do not, so check the product listing or manual for the correct hood for your lens. A hood that fits poorly can show up as dark corners in the image, so only use one designed for your lens.
Protective filters are a more debated choice. A clear or ultraviolet filter keeps the front element from scratches and splashes, but it adds another glass surface that can add flare or reflections if poorly made. Some photographers use them, and others prefer a hood alone. If you buy a filter, check the thread size printed on the lens or in the manual, usually shown in millimeters, and choose a thin design if you use wide-angle lenses to reduce the chance of dark corners. Specialty filters, such as polarizers and neutral density filters, are creative tools that you can add later if your photography calls for them.
Flash and Lighting Basics
Light is the foundation of photography, and a modest lighting accessory can improve many images. The built-in flash on a camera is convenient but is a small, direct source that can flatten faces and cause harsh shadows. An external flash unit, mounted on the hot shoe, offers more power and, importantly, can be tilted or swiveled to bounce light off a ceiling or wall for a softer look. Compatibility matters: check that the flash is designed for your camera system, and whether it supports the automatic exposure modes your camera offers.
If you shoot portraits, products or small subjects at home, a continuous light panel or a small softbox may be easier to use, since you see the effect of the light as you place it. Reflectors are a simple, low-cost tool that bounce existing light to fill shadows. A collapsible reflector is light and packs flat.
For video, a small LED panel can lift the look of interviews and vlogs. Think about power, since lights may use batteries or a mains adapter. Check the mounting options and whether the light attaches to a stand, to the camera or to a cold shoe.
Start simple. Practice with natural light from a window and a reflector before you buy more gear. Add a flash when you find yourself repeatedly limited by low light or flat results.
Audio and Video Add-Ons
If you record video, sound quality often matters more to viewers than image quality. The built-in microphone on a camera picks up handling noise, wind and the sound of the camera itself, and it is far from the subject. A small shotgun microphone that mounts on the hot shoe improves clarity, and a wireless lavalier system can capture a speaker’s voice more cleanly. Check the camera’s microphone input type and whether it has a headphone jack for monitoring. Some cameras provide power through the hot shoe or the port, while others do not, so read the manual for compatibility.
A foam or fur windscreen helps outdoors. Headphones let you check levels while recording, which can save a shoot from unusable audio.
For stability and a smoother image, consider a small handgrip or cage, which provides mounting points for accessories. A gimbal or a stabilizer can reduce shake when walking, but it is a larger investment and takes practice. If your camera and lens have built-in stabilization, you might not need extra gear to start.
Also consider an external monitor or a way to view the camera screen when it is difficult to see. Check HDMI port types and any restrictions on recording while a monitor is connected. Always test your setup before an important shoot to catch problems like noise, hum and overheating.
Cards, Backups and Workflow Gear
Memory cards deserve more than a quick purchase. Check which card types your camera accepts, whether it has one slot or two, and what speed class is recommended for the features you will use, such as burst shooting or high-quality video. The manual or camera maker’s support page normally lists suitable types. Buying from a trusted seller helps avoid counterfeit cards, which can fail or have lower real capacity than advertised.
Carry more than one card and label them. If your camera has two slots, you can set it to record to both for backup. Format cards in the camera, not on a computer, to ensure they use the correct file structure. Do not delete files on the camera in a way that might cause errors, and avoid removing a card while the camera is writing.
A card reader is usually faster and more reliable than connecting the camera by cable, and it spares the camera battery. Think about storage: photo and video files grow quickly, so plan for external drives or cloud storage and keep at least two copies of important work, ideally in different places.
Develop a routine. Copy files from the card, check that they open, and only then clear the card for reuse. Name folders by date and event, so you can find images later. A simple routine is worth more than extra gear.
What to Buy First and What Can Wait
With so many options, it helps to rank purchases by need. Essentials are the items without which you cannot shoot or keep the camera safe: a memory card, a spare battery or charging solution, a bag or case and a strap. After that, add accessories that solve a problem you have actually run into. If your images are blurry in low light, consider a tripod or a faster lens. If your photos have flat lighting, a reflector or flash might help. If sound is poor in your videos, a microphone is the next step.
Be wary of large bundles of accessories packed with a camera. They may include items you do not need and that are of lower quality. Check the contents and compare them with what you would buy separately.
Think about budget in tiers. A basic tier covers safe carrying, power and storage. A middle tier adds stability and light control. A higher tier adds specialist microphones, lighting or stabilizers. You do not need to move up the tiers all at once.
Questions to ask before buying any accessory:
- Is it compatible with my camera and lens, including mount and thread size?
- What problem will it solve for me this month?
- Is the product the type that wears out, and can I replace it easily?
- Can I borrow or rent it first?
Choosing a Bag That Fits Your Kit and Your Day
A camera bag has two jobs: keep the gear safe and keep it reachable. The right balance depends on how you shoot, so start with what you carry and where you carry it, not with the bag’s appearance.
Common bag types
- Shoulder bags give fast access and suit walking, street work and events, but they can strain one shoulder if loaded heavily.
- Backpacks spread weight across both shoulders and fit a body, two or three lenses, a flash and often a small tripod. They are better for hiking and longer days, although reaching the camera takes a moment.
- Sling bags sit between the two. You swing them around to reach the camera and keep a body and one or two lenses within easy reach.
- Hard cases protect gear on flights and in vehicles. They are bulky and slow to use on location, so they work best for transport and storage.
- Inserts and wraps turn any ordinary bag into a padded camera bag, which is useful if you already own a backpack you like.

What to check before buying
Measure your body with the lens attached and the hood reversed, plus each lens you plan to carry. Compare the measurements with the interior dimensions listed by the maker. Look for adjustable dividers, padding thick enough to cushion knocks, a rain cover or weather-resistant fabric, and zippers that feel robust. If you will fly, check the carry-on size limits of the airlines you use, since they vary. Leave a little spare room, because kits tend to grow. A bag filled to the limit on day one will not hold your next lens.
Tripod and Support Choices by Shooting Style
A support is worth buying when you often shoot in dim light, use long exposures, record video or want precise framing. The type depends on what you do most.
| Shooting style | What helps most | Things to check |
|---|---|---|
| Landscape and night | A sturdy tripod with a smooth ball head | Maximum load rating, leg lock type, whether the center column is stable when raised |
| Travel | A compact, light tripod that folds short | Folded length, weight, and whether it stays steady with your heaviest lens |
| Video | A fluid head for smooth pans and tilts | Counterbalance range, plate type, and handle position |
| Macro and product | A tripod with low angle options and fine adjustment | Minimum height, precise head movement |
| Wildlife and sports | A monopod for quick movement with long lenses | Extended height, foot grip, lens collar compatibility |
Check the load rating listed by the maker and keep your camera and heaviest lens well below it. A tripod that is too light for the camera will shake in wind or when you press the shutter. Use a remote release, a cable or the camera’s self-timer to avoid shaking the camera when you press the button. Make sure the quick-release plate type matches the head, and that the plate fits your camera without covering the battery door if you need to swap batteries on the tripod.
Batteries, Chargers and Power on the Road
Battery life varies with the camera, the temperature and how you shoot. Video, live view, burst shooting and cold weather all reduce the number of shots per charge. Manufacturers publish rated shot counts, but real-world use is often different, so plan with a margin.
Carry at least one spare battery that is made for your camera. Third-party batteries can be cheaper, but quality and capacity claims vary, and some cameras display a warning or restrict features when they detect non-original cells. Read reviews and the compatibility notes, and check the maker’s guidance. Label your batteries and rotate them so that all get used.
Consider how you will charge. Some cameras charge through a USB port, which allows charging from a power bank, a laptop or a car outlet. Others require a separate wall charger. If you travel, check that the charger accepts the voltage in the countries you visit and bring the right plug adapter. For long video sessions, a dummy battery connected to a power source can keep the camera running, if your camera supports it. Never charge batteries unattended on flammable surfaces, and stop using any battery that swells, leaks or becomes unusually hot.
In cold weather, keep spare batteries in an inside pocket near your body. A cold battery may show less charge than it really has, and warming it often brings back some capacity.
Cleaning and Basic Care Items
Dust and fingerprints affect image quality, and a small cleaning kit costs little compared with the gear it protects. A basic kit includes a blower, a soft brush, microfiber cloths and a lens cleaning solution made for coated optics. Use the blower first to remove loose grit, because wiping grit across the glass can scratch it. Apply cleaning fluid to the cloth, not directly to the lens, and wipe gently in a circular motion.
Sensor cleaning is more delicate. Many cameras have an automatic sensor cleaning function, and a hand blower is often enough for loose dust when the lens is off, with the camera held facing down. Swabs and wet cleaning can damage the sensor if done wrongly. If you are not confident, use the service offered by the maker or a reputable camera shop. Always change lenses in a clean place, away from wind and dust, and cap the body or lens quickly.
Silica gel packs help in humid climates when storing gear, and a rain cover or even a clean plastic bag protects the camera in drizzle. After shooting near salt water, wipe the exterior with a lightly damp cloth, dry it and let the equipment air out. Check the manual for what the manufacturer says about weather resistance, because it varies between models and lenses.
Starter Kits by Type of Shooting
If you find a long list overwhelming, build a small kit around what you do. These are general suggestions to adapt, not fixed shopping lists.
- Family and travel snapshots: two memory cards, a spare battery, a padded sling or small backpack, a strap and a microfiber cloth.
- Landscape: add a stable tripod with a good ball head, a remote release, a lens hood and possibly a polarizing filter.
- Portraits at home: add a collapsible reflector and consider a bounce-capable flash or a continuous light.
- Vlogging and video: add a small microphone, a grip or cage, a fluid head and extra batteries or a power option.
- Events and low light: add an external flash, a fast lens, extra cards and a bag with quick access.
Rent or borrow before spending on expensive items. Many camera shops rent lenses, lighting and stabilizers by the day, and that gives you a chance to learn what you actually use. When your first purchases are modest and match your habits, you will spend less and shoot more.
Buying Mistakes That Are Easy to Avoid
Several errors repeat among new owners. Buying accessories for the wrong mount or thread size is the most common, so check the model number and the specifications each time. Choosing a very cheap tripod is another, since it often wobbles and may cost more to replace than a better one would have cost at the start. Overbuying filters, lights and gadgets before learning the basics is a third.
Counterfeit memory cards and batteries are a real risk when buying from unknown sellers. Look for established retailers, check seller ratings, and test new cards by filling them with data and verifying the files. Finally, do not forget the small things. A lens cloth, a spare strap and a rear lens cap rarely appear on lists, but missing them is irritating at the wrong moment. Keep a short checklist in your bag, tick it before each outing, and update it when you realize you forgot something.
Products Worth a Look
As an Amazon Associate, reviewstook.com earns from qualifying purchases. These picks come from our guide: 7 Best Mirrorless Cameras: Canon, Sony, Fujifilm, Lumix (2026).
-
Canon EOS R100 (RF-S 18-45mm kit)
-
Sony Alpha a6100 (body)
-
OM SYSTEM OM-5 Mark II (body)
 OM SYSTEM OM-5 Mark II Silver Mirrorless Camera Body
Going Deeper: Living With This Choice Day After Day
Camera gear is easy to judge in a shop and much harder to judge in real life, because the qualities that matter most only appear over weeks of ordinary shooting. With mirrorless camera accessory kit, the real questions are practical ones. Does it stay on the camera, in the bag, or on your wrist without getting in the way? Does it still help on a grey, rushed day when you are shooting quickly, rather than only on a calm day when you have time to set everything up carefully? Does it solve the problem you bought it for, or does it solve a slightly different problem while adding a new annoyance of its own? Those are the questions this deeper section works through, so you can match the picks above to your own habits instead of to an idealised version of them.
A useful habit is to judge any camera accessory or system decision by friction. Low-friction gear disappears into the shoot: you reach for it without thinking, it fits the first time, and it does not need to be removed, adjusted, or worked around for the next shot. High-friction gear may perform well in isolation yet still end up left at home, because every outing involves a small negotiation with it. When two options in this guide look close on paper, the lower-friction option is very often the better long-term buy, especially for photographers who shoot family life, travel, and everyday subjects far more often than staged projects.
Thinking in Outings, Not in Product Pages
Before you buy, picture three real outings and walk through them honestly. Picture a bright day outdoors, where glare, contrast, and changing light test both you and your gear. Picture an indoor day with mixed lighting, limited space, and subjects who will not wait while you fiddle with equipment. Then picture a travel day, when everything must fit in one bag, survive being packed and unpacked repeatedly, and work even when you are tired. For each outing, ask where mirrorless camera accessory kit helps, where it is neutral, and where it might slow you down. That simple exercise exposes mismatches that a feature list never will, and it explains why this guide keeps returning to fit, compatibility, and handling rather than headline claims.
It also helps to think about what you will stop doing once you own it. Every addition to a camera kit quietly replaces something: another accessory stays home, a step in your routine disappears, or a workaround you relied on is no longer needed. If you cannot name what changes in your routine, the purchase may be adding weight without adding photographs. The strongest picks in this article earn their place because they change a real moment in a shoot for the better, whether that means cleaner files, faster handling, safer carrying, or simply more confidence that the camera is ready when the moment arrives.
Compatibility: The Check That Decides Everything
Almost every disappointment in this category traces back to a compatibility check that was skipped, rushed, or based on an assumption. Names that sound similar are not always interchangeable, sizes that look close are not always close enough, and a product that fits one body or lens in a range may not fit the next one in the same range. Before ordering, confirm the exact fitting from the markings on your own equipment rather than from memory or from a listing title. Photograph those markings with your phone, keep them in a note alongside your camera model and lens details, and compare them character by character with the product description. That unglamorous minute of checking prevents most returns in this category.
Compatibility also has a second, quieter layer: how the new item behaves alongside the rest of your kit. Does it still work with the filters, caps, straps, bags, and supports you already own? Does it change the order in which you pack, mount, or store things? Does it block a control, cover a sensor, crowd a mount, or make a routine action awkward? A mirrorless camera accessory kit choice that is technically correct but fights the rest of your kit will frustrate you in ways that are hard to predict from a product page. Where this guide notes a pairing that works well or a combination to avoid, treat that note as seriously as the headline recommendation.
How to Verify Fit Before and After It Arrives
When your order arrives, test it properly before you throw away the packaging or head out on an important shoot. Fit it in good light, at home, with time to notice problems. Check that it seats fully and evenly, that nothing is forced, and that removing it is as smooth as fitting it; cross-threading, grinding, wobbling, or unusual resistance are all reasons to stop rather than push harder. Then take a short series of test photographs or a brief test session in conditions similar to your real use, and inspect the results at full size. Look at the corners, the edges, and the details you would normally overlook in a quick preview, because that is where fit problems announce themselves first.
Keep the packaging and paperwork until that home test is complete, and repeat a shorter version of it whenever you pair the item with a different body, lens, or accessory for the first time. Combinations, not individual products, are what you actually shoot with. A few minutes of methodical checking also builds a useful personal record: note which combinations worked, which were merely acceptable, and which to avoid. Over time that note becomes more valuable than any generic compatibility chart, because it describes your kit, your subjects, and your standards rather than an average photographer who does not exist.
Care, Storage and Getting a Long Working Life
Camera accessories rarely fail dramatically; they wear out quietly. Threads collect grit, rubber and foam lose their shape, coatings pick up fine scratches, straps fray at the stitching, and small parts such as caps, screws, and release fittings go missing one at a time. A light care routine prevents most of it. Wipe items down after use in dusty, sandy, or damp conditions, let everything dry fully before it goes back into a closed bag, and store pieces in individual pouches or compartments so hard edges do not rub against glass, screens, or each other during transport. Keep spares of the smallest, cheapest parts, because losing one on a trip can disable an otherwise complete kit.
Cleaning deserves the same restraint as shooting technique. Start with air and a soft brush to remove loose grit before anything touches a surface, because wiping grit across glass or a coating does lasting damage in a single pass. Use a clean microfibre cloth, replace cloths that have picked up dirt, and avoid household cleaners unless the maker specifically allows them. Inspect your mirrorless camera accessory kit under a bright light every few months: look for bent edges, cracked plastic, stretched material, loose stitching, or a fit that has become sloppy. Catching wear early usually means a cheap replacement on your schedule, rather than a failure in the middle of a shoot you cannot repeat.
Mistakes That Quietly Ruin Good Photographs
Some of the most frustrating photographic problems are not caused by a bad camera or a bad lens, but by a small accessory used slightly wrong. A poorly seated fitting can soften corners or intrude into the frame. A dirty surface can add haze that looks like a lens fault. A support or strap arranged carelessly can introduce movement, strain, or a slow drift that only shows up when you review the files later. When something looks off in your images, resist the urge to blame the most expensive item first. Remove accessories one at a time, repeat the shot, and find the simplest cause. That process of elimination is a core photographic skill, and it is one reason experienced photographers keep their kits simpler than beginners expect.
Another quiet mistake is buying a full set of everything at once. A large bundle feels efficient, but it hides which items you actually use, fills your bag with pieces that duplicate each other, and makes it harder to notice a poor fit because everything is unfamiliar at the same time. Build gradually instead: add one piece, shoot with it across several outings, and only then decide what is still missing. The checklist and ordering advice elsewhere in this article exists precisely to support that slower, cheaper, and ultimately more satisfying way of building a kit around mirrorless camera accessory kit.
How the Picks Above Differ in Practice
Readers often ask why this guide keeps several options that appear, at a glance, to do the same job. The honest answer is that photographers differ more than products do. One pick suits someone who shoots one camera and one lens almost exclusively and wants the neatest, most dedicated solution. Another suits someone who swaps lenses or bodies often and values flexibility over neatness. A third suits a beginner who needs forgiveness while learning, and a fourth suits a careful owner who prioritises protection during transport above speed in the field. None of those priorities is wrong. The comparison sections above are written to surface those trade-offs plainly, so you can recognise your own priority and choose accordingly rather than simply taking the first name in the list.
When you are torn between two picks, decide with a single deciding question: which one removes the problem I actually have? If your problem is glare and lost contrast in bright conditions, weight that above convenience features. If your problem is gear getting knocked, lost, or disorganised in a bag, weight protection and fit above everything else. If your problem is that you leave equipment at home because setting up feels like a chore, weight speed and simplicity. A mirrorless camera accessory kit decision made against one clear problem almost always ages better than a decision made by averaging every possible advantage, because real satisfaction comes from the problem that disappears, not from the longest list of minor virtues.
When to Replace, Upgrade or Simply Stop Buying
Knowing when to stop is part of building a good kit. Replace an item when its fit becomes loose, its surface is damaged in a way that affects your files, its material has perished, or it no longer matches equipment you now own. Upgrade when your shooting has genuinely changed: a new lens, a new body, a new subject, or a new routine that the current item cannot serve. Do not upgrade merely because a newer version exists, because small photographic accessories improve slowly and the money is usually better spent on time out shooting, on a course or a photobook, or on the one missing piece your own notes keep mentioning.
Finally, keep perspective about what mirrorless camera accessory kit can and cannot do. Good accessories protect your equipment, remove avoidable flaws, and make the camera easier to use well. They cannot fix poor light, an unsteady hand, a missed focus, or a subject you were not ready for. The photographers who get the most from the picks in this guide are the ones who pair sensible gear with unglamorous habits: arriving with charged batteries and empty cards, checking settings before the moment matters, reviewing their files honestly afterwards, and writing down what to do differently next time. Gear supports those habits; it never replaces them.
Building Your Kit in Stages Without Wasting Money
The most economical mirrorless kit is built in stages, guided by the photographs you missed rather than the products you noticed. Stage one covers protection and power: a bag that truly fits, a spare battery, enough card capacity, and basic cleaning supplies, because those items prevent lost photographs rather than merely improving them. Stage two covers stability and light, added when your subjects demand them: a support that matches your camera and lens weight, and a first step into controlled lighting when indoor or portrait work keeps asking for it. Stage three is refinement: audio for serious video, extra straps and mounts for the way you personally carry gear, and duplicates of the small items you keep misplacing.
At each stage, shoot for several weeks before moving to the next. That pause is where the savings happen, because many imagined needs disappear once you see your real habits clearly. Keep a short note on your phone after each outing: what you wished you had, what you carried and never used, and what nearly went wrong. Three or four of those notes will write your next shopping list for you, in the right order, and will stop you buying a second version of something you already own. That staged approach is the heart of the checklist in this article, and it works whether your budget is generous or tight.
Another useful exercise is to compare any new addition against the kit you already own before it arrives. Lay out, at least in your mind, everything it must work alongside: the bodies, lenses, supports, bags, and small accessories you reach for most. Ask where the new piece will live, both in the bag and at home, and what you will reach for less once it is part of the kit. Gear that has a clear home gets used; gear that floats between bags gets forgotten, lent, or lost. That simple question of where it lives has saved more photographers money than any buying guide, because a surprising number of purchases turn out to duplicate something already owned and simply misplaced.
Think, too, about buying with returns and support in mind rather than only with the product in mind. Buy from sellers whose descriptions state compatibility precisely, keep your order details, and test the item promptly while a return is still simple. Photographers who shoot for clients or travel for photography should go further and identify a backup plan: a local shop that stocks the essentials, a fellow photographer who could lend a piece, or a spare kept deliberately. None of that diminishes the picks in this guide; it recognises that even the right product can arrive faulty, and that a calm plan beats a panicked search the night before an important shoot.
Season and setting change what good gear means in practice. A kit that behaves beautifully in a dry studio can struggle with beach sand, winter gloves, festival dust, or a rainy wedding. Before a demanding outing, handle your equipment wearing the gloves you will actually wear, pack it in the bag you will actually carry, and practise the two or three operations you will need most. If something is fiddly at the kitchen table, it will be worse in the cold and the dark. That rehearsal takes minutes, reveals problems while they are still cheap to fix, and is a hallmark of photographers whose gear rarely lets them down in public.
Frequently Asked Questions
What to buy first?
A card, bag and strap.
Tripod needed?
For low light and video.
Where to start?
See buying guide.
Do I need a UV filter on every lens?
It is optional. Some photographers like the front-element protection, others prefer a hood alone. If you buy one, pick the correct thread size and a quality design.
How do I find my lens filter size?
The thread size is usually marked on the front or inside the lens cap, and it is also in the manual. It is shown in millimeters with a diameter symbol.
Is an external flash worth it?
It can improve indoor and low-light photos because you can bounce the light for a softer look. Check that it is compatible with your camera.
What memory card should I buy?
Check the camera manual for supported card types and speed classes. Buy from a reputable seller to avoid counterfeits.
Should I format my memory card in the camera?
Many makers recommend it, since it sets the correct structure for that camera. Copy your files first, because formatting erases the card.
Do I need a microphone for video?
The built-in microphone is fine for casual clips, but an external mic usually improves clarity. Check the camera's input and compatibility.
How many batteries should I carry?
Carry at least one spare, and more for long shoots or video. Battery life depends on the camera and the way you use it.
Are camera bundles good value?
They can be if you need everything inside. Compare the contents with what you would choose separately, and check the quality.
What size camera bag do I need for a mirrorless camera?
Measure your body with the lens attached, plus any extra lenses you plan to carry, and compare with the bag’s interior dimensions. Choose a bag with a little spare room, adjustable dividers and padding. Mirrorless kits are smaller than DSLR kits, but they still grow as you add lenses.
Is a cheap tripod good enough to start with?
It can work for light cameras in calm conditions, but very cheap tripods tend to wobble and may not hold a heavier lens. Check the maker’s load rating, keep your gear well under it, and consider buying one steady model once rather than replacing a weak one.
Can I charge my mirrorless camera battery with a power bank?
Many models charge through USB, but not all do, and some need a specific power standard. Check the manual or the maker’s support page. If your camera supports it, a power bank is handy for travel, while others require the supplied wall charger.
How do I clean my camera sensor safely?
Start with the camera’s built-in cleaning function and a hand blower while the camera faces down. Avoid touching the sensor with swabs unless you are trained. If dust remains, use the maker’s service or a reputable camera shop. Never use compressed air cans, which can spray propellant.
Are third-party camera batteries safe to use?
Quality varies. Some work well, others have lower real capacity or cause warnings on the camera. Check compatibility, buy from reputable sellers and read the maker’s guidance, since some manufacturers say third-party cells may affect performance. Stop using any battery that swells, leaks or overheats.
Bottom Line
Buy a card, bag and strap first, and add the rest as your shooting needs show up.
More Camera Guides
- Camera Lens Mount Guide
- Best Lenses for Canon RF Cameras
- Best Lenses for Sony Mirrorless Cameras
- Best Lenses for Nikon Z Cameras
- Best Nikon Z Mirrorless Cameras
- Best Ball Heads for Mirrorless Tripods
- Best Fluid Head Tripods for Video
- Best Dummy Batteries for Sony Cameras
- Mirrorless Camera Buying Guide
- Best Mirrorless Cameras
- Best Lenses for Fujifilm X Cameras
- Best SD Cards for Mirrorless Cameras
- Best Tripods for Mirrorless Cameras
- All camera guides


