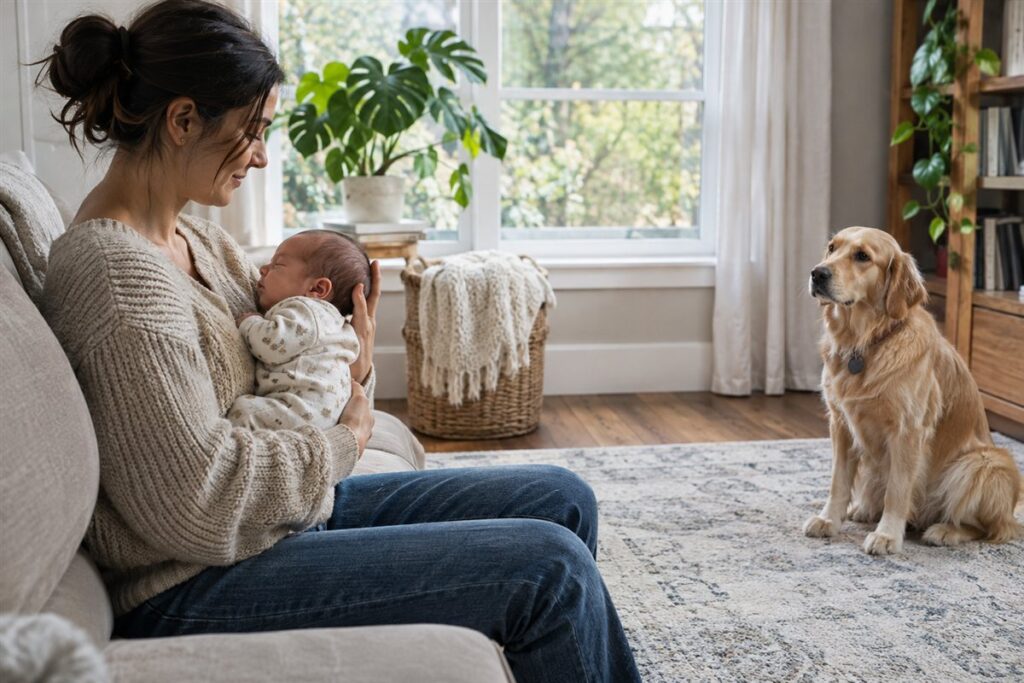
The calmest way to photograph a newborn with a pet is to keep a parent in full charge of the baby, let the animal stay relaxed, and shoot short, simple frames. This guide is general photography technique only. The baby’s wellbeing always comes first, and a second adult should be present to watch the pet while a parent holds the baby.
Safety Ground Rules
No photo is worth a risk. Set these rules before anyone lifts a camera.
- A parent stays in charge of the baby at every moment, and a second adult manages the pet.
- The pet is never left alone with the baby, even for a moment, and is never placed on or touching the baby for a pose.
- If the pet looks anxious, stop and try again another day.
- Follow the parents’ own judgment and any guidance they have received about their baby and their animal.
- Keep the session short and take breaks.
Prepare the Pet and the Space
- Walk and feed the pet before the session so it is settled.
- Let the animal sniff the room and the equipment ahead of time.
- Choose a quiet spot with soft window light, which lets you avoid flash.
- Have treats or a favorite toy ready, held by the second adult.
- Use a familiar blanket or bed so the pet feels at home.
Composition Ideas That Stay Calm
You do not need the pet and baby touching to tell a story. Distance and gentle framing often look more natural.
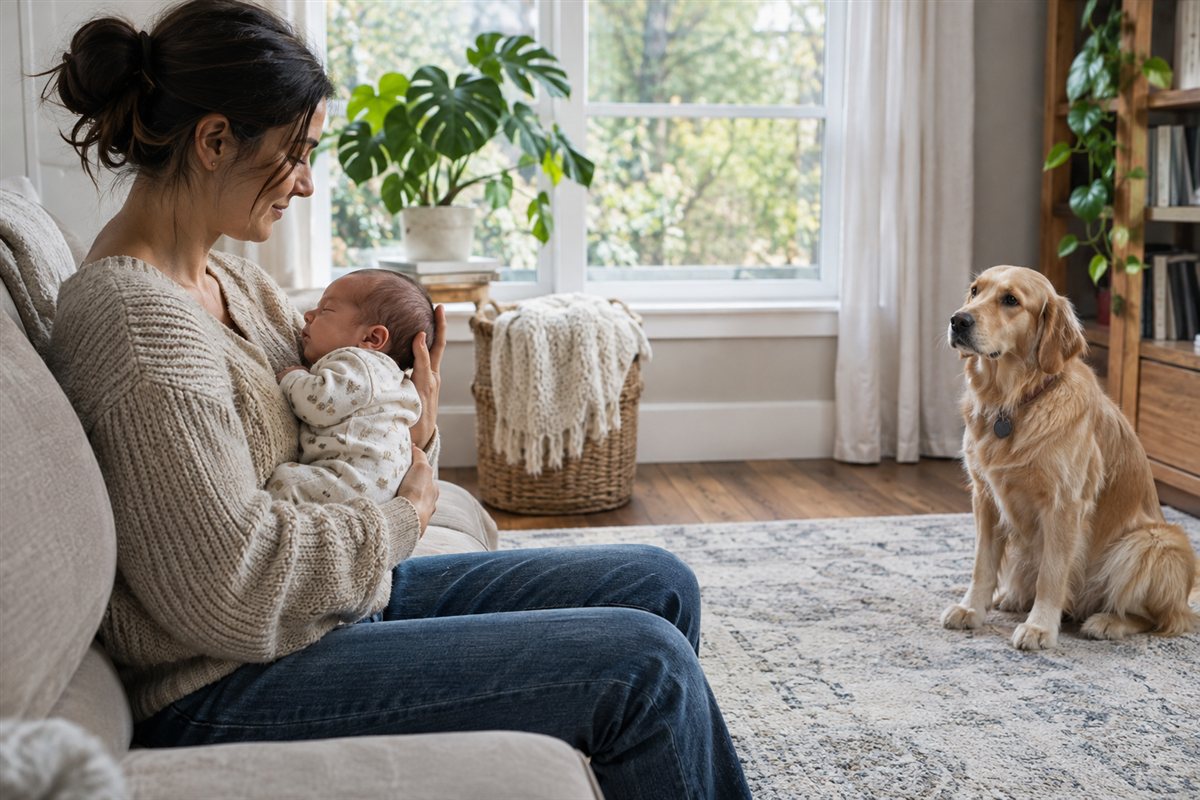
- Show the pet lying nearby while a parent holds the baby, with the animal looking toward the family.
- Photograph the pet’s face in the foreground and the baby softly blurred behind, using a wide aperture.
- Capture details such as a paw beside a blanket or a nose near a tiny sock.
- Take a wide shot of the whole family on a couch, shot from eye level.
Camera Settings as Baselines
| Setting | General idea |
|---|---|
| Aperture | f/2 to f/4 for soft backgrounds |
| Shutter speed | Roughly 1/250 or faster for a moving pet |
| ISO | Raise it before slowing the shutter |
| Focus | Continuous mode for the pet, single point for the baby |
Turn off any noisy beeps and avoid sudden flashes or loud shutter sounds if your camera has a quiet mode.
Consider a Composite
If the moment does not feel right, photograph the baby with a parent in one frame and the pet in another frame from the same spot with the same settings, then combine them in editing. This keeps both subjects comfortable and gives you a clean result.
Reading Your Pet’s Body Language
Before any photo session, take time to understand how your pet communicates. Animals show stress, curiosity and comfort through posture, movement and sound, and recognizing these signals helps you end a session before a problem develops. This is general information, and a veterinarian or qualified animal behavior professional can give advice specific to your pet.
Signs that a dog or cat is relaxed typically include a loose body, soft eyes, a gently moving tail and normal breathing. Signs of stress or discomfort can include stiffening, yawning, lip licking, turning away, flattened ears, a tucked tail, hiding, growling, hissing or sudden restlessness. Excitement can also be a problem around a newborn, since a bouncy, overeager animal may move unpredictably. If you are unsure how your pet is feeling, treat that as a reason to pause.
- Know your pet’s triggers: loud sounds, bright flashes, unfamiliar equipment and crowded rooms can upset some animals.
- Respect the first sign of discomfort: if the pet moves away, let it go, and do not force it to return.
- Keep sessions positive: reward calm behavior with treats and praise, delivered by the second adult.
- Consider the pet’s age and health: older or unwell animals may tire quickly or be more sensitive.
- Plan an exit: have a separate quiet space where the pet can rest between shots.
Some pets are not suited to being near a newborn for photographs, and that is perfectly acceptable. In those cases, you can photograph the pet and the baby separately and combine the images later. Safety and comfort for everyone are more important than getting a particular shot.
Introducing the Pet to the Camera and the Baby Beforehand
Surprises are the enemy of a calm session. If your pet has never seen your camera, lights or reflectors, bringing them out on the day may cause alarm. A few practice rounds in the days before can make the actual photo time much easier.
Start by leaving equipment out where the animal can sniff it. Let it explore without pressure, and give treats when it stays calm. Make small clicking sounds, and reward the pet for ignoring them. If you plan to use a reflector, unfold it slowly and let the pet see it. Avoid flash, which can startle animals and may disturb the baby.
The introduction between pet and baby should follow the family’s own guidance and any advice from their veterinarian or other professionals. By the time of the session, the pet should already be used to the baby’s presence in the home, with supervised, calm interactions established by the parents. A photo session is not the time for a first meeting.
- Let the pet become familiar with the camera, reflector and any stands during a few short practice sessions.
- Keep the pet’s regular routine on the day, including walks and meals.
- Choose a time when the baby is fed and sleepy and the pet is relaxed, since both are easier to manage then.
- Arrange the room so the pet has space to move away and the baby is always held or placed safely by a parent.
- Keep the session short, and stop if either subject becomes fussy.
Being patient with preparation reduces stress for everyone and gives you better pictures.
Working With Light in a Nursery or Living Room
Home spaces are comfortable for babies and pets, but they can be difficult for photography. Rooms are often dim, with mixed light from windows, lamps and screens. Learning to read and shape the available light gives you softer, more flattering images without disturbing anyone.
Window light is usually the best option. Place the family so the light falls from the side, which shows form and texture without being harsh. Avoid direct sunlight on the baby’s face, which can cause squinting and uneven brightness, and instead use a thin curtain or shift the family to a spot where the light is softer. A white sheet or foam board placed gently out of reach of the pet can bounce light into shadows, but check that it is stable and will not tip over.
- Turn off competing lamps: mixed color temperatures can give odd skin tones. Choose either window light or lamps, not both, if you can.
- Watch the background: clear clutter, cords and toys so the image stays simple and nothing hazardous lies near the baby.
- Use the right white balance: adjust for the room’s light, and shoot raw to fine-tune later.
- Raise ISO rather than slowing the shutter: moving pets and wiggling babies blur easily at slow speeds.
- Keep the room comfortable: a newborn needs a warm environment, and a hot room can also be uncomfortable for a pet, so check the temperature.
Avoid placing the baby on a surface where a pet could jump up unexpectedly. Keep all props simple and secure. Never use anything that could harm the baby or the animal.
Posing Ideas That Keep Everyone Safe and Relaxed
You can create touching images that show the bond between baby and pet without risky poses. Think about gentle, natural moments rather than staged positions.
One approach is to have a parent sit on the floor or sofa holding the baby, while the pet sits or lies calmly beside them, with a second adult nearby. The pet can look toward the baby or the camera. Another idea is to photograph the pet and baby in the same room but not touching, using layers in the frame, such as the baby in the foreground and the pet in the background. A third option is a close detail shot of the baby’s hand and the pet’s paw near each other, taken carefully without contact.
- Use a parent as an anchor: a parent’s calm presence reassures both baby and pet, and the parent maintains control at all times.
- Let the pet choose its spot: animals relax more when they are not forced into positions.
- Shoot from the pet’s eye level: kneeling or lying down gives a more personal view and a gentler perspective.
- Capture the in-between moments: a glance, a sniff from a distance or a sleepy yawn often makes the best photo.
- Avoid props that tempt the pet: blankets with strong smells, toys or food near the baby may attract unwanted attention.
- Take breaks: give the pet water and a rest between sets of shots.
Each family is different, and you should follow the parents’ guidance on what feels comfortable. If anyone seems uneasy, change the plan. A simple photo of the baby asleep with the pet resting nearby, in a safe arrangement, can be more moving than a forced pose.
Editing and Compositing the Final Images
When live interaction is not practical, editing offers a safe way to bring baby and pet together. A well-made composite can look natural and keep everyone out of harm’s way.
Plan the composite during the shoot. Place the camera on a tripod and keep the framing, focal length, exposure and white balance identical across frames. Take one frame with the baby held safely by a parent, and another with the pet in position, in a spot that matches the lighting. If a parent is holding the baby, consider photographing the empty space as well, so you have a clean background to blend. Take several frames of each, so you can pick expressions that match.
- Import the frames and choose the best baby image and the best pet image.
- Open them as layers in an editor that supports masks, and align them using the background.
- Use a layer mask to blend the pet into the baby scene, painting carefully along the edges.
- Match the brightness, color and shadows so the two parts look like they were taken together.
- Remove the parent’s hands or supporting objects only if you have a clean background frame to use, and keep the result believable.
- Check the edges at high zoom, and clean up any fur, blankets or shadows that look unnatural.
Be honest with the family about how the image was created. Some parents love the idea, and others prefer an unedited picture. Keep the original frames in case they want a different version. Back up the files carefully, since newborn images are precious and cannot be recreated.
A Gear Checklist for the Session
Having the right items within reach keeps the session short and calm. Gather everything before the baby or the pet enters the room, so no one has to leave halfway through. Here is a practical list to adapt.
- A camera with a fully charged battery and an empty memory card, plus a spare of each.
- A lens that lets you stand back a little, so you are not crowding the animal or the baby.
- A soft, washable blanket or throw to define the frame and give the pet a familiar spot.
- Quiet treats or a favorite toy, held by the second adult and used the way the pet’s trainer or vet would suggest.
- A lint roller and a soft cloth for quick tidying between frames.
- A gate or closed door to give the pet a break room when it needs one.
- A small stool or low table for placing the camera bag out of reach.
Keep the area free of cords, small objects and clutter. A tidy floor also gives you cleaner backgrounds and fewer things to remove in editing.
A Simple Shot List to Follow
Going in with a plan stops you from wandering around trying new angles while everyone gets tired. Aim for a handful of frames, and be content when you have them.
| Shot | What it looks like | Why it works |
|---|---|---|
| Wide room view | Parent, baby and pet in the same space | Sets the scene without forcing contact |
| Parent with baby, pet nearby | Pet resting a short way off | Keeps attention on the baby |
| Detail frame | Tiny hand beside a paw on a blanket | Shows scale in a calm composition |
| Pet looking on | Animal gazing toward the baby | Tells the story with distance |
| Quiet portrait | Pet alone, then baby alone | Gives you pieces for later |
Work through the list from the least demanding frame to the most, and stop when the pet or the baby shows signs of being finished.
Common Mistakes to Avoid
Most problems in this kind of session come from rushing. Learn the usual traps so that you can sidestep them.
- Trying to get everything in one long session, which tires the baby, the pet and the parents.
- Leaving the baby unattended on a surface, even for a moment while you change a setting.
- Asking the pet to hold a pose it does not understand, which can lead to stress.
- Moving suddenly or leaning in close, since quick motion can unsettle an animal.
- Using noisy props or loud clicking that the pet has never heard before.
- Skipping a practice round, which leaves everyone meeting the camera for the first time during the real shoot.
- Ignoring the pet’s signals because the picture looks good in the viewfinder.
If something feels off, pause and let everyone settle. A missed frame costs very little compared with an upset animal or an upset baby.
A Short Glossary of Photography Terms
- Aperture: the opening in the lens that controls how much light reaches the sensor and how soft the background looks.
- Shutter speed: how long the sensor is exposed, which affects whether motion looks sharp or blurred.
- ISO: the sensor sensitivity, where higher settings brighten the image but add grain.
- Focal length: the lens zoom, which changes how much of the room fits in the frame.
- Composite: an image built from separate frames, for example the baby and the pet shot one at a time.
- White balance: the setting that keeps whites looking neutral under different lights.
You do not need to master these ideas to take a lovely picture. Even a basic understanding helps you adjust when the room light changes.
Choosing a Plan by Situation
No two homes or animals are alike, so match your approach to what is in front of you. If the pet is easygoing and used to visitors, a relaxed session with a parent holding the baby and the pet lying nearby can work. If the pet is anxious, loud, or very energetic, a composite, with each subject photographed separately, is often the gentler route.
When you feel unsure about the animal’s reaction, ask for advice from the pet’s veterinarian or a qualified trainer, and follow guidance from your baby’s pediatrician about handling and the environment. A professional photographer who has experience with newborns can also manage the session, which many families find reassuring.
Wrap-Up and Culling Routine
When the session ends, give the pet a quiet moment and a familiar space, and let the baby settle with a parent. Only then sit down with your images. Looking through frames while a pet is still excited usually leads to rushed choices.
Begin by deleting obvious misses: closed eyes, soft focus, blocked faces. Then compare similar frames and keep the one where the mood feels warmest and the pet looks comfortable. Mark a few favorites, and leave the rest for another day. Fresh eyes the next morning often reveal which picture you actually love.
Back up your files in two places before you do any editing. Name the folder with the date so the set is easy to find years later, when the baby and the pet have both grown.
FAQ
How long should the session be?
Keep it brief. Several short bursts with breaks usually work better than one long push.
Should I use flash?
Window light is usually gentler and avoids surprising anyone, so use flash only if the parents agree.
What if my pet is nervous around the baby?
Do not push the interaction. Photograph them separately and combine the images in editing, or enjoy portraits of each on their own. Consider seeking advice from your veterinarian or a qualified behavior professional.
Should I hire a professional for newborn and pet photos?
It can be helpful, as an experienced photographer can plan safely and work quickly. Ask about their approach to safety, and make sure parents stay in charge of the baby.
Is it okay to use treats during the shoot?
Treats can help keep a pet calm and focused, but have the second adult handle them. Avoid giving food near the baby, and follow your pet's dietary needs.
How can I keep the pet from jumping up?
Practice commands beforehand, and keep the pet on a leash or in a controlled position if needed. The second adult should stay beside the animal at all times.
What lens works best?
A moderate focal length, such as a standard prime or short zoom, lets you stay at a comfortable distance. Choose one that works well in soft light.
When is the best time of day for the session?
Choose a time when the baby is calm and fed, and the pet has had exercise. Soft daylight from a window is often most flattering.
Can I take photos if the pet sheds a lot?
Yes, but brush the pet beforehand and keep a lint roller handy. Check the baby's blanket and clothes for stray hair before shooting.
How many photos should I expect to keep?
It varies. Short sessions with a few good frames are normal, and a single great image can be enough. Focus on safety first and quantity second.
The Short Version
Keep a parent in charge of the baby and a second adult with the pet. Use soft light, short sessions and simple framing, and use a composite when the moment will not cooperate.