Disclosure: As an Amazon Associate, reviewstook.com earns from qualifying purchases. Links to Amazon on this page are affiliate links; they cost you nothing extra.
A better webcam picture often comes from better setup, not a new camera. Lighting, position and a few settings can change how you look on calls. This guide shows the changes that make the biggest difference, in order of effect.
This guide is based on general video knowledge, not our own testing.
By the Reviewstook Editorial Team. Last updated: October 31, 2026.

1. Fix Your Lighting
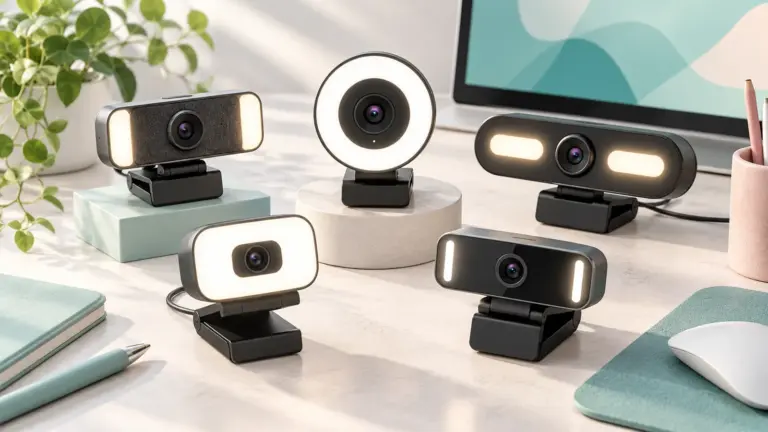
Light your face from the front using a window or a soft lamp. Avoid light behind you, which turns you into a silhouette. Two soft lights at 45 degrees give flattering results. See lighting for webcams and webcams with ring light.
In this guide
2. Raise the Camera to Eye Level
Place the camera at eye level, not below. Use a stand or a monitor mount. See webcam stands.
3. Clean the Lens
Fingerprints blur the image. Wipe the lens with a microfiber cloth.
4. Adjust Camera Settings
Open the camera settings in your app or the maker’s software. Adjust exposure, brightness, white balance and autofocus. Turn on low-light compensation if it exists, and lock exposure if it changes.
5. Check Resolution and Frame Rate
Make sure the app uses the highest resolution and 30 fps. Some apps default to lower settings. A fast USB port gives the camera more bandwidth.
6. Improve the Background
Remove clutter or use a plain wall. A green screen helps streaming; see green screens.
7. Improve Audio Too
Audio quality matters as much as video. Use a headset or microphone close to your mouth; see USB microphones.
8. Upgrade Only If Needed
If these steps do not help, look at a better webcam: webcams for low light or 4K webcams.
Walkthrough: Get the Exposure and Color Right
Most webcam software has manual controls even when automatic mode looks fine. Open the camera settings in your video app or the maker’s software and turn off auto exposure and auto white balance if the picture keeps changing as you move. Set exposure so your face is bright without clipping the highlights, then set white balance to match your light, usually between 4000 K and 5000 K for daylight-style lamps. If your skin looks orange, lower the temperature; if it looks blue, raise it.
Fixing a Backlit Image
If a window behind you makes your face dark, the simplest fix is to turn around so the window is in front of you. If that is not possible, close the blinds, use a lamp aimed at your face, or enable backlight compensation if the camera has it. A bright background forces the camera to underexpose your face.
Using Software Filters
Streaming software such as OBS Studio can add filters to the webcam image, including color correction, sharpening and noise suppression. Use small adjustments, because heavy processing looks unnatural. The virtual camera feature lets you send the improved image to meeting apps.
Check Bandwidth and Cables
A webcam needs a good USB connection. Plug it directly into a USB 3 port on the computer, not into a hub, and use the cable that came with it. Low bandwidth can cause lower frame rates or reduced quality.
Audio and Video Sync
If your voice does not match your mouth, check that the same device handles audio and video, or adjust the audio delay in your streaming software. A separate USB microphone often improves sound more than any webcam setting.
A Fast Troubleshooting Checklist
- Image grainy: add light and lower the gain.
- Image soft: clean the lens and check focus.
- Colors odd: set white balance manually.
- Frame rate drops: use a USB 3 port and close other video programs.
- Face too dark: face the light source.
If you decide to upgrade, see our webcam buying guide and best webcams.
Understanding Why a Webcam Image Looks Poor
Webcams use small sensors and small lenses, so they depend heavily on the light that reaches them. Most complaints trace back to a short list of causes, and knowing which one you have makes the fix quicker. Grain, softness, odd color and a flat look each point somewhere different.
Grain, which looks like colored speckles, usually appears when the camera does not have enough light and boosts its sensitivity to compensate. A soft or smeared image can come from a dirty lens, focus hunting, or the app compressing the video. Strange skin tones often come from mixed light sources, such as a warm lamp and a cool window at the same time. A flat, washed-out picture may be caused by too much light from behind you or a screen glare.
Because the camera is often built into a laptop lid or sits on a monitor, its position and angle also affect how you appear. Looking up into a lens at a low angle is unflattering for almost anyone, regardless of resolution.
- Grain: add light in front of you.
- Softness: clean the lens, check focus and settings.
- Odd color: use one type of light and set white balance.
- Flat look: reduce backlight and glare.
Spend a few minutes identifying the problem before buying anything. Resolution numbers on a box do not fix a poorly lit room.
Building a Simple Lighting Setup
Good lighting is the single most useful change, and it does not need specialist equipment. The goal is soft, even light on your face from the front or slightly to the side, with no strong light source behind you.
A window is a fine starting point. Face it, or sit at an angle to it, so daylight falls on your face. Daylight changes through the day, so the picture may shift in color and brightness. If that bothers you, close the blinds partly and use a lamp for consistency.
A desk lamp can work well if you point it at a wall or ceiling behind the screen, so the light bounces and softens before it reaches you. A bare bulb aimed straight at your face creates harsh shadows. If a lamp is too bright, a sheet of paper or a diffuser over it can soften the light. Many dedicated video lights come with adjustable brightness and color temperature, which helps match them to the room.
- Light from the front, not from behind.
- Keep the lamp slightly above eye level.
- Use bulbs of the same color in the room where you can.
- Avoid overhead lights that cast shadows under your eyes.
Check the result on a test call or in the camera preview before an important meeting. Adjust until your face looks natural and no part is much brighter than another.
Positioning the Camera and Framing Yourself
Camera placement changes how you look more than most settings. Put the lens at or just above eye level and about an arm’s length away. A laptop on a stack of books, or a separate camera on a monitor mount, is often enough to get the angle right.
Frame yourself so your eyes sit roughly a third of the way down from the top of the picture, with a small amount of space above your head. Leave your shoulders in the frame. Sitting too close distorts features and makes the image feel crowded, while sitting too far away makes you small and hard to read.
If you use a monitor with the camera on top, look toward the lens when you want to appear to make eye contact. That feels unnatural at first, but you can place the meeting window near the camera so your eyes stay close to it while you read faces.
- Lens at eye level or slightly above.
- Head and shoulders in frame.
- Level the camera so the horizon is straight.
- Check what is visible behind you.
A stable mount matters too. A camera that wobbles when you type creates distracting movement for everyone on the call. A clamp or a heavier base helps. Check the mount type and thread options on the listing if you buy one.
App Settings That Quietly Reduce Quality
Even a good camera can look poor if the software limits it. Video call apps often compress the video to save bandwidth, and some switch to lower quality when the connection is weak or when many people are on the call. This is normal behaviour and not necessarily a fault with your camera.
Look through the video settings in your app for options such as HD video, low-light adjustment, touch up appearance and background effects. HD video may be off by default. Touch-up and virtual background features add processing, which can soften the picture or slow the computer, so test with them on and off.
Check that the app is using the camera you intend. Computers with a built-in camera and a separate USB camera sometimes choose the wrong one. Select the correct device in the app settings and confirm it in the preview.
Other programs can also hold the camera or use processing power. Close apps you are not using, especially other video or screen capture tools. If the picture stutters, a busy computer or a weak connection is a likely cause, so try a wired network connection when possible.
- Turn on the HD option if available.
- Choose the right camera in each app.
- Test effects on and off.
- Close other programs that use the camera.
If you change settings in the maker’s software, check that they are kept when you open a different app.


Ready to Buy? Start Here
If this guide helped you decide what to look for, these products are a place to start.
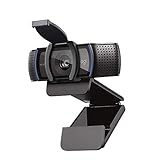

As an Amazon Associate we earn from qualifying purchases. Prices and availability are shown on Amazon.
A Ten-Minute Setup Routine Before Important Calls
Good video is mostly habit. A short routine before a meeting removes most of the common problems without buying anything.
- Wipe the lens gently with a soft cloth made for optics.
- Open the live camera view and check framing, brightness and background.
- Turn on a lamp or move toward a window so light falls on your face.
- Close the programs that use the camera or heavy processing.
- Confirm the right camera and microphone are chosen in the meeting app.
- Do a short recording and play it back for a quick check of sound and picture.
Repeat the steps for a week and they become automatic. The live view step is the most valuable because it shows what others will see, not what you imagine.
Posture, Distance and Framing Habits
Camera quality is often limited by where you sit. A camera too close distorts features, while one too far away makes you small and weakens detail. Aim for a comfortable distance where your head and shoulders fill the frame with some space above you. Keep your eyes near the top third of the picture and avoid sitting off to one side unless that is a deliberate choice.
Look at the camera lens occasionally rather than only at faces on the screen, which helps people feel you are looking at them. Place the video window of the meeting close to the camera so your gaze stays near the lens. Sit upright but relaxed, and avoid leaning into the camera, which changes the framing and the light on your face.
Light Sources and Their Effects
| Light source | Effect on your image | Tip |
|---|---|---|
| Window in front | Soft, even and natural | Best when direct sun is softened by a curtain |
| Window behind | Dark face, bright background | Turn around or add a lamp in front |
| Ceiling light only | Shadows under eyes and nose | Add a lamp at face height |
| Desk lamp to one side | Dramatic, uneven | Bounce it off a wall for softness |
| Ring or panel light | Even light, may show in glasses | Move slightly off axis |
Backgrounds That Help You Look Professional
A simple, tidy background keeps attention on you. Remove clutter within the frame, avoid busy patterns, and keep a little distance between you and the wall so that your shadow does not fall on it. A plant, a bookshelf or a plain wall with soft light can all work well. Check for items that might be distracting, such as washing or open doors, and avoid anything personal you would rather not share.
Virtual backgrounds and blur effects can be convenient, but they depend on software and can produce odd edges around hair and hands. If you use them, test the effect with the clothes you plan to wear and keep a plain solid color behind you for better results.
Fixing Choppy or Soft Video
If the picture looks soft or stutters, work through the usual causes in order. Check the lens, then the lighting, since dim rooms force cameras to reduce frame rate and add noise. Confirm that the meeting app is set to the quality you expect and that the camera is plugged into a suitable port. Close other programs, and check whether your internet connection is stable. If your meeting software compresses video heavily, some softness is outside your control.
- Try a different port or a shorter cable.
- Close and reopen the app and the camera after changing settings.
- Update the camera software and drivers following the maker instructions.
- Check for background updates that might slow the computer.
When a Better Camera Is Worth It
If you have improved the lighting, cleaned the lens, raised the camera and tidied the background, and the image still falls short, a new camera may be a fair step. Look for a model that suits your computer, offers settings you can control, and has a good record of support from the maker. A camera is a small part of the overall picture, but it is a good place to spend once the basics are in place.
Wardrobe and Appearance Choices on Camera
What you wear affects how the camera handles the image. Very bright white can force the camera to darken everything, while very dark clothing can merge with a dark background. Medium tones usually look balanced. Fine stripes and tight patterns can produce a shimmering effect on some cameras, so solid colors are a safer choice for important calls. Glasses can reflect screens; tilting them slightly or lowering the monitor brightness can help.
Think about the colors of your background too. A wall that matches your clothing can make you seem to blend in, so aim for some contrast. A bit of extra care here costs nothing and often improves the image more than a settings change.
Keeping Settings Consistent Over Time
Once you find a setup that looks good, protect it. Note where the lamp sits, how high the camera is and which settings you chose. Mark the position of the camera with a small piece of tape on the desk or monitor so that it returns to the same place after you move it. If your software allows saved profiles, create one for daytime and one for evening. Check the picture again after software updates, since they can change defaults. A written note of your preferred settings makes recovery quick if the computer is reset.
Reading This Guide With Your Own Setup in Mind
This extended section grows out of the original guide on how to improve webcam quality, and it is written to be used rather than merely read. Keep your own equipment, your own room, and your most common listening or working situation in mind as you go through it, and test each suggestion against the picks and criteria already covered above. The most valuable outcome is not a longer list of things to buy; it is a clearer understanding of which problem you are solving, which of the options already discussed solves it, and which habits will make any of those options perform at their best in your home.
Going Deeper: Light, Exposure and Colour
Finally, remember that viewers judge the whole impression, not individual specifications. A calm background, even light, a clear voice, and a speaker who looks toward the camera and listens visibly will outperform a technically superior picture undermined by clutter, echo, and distraction every time. Work through the elements in that order of impact, verify each with a short recording, and your calls will feel noticeably more professional long before any hardware upgrade enters the picture.
Colour of clothing and background interact in ways worth a moment of thought. Very bright tops can pull exposure away from your face, busy patterns shimmer on compressed video, and a background colour close to your clothing colour makes you blend into the wall. Solid, mid tone clothing against a contrasting, calm background reads clearly on almost any camera and connection. Keep one reliable call outfit combination in mind for important days and you remove a whole set of variables from your morning.
Background management is about removing distractions rather than performing perfection. A plain wall, a tidy shelf, or a curtain all work well. What fails is a bright doorway where people walk past, a window with moving traffic, or clutter at the edge of the frame that draws the eye. Turn around and look at what the camera sees, not what you see from your chair. Removing one distracting object usually improves the picture more than adding any decorative item ever will.
Light direction matters more than light quantity, and this is the single most useful idea in webcam improvement. A bright window behind you turns your face into a silhouette no matter how good the camera is, while a modest light in front of you, slightly above eye level and angled down gently, produces a flattering and clear image. If you can change only one thing before an important call, change where the light comes from. Move yourself or the light so your face is the brightest thing the camera sees.
A Reliable Routine for Important Calls
Seasonal light changes catch many home workers out twice a year. A desk arranged for bright summer mornings can become a cave of gloom on winter afternoons, and the camera that looked excellent in June can look tired in November without anything being broken. When the clocks change, repeat your basic checks: preview the picture at the times of day you actually take calls, adjust lamp position or brightness, and confirm the white balance still settles on natural skin tones. Ten minutes of seasonal maintenance keeps your on camera presence consistent all year.
Households that share a workspace need a reset ritual more than they need better hardware. Agree on a standard position for the camera and chair, keep the lens cloth in a fixed place, and leave a short note of the settings that produce a good picture. When each person returns the setup to the agreed standard after use, the next person starts from a known good state instead of troubleshooting someone else’s adjustments. Most shared desk camera complaints disappear within a week of adopting this simple courtesy.
Presenters and teachers who share screens or demonstrate objects need a slightly different setup from conversational callers. Check that your camera stays focused when you hold an item up, that your lighting still reaches you when you lean toward the screen, and that your background does not compete with shared content. Practise the exact movements your presentation requires while watching the preview. Movements that feel small from your chair can carry your face out of frame or into shadow on camera, and it is far better to discover that in rehearsal than in front of an audience.
When you record or present to larger audiences, rehearse transitions as well as content. Moving from your face to a shared screen, to a document camera view, or to a demonstration changes lighting and focus demands instantly. Practise each transition while watching the preview so you know where to sit, where to hold materials, and when to pause for focus to settle. Audiences experience clumsy transitions as unprofessional even when the content is strong, while smooth transitions make modest equipment look deliberate and polished.
Troubleshooting Picture and Sound Problems
Network and bandwidth problems disguise themselves as camera problems. A picture that freezes, smears, or drops to a blur during calls but looks sharp in a local preview is usually a connection issue rather than a camera fault. Close heavy uploads and cloud sync during important calls, prefer a wired connection when you can, and lower the sending resolution if your connection struggles, because a stable modest picture looks far more professional than an ambitious one that keeps collapsing in front of your audience.
Privacy habits deserve the same deliberate design as picture quality. A physical cover, an indicator light you trust, and a routine of closing the cover when the working day ends protect you from the classic accident of joining a call before you are ready. Position the camera so that even an accidental activation shows a tidy, unrevealing background. These habits cost nothing and remove an entire category of embarrassment and risk, which is why experienced remote workers treat them as part of the setup rather than an optional extra.
Framing is a communication choice, not just a technical one. Leave a little headroom, keep your eyes roughly a third of the way down from the top of the frame, and sit far enough back that your shoulders and some natural gesture are visible. Sitting too close exaggerates every movement and makes viewers uncomfortable without knowing why. If your desk forces you close to the camera, a slightly wider view or a repositioned monitor can restore comfortable distance without any new hardware at all.
Two camera households, such as a laptop camera plus a separate camera, need a clear default and a clear reason to switch. Decide which camera serves everyday calls and set it as the default everywhere, then reserve the other for the specific situations where it genuinely helps. Confusion at the start of a call, with an app selecting the wrong camera and the wrong microphone in combination, is one of the most common remote work fumbles, and it is entirely prevented by deciding your defaults calmly in advance.
Common Mistakes That Make Good Cameras Look Bad
Glasses wearers have a specific set of tricks available. Angle the light slightly to the side rather than straight on, tilt your frames a fraction downward, and raise the light a little higher so reflections bounce away from the lens. If reflections persist, moving the light further from the camera axis usually helps more than dimming it. Test with your actual call lighting, because a fix that works in daylight may fail completely under your evening lamp.
Your chair and desk height influence the picture more than most camera settings do. If you sit low, the camera looks up at you; if the desk is high, the laptop screen tilts and the framing crops your forehead. Small props are legitimate tools here: a stack of books under a laptop, a cushion that raises your sitting position, or a monitor arm that places the camera correctly all count as real improvements. Judge the result in the preview, not by how the arrangement looks from across the room.
Audio carries more of your professional impression than video does, which surprises many people. Viewers forgive a soft picture quickly but abandon muffled or echoing speech. Keep the microphone reasonably close, reduce hard reflective surfaces near your speaking position where you can, and always listen to a short recording of yourself before assuming you sound fine. If you improve only one thing after your lighting, improve the clarity and consistency of your voice.
Software settings deserve a scheduled review because updates change them silently. Resolution, frame rate, automatic exposure, automatic white balance, and low light compensation all live in different places depending on the app and the camera software. After any major update, open your preview and confirm the picture still looks the way you set it up. Keep a short note of the settings that work for you. That note turns a mysterious bad camera day into a two minute restoration job.
Extended Questions Worth Asking Before You Decide
Colour temperature consistency keeps you looking natural. When a warm lamp, cool daylight from a window, and a ceiling light all mix on your face, automatic white balance hunts between them and your skin tone shifts during the call. Simplify the mix: either commit to daylight by turning room lights off, or close the blinds and commit to your lamps. One consistent light source family lets the camera settle, and a settled camera produces a stable, professional looking image that does not distract the people watching you.
Exposure and gain explain most grainy images. In dim light the camera raises gain to brighten the picture, and gain brings noise with it. Adding light lets the camera lower gain, which cleans the image far more effectively than any software noise reduction. If your picture looks speckled, the honest fix is almost always more light on your face rather than a new camera. Test this in the evening with your normal room lighting, because that is when the weakness shows itself most clearly.
Recording yourself for asynchronous updates, lessons, or applications follows the same principles as live calls with one addition: you can review and redo. Record a short test, watch it fully rather than sampling the start, and check framing, light, and voice together. Small faults you tolerate live become permanent in a recording that people may watch repeatedly. The good news is that one careful setup session serves dozens of recordings, so the time invested in getting the test right is repaid every time you press record afterwards.
A repeatable pre-call routine protects you on the days when you are rushed. Open your camera preview, check framing, glance at the background, wipe the lens, and confirm the microphone selection. That sequence takes under a minute once it becomes habit. Keep any small items you use, such as a lens cloth or a sticky note to cover an indicator, in one fixed place near the computer. The goal is a setup that returns to a known good state quickly, even after someone else has used the desk or an update has changed a default.
Going Deeper: Light, Exposure and Colour
Test your setup under your worst realistic conditions, not your best. If you take evening calls under a single warm lamp, that is the condition to optimise for, even if the morning picture by the window looks wonderful. Many people tune their camera in bright daylight and then wonder why their most important evening meetings look poor. Deliberately rehearse the hard case: close the blinds, switch on the lamps you actually use at night, and adjust until that picture is good. A setup that survives the worst case handles every easier case automatically.
Dual monitor and laptop arrangements create a subtle eye line problem worth solving deliberately. If your camera sits on one screen while your meeting window lives on another, you will appear to stare off to the side for the entire call. Drag the meeting window to the screen that carries the camera during important conversations, or position the camera as close as possible to where faces appear on your screen. Eye contact is mostly geometry, and this small rearrangement improves how attentive and engaged you appear more than any resolution increase.
More Questions Answered in Depth
Why does my picture look good in the preview but poor on calls?
The preview shows what the camera produces locally, while a call also passes through network limits and the app compression. If the local picture is sharp and the call picture is not, focus on your connection, on other traffic in the household, and on the resolution the app is sending. Testing at a quieter time of day quickly shows whether the connection is the limiting factor rather than the camera itself.
How often should I revisit my setup once it looks good?
Glance at the preview before important calls and do a fuller check after any major software update, a desk move, or a change of lighting such as new curtains or a moved lamp. Seasons change daylight noticeably, so a setup tuned in summer may need a small adjustment in winter. A short written note of your working settings makes each of these checks a matter of minutes.
Putting the Whole Picture Together
Keep a photograph of your finished setup on your phone, taken from the camera position, so you can see exactly what callers see and restore the arrangement after cleaning or visitors. That single image settles arguments about where the lamp stood and how high the camera sat. When something about your picture drifts over time, compare the live preview with the photograph and change the one thing that differs. This habit turns a vague sense that something looks off into a precise, quick correction you can make between meetings.
Budget your improvement efforts across a month rather than a single shopping trip. Week one belongs to position and light, week two to settings and software defaults, week three to audio clarity, and week four to reviewing recordings of yourself and refining the details. This pacing lets you feel the effect of each change in real calls and prevents the common pattern of changing everything at once, feeling briefly impressed, and never learning which change actually mattered. Your colleagues will notice a steady improvement in how you come across, even if they cannot name why.
If you manage technology for a small team, write the webcam standard down as a one page checklist and share it before people buy anything. Agreed camera height, lighting direction, background expectations, and a test recording step will lift the whole team’s presence more than individual expensive cameras scattered across different setups. Consistency also makes support easy, because everyone troubleshoots from the same known starting point. The checklist in this guide and the notes above give you everything needed to write that page in an afternoon.
Remember that confidence is visible on camera. Sitting upright, looking toward the lens when you make an important point, and pausing instead of filling silence all read as professional through almost any camera. Technical quality supports that presence but cannot replace it. Practise one important call setup until the technology side becomes automatic, and your attention is freed for the conversation itself, which is the entire reason the camera exists in the first place.
One last habit separates people whose calls always look polished from people who scramble: a thirty second reset at the end of the day. Return the camera to its agreed position, coil the cable the same way, leave the lens cloth in its place, and close the privacy cover. Tomorrow’s first call then starts from a known good state instead of from whatever yesterday’s last adjustment left behind. Small closing rituals like this are unglamorous, and they are exactly why some home setups feel effortless while others feel like a recurring argument with the furniture.
A Note on Consistency Across the Week
Treat Monday’s first call as your weekly audit. If the picture, the framing, and your voice all pass that unplanned inspection, the setup is doing its job and deserves to be left alone. If something has drifted, fix it in the calm before the week accelerates rather than during Friday’s important presentation. A setup audited weekly in this low key way almost never produces a public failure, because small drifts are caught while they are still small, private, and cheap to correct.
Frequently Asked Questions
Why is my webcam grainy?
Usually low light. Add light in front of you.
Why is my webcam blurry?
A dirty lens, autofocus problems or low resolution settings.
Do I need a new webcam?
Not always. Lighting and settings fix most problems.
Does a higher resolution always mean a better picture?
No. Lighting, lens quality, sensor size and app compression all affect the result. A well-lit lower-resolution image can look better than a dim higher-resolution one.
Why does my webcam look different in different apps?
Each app applies its own compression, resolution limits and effects. Settings saved in the maker's software may also not carry across. Check the video settings in each app.
Can a ring light help?
It can add even front light, which helps in dim rooms. Position and brightness matter, and a very bright ring close to the face can cause glare, especially on glasses.
How do I reduce glare on my glasses?
Move the light source higher or to the side, soften it and tilt the screen slightly. Avoid light pointed straight at your face from the screen height.
Is a separate webcam better than a laptop camera?
Often a separate camera offers more positioning freedom and may include better lenses, but results vary by model. Check the listing and make sure your lighting is good first.
Why is the image delayed or choppy?
A weak connection, a busy computer or a low-bandwidth USB port can cause it. Close other programs, use a direct USB port and test with a wired network if possible.
Should I use a virtual background?
It is fine if you need privacy, but edges can look rough, especially in poor light. A tidy real background is often cleaner.
Bottom Line
Light your face, raise the camera, clean the lens and check settings before you spend money. See our webcam buying guide if you do want to upgrade.
Related Reading
- 720p vs 1080p vs 4K Webcams: Which Resolution Do You Need?
- 6 Best OBSBOT and Insta360 Webcams: AI Tracking 4K
- 5 Best Webcams for Mac and MacBook: 1080p and 4K
More Webcam Guides
- Best Webcams
- Best Webcams for Zoom
- Best Webcams for Streaming
- Best 4K Webcams
- Best Webcams Under $50
- Best Cheap Webcams
- Best Webcams with Ring Light
- Best PTZ Webcams
- Best Windows Hello Webcams
- Best Conference Room Webcams
- Best Wide-Angle Webcams
- Best Logitech Webcams
- All webcam guides