Disclosure: As an Amazon Associate, reviewstook.com earns from qualifying purchases. Links to Amazon on this page are affiliate links; they cost you nothing extra.
Webcam resolution is easy to compare on a box, but harder to judge in real use. A higher number is not always better, because your connection, your app and your lighting limit what you actually see. This guide explains when each resolution makes sense.
This comparison draws on general video knowledge and product information, not our own testing.
By the Reviewstook Editorial Team. Last updated: October 31, 2026.

720p
720p (1280 by 720) is sufficient for basic video calls on small windows. It uses less bandwidth and works on slow connections. It looks soft on large screens.
In this guide
1080p
1080p (1920 by 1080) is the sweet spot. It looks sharp for calls and streaming and is supported by most apps. Most people should buy 1080p. See our best webcams.
4K
4K (3840 by 2160) captures four times the pixels of 1080p. It helps if you crop, zoom digitally, record content or stream in high quality. Many apps and connections limit video to 1080p, so you may not see the benefit in calls. See 4K webcams.
What Matters More Than Resolution
Sensor size, lens quality, lighting and compression often matter more. A good 1080p webcam in good light can look better than a cheap 4K webcam in a dim room.
Bandwidth and Apps
Video apps compress video heavily and may not use full resolution. Streaming software can use more. Check your upload speed.
Which to Choose
- Casual calls: 720p or 1080p.
- Work calls and meetings: 1080p.
- Streaming and recording: 1080p at 60 fps or 4K.
Why Pixels Are Not the Whole Story
Resolution counts pixels, but image quality also depends on the sensor, the lens, the processing and the compression. A webcam with a tiny sensor produces noisy video in a dim room whether it has 1080p or 4K. A better lens keeps the picture sharp across the frame instead of only at the center. Processing decides how well the camera balances a bright window and a dark face. This is why a good 1080p webcam can look better than a cheap 4K one.
Compression and Bandwidth
Video calls compress video heavily. Most meeting apps cap what they send, and many default to 720p or 1080p to protect weak connections and save computing power. A 4K webcam may be downscaled before your colleagues see it. The apps differ and change settings over time, so check the video settings in the app you use. For recording and streaming, you control the settings, and 4K needs much more bandwidth and storage.
Frame Rate and Low Light
Frame rate measures how many pictures per second the camera records. 30 fps is standard for calls and 60 fps looks smoother for streaming and motion. In low light, webcams often reduce frame rate to collect more light per frame, which makes video look choppy. A larger sensor and a wider aperture help. Good lighting in front of you is the cheapest fix; see lighting for webcams.
Digital Zoom and Cropping
One real benefit of 4K is cropping. You can crop a 4K image to a 1080p frame and keep detail, which allows digital zoom, auto framing and following you as you move. If you use these features, 4K is useful even when the output is 1080p.
How to Test Your Webcam
- Record a short clip in your usual lighting, in the app you use for calls.
- Compare faces, text on a held document and the background.
- Look at noise in dark areas and how the camera handles a bright window.
- Check autofocus when you lean in or hold up an object.
Which Resolution Fits You
- Basic calls: 720p works, 1080p is better. See webcams under $50.
- Daily meetings: 1080p with good light. See best webcams.
- Streaming and recording: 1080p at 60 fps, or 4K if you need cropping. See 4K webcams and webcams for streaming.
Lighting and Camera Position
If you can only improve one thing about how you look on camera, improve the light. A webcam sensor is small, and it needs a lot of light to produce clean, detailed video. When a room is dim, the camera raises its sensitivity, and that adds visible noise, smears fine detail and often softens the picture more than the jump between resolution tiers ever would. A soft light source in front of you, such as a window you face or a lamp placed behind the monitor, will do more for image quality than a more expensive camera.
Avoid sitting with a bright window or lamp behind you. The camera will expose for the bright background and leave your face dark, and no resolution fixes that. Side lighting from a window can look pleasant, but it may leave one side of your face in shadow. If your light changes over the day, close blinds or add a lamp to keep the exposure steady.
Position matters too. Place the camera at or slightly above eye level, since a low angle exaggerates the chin and makes the ceiling the main background. Keep the camera centered on the monitor you look at most, so you appear to face the audience. Leave a little headroom in the frame, and make sure the lens is clean, because a smudge creates a hazy look that people mistake for a poor sensor.
Finally, check your background for clutter and bright light sources such as lamps in frame, which can confuse automatic exposure.
Field of View and Autofocus
Resolution tells you how many pixels there are, but field of view tells you how much of the scene they cover. A wide field of view fits more of the room, which is useful for a group at a desk or a small meeting room, but it spreads the same pixels over a larger area and can make your face smaller in the frame. A narrower view keeps your face larger and the background tighter, which many people prefer for solo calls. Check the listing for the field of view and whether the camera lets you change it in software.
Autofocus is another detail that matters more than pixels. A fixed-focus camera is simpler and can look fine at a typical desk distance, but it may blur if you lean in or hold an object up to the lens. An autofocus camera adjusts, but it may hunt back and forth in poor light or when you move quickly. Reading the product description and user comments about focus behavior is worthwhile, and the camera’s app may offer manual focus or a lock.
Lens quality affects sharpness at the edges, and wide lenses can show distortion at the corners. If you plan to use digital zoom, a sharp lens preserves detail when you crop.
Think about your usage. For a single person at a desk, a moderate field of view and reliable focus are usually enough. For a group, a wide view is valuable, even if it means a larger resolution is needed to keep faces clear.
Connections and Compatibility
A webcam can only send as much video as its connection allows. Most plug into a USB port, and the port type and version affect what is possible, especially at higher resolutions and frame rates. Some cameras compress video inside the camera to fit through the cable, and that can reduce quality. If a listing mentions a specific USB requirement, make sure your computer has a matching port, and avoid unpowered hubs and long extension cables, which can cause dropouts.
Check compatibility with your operating system and apps. Many webcams work as plug-and-play devices, but features such as autofocus tuning, field of view settings or tracking may need a maker’s app, and the app may not be available for every system. If you use a laptop with limited ports, count the ports you have before you buy.
Also look at the mounting. A clip that fits a thin laptop screen may not fit a thick monitor, and a tripod thread gives you more flexibility for positioning. Cable length matters if the computer sits far from where you want the camera.
Finally, check whether the camera includes a microphone, and whether you will use it. Built-in microphones vary, and many people use a headset or separate microphone. Do not choose a webcam for its audio unless the listing and comments suggest it is good enough for your use.
Privacy and Security Features
A webcam is a window into your home or office, so privacy features are worth attention. A physical shutter or cover that slides over the lens gives clear assurance that the camera is off, and many people prefer that to relying on software alone. Some cameras have a light that shows when they are active. Check whether the light is hardware-driven, and read the maker’s description of how it works.
Software settings also play a role. Review which apps have permission to use the camera in your operating system, and revoke access for programs that do not need it. Keep drivers and firmware updated through the maker’s official channels, and avoid downloading tools from unknown sources.
If you use the camera for work, understand your organization’s policies on recording and background images. Blur and virtual background features can hide a messy room, but they may use processing power, and some do better with a well-lit scene.
When you are not using the camera, unplug it or cover the lens. If you share a computer with others, think about who can access the camera, and use account separation where possible. These steps cost little and make you less dependent on trust in any single setting.
When an Upgrade Makes Sense
Many people upgrade a webcam when the problem lies elsewhere. Before spending money, try the simple fixes: more light in front of you, a cleaner lens, a better camera angle, a closer app setting and a stable USB connection. If your video still looks poor after those changes, then look at the camera itself.
Signs that it is time to replace a webcam include persistent noise even in good light, focus that cannot hold on your face, color that looks washed out or tinted, frequent dropouts or a lens that has been scratched or damaged. Another sign is that your needs have changed: you now stream or record, or work from a bigger desk where the old field of view no longer works.
When comparing budget levels, think in qualitative terms. Entry-level models give acceptable video for casual calls in good light. Mid-range models usually add better sensors, faster autofocus and better software control. Higher-end models add features such as wider fields of view, tracking, advanced processing or higher-resolution recording. Pay for the features you will use, not the ones that merely sound impressive.
Finally, read the return policy and warranty, so you can test the camera in your real setup. A product that looks good on a spec sheet may behave differently in your room, and a flexible return window gives you room to check.
Why Resolution Is Only One Part of Webcam Picture Quality
It is easy to treat the number on the box as the whole story, yet two webcams with the same resolution can look very different on a video call. The sensor size, the lens, the way the camera handles low light and the software processing all shape the image. A well-made 1080p camera often looks cleaner than a poor 4K one, and the video app you use may compress the picture anyway. Think of resolution as a ceiling rather than a promise.
- Sensor and lens quality: Larger sensors and better glass capture more light and detail.
- Low-light behavior: Many home offices are dim, and this is where cameras differ the most.
- Autofocus and exposure: Smooth adjustments keep your face sharp and evenly lit.
- Frame rate: Smoother motion needs a higher frame rate, which some cameras reduce at higher resolutions.
- Field of view: A wider view fits more of the room, while a narrower view keeps focus on you.
- Software controls: Apps from the maker may let you adjust brightness, color and cropping.
Look at sample footage rather than relying on the label, and check which resolutions work with the apps you use.
Matching Resolution to What You Actually Do on Camera
The right level depends on your daily use. Work calls, streaming, lessons and content creation all place different demands on a camera and on your internet connection. The table summarizes common situations.
| Use | Resolution that often suffices | Why |
|---|---|---|
| Casual video chats | 720p | Fine for small windows and slower connections |
| Daily work meetings | 1080p | Clear detail for faces and shared screens in most apps |
| Streaming and recording | 1080p at a good frame rate | Smooth motion matters as much as pixels |
| Content creation with cropping | 4K | Extra pixels leave room to crop or reframe |
| Teaching or demonstrations | 1080p or higher with autofocus | Clear view of objects held up to the camera |
Many conferencing services limit video quality, so a higher resolution may not show up on the other side of the call.
Bandwidth, Computer Load and Cables
Higher resolution means more data. A 4K stream needs a stronger connection and a capable computer, and an older laptop may struggle or heat up. Check the USB standard on the webcam and on your computer, since a camera that needs a faster port will not perform properly on an older one. Use the cable supplied by the maker or one of the stated type, and try a port on the computer itself rather than a crowded hub.
- Check the minimum system requirements on the webcam page.
- Confirm that your video apps support the resolutions you want.
- Test the camera in your normal conference app before an important call.
- Lower the resolution if your connection stutters.
Lighting and Placement Beat Pixel Counts
A simple lamp placed in front of you, a clean lens and a camera at eye level often improve the picture more than a resolution upgrade. Avoid sitting with a bright window behind you, and keep the background tidy.
Built-In Laptop Cameras Versus an External Webcam
Many laptops include a camera, and for casual calls it may be enough. External webcams usually offer better optics, flexible placement and extra features such as autofocus and privacy shutters. The placement is often the biggest difference: a laptop camera sits low, which gives an unflattering angle, while an external camera can be set at eye level on top of a monitor. Consider upgrading when you have regular calls or record content.
- Angle and height: Position the lens at eye level for a natural look.
- Privacy shutter: A cover gives peace of mind when the camera is idle.
- Microphone quality: Built-in webcam microphones vary, and a separate microphone may sound clearer.
- Mounting options: Clips, tripod threads and monitor mounts add flexibility.
- Driver and software support: Check that your operating system is supported.
- Portability: Some webcams fold flat for travel.
Test the camera in your usual lighting and adjust the settings before an important call.


Ready to Buy? Start Here
If this guide helped you decide what to look for, these products are a place to start.

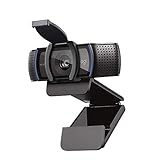
As an Amazon Associate we earn from qualifying purchases. Prices and availability are shown on Amazon.
Resolution Decisions in the Wild: Four Rooms, Four Answers
Abstract comparisons become clear when you walk them through real rooms. Consider the home office with a north-facing window and daily team calls: the light is kind, the audience sees a modest tile, and 1080p is not a compromise but the correct tool — sharp, undemanding of bandwidth, and flattering. Adding 4K to that room buys cropping headroom its owner will never use. The same money spent on a lamp for winter afternoons improves every call the room hosts.
Now the evening teacher, working under household bulbs, moving between face view and a desk demonstration. Here the contest is not resolution at all but light gathering and the ability to crop without collapse — a case where a higher-resolution camera earns its place for the digital zoom alone, provided its low-light behavior is strong. And the family caller, squeezing three generations onto one laptop for a weekly call, needs width more than pixels: field of view decides whether grandmother sees everyone, and 1080p spread across that wide frame is entirely sufficient for the tile sizes involved.
The pattern across these rooms is the real conclusion of the comparison. Resolution is a budget of detail to be spent where your situation needs it — on cropping, on recording, on large displays — and wasted where it does not. Decide which room is yours, and the numbers in this comparison stop being a league table and become a simple matching exercise between your conditions and the tier built for them.
Test Before You Judge: A Fair Way to Compare Any Two Cameras
Comparisons between webcam resolution go wrong when each candidate is tested under different conditions. A fair test holds everything constant except the camera itself. Use the same seat, the same lighting, the same application and the same time of day, and record a short clip with each camera rather than relying on the live preview, which flatters whatever is currently connected. Speak at your normal volume, move your head the way you do in conversation, and include a moment of looking down at notes, because autofocus and exposure behavior during movement is where cameras genuinely differ.
Judge the recordings in a deliberate order. First, the face: is exposure balanced, or are you too dark against the room or washed out by a window? Second, detail: can you read the texture of clothing and the edges of glasses without harsh sharpening artifacts? Third, color: does skin look like skin, and do familiar objects — a book cover, a plant — hold their real colors? Fourth, sound, listened to on headphones: clarity at your normal distance, and how much room and background the microphone admits. Write two or three sentences per camera while the impressions are fresh; memory of picture quality fades remarkably fast.
Include the conditions you actually struggle with, not just the easy ones. If your difficult calls happen in the evening, test in the evening. If you present standing up, test standing, at your presenting distance. If a partner or colleague sometimes joins you in frame, test with two chairs occupied. A camera that wins in perfect midday light but collapses in your real conditions is the wrong winner, and discovering that during a structured test is far cheaper than discovering it during an important call.
End the test by considering the whole ownership picture: how the camera mounts on your screen, whether its cable reaches comfortably, whether its software behaves on your system, and how its controls fit your habits. The best choice among webcam resolution is rarely the one with the longest specification list; it is the one whose picture, sound and daily handling suit your room and routine. A structured hour of testing tells you which one that is, and the notes you keep will still be useful when you next upgrade.
Sound and the Room: Why Audio Decides How Professional You Seem
Viewers forgive a soft picture far more readily than poor sound, so the audio side of webcam resolution deserves the same care as the image. Start with distance. A microphone hears your voice relative to everything else in the room, so halving the distance between you and the microphone does more for clarity than any noise-reduction toggle. If you rely on a camera microphone, that argues for sitting at a normal desk distance rather than leaning back, and for keeping the camera — and therefore its microphone — in front of you rather than off to the side where your voice arrives off-axis.
Rooms add their own signature. Hard floors, bare walls and a desk against a corner reflect sound back into the microphone as a hollow, echoing quality that listeners describe as sounding distant or cheap. You do not need studio treatment to tame it. A rug, curtains, a bookcase or even a cushion on the desk absorbs reflections, and simply moving away from a corner into the middle of a wall often helps. Test honestly: record a short clip in your usual seat, then another with a couple of soft furnishings added, and listen on headphones. The difference is usually obvious within seconds.
Background noise is a separate problem from echo, and it needs a different response. Steady sounds such as fans and traffic are the easiest for software noise suppression to remove, while irregular sounds — a dog, a doorbell, keyboard clatter — slip through. Positioning helps here too: a microphone close to your mouth can run at lower gain, which means it picks up less of the room. If your setup allows a separate microphone or a headset for important calls, keep that option ready rather than treating the built-in microphone as the only choice for every situation.
Build a thirty-second sound check into your routine. Before an important call, record a few sentences at your normal speaking volume, play them back, and listen for the three common faults: echo, background noise and distortion from speaking too loudly or too close. Adjust one thing at a time — position first, then gain, then software suppression — so you learn which change actually fixed the problem. That habit, repeated a few times, teaches you more about how webcam resolution behave in your space than any amount of specification reading.
A Troubleshooting Routine That Starts With the Simplest Fix
When webcam resolution misbehave, the temptation is to change everything at once, which leaves you not knowing what fixed it — or what broke it further. Work instead in a fixed order, from the physical layer upward. First, the lens: a fingerprint or dust film softens any image, and a gentle wipe with a clean microfiber cloth costs nothing. Second, the connection: reseat the cable, try a different port, and remove an unpowered hub from the chain, because many intermittent faults are really power or bandwidth problems in disguise.
Third, check which application owns the camera. Only one program can usually use a camera at a time, and a forgotten browser tab or a second meeting app can hold it hostage, presenting as a black screen or a frozen frame in the app you actually want. Close rivals, then check the operating system’s privacy permissions, which can silently block an app after an update. Fourth, look at the app’s own settings: the correct camera selected, the resolution you expect, and any low-light or high-definition toggles in the state you intended.
If the picture is live but poor, separate light problems from bandwidth problems with one test: record a short local clip with your camera or recording software. If the local recording looks good while the live call looks bad, your camera is fine and the network or the meeting platform is compressing you — a wired connection, fewer competing devices, or a lower resolution that the platform handles more gracefully will help more than a new camera. If the local recording also looks poor, the problem is in your room: light, position or settings, in that order.
Keep a short note of what worked. Webcam faults repeat — after updates, after desk rearrangements, after a new monitor arrives — and a two-line record of the cause and the fix turns a frustrating half hour into a two-minute routine. Note also what did not help, so you skip dead ends next time. This calm, layered approach resolves the overwhelming majority of problems with webcam resolution without spending anything, and it tells you honestly when a fault really is hardware and a replacement is justified.
Working Through the Shortlist: A Step-by-Step Way to Narrow It Down
A shortlist like this one can feel harder to choose from than a single recommendation, because every pick is defensible for somebody. The way out is to decide in the right order, eliminating on the factors that cannot be changed later. Start with fit: does the product suit your computer, your screen, your room and the applications you use every day? A pick that fails on fit should leave the list immediately, however strong its other qualities, because you will fight that mismatch every time you use it.
Next, decide on the job. Write down the two or three things you actually do most — the calls, recordings, lessons or sessions that fill your week — and rank the picks by how directly their strengths, as described in the reviews above, serve those jobs. Ignore strengths aimed at uses you do not have. This step usually cuts a list of six or seven down to two or three without any agonizing, because most products are built with a clear primary audience in mind and the reviews above say plainly who each one suits.
Then weigh the trade-offs honestly. Every pick in this guide carries a noted limitation, and the right question is not which limitation sounds worst in the abstract but which one you will actually encounter. A limitation that appears in a situation you never face costs you nothing; a small limitation that appears in every session will annoy you for years. Match the limitation to your routine, not to your imagination, and be suspicious of choosing a product for an occasional use while accepting daily friction for it.
Finish with the practicalities: what you already own that the product must work with, how much setup effort you are willing to invest once, and whether the product’s controls and software fit the way you like to work. If two picks still tie after all this, choose the one whose strengths cover your most frequent use and whose limitation touches your rarest — and then stop second-guessing. Set it up carefully, run the tests described in this guide, and give it a week of real use before judging, because almost every setup improves once its position and settings are dialed in.
Lighting in Practice: Getting More From the Room You Already Have
Most people judge webcam resolution in whatever light happens to be in the room, and that is exactly why so many first impressions mislead. A camera that looks soft and noisy at night under a ceiling bulb can look clean and sharp at midday facing a window, without a single setting changed. Before you decide a camera is disappointing, test it in the best light you can reasonably give it: face the main light source rather than sitting with it behind you, move closer to that source if you can, and let the camera settle for a few seconds after you sit down, because exposure systems hunt briefly before they lock on.
The direction of light matters as much as the amount. Light coming from directly above carves shadows under the eyes and brow, which reads as tiredness on camera even when you feel fine. Light from the front, slightly above eye level and angled a little downward, fills those shadows and models the face gently. If your desk faces a wall, a lamp bounced off that wall gives a softer result than the same lamp pointed straight at you, because the wall becomes a larger, more diffuse source. Experiment with distance as well: moving a lamp a short distance further away and raising its brightness often looks better than a dim lamp close to your face.
Mixed light is the quiet troublemaker. A warm ceiling light plus cool daylight from a side window gives the camera two different colors to choose between, and automatic white balance tends to compromise in a way that flatters neither. The practical fix is to commit to one dominant source during calls: either close the blinds and work under your lamp, or switch the lamp off and use the window. Consistency also helps across a working day. If your most important calls happen at a set time, arrange your lighting for that time rather than for the brightest moment of the morning, because a setup that only works at noon is not really a setup.
Finally, remember that every participant sees a compressed version of you. Video apps reduce detail to save bandwidth, and they sacrifice shadow areas first, which is why a slightly brighter image than feels necessary on your own preview usually survives the journey better. Raise exposure a touch if your software allows it, keep your face the brightest thing in the frame, and avoid a bright window or lamp visible behind you, since the camera will expose for that hotspot and leave you in silhouette. Small, deliberate lighting habits like these improve webcam resolution more reliably than any single specification on a product page.
Position and Eye Line: The Ergonomics Behind a Natural Picture
Where the camera sits shapes how other people read you, and the rules are simple once you see them. The lens should be at eye level or a fraction above it, close to the screen you actually look at, so that your gaze lands near the camera when you glance at the faces in front of you. A camera perched low on a laptop base looks up at your chin and the ceiling; a camera placed far above looks down and makes you appear diminished. Neither is a fault of the camera itself, and both are fixed by raising or lowering the mount, not by buying a different model from the webcam resolution shortlist.
Distance completes the geometry. Sitting roughly an arm’s length from the lens gives a natural head-and-shoulders framing for one person and leaves room to gesture without leaving the frame. Too close, and wide lenses exaggerate the features nearest the camera; too far, and your face becomes a small part of a room picture, wasting the resolution you paid for. If your framing feels wrong, change your chair distance before you reach for digital zoom, because moving physically closer preserves detail that cropping throws away.
Think about the background as part of the position, not an afterthought. A camera at the right height pointed at a cluttered shelf still distracts, while the same camera angled slightly can move a doorway, a bright window or a moving household member out of frame. Sit in your call position and study the preview as a stranger would: what moves, what glows, what competes with your face? Small rotations of the camera or shifts of your chair often clean the frame more effectively than background-blur software, which can shimmer around hair and glasses.
Ergonomics matter because calls are long. If achieving a good angle means hunching toward a laptop or craning at a raised monitor, the setup will quietly degrade as you tire and slump, and your framing will drift with you. Arrange the desk so the comfortable posture and the good picture are the same posture: screen at a height that keeps your neck neutral, camera attached to that screen, chair supporting you upright. When the comfortable position is also the photogenic one, webcam resolution deliver their best results on the tenth call of the week, not just the first.
Care and Longevity: Making a Small Camera Last for Years
Webcams and their accessories fail quietly rather than dramatically: a hinge loosens, a cable frays at the connector, a lens gathers a film of dust. A little routine care keeps webcam resolution performing as they did on the first day. Clean the lens with a dry microfiber cloth, using a gentle circular motion and no household sprays, which can damage coatings. If the lens is very dirty, breathe on it lightly or use a cloth made for optics. Clean the body and mount at the same time, because dust on a clip becomes dust on the lens the next time you adjust it.
Cables deserve respect because they are the most common point of failure. Avoid sharp bends near the connector, do not let a chair wheel rest on a run of cable, and leave a little slack so that adjusting your monitor does not tug the camera. If your camera moves between rooms or travels in a bag, coil the cable loosely and use the privacy cover or a small pouch to protect the lens from keys and coins. A camera that lives on one desk, undisturbed, will usually outlast one that is packed and unpacked daily, so a second inexpensive unit for travel can be kinder than constantly moving your main one.
Software care matters too. Companion apps and firmware occasionally fix autofocus hunting, exposure quirks or compatibility with a new operating system, so check for updates when you set the camera up and again if behavior changes after a system update. At the same time, avoid installing utilities you do not need: every extra background app is another claimant for the camera and another possible source of conflicts. Keep the tools you genuinely use — framing, exposure or effects controls — and remove the rest.
Finally, store the camera sensibly when it leaves the desk for a while: lens cover closed, cable coiled, somewhere dry and out of direct sun, which can heat plastics and adhesives. When you return it to service, run the same quick checks you would give a new purchase — lens clean, mount firm, picture and sound recorded and reviewed. Treating webcam resolution as long-lived tools rather than disposable gadgets saves money and, just as importantly, saves the setup time you invested in getting the picture right.
Frequently Asked Questions
Is 4K worth it for video calls?
Usually not, because most apps limit resolution.
Does 1080p look good enough?
Yes, for most calls and streams.
Will 4K use more bandwidth?
Yes, if the app uses it.
Will a better light improve my webcam more than a new camera?
Often yes. Webcams have small sensors that depend on strong, even light, so a lamp or window in front of you can improve clarity, noise and color more than a resolution upgrade.
Where should I place my webcam?
At or slightly above eye level, centered on the screen you look at most. This gives a natural angle and keeps your eyes close to the lens.
Do I need a USB 3 port?
Check the listing. Some higher-resolution or higher-frame-rate modes need a specific USB version, and a poor connection can limit quality or cause dropouts.
Is a built-in laptop camera good enough?
For casual calls in good light it may be fine. An external camera usually offers a better sensor, a better position and more control.
Should I use my webcam's built-in microphone?
It works for convenience, but many people prefer a headset or separate microphone for clearer sound. Test it in your own room before relying on it.
What is a privacy shutter?
It is a physical cover that slides over the lens so the camera cannot see anything when closed. It gives a clear visual sign that the camera is not recording.
Can I use a phone as a webcam instead?
Some phones can work as webcams with the right app and cable or wireless setup. Check compatibility with your computer and apps before you depend on it.
Will I see the difference between 1080p and 4K on a laptop screen?
In a small call tile, barely; the platform’s compression and the tile size hide it. The difference appears when your image is shown large, recorded locally, or cropped. Judge resolution by the largest and most demanding way your picture is actually used, not by the preview on your own screen.
Does higher resolution always need more light?
Higher-resolution sensors pack smaller pixels, which can gather less light each, so the tendency is real — but sensor design matters more than the tendency. The practical rule stands: any camera looks better with more light, and a high-resolution camera in a dim room will not rescue itself with pixels. Light first, then resolution.
If my internet is slow, which resolution should I choose?
Choose the resolution your connection delivers steadily — for most home connections that is 1080p, and for struggling connections a stable 720p beats a stuttering higher mode. A camera that offers several modes lets you step down on bad days, which is worth more than a camera locked to an ambitious maximum.
Is 720p ever the right choice in 2026?
Yes, in narrow circumstances: very limited bandwidth, an older computer that struggles with more, or a secondary camera for a desk or document view where fine detail does not matter. As a main face camera for regular work it is now the floor rather than the target, but a floor has its uses.
Bottom Line
Buy 1080p for most uses and reserve 4K for recording or streaming where you can use it. See our webcam buying guide.
Related Reading
- 6 Best OBSBOT and Insta360 Webcams: AI Tracking 4K
- 6 Best Webcams for Low Light: Large Sensors and Lights
- 5 Best Webcams for Mac and MacBook: 1080p and 4K
More Webcam Guides
- Best Webcams
- Best Webcams for Zoom
- Best Webcams for Streaming
- Best 4K Webcams
- Best Webcams Under $50
- Best Cheap Webcams
- Best Webcams with Ring Light
- Best PTZ Webcams
- Best Windows Hello Webcams
- Best Conference Room Webcams
- Best Wide-Angle Webcams
- Best Logitech Webcams
- All webcam guides