A magnetic lens filter snaps onto a thin ring that stays on the lens, so swapping a polarizer for a neutral density filter takes a moment instead of several turns of a thread. Most systems are sold as kits that combine the ring, one or more filters and a magnetic cap.
The six products below range from a 49mm four-filter kit to an 82mm polarizer set, plus one adapter that turns existing screw-in filters into magnetic ones. Details come from each product’s listing page. We have not used these filters ourselves. Optical and coating claims are the makers’ own.
As an Amazon Associate we earn from qualifying purchases. Links below are affiliate links, and they do not change the product information we give.

What to Look For
| Feature | Why it matters |
|---|---|
| Thread size | The ring must match the lens thread, such as 49, 67, 77 or 82mm |
| Filter types | CPL reduces reflections; ND filters allow slower shutter speeds in bright light |
| Frame thickness | A slim frame helps avoid darkened corners on wide lenses |
| Caps and pouch | A magnetic cap and a pouch protect the glass in a bag |
| Adapter option | A ring pair can convert filters you already own |
In this guide
Specs at a Glance
| Kit | Thread size | In the box | Notes |
|---|---|---|---|
| K&F Concept 67mm | 67mm | CPL, ND8, ND64, ring, cap | Maker lists AGC optical glass with 28 coating layers |
| Kase Wolverine Revolution Plus | 77mm | CPL, ND8, ND64, ND1000, ring, cap, bag, tool | Colored frames identify each filter |
| Urth 4-in-1 Plus | 49mm | UV, CPL, ND8, ND1000, ring, 2 caps | Maker lists SCHOTT glass and a magnalium frame |
| Kase adapter ring kit | 77mm | Two magnetic rings | About 13 g; converts a screw-in filter |
| K&F Concept CPL, ND2-32 and diffusion | 82mm | CPL, variable ND, black diffusion 1/4, ring, cap, case | Variable ND with hard stops |
| K&F Concept CPL | 82mm | CPL, ring, cap | 5.3mm slim frame |
The 6 Best Magnetic Lens Filters
Top pickBest for a 67mm lens that needs a starter set
1. K&F Concept 67mm Magnetic Filter Kit
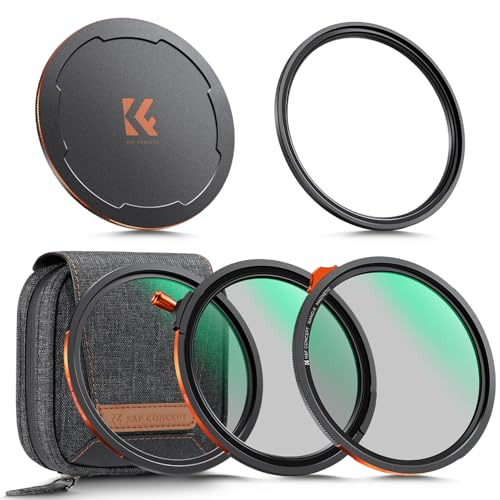
A five-piece kit for 67mm lenses with a CPL, an ND8 (3 stops) and an ND64 (6 stops), a magnetic basic ring and a lens cap. The maker lists Japanese AGC optical glass with 28 multi-layer coatings and describes a swap time of under one second.
Suits: a 67mm lens that needs a starter set. Strengths: a CPL plus two ND strengths. Weaknesses: only fits one thread size. Skip it if your lens is not 67mm.
View K and F CONCEPT 67mm Magnetic Filter CPL+ND8+ND64+Magnetic Basic Ring+Lens Cap on Amazon
Best for landscape and long exposure work
2. Kase 77mm Wolverine Revolution Plus Master Kit
A 77mm kit with a CPL, ND8, ND64 and ND1000, an inlaid adapter ring, a magnetic lens cap, a filter bag and a 3D tool. The maker describes tempered optical glass with nano coatings, a 0.1 percent reflectivity figure for the CPL, an ultra-slim ring that can stay on the lens and colored frames to identify each filter.
Suits: landscape and long exposure work. Strengths: four filters and color-coded frames. Weaknesses: fits only 77mm. Skip it if you only need a polarizer.
View Kase 77mm Wolverine Revolution Plus Master Magnetic Filters Kit on Amazon
Best for compact cameras and lenses with a 49mm thread
3. Urth 49mm 4-in-1 Magnetic Essentials Kit (Plus)
A small-lens kit with magnetic UV, CPL, ND8 and ND1000 filters, an adapter ring and two caps. The maker lists 20-layer nano-coated SCHOTT glass, a magnalium frame and an ultra-slim rim intended to avoid vignetting. The listing also shows a weight of 0.15 g, which cannot be right for a four-filter kit, so ignore that figure.
Suits: compact cameras and lenses with a 49mm thread. Strengths: four filters plus two caps. Weaknesses: a conflicting weight entry. Skip it if your lens uses a larger thread.
View Urth 49mm 4-in-1 Magnetic Essentials Lens Filter Kit (Plus) on Amazon

Best for owners of screw-in filters
4. Kase 77mm Magnetic Adapter Ring Kit
Two aluminum alloy rings, one for the 77mm lens and one for a 77mm screw-in filter, that convert an existing threaded filter into a magnetic one. The listing gives about 13 grams for the set and says it works with 77mm lenses and traditional 77mm thread filters.
Suits: owners of screw-in filters. Strengths: keeps filters you already own. Weaknesses: no filter included. Skip it if you need a complete kit.

Best for hybrid photo and video work
5. K&F Concept 82mm Magnetic CPL, ND2-32 and Black Diffusion Kit
An 82mm video-minded set with a CPL, a variable ND2-32 (1 to 5 stops) with hard stops, a 1/4 black diffusion filter, a magnetic ring, a lens cap and a carrying case with a carabiner. The maker mentions a Teflon ring for smooth, quiet rotation.
Suits: hybrid photo and video work. Strengths: a variable ND and a diffusion filter. Weaknesses: fits only 82mm. Skip it if you want fixed ND strengths.

View K and F CONCEPT 82mm Magnetic CPL and ND2-32 and Black Diffusion 1/4 Filter Kit on Amazon
Best for a single polarizer for an 82mm lens
6. K&F Concept 82mm Magnetic CPL Filter Kit
A three-piece set with a circular polarizer, a magnetic basic ring and a filter cap. The maker lists a 5.3mm ultra-slim frame, AGC glass and 28 layers of coating, and notes the packaging may be old or new.
Suits: a single polarizer for an 82mm lens. Strengths: a slim frame and a simple set. Weaknesses: no ND filter. Skip it if you want long exposures.
View K and F CONCEPT 82mm Magnetic CPL Filter Kit, Basic Adapter Ring and Lens Cap on Amazon
Best Picks by Category
These labels group the picks by kit contents, thread size and intended use. They summarize listing data and are not hands-on test results.
- Most complete kit: Kase 77mm Wolverine Revolution Plus Master Kit — a premium-tier four-filter kit; check price on Amazon. This is not an independent product-quality award.
- Starter set: K&F Concept 67mm Magnetic Filter Kit — a mid-range-tier CPL and ND kit for 67mm lenses; check price on Amazon.
- Best value: K&F Concept 82mm Magnetic CPL Filter Kit — a budget-tier single-polarizer kit; check price on Amazon.
- Budget pick: Kase 77mm Magnetic Adapter Ring Kit — a budget-tier adapter-only option with no filter included; check price on Amazon.
- Premium option: Kase 77mm Wolverine Revolution Plus Master Kit — a premium-tier kit; check price on Amazon.
Price Tier Comparison
The table groups the picks by price tier. Prices change often, so check price on Amazon for the current price.
| Product | Price | Price tier |
|---|---|---|
| Kase 77mm Magnetic Adapter Ring Kit | Check price on Amazon | Budget |
| K&F Concept 82mm Magnetic CPL Filter Kit | Check price on Amazon | Budget |
| K&F Concept 67mm Magnetic Filter Kit | Check price on Amazon | Mid-range |
| Urth 49mm 4-in-1 Magnetic Essentials Kit (Plus) | Check price on Amazon | Mid-range |
| K&F Concept 82mm Magnetic CPL, ND2-32 and Black Diffusion Kit | Check price on Amazon | Mid-range |
| Kase 77mm Wolverine Revolution Plus Master Kit | Check price on Amazon | Premium |
Care and Setup
- Check the thread size printed on the lens barrel, marked with a diameter symbol.
- Leave the magnetic ring on the lens and cap it when not shooting.
- Clean glass with a blower first, then a lens cloth.
- Keep filters in their pouch with the caps on.
Mistakes to Avoid
- Ordering the wrong thread size.
- Mixing rings from different systems, since magnets are not always compatible.
- Stacking several filters on a wide lens without checking the corners.
- Leaving filters loose in a bag.
Magnetic Lens Filter FAQ
Can I mix brands?
Not reliably. Each maker uses its own ring and magnet layout, so stay within one system.
Will one kit fit all my lenses?
Only lenses with the same thread size. Each kit here is listed for one size, so check every lens first.
The Short Version
For a 67mm starter set, the K&F 67mm. For a four-filter 77mm kit, the Kase Wolverine. For small lenses, the Urth 49mm. To convert existing filters, the Kase adapter. For video, the K&F 82mm variable ND set. For a lone polarizer, the K&F 82mm CPL.
What Each Filter in a Kit Actually Does
Magnetic kits bundle several filters, and it is easy to buy a set without knowing which piece you will use most. A short tour of the common types shows what belongs in your bag.
Circular polarizer (CPL)
A polarizer cuts reflected glare from water, wet leaves, glass and many other non-metallic surfaces. Outdoors it can deepen a blue sky and make foliage look less washed out. You rotate the filter to control the effect, which is strongest when the lens points at roughly 90 degrees to the sun. A polarizer also absorbs light, typically costing about one to two stops, so it slightly lowers your shutter speed. Landscape and travel shooters get the most from one.
Neutral density (ND)
ND filters reduce light without changing color, so you can use a slower shutter or a wider aperture in bright conditions. The number tells you how much. An ND8 cuts three stops, an ND64 cuts six, and an ND1000 cuts about ten. Each stop halves the light. That is the difference between a waterfall caught at a fraction of a second and the same scene blurred into silk across several seconds. For video, ND is how you keep a natural shutter speed without closing the aperture to a point where the image softens.
Variable ND
A variable ND filter combines two polarizing layers so one ring adjusts the strength, such as the ND2-32 range in the K&F 82mm kit. It is flexible, which suits video where light changes. The drawbacks are worth knowing. At the extreme end it can produce a dark X-shaped pattern across the frame, and color can shift slightly. Makers sometimes add hard stops to prevent the dark zone, which is the design noted for that kit. Fixed ND filters avoid the problem, but you must swap filters as conditions change.
UV and protection filters
A UV filter does little for modern digital sensors beyond protecting the front glass. Some photographers keep one on as a cheap shield against dust, spray and scratches. Others prefer the lens hood and cap for that, because any extra glass adds a small chance of flare.
Diffusion filters
A black diffusion filter, such as the 1/4 strength in the 82mm kit, softens highlights and lowers contrast to give footage a gentler, less digital look. It is a creative choice, not a correction, and it suits portraits and cinematic video better than landscape work.
Magnetic Versus Screw-In and Square Filters
The magnetic design is one of three common ways to mount filters, and it helps to know the alternatives before committing.
| System | Strength | Drawback |
|---|---|---|
| Screw-in | Simple, secure and widely available | Slow to swap, easy to cross-thread, tends to stick |
| Magnetic | Fast changes, ring can stay on the lens | Brand-specific, one thread size per kit |
| Square or slot-in | One holder fits many lenses, graduated filters possible | Bulky, more expensive, more to carry |
Magnets are convenient for run-and-gun work, street shooting and travel, where a missed moment costs more than a few extra dollars. Screw-in filters hold more firmly in rough use and avoid the risk of a knock dislodging the filter. Square systems win for serious landscape work because graduated filters, which darken only the sky, need a rectangular shape. Magnetic kits generally do not replace those.
A practical point on safety: the magnets are strong enough for ordinary use, but a sharp bump or a strap pulling the filter sideways can pop it off. If you are shooting on a ledge or over water, a lost filter is one more reason to keep the cap on during transit and to hold the camera with both hands.
Matching a Kit to the Pictures You Take
Landscapes and long exposures
A polarizer plus a strong ND, like the ND1000 in some kits here, covers the main landscape tricks: reduced glare and smooth moving water or clouds. Use a sturdy tripod and a remote release or a timer. A stronger filter means longer exposures, so wait for calm conditions.
Travel and street
Think light and quick. A smaller kit that sits in a pocket, with a ring that stays on the lens, helps you work without fuss. A polarizer alone often delivers most of the benefit.
Video and hybrid shooters
Videographers commonly follow the rule of setting the shutter speed to about double the frame rate, for example 1/50 second at 25 or 24 frames per second. In bright daylight that forces a small aperture unless you add ND. A variable ND makes this simple, while a few fixed filters give cleaner results at a known strength.
Portraits outdoors
If you like a wide aperture for a soft background in midday sun, a weak ND helps avoid overexposure when your camera’s fastest shutter speed is reached. A polarizer is less helpful here and can make skin look less natural.
Owners of existing filters
If you already own good screw-in filters, an adapter kit like the Kase one lets you try the magnetic approach without replacing them. You need a ring for the lens and another for each filter, so the cost grows if you own several.
Sizing, Vignetting and Lens Compatibility
- Find the thread size. It is printed on the front of the lens or inside the cap, with a diameter symbol. If your lenses use different sizes, you can buy a kit for the largest and use step-up rings on the smaller ones, though that adds bulk and can cause vignetting on wide lenses.
- Watch the corners on wide-angle lenses. A thick frame can block the edges of the image. That is why slim frames are advertised. Test any new filter on your widest focal length before an important shoot.
- Check front-element behavior. A CPL needs to be rotated, but on lenses where the front element turns during focusing, rotation can change as you focus. Adjust the polarizer last.
- Hoods and caps. Some petal hoods will not fit over a filter and ring. Confirm that the lens cap or magnetic cap works with your hood.
- Autofocus and metering. Strong ND filters make the viewfinder dark and can confuse autofocus. Compose and focus first, then attach the filter and switch to manual focus.
Optical Quality and Build: Reading the Fine Print
Filter claims can be hard to verify. Phrases such as optical glass, multi-layer coating and nano coating describe the manufacturing approach, but they do not tell you how neutral the color is or how much flare appears. Treat those words as the maker’s own statements. Look for comments from buyers who shoot toward the sun, since glare and ghosting show up there first.
Very strong ND filters can let in infrared light that some sensors record, producing a color cast. Many makers add an infrared cut coating, so check whether the listing mentions it. A mild cast is usually fixable in editing but costs time.
On the mechanical side, look at the frame material and whether the ring is thin enough to stay on the lens. A loose or poorly aligned magnet means the filter sits slightly tilted, which can cause soft corners. Also confirm the packaging includes caps, because an uncapped glass surface left in a bag picks up dust and fingerprints.
Starter Kit or Full System: Where the Money Goes
The kits in this guide span a wide price range, and the difference is mostly about number of filters, glass and coating claims, frame precision and accessories such as pouches. A starter kit gets you one polarizer and one or two ND strengths, which is plenty for learning. A larger system makes sense when you shoot long exposures often, need consistent color across several filters or want a rugged case and tools. Buying a thread size you will outgrow is the costly mistake: if you plan to move to a bigger lens, think about a kit sized for that lens and use step-up rings for the smaller ones.
Finally, if two products look nearly identical on the listing, compare the number of included filters and the quality of the case. A complete set from one maker usually costs less per piece than adding filters one at a time later, so decide how much you will actually use before you pay for extras.
FAQ
Do I need a polarizer or an ND filter first?
It depends on the picture. A polarizer helps with glare and washed-out skies and works for most outdoor photography. An ND filter matters when you want slow shutter speeds in bright light, such as smooth water or video at a natural shutter speed. Many beginners start with a polarizer.
What does ND8, ND64 and ND1000 mean?
The number is the factor by which light is reduced. ND8 cuts three stops, ND64 cuts six stops and ND1000 cuts about ten stops. Each stop halves the light, so higher numbers allow much longer exposures or wider apertures in bright conditions.
Will a magnetic filter vignette on a wide-angle lens?
It can. A thick frame or stacked filters may block the corners at short focal lengths. Slim frames lower the risk, but test your widest setting before a shoot. If corners go dark, remove the extra filter or choose a thinner ring.
Can I use a polarizer and ND filter together?
Yes, but stacking adds glass and thickness, which increases the risk of vignetting, flare and softness. On wide lenses, stack carefully and check the corners. A variable ND can also affect polarization, so test the combination before you rely on it.
Are magnetic filters good for video?
They suit video because swapping or removing an ND filter takes seconds when light changes. Variable ND is flexible but can show a dark pattern at the extreme setting, so many people prefer fixed strengths for critical shots. Check ring stability if you handhold the camera.
How to Judge magnetic lens filter Quality Beyond the Headline Features
The headline features of any magnetic lens filter are the easiest part to compare, but they are rarely what decides whether you still enjoy using it a year from now. When you are controlling light and reflections at the front of a lens, the details that matter most tend to be the ones you feel every single day: how smoothly parts move, how predictable the behaviour is, and how much small friction builds up between you and the job you actually want to do. A sensible way to judge quality is to separate the purchase into three layers. The first layer is the core job, the one task the product exists to do. The second layer is everything that supports that job, such as handling, build, compatibility and ease of cleaning or maintenance. The third layer is ownership over time: spare parts, support, and how gracefully the product ages when it is used hard rather than admired on a shelf.
A useful exercise before you buy is to write down the three situations in which you will use the product most often, in plain language, and then test every candidate against those situations rather than against an idealised best case. Products that look similar on a comparison table often separate quickly once you ask concrete questions. What happens on a rushed morning, on a long day, or in awkward conditions? Does the design still make sense when you are tired, hurried or working in a tight space? The options in the main list above were chosen because they cover different answers to those questions, from simple and robust to feature-rich and specialised, so the honest comparison is not which one is best in the abstract but which one matches your three situations most closely.
It also helps to distinguish between limitations you can work around and limitations you cannot. A workaround you perform once, such as an initial setup step or buying one inexpensive accessory, is a minor cost. A workaround you must repeat every single session is a design mismatch, and it will quietly push the product into a drawer or onto a resale listing. As you read the individual reviews above, pay attention to the skip-if notes: they exist precisely to flag those repeat-every-time mismatches, and they are usually a more reliable guide than the headline strengths.
Setting Up and Getting the First Week Right
The first week with a new magnetic lens filter teaches you more than any specification sheet, provided you use that week deliberately. Start with the simplest possible version of your routine for controlling light and reflections at the front of a lens. Resist the urge to test every feature at once, because when something disappoints you will not know whether the cause was the product, your settings, or simple unfamiliarity. Change one variable at a time, keep the rest of your routine constant, and note what actually changed. A few lines in a notebook or phone note, written immediately after a session, are worth more than a detailed memory reconstructed days later.
Pay attention to the order in which problems appear. Early problems are usually fit and familiarity problems: things feel awkward because your hands, your workspace or your habits were built around different equipment. Those problems often fade within days. Problems that persist into the second week, and that you find yourself planning around, are the real signals. If you bought from a retailer with a returns window, treat that window as part of the product test rather than as an embarrassment to avoid. A return made for a clear, observed reason is a successful test, not a failed purchase.
Finally, set the product up for the way you will actually store and reach for it. Equipment that lives in its working position gets used; equipment that must be unpacked, assembled or fetched from another room gets skipped on busy days. Where your magnetic lens filter lives, how it is stored between sessions, and how quickly it returns to a ready state will shape your results as much as any feature on the box.
Technique Matters More Than Most Upgrades
Experienced photographers and video shooters tend to agree on an unglamorous point: technique explains more of the final result than the difference between good products in the same class. That is good news, because technique is free. The core skill in controlling light and reflections at the front of a lens is consistency: doing the same sensible steps in the same order until they become automatic, so that when you do change something, the effect is visible and repeatable. Random variation hides cause and effect; consistency reveals it.
Build a short baseline routine and write it down. Include the preparation steps people usually skip, the order of operations, and the one or two checks you perform before you start and after you finish. Then, when a result disappoints, walk the routine backwards and find the first step that differed from the baseline. Most disappointments trace back to a hurried preparation step, a skipped check, or an environmental factor such as temperature, light, clutter or fatigue, rather than to the product itself. Fixing the step is cheaper and more satisfying than replacing the product.
When you do upgrade, upgrade the bottleneck. If your routine is consistent and one specific step still limits you, that step is where money earns its keep. If your routine is inconsistent, a better product mostly gives you more expensive inconsistency. This is why the picks above are organised by use case rather than by a single ranking: the right upgrade for a beginner building consistency is rarely the right upgrade for an experienced user chasing a specific capability.
Common Mistakes and How to Avoid Them
The most common mistake with any magnetic lens filter is buying for an imagined routine instead of a real one. It is easy to picture the ambitious version of controlling light and reflections at the front of a lens: the big project, the demanding trip, the elaborate session. Most of life, though, is the ordinary version, and a product optimised for the rare ambitious day often performs worse on the ordinary days that make up ninety percent of its use. Buy for the routine you have, and let the ambitious version be the pleasant surprise rather than the design brief.
A second mistake is ignoring compatibility until after the purchase. Compatibility is not only about whether two things physically connect or fit. It is also about sizes, clearances, weights, power, software, and the accessories you already own. Before ordering, list what the new product must work with, measure the spaces it must fit into, and check the makers’ own compatibility notes rather than relying on a marketplace answer written about a different model. Five minutes with a tape measure and a compatibility list prevents the most frustrating category of return.
A third mistake is neglecting the boring consumables and care items that keep the product working: the correct cleaning method, the replacement part that wears out, the storage condition that prevents damage. Owners who build a tiny maintenance habit, a few minutes on a regular rhythm, routinely get years more service from mid-range products than careless owners get from premium ones. The premium price buys capability; the maintenance habit is what lets you keep it.
Matching the Picks Above to Real Situations
Because the list above covers several different approaches to the same job, it helps to translate the picks into situations. If your priority is simplicity and reliability above all else, favour the pick whose review emphasises straightforward operation and easy care, even if its feature list looks shorter. Features you never use do not merely add nothing; they add weight, cost, cleaning burden and failure points. If your priority is room to grow, favour the pick with the widest compatibility and the most standard fittings, because it will absorb future accessories and changes of routine without forcing a replacement.
If you work in demanding conditions, heat, cold, moisture, dust, travel or long continuous sessions, weight the durability and protection notes in each review more heavily than the convenience notes. Convenience features are designed for comfortable conditions; protection features earn their value precisely when conditions stop being comfortable. Conversely, if your use is entirely at home or in a studio, protection you will never need is dead weight, and the lighter, simpler, easier-to-clean option is usually the smarter buy.
Budget deserves a situation-based answer too. Spending more makes sense when the expensive pick removes a step you perform constantly, solves a compatibility problem you definitely have, or survives conditions you definitely face. Spending more makes little sense when the difference is a capability you might use someday. A practical rule: pay for the problems you already have, not for the problems you can imagine. The comparison notes in each review above are written to help exactly that judgement, pick by pick.
Care, Cleaning and Long-Term Ownership
Long-term ownership of a magnetic lens filter is mostly a story of small habits. Clean the product the way the maker directs, with the materials the maker approves, and be suspicious of aggressive shortcuts: harsh chemicals, abrasive pads and improvised tools cause more cumulative damage than the dirt they remove. Where the maker is silent, the conservative default is warm water, a soft cloth, mild detergent where appropriate, and patience. Let things dry fully before storage, because trapped moisture is a slow and silent enemy of metals, fabrics, seals and electronics alike.
Inspect wear points on a schedule rather than waiting for failure. Straps, hinges, seals, threads, contacts, edges and moving joints all announce their decline gradually: stiffness, play, fraying, discolouration, roughness or a new noise. Catching wear early usually means a cheap replacement part or a small adjustment; catching it late can mean a ruined session or a damaged companion product. Keep the small spares and tools that came in the box together in one labelled place, because the day you need them is never the day you want to search for them.
Storage deserves the same thought as use. Store the product clean, dry, unloaded where the maker advises it, and away from extremes of heat and damp. If it travels with you, protect it from the two forces that damage equipment most in transit: impact and abrasion. A modest case, wrap or divider system, used consistently, preserves both function and resale value far better than careful intentions.
Understanding the Trade-Offs in This Category
Every magnetic lens filter design is a bundle of trade-offs, and understanding the main ones makes the reviews above much easier to use. The first trade-off is capability versus simplicity. More capability usually means more adjustments, more modes or more parts, and each addition asks something of you: learning time, setup time, or attention during use. The second trade-off is size and weight versus capacity and comfort. Bigger and heavier designs can carry more, reach further or run longer, but they ask more of your body, your vehicle and your storage space. The third trade-off is specialisation versus versatility. A specialised product does one job beautifully and other jobs reluctantly; a versatile product does everything adequately and nothing perfectly.
None of these trade-offs has a universally right answer, which is why honest reviews describe them instead of hiding them. When a review above lists a limitation, read it as a coordinate rather than a verdict: it tells you where that product sits on the trade-off map. Your job as a buyer is simply to know where you sit on the same map. If you are unsure, versatility and simplicity are the safer defaults, because most people overestimate how specialised their routine really is, and an adequate tool used constantly beats a perfect tool used rarely.
Price interacts with trade-offs in a way worth stating plainly. Higher prices in this category usually buy refinement: smoother operation, better materials, tighter tolerances, better support. They rarely buy a different category of result. A careful user with a mid-priced pick and a consistent routine will outperform a careless user with the flagship almost every time, which is another way of saying that the reviews above matter less than the habits in these added sections.
A Practical Checklist Before You Buy
Before ordering any magnetic lens filter, run through a short written checklist. First, state the job in one sentence: what will this product do, how often, and where. Second, list everything it must be compatible with, including sizes, fittings, power and the accessories you already own. Third, measure the space it will live in and the space it must pass through. Fourth, decide which single trade-off you care about most, capability, size, simplicity or specialisation, and let that decision rank the shortlist. Fifth, check what ownership requires: cleaning method, wear parts, warranty terms and the maker’s support route.
Sixth, re-read the review of your leading candidate and look specifically for the skip-if line. If it describes you, believe it and move to the next candidate; reviewers include those lines because they are the most common source of returns and regret. Seventh, if two candidates still tie, choose the one that is easier to return, easier to service, or already owned and understood by people whose use resembles yours. Ties are broken better by ownership practicalities than by one more comparison video.
Finally, plan the first week when you order, not when the box arrives. Decide your baseline routine, what you will keep constant, and what single thing you will test first. A purchase approached this way rarely disappoints, because even if the product turns out to be wrong for you, you will know exactly why, and the next choice will be right.
Questions Worth Asking That Spec Sheets Do Not Answer
Specifications answer the questions makers find easy to print. Ownership raises different questions. How does the product behave at the end of a long day rather than the start of a short one? What does it feel like to clean after the messiest realistic session, not the tidiest? Which part will wear first, what does that part cost, and can you replace it yourself? How does the product behave slightly outside its intended conditions, because real life will take it there? The reviews above try to answer several of these from listing information and category knowledge, and where a listing is silent, that silence is itself worth noticing.
Another under-asked question is what the product demands of the rest of your kit. Some products quietly require companions: a particular fitting, a stronger support, a bigger bag, a different workflow. Total cost of ownership is the purchase price plus those companions plus the wear parts over the years you will keep it. A seemingly expensive pick that needs nothing extra can be cheaper to own than a bargain that drags three accessories behind it. When you compare the picks above, compare whole systems, not single items.
The last question is about exit. If your routine changes, can the product adapt, be handed on, or be sold without embarrassment? Standard fittings, transferable warranties and durable construction all preserve options. Unusual proprietary choices can be worth it for a committed specialist, but they narrow your future, and that narrowing should be a conscious decision rather than a surprise.
Building a Routine That Gets the Most From Your Choice
Whichever pick you choose from the list above, the return on it will be decided by the routine you build around controlling light and reflections at the front of a lens. Keep the routine short enough to survive a busy day: a preparation step you can do in minutes, a consistent working method, and a two-minute reset afterwards that leaves everything ready for next time. Routines fail when they depend on motivation; they succeed when they depend on arrangement. Put things where the routine needs them, in the order the routine needs them, and remove every step that exists only because it has always existed.
Review your routine monthly with fresh eyes. Ask which step produces the most value and which produces the most friction, and be willing to move effort from the second to the first. Small routine improvements compound quietly: a slightly better arrangement, a slightly earlier check, a slightly more consistent setting. Over a season, those small improvements are worth more than most equipment upgrades, and they transfer free of charge to whatever equipment you own next.
Share the routine if you work or live with others who use the same equipment. A shared baseline means anyone can pick up the kit and get a predictable result, and it means problems get diagnosed against a known standard instead of against five private habits. Consistency is a team sport as much as a personal one, and the best-equipped households and studios are usually the ones where the routine is written down, visible and boringly reliable.
More Questions, Answered
How long should a good magnetic lens filter last with regular use?
With regular use and the basic care described above, a well-made magnetic lens filter should serve for years rather than months. Lifespan depends far more on handling, cleaning and storage than on the purchase price alone. Wear parts are the exception: items designed to be replaced should be replaced on the maker’s schedule, and doing so on time is what allows the main product to reach its full lifespan.
Is it worth paying more for a premium magnetic lens filter?
It is worth paying more when the premium version removes friction from a step you perform constantly, solves a compatibility need you definitely have, or offers support and spare parts you will actually use. It is rarely worth paying more for a capability you expect to grow into someday. Buy for the routine you have now, and let a proven, repeated limitation, not enthusiasm, trigger the next upgrade.
What should I check first if results disappoint?
Check your routine before you blame the product. Return to your written baseline, confirm each preparation step was done properly, and change only one variable in the next session. Most disappointing results trace back to a skipped preparation step, an environmental factor, or an unfamiliarity that fades with practice. If the same problem survives several careful, consistent sessions, then the product itself is the likely cause and a different pick from the list is justified.
Can one magnetic lens filter suit both beginners and experienced users?
Sometimes, but the honest answer is that beginners benefit most from simplicity and forgiveness, while experienced users benefit from control and compatibility. A versatile mid-range pick often serves both reasonably well, which is why several options above aim at that middle ground. What a beginner should avoid is a highly specialised product whose strengths only appear inside a narrow, advanced routine.

