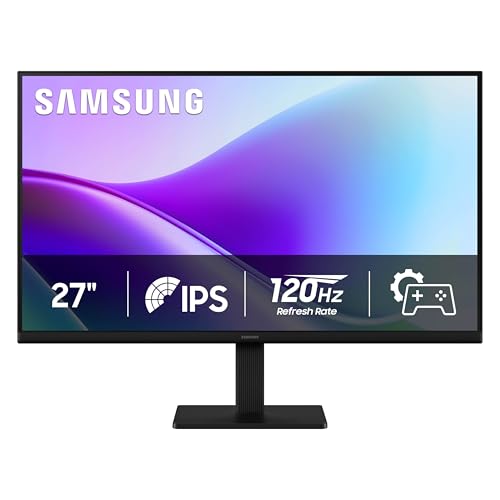
A monitor arm holds your screen above the desk so you can move it to suit you. Check four things before choosing: that your monitor has a VESA mounting pattern, that the arm’s weight range covers it, that the desk can take the clamp or bolt, and that the reach suits your seating.

Check Your Monitor First
Turn your monitor around and look for four small screw holes in a square pattern on the back. That is the VESA mount, and the spacing is given in millimetres, for example 75 by 75 or 100 by 100. The maker’s guide lists it. If there are no holes, some makers sell adapters, though you should follow their instructions carefully.
In this guide
Four Key Checks
| Check | Why it matters | What to look at |
|---|---|---|
| VESA pattern | Arm and screen must line up | Hole spacing on both |
| Weight range | Gas springs need the right load | Minimum and maximum, not only the maximum |
| Screen size | Large or ultrawide screens can overwhelm a basic arm | Maker’s size guide |
| Desk fit | Clamp needs solid edge and thickness | Desktop thickness, edge gap, material |
Finding the Numbers You Need
Gather these before you compare arms. They are usually in the monitor’s manual or on the maker’s product page, and sometimes on a label on the back.
- VESA hole spacing, in millimetres.
- Monitor weight without the stand. Use the weight stated for the screen alone, since the stand is removed when the arm is fitted.
- Screen size and shape, such as standard or ultrawide.
- Thickness of your desktop, measured at the edge where you intend to clamp.
- Any lip, drawer rail or cable tray under the desk that might block the clamp.
Mount Style
- Clamp: grips the desk edge. No holes, but needs a firm, flat surface and enough thickness.
- Grommet: goes through an existing hole in the desk. Very stable.
- Wall mount: frees the desk entirely but needs a suitable wall and careful fixing.
Hollow, thin or glass desktops may not take a clamp. Read the desk maker’s notes, and if unsure, ask a qualified person.
Check how far the arm can lower and raise the screen compared with your desk and seat. A tall person may want a high reach, while someone with a low desk may need the arm to go down near the surface. Also look at the rotation: turning a monitor to portrait is helpful for long documents or code, but only if both the arm and the screen support it, so check the maker’s notes.
Movement and Reach
Single arms hold one screen, while dual arms hold two. Look for height, tilt, swivel and rotation. Longer reach lets you push the screen away when you stand, but it adds leverage that can strain a weak desk. Cable channels along the arm keep leads tidy.
Take a moment to read the clamp instructions for the desk edge. Some arms need a minimum edge thickness and a clear gap beneath, while others offer a bolt-through option. Tighten the clamp evenly and test it by pressing gently on the arm before the monitor goes on. If the desktop is thin, hollow or finished with a delicate coating, use the plates or pads the maker supplies, and ask a qualified person if you are unsure.
Installing It
- Clear the desk and attach the base according to the instructions.
- Fit the mounting plate to the monitor with the supplied screws.
- With a helper, lift the monitor into the arm.
- Adjust the tension so the screen stays where you place it.
- Route cables and check for pinch points.
After installing, spend a few minutes tuning the setup. Set the screen at a comfortable distance, tilt it slightly back, and make sure it clears the desk when pushed all the way in. Re-check the clamp bolts after a week, since they can loosen with movement. If you later change to a heavier or lighter monitor, adjust the tension again according to the maker instructions.
Common Scenarios
- Small desk against a wall: a single arm with a short reach frees the surface without hitting the wall.
- Standing desk: check that the arm and its cables allow the full travel of the desk, and keep slack in the leads.
- Two monitors: a dual arm needs both screens within the weight range, and the clamp must carry the combined load, so read the maker’s limits.
- Shared desk: a gas-spring arm that moves smoothly lets different people reposition the screen quickly.
Mistakes to Avoid
- Using the monitor weight with the stand attached: arms are matched to the screen weight alone.
- Ignoring the minimum weight: if the screen is too light, the arm may spring upward.
- Clamping to a thin or hollow desk edge: the desk can crush or flex, so check the desk maker’s notes.
- Lifting a monitor alone: a helper reduces the risk of dropping the screen or straining your back.
- Overtightening bolts: this can mark or crush the desk, so use the plates the maker supplies.
It also helps to check the clearance behind the desk. An arm that swings or extends can hit a wall, window sill or shelf, and a rear cable can snag as the screen moves. Pull the arm through its full range with the monitor unplugged or carefully supported, as the maker describes, to see where the limits are before you route the final cables.
Care and Upkeep Over Time
Look at the arm every few months. Check the clamp or grommet is tight, the joints hold their position, and the cables are not pulled tight. If the screen begins to drift, use the tension adjustment as the maker describes. Wipe the arm with a dry or lightly damp cloth. Do not use oil on moving joints unless the maker says to, because it may leave residue or affect gas springs. If you move house or change desks, remove the monitor first, then release the clamp.
Quick Troubleshooting
| Symptom | Likely cause | What to try |
|---|---|---|
| Screen sinks down | Tension too low or weight above the range | Increase the tension; if it still sinks, check the monitor weight against the range |
| Screen springs upward | Tension too high or screen below the minimum weight | Reduce the tension and check the minimum weight |
| Desk edge flexes | Weak desktop or a long reach | Move the clamp, shorten the reach or ask a qualified person |
| Screen wobbles when typing | Loose joints or a light desk | Tighten joints and keep the arm folded closer to the base |
Glossary
- VESA: a standard hole pattern on the back of many monitors, measured in millimetres.
- Gas spring: a sealed cylinder that balances the weight of the screen.
- Grommet: a hole through the desk used to bolt an arm in place.
- Reach: how far the arm can extend from its base.
- Tension: the setting that balances the arm to the screen weight.
- Mounting plate: the plate that attaches to the screen and then locks into the arm.
Setting Screen Height and Distance for Comfort
The main reason people buy an arm is to put the screen where their body wants it. Ergonomics guidance varies a little between sources, but a common starting point is to place the top edge of the screen at or slightly below eye level when you sit upright, with the screen roughly an arm's length away. Many people find that 20 to 30 inches works for typical desktop monitors, and larger screens often need more distance. These are starting points, not rules, so adjust them to how your eyes and neck feel after an hour of work.
Height
If you wear progressive or bifocal lenses, you may prefer the screen a bit lower so you do not tilt your head back. If you stand at times, an arm with a long vertical range lets you raise the screen without moving the desk. Check the arm's listed height range against your seated and standing eye heights before you buy.
Tilt and angle
A small downward tilt, often a few degrees, can reduce glare from overhead lights. Avoid tilting so far that the screen reflects the ceiling. If a window sits behind or beside you, rotate the monitor slightly until the reflection disappears. A full-motion arm makes this easy compared with a fixed stand.

Distance from your face
Pull the screen closer only if text is hard to read, and consider increasing the on-screen text size instead. Sitting very close to a large screen forces constant head turning. If you must turn your head to see corners, the screen is likely too near or too big for the setup.
Adjusting Tension and Friction After Mounting
Most arms either use a gas spring or a mechanical spring to counterbalance the screen. The adjustment is usually a hex key screw near the joint of the arm. The goal is for the screen to stay where you leave it, and to move with light pressure.
- If the screen drifts down on its own, add tension, typically by turning the adjuster in the direction marked on the arm or in the manual.
- If the screen creeps upward, reduce tension a little.
- If the screen swings too freely left and right, look for a friction or pivot screw and tighten it a quarter turn at a time.
- If the tilt is loose, there is usually a small tilt-tension screw on the head.
Make changes in small steps and test between each one. Over-tightening can strip the adjuster or make movement jerky. Always hold the monitor with one hand while adjusting, since a sudden release of tension can drop or lift the screen quickly. If the adjuster hits its limit and the screen still moves, the monitor may be outside the arm's rated weight range, which is a sign to choose a different model rather than force it.
Desk Materials and Surface Protection
Clamp-style arms squeeze the desk edge, so what the desk is made of matters. Solid wood, plywood and thick laminated boards generally hold well. Hollow-core desks, thin particleboard, glass tops and desks with a lip or an angled edge can be a problem. Always read the arm's stated desk thickness range, which is often around 0.4 to 3.5 inches for common models, and follow the manufacturer's instructions.
- Thin or soft tops: use the included reinforcement plate or a flat steel plate on the underside, if the manual allows it.
- Glass tops: only use arms that state they are suitable, and follow the instructions exactly.
- Painted or veneered surfaces: place a thin pad of felt or rubber between the clamp and the surface to prevent marks.
- Back-panel desks: a gap or modesty panel at the rear may block a clamp, in which case a grommet mount through a hole can work better.
After installation, press down and sideways on the arm gently to check for flex in the desk edge. Re-check clamp tightness after a week, since pads can settle. Do not exceed the stated weight limit, and keep in mind that leaning on the arm or hanging items on it adds load that it was not designed to carry.
Cable Routing and Multi-Monitor Layouts
A clean cable path prevents tugging on connectors, which is a frequent cause of flickering or lost signals. Leave a loop of slack at each joint so the cable does not stretch when the arm moves through its full range. Fasten cables along the arm with the clips or sleeve provided, or with soft hook-and-loop straps, and avoid tight zip ties that can pinch.
When you run two screens, you can use two separate arms or a dual arm. Two arms give each screen its own position. A dual arm uses one clamp, which saves desk space, but the combined weight loads one point and you need to confirm the total weight limit. Decide on your layout by how you use the screens.
- Side by side: works well for comparing documents. Angle the screens slightly inward so they form a shallow curve toward you.
- Primary and secondary: place your main screen directly in front and the second off to one side at a slight angle. This avoids repeated neck twisting.
- Stacked: suits tall spaces or tight desks, but the upper screen is mostly useful for reference content because of the head tilt required.
Check that your computer has enough video outputs and the right cables for both screens before you plan the layout.
A Worked Example: Moving a 27-Inch Monitor to an Arm
Imagine a 27-inch monitor that the stand listing says weighs about 12 pounds without the base. Start by reading the back of the monitor for VESA hole spacing, commonly 100 by 100 millimeters, and by checking the weight of the panel without its stand. Confirm that the arm's weight range covers that number with some margin, and that it mentions your screen size.
Clamp the arm to the desk edge, leaving the screen off. Attach the VESA plate to the monitor with the supplied screws, using the length given in the manual so they do not bottom out inside the housing. Lift the monitor onto the arm head, ideally with a helper, and lock it in place. Plug in the cables with a bit of slack, then adjust the spring tension until the screen holds at eye level. Finally, tilt and rotate until the reflections on the screen vanish. The whole job commonly takes under an hour for a first-timer, though that depends on the model and how comfortable you are with the tools.
Ultrawide, Curved and Laptop Considerations
Ultrawide and curved monitors are often heavier and have a larger center of gravity, so arm choice needs extra care. Look for arms that list ultrawide screens in their size range, and confirm the weight limit with real margin. A wide screen also needs enough lateral space, so measure the arm's swing against the desk depth and any wall behind it. With a curved panel, the VESA plate may sit in a recess, and spacers can be needed to keep the arm head from touching the back of the case. The monitor maker or arm maker may supply these.
If you use a laptop beside the main screen, consider a laptop tray arm or a stand at matching height. Mixing screen heights forces your neck to tilt each time you look across. Match the top edges where you can, and set the laptop screen on a stand if you use it for more than quick glances.
Cost and Value Notes
Monitor arms cover a wide price range. Lower-priced arms often work for lighter screens, while higher-priced ones tend to offer a wider weight range, smoother motion and better materials. Spend more only if you need the extra range, such as a heavy screen or frequent repositioning. Compare warranty terms and the clarity of the manual, because these say a lot about how much support to expect. Be cautious about listings that give a weight range without the screen size range, since both matter.
Warning Signs That an Arm Needs Attention
Watch for a screen that sags again after you adjusted it, creaking noises when you move the arm, a clamp that has loosened, or visible bending in the arm tube. These suggest overloading, a worn spring, or a loosening bolt. Lower the monitor to the desk surface, remove it, and inspect the arm. Retighten fasteners according to the manual, and replace the arm if it shows cracks or deformation. Keep the original manual and the box for the model name and any support contact details.
Ready to Buy? Start Here
If this guide helped you decide what to look for, these products are a place to start.
View VIVO Single Monitor Desk Mount on Amazon
As an Amazon Associate we earn from qualifying purchases. Prices and availability are shown on Amazon.
Gather Four Numbers Before You Look at Any Arm
Monitor arm shopping goes wrong when it starts with the arm. It should start with four numbers from your existing setup, each of which you can get in a few minutes with a tape measure, a bathroom scale and the monitor’s own settings menu or manual. First, the monitor’s weight without its stand, which is the figure the arm actually carries; if the manual gives only a total weight, weigh the monitor carefully with its stand removed, or weigh yourself holding it and then not holding it and subtract, which is accurate enough for choosing a range. Second, the VESA hole pattern, found by measuring the distance between the mounting holes horizontally and vertically, centre to centre. Third, your desk’s thickness at the exact spot the clamp will grip, including any lip, bevel or crossbar underneath. Fourth, the distance from that clamp spot to where you sit, which bounds the reach you need.
Write the four numbers on one card and keep it in front of you while you shop. Every candidate arm either accommodates all four or it does not, and this simple discipline removes most of the catalogue instantly. It also protects you from the commonest trap in this category, which is a beautiful arm whose weight range starts just above your monitor’s weight or ends just below it, discovered only when the screen will not stay where you put it.
The weight range has two ends, and both matter
Buyers check that an arm can hold their monitor up; fewer check that it can hold it down. A counterbalanced arm adjusted for heavy screens will push a light monitor upward and refuse to stay low, just as an arm at its limit lets a heavy screen sink. Your monitor’s weight should sit comfortably inside the arm’s stated range, ideally in the middle half of it, so the tension adjustment has room to work in both directions as the arm ages and its springs or friction change. Do the subtraction both ways: your weight minus the range’s minimum, and the range’s maximum minus your weight. Both results should be clearly positive. If either is near zero, keep looking.
Desk Fit: The Clamp’s-Eye View
Get down and look at the underside of your desk where the clamp will go, because that view decides more installations than any product photograph. You need a solid run of desktop thick enough for the clamp’s jaw, free of the desk’s own frame, cable trays and modesty panels for the clamp’s full depth, and strong enough to take a squeezing and levering load at its edge. Particleboard and hollow-core tops deserve particular care: they can carry a monitor’s weight spread through a clamp, but they crush gradually under a small, tight contact patch, so a reinforcement plate that spreads the load, or a through-bolt fitting where the design allows it, is a wise companion. Solid wood, thick laminate over a solid core and metal desks are the straightforward cases.
Measure the clearance behind the desk too. A clamp and the arm’s first joint need room between the desk edge and the wall, and a monitor pushed hard against a wall loses most of the arm’s range of movement, which you paid for. If your desk must stand against a wall, work out from your fourth number, the reach, whether the arm can still bring the screen to your viewing distance, or whether a pole mount that rises from near the back edge suits the geometry better. Doing this arithmetic on paper, before ordering, is the difference between an installation afternoon and a returns process.
Worked Example: Checking an Arm Against a Real Desk
Suppose your four numbers are these: a monitor weighing a moderate amount squarely in the middle of the ranges you are considering, a common square VESA pattern confirmed by measurement, a desktop of medium thickness with a clear underside, and a seated position that puts your eyes a good arm’s length and more from the clamp point. Now test a candidate on paper. Its reach, stated as a maximum extension, must exceed the distance from the clamp to your desired screen position, with something in hand, because an arm at full stretch is at its least stable and cannot also angle the screen. Its height range must place the screen centre at your seated eye line minus the small downward offset described elsewhere in this guide, again mid-range rather than at a limit.
Then test the same candidate against a change you might plausibly make: a second, smaller monitor beside the first, or the desk moved so the clamp point shifts. If the candidate fails the future test but passes today’s, that is not a reason to reject it, only to buy it knowingly, understanding that it is a solution for this desk and this screen. The unforgivable failures are today’s: reach short, range wrong at either end, clamp incompatible. Those three checks, honestly done, are most of monitor arm selection.
Movement: Buy the Range You Will Actually Use
Arms offer movement in several directions, and each direction should be matched to a need you can name. Height movement serves changing posture and shared desks. Swivel serves turning the screen toward a colleague or a different seat. Tilt serves glare and the small downward angle of comfortable viewing. Extension and retraction serve desks where the working depth changes between tasks. If you cannot name the moment in your week when a movement would be used, that movement is decoration on your purchase, and decoration in a mechanism is not free: every joint is a place where play, creep and cost live.
For the movements you do need, judge quality by smoothness under load, which you can only test after mounting. During the return window, move the screen through its full working range slowly, several times, and feel for the differences: even resistance is healthy, while a sticky patch followed by a sudden slip means the screen will never sit precisely where fine work needs it. Set the screen at your working position last thing at night and mark its height against the wall with removable tape; a visible drop by morning is a tension problem to solve now, by adjustment if the manual offers it and by return if it does not.
Cables, Docks and the Second Week Problems
Most arm installations look tidy on day one and cause trouble in week two, and cables are usually why. A monitor on an arm moves, so its cables need a service loop: enough slack, guided along the arm, to reach every position in the range you actually use without pulling at the ports. Route the cables with the screen at its furthest and highest position, secure them loosely in the arm’s channels or clips, then move the screen through its range and watch the loop breathe. A cable that goes taut at any point will eventually work a port loose or drag the screen out of position, and a cable with far too much slack will snag on the desk edge and do the same from the other direction.
If your setup includes a dock or a hub, decide where it lives now: fixed to the desk with cables reaching the moving screen, or mounted so it moves with the screen where the design permits. The laptop’s own cable to the dock does not move, so the desk-fixed arrangement is usually simpler and kinder to connectors. Leave yourself one kindness for the future: a little labelled slack at the desk end of each cable, so that swapping a monitor or a computer later is a ten-minute job rather than a full re-route performed on your knees.
Sharing, Standing and Other Real Lives
Finally, fit the arm to the life around the desk. On a shared or hot-desking setup, the arm will be adjusted by other hands, so favour designs whose movements are tool-free and whose tension, once set, does not need redoing at each height; write the correct tension setting on a label under the desk for whoever maintains the space. On a sit-stand desk, remember the whole desk moves, so the arm’s job is only the screen’s position relative to you, but cable slack must now serve two masters, the arm’s range and the desk’s travel, and the floor end of every cable needs its own generous loop that never tightens at full standing height. In a home where the desk doubles for other purposes, an arm that swings the screen aside or folds it back against the wall returns the whole desk surface in seconds, a benefit that never appears in specification tables and may matter more than any of them.
After the Install: A Month of Small Adjustments
Mounting the arm is the beginning of the decision, not the end, and the first month deserves a deliberate routine. In the first week, resist the temptation to keep fiddling; set the screen using the height and distance guidance in this guide, then work normally and let your neck and eyes gather evidence. At the end of the week, make one adjustment at a time, height first, then distance, then tilt, living with each for a couple of days, because changing everything at once leaves you unable to say what helped. Keep a short note of each change and its effect; three lines in a notebook will save you from circling the same settings repeatedly.
By the second week, do the mechanical checks while they are still quick. Revisit the clamp or through-bolt fixing, because desk materials settle under a new load and a fixing that was firm on day one can relax slightly; a careful check and, if needed, a modest tightening to the maker’s guidance is normal commissioning, not a sign of failure. Move the arm through its full range and listen and feel for any new stiffness, clicking or play at the joints, and run the overnight sag test once more with a tape mark on the wall. Reroute any cable that has revealed itself as too tight or too loose now that your real working positions are known, since cables arranged for imagined positions are the ones that pull.
Planning the upgrade path
Think, finally, about what this purchase teaches you for the next one. If a second screen is likely within the desk’s lifetime, note now whether your desk edge has clamp room for it, whether your current arm’s position leaves a sensible place for a partner screen, and whether the cables you routed leave a clear path for a second set. If a larger or heavier monitor is likely, your four-numbers card tells you immediately whether the present arm’s range covers it or whether the next monitor purchase quietly includes a new arm too, a cost worth knowing before the screen is chosen rather than after. Keep the card, with the monitor’s weight and pattern and the desk’s thickness, in the desk drawer. Monitor arms are bought rarely and researched from scratch each time by most people; your card turns the next purchase into a ten-minute confirmation, and it records the tension settings and clamp position that worked, so even a house move does not reset your knowledge to zero.
Choosing for Two Screens From the Start
Dual-monitor setups deserve their own pass through the decision process, because the choices interact. Begin with the relationship between the screens: one primary screen centred in front of you with a secondary angled beside it suits most work, while two equal screens with the join centred suits work that genuinely spans both, and the arm arrangement follows from that decision. Two independent arms give each screen its own height, distance and angle, which matters when the screens differ in size or when one is a laptop on a stand beside a monitor. A combined dual mount on one post keeps the desk edge tidier and the pairing symmetrical, but it ties the screens’ heights together and makes small independent corrections harder, so it suits matched pairs of monitors doing matched work.
Run the four-numbers exercise for both screens, not just the larger one, and add the weights together when judging any shared component such as a post or a clamp that carries both. Desk strength matters twice over, as this guide has noted, and so does cable planning: two screens mean at least four cables moving through their ranges, and routing them as two tidy bundles, one per screen, rather than one shared thicket, makes every future change, a swapped screen, a new computer, a moved desk, a one-screen job instead of an afternoon. Finally, set the screens so their image tops align and their bezels meet at a slight angle toward you, then live with the arrangement for the adjustment month described in this guide before judging it. Dual setups reward patience in setup more than any other desk configuration, because two screens multiply both the benefit of a good arrangement and the irritation of a careless one.
A Note on Arms in Rented Homes and Shared Offices
Some desks come with rules, and an arm choice should respect them from the start. In a rented home or a managed office, drilling a desk for a through-bolt mount may be forbidden or simply unwise, which makes the clamp the default, and makes it worth confirming that the desk’s edge and material can take a clamp before the arm is chosen rather than after it arrives. Where desks are allocated by a facilities team, ask what is already known: many workplaces have an approved list, spare reinforcement plates and a person who has mounted fifty of these and will spot your desk’s quirk in ten seconds. In shared spaces, label your settings under the desk, as this guide suggested, and leave the arm’s tools, if any are needed for adjustment, in the desk drawer rather than at home, because an adjustable arm whose key lives elsewhere is, in practice, a fixed arm. None of these considerations is glamorous, and all of them decide whether a well-chosen arm stays well set up in the real building it lives in.
There is a quiet satisfaction available at the end of this process that is worth naming, because it is the real product being bought. A screen that floats exactly where your eyes want it, that moves with a fingertip when the work changes and returns without argument, that leaves the desk surface empty for paper, tools and thought, changes the feeling of a desk out of proportion to the modest hardware involved. People describe such a desk as tidy, but what they usually mean is that nothing on it is fighting them. The four numbers, the desk checks and the month of small adjustments are how that feeling is reliably manufactured, and once you have it, you will understand why monitor arms inspire a loyalty that their plain appearance never quite explains to anyone who has not lived with one.
FAQ
Can a monitor arm damage my desk?
A clamp can mark the desk surface or squeeze a weak edge. Use padding or the supplied plates as advised.
Why does my screen drift down?
The tension is likely wrong, or the screen is outside the arm’s weight range.
What if my monitor has no VESA holes?
Some makers sell adapter kits for specific screens. Follow the adapter maker’s instructions and check the weight range. If no suitable adapter exists, a stand may be a better choice.
Can I use an arm with a curved or ultrawide screen?
Often yes, if the arm lists support for that size and weight. Wide screens add leverage, so check the maker’s size guidance and desk strength.
Do I need a helper to install it?
It is wise to have one when lifting the monitor into the arm. Many screens are awkward and fragile, and a second pair of hands reduces the risk of a drop.
How high should a monitor arm hold my screen?
A common starting point is to set the top edge of the screen at or slightly below eye level while you sit upright. Many people also like the screen about an arm length away. Adjust from there based on how your neck and eyes feel, especially if you wear progressive lenses.
How do I adjust the tension on a monitor arm?
Find the tension adjuster, usually a hex key screw near the arm joint, and turn it in small steps. Add tension if the screen sinks and reduce it if the screen rises. Hold the monitor while you adjust, and check the manual for the correct turn direction.
Can a monitor arm be used on a glass desk?
Only if the manufacturer says the model is suitable for glass. Glass can crack under clamp pressure, and some arms come with special pads or plates for it. Read the desk-type notes in the manual, and choose a grommet or different mount if it is not allowed.
Is a dual monitor arm better than two single arms?
A dual arm saves desk space and uses one clamp, but it concentrates the combined weight on one point. Two single arms give more freedom to position each screen. Check the total weight limit and the span between screens before you decide.
How tight should the clamp be on a monitor arm?
Tighten the clamp until the arm no longer moves when you push on its base, then stop. Over-tightening can dent soft desks or crack thin tops. Re-check after a week because clamp pads can settle, and follow the manufacturer torque or turn guidance.
How do I measure the VESA pattern if the holes are hidden?
The holes often sit under the monitor’s own stand bracket or a snap-on cover. Power everything down, lay the monitor face down on a soft, flat surface, and remove the stand following the maker’s instructions, which usually involves a release button or a few screws; the square or rectangular pattern of threaded holes will be revealed in the centre of the back panel. Measure centre to centre horizontally and vertically with a ruler, since those two distances are the pattern. Photograph the panel before you refit the stand, so you never have to repeat the undressing to answer a listing’s question.
My desk has a cable grommet hole. Can the arm mount through it?
Some arms offer a through-desk fitting that can use an existing grommet hole, and it can be the neatest solution where a clamp cannot grip, such as a desk with a deep rear frame. Check three things: the hole’s diameter against the fitting’s requirements, the desk material’s strength around the hole, since the load now concentrates there, and what happens to your cables, which shared the hole until now and need a new route. If any of the three fails, a clamp at a different position along the desk edge, with the arm reaching across, is usually the simpler answer.
Why does my screen wobble when I type?
Wobble is the whole system moving, so work through it in order. The desk itself may flex, especially on carpet or with adjustable legs at full height; test by pressing the desk edge. The clamp may have settled into the desktop material in its first days and loosened, which a careful re-tightening to the maker’s guidance fixes. The arm’s joints may be set at full extension, where leverage is greatest; bringing the screen a little closer and the arm a little more folded stiffens the geometry noticeably. Address the causes in that order and the wobble usually reduces to a level your eyes ignore.
Can I add a second arm later for another monitor?
Usually yes, and planning for it costs nothing now. Leave clamp space along the desk edge for a second mount, keep the first arm’s cables routed to one side so a second set has a clear path, and note that two independent arms are simpler to position asymmetrically, one main screen centred and one secondary angled, than a combined dual mount. The main constraint is the desk itself: two arms concentrate two loads at the edge, so the desk strength checks in this guide matter twice over, and a reinforcement plate under each clamp is cheap insurance.
The Short Version
Confirm VESA holes, weight range, desk strength and reach, then choose a mount style that fits. Follow the maker’s installation guide closely and ask for a helper when lifting.