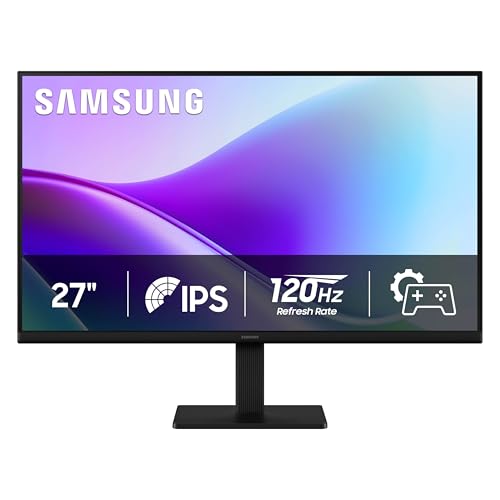
A monitor stand, or riser, lifts your screen so the top edge sits near eye level, and some add storage below. Choose by the height you need, the platform width, the weight it can carry and how it looks and feels on your desk.

Find Your Height First
Sit in your usual position with your arms resting naturally. Look straight ahead. The top of the screen should sit around eye level or slightly below. Measure the gap between your screen’s current top edge and that point. That number is the extra height you want from a stand. Stands come in fixed heights or with adjustable levels, so check the range the maker lists.
Think about the keyboard and mouse too. A riser lifts only the screen, so the keyboard stays at desk height, and that is usually the intended arrangement. If your desk is too high for comfortable typing, a stand may make the whole setup less comfortable, and adjusting your chair or desk height would be the first step. Take a few minutes after setup to sit in your normal position and confirm the screen, keyboard and mouse all feel natural.
In this guide
What to Compare
| Factor | Why it matters | What to check |
|---|---|---|
| Platform width | Must hold the monitor base with room to spare | Base width versus platform width |
| Platform depth | Affects how far back the screen sits | Enough depth for the monitor’s feet |
| Weight limit | Prevents sagging or tipping | Maker’s maximum compared to your monitor |
| Under-stand space | Lets you tuck a keyboard away | Gap height and width |
| Material | Sets sturdiness and appearance | Wood, metal, or plastic build, plus non-slip feet |
| Extras | Adds drawers, ports or cable slots | Whether you will truly use them |
Features Worth Thinking About
- Non-slip surface: keeps the monitor from sliding when you nudge the desk.
- Open back: lets cables pass through and keeps airflow around devices.
- Dual-monitor width: a long platform can carry two screens, as long as the weight limit covers both.
- Storage shelf: good for notebooks and small items, but do not overload it.
Measuring Your Monitor and Desk
- Measure the width of your monitor’s base or feet from the outer edge of one foot to the other.
- Measure the depth of the base from front to back.
- Look up the monitor weight in its manual, with the stand attached since it will sit on the riser as it is.
- Measure the free desk width and depth where the riser will go, leaving room for the keyboard and mouse.
- Check the height under any shelf or window sill above the desk so the raised screen will fit.
- Compare each figure with the maker’s listed platform size and weight limit.
Plan the cables before you place the monitor on the stand. Power and display leads often need more slack once the screen is raised, and a stand with a cable slot or open back makes this easier. Use soft ties rather than tight clips, so you can move the monitor later without damaging the leads, and keep power cables away from any heat source or from places where they can be pinched under the stand feet.
Setting It Up
- Assemble the stand on the desk and check it sits level.
- Switch off and unplug the monitor, then lift it with both hands.
- Place it centrally on the platform.
- Reconnect cables, leaving slack.
- Sit down and check your eye line again, adjusting if needed.
Stability deserves a final check. Gently push on the side of the desk and see whether the monitor wobbles. A good fit should feel steady and not creep when you tap keys. If the stand has legs, make sure all feet touch the desk evenly, and use felt or rubber pads if the desk surface is delicate. Look at the weight limit again if you swap to a larger screen.
Common Scenarios
- Single monitor on a shallow desk: a compact riser with a tidy under-space for a keyboard saves room.
- Laptop beside a monitor: a stand raises the monitor to line up with the laptop screen, or a laptop riser does the reverse.
- Two monitors: a wide platform may carry both, provided its weight limit covers the combined load.
- Desk with lots of clutter: a riser with a shelf or drawers clears loose items off the surface.
Mistakes to Avoid
- Choosing a platform narrower than the monitor feet: the screen can tip, so the platform should support the whole base.
- Overloading the shelf beneath: heavy items on a light stand can bend it.
- Raising the screen too far: the top edge above eye level makes you tilt your head back.
- Forgetting cable slack: raised screens pull on leads that were tight.
- Stacking books as a permanent riser: they shift and can slide off, so use a proper stand.
Think also about the lighting in the room. A raised screen may show reflections from a window or lamp that were not visible at the lower height. Tilt the monitor a little, move the stand, or change the lighting to reduce glare. Raising a screen also moves the cables, so recheck them for strain after you adjust the height.
Care and Upkeep Over Time
Wipe the stand with a dry or lightly damp cloth. Check feet and any joints for looseness every few months, and replace worn non-slip pads. If the stand is wood or has a coating, follow the maker’s cleaning advice and avoid harsh solvents. Keep the area around vents clear of paper and clutter, and take another look at the weight limit when you change monitors. Lift the screen with both hands when you move it, or ask a helper.
Quick Troubleshooting
| Symptom | Likely cause | What to try |
|---|---|---|
| Screen wobbles when you type | Stand not level or feet loose | Check all feet touch the desk and tighten fittings |
| Screen slides on the platform | Smooth surface | Add a non-slip mat suited to the monitor |
| Neck feels strained | Screen too high or too low | Adjust height so the top edge sits near eye level |
| Stand sags in the middle | Weight above the limit | Reduce the load or choose a sturdier stand |
Glossary
- Riser: a raised platform that lifts the monitor.
- Platform: the flat top surface the monitor sits on.
- Weight limit: the maximum load the maker lists.
- Footprint: the desk area the base covers.
- Eye line: the horizontal line at the height of your eyes.
- Cable slot: a cut-out or gap that lets leads pass through.
Ergonomics Behind the Numbers
A stand exists to put the screen where your body wants it. General ergonomic guidance suggests that the top of the screen should sit at or slightly below eye level, with the screen roughly an arm’s length away, and your neck in a relaxed, neutral position. If you find yourself tilting your head down or craning forward, the screen is probably too low or too far away.
These are starting points, not rules. People differ in height, seat position, eyesight, and whether they wear bifocals. Someone with progressive lenses may need the screen lower than usual to avoid tipping the head back. Adjust in small steps, work for a while, and notice whether your neck, shoulders, or eyes feel strained at the end of the day.
- Sit in your normal working posture before judging screen height, not a stiff upright posture.
- Keep your forearms roughly level with the desk when typing, so the stand does not push you to raise your shoulders.
- If discomfort persists, a qualified professional can offer personalized advice.
Weight, Stability and Weight Limits
Every stand has a rated weight capacity. Treat it as a hard limit, and leave some margin. Check the weight of your monitor in its specifications, with the factory stand removed if you plan to mount it differently, and compare with the stand’s rating. A stand that is close to its limit can sag, wobble, or tip when you tap the desk.
Stability also depends on the footprint and the legs. A wide stand with a flat, solid top generally resists wobble better than a narrow one. A stand with a drawer or shelf has more mass at the base, which can help, but be sure the load does not shift when you open the drawer. If you lean on the desk or use a standing desk that moves, test the setup before trusting it.
- Place the monitor so its weight sits over the stand’s center rather than at one edge.
- Add non-slip pads if the stand or monitor feet slide on the surface.
- For very large or heavy displays, consider whether a desk-mounted arm is the safer option.
Materials and Finish
Stands are commonly made of wood, engineered wood, metal, bamboo, or plastic, and each has trade-offs. Metal stands tend to be rigid and slim. Wood and bamboo look warm and can be sturdy but may show wear from heat and moisture. Plastic stands are light and inexpensive but can flex under heavy loads.
Look at the finish and edges. Smooth, rounded edges are easier to live with than sharp corners, and a matte surface hides fingerprints better than gloss. If the stand will hold a heavy monitor for years, a solid construction with good joints is worth more than a decorative look.
Cable Management and Desk Layout
A stand changes how cables run, because raising the monitor creates a gap beneath it and may expose the cables. Plan the route before you finish setup. Leave enough slack for the monitor to move, but avoid long loops dangling behind the desk.
- Route the power and video cables through a rear cutout or clip if the stand provides one.
- Use cable ties or reusable hook-and-loop straps to bundle cables, leaving slack so no connector is under strain.
- Keep power cables and data cables reasonably separate where practical, and do not cover power strips with fabric or paper.
- Label the plugs at the wall end so you can unplug the right one later.
Think about what goes under the stand as well. Keyboards slide beneath well, and a slim storage tray can hold a notebook or phone. Avoid putting anything that gets warm, such as a power adapter, in a closed space under the stand unless the maker allows it.
Planning for Dual Monitors
Two screens change the math. Two small monitors may sit side by side on a single wide stand, while two larger monitors usually need two stands or an arm. Measure the combined width of both screens, including bezels, and compare it with the desk depth and the stand width.
For comfort, place the screen you use most directly in front of you, with the second to the side at a slight angle. If you use both equally, center the seam between them in front of you and angle each inward. Matching the stand heights is important, since uneven tops force you to tilt your head back and forth.
Alternatives When a Stand Is Not the Right Fit
A stand is simple and needs no tools, but it is not perfect for every setup. If you want fine height control, tilting, rotating, or more desk space, a desk-mounted monitor arm may suit you better, provided the desk has a solid edge or grommet hole and the monitor has a standard mounting pattern, often called VESA. Check your desk’s thickness and material before buying an arm.
For a quick fix, a sturdy stack of books with a flat top can serve as a temporary riser while you work out the right height, but it is not a long-term solution because stacks can slip. Once you know the height that suits you, pick a stand that matches it. If you share a desk with someone of a different height, a stand with adjustable legs can save repeated swapping.
A Worked Example: Setting Up a Desk From Scratch
Here is an invented example to show the process. Suppose a person sits in a chair where their eyes are about 45 inches above the floor, and the desk surface is 29 inches high. The distance from the desk to eye level is therefore about 16 inches.
The monitor they own measures 14 inches from the bottom of its base to the top edge of the screen, and the visible screen starts about 3 inches above the base. For the top edge of the screen to sit at or just below eye level, the stand should lift the monitor by about 2 inches, minus a small allowance, so a stand in the range of 2 to 4 inches might be a fair starting point. If they used a laptop beside the monitor, a stand in the higher part of that range would help align the two.
This is only an illustration. Your numbers will differ, so measure your own desk height, eye level, and monitor dimensions. Use the arithmetic as a guide, then adjust by trying the setup for a few days.
Testing and Fine-Tuning After Setup
After the stand is in place, do a short check before settling in.
- Sit normally and close your eyes, then open them and see where your gaze lands. It should fall near the top third of the screen.
- Check for glare from windows or lights, and adjust the screen tilt or move the desk if needed.
- Make sure the screen is about an arm’s length away, and adjust text size rather than leaning in.
- Take regular breaks to look into the distance, as eye strain comes from more than screen height alone.
If your neck or eyes feel better after a week, you are probably close. If not, change one thing at a time, such as height, distance, or brightness, so you know what made the difference.
Common Setup Problems and Fixes
Even a good stand can cause trouble if the setup is off. A monitor that feels too high usually means the stand is taller than needed, and a thinner riser or removing the monitor base spacer may help. A screen that seems too far away often results from a deep desk, so pulling the stand forward or moving the chair closer can fix it without any purchase.
If the stand blocks your keyboard tray or drawer, measure the clearance beneath before buying, and look for a design with a wide opening. If the screen sags backward over time, check the monitor feet for slipping and tighten any fasteners. For glare, try a matte screen filter or reposition the desk, since changing height rarely solves reflections on its own.
- Neck pain after a week: lower or raise the screen by an inch at a time.
- Dry or tired eyes: check distance, brightness, and break frequency along with height.
- Stand creaks: tighten screws and check for uneven feet.
If symptoms persist or worsen, consult a healthcare professional, because a stand cannot fix every source of discomfort.
Ready to Buy? Start Here
If this guide helped you decide what to look for, these products are a place to start.
As an Amazon Associate we earn from qualifying purchases. Prices and availability are shown on Amazon.
Work Backwards From Your Eye Line
A monitor stand has one primary job, which is to put the screen at the height your body wants, and everything else it offers is secondary. So start with the measurement that defines success. Sit in your chair, set up as you normally work, feet supported and back against the chair, and look straight ahead. Have someone note where your eyes are relative to the desk surface, or measure the height of the centre of your current screen from the desk and then judge honestly whether you look down at it steeply, meet it comfortably or crane up at it. The comfortable target, as the ergonomics section of this guide explains, is a screen centre a little below your straight-ahead eye line, so your gaze falls slightly downward and your neck stays near neutral.
The stand height you need is then a subtraction, not a guess: target screen-centre height minus current screen-centre height equals the lift required. Do this arithmetic with your monitor on its own factory stand, because the stand you buy must supply exactly that difference, no more and no less. A stand that lifts well beyond the difference is not giving you extra value; it is putting the screen too high and forcing you to solve a new problem, usually by slouching, which defeats the entire purchase. A stand that falls short leaves you stacking it on books, which is where you started. This one subtraction, done carefully, is worth more than every other feature comparison in this guide combined.
Recheck the arithmetic if your chair or desk changes
The subtraction depends on where you sit, so it expires when your furniture changes. A new chair with a different seat height, a desk at a new height, or a move to a sit-stand frame all shift your eye line and reopen the question. This is a genuine argument for a stand with some height adjustment if your furniture is likely to change, and an equally genuine argument for a simple fixed stand if your setup is settled for years. Match the stand’s flexibility to your life’s stability, not to an abstract preference for adjustability.
Platform Size: Fit the Footprint, Not the Screen Diagonal
Stands are often sold by the screen size they suit, but what physically sits on the platform is the monitor’s own base or feet, and those vary enormously between models of identical screen size. Measure the footprint of your monitor’s base, width and depth, and compare it with the platform’s usable surface, doing the subtraction in both directions. You want a positive remainder all round, enough that the base sits fully supported with a margin against knocks, but not so much platform that it eats desk space you need for your keyboard and papers. A base that overhangs the platform at any point is an automatic rejection, however good the stand looks, because an overhung monitor is a tipped monitor waiting for its moment.
Depth deserves special attention on shallow desks. Add the platform’s depth to the space your keyboard needs in front of it, and compare the total with your desk’s depth. If the sum exceeds the desk, something must give: either the keyboard crowds your stomach, the monitor crowds your eyes, or the stand is simply too deep for the desk. Finding this out with a tape measure at home is free; finding it out with a delivered stand is a returns label.
Two monitors change the platform question entirely
For a pair of screens, the arithmetic doubles and the geometry matters. Two bases side by side need a platform at least as wide as both footprints plus the small gap or overlap your angled arrangement creates, and the stand must be rated for the combined weight, not just each screen individually. Angle the monitors on a tape outline on your desk before ordering, marking where each base would sit, because the angled outer edges of the bases often need more width than a straight-line estimate suggests. Many dual setups are honestly better served by two smaller stands, one per screen, which can differ in height if the screens differ, an option the single long platform cannot offer.
Load, Deflection and the Creep Test
Every stand states or implies a load it can carry, and your monitor’s weight, which you can take from its manual or by weighing it carefully, should sit comfortably below that figure rather than at it. The reason is deflection: materials bend under load, and a shelf or platform loaded near its limit bows visibly, tilts the screen and worsens slowly as the material creeps over months. A stand that is ramrod straight with your screen on day one but rated only just above its weight may not be straight in a year. Margin is the whole game: choose a stand whose comfortable capacity exceeds your load by a clear amount, and the platform will stay level for its whole life.
Test deflection at home during the return window with a simple method. Place the loaded stand on your desk, lay a straight edge or a long ruler across the platform’s front edge, and sight along it for bow. Then leave the monitor in place for two days and sight again. Any increase in bow over that short period is the material telling you it is working too hard, and it will not improve with time. While you are there, push down gently at each front corner; a well-matched stand feels like furniture, solid and silent, rather than like equipment under strain.
What Goes Underneath: Planning the Space You Gain
The storage space under a raised monitor is the stand’s most advertised bonus and its most squandered one. Before buying, decide what will actually live there, and measure those items. The classic tenant is the keyboard, slid away to free the desk for writing, and that requires the under-space to be both tall enough for the keyboard’s thickness plus your fingers gripping it, and deep enough for its full depth. Other honest tenants are a notebook, a closed laptop used with the monitor, or a small desk organiser. Dishonest tenants, the ones that arrive by drift, are loose papers, unfiled receipts and general clutter that the stand merely hides from view while it gathers dust.
Check the under-space dimensions as carefully as the platform: internal height, width between any legs or supports, and depth. A stand whose supports sit at the front corners can steal the width your keyboard needs even when the headline dimensions look generous. If your plan involves sliding a laptop underneath and using the monitor as its screen, also plan the cables: the laptop’s connections will live in that space permanently, and a stand with a closed back turns every cable change into a excavation. Open-backed designs earn their keep in exactly this setup.
Worked Example: Specifying a Stand for a Shared Family Desk
Consider a desk used by two adults of different heights and a teenager doing homework, a common and genuinely hard brief. The eye-line subtraction gives three different answers, a few centimetres apart, which immediately rules out the cheapest fixed stands unless the family accepts a compromise height plus chair adjustment to absorb the difference. The platform arithmetic is simpler: one mid-sized monitor with a wide, shallow base, needing a platform with a small positive remainder in width and a careful check in depth because the desk is not deep. The load check is easy, since the single screen sits well within any sensibly rated stand’s capacity, which frees the budget for the thing this brief actually needs, which is height adjustment that can be changed without tools, because a stand that needs an afternoon and an Allen key to adjust will be adjusted exactly once.
Notice how the example resolves: the family’s real specification emerged from their circumstances, a shared desk and a shallow depth, and not from any feature list. The teenager’s homework adds one more requirement the adults would have missed, which is that the under-space must swallow a keyboard to turn the computer desk back into a writing desk in seconds. Three measurements and one honest conversation produced a complete specification. Your own version of this exercise, with your numbers and your household, is the most reliable route through this entire category.
Setting Up and Living With the Stand
Installation is simple and still worth doing deliberately. Clear the desk fully, place the empty stand, and check it sits level and does not rock on its feet before any weight goes on; a rock at this stage is a foot or a floor issue that load will only amplify. Centre the monitor on the platform by eye from your seated position, not by measuring from the desk edges, because your eyes are the customer. Route the cables after positioning, leaving a gentle loop behind the monitor so the screen can be turned for cleaning without dragging anything, and keep power bricks off the platform unless the stand is rated and shaped for them, since their weight belongs in the load arithmetic if they ride up there.
Then live with it for a fortnight before declaring success. Your neck and shoulders are the judges, and they vote over days, not minutes. Small corrections are normal in week one: a centimetre of height via the stand’s adjustment or a slim shim book under the monitor base, a slight change of screen tilt, a rearrangement of what lives underneath. If discomfort persists after honest fine-tuning, revisit the original subtraction before blaming the stand, because the commonest cause is a chair height that drifted from the position you measured in, quietly moving your eye line away from the screen you so carefully placed.
Materials in Daily Life: What Your Hands and Eyes Will Notice
Beyond their strength, stand materials shape small daily experiences that listings rarely mention. A metal platform feels cool and stays flat, but it can ring faintly when a mug is set down hard and it shows dust against a dark finish within a day. A wooden or wood-effect platform is quieter, warmer to the touch and kinder to the items slid across it, but it deserves a check for how its edges are finished, since a sharp or poorly sealed edge is where such stands age first and where your wrists may rest. Glass-topped designs look light and clean in a bright room and reveal every fingerprint and cable beneath them, which is either a pleasure or a torment depending entirely on your temperament, and you know which you are.
Finishes matter to the monitor as well as to you. The platform’s surface should grip the monitor’s base enough that the screen does not creep when the desk is bumped, without being so abrasive that sliding the monitor into position scratches its feet or the platform itself. Test this during the return window by repositioning the monitor a few times, as you will for cleaning, and inspecting both surfaces. Rubber pads and mats solve most mismatches, but they add a millimetre or two to your carefully calculated height, so add them before your final eye-line check rather than after, and let the arithmetic absorb them.
The stand as part of the room
A monitor stand is furniture as much as equipment: it is large, always visible and sits at the centre of the desk you look at all day. It is legitimate to weigh how it looks and how it makes the desk feel, provided the ergonomic subtraction and the footprint and load checks have already been passed. A stand that pleases you will be kept clear and used as intended; a stand you resent will accumulate clutter and quiet compromises. Consider also the view from the other side if your desk faces into a room, because the back of the setup, its cables and the stand’s rear face, is what the household sees. A few minutes of cable tidying and an honest look from the doorway complete the installation in a way that purely technical checks never quite do, and they cost nothing but the decision to bother.
Stands for Particular Desks: Standing, Small and Shared
Three desk situations bend the general rules enough to deserve direct attention. On a sit-stand desk, the stand’s job narrows: the desk itself does the large height work, so the monitor stand only needs to supply the fixed difference between the screen’s natural position and your eye line, and that difference is the same whether you are sitting or standing, provided your desk heights are set correctly for both postures. Check the subtraction in both positions during setup; if the difference changes between sitting and standing, it is your desk heights that need adjusting, not a taller stand. Stability also matters more on a moving desk, since the whole surface travels and any wobble in the stand is amplified at the top of the desk’s range, so run the corner-press test with the desk fully raised.
On a genuinely small desk, the stand becomes a space-making tool first and a posture tool second, and the under-space planning in this guide becomes the main event: the winning stand is the one whose footprint returns the most usable desk, which usually means a design whose supports sit at the rear, leaving the front area fully open for the keyboard to slide away. Measure the reclaimed space as carefully as the platform, because on a small desk that space is the purchase. On a shared desk, finally, favour stands that tolerate being moved, bumped and occasionally borrowed without losing their setup, and accept a compromise height softened by chair adjustment, since a stand that needs tools and twenty minutes to suit each user will, in practice, suit nobody after the first week.
A Note on Buying a Stand Second-Hand or for a Team
Stands are among the safer things to buy used, because their condition is legible: a platform is flat or it is not, feet are present or they are not, and the deflection and corner-press tests in this guide will tell you in two minutes whether a particular stand still does its one job. Check especially for the slow failures that photographs hide: a shelf that has bowed under a previous heavy monitor, hairline cracking around fixings on plastic designs, and missing feet that make a stand rock on a hard desk. For a team or a whole office, the same legibility is an argument for standardising on one sound design at the height range your furniture needs, bought with a spare or two, because a uniform setup can be adjusted, cleaned and repaired from shared knowledge, and a new starter inherits a desk that already works. Whether the stand is for one careful owner or forty colleagues, the contract is the same one this guide began with: the right lift, honestly measured, on a platform that stays level under the load it was given.
It is worth closing by acknowledging the stand’s limits, because a purchase made with clear eyes lasts longer than one made on promises. A stand will not fix a chair that does not support you, a desk at the wrong height for your arms, lighting that throws reflections across the screen, or a working day with no movement in it. What it does, completely and reliably, is place one screen at the height your measurements asked for and keep it there, and in a setup where the other elements are even roughly right, that single correction is often the one that makes the whole desk feel considered rather than accumulated. Buy it for that job, measure for that job, and judge it on that job, and a monitor stand will repay you in the least dramatic way possible: by never being thought about again.
FAQ
Is a stand better than a monitor arm?
A stand is simple and needs no clamping. An arm offers more adjustment and frees more desk space. See your own needs and desk.
Can I put a laptop on a monitor stand?
If the weight and size fit, yes, but check airflow under the laptop.
How high should the stand be?
High enough that the top edge of the screen sits around eye level or slightly below when you sit upright. Measure the gap from your current setup and choose a stand that covers that range.
Does a stand work with a curved or ultrawide screen?
Often, if the platform is wide enough to carry the whole base and the weight limit covers it. Check the monitor base width and depth against the maker’s platform size.
Can I store things underneath?
Yes, within the shelf’s limits. Keep heavy items off a light stand, and leave space around any device that needs airflow.
What is the best height for a monitor stand?
The best height puts the top of the screen at or slightly below your eye level when you sit in your normal posture. That varies by person and chair. Measure from the desk to your eye level, subtract the monitor’s height above its base, and pick a stand close to the result.
How much weight can a monitor stand hold?
It depends on the model. Light stands may be rated for only a modest load, while sturdy metal or solid wood stands hold much more. Check the stated weight capacity, compare it with your monitor’s weight, and leave a margin so the stand stays stable.
Do I need to remove the original stand from my monitor?
Usually not. Most people place the monitor, with its own base attached, on top of a riser. You only remove the original stand when mounting the monitor to an arm or wall bracket that uses the VESA pattern on the back.
Will a monitor stand fit my standing desk?
Most will, but check the stand’s footprint against the desk surface and make sure the weight stays centered during movement. Cables need extra slack so they do not tug when the desk rises or lowers. Test the full range slowly before leaving it unattended.
How do I stop my monitor from wobbling on a stand?
Check that the stand is on a level surface and the screws are tight. Center the monitor’s base on the stand and add rubber pads to prevent sliding. If it still wobbles, the stand may be too light or narrow for the monitor, and a sturdier model may be needed.
Can I use a monitor stand on a glass desk?
Yes, with attention to how the load spreads. A stand’s feet concentrate the combined weight of stand and monitor onto small contact patches, and glass, even toughened glass rated for desk use, prefers that weight spread. Choose a stand with wide feet or a solid base rather than four small points, confirm the desk maker’s own weight guidance for the surface, and place the stand away from the glass edges where stress concentrates. Check the feet for grit before positioning, since a trapped grain under a loaded foot is the classic way glass gets scratched or worse.
Is a wider stand always more stable?
Width helps stability against sideways tipping, but stability is a system of footprint, height, load position and material stiffness together. A very wide but thin and flexible platform can wobble more in daily use than a narrower, stiffer one, because the monitor’s weight works at the end of a longer lever. Judge by the loaded tests in this guide, the straight-edge deflection check and a gentle corner press, rather than by width alone, and keep the monitor centred so its weight sits over the stand’s supports rather than cantilevered toward an edge.
What can I do if my stand is slightly too short?
First recheck whether it is the stand or your chair that is out of position, since raising your seat a little and supporting your feet can close a small gap honestly. If the gap is real and small, a stable, full-footprint riser under the monitor base, such as a plain board cut to the base’s size, is a tidy fix; never balance a monitor on small blocks under its feet, which converts a height problem into a tipping hazard. If the gap is large, the stand is simply the wrong height for you, and exchanging it beats building a tower, because every added layer adds movement and risk.
How do I keep the space under the stand from becoming a junk drawer?
Give the space a single named tenant, as this guide suggests, and let everything else be homeless by design. The keyboard-only rule works well: when the keyboard is out, the space is visibly, intentionally empty, which discourages drift far better than tidiness resolutions. A weekly ten-second reset while you clean the desk, returning the space to its one tenant, keeps the habit. If you genuinely need desk storage, a small organiser that fits the under-space exactly, measured like everything else in this guide, turns the area into a drawer with boundaries instead of a cave without them.
The Short Version
Work out the height you need, confirm the platform fits and the weight limit covers your screen, and choose useful extras only. Check the stand sits level and follow the maker’s setup steps.