Disclosure: As an Amazon Associate, reviewstook.com earns from qualifying purchases. Links on this page are affiliate links at no extra cost to you; prices and availability change frequently, so check Amazon for the latest.
How to Set Up a Prebuilt Gaming PC: From Box to First Game, Done Properly
This guide explains how to set up prebuilt gaming pc hardware correctly on its first day — the unboxing checks, the one cable mistake that makes new machines feel slow, the update order that prevents half of all first-week problems, and the settings that unlock the performance you actually paid for. A prebuilt arrives assembled and tested, but it does not arrive finished: the builder could not know your monitor, your network, your peripherals, or your games, and the gap between a tower that merely boots and a tower that is properly set up is worth real frame rates and real frustration avoided.
Allow one unhurried session for the whole process. None of the steps is difficult, and every step is easier in order than out of it: physical checks before power, system updates before games, display settings before judging performance. Owners who rush straight to installing their favourite title routinely misdiagnose setup issues as hardware faults — a monitor running at a default low refresh rate, a display plugged into the wrong port, a launch-day driver from the factory image — and some return perfectly good machines for reasons a checklist would have fixed in minutes.
The guide is written around the six verified configurations in this cluster, from the entry-tier ZYNEEX tower to the flagship Alienware Aurora, but the steps apply to any prebuilt from any builder. If you are still at the choosing stage, start with How To Choose A Prebuilt Gaming PC and the reference criteria in Prebuilt Gaming PC Buying Guide; this page begins where those end, with a box on your floor and an evening ahead of you.
In this guide
Key Takeaways
- Remove all internal transit packaging and check that nothing has come loose before the first power-on.
- Plug the monitor into the graphics card ports, never the motherboard ports — the most common setup mistake in PC gaming.
- Update in order: Windows first, then the graphics driver from the card maker, then any builder drivers.
- Set the monitor refresh rate manually in Windows; high-refresh panels commonly default to a lower rate.
- Use the first two weeks as a shakedown: play your most demanding game in long sessions while the return window is open.
Where to Buy
Every configuration named in this article was checked against the verified pick sheet for this cluster before inclusion, and each link below goes to the exact configuration described in the text. Prebuilt line-ups change without warning — a builder swaps a power supply, a storage size, or a wireless card while keeping the model name — so always re-read the full specification on the product page before you order, and use the links here to check the latest price on Amazon rather than trusting a figure quoted anywhere else. reviewstook.com recommends only configurations whose processor model, graphics card, memory, and storage are all named explicitly; if any one of those four lines is vague on a listing you are considering elsewhere, treat that vagueness as information in itself.
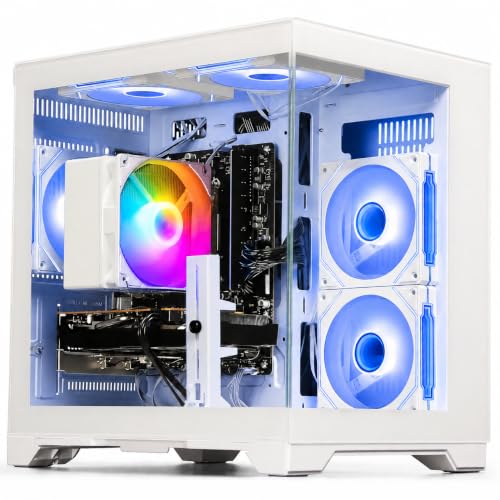
Best Budget — ZYNEEX Prebuilt Gaming Desktop — GeForce RTX 3050 6GB, 16GB DDR4 3200MHz, 1TB NVMe SSD. Check on Amazon
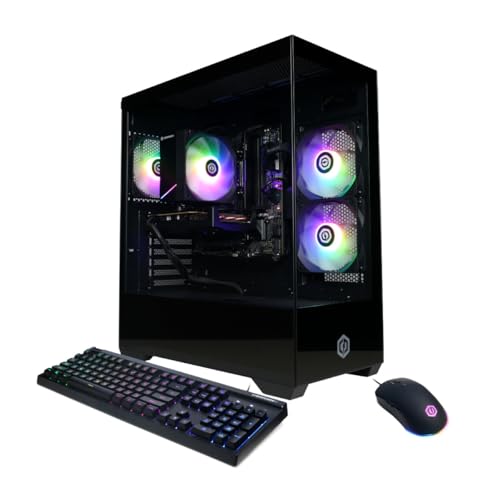
Best Balanced — CyberPowerPC Gamer Xtreme (Intel Core i5-14400F, RTX 5060) — GeForce RTX 5060 8GB, 16GB DDR5, 1TB PCIe 4.0 SSD. Check on Amazon
Best Overall — CyberPowerPC Gamer Master (Ryzen 7 8700F, RTX 5060 Ti) — GeForce RTX 5060 Ti 8GB, 16GB DDR5, 1TB PCIe 4.0 SSD. Check on Amazon
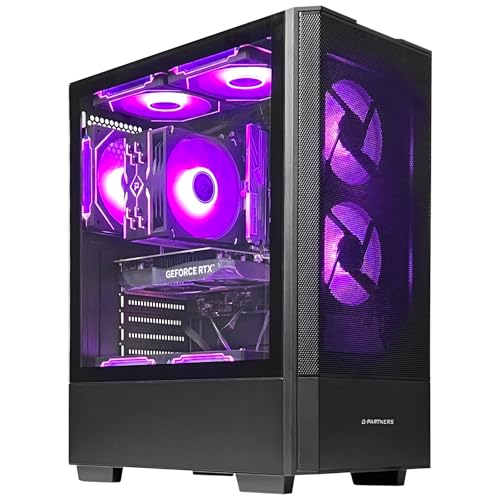
Best for Streaming — KOTIN Gaming PC Desktop (Ryzen 7 8700F, RTX 5060 Ti) — GeForce RTX 5060 Ti 8GB, 16GB DDR5, 1TB SSD. Check on Amazon
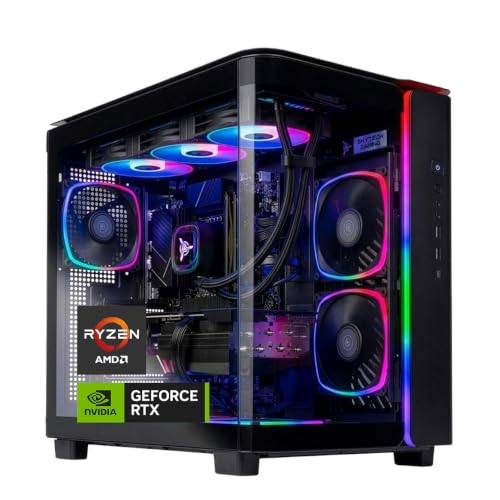
Best Premium — MSI Codex Z2 Gaming Desktop (Ryzen 7-8700F, RTX 5070) — GeForce RTX 5070, 32GB DDR5, 2TB SSD. Check on Amazon
Best Flagship — Alienware Aurora Gaming Desktop (RTX 5080, Core Ultra 9 285) — GeForce RTX 5080, 32GB DDR5, 1TB SSD. Check on Amazon
Step One: Unbox, Inspect, and Place the Tower
Photograph the box before opening it if there is any visible damage, then unpack on a clear surface and keep every bag, foam piece, and document until the machine has proven itself for a fortnight. Check the rear panel and confirm the specification on the order matches the machine in front of you — model, graphics card, memory, and storage are all verifiable in minutes once Windows is running, but a visual once-over now catches shipping damage while it is unambiguous. Many builders ship protective foam or an inflatable pack inside the case to support the graphics card in transit; it must come out before power-on, and the case will usually carry a warning label to that effect. While the panel is open or the foam is coming out, look — do not pull — for anything obviously displaced: a graphics card sagging out of its slot, a memory module visibly unseated, a cable resting against a fan.
Placement is a performance decision. The tower needs unobstructed air at its intakes and exhausts — front, top, and rear on most designs — and it belongs on a hard surface or a low stand, not sunk into thick carpet where a bottom-mounted power supply intake suffocates. Keep clearance behind the machine for cables to bend without strain, and think about heat in summer: a gaming tower under load is a steady heat source, and a small closed room will notice it. If the PC will live in a shared space, distance from seating and a good headset do more for domestic peace than any specification.
Step Two: Connect Everything — With One Critical Rule
Connect the power cable, then the peripherals, then the network — wired Ethernet for setup day if it is at all practical, even if Wi-Fi is the long-term plan, because the first hours involve large downloads that a wire makes faster and more reliable. Then the critical rule: the monitor cable goes into the graphics card, the horizontal row of ports low on the rear panel, and not into the motherboard ports near the USB cluster. Plugging into the motherboard routes the display through weak integrated graphics on machines that have it, and the result — a brand-new gaming PC that runs games badly — has generated more confused returns than any hardware fault in this industry. If you remember one sentence from this guide, make it that one.
Use the cable type that matches your monitor ambitions: a current DisplayPort or HDMI connection appropriate to your panel resolution and refresh rate, seated firmly at both ends. Connect controllers and headsets after the first boot rather than before, so that any pairing quirk is diagnosable as a pairing quirk and not tangled up with first-run setup.
Step Three: First Boot, Updates, and Removing What You Do Not Want
Power on and let Windows complete its first-run process without interruption. Create your account, connect the network if you have not already, and then — before games, before launchers, before anything enjoyable — open Windows Update and run it repeatedly until it reports nothing further. Factory images are weeks or months old, and a new machine commonly needs several rounds of updates with restarts between them. Next, install the graphics card maker own software and take the current driver from there; the driver on the factory image predates recent games and is the single most common cause of a new machine underperforming its reviews. Finally, check the builder support page for your model for newer motherboard, network, or audio drivers, and install what is newer than what you have.
Then declutter. Prebuilds commonly arrive with trial software, promotional utilities, and duplicate updaters. Remove what you do not recognise a need for, keep the builder tools that manage lighting, fans, or warranty registration if you will actually use them, and be finished: a clean machine with current drivers is the baseline every later judgement depends on. Create a restore point or confirm system protection is on, so the clean baseline is one you can return to.
Step Four: Set the Display and Sound Up as Hardware, Not Defaults
Open Windows display settings and set your monitor refresh rate explicitly — a high-refresh panel left at its default rate is performance you paid for and never received, and it is invisible until you check. Confirm the resolution is the panel native resolution, enable variable refresh if your monitor and card support it, and calibrate nothing else yet: play first, tweak colour later if you care to. In your games, enable upscaling in demanding titles, cap frame rate a few frames below the panel maximum for the smoothest variable-refresh delivery, and set texture quality by your card video memory rather than by habit.
Sound deserves the same two minutes. Set your headset or speakers as the default device, confirm the microphone input is the one you intend — not a webcam or controller microphone selected by accident — and test voice in the application you actually use with friends. More first-night gaming sessions are spoiled by audio defaults than by any other single cause after the display cable.
Problem: The New PC Feels Slow, Stutters, or Runs Hot — Work This List
Problem: games run far below expectations. Check, in order: monitor cable in the graphics card, not the motherboard; refresh rate set correctly; current graphics driver installed; upscaling enabled in the game; and the game actually using the discrete card in its own settings. One of those five is the answer in the overwhelming majority of cases.
Problem: stutter with good average frame rates. Look at memory and storage pressure — many applications open alongside the game, or a nearly full SSD — and at background downloads and updates still running from setup day. Give the machine a clean restart, close what you do not need, and retest before suspecting hardware.
Problem: fans are loud or temperatures climb in long sessions. Confirm internal transit packaging is fully removed, the tower has clearance on all vented sides, and it is not sitting on thick carpet. Check fan and lighting control software from the builder is installed and set to a sane profile rather than a fixed maximum or a silent mode unsuited to gaming.
Problem: Wi-Fi is slow or Bluetooth peripherals will not pair. Fit any external antennae that shipped in the box — a step owners skip constantly — confirm the current wireless driver, and pair Bluetooth devices one at a time near the machine before moving them to playing distance.
The Machines This Guide Was Written Around
Every configuration below arrives with the same setup needs and rewards the same first-hour care. They are listed from entry tier to flagship so you can see what changes with tier — connectivity improves, cooling grows more elaborate, bundled software varies — and what never changes: the cable rule, the update order, and the refresh-rate check apply identically to the least and most expensive towers here. The full range is compared in Prebuilt Gaming PC Reviews.

Best Budget — ZYNEEX Prebuilt Gaming Desktop
Strengths
- A full terabyte of NVMe storage at the entry tier, where many rivals still ship half that capacity
- The RTX 3050 is a genuine discrete graphics card with modern upscaling support, so this is real gaming hardware rather than a styled office tower
- The Ryzen 5 5500 and RTX 3050 pairing is honestly matched — neither component is waiting on the other in mainstream titles
Trade-offs
- Expect sensible settings rather than maximum settings in the most demanding new releases
- The DDR4 platform is mature and affordable, but it is at the end of its upgrade road
- A smaller assembler means a smaller support network than the largest national brands
| Component | Specification (verified) |
|---|---|
| Processor | AMD Ryzen 5 5500 |
| Graphics | GeForce RTX 3050 6GB |
| Memory | 16GB DDR4 3200MHz |
| Storage | 1TB NVMe SSD |
| Other | ARGB air cooling; Wi-Fi; Windows 11 |
A first-time buyer, a student, or an esports-focused player whose library leans toward competitive and mainstream titles and who wants a tower that works on day one without a second purchase hiding behind the first one. If your gaming is a mix of shooters, sports titles, indie games, and a back catalogue you have been meaning to finish, this tier covers it without drama.
In daily use the machine feels quick because the storage is a proper NVMe drive and the memory is sufficient for Windows, a launcher, voice chat, and a game to coexist. Load times are short, the desktop is responsive, and high-refresh play in lighter titles is entirely realistic. Where you will notice the tier is in heavy new releases at their highest presets, where turning a few settings down is the honest price of entry-level hardware.
The honest limitation is the graphics ceiling. This is a 1080p machine in the true sense: excellent at that resolution with sensible settings, not a shortcut to high-refresh 1440p. Buy it for the monitor you own today, not for a monitor you might buy in two years.
Best for: buyers matching the profile above, on a monitor matched to this tier. / Not suited for: buyers whose library, resolution, or budget contradicts the trade-offs listed here.

Best Balanced — CyberPowerPC Gamer Xtreme (Intel Core i5-14400F, RTX 5060)
Strengths
- A current-generation RTX 5060 brings modern upscaling and ray-tracing support to a mainstream tower
- The Core i5-14400F is a well-balanced modern processor that does not hold the graphics card back at 1080p or 1440p
- DDR5 memory and PCIe 4.0 storage put the machine on a current platform rather than a clearance one
Trade-offs
- 16GB of memory is the correct minimum rather than a generous allowance for heavy multitaskers
- CyberPowerPC is a large system integrator, so support is structured rather than personal
- No headline feature beyond the core specification — it wins on balance, not on a single flourish
| Component | Specification (verified) |
|---|---|
| Processor | Intel Core i5-14400F |
| Graphics | GeForce RTX 5060 8GB |
| Memory | 16GB DDR5 |
| Storage | 1TB PCIe 4.0 SSD |
| Other | WiFi Ready; Windows 11 Home; GXiVR8060A47 |
The mainstream buyer who plays a bit of everything — new releases, competitive titles, and older favourites — and wants one tower that handles all of it at high settings without paying flagship money. It is also the natural recommendation for a household PC that games in the evening and does school or office work in the day.
Day to day, this is the configuration that disappears into the background in the best way. Games install quickly, alt-tabbing to a browser or guide is painless, and the RTX 5060 has enough headroom that most titles can be left at high presets with upscaling available when a demanding release arrives. For streaming, the NVIDIA encoder keeps the cost of broadcasting low.
The limitation is headroom for the heaviest multitasking. If you routinely stream, record, edit clips, and keep dozens of browser tabs open while gaming, the 32GB premium configurations further down this page will serve you better than adding memory later and hoping the slots cooperate.
Best for: buyers matching the profile above, on a monitor matched to this tier. / Not suited for: buyers whose library, resolution, or budget contradicts the trade-offs listed here.

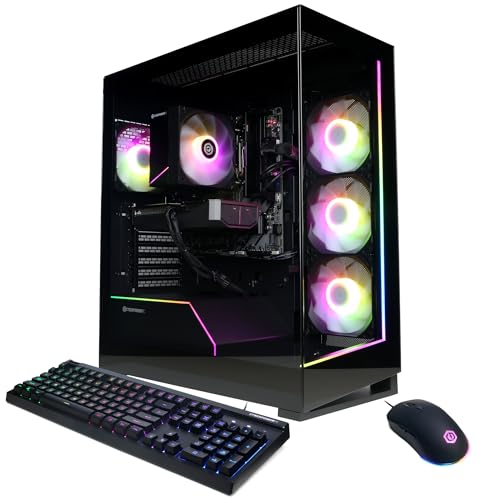
Best Overall — CyberPowerPC Gamer Master (Ryzen 7 8700F, RTX 5060 Ti)
Strengths
- The RTX 5060 Ti is more graphics card than 1080p needs and exactly right for high-refresh 1440p, which gives the machine a long useful life
- The Ryzen 7 8700F is a current-generation eight-core-class processor with real headroom for streaming and future titles
- CyberPowerPC’s Gamer Master line uses standard tower layouts that are straightforward to upgrade later
Trade-offs
- Some of what you pay for is reserve capacity that a basic 60Hz monitor cannot show you
- 16GB of DDR5 is sufficient for gaming but not the final word for creators who edit large projects
- As with any large integrator, check the exact power supply fitted to your unit on arrival
| Component | Specification (verified) |
|---|---|
| Processor | AMD Ryzen 7 8700F |
| Graphics | GeForce RTX 5060 Ti 8GB |
| Memory | 16GB DDR5 |
| Storage | 1TB PCIe 4.0 SSD |
| Other | WiFi Ready; Windows 11 Home; GMA2900A3 |
A buyer who wants one machine to last — flawless high-refresh 1080p today, confident 1440p tomorrow, and enough processor for streaming, recording, or light content work on the side. If you keep computers for four or five years rather than replacing them every two, this is the tier where that habit starts to pay.
In practice the 5060 Ti changes how you set games up: instead of negotiating with the settings menu, you start at high or ultra and adjust only the most expensive effects. Frame rates in competitive titles are high enough to justify a fast monitor, and upscaling support means that as games grow heavier, the machine has a lever to pull before it has a problem.
The limitation is economic rather than technical. Paired with an old 60Hz display, a meaningful share of this machine’s ability is invisible. Budget for a high-refresh monitor alongside it, or step down a tier and put the difference toward the screen.
Best for: buyers matching the profile above, on a monitor matched to this tier. / Not suited for: buyers whose library, resolution, or budget contradicts the trade-offs listed here.

Best for Streaming — KOTIN Gaming PC Desktop (Ryzen 7 8700F, RTX 5060 Ti)
Strengths
- The specification names its 650W Gold power supply explicitly, which is the single best sign of a thoughtfully built prebuilt
- DLSS 4 support and WiFi 6 cover both the performance-longevity and connectivity boxes in one tower
- The Ryzen 7 8700F and RTX 5060 Ti pairing is the proven sweet spot for gaming plus streaming
Trade-offs
- KOTIN is a smaller brand than MSI or Alienware, so long-term support depends on a narrower organisation
- 16GB of memory, again, is standard rather than generous for the heaviest multitaskers
- ARGB showpiece styling will not suit every room or every taste
| Component | Specification (verified) |
|---|---|
| Processor | AMD Ryzen 7 8700F |
| Graphics | GeForce RTX 5060 Ti 8GB |
| Memory | 16GB DDR5 |
| Storage | 1TB SSD |
| Other | WiFi 6; Windows 11 Home; DLSS 4; ARGB cooling; 650W Gold PSU |
A streamer or aspiring creator who wants the 8700F and 5060 Ti combination with the power supply question already answered properly. It also suits any buyer who has read enough prebuilt horror stories to care about the unglamorous components as much as the headline ones.
The Gold-rated power supply matters in ways you feel indirectly: stable power under load, quieter operation than a strained budget unit, and a realistic path to a future graphics upgrade without replacing the PSU at the same time. Combined with WiFi 6 and current upscaling support, the machine asks very little of its owner beyond being used.
Brand scale is the honest caveat. The hardware specification is strong and verified, but if white-glove national support coverage matters more to you than any single component, one of the larger brands on this page is the safer home for your money.
Best for: buyers matching the profile above, on a monitor matched to this tier. / Not suited for: buyers whose library, resolution, or budget contradicts the trade-offs listed here.

Best Premium — MSI Codex Z2 Gaming Desktop (Ryzen 7-8700F, RTX 5070)
Strengths
- 32GB of DDR5 and 2TB of storage as standard remove the two most common upgrade errands entirely
- The RTX 5070 is a clear step above the 5060 class, aimed squarely at high-refresh 1440p and entry 4K with upscaling
- MSI is a major manufacturer with the support infrastructure to match, and USB Type-C plus VR-Ready labelling round out a complete specification
Trade-offs
- You pay a premium-tier price for a premium-tier specification — value hunters should look at the 5060 Ti machines first
- 1TB would be enough for many buyers, so part of the spend is storage some owners will never fill
- A machine this capable deserves a monitor to match, which is a real additional cost if you do not own one
| Component | Specification (verified) |
|---|---|
| Processor | AMD Ryzen 7-8700F |
| Graphics | GeForce RTX 5070 |
| Memory | 32GB DDR5 |
| Storage | 2TB SSD |
| Other | USB Type-C; VR-Ready; Windows 11 Home; A8NVP-436US |
A buyer who plays demanding single-player releases at 1440p, creates content, or simply refuses to think about upgrades for several years. The combination of a stronger graphics card, double memory, and double storage makes this the configuration for people whose previous PC annoyed them in small ways every week.
The lived experience is headroom everywhere: large game libraries installed at once, editing timelines that do not stutter, virtual reality that runs without a settings negotiation, and multitasking that never forces you to close anything. It is the first configuration on this page where the honest advice is to stop reading specifications and start thinking about your monitor and chair instead.
The limitation is that premium tiers have diminishing returns for lighter libraries. If your gaming is mostly esports and indie titles, this machine will spend its life under-used, and a 5060 Ti configuration plus a better monitor is the smarter allocation.
Best for: buyers matching the profile above, on a monitor matched to this tier. / Not suited for: buyers whose library, resolution, or budget contradicts the trade-offs listed here.


Best Flagship — Alienware Aurora Gaming Desktop (RTX 5080, Core Ultra 9 285)
Strengths
- The RTX 5080 is flagship-class graphics that makes 4K with upscaling and high-refresh 1440p both genuinely comfortable
- The Core Ultra 9 285 is the strongest processor in this roundup, with abundant cores for creation and streaming workloads
- Wi-Fi 7 and 2.5Gb Ethernet give it the most complete connectivity of any machine here, inside a distinctive Aurora chassis
Trade-offs
- Flagship pricing buys flagship performance, but the value curve is steepest at the tiers below this one
- Alienware’s proprietary design language can make some future upgrades less standard than in a conventional tower
- 1TB of storage is, oddly, the one specification where the cheaper MSI above it offers more
| Component | Specification (verified) |
|---|---|
| Processor | Intel Core Ultra 9 285 |
| Graphics | GeForce RTX 5080 |
| Memory | 32GB DDR5 |
| Storage | 1TB SSD |
| Other | 2.5Gb Ethernet; Wi-Fi 7; Windows 11 Home; ACT1250 |
An enthusiast who plays at 4K or high-refresh 1440p, creates seriously, and wants a single flagship tower from a brand with a long gaming history. It is also the pick for buyers who value industrial design and are willing to pay for a machine that looks like nothing else on the desk.
At this level the conversation changes from settings to experiences: path-traced scenes become playable with upscaling and frame generation, large creative projects render without planning your day around them, and a high-end monitor finally has a partner worthy of it. The machine is quiet confidence rather than a compromise negotiated title by title.
The honest limitation is proportionality. Most players, on most monitors, in most games, will not see a difference large enough to justify stepping from the premium tier to this one. Buy it because you will use the headroom or because you simply want the flagship — both are legitimate, but know which one is true.
Best for: buyers matching the profile above, on a monitor matched to this tier. / Not suited for: buyers whose library, resolution, or budget contradicts the trade-offs listed here.

Comparison Table: The Six Reference Configurations Side by Side
Use this table the way experienced buyers do: find the graphics card first, then check that memory and storage do not undercut it. A strong card paired with too little memory or storage is a compromise wearing a headline; a balanced row is a machine that will feel right for years.
| Machine | Processor | Graphics | Memory | Storage |
|---|---|---|---|---|
| ZYNEEX Prebuilt Gaming Desktop | AMD Ryzen 5 5500 | GeForce RTX 3050 6GB | 16GB DDR4 3200MHz | 1TB NVMe SSD |
| CyberPowerPC Gamer Xtreme (Intel Core i5-14400F, RTX 5060) | Intel Core i5-14400F | GeForce RTX 5060 8GB | 16GB DDR5 | 1TB PCIe 4.0 SSD |
| CyberPowerPC Gamer Master (Ryzen 7 8700F, RTX 5060 Ti) | AMD Ryzen 7 8700F | GeForce RTX 5060 Ti 8GB | 16GB DDR5 | 1TB PCIe 4.0 SSD |
| KOTIN Gaming PC Desktop (Ryzen 7 8700F, RTX 5060 Ti) | AMD Ryzen 7 8700F | GeForce RTX 5060 Ti 8GB | 16GB DDR5 | 1TB SSD |
| MSI Codex Z2 Gaming Desktop (Ryzen 7-8700F, RTX 5070) | AMD Ryzen 7-8700F | GeForce RTX 5070 | 32GB DDR5 | 2TB SSD |
| Alienware Aurora Gaming Desktop (RTX 5080, Core Ultra 9 285) | Intel Core Ultra 9 285 | GeForce RTX 5080 | 32GB DDR5 | 1TB SSD |
Two patterns are worth noticing. First, every configuration here names its exact processor and graphics card — that transparency is itself a quality signal. Second, the jump from 16GB to 32GB of memory and from 1TB to 2TB of storage happens at the premium tier, which is exactly where heavy multitaskers and large-library owners should be shopping anyway.
How Do Drivers, Settings, and Small Tweaks Change Performance?
A surprising share of the performance owners leave on the table is software, not hardware. Graphics drivers are updated constantly, and new releases routinely include optimisations for new games; running a driver from many months ago on a current title is a self-inflicted handicap. Make the card maker update utility part of your routine, and prefer clean, current drivers over whatever version shipped in the box, which may predate your favourite games entirely.
Inside games, learn the settings hierarchy. Resolution and upscaling quality move performance the most; ray-traced effects are usually the next largest cost; shadow quality, volumetric effects, and draw distance follow; texture quality mostly consumes video memory rather than frame rate, so it can often stay high even on modest cards. When a new release runs poorly, the efficient order is: enable upscaling, reduce ray tracing, then shadows and volumetrics – before touching the settings that make the game look like itself. Capping frame rate a few frames below your monitor maximum, with variable refresh enabled, gives smoother delivery than an uncapped rate swinging wildly.
At the system level, keep storage meaningfully free – a nearly full solid-state drive slows down – and let Windows manage its own gaming features rather than stacking third-party optimisers on top of each other. Keep the machine vents dust-free, because a dust-choked cooler quietly taxes performance for months before it ever causes a shutdown. None of this is glamorous, and all of it together is worth more than the difference between adjacent hardware tiers.
What Should You Do in the First Hour With a New Gaming PC?
The first hour decides whether a good machine feels good. Start before power: remove all packaging, including any protective foam or padding shipped inside the case, and confirm nothing has come loose in transit – a graphics card or memory module can unseat itself in shipping, and a careful look now prevents a confusing first boot. Place the tower where its fans can breathe, with clearance at the front, top, and rear, and keep it off thick carpet where a bottom intake would suffocate.
Then make the single most important connection correctly: plug the monitor cable into the graphics card ports, not the motherboard ports. This mistake is the most common cause of a new gaming PC feeling slow, because the display ends up driven by weak integrated graphics while the real card sits idle. Connect wired Ethernet if you can for the setup phase even if you plan to use Wi-Fi afterwards; large updates download faster and more reliably on a wire. Power on, let Windows finish its first-run process, and resist the urge to install games until the system itself is current.
Update in order: Windows Update until it stops finding anything, then the graphics driver directly from the card maker own software, then the motherboard and wireless drivers if the builder support page offers newer ones. Set your monitor refresh rate in Windows display settings, because high-refresh panels commonly default to a lower rate until told otherwise, and enable variable refresh if your monitor and card support it. Remove trial software you do not want, install your launchers, and only then install the first game – ideally your most demanding one, so the shakedown test happens while the return window is wide open.
Why Do Thermals, Airflow, and Noise Decide How a PC Feels to Own?
Specifications describe what a machine can do in a benchmark; thermals decide what it can do in your room, in summer, in the third hour of a session. A graphics card and processor under gaming load convert nearly all their power draw into heat, and that heat must leave the case continuously. Builders who prioritise airflow – vented or mesh panels, sensibly placed fans, coolers sized to the processor rather than to the price – produce machines that hold their performance quietly. Builders who seal hot components behind decorative glass produce machines that get louder and slower the longer you play.
You cannot fully judge thermals from a listing, but you can read the signals. Named coolers, visible front or top ventilation, and a power supply with capacity to spare all suggest a builder thinking about sustained load. A very small case around very powerful components is a question worth asking rather than an automatic disqualification – good small designs exist – but the burden of proof sits with the design. Placement at home matters just as much: a tower needs clearance around its intakes and exhausts, belongs off thick carpet, and should never be sealed inside a closed cabinet while gaming.
Noise is the daily consequence. Most owners forgive a machine that is audible under full load; few forgive one that whines, rattles, or cycles its fans distractingly at the desktop. Fan bearing noise and aggressive fan curves are the complaints that fill owner discussions of otherwise well-specified machines, and they are exactly what the first-two-weeks test is for: play your most demanding game for long sessions early, while returning or exchanging is still painless, and listen to the machine as carefully as you watch the screen.
Does Your Network Deserve a Place in a Gaming PC Decision?
For online players, the network is a component of the gaming PC in everything but location. A fast tower on a congested wireless connection, three rooms from a struggling router, will feel worse in a competitive match than a modest tower on a clean wired connection. Before blaming hardware for lag, separate the two kinds of delay: frame rate, which the PC controls, and latency, which the network controls. They feel similar in a bad moment and have entirely different cures.
Wired Ethernet is still the gold standard for competitive play – stable, low-latency, and immune to the interference that plagues shared wireless environments – and the better towers in this cluster include fast Ethernet as standard. Where a cable is impossible, modern Wi-Fi standards on a recent router, with the PC positioned sensibly, are genuinely good; where the router itself is ancient, upgrading it can improve a whole household gaming more than any single PC component. Bluetooth, meanwhile, is the quiet essential for controllers and headsets, and it is worth confirming explicitly on any tower you buy, because it is not universal at the budget end.
Game downloads are the other network reality: modern titles are large enough that download speed decides whether a new release is an evening event or a weekend project. A fast connection, adequate storage, and a launcher configured to download while you do something else turn that reality into a non-issue. Buy the PC for the games; make sure the network can feed it.
How Should You Judge Warranty, Support, and Returns?
Two towers with identical components are not identical products, because one of them will eventually need help. Before ordering, spend a few minutes on the unglamorous questions. How long is the warranty, and does it cover parts and labour or parts only? When something fails, do you ship the whole tower at your inconvenience, or will the builder send a replacement component with instructions – the difference between a week without a PC and an afternoon with a screwdriver? Is support reachable by phone and chat, in your timezone, and do owners describe it as competent? Large brands justify part of their price here; smaller assemblers often compete with surprisingly personal support. Both models can be good, but no information available is also a model, and it is the bad one.
Returns deserve the same attention. Marketplace purchases generally carry protective return policies in the first weeks, which is precisely when manufacturing defects reveal themselves. Use that window deliberately: in the first fortnight, run the machine hard. Play your most demanding game for long sessions, test every port you will ever use, confirm the wireless and Bluetooth work with your actual peripherals, and check that the machine you received matches the specification you ordered, component by component. A gaming PC that survives two weeks of heavy use almost always survives for years; the early window is when weak units identify themselves, and it costs you nothing but attention to catch them.
Keep records as you go: the order confirmation, the exact configuration as listed on the day you bought it, and photographs of the machine on arrival. Configurations change silently in this market, and if a dispute ever arises, the listing as it stood at purchase – not as it stands today – is the document that matters. A screenshot takes ten seconds and settles arguments that memory cannot.
How Should You Match a Monitor to a Prebuilt Gaming PC?
A gaming PC and its monitor are a single system, and mismatching them is the most common way buyers waste money in both directions. A flagship tower feeding an old 60Hz office display can only ever show sixty frames per second, no matter how many it renders; a budget tower expected to drive a large 4K panel will struggle in exactly the games its owner most wants to play. Before you choose a tier, name your monitor – its resolution, its refresh rate, and whether it supports variable refresh – and let those three facts discipline the whole purchase.
At 1080p, high-refresh monitors are the best-value upgrade in PC gaming: a fast 1080p panel paired with a mainstream tower produces a visibly smoother, more responsive experience than a stronger tower paired with a slow screen. At 1440p, the sweet spot for most buyers today, a mid-to-upper graphics card and a 144Hz-or-faster panel reward each other. At 4K, expect to use upscaling in demanding titles even on premium hardware, and treat the monitor budget as part of the PC budget, because at that resolution the two purchases are inseparable.
Size matters alongside resolution. Pixel density decides sharpness: 1080p looks crisp on a smaller screen and coarse on a very large one, while 1440p suits the popular mid-size desk monitors and 4K earns its cost on larger panels. If you sit close, favour density; if you sit back or play on a TV across the room, a larger screen at a lower resolution can be the more comfortable and more affordable answer. There is no universally correct pairing – only a pairing that is correct for your desk, your distance, and your games.
What If Your Space, Noise Limits, or Roommates Set the Rules?
Not every gaming PC lives on a large desk in a private room. Dorm rooms, shared flats, small apartments, and living-room setups impose constraints that specifications ignore: physical footprint, heat dumped into a small space, and noise that other people have to live with. A large tower under full load is a small space heater with a fan soundtrack, and in a shared room that is a social fact as much as a technical one. Buyers in these situations should weight case size, cooling design, and power draw as first-class criteria rather than afterthoughts.
Practical answers exist at every tier. A mainstream tower at sensible settings draws far less power – and therefore produces far less heat and noise – than a flagship running at its limit, and for many shared-space players that is the decisive argument for the middle of the range rather than the top. Headphones solve the audio half of the noise problem completely. Placement solves much of the rest: ventilation clearance, distance from beds and sofas, and never sealing a gaming tower inside closed furniture while it works.
If the machine will live in a living room and double as a media and couch-gaming centre, connectivity and wireless peripherals matter more than peak frame rates, and a slightly quieter, slightly smaller machine will be loved more than a louder flagship. The best gaming PC is the one that fits the life around it; specifications are how you achieve that fit, not a substitute for thinking about it.
Frequently Asked Questions
What is the most common mistake when setting up a prebuilt gaming PC?
Plugging the monitor into the motherboard ports instead of the graphics card ports. The display then runs on weak integrated graphics and the new machine feels slow. The second most common is leaving the monitor at its default refresh rate.
Should I update drivers before or after installing games?
Before. Run Windows Update until it finds nothing more, then install the current graphics driver from the card maker software. A factory-image driver can predate your games and quietly cost significant performance.
Do I need to remove the packaging inside the case?
Yes, always. Many builders ship foam or an inflatable support inside the case to protect the graphics card in transit. It must be removed before power-on, and cases usually carry a warning label saying so.
How do I set my monitor to its full refresh rate?
In Windows display settings, open the advanced display options and select the highest refresh rate your panel supports. High-refresh monitors commonly default to a lower rate until you do this.
What should I do in the first two weeks with a new gaming PC?
Use it hard: long sessions in your most demanding game, every port and wireless feature tested, and the delivered specification verified against your order. Defects reveal themselves early, while returns and exchanges are painless.
Is wired Ethernet necessary if my PC has Wi-Fi?
Not necessary, but recommended for setup day and for competitive play. Large updates and game downloads are faster and more reliable wired; modern Wi-Fi is perfectly good for everyday gaming once the machine is current.
Where do I start if I have not bought the PC yet?
With the decision guides: How To Choose A Prebuilt Gaming PC for the step-by-step method and Prebuilt Gaming PC Buying Guide for the component criteria. Then come back here on delivery day.
Final Recommendation
Set up in order and a prebuilt rewards you immediately: inspect and place the tower, obey the cable rule, update the system before the games, set the display to what you paid for, and shake the machine down hard inside its return window. Ninety minutes of method on day one prevents nearly every story that begins with a disappointed owner and a perfectly good computer.
If questions remain about whether the prebuilt route itself was right for you, Prebuilt Gaming PC Pros And Cons is the honest balance sheet — but for most owners who follow this checklist, the only remaining task is the enjoyable one: installing the library and playing it.