A label printer is a machine built to print onto sticky labels, usually from a roll, with text, barcodes and simple graphics. It differs from an ordinary desk printer because it is shaped around label stock, so it feeds, positions and cuts or tears labels without the fuss of loading sheets.

What It Does
Labels carry information that must be read quickly. A label printer produces them on demand, in the size you set, so you can identify, sort and send things without handwriting anything.
- Shipping and return labels with address and tracking codes.
- Product and shelf labels with names and barcodes.
- Storage labels for boxes, tubs, cables and tool drawers.
- File, folder and name labels in offices.
- Date and handling labels where records matter.
In this guide
Key Words, Defined
- Label stock
- The sticky labels on a backing sheet, supplied as a roll or fan-folded stack.
- Printhead
- The strip that makes the image on the label.
- Direct thermal
- A method where heat darkens coated labels, with no ink or ribbon.
- Thermal transfer
- A method where heat moves a ribbon coating onto the label.
- Driver
- The software that lets your computer talk to the printer.
How It Differs From a Desk Printer
| Point | Label printer | Desk printer |
|---|---|---|
| Main media | Rolls of labels | Sheets of paper |
| Typical output | Small labels, often one colour | Full pages, often colour |
| Supplies | Labels, sometimes a ribbon | Ink or toner and paper |
| Best at | One label after another | Documents and photos |
Who Uses One
People who send parcels regularly, small shops, workshops, offices and anyone who needs neat, repeatable labels will find the idea useful. Someone who needs a label rarely may manage with a regular printer or a print service.
Basic Use in Three Steps
- Load the roll and set the guides.
- Choose the label size in the print window.
- Send the label and check the first one.
If you are unsure whether one suits you, try describing your most common label in a sentence: its size, what it says and how long it must last. That description tells you whether you need a label printer, a regular printer or a print service, and it is also the first thing you will want to know when you compare models later. Keep in mind that every model has its own supported sizes, so read the maker’s guide before deciding.
A Worked Example: Printing Your First Label
The exact steps differ between models, so treat this as a general outline and follow the maker’s guide for yours.
- Unpack and place the printer. Put it on a flat, stable surface with room for the label roll to turn and for printed labels to leave the slot.
- Connect it. Use the cable or wireless method the maker describes, and install the driver or companion software it recommends.
- Load the label roll. Open the cover, place the roll on its holder, thread the labels through the guides and close the cover. Many printers sense the label gap on their own, and some need a short calibration routine described in the manual.
- Set the label size. In the print window, choose the size that matches the roll. A mismatch between the software size and the loaded labels is a common cause of misaligned printing.
- Design the label. Type the text, add a barcode or a simple image if needed, and keep margins clear of the label edges.
- Print one label. Check position, sharpness and readability before printing a batch, and scan any barcode with the device that will read it in real use.
Direct Thermal or Thermal Transfer
The two printing methods defined earlier suit different jobs. Direct thermal labels are coated so that heat from the printhead darkens them, which means no ribbon or ink to manage. They are convenient for labels that are used soon after printing, such as shipping labels, but the coating can fade over time, especially when exposed to heat, light or friction. Thermal transfer printing uses a ribbon that melts onto the label, which generally gives longer-lasting marks and suits labels that must stay readable for longer, though it adds the ribbon as a supply to manage. Check the maker’s guide to find out which method a given model uses and which label types it accepts.
Common Scenarios
Sending parcels from home
Carriers have their own requirements for label size, layout and barcodes. Check the carrier’s current instructions before choosing a label size or format, and make sure the printed barcode is clear and has quiet space around it.
Organising a workshop or garage
Labels on drawers, bins, cable boxes and shelves save searching. Use short, consistent wording, and think about where the label will be read from, since small text on a high shelf is hard to see.
Running a small shop
Shelf and product labels with names and barcodes keep stock organised. Keep a template for each label type, so the layout stays the same and mistakes are easier to spot.
Marking food or storage containers
Dates and contents on labels reduce guesswork. If labels will face moisture, cold or washing, check the label stock description for suitability, and consider whether a removable or permanent adhesive suits the job.
Quick Troubleshooting
| Symptom | Likely cause | What to try |
|---|---|---|
| Print is faint or has pale streaks | Dirty printhead or wrong darkness setting | Clean the printhead as the manual directs and adjust the setting |
| Text is cut off or shifted | Label size in software does not match the roll | Select the correct size and run the feed or calibrate routine |
| Labels jam or feed crookedly | Roll not seated or guides too tight or loose | Reload the roll and set the guides to the label width |
| Printer prints blank labels | Wrong label type for the method, such as plain labels in a direct thermal model | Use the label stock the maker specifies |
| Barcode will not scan | Low contrast, too small or no quiet zone | Enlarge it, increase contrast and leave clear space around it |
Mistakes to Avoid
- Buying labels before checking compatibility. Sizes, core diameters and label types vary, so match them to the printer’s supported list.
- Touching the printhead with bare fingers. Oil and dirt degrade the print. Clean it only with the method the maker recommends, and let it cool first.
- Skipping the single-label check. A whole batch can be wasted if the alignment is wrong.
- Cramming too much onto a small label. Fewer words in larger type are easier to read and scan.
- Storing labels in heat or sunlight. Heat and light can darken or fade thermal stock and weaken adhesive.
Care and Upkeep
Keep the printer in a clean, dry place and wipe dust from the roller and label path. Clean the printhead on the schedule suggested by the maker. Store spare label rolls in their packaging, in a cool and dry place, and use the oldest first. Turn the printer off or let it sleep when not in use, and follow the manual for storage and updates to the driver software.
The Main Types of Label Printers
Label printers come in several families, and knowing the differences helps you read product descriptions without confusion. The groups below overlap a little, but they cover most of what you will find for sale.
Desktop thermal printers
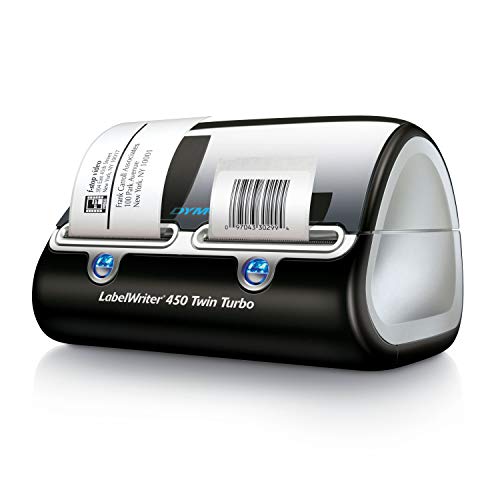
These are the workhorses for shipping labels, shelf labels and barcodes. They are usually about the size of a toaster, take a roll of labels and connect by USB, and sometimes by wireless networking. Most print black on white, and they are built for steady daily use.
Handheld label makers
Small battery-powered devices with a keypad or a phone app, aimed at home organizing, cables and office tags. They use cartridges of tape, often with a built-in cutter. They are portable and quick for short labels, but the tape is usually narrow and the cost per label higher than with larger machines.
Color label printers
These use inkjet or toner technology to print full-color labels on rolls. They suit product packaging, jars and craft items where appearance matters. Color labels cost more per label and may need specific label stock.
Industrial printers
Larger machines for warehouses and factories, built for high volume, wide labels and tough materials. They are rarely needed for a home or small business, and are priced accordingly.
If you are unsure where you fit, think about volume. Printing a handful of labels a week points to a handheld model. Printing dozens of shipping labels a day points to a desktop thermal printer.
Choosing Label Sizes and Materials
Label stock is half of what you are buying. A printer that cannot take the size or material you need will not be useful, no matter how good its other features are.
Start with the common sizes. Shipping labels are often 4 by 6 inches, a size many carriers and marketplaces expect. Shelf and product labels vary widely, with small ones around 1 by 2-1/4 inches and larger ones up to 2 by 4 inches. Address labels and file labels tend to be smaller. Check which widths the printer supports, since many have a maximum and sometimes a minimum.
Next, think about material. Paper labels are inexpensive and good for indoor use. Synthetic labels made of plastic film tolerate moisture and oils. Removable adhesives let you peel the label away without residue, while permanent adhesives stay put. Freezer-grade adhesives are made for cold storage, and some are rated for food contact, so check the packaging before using them near food.
- Check the roll’s core size, which is the inner diameter of the cardboard tube, and the outer roll diameter against the printer’s specifications.
- Look for the printer maker’s recommended stock. Third-party rolls often work but may vary in quality.
- Buy a small pack before committing to a large box of labels you have not tried.
Remember that label sizes can be chosen in software, but the width of the roll sets the hard limit. Always match the roll to the printer, not the other way around.
Software, Drivers and Connections
A label printer needs more than a cable. Software decides how the label looks and how smoothly it prints.
Most printers come with a design program or app, and many also work with the programs you already use, such as spreadsheets, word processors or marketplace websites. Check that the printer has a driver for your computer’s operating system and, if you plan to use a phone, that the app supports your phone type. Some printers appear to the computer as a standard printer, which makes them easy to use from almost any program.
Common ways to connect include USB cables, wireless networking and Bluetooth. USB is simple and reliable. Wireless lets several people share one printer. Bluetooth suits phones and small devices. Confirm the connection types before you buy, since adding one later is rarely possible.
- Look for features such as templates, batch printing from a spreadsheet and barcode generation if you need them.
- Check whether software updates are available and how long the maker supports old models.
- Try the design program, or its free trial, before you buy if the maker offers one.
If you plan to print shipping labels, check which carriers and marketplaces your printer works with and whether it needs special settings for them. Many sellers find a short test print on plain paper confirms the size and layout before any real labels are used.
Running Costs and Buying Tips
The price on the box is only part of the cost. A label printer is a bit like a razor: the ongoing supplies often cost more than the machine.
Direct thermal printers need only labels, which makes the ongoing cost easy to predict. Thermal transfer printers need labels plus ribbons. Cartridge-based handheld models need tape cartridges, whose price per foot varies considerably between brands. Color printers need ink or toner. Compare the cost per label over a typical month rather than the unit price alone.
Read the specifications for print speed, resolution and maximum label width, but weigh them against real needs. A faster printer saves time if you print hundreds of labels, but it is wasted on a handful a week. A higher resolution helps with small text and dense barcodes.
- Buy from a seller with a clear return policy so you can swap the printer if it does not fit your labels.
- Check that spare parts such as print heads and rollers are available.
- Read user reviews for patterns of the same complaint, such as jamming or poor software, instead of focusing on a single rating.
- Ask whether third-party labels void the warranty.
Set aside a small budget for extras: spare rolls, a cleaning kit, and a stand or shelf so the roll feeds without kinking.
When a Label Printer Is Not the Right Tool
A label printer is excellent for rolls of identical or sequential labels, but it is not the answer to every labeling job.
If you only need a few labels each year, a sheet of blank sticky labels and a regular printer may cost far less. If you need large, full-page prints, a standard printer is better suited. For permanent outdoor signs, engraved or professionally printed signs often outlast any sticker. For marking metal parts or tools that must withstand heat or solvents, specialist tags or engraving may be a better fit.
Likewise, some tasks need a legal or regulated label, such as hazardous material markings or food allergen labels. These have rules about content, size and materials, so check the requirements from the relevant authority rather than relying on a label printer’s default templates.
If you are not sure, borrow a printer from a friend or a workplace, or try a low-cost model, and see how often you actually reach for it. Real use is the best guide to what you need.
Before you commit, it helps to write down the three or four labels you expect to print most often, along with their sizes, how many per week and where they will be applied. Compare that list with the printer specifications, and you will quickly see which models fit and which do not. This small exercise prevents the common mistake of buying a model that is either far more than needed or just short of what you require.
If you are still uncertain, ask the maker or seller about sample labels, return terms and what support is available, so you can get help if something goes wrong.
Ready to Buy? Start Here
If this guide helped you decide what to look for, these products are a place to start.

As an Amazon Associate we earn from qualifying purchases. Prices and availability are shown on Amazon.
What a Label Printer Does
A label printer is a small machine that prints text, barcodes or images onto adhesive labels. Instead of cutting and writing by hand, you type or choose a design, and the printer produces a neat label ready to stick. Most home models are compact and connect to a computer or phone.
- It prints on tape or label rolls made for that printer.
- Many use heat on special paper, so no ink or toner is needed.
- It can print names, barcodes, addresses and symbols.
- It cuts labels to length, either automatically or by hand.
- It connects by cable, wireless link or built-in keyboard, depending on the model.
Who Uses One and Why
| User | Typical use |
|---|---|
| Household | Pantry, bins, cables, files |
| Workshop | Drawers, tools, shelf locations |
| Small seller | Shipping labels and barcodes |
| Office | Folders, equipment, mailing labels |
First-Time Tips
- Check the label size and type the printer uses before buying supplies.
- Read the maker’s setup steps and install any needed software.
- Print a test label and check that text is crisp.
- Keep a spare roll or cassette on hand.
If you only need a few labels a year, handwriting may be enough. If you label often, a printer saves time and gives a tidy look. Think about how you will use it, then pick a model that suits your needs and the supplies you can easily find.
Some printers include templates for common jobs, such as file folders, jar labels or cable flags. Browsing the options in the maker’s software is a good way to see what the machine can do before you decide what to buy.
Inside the Idea: What Makes a Label Printer Different in Daily Use
The earlier sections define a label printer and compare it with neighbouring tools. This section slows down on the experience of using one, because the difference between a label printer and a general printer is felt less in specifications than in small daily moments. A label printer is built around a single repeated action: present the right stock, receive a finished label, peel it, stick it. Everything about the category, from roll loading to the software templates, exists to make that loop quick and hard to get wrong.
The loop: load, print, peel, stick
Loading a roll and closing the lid is the whole paper routine for most label printers, in contrast to aligning sheets in a tray. The printer senses or is told where each label begins and ends, so consecutive labels emerge in register without the drift that plagues sheet printing. Peeling is part of the design too: labels on a roll present their edge in a predictable place, and many users develop a rhythm of printing the next label while applying the current one. Sticking completes the loop on a surface you prepared while the label printed. When people say a label printer changed how they work, they usually mean this loop replaced a sequence of measuring, cutting, taping and hoping.
Compare that with printing labels on a general printer. The sheet must be loaded the right way up and the right way round, the correct template selected, and the part-used sheet remembered for next time, with its missing labels accounted for so the next run does not print on a gap. None of this is difficult, but all of it is friction, and friction multiplied by every labeling session is what pushes regular labelers toward a dedicated machine. Occasional labelers never feel enough friction to care, which is why the honest advice depends on how often you print, not on how impressive either machine is.
Templates and the quiet importance of defaults
Label software lives or dies by its defaults. A good setup remembers your label size, your return address, your preferred layout for shipping and your common organising labels, so a routine print is a few clicks or taps. The first session with any label printer should therefore be spent setting defaults rather than printing real work: create the templates you will reuse, save them with plain names, and print test labels on cheap stock. Every future session repays that hour. Users who skip it re-enter sizes and addresses forever, conclude the machine is fiddly, and use it less, when the real problem was an unfinished setup.
Templates also protect accuracy. A saved shipping template pulls the destination from the order or address entry once, in a layout where each field sits in the right place. A saved organising template keeps wording consistent across a shelf of jars or a wall of storage boxes, so similar items get similar labels and the whole system stays readable. Consistency sounds cosmetic until you are searching a garage at night; then it is the difference between a labeling system and a pile of individual labels.
What a label printer cannot do, stated plainly
A label printer will not print a letter, a photo or a document, and its width limit is a hard boundary: a label wider than the printer accepts is simply not available to you. Colour, on most dedicated machines, is limited or absent. The printer also cannot fix bad data; an address typed wrongly will be printed beautifully and wrong. Finally, it cannot choose your stock for you. Adhesive, finish and material must suit the surface and conditions, and the wrong stock fails no matter how good the printer is. Knowing these limits in advance prevents the disappointment of expecting a small specialist to behave like a general office machine.
Judging whether you need one yet
Three signals suggest a label printer will earn its space. First, you print labels most weeks, not most months. Second, you catch yourself batching labeling jobs to avoid the fuss of setting up the general printer, which means friction is already taxing you. Third, one label size, usually the shipping size, accounts for most of what you print, so a roll of it loaded and ready would cover the bulk of your work. If none of those signals is present, sheet labels and a general printer remain a perfectly respectable setup, and the money is better spent on good stock and a tidy workspace.
If the signals are present, choose by the loop rather than by the longest feature list. Check that the printer handles your main label size, that its software works with the devices and platforms you actually use, that stock for it is easy to obtain in the sizes you need, and that loading and clearing it looks simple in demonstrations. Print quality for text and codes is a solved problem across the category; the machines differ mainly in width, connectivity, software and stock ecosystem, and those are the grounds on which to choose.
A first week that builds good habits
In the first week, print more test labels than real ones. Learn how the roll loads, how the printer signals the end of a label, and how your software handles size changes. Label the printer itself with its stock size and the date you loaded it, using its own output, as a small joke that is genuinely useful later. Set up your return address template and one organising template. By the end of the week the loop should feel automatic, and automatic is the whole point: the best labeling setup is the one you use without thinking, leaving your attention for the parcels and projects the labels serve.
Designing Labels That Work: Layout, Wording and Readability
Owning a label printer solves the production of labels; it does not solve their design, and design is where labels succeed or fail in the real world. A label is a tiny document with one reader in mind, often a tired person in poor light, or a scanner moving quickly. This section covers the design habits that make labels readable and useful, whether they are shipping a parcel, naming a storage box or dating the contents of a freezer, and it needs no artistic talent, only a few consistent rules applied every time.
The hierarchy rule: one thing should shout, the rest should speak
Every label has a most important element. On a shipping label it is the destination; on a storage label it is the name of the contents; on a food label it is usually the contents and the date together. Make that element the largest, clearest thing on the label, and let supporting details sit smaller around it. Labels fail when everything is the same size, because the reader must study the whole label to find the one fact they need. They also fail when decoration competes with information: borders, logos and extra lines all spend the reader attention that the key fact needed. A plain label with a clear hierarchy beats a handsome label with none, every day of the week.
Type size follows from reading distance. A label read in the hand can be modest; a label read on a shelf across a garage must be large enough to resolve at that distance, which usually means fewer words in bigger type rather than a complete inventory in small type. If the details matter, split the job: a large short name on the outside of the box for finding it, and a detailed list inside the lid or in a note for the day it is opened. Trying to make one label do both jobs at one size is the classic design compromise that serves neither.
Wording: write for the person who did not pack the box
The reader of your label is usually a future version of you who has forgotten the context, or someone else entirely. Write contents as nouns a stranger would use, not private shorthand, and put the most identifying word first, since readers scan beginnings. Dates deserve a consistent, unambiguous format chosen once and used forever; a date that can be read two ways will eventually be read the wrong way on the day it matters. For anything perishable or time-sensitive, the date is part of the main message, not a footnote, and it should be written at the moment of labeling, never added later from memory.
Consistency across a set of labels is a design feature in itself. Same layout, same wording pattern, same date format and same placement on each box or jar makes a shelf read like an index. The printer templates discussed earlier in this guide exist to enforce exactly this. Build one template per job type, resist improvising variations, and the whole collection becomes searchable at a glance, which is the real promise of labeling anything in the first place.
Colour, contrast and materials as design tools
Most label printing is black on white, and that is a strength: the contrast is maximal, codes scan reliably, and text stays readable in poor light. Where colour is available, spend it on meaning, not decoration: a colour band for a category, a coloured stock for fragile or urgent items, a consistent colour per room or per family member. Colour that means something speeds up recognition; colour that means nothing becomes noise the reader learns to ignore. Whatever the palette, keep the text itself dark on a light ground, because coloured text on coloured stock is where readability goes to die.
Material is design too. A glossy label looks smart and can glare under bright light; a matte label reads calmly almost everywhere. A clear label disappears elegantly on glass and shows every bubble and fingerprint beneath it. A freezer-proof or water-resistant stock looks ordinary and survives conditions that destroy a prettier label. Choose the material for the life the label will live, then design within it, rather than falling for a finish and discovering its limits on a cold jar or a damp parcel.
A quick design review before you print a batch
Print one label and interrogate it. Can the key fact be read at the real reading distance, in the real light, in two seconds? Is anything on the label that the reader does not need? Would a stranger understand every word? Does the code, if there is one, scan on the first attempt? If the label passes, print the batch with confidence. If it fails, the fix is almost always subtraction or enlargement, removing a line, or giving the key fact more room, rather than adding anything. Good label design is mostly the discipline of leaving things out, and a label printer, which makes revision cheap, is the perfect tool for practising it.
Label Printers in Shared and Growing Settings
A label printer often begins as one person tool and quietly becomes shared infrastructure: a family relies on it, a market stall team passes it around, a small business builds its dispatch routine on it. Sharing changes what good looks like. The best shared printer is not the one with the most features but the one a new person can use correctly in their first session, with the right stock loaded, the right templates saved and the common mistakes designed out in advance.
Making a printer safe for other people hands
Start with the physical setup. Label the printer itself with the stock size it normally carries and the date the roll was loaded. Keep spare rolls of that size beside it, and keep any alternative sizes in a different, clearly marked place, because most shared-printer disasters are stock swaps nobody noticed. Put a one-page guide where the packing happens, not in a drawer: how to print the standard shipping label, how to print the standard storage label, and what to do when a label comes out wrong. Three short procedures, written in the words your household or team actually uses, prevent nearly every shared-use error.
Templates carry the rest of the safety. Save the standard labels with plain names, protect them from casual editing where the software allows, and agree that improvements happen by creating a new version rather than overwriting the one everyone depends on mid-season. When something about the setup changes, a new stock size, a new return address, a new platform, update the one-page guide in the same session. A shared system is only as current as its shortest note, and stale instructions are worse than none because they are followed with confidence.
Growing from occasional to regular without chaos
Growth usually announces itself as friction: the printer is in the wrong room for the person who now uses it most, the roll runs out during the busiest week, the single template no longer matches the two parcel sizes the work has split into. Treat each friction as a design signal rather than an annoyance. Move the printer to the work. Keep a reserve roll as a rule, not a hope. Split the template into the small set the work actually needs. None of these steps requires a new machine; they require noticing that the system around the machine must grow when the work does, in small deliberate adjustments instead of one eventual overhaul.
If a second printer eventually joins, perhaps a small maker for the rest of the house while the main printer serves the business, give each machine its own territory and its own stock shelf from day one. Shared stock between different machines is the classic false economy of growing setups, because the rolls and tapes look similar, fit poorly and produce a week of mysterious failures. Separate, labelled, boring: that is what a grown-up labeling setup looks like, and it is entirely achievable with the printer you already own plus the habits in this section.
The ten-minute monthly reset
A label printer stays a pleasure when it receives ten minutes of attention a month, and drifts into annoyance when it receives none. Use the reset to wipe the exterior and the label path as the maker guidance suggests, check the loaded roll and note its size on the printer label, print one test of each saved template and confirm each still looks right, and glance at the stock shelf to see what the next month will need. Finish by labeling one thing you have been meaning to label for weeks, because the reset should end with the machine doing its job, not merely being serviced. Ten minutes is short enough to survive busy months, and regular enough to catch the slow problems, a fading template, a drifting stock supply, a roll quietly running out, while they are still small. Owners who keep this rhythm rarely describe their printer as unreliable, and owners who skip it often describe the same model as temperamental. The difference is seldom the machine; it is the ten minutes, and ten minutes is a price anyone who labels regularly can afford to pay for a tool that simply works every time it is asked.
The reset has one more quiet benefit worth naming: it keeps the printer present in your mind as a working tool rather than furniture. Tools that are looked at monthly get used for the small jobs, the single jar, the one cable, the lone box, and it is the accumulation of those small jobs, done in seconds because the machine was ready, that repays the purchase many times over. A printer that only earns its keep on big dispatch days is a printer half used. Ten minutes a month is what keeps the other half alive.
FAQ
Can a label printer print on normal paper?
Generally no. It is designed for label stock. Check the maker’s guide for any media it accepts.
Does it connect to a phone?
Some models do through a cable or wireless link. The maker’s guide lists the options for each model.
Do I need a computer to use one?
Many models need a computer or phone to design and send labels, while some have a built-in keypad and screen for simple text. The maker’s guide states how each model works and what software it supports.
What is the difference between a continuous roll and a die-cut roll?
Die-cut labels come pre-cut to a set size with gaps between them. Continuous rolls are an unbroken strip that the printer cuts or you tear to the length you need. Die-cut suits repeated sizes, and continuous suits varied lengths.
Can I print in colour?
Some label printers print in one colour only, while others use different technology for colour. Check the model description, and note that colour output often needs matching label stock.
What size labels do I need for shipping packages?
Many carriers and marketplaces use 4 by 6 inch labels, but requirements vary. Check your carrier’s or marketplace’s instructions before buying a printer or label roll, and print a test on plain paper to confirm the layout fits. Confirm the size before you buy a roll.
Do label printers need ink?
Direct thermal models use heat on special paper and need no ink or ribbon. Thermal transfer models use a ribbon. Some handheld models use tape cartridges, and color label printers use ink or toner. The type determines your ongoing supply costs. Check the model specifications.
How much does a label printer cost to run?
It depends on the type. Direct thermal printers need only labels, while thermal transfer needs labels and ribbons and color printers need ink. Compare cost per label over a typical month instead of looking at the printer price alone. Consider this when budgeting for supplies.
Can several people share one label printer?
Yes, if it supports wireless networking or is connected to a shared computer. Check driver support for each person’s computer or phone, and decide who manages label rolls and settings so changes do not disrupt others. Ask the seller if you are unsure.
Are label printers good for food or freezer labels?
Some labels are made for cold or food use, with freezer-grade adhesives or food-safe materials, but you must check the packaging. Regular labels may peel or smear in damp conditions. Follow local food labeling rules for anything you sell or share.
How long does it take to learn to use a label printer?
The basic loop of loading, printing and applying takes minutes to learn. The part worth an unhurried first session is setting up templates and defaults for the labels you print repeatedly. After that, routine printing is a few clicks. Most frustration attributed to learning is really unfinished setup, so invest the time once, at the beginning.
Can a label printer print one label at a time?
Yes. Printing a single label is normal use, and a roll-fed machine does it without wasting the rest of a sheet. That is one of its quiet advantages over sheet labels, where a single print consumes a sheet position and leaves a part-used sheet to manage. For very occasional single labels, though, the setup of any printer may still lose to a handwritten label or a label maker.
What should I check before my first print?
Confirm the loaded stock size matches the size set in the software, print one test label, and check the text is complete, sharp and positioned within the label edges. For a shipping label, also confirm the code scans and the address matches the order. One careful test prevents a batch of identical mistakes.
Where should a label printer live?
Where the labeling happens: beside the packing area for shipping, or near the shelves and storage it serves for organising. A printer stored in a cupboard acquires setup friction and gets used less. Give it a permanent spot with its stock beside it, within reach of the work, and it will be used the way it was meant to be.
The Short Version
A label printer is a purpose-built machine for sticky labels. It suits people who need many clean, consistent labels, and it differs from a desk printer mainly in media and speed of repeat work. Match labels to the printer, check one label before a batch, and look up the carrier’s current instructions for parcels.

