Disclosure: As an Amazon Associate, reviewstook.com earns from qualifying purchases. Links to Amazon on this page are affiliate links; they cost you nothing extra.
Streaming looks effortless from the viewer’s side: someone plays a game, talks to chat, and the picture is smooth. Behind it sits a stack of choices about hardware, software, internet, audio and lighting that all have to work together. Get one wrong and viewers see dropped frames, hear echo or give up and leave. Get them right and a modest setup can look and sound professional.
This guide walks through a complete PC game streaming setup: what your computer needs, how encoding works, how to check your internet connection, which software to use, how to set up audio, camera and lighting, when you need a capture card or a second PC, how to configure scenes and settings, how to protect your privacy, and how to troubleshoot dropped frames and lag. It is written from general streaming knowledge rather than testing of specific products. Platform rules and recommended settings change, so check the official guidance for the service you stream on.
By the Reviewstook Editorial Team. Last updated: November 1, 2026.
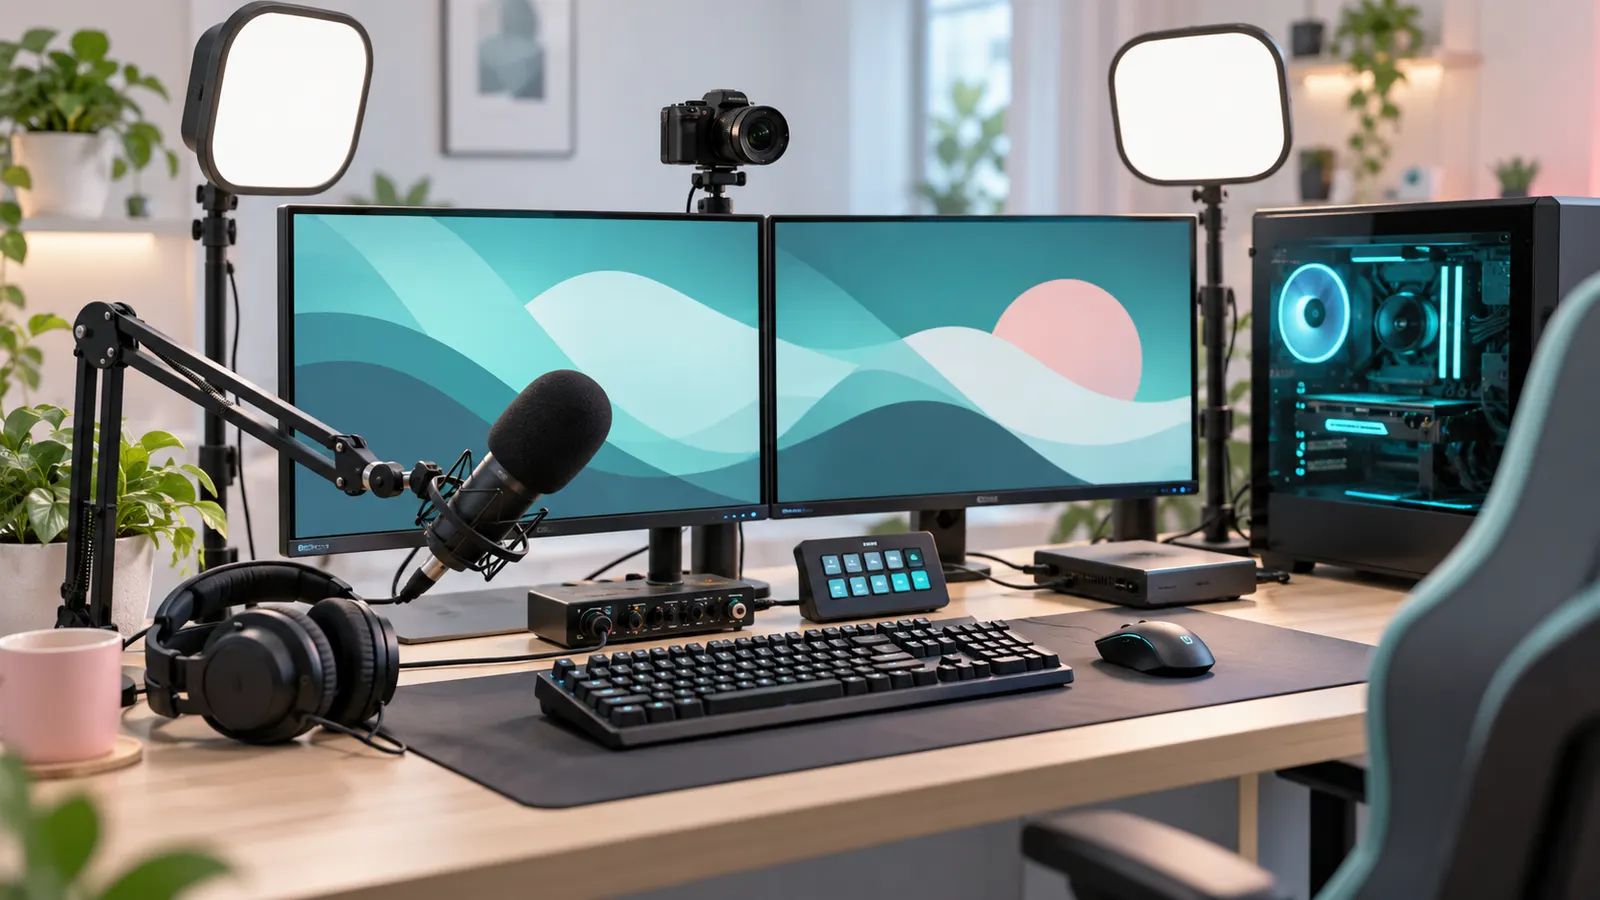
The Streaming Chain at a Glance
Think of streaming as a chain. A weak link anywhere affects the whole stream.
- Game and PC. The computer runs your game and the streaming software at the same time.
- Capture. The streaming software captures the game, your camera and your audio.
- Encoding. The video is compressed into a form that can be sent over the internet.
- Upload. Your internet connection sends the compressed stream to the streaming service.
- Delivery. The service passes it to viewers, in different quality levels.
Everything you buy or configure fits one of those links. The rest of this guide takes them in order.
In this guide
Your PC: Can It Play and Stream?
Streaming adds load to a PC that is already busy running a game. The main costs are encoding the video and running the streaming software, which uses processor, graphics and memory resources.
Processor, graphics card and memory
- Graphics card. It runs the game, and modern cards also contain a dedicated video encoder. Using that encoder takes the load off the processor.
- Processor. A processor with six or more cores gives comfortable room for a game plus streaming software and background tasks. Our gaming CPU buying guide explains the trade-offs.
- Memory. 16 GB is a workable minimum, and 32 GB gives breathing room for the game, streaming software, browser and chat windows. Running out of memory causes stutter; see our guide to fixing stuttering.
- Storage. A solid state drive helps games load, and gives recording space if you save local copies.
Two types of encoding
| Method | How it works | Pros | Cons |
|---|---|---|---|
| Hardware (GPU) encoding | A dedicated encoder on the graphics card compresses the video | Low performance impact on the game; good quality on recent cards | Older cards have weaker encoders |
| Software (CPU) encoding | The processor compresses the video | Can give high quality at a given bitrate with a powerful processor | Uses a lot of CPU, which can hurt game performance |
For most single-PC streamers, hardware encoding on a modern graphics card is the best starting point. Software encoding makes sense on a second PC or a very strong processor.
Your Internet: Upload Speed Matters
Viewers need your stream, so your upload speed matters more than download speed. Many home plans have fast downloads but slower uploads.
How much upload do you need?
The video bitrate you choose is the amount of data per second you send. Streaming services publish recommended ranges, which change from time to time. As a rough guide:
| Quality | Typical video bitrate range | Suggested minimum upload |
|---|---|---|
| 720p at 30 frames per second | About 2,500 to 4,000 kbps | About 6 Mbps |
| 1080p at 30 frames per second | About 4,000 to 6,000 kbps | About 8 to 10 Mbps |
| 1080p at 60 frames per second | About 6,000 to 8,000 kbps | About 10 to 12 Mbps |
| 1440p or higher | Higher, if the service allows | Check the platform guide |
Leave headroom, because your upload must stay steady, not just touch the number. Test your upload speed at different times of day. Check the platform’s current recommendations before choosing a bitrate.
Improve your connection
- Use a wired Ethernet connection, not WiFi. Our gaming router list includes routers with good wired ports.
- Pause other uploads and large downloads during streams.
- Restart the router if you see dropped frames at odd times.
- Ask your provider about upload speeds, or upgrade your plan if it is a bottleneck.
Streaming Software
Streaming software captures your game, camera and audio, lets you arrange scenes, and sends the stream to the service.
- OBS Studio is a free, widely used program with plenty of tutorials.
- Software built by streaming services or hardware makers can be easier to set up but less flexible.
- Console and platform tools let you stream from a console, with fewer options.
Most beginners start with a free tool such as OBS, use its auto-configuration wizard for a starting point, then adjust.
Key settings to understand
- Output resolution and frame rate. Choose what your upload and hardware can handle, such as 1080p at 60 or 720p at 60. Smooth frame rate often matters more than resolution for fast games.
- Bitrate. Set within the service’s recommended range and within your upload speed.
- Encoder. Choose the hardware encoder for your graphics card if available.
- Keyframe interval. Many services ask for a keyframe every two seconds.
- Rate control. Constant bitrate is the common choice for live streaming.
Audio: The Most Important Part
Viewers forgive average video but leave quickly over bad audio. Plan three audio sources: your microphone, the game sound and any music or chat apps.
Microphone
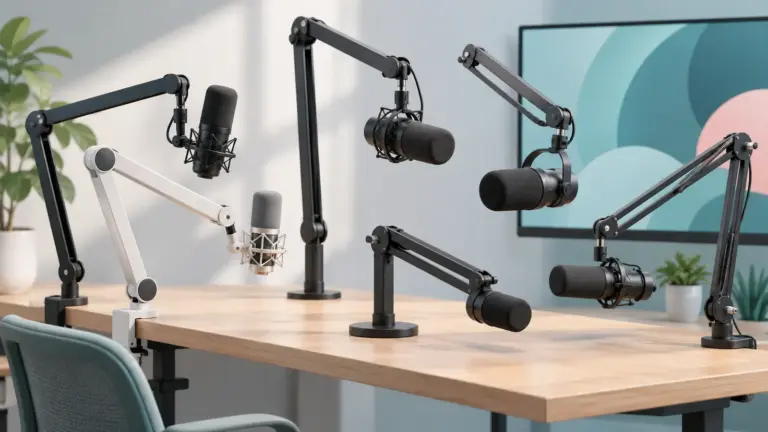
A dedicated microphone sounds better than a headset’s built-in boom. Dynamic microphones reject room noise and suit untreated rooms. USB microphones are plug and play, and XLR microphones offer more upgrade options but need an audio interface. A boom arm keeps the microphone close to your mouth and off the desk. Position the microphone a few inches from your mouth and slightly off-axis to avoid pops.
Separate your audio sources
Set up your software so that your voice, game sound and music are separate tracks that you can adjust. Keep voice clearly louder than the game. Use the software’s filters, such as noise suppression, a noise gate and a compressor, to clean up your voice. Test by recording a short clip and listening on headphones.
Avoid echo and feedback
Use headphones, not speakers, so that the game sound does not feed back into your microphone. If you hear yourself delayed, check your monitoring setup.
Music copyright
Many services mute or penalize streams that play copyrighted music. Use music you have the rights to use, such as royalty-free tracks or licensed streaming music.
Camera, Lighting and Background
Camera
A decent 1080p webcam is enough for most streamers. Features that matter are good autofocus, low-light performance and a suitable field of view. Position the camera at eye level. Our streaming webcam list compares options, and the 4K webcam list covers higher-end models. Some streamers use a camera with a capture device for better image quality.
Lighting
Lighting matters more than the camera. Use a soft light in front of you, slightly above eye level, and avoid strong light behind you. Window light can be great, but changes during the day. A key light plus a gentle fill light gives a clean look. Keep brightness consistent across your stream.
Background
A tidy, simple background is enough. A green screen lets you replace the background, but needs even lighting. Our green screen list compares options. Software background removal is an alternative with less hardware.
Capture Cards and Two-PC Setups
When you need a capture card
- You stream from a console and want better quality than the console’s built-in tool.
- You use a second PC for streaming.
- You connect a camera for higher-quality video.
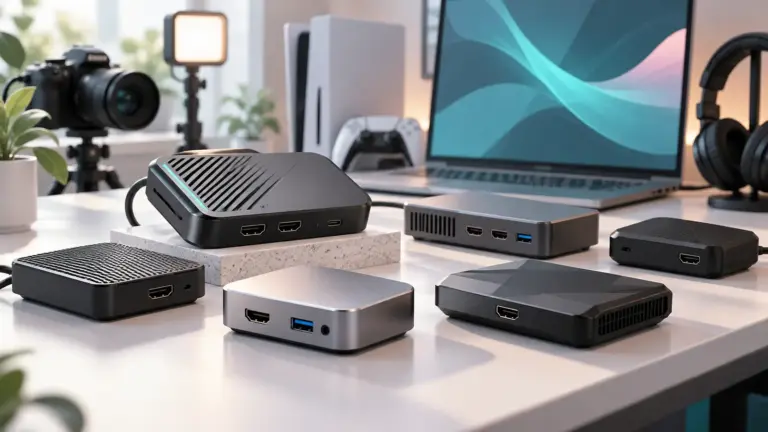
A capture card brings video from another device into your streaming PC. Check the resolution and frame rate it supports, and whether it has pass-through so you can see the game with low delay. Our capture card list compares models.
Single PC or dual PC?
| Setup | Pros | Cons |
|---|---|---|
| Single PC | Cheaper, simpler, no extra hardware | Game and stream compete for resources |
| Dual PC | Separate load, higher quality encoding possible | More cost, more cables, more setup |
Most beginners do well with a single PC and hardware encoding. A second PC is for streamers who need maximum quality or whose game uses all the resources.
Controls and Workflow
- Hotkeys. Set keyboard shortcuts to switch scenes and mute the microphone.
- Stream deck or macro pad. A physical controller makes scene changes and audio control quick. Our stream deck list compares options.
- Second screen. A second monitor lets you see chat and software while the game fills the main screen.
- Chat tools. Use a chat window, moderation tools and alert settings so you can respond without leaving the game.
Scenes and Layout
Keep your scenes simple. A common set is:
- Starting soon. A countdown or message before you go live.
- Gameplay. The game with a small camera overlay.
- Just chatting. A larger camera view for talking.
- Be right back. A message when you step away.
- Ending. A closing scene with thanks and socials.
Make sure overlays do not cover important parts of the game, such as the minimap or health bar. Use readable fonts and consistent colors. A clean, simple layout looks better than a cluttered one.
Step-by-Step: A First Stream
- Check your PC, internet and upload speed.
- Install streaming software and run the setup wizard.
- Connect your streaming account using the service’s official method.
- Set your resolution, frame rate, bitrate and encoder.
- Add the game capture source, camera and audio sources.
- Test your microphone and level.
- Record a short test clip and watch it back.
- Set your stream title, category and basic settings on the service.
- Go live for a short private or unlisted test if the platform allows.
- Check the stream on another device and listen for audio issues.
- Go live, interact with chat and keep notes about problems.
Privacy and Safety
- Protect your stream key. It works like a password. Never show it on screen or share it.
- Avoid revealing personal information. Check what is visible on screen: names, addresses, emails and notifications.
- Use a stream delay if you play competitive games and worry about stream sniping.
- Hide notifications from messages and email.
- Use two-factor authentication on your streaming account.
- Set moderation tools to handle spam and harassment.
- Follow the platform’s rules on content, music and age restrictions.
Troubleshooting
| Problem | Likely cause | What to try |
|---|---|---|
| Dropped frames over the network | Upload too low or unstable | Lower bitrate, use Ethernet, pause other traffic |
| Skipped frames due to encoding lag | Encoder overloaded | Use hardware encoding or lower the output resolution or frame rate |
| Skipped frames due to rendering lag | Graphics card too busy | Lower game settings or cap game frame rate |
| Game stutters while streaming | CPU, GPU or memory overload | Reduce stream settings; see our stuttering guide |
| Echo in the stream | Speakers feeding the microphone | Use headphones and check audio routing |
| Viewers say audio is too quiet | Low microphone level | Adjust gain and use a compressor |
| Blurry picture | Low bitrate or resolution | Raise bitrate within upload limits, or lower frame rate |
| Black screen on capture | Capture method or permissions | Try display capture or run the software as administrator |
| Delay between game and stream | Normal platform delay | Check low-latency options if the service offers them |
Input delay in your own game is a separate matter. See our guide on reducing input lag if the game feels laggy while streaming.
Budgeting Your Setup
You do not need everything at once. A sensible upgrade order is:
- Audio. A decent microphone and a quiet room.
- Lighting. A soft key light.
- Internet. A wired connection and enough upload.
- Camera. A good webcam.
- Controls. A stream deck or hotkeys.
- Capture card and second monitor as your needs grow.
Our streaming gear hub collects the related lists.
Common Mistakes
- Ignoring audio quality.
- Setting a bitrate higher than the upload can sustain.
- Streaming over WiFi.
- Using software encoding on a weak processor.
- Showing the stream key or personal information.
- Using copyrighted music without permission.
- Overcomplicating scenes and overlays.
- Not testing before going live.
- Poor lighting, then blaming the camera.
- Expecting instant growth rather than building consistency.
Ready to Buy? Start Here
If this guide helped you decide what to look for, these links take you to the next step.
Compare specific products
- 7 Best Webcams for Streaming: 1080p60 and 4K (2026)
- 6 Best Green Screens for Streaming and Video Calls (2026)
Gear for this guide
- USB microphones on Amazon
- Capture cards on Amazon
- Ring lights on Amazon
- Boom microphone arms on Amazon
As an Amazon Associate we earn from qualifying purchases. Prices and availability are shown on Amazon.
Building a Simple Scene Layout Before You Go Live
A tidy layout makes a stream easier to watch. Before your first broadcast, sketch the screen on paper. Decide where the game or main window goes, where your camera sits, and where chat or alerts will appear. Keep important parts of the game away from areas covered by overlays.
Build one scene for gameplay, one for opening soon, one for a short break and one for the end of the stream. Name them clearly so you can switch quickly. Practice moving between scenes with hotkeys while the stream is offline.
Audio Balance Between Game, Voice and Music
| Source | Purpose | Balance tip |
|---|---|---|
| Game sound | Main background | Keep it lower than your voice so speech stays clear |
| Microphone | Commentary and chat | Aim for steady levels without peaking |
| Music | Mood during breaks | Use only music you have the right to stream |
| Alerts | Follower and chat notices | Keep them short and not jarring |
Record a short clip and play it back on headphones and on a phone. If the voice vanishes behind the game, lower the game level and raise the microphone slightly.
A Pre-Stream Checklist
- Close apps you do not need to free up system resources.
- Check that the microphone and camera are selected in the software.
- Confirm your internet connection is steady, using a wired connection if possible.
- Look at the monitor window for sound levels and picture quality.
- Make sure notifications from other apps are silenced.
- Have water and a break plan ready.
Lighting Your Face on a Budget of Space
A good picture does not need many lights. Place a soft light source slightly above and to one side of the camera, and avoid strong light behind you. Window light helps, but it changes through the day, so use a lamp for consistency. Watch for glare on glasses and shiny surfaces.
Rules and Etiquette on Platforms
Each platform has its own community guidelines, and you are responsible for following them. Read the rules on content, music and chat moderation before going live. Ask trusted viewers to act as moderators, and set clear chat rules in the description. For privacy, hide personal information on screen, such as emails, addresses and notifications, using the privacy settings of your software.
A Short Glossary for New Streamers
- Bitrate: the amount of data sent each second; higher values give a cleaner picture but need more upload speed.
- Encoder: the part of your software or hardware that compresses video for sending.
- Frame rate: how many pictures per second your video shows.
- Scene: a saved arrangement of sources such as game, camera and overlays.
- Source: any single item in a scene, like a window capture or a microphone.
- Overlay: graphics placed above the video, such as a frame or a name bar.
- Dropped frames: pictures lost between your computer and the platform because of a weak connection or overload.
- Latency: the delay between what you do and what viewers see.
These terms appear in almost every setup guide, and knowing them makes settings menus much less confusing.
Trial Runs Before the Audience Arrives
Do a private run before your first public broadcast. Record a few minutes of gameplay and commentary, then watch it carefully. Look for stutters, audio that cuts out, a face that is too dark or a game that is hard to read at lower quality. Adjust one setting at a time, record again and compare.
If you notice dropped frames, lower the bitrate or the resolution, close background programs and check whether other devices on your network are using a lot of bandwidth. Ask a friend to watch a private stream and tell you what they see, since your own view can differ from theirs.
Going Deeper: Building a Stream That Stays Stable
New streamers usually obsess over peak image quality, but viewers forgive a slightly softer picture far sooner than they forgive stutter, dropped audio or a stream that falls over mid-game. Stability comes from leaving headroom everywhere: the encoder should not run at the edge of what the hardware can do, the upload connection should not be saturated, and the game should not consume every spare cycle the system has. Test with the most demanding game you play, in its busiest scenes, while recording locally with your intended stream settings, then watch the recording critically before you ever go live.
Bitrate choices should follow your actual tested upload speed, not the number on your internet plan. Run a sustained upload test at the time of day you plan to stream, because evening congestion changes the picture, and leave a comfortable margin for the game itself, voice chat and normal network variation. A modest, steady bitrate with a clean encode looks better to viewers than an ambitious bitrate that forces the encoder to skip frames whenever the action peaks, and platforms will also process a stable feed more kindly than one that constantly renegotiates quality.
Audio: The Half of Streaming Beginners Neglect
Viewers leave bad audio faster than bad video. Your voice should be clearly louder than game sound, consistent in level, and free of keyboard clatter, fan noise and room echo as far as your space allows. Position the microphone close to your mouth and turn its gain down rather than placing it far away and turning it up, because a close microphone hears mostly you while a distant one hears the whole room. Record short test clips and listen on ordinary headphones and a phone speaker, since that is how much of your audience will hear you. Simple processing, applied gently, helps: a noise gate to cut silence between phrases, light compression to even out loud and quiet moments, and a limiter to catch shouts during exciting plays.
Scenes, Overlays and the Discipline of Less
A tidy scene layout beats a busy one. Viewers came for the game and your commentary, so keep overlays small, readable and purposeful: a camera frame, an alert that appears briefly, and perhaps one small element that shows recent support. Test readability at phone size, because text that looks fine on your monitor can vanish on a small screen. Build a few core scenes, such as starting soon, gameplay, a short break screen and an ending screen, and resist adding more until the basics run flawlessly from simple hotkeys you can hit without looking.
Prepare for failure like a professional. Keep a muted break scene ready for interruptions, know how to mute your microphone instantly, and have a local recording running for important sessions so a dropped connection does not erase the content entirely. Write your stream title, category and settings down once they work, because re-deriving a working configuration from memory at midnight is how small mistakes creep in.
Two-PC and Single-PC Trade-Offs in Practice
A second PC dedicated to encoding isolates the game from the stream completely, which is wonderful for consistency and troubleshooting, but it doubles cost, desk space, audio routing complexity and the number of things that can go wrong before a stream. Most beginners and many established streamers do better with one well-chosen machine, hardware encoding, and sensible game settings. Move to a dual setup only when you can name the specific problem it solves for you, such as a game that genuinely saturates your system, rather than because successful channels are seen using one.
Growing Without Burning Out
The technical setup is the easy half of streaming; the sustainable half is rhythm. A schedule you can keep beats an ambitious one you abandon, and regular shorter streams usually build more habit in viewers than occasional marathons. Review your own recordings briefly after each session with a notebook: one thing that worked, one thing to fix, one idea to try. Improve the setup in small steps between streams rather than rebuilding it on stream day, and keep a short pre-flight checklist covering microphone levels, scene selection, game capture, recording, and a private test of alerts.
Troubleshooting the Classic Stream Problems
When the stream stutters but the game feels fine, suspect the encoder or the network and check dropped-frame counters in your software to see which one it blames. When the game stutters only while streaming, suspect system load and lower the game settings or the capture load before touching quality sliders. Echo usually means a source is being captured twice, often the desktop audio and a monitored microphone at once, so trace each sound from its origin to the output once, patiently. Desynced audio and video can often be corrected with a small offset adjustment in the software once you identify which direction the delay runs. Solving one variable at a time, and writing down what fixed it, turns streaming from superstition into a repeatable craft.
Decision Workshop: Three Streamers, Three Sensible Setups
Consider a student streaming from a bedroom to a small audience of friends. Their constraints are money, noise carried through thin walls, and a single mid-range PC, so their best setup is a modest microphone placed close, hardware encoding, a tidy pair of scenes and a bitrate chosen for stability on their real connection. Every spare unit of budget belongs in the microphone position and a simple light before any capture gadget, because their viewers will judge the stream by voice clarity and whether it stays up, not by whether the overlay animates. This streamer should also set expectations at home, agreeing streaming hours with the people who share the connection and the walls.
Consider a variety streamer growing an audience who plays demanding modern releases. Their problem is load: the newest games already stretch their machine, and encoding must not be the thing that tips a busy scene into stutter. They benefit from learning their encoder settings deeply, testing each major release offline before streaming it, and keeping a lower-load scene profile ready for the heaviest titles. Their upgrade path, when money arrives, runs through the component their recordings prove is saturating, which is why the habit of reviewing test recordings matters more than any shopping list.
Consider a console streamer who wants to add commentary and a camera without building a PC around the hobby. Their route is a capture solution matched to how much production they truly want: console built-in streaming for simplicity, or a capture device and a laptop for overlays and control. The deciding question is how much friction they will tolerate before every session, because a setup that takes twenty minutes to assemble will quietly end a streaming habit that a five-minute setup would have sustained for years.
More Questions New Streamers Ask
How good does my internet need to be? What matters is sustained upload, tested at your streaming hour, not the download figure on your contract. Measure it several times, assume you can use only a comfortable portion of it for the stream itself, and let that measurement set your bitrate rather than copying a favorite streamer settings. If your upload is modest, a lower-resolution stream with clean encoding and good audio will win and keep more viewers than an ambitious feed that buffers. Wired connections beat wireless for streaming whenever running a cable is remotely possible.
Do I need a camera? No, and many successful streams run without one, but a camera changes the relationship with viewers because people connect with a person. If you use one, lighting matters more than the camera itself: a soft light in front of you beats an expensive sensor in a dark room. If you skip the camera, invest the energy in voice presence and a clear visual identity for the channel, and revisit the question once the habit of streaming is established rather than treating it as a launch requirement.
Why does my recording look fine but my stream looks worse? Because they travel different paths. A local recording uses your full chosen quality and never crosses the internet, while the stream is limited by your bitrate, re-processed by the platform, and delivered at whatever quality tier the platform grants your channel. Judge your stream by watching the actual broadcast replay, not the local file, and set expectations accordingly: the goal is a clean, stable broadcast picture, and chasing recording-level sharpness on a live feed leads streamers to bitrates their connections cannot sustain.
What should I do when almost nobody is watching? Exactly what you would do with an audience, because recordings and clips are how new viewers meet you, and because the habit of commentating is a skill built during quiet hours. Talk through your decisions in game, greet anyone who does appear like they matter, because they do, and review the session afterward for one improvement. Growth in streaming is famously uneven, and the streamers who last are the ones whose process does not depend on the viewer count of a particular evening.
When is it time to upgrade gear? When you can name the limitation in one sentence and point to it in a recording: the microphone clipping, the encoder dropping frames in a specific game, the camera dissolving in low light. Upgrades bought against a named problem improve the stream measurably, while upgrades bought from general dissatisfaction usually just rearrange it. Keep a short written wishlist in that order, and let the stream own pace of growth, not a sale calendar, decide when each item is bought.
Ownership Notes: The Streamer Maintenance Hour
Once a month, give the setup an hour of unglamorous maintenance. Update the streaming software and your graphics drivers, but never on a stream day, because updates change defaults and occasionally break capture methods, and you want a quiet test session between any update and a live audience. Export or back up your scene collections and settings once they work, since rebuilding a profile from memory after a disk failure or a corrupted update is a special kind of misery that a single saved file prevents entirely. Review your stored recordings and delete what you do not need, because a drive filled by old test files has a way of announcing itself mid-stream.
Use the same hour to watch ten minutes of your own recent broadcast with a notebook. Listen for the microphone level drifting when you get excited, watch whether alerts cover important game information, and check the phone view for text you assumed was readable. Small, regular corrections like these compound into a channel that feels professional long before its audience is large, and they cost nothing but the honesty to watch your own work critically. Pair the technical review with one content note, a moment that worked, a segment that dragged, because production quality and presentation grow together or not at all.
A Pre-Flight Checklist Worth Printing
Keep a short list by the desk and run it before every session: microphone live and at the tested level, correct scene selected, game capture showing the right window, local recording started, alerts tested privately, phone silenced, water within reach, and the break scene one hotkey away. Sixty seconds of checklist prevents the five classic opening disasters, the muted first ten minutes, the wrong screen shared, the unrecorded special session, the phone call broadcast to everyone, and the panic that makes a new streamer look newer than they are. Professionals in every field use checklists for exactly this reason: memory is a terrible place to store a routine you perform under excitement.
A Practical First Month of Streaming
Week one belongs to systems, not growth: stream on schedule, run the checklist, record everything, and fix exactly one technical thing between sessions, chosen from your notes by how much it annoyed you rather than by how interesting it is to fix. Week two belongs to presentation: watch your recordings at phone size, tighten your scenes, and learn your own voice well enough to stop apologizing for it. Week three belongs to content: plan one segment per stream you would describe to a friend beforehand, because a stream with one intentional segment has a spine that pure improvisation rarely finds. Week four belongs to review: read the month of notes as a single document, and you will see your own pattern, the recurring fault, the recurring strength, more clearly than any analytics dashboard shows it.
Notice what this month never includes: a gear purchase. That is deliberate. A month of disciplined streaming teaches you exactly which limitation is real, and it is almost never the one the shopping cart predicted. Streamers who buy after this month buy once, correctly, and usually less than they feared. Streamers who buy before it own a drawer of solutions to problems they turned out not to have, while the actual problem, usually audio position or an overloaded encoder setting, waited patiently for attention that cost nothing.
Handling a Bad Stream Without Spiraling
Every streamer gets a cursed session: the dropped frames, the game crash, the neighbor drilling. Handle it in the open and briefly, switch to the break scene, fix what is fixable in two minutes, and either continue with the adjusted setup or end gracefully with a clear promise about next time. Viewers remember composure longer than they remember the fault, and your own notes afterward will be more useful than your feelings during. Then apply the one-change rule to whatever failed, test it offline, and let the next session be the proof. A streaming habit is not built by avoiding bad nights; it is built by metabolizing them into checklists.
Reading Your Own Analytics Without Losing Heart
Once the setup is stable, the numbers platforms offer become the next temptation and the next trap. Averages hide everything that matters at small scale: one generous evening can disguise a month of quiet, and one technical disaster can erase a week of growth in a chart while teaching you more than the week did. Read analytics in months, not days, and read them for direction rather than verdicts: are returning viewers appearing, are people staying longer into a stream, which game or segment quietly outperforms everything else you do. Those three signals, trended slowly, are a strategy trying to get your attention.
Compare yourself only with your own past, because the visible streamers are survivors of a filter you cannot see, with resources, timing and luck that are not variables in your control. Your controllable variables are the ones this whole guide is built from: a stable, good-sounding, watchable stream, on a schedule, improving by one logged fix at a time. Channels built on those variables grow the way compound interest grows, insultingly slowly and then, to everyone who was not watching the process, suddenly. Keep the process boring and the content alive, and let the chart take care of itself.
The Gear Fast: A Discipline Worth Stealing
Impose a simple rule for the first season: no purchase without a logged problem it solves, witnessed in a recording, named in one sentence. The rule sounds strict and feels liberating, because it ends the ambient shopping that haunts new streamers and replaces it with a short, honest list that shrinks as your skill grows. Most items on the first version of that list solve themselves, through settings, placement or practice, which is the deepest lesson streaming teaches: the craft is mostly free, and the gear is mostly punctuation.
Community Without Losing the Plot
At some point the stream stops being a solo technical exercise and becomes a small community with regulars who know your games, your schedule and your running jokes. Tend that community with the same steadiness as the setup: learn names, remember what people told you last week, set clear and kind rules early, and enforce them boringly and consistently so the space stays welcoming to the next stranger who wanders in. Appoint help only when the chat genuinely needs it, and choose the calm regular over the loud one. None of this appears in a settings menu, yet it decides whether the channel is a place people return to, which is the only growth metric that has ever really mattered.
Protect yourself in equal measure. Keep personal details at the distance you chose on day one, use the platform safety tools without hesitation, and remember that a streamer owes an audience a good show, not access to a private life. The streamers who last a decade are the ones whose boundaries survived their growth, and boundaries, like bitrates and microphone positions, are set deliberately in advance rather than improvised under pressure. Set yours while the audience is small and the decisions are easy, and the setup you have built, technical and human together, will be able to carry whatever success it earns.
Clips, VODs and the Second Life of a Stream
A live session ends, but its material should not. The recording you kept, following the advice earlier in this guide, can become the short clips and highlights by which new viewers discover you, and the discipline of reviewing a session for one fix becomes, with the same notebook open, a search for one moment worth keeping. You do not need an editor’s suite or a second hobby; you need the habit of marking moments as they happen, with a hotkey or a timestamp in your notes, so the good material is findable later. Streams are perishable and clips are durable, and the streamers who grow treat every session as raw material for both.
The Two-Hour Rule for New Gear
When a new piece of streaming gear does arrive, give it a rule: it must be installed, tested in a private recording and understood within two hours, or it goes back in its box until a day when it can be. Gear installed in a rush between streams becomes haunted gear, blamed for faults it did not cause and never configured well enough to cause the good it promised. The two-hour rule keeps the setup a system you understand completely, which, as this guide has argued from its first page, is worth more than any single device in it.
Frequently Asked Questions
What do I need to start streaming?
A PC that can run your game with spare capacity, a stable internet connection with enough upload speed, free streaming software, a microphone and optionally a webcam.
How much upload speed do I need?
For 1080p at 60 frames per second, around 10 to 12 Mbps of stable upload is a typical suggestion. Check the platform’s current guidance.
Do I need a capture card?
Not for streaming a PC game on the same PC. You usually need one for consoles with high quality or for a second PC setup.
Is hardware or software encoding better?
Hardware encoding on a modern graphics card is the best starting point for single-PC streamers. Software encoding suits strong processors or a dedicated streaming PC.
Do I need a green screen?
No. A tidy background works, and software can remove backgrounds. A green screen gives cleaner edges if lighting is good.
Why does my stream drop frames?
Common causes are low or unstable upload, an overloaded encoder or an overloaded graphics card. The software shows which type of dropped frame it is.
Can I stream from a console?
Yes, using the console’s built-in tools or a capture card with streaming software on a PC.
How do I keep my stream key safe?
Never show it on screen, do not share it, and reset it if you think someone saw it.
Bottom Line
A good stream rests on a few fundamentals: a PC with spare capacity, stable wired internet with enough upload, hardware encoding at a bitrate your connection can hold, and above all clear audio. Add a decent camera, soft lighting and simple scenes, protect your stream key and personal information, and test before you go live. Upgrade in order of impact: audio, lighting, internet, camera, then controls and capture hardware.
Related Reading
- Best Capture Cards
- Best Stream Decks and Controllers
- Best Green Screens
- Best Webcams for Streaming
- Best Gaming Routers
- Fix Stuttering in PC Games
- How to Reduce Input Lag on PC
- All Streaming Gear guides