To print barcode labels for inventory, decide what each code will say, set up a label template that matches your label stock, print a small trial run and scan it before printing the full batch. The steps below work with most label printers and label design programs. This guide also covers layout, a worked walkthrough, care of printed labels, and the mistakes that lead to codes that will not scan.

Before You Print
Good labels begin with a clean list. Gather your item numbers or bin numbers in a spreadsheet, one per row, and remove duplicates. Every code on a shelf should point to exactly one item or location.
Also decide the label size. Measure the flat area on the box, shelf edge or bin where the label will go, and leave a margin around it so the label does not wrap over an edge.
In this guide
The Seven Steps
- Choose the code format. A linear code works for short IDs; a 2D code suits longer data. Make sure your scanner reads the format.
- Set the page size in the printer driver. Enter the exact width and height of the label stock, as given in the stock maker’s guide.
- Build the template. Place the barcode, add a short human-readable line under it, and keep text large enough to read at arm’s length.
- Link the data. Connect the template to your spreadsheet so each label pulls its own number.
- Print one label. Check position, edges and darkness before running more.
- Scan the sample. Use the same scanner your team will use. If it fails, adjust size, darkness or margins and try again.
- Print the batch. Print in the order you will apply them, such as aisle by aisle, to save handling time.
Layout Tips That Help Scanning
- Leave a blank margin on both sides of a linear code. Scanners need that quiet zone to find where the code begins and ends.
- Print black on a light, matte background. Low contrast and glossy glare make codes harder to read.
- Avoid stretching or shrinking the code image in a design program; change the size using the barcode settings instead.
- Keep the code flat. Do not place it across a fold, a seam or a curved corner.
Choosing a Numbering Scheme
The code only carries what you tell it to, so design the numbers before you print. A short, plain number that matches a row in your spreadsheet is usually easier to manage than a long code packed with meaning. If you do want some structure, keep it simple, for example a few letters for the area, then a running number.
| Scheme | Works well for | Watch for |
|---|---|---|
| Plain running number | Small collections of tools and parts | Needs the spreadsheet to tell you what it is |
| Area prefix plus number | Several shelves, rooms or bins | Prefixes must stay consistent |
| Separate codes for items and locations | Stock that moves between bins | Two lists to keep up to date |
Whatever you choose, avoid reusing a number after an item is retired, because old labels can linger on shelves and confuse records.
Worked Example: Labelling a Workshop Parts Cabinet
Suppose you have a cabinet with twenty drawers of screws, bits and fittings. The numbers below are invented for the example.
- Open a spreadsheet and list each drawer in a row. Give each a number such as D01 to D20, and add columns for contents and shelf location.
- Measure the front of a drawer, including any handle or lip. Decide on a label that fits in the flat part with a small margin all round.
- Check the label stock maker’s guide for the sheet layout and enter the size into your label program or printer driver.
- Build a template with the barcode in the center and the drawer number printed underneath in a large, plain font. Add a short description above, such as “Wood screws”.
- Link the template to the spreadsheet and look at the first few labels on screen. Make sure each shows the right number.
- Print a single label on the correct stock, stick it temporarily on a drawer and scan it with the scanner you plan to use. Try from different distances and angles.
- If the scan fails, make the code larger, increase darkness slightly, or enlarge the margin. Print another and try again.
- Print the remaining labels in drawer order, apply them to clean, dry fronts, and scan every one to confirm it matches the sheet.
Apply and Record
Apply labels to clean, dry surfaces and press them down from the center outward. Then scan each code once to confirm it matches the record. Keep your spreadsheet as the master list so you can reprint a damaged label exactly as it was.
Common Scenarios
Labels for small parts bins
Space is tight, so use short numbers and a small linear code with a clear margin. If a scanner struggles, move to a 2D code, if your scanner reads that type.
Labels on rough or curved surfaces
Choose label stock made for that surface according to the maker, or attach the label to a flat card or tag that hangs on the item.
Cold, damp or dusty storage
Some stock handles these conditions better than others. Check the label maker’s guidance for the conditions you have, and wipe the surface before applying.
Several people scanning
Agree on one scanner type and one set of rules. Keep a short written guide near the shelves describing what each code means and where to log changes.
Mistakes to Avoid
- Printing the whole batch before scanning one: a small mistake in size or darkness then wastes the whole sheet.
- Resizing the barcode as a picture: stretching changes the bar widths, which scanners rely on.
- Duplicate numbers: two items with one code makes the stock list unreliable. Remove duplicates before printing.
- Too little margin: without the quiet zone, scanners may miss the beginning or end of the code.
- Applying to dusty or damp surfaces: labels lift and codes get scuffed. Clean and dry first.
Quick Troubleshooting
| Symptom | Likely cause | What to try |
|---|---|---|
| Scanner does not read the code | Code too small, faint or without margin | Enlarge, adjust darkness and add margin |
| Print shifts off the label | Page size does not match the stock | Re-enter the label size and feed the stock as the maker shows |
| Streaks across the bars | Dirty print head or low ink | Clean the printer as the manual says and reprint |
| Scan gives the wrong item | Duplicate or mistyped number | Check the spreadsheet and reprint the affected labels |
Glossary
- Linear code: the familiar pattern of vertical bars.
- 2D code: a square pattern that holds more data in a small space.
- Quiet zone: the blank margin around a code that scanners need.
- Label stock: the sheets or rolls of sticky labels used for printing.
- Template: a saved label layout that pulls data from a list.
- Driver: software that tells the computer how to talk to the printer.
Picking a Barcode Type
Not every barcode suits every label. The right choice depends on how much you need to encode, how small the label is, and what scanner you own. Picking a type before you design the label avoids the frustration of a code that looks fine but will not scan.
One-dimensional codes, the familiar lines of varying width, are the simplest. Code 128 is a popular choice for inventory because it handles letters and numbers in a compact space. Code 39 is older and simpler but takes more width for the same content. UPC and EAN codes are meant for retail products with registered numbers, so do not use them for your own internal numbering unless you have a legitimate registration, as they can clash with real products.
Two-dimensional codes, such as QR codes and Data Matrix, store far more in a small area and can hold a web address or a longer text. QR codes scan well from phone cameras, which is handy if you do not own a dedicated scanner. Data Matrix is often used for very small parts.
- Small bins and short item numbers: Code 128 is usually a good fit.
- Phone scanning and links to a record: QR code.
- Tiny labels or small parts: Data Matrix, if your scanner reads it.
- Retail shelf items with a registered number: follow the product’s existing UPC or EAN.
Check your scanner’s manual or the app’s settings to confirm which types it reads. Some scanners come with many types disabled and require a setup sheet or setting to enable them.
Print Settings and Label Stock
Print quality is the single biggest factor in whether a code scans. A blurred edge, faint ink or a skewed print can turn a good design into an unreadable one.
Match the print resolution to the label. Most label printers are rated in dots per inch, and common values range from about 200 to 300 dpi or more. For small, dense codes a higher resolution helps. Always print at actual size rather than letting software scale the page, because scaling changes the width of the bars and may break the code.
Set the print darkness carefully. Too light and bars look faded; too dark and they bleed together and narrow the white gaps. Print a test strip and adjust one step at a time. If your printer offers speed settings, slower printing often gives crisper results.
Choose label stock to suit the environment. Direct thermal labels are simple and need no ribbon, but they can fade with heat, sunlight and friction over time. Thermal transfer labels use a ribbon and are generally more durable for long storage. Paper labels are fine indoors, while synthetic materials such as polyester stand up better to moisture, oil and outdoor conditions.
- Check that the label size in your software matches the roll exactly, including gaps and margins.
- Calibrate the printer so it detects the label gaps correctly, following the maker’s instructions.
- Leave a clear blank border, called a quiet zone, around the code, since scanners need it to find the start and end.
Testing and Quality Checks
A code that looks sharp to the eye may still fail in practice. Build a short test routine into every print job.
First, scan a sample with the actual scanner or phone app that will be used day to day. Try it from the distances and angles that match real use: from a standing position, at an arm’s length, and under the lighting in the shelf area. Glossy labels can reflect overhead light and make scanning harder, so tilt them and see.
Second, check what the scanner reports. Open a plain text field and scan into it, then compare the result against the number you intended. A missing digit or an added character is a sign of a setting or a printing issue. Some scanners add a prefix or suffix, such as a carriage return, which is often useful but should be intentional.
Third, test a sample from the middle and end of the batch, not just the first label. A printer that drifts out of alignment partway through a roll will produce bad labels later in the run.
Keep a small record of the settings that worked: label size, code type, darkness and speed. When you change rolls or printers, you will be able to restore what worked in a few minutes instead of starting over.
Linking Scans to Your Records
A barcode is just a key. Its value comes from what it opens. Before printing a large batch, decide how a scan will connect to your list of items.
The simplest approach is to scan into a spreadsheet cell. The scanner types the code, and a lookup formula returns the item name and location. This works with a basic scanner that acts like a keyboard. If you use inventory software, check how it imports codes, and whether it expects a certain format or length.
Keep the numbering scheme stable. If an item’s code encodes its category or location and that changes, the label becomes misleading. Many people choose meaningless but unique numbers so the label never needs reprinting when stock moves. Others prefer readable codes. Either works if you stay consistent.
Plan for exceptions: items with no label, damaged labels, and codes that fail to scan. Give each a path. Typing the printed human-readable number into the search box is a good backup, which is another reason to print it under the barcode.
Keeping the Label System Running
Printing the first batch is the easy part. Long-term, you will need a process for replacements and changes.
Keep a small supply of the same label stock, since switching types may change the look and scan behavior. Store rolls away from heat and direct sunlight, in their packaging, and use older ones first. Clean the print head periodically as the printer maker describes, usually with a recommended wipe, because residue causes streaks that damage bars.
Schedule a quick review of labels during your regular counts. Look for corners lifting, ink fading, and labels covered in dust or grease. Replace them before they fail rather than after. When you retire an item, remove or cross out its label so that nobody scans an out-of-date code.
Finally, write a one-page guide for anyone else who prints labels: where the template lives, which settings to use, how to run a test scan and who to ask when something goes wrong. A short guide prevents the slow drift into mismatched labels that makes a system feel unreliable.
One more habit is worth building: print a few spare labels of each type and store them with the template notes. When a label gets damaged, you can replace it quickly and know it matches the original number. For high-traffic items, consider laminating or covering labels with clear tape rated for the surface, but test that the cover does not cause glare that interferes with scanning.
Finally, remember that a barcode system pays off only if people use it. Place a scanner or a charged phone where the work happens, and keep the process quick enough that nobody is tempted to skip it.
Keep a printed sample sheet of your labels near the printer so anyone can compare a new print against a known good one.
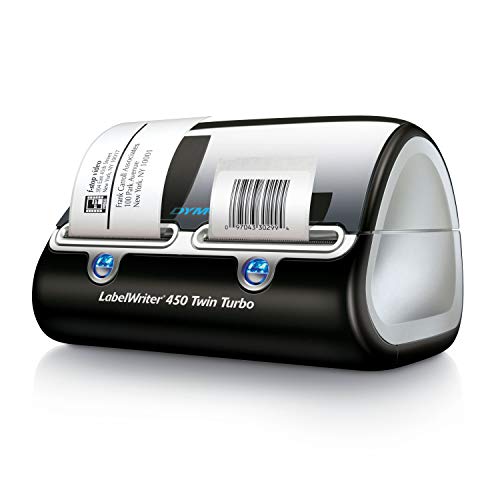
Ready to Buy? Start Here
If this guide helped you decide what to look for, these products are a place to start.

As an Amazon Associate we earn from qualifying purchases. Prices and availability are shown on Amazon.
Choose the Barcode Format and Content
An inventory label only works if every scanner and person in your system can read it. Before you print anything, decide what the code will represent: a simple item number, a location, or a longer identifier. Keep the content short and consistent, since long numbers need larger labels and are harder to scan on small items.
- Decide what each barcode stands for, such as item, bin or shelf location.
- Choose one code format and use it everywhere so your scanner can stay consistent.
- Create a numbering plan with room to grow.
- Check the scanner or app instructions for supported formats.
- Print a few trial labels and scan them before printing a full batch.
Label Size and Surface
| Item | Suggested label approach |
|---|---|
| Small parts bins | Small label with a short code |
| Shelves | Wide label across the front edge |
| Tools and equipment | Durable label applied to a flat area |
| Boxes | Larger label on the side that faces out |
Printing Tips
- Keep a quiet margin around the barcode so scanners can find it.
- Use black print on a plain light background.
- Avoid curved or creased areas that distort the lines.
- Clean the printer head as the maker advises if codes begin to fade.
Keep a spreadsheet or app record linking each code to the item it represents. Without that link, a barcode is just a pattern. Update the record whenever an item moves or is removed from stock, and scan a handful of labels each month to confirm they still read properly.
Store spare label rolls and a few printed test labels in the same drawer, so that whoever takes over the system can see how a good barcode should look and compare it with any that fade over time.
Building a Code System Before You Print Anything
The printing itself is the easy part. What decides whether a barcode system helps or quietly creates confusion is the thinking that happens before the first label comes off the roll. A barcode is only a picture of an identifier, so the identifier underneath it has to be stable, unique and boring in the best possible way. Sit down with a notebook and decide what one code means in your space. In most small inventories, one code stands for one kind of item in one condition and one unit of measure, so a single loose part and a sealed pack of the same part get different codes. That distinction sounds fussy on paper, yet it prevents the classic muddle where a scan tells you something is in stock without telling you in what form.
Keeping SKU habits consistent
A simple internal code, often called a SKU, works best when it follows the same pattern every time. Pick an order for the parts of the code and never improvise: for example, a short group hint, then a short item hint, then a variant hint for size, colour or pack quantity. Keep the characters plain, avoid spaces, and avoid characters that look alike when handwritten, because people will copy these codes onto shelf edges, delivery notes and count sheets. Decide in advance how you will handle a genuinely new variant: it earns a new code rather than borrowing an old one with a letter tacked on in pencil. Write the rules on one page, keep that page near the printer, and treat it as the constitution of the system. When everyone follows the same pattern, a code becomes readable at a glance, sorting a list becomes predictable, and a new helper can guess where an item belongs before scanning anything at all.
One code, one meaning, forever
Resist the temptation to recycle a code after an item is discontinued. Old labels linger on boxes, bins and returned stock for years, and a recycled code makes an old label lie with complete confidence. Retire codes instead: mark them inactive in your list, keep the record, and move on. The same discipline applies to locations. If a shelf is reorganised, give the new layout its own location codes rather than silently reusing the old ones, at least until every old label has been removed. These habits cost nothing, and they are what separate a system you can trust during a busy week from one you have to second-guess every time the numbers look odd.
Placement, Quiet Zones and Readable Bars
A scanner does not read a barcode the way a person reads a sentence. It measures contrast and spacing, and it needs a calm margin around the symbol to know where the code begins and ends. That margin is the quiet zone: blank space on both sides of the bars, free of text, logos, tape edges and the border of the label itself. When a design crowds the bars, trims the margin during printing, or lets a bin edge shadow one side, scans become hesitant even though the label looks fine to the eye. Leave generous blank space, keep the human-readable number below the bars rather than beside them, and never let a second label overlap the first.
Where the label sits on the item
Put the label where a scanner naturally points: on a flat area, at a consistent height and orientation, away from seams, corners and curves that bend the bars. On bins, choose the same corner every time so muscle memory builds. On shelving, place the location label where it can be scanned without moving stock. If an item is stored in several places, each place gets its own location label while the item keeps its own code, because item identity and storage place are two different facts. Avoid wrapping a barcode around an edge, avoid placing it under shrink film that wrinkles, and avoid glossy tape over the bars, since reflections can defeat a scanner that handled the bare label perfectly.
Contrast and bar quality in plain terms
Dark bars on a light, matte background remain the safest combination. Coloured bars, pale inks and busy backgrounds all reduce contrast, and a code that scans on the bench under bright light may fail in a dim storeroom. Print quality matters just as much: fuzzy edges, streaks and a worn printhead blur the difference between wide and narrow elements. If several labels in a row look slightly grey or broken, deal with the printer first and the design second. A clean, sharp, unglamorous barcode outperforms a decorative one every single day of the week.
A Test-Scan Routine You Can Repeat
Never commit a whole batch on the strength of one successful beep. Print a small test sheet or a short run first, then scan every test label with the actual device and in the actual place where scanning will happen. Move through the same motions a busy person would use: normal distance, normal angle, normal speed, and the lighting of the real shelf rather than the bright desk. Check that the decoded value matches the intended value exactly, character for character, because a code can scan smoothly and still be the wrong code if the source list had a typo.
What to record from each test
Keep a short test log with the date, the code range, the label stock, the printer settings used and the result. When a problem appears weeks later, that log turns guesswork into comparison: you can see what changed. Include one deliberate edge case in each test, such as the smallest label you use or the longest code, since extremes reveal weak margins and cramped layouts before ordinary labels do. If a phone will ever stand in as a backup scanner, test with the phone too, holding it the way someone would in a hurry, and confirm the app reports the full value rather than a shortened or reformatted version.
Training the human half of the system
Most scanning failures in small setups are habits, not hardware. Show everyone the same simple technique: aim, pause briefly, let the device confirm, and glance at the screen to see the item name rather than trusting the beep alone. Agree on what to do when a label will not scan: type the printed number, set the item aside, and report the label for reprinting instead of shaking the scanner or guessing. A shared routine keeps the data clean, and clean data is the entire point of putting barcodes on things in the first place.
Rolling the System Out Without Chaos
Introduce labels in one zone at a time. Finish a shelf, a cabinet or a category completely, scan everything once to confirm the records match the physical stock, and only then move on. Partial labelling is worse than none, because nobody can tell whether an unlabelled bin is empty, new or simply missed. Keep a small labelling kit together: spare labels, a pen, a cloth for dusty surfaces and the one-page code rules, so the job never stalls for want of a minor item. Finally, schedule a light review after the first busy period. Walk the shelves, look for peeling corners, faded print and labels that migrated onto the wrong bins, fix what you find, and adjust the rules page if reality taught you something the plan did not.
Worked Patterns for Common Inventory Shapes
Abstract rules become useful when you see them fitted to real storage. Consider a shelf of small hardware sorted into bins. Each bin holds one part type, so the bin front carries the item code, while the shelf end carries the location code. A scan of the bin answers what should be here, and a glance at the shelf answers where here is. When a bin is refilled from bulk stock, the refill is the moment to scan and confirm the part in hand matches the code on the bin, because the costliest inventory error is a look-alike part filed confidently in the wrong home. Consider, by contrast, a rack of larger boxed items where each box is individually valuable. There the item label belongs on each box, placed on the same face and corner so a row of boxes reads like a row of book spines, and counting becomes a walking scan rather than a handling exercise.
Seasonal and rotating stock
Stock that appears for part of the year tempts people to improvise temporary codes, and temporary codes have a way of becoming permanent confusion. Give seasonal items proper codes from the same scheme, mark them inactive out of season in the list, and store their labels with the items rather than peeling them off and re-inventing them next year. When the season returns, a test scan of a few labels confirms the print has survived storage, and the system wakes up instead of being rebuilt. The same approach suits rotating display stock, event supplies and anything else that cycles in and out of the main shelves.
When labels meet people who did not make them
Sooner or later someone else will scan your labels: a helper, a family member, a buyer of the whole setup, or future you after a long break. Design for that stranger. Keep the printed number under every code, keep a one-page legend of the code pattern near the printer, and avoid private abbreviations that only make sense in your head. If a code segment means a room, a material or a category, the legend should say so in plain words. A system a stranger can use after five minutes of reading is a system that will survive holidays, illnesses and growth; a system locked in one memory is a single point of failure wearing a barcode costume.
Troubleshooting Scan Failures by Pattern
When scans begin to fail, note the pattern before touching any setting. If one label fails while its neighbours scan, the label itself is damaged, faded, dirty or badly placed, and reprinting that single label is the honest fix. If every label from one printing session fails, suspect that session: the stock, the print quality or a setting that changed that day, which your test log can confirm. If labels scan at the desk but fail at the shelf, suspect light, angle or distance in the real location, and test there rather than at the desk. If a scanner reads codes but the values arrive garbled or shortened, suspect the connection or app settings between scanner and record, not the labels at all. Each pattern clears half the suspects instantly, and pattern-reading is a skill that transfers to every other tool in the building.
The reprint discipline
Reprinting sounds trivial and causes a subtle class of error: duplicates. When you reprint a label for an item, the old label must be removed or completely destroyed in the same moment, because two live copies of one identity will eventually sit on two different items. Keep a small rule: no new label leaves the printer until the old one is in hand or confirmed gone. Note the reprint in your log with the reason, since a cluster of reprints on one shelf often reveals a storage problem, like damp or abrasion, that is quietly eating labels and will eat their replacements too unless the cause is fixed.
Costs, Time and the Honest Economics of Labelling
People sometimes hesitate at the small ongoing costs of a barcode system: labels, printer wear and the minutes spent applying them. Set against those costs honestly. An unlabelled inventory charges its own tax in searching, recounting, double-buying items already owned and hesitating over look-alike parts. Labelling converts that scattered, invisible tax into a small, visible, predictable cost, and it pays the dividend in confidence: when the list says an item is present, you believe it enough to stop searching and start working. The break-even point arrives surprisingly early, usually the first time a scan ends an argument about whether something is in stock.
Labelling sessions as a rhythm, not a project
The healthiest systems label in small, regular sessions rather than heroic annual efforts. Ten minutes with a delivery, labelling new arrivals before they join the shelves, keeps the system complete without ever becoming a dreaded project. Batch the printing, apply in one pass, scan to confirm, and file the test log. That rhythm also spreads label stock use evenly, so you notice a running-low roll while reordering is still a calm errand rather than a mid-delivery emergency. Systems maintained in minutes survive; systems maintained in weekends quietly stop being maintained.
A Starter Checklist for Your First Hundred Labels
Beginners do better with a short runway than with a grand design. For the first hundred labels, hold the pattern deliberately simple: one code scheme, one label size, one printer setting that you have test-scanned, and one storage zone labelled completely before you allow yourself a second. Print in small runs, scan every run, and keep the test log even when everything works, because the log of a good day is the comparison that saves a bad one. Expect the hundredth label to teach you something the plan missed: a bin shape that fights the label size, a code segment everyone misreads, a shelf position no scanner can reach comfortably. Write that lesson into the rules page the same day. A system that updates its own rules from experience stays fitted to the real shelves, while a system frozen at its launch design slowly becomes a museum of its first guesses. By the time the second hundred labels are due, the routine should feel ordinary, and ordinary is the goal: barcodes are infrastructure, and infrastructure succeeds by being unremarkable every single day.
When the Inventory Grows Legs: Multiple Sites and Helpers
Success creates the next problem: stock spreads to a second shelf, a second room or a second pair of hands. The code system travels well if its rules were written down early, because new locations simply earn new location codes in the same pattern and new helpers learn from the same one-page legend. What does not travel well is improvisation. Resist letting a second site develop its own dialect of codes, its own label placement habits or its own private abbreviations, because the day the two halves need to agree, and that day always comes, dialects must be translated and translations breed errors. Hold a short alignment moment whenever the system expands: print the test sheet at the new spot, scan with the devices that will live there, walk one complete arrival from delivery to shelf together, and update the rules page with anything the expansion taught you. Growth handled as a deliberate extension keeps one system; growth handled as a fresh start quietly creates two, and two systems are worse than one, however modern each may feel.
A closing habit: the monthly shelf walk
Once a month, walk the labelled shelves with no task except looking. Peeling corners, fading print, a label migrated onto the wrong bin, a location code nobody updated after a tidy-up: the shelf walk finds them while they are still small embarrassments rather than data errors. Take a pen, a few spare labels and the rules page, fix what you find on the spot, and note anything that needs a decision. Fifteen unhurried minutes a month is the entire maintenance contract of a healthy barcode system, and it is the difference between a system that ages gracefully and one that quietly rots between annual panics.
FAQ
Should I print the number under the barcode?
Yes. A readable line lets a person find the item when a scanner is not at hand or a code is scuffed.
How many sample labels should I scan?
Scan several, not just one, and try different angles and distances that match real use. If any fail, correct the layout before printing the whole batch.
Do I need a special printer?
Many ordinary printers can print barcodes on label sheets if the output is sharp and the size is right. Dedicated label printers are made for rolls and may suit large volumes. Check what your printer and label stock makers say about compatibility.
How long will printed labels last?
That depends on the stock, the printing method and the conditions on the shelf. Rubbing, sunlight, moisture and heat can wear them down. Inspect labels at regular intervals and reprint worn ones from your master list.
Can I use the same code for several identical items?
You can if you track them as a group, such as a bin of identical screws. If you need to track each item individually, each one needs its own unique number.
Which barcode type is best for a home or small shop inventory?
Code 128 is a common choice because it handles letters and numbers compactly. A QR code works well if you scan with a phone. Check which types your scanner reads, and avoid UPC or EAN for internal numbering because those are meant for registered retail products.
Why do my barcode labels print but not scan?
Common causes are printing at the wrong size, too light or too dark settings, a missing quiet zone around the code, glossy glare, or a scanner with that code type turned off. Print at actual size, adjust darkness in small steps and check the scanner settings.
Should I use direct thermal or thermal transfer labels for barcodes?
Direct thermal is simple and needs no ribbon but can fade with heat, light and rubbing. Thermal transfer uses a ribbon and is generally more durable for long storage. Choose based on how long the labels must last and where they will sit.
Can I scan barcode labels with my phone?
Yes, many phone camera and scanning apps read common codes, and QR codes are especially easy. A dedicated scanner is faster for large jobs. Test your phone app on a sample label under real lighting before you print a full batch.
What is a quiet zone on a barcode label?
It is the blank margin around the code that helps a scanner find where the code starts and ends. If text, a border or the edge of the label crowds the code, scanning can fail. Follow your label software’s recommendation for margin size.
How do I decide between labelling items and labelling locations?
Label both when you can, because they answer different questions. An item label says what a thing is; a location label says where it lives. Small setups sometimes begin with location labels alone for bulk stock and add item labels for valuable or easily confused pieces. Whichever you choose, keep the two kinds visually distinct so a scan is never mistaken for the other kind.
What should I do when two items arrive with the same supplier code?
Treat the supplier code as information, not as your system of record. Assign your own internal code to each distinct item, record the supplier code in your list as a cross-reference, and label with your code. That keeps your system stable even when a supplier reuses, changes or prints the same code across variants.
How large should the quiet zone be in practice?
Leave a clear blank margin on both sides of the bars at least as wide as the widest element your design uses, and more if the label allows it. The practical test is simple: if text, a logo, a tape edge or the label border sits close beside the bars, move it. Generous margins forgive small printing shifts that tight margins punish.
Can I handwrite a code when a label is damaged?
Yes, as a temporary measure. Write the full code clearly on a plain label, place it exactly where the damaged one was, and reprint a proper barcode at the next quiet moment. Note the replacement in your records so the damaged label is not counted twice, and remove or fully cover the old label so two identities never share one item.
The Short Version
Prepare a clean list, match the template to the label stock, print a single label and scan it, then print the batch. Keep a margin around each code and keep the master list so replacements are easy. Scan every label after applying to confirm it matches the record.

