An online shop usually needs three kinds of label: product labels, stock or shelf labels and parcel labels. Each has a different job and different rules. The steps below help you set up all three, and remind you where to check outside instructions. You will also find a worked example, common scenarios and fixes for problems that appear in a busy shipping room.

Know the Three Label Jobs
- Product labels go on items or packaging and tell the customer what is inside.
- Stock labels go on shelves and boxes so you can find items quickly.
- Parcel labels carry the delivery address and tracking details for the carrier.
Keeping these separate in your head helps you avoid mixing their rules. A product label follows the rules for your goods, a stock label follows your own scheme, and a parcel label follows the carrier.
In this guide
Setting Up Product Labels
- List the details you want on each product: name, variant, quantity or size.
- Check what rules apply to your goods. Requirements for product information can differ by item type and place, so check your local rules and your selling platform’s current instructions. This article cannot list them for you.
- Create a template with fixed positions for each detail.
- Print a sample, apply it to real packaging and view it from the customer’s side.
Setting Up Stock Labels
- Give each shelf or bin a simple location code.
- Give each product a stock code, kept short and unique.
- Print the stock code on a label that matches the shelf label, so matching is easy.
- If your system uses barcodes, check that your scanner can read the printed sample.
Setting Up Parcel Labels
Parcel labels are governed by the carrier. Always follow the carrier’s current instructions on label format, size, placement and what must appear on them. If you print from a carrier site or a selling platform, use the format they ask for. Do not shrink or crop a label to fit.
- Stick the label flat, on a clear area of the package.
- Do not cover it with tape that makes the code hard to scan, unless the carrier says it is fine.
- Remove or cover old labels on reused boxes, as advised by the carrier.
A Worked Walkthrough: One Order From Shelf to Door
This sequence shows where each label type does its job.
- An order arrives. The packing list shows the stock code and location for each item, taken from your stock labels.
- You go to the location on the shelf label and match the stock code on the bin to the list.
- You take the item and check that its product label matches the order: name, variant and size.
- At the packing bench you choose a box, add padding and any paperwork such as a packing slip, with the order number on it.
- You print the parcel label in the format the carrier asks for, and check the address against the order.
- Before sealing, you compare the label, the order and the item once more.
- You seal the box, stick the parcel label on a flat area with the barcode clear, and place the parcel in the outgoing area, grouped by carrier if you use more than one.
- You mark the order as packed in your records and note the tracking reference.
Cutting Down Mistakes
Print labels in the order you pack, and match the label to the item before sealing the box. Keep a clear spot for finished parcels so labels are not mixed up. If a label fails to print clearly, reprint it, rather than hand-writing over a code.
Keeping Records Together
Good labels work best alongside simple records. Keep a sheet or spreadsheet listing each stock code, product name, location and any notes. When you add a product, create its record and its label on the same day. When you stop selling something, remove the old labels and update the sheet. This habit stops old codes from lingering on shelves and causing mix-ups when you are busy packing.
Common Scenarios
Products with several variants
Give each variant its own stock code, bin and label. A label that says only the product name leads to wrong sizes or colors being sent.
Handmade or small-batch goods
Create a template with the same positions for each detail, and print in batches. Check your local rules for any information your goods need to carry, since these vary by item type and place.
Items that sell on several platforms
Use one stock code across all of them, and follow each platform’s current instructions for any labels or identifiers it requires. Your own stock code still belongs on the shelf.
Returns coming back to the shop
Set up a small returns area with its own labelled bins. Check items, then relabel and restock them, or note them as unsellable, before they go back on a shelf.
Mistakes to Avoid
- Cropping or resizing carrier labels. Scanners may fail to read them, so keep to the format the carrier asks for.
- Using one code for two products. Orders then get mixed up, so keep stock codes unique.
- Putting quantities on shelf labels. They change constantly, so keep them in your records.
- Applying labels to wet, dusty or creased surfaces. They lift in transit, so wipe and smooth first.
- Assuming rules are the same everywhere. Rules for goods and shipping differ, so check the platform and the carrier regularly.
Quick Troubleshooting
| Symptom | Likely cause | What to try |
|---|---|---|
| Parcel labels will not scan | Faint print, wrong size or creased surface | Check the printer, print at the size asked for and apply on a flat area |
| Wrong item sent | Label and item not compared before sealing | Add a final check at the bench and keep stock codes unique |
| Shelf labels do not match the system | Records not updated | Walk the shelves with your list and fix mismatches |
| Labels peel in storage | Dusty, damp or cold surface | Clean, dry and press down; check the label maker’s guide for surface advice |
Glossary
- Stock code: a short unique code for each product in your records.
- Location code: a code naming a shelf or bin.
- Parcel label: the carrier’s shipping label with address and barcode.
- Packing slip: a sheet listing the order contents.
- Template: a saved label layout with fixed positions for each detail.
- Variant: a version of a product, such as a different size or color.
Choosing Label Stock, Size and Adhesive
The label you print is only as good as the material under the ink. Online sellers typically use a handful of stock types, and picking the right one avoids smudging, peeling and unreadable barcodes.
Direct thermal and thermal transfer
Direct thermal labels turn dark when heated, with no ink or ribbon. They are common for shipping labels because they are simple and cheap to run. They fade with heat, sunlight and friction, so they suit short-lived labels such as parcels. Thermal transfer labels use a ribbon to melt ink onto the label, last longer and resist fading, which suits product or shelf labels that will stay on for months.
Inkjet and laser sheets
Sheet labels printed on a regular inkjet or laser printer work for low volume and for labels with color branding. Check that the label sheet matches your printer type, as laser labels run through a hot fuser and the wrong adhesive can melt inside it. Inkjet labels may smear if they get wet unless the stock is water resistant.
Size and shape
A common shipping label size in the United States is 4 by 6 inches, and many carriers accept it directly. For small items, labels in the range of 1 by 2 inches or 2 by 3 inches fit most products. Round and oval labels suit jars, tins and bottles. Choose a size that leaves a margin around the text so a slightly off-center print still reads well.
Adhesive choices
- Permanent adhesive: bonds firmly to most boxes, bags and plastics. Good for parcels and stock labels that you never plan to move.
- Removable adhesive: peels off cleanly, useful for reusable containers and shelving.
- Freezer or cold-surface adhesive: designed for chilled or frozen goods.
- Textured or fabric surfaces: need a stronger adhesive, and sometimes a hang tag or a sewn-in label instead.
Test a small batch on the real packaging before you buy a large roll. Oily, dusty or curved surfaces are especially hard on adhesives.
Barcodes and Identifiers in Plain Terms
Barcodes sound technical, but the idea is simple: they turn a number into something a scanner can read. There are two kinds of numbers to understand.
The first is your own internal code, often called a SKU (stock keeping unit). It is a short code you invent, such as a product type, size and color combined into one string. SKUs are free to create and only need to be unique within your shop.
The second is a standardized product code, such as a UPC or EAN, which identifies a product across stores and marketplaces. These codes are assigned through a global standards organization, and some marketplaces and retailers require them. If you resell another brand’s goods, you generally use the manufacturer’s code. If you make your own products, check the rules of each marketplace you sell on before buying codes, since requirements and exemptions differ.
When you print a barcode, keep it large enough to scan, with a clear blank margin on each side, and print it in dark ink on a light background. Test every new label design with an actual scanner or a phone scanning app before printing a full roll. A barcode that looks fine to the eye can still fail because of low contrast or a printing resolution that is too coarse.
What Goes on a Label: Content Basics and Rules to Check
Different products have different labeling obligations. This guide cannot tell you the rules for your product or location, and they change, so treat the following as a prompt for what to research rather than legal advice.
- Food, supplements and cosmetics often have strict requirements for ingredients, allergens, weights and a contact name or address.
- Textiles and clothing may require fiber content and care information.
- Electrical goods, toys and products for children can carry safety markings and warnings.
- Products made from certain materials may require country-of-origin statements.
- Batteries, aerosols, liquids and other regulated items have extra rules for shipping and for the outside of the package.
Check with your government’s consumer protection or product safety agency, your marketplace’s seller policies, and your carrier’s shipping rules. If you are unsure, ask a qualified professional before you print a thousand labels with the wrong wording.
Print Quality, Printer Care and Troubleshooting Smudges
A label printer is a simple machine, but small problems can cause big delays. Thermal printers need a clean print head and a clean roller. Wipe the head with a recommended cleaning swab or isopropyl alcohol on a lint-free cloth, following the maker’s instructions and with the printer unplugged. Do this on a regular schedule, as dust and adhesive residue lead to streaks, faded areas and misfeeds.
Common symptoms and likely causes include:
- Faint or uneven print: a dirty head, settings too light, or label stock that does not match the printer type.
- Vertical white lines: debris on the print head or a damaged element.
- Labels printing off the edge: the paper size in the print dialog does not match the roll, or the sensor needs calibration.
- Jammed or skipped labels: a roll not seated correctly, curled backing paper, or stock that is too thick.
Keep spare rolls dry and out of direct sun, and use a fresh roll if you see unexplained problems. Many printers have a calibration routine that sets the gap and mark sensors; run it when you load a new type of stock.
A Workflow for Busy Weeks
Label systems tend to break down during peak periods, so build one that can stretch. Print in batches rather than one at a time, and group orders by carrier or by shelf area. Use a station with the printer, a scale, a tape dispenser and the packing supplies within arm’s reach, so each parcel takes the same series of steps.
Consider a three-step check at the moment you stick the label: scan or read the item code, compare the name on the label with the order, and look at the address once more. It takes seconds and prevents the most expensive mistakes. Keep a spare box labeled “problem labels” for misprints and reprints, and review it weekly. If the same problem keeps appearing, the fix is usually a template change, not more care.
Cost and Time Planning for Label Supplies
Label costs add up with volume, and the real expense is often the rolls, not the printer. Direct thermal rolls usually cost less per label than thermal transfer, because they require no ribbon. Sheet labels cost more per label but are convenient at a small scale. Prices vary by brand and quantity, so compare current listings, and check what per-label cost you are actually paying.
Include time in your calculation. If you handle ten parcels a week, almost any setup will do. At fifty or a hundred parcels a week, shaving thirty seconds off each one saves real hours, and a dedicated thermal printer and a reliable template start to pay for themselves. Review the numbers every few months, and adjust your tools to match the way your shop is actually growing.
Designing a Label Template That Stays Readable
A good template saves time on every single label, so it is worth an hour of setup. Start with the most important information and make it the largest: the product name or order number. Put secondary details, such as variant, size or batch, in smaller type below it. Avoid decorative fonts for anything that needs to be scanned or read quickly, and choose a plain, clear typeface instead.
Keep to a consistent layout across all your products. When every label has the barcode in the same corner and the name in the same position, packers learn where to look, and mistakes drop. Use bold weight or a thin border sparingly to separate sections, and do not crowd the edge of the label, since printers and rollers rarely align perfectly.
Set a few rules for color if you use it. Many shops give each product family a color strip so items can be found at a glance on a shelf, but black on white remains the safest for text and barcodes. Save templates under clear names, keep a master copy that is never edited, and print a test on plain paper at actual size before loading real label stock. Hold the paper test up to a label sheet to see whether everything lines up.
Finally, write down the template rules in a short note that anyone helping in the shop can follow. A single page covering label sizes, which template to use for which task, and where to find replacement rolls makes it far easier to bring in a helper during busy weeks.
Ready to Buy? Start Here
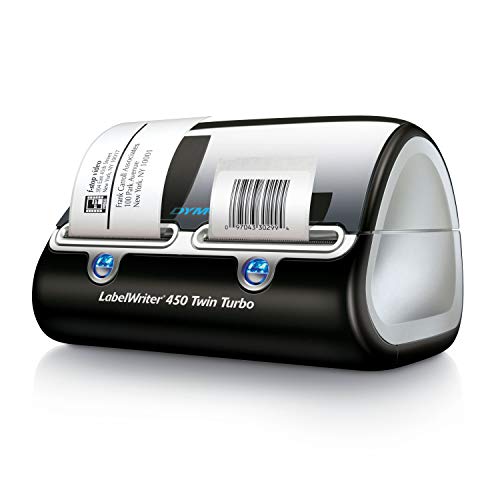
If this guide helped you decide what to look for, these products are a place to start.

As an Amazon Associate we earn from qualifying purchases. Prices and availability are shown on Amazon.
What Belongs on a Product Label: A Closer Look
The earlier sections listed the three label jobs in a shop. This section slows down on the first job, the product label, because it is the one customers read most closely and the one that causes the most reprints when it is planned in a hurry. A good product label does three things at once: it tells the buyer what the item is, it helps the shop itself track the item, and it looks like it belongs to the same shop as every other label you send out. When one of those three jobs is missing, the label still sticks to the box, but it stops earning its place.
Information buyers expect, in plain terms
Exact legal wording depends on what you sell and where you sell it, and this guide does not replace the rules for your category or your region. At a concept level, though, buyers expect a product label to answer a small set of questions without them having to message the shop. What is this item called. Who made or packed it. What is inside, in terms a non-specialist understands. How much is there, expressed as a weight, a volume or a count. How should it be stored or used, if that is not obvious. And how can the buyer reach the seller if something is wrong. Work through that list for each product you sell and write the answers down once, in a master note, before you design anything. Designing from a finished list is far easier than discovering a missing line after a roll has been printed.
Some categories carry extra expectations. Food, cosmetics, cleaning products and items for children are common examples where buyers and marketplaces look for more detail, such as ingredient lists, safety warnings or age guidance. Treat those as a prompt to check the current rules for your category and your selling platform, and to ask a qualified adviser when you are unsure, rather than copying the wording from a competitor. A competitor may sell in a different region, under different rules, or may simply be wrong. Your master note should record where you checked, and when, so the next person in the shop can see the reasoning rather than guessing.
SKU and barcode thinking, without the jargon
A SKU is simply your own short code for one exact version of one product. If a candle comes in two scents and three sizes, each combination that a buyer can order is a separate SKU in most shop systems, because each one sits in its own place in stock and needs its own count. Keep SKUs short, readable aloud, and built from a pattern you can extend, such as a few letters for the product family followed by a short code for the variant. Avoid letters that look like numbers when printed small, and avoid changing a SKU once parcels have gone out with it, because old labels, old paperwork and old messages will keep referring to it.
A barcode is the machine-readable form of an identifier. The bars let a scanner read the code faster and with fewer mistakes than typing. Whether you need a barcode at all depends on your platform, your volume and whether anyone in your chain actually scans. A small shop that packs by eye may work happily with a clear printed SKU in large type. A shop sending stock to a warehouse or selling through a platform that scans at intake will usually need proper barcodes, and may need them from a recognised source rather than invented at the desk. Either way, the same discipline applies: one identifier, one product version, recorded in one place, printed at a size that scans on the first attempt, with quiet blank space around it.
Keeping every label recognisably yours
Brand consistency on labels is mostly a matter of small decisions made once and then repeated. Use the same shop name treatment on every label, the same typeface family, the same placement for the logo or name, and the same tone in short lines of text. Customers who order twice should feel that both parcels came from the same careful shop. Consistency also helps inside the shop: when every product label follows the same layout, packers learn where to look for the variant, the count or the storage note, and they spot a wrong label faster because it breaks the pattern.
Build one master template per label size and lock the parts that should never move. Leave generous margins, because printers shift slightly and labels are cut with tolerances. Resist filling every corner; white space is what makes the important lines readable at arm’s length. When you redesign, change the master template, print a short test run, stick the new label beside the old one, and only then roll the change across the range. Quiet, gradual consistency beats a fresh look every month that leaves three generations of labels in circulation at once.
From Template to Shelf: A Steadier Labelling Routine
Prepare the data before you touch the printer
Most label errors are data errors that were printed faithfully. Before a print run, read the list you are about to print against the stock in front of you: product name, variant, count and identifier. Print one label first, stick it on the actual item, and read it as a customer would. Only then print the rest of the run. This single-label proof feels slow for the first week and then becomes the habit that quietly removes most reprints, most apologetic messages and most parcels opened and resealed at the packing bench.
Batch by product, not by order
When several orders contain the same product, labelling the products in one batch and then picking from labelled stock is usually calmer than labelling order by order. The printer stays on one template, the roll stays loaded, and your hands learn one repeated motion. Keep batches small enough that a mistake affects a handful of items rather than a whole shelf, and place a simple divider or note at the end of each batch so the next product does not inherit the previous label by accident. If two products look similar, label them at different times or at opposite ends of the bench, never side by side in the same pile.
A quick quality pass before parcels leave
Add a ten-second label check to the moment a parcel is sealed. Is the product label the right variant. Is the stock label, if you use one, matching the pick list. Is the parcel label flat, fully stuck down and readable, with the barcode area smooth and uncreased. This pass works because it happens while fixing a mistake still costs a label rather than a return. Shops that build the check into the sealing motion itself, rather than as a separate inspection round, find it survives busy weeks when separate rounds get skipped.
Stock Labels and Parcel Labels: The Two Quiet Systems
Product labels get the attention because customers see them. The other two label jobs in a shop, stock labels and parcel labels, decide whether the business runs calmly behind the scenes. They deserve the same deliberate design as the product label, even though nobody will ever compliment them.
Stock labels that make counting honest
A stock label lives on the shelf, the bin or the product’s storage place, and its job is to connect the physical item to the count you believe you hold. Keep it ruthlessly simple: the product name exactly as it appears in your records, the variant, the SKU if you use one, and nothing decorative. When the name on the shelf differs even slightly from the name in your system, counts drift, because two people reasonably conclude they are looking at two different products. Reorder notes belong on the stock label too, in a simple form such as a line marking the point at which more stock should be ordered. The person who notices the shelf is low is usually the person packing, not the person who orders, so the label has to carry the message between them.
Replace a stock label the moment it stops being true. A shelf label that names a product moved elsewhere last month teaches everyone to ignore shelf labels, and a system people ignore is worse than no system, because it looks authoritative while lying. When you reorganise, relabel in the same session, while the new arrangement is still fresh in your mind. Half-finished relabelling is how shops end up with two homes for one product and no home at all for another.
Parcel labels and the last thirty seconds
The parcel label is the only label the carrier cares about, and it is applied in the last thirty seconds before a parcel leaves your hands. Build those thirty seconds into a ritual. Read the destination once against the order. Check the barcode area is smooth and complete. Place the label on the largest flat face, clear of seams and tape joins, and cover or remove every older label on a reused box. If your service provides a return address element, make sure it is present and current. Rituals survive tiredness and busy days in a way that good intentions do not, and the parcel label is exactly where tiredness costs money, because a mislabelled parcel is usually discovered by the customer, in public, a week later.
When the three systems disagree
Occasionally the three label jobs contradict each other: the product label says one variant, the pick list says another, the parcel is already sealed. Treat any disagreement as a stop signal, not a judgement call. Open the parcel, check the physical item against the order, and let the item itself settle the argument. The few minutes that costs are cheaper than a return, a replacement and an apology. Afterwards, ask which label allowed the confusion and fix that label’s design or wording, because a disagreement that happened once will happen again on a busier day with a less careful packer.
Teaching the System to Anyone Who Helps You
A labelling system that only works when you personally run it is a fragile system. Seasonal help, a partner covering a holiday, or a first employee all need to produce labels indistinguishable from yours. Write the system down as a short bench guide: which template for which job, which roll lives in the printer, the one-label proof rule, and the sealing check. Keep the guide where the labels are printed, not in a folder elsewhere. Walk a helper through one complete order while they do the work and you only watch and answer questions; people learn labelling by labelling, and the mistakes they make under supervision are the cheapest training you will ever buy. When a helper invents a shortcut that genuinely works, adopt it into the written guide rather than letting it live as folklore, because the next helper deserves the improved version too.
Finally, review the whole labelling system on a calm day a few times a year. Lay one of each label you use on the table and read them as a set. Do they still match each other, your current products and your current platforms. Has a variant crept in that has no proper template. Has a rule from a platform changed quietly. An hour of this review, done before the busy season rather than during it, is what keeps a small shop’s labels looking like they came from a much larger, calmer operation.
Seasonal Peaks and Special Products
When order volume jumps
Busy seasons do not change what good labelling is; they change how much forgiveness the system has. Prepare before the peak rather than during it. Print product and stock labels for your predictable bestsellers in advance, in calm batches with the proof rule intact, so peak days spend their label time on parcel labels alone. Check roll stock against the season honestly: running out of the right roll mid-peak forces substitutions that confuse packers and customers alike. Brief anyone helping with the two rules that prevent most peak errors, one label proof at the start of each session, and a stop whenever the three label systems disagree. Peaks punish improvisation and reward boring preparation, which is fortunate, because boring preparation can be done in the quiet weeks when time is cheap.
Gift orders and presentation
Gift orders add a wrinkle: the product label may be the presentation, and the parcel may need to hide prices, shop paperwork or anything that spoils a surprise, depending on the options your shop offers. Decide in advance what your gift presentation is, which labels stay, which inserts are excluded, and how the parcel is marked so a packer can tell at a glance that this order follows the gift path. A small symbol or note position on the pick paperwork, agreed beforehand, prevents the two classic gift failures: the standard paperwork included out of habit, and the product label removed by an over-helpful packer who thought it was clutter. The product label itself usually stays; it identifies the item and carries your shop’s name to a new household, which is precisely why gift orders are worth the extra care.
Fragile, perishable and awkward items
Some products need the label system to speak to handlers as well as customers. Where your carrier or platform provides recognised handling marks or label options, use theirs rather than inventing your own, because sorting staff are trained to notice the standard forms. Position handling information where it will be seen before the parcel is lifted, not on the underside. For items whose contents change how they should be stored on arrival, a short storage line on the product label or an insert saves the customer guessing and saves you the message exchange later. Keep such lines factual and brief; a label is a poor place for essays, and a handler moving quickly reads only what is large, standard and early in their glance.
Learning from returns
Every return that mentions confusion, wrong variant, damaged label or unreadable barcode is a free audit of your labelling system. Keep a simple tally of label-related return reasons beside the returns area. A pattern of variant mix-ups points at product labels that look too similar; a pattern of carrier complaints points at parcel label placement or protection; a pattern of customers unable to identify contents points at product information. Fix the pattern at the template level, once, rather than apologising at the parcel level repeatedly. Shops grow out of their early label designs, and returns are the most honest record of exactly where the design has been outgrown.
A Short Self-Audit for Your Whole Label Setup
Once or twice a year, audit the setup as a stranger would. Pick one product and follow it through all three label jobs with fresh eyes. Read its product label and ask whether a first-time buyer would know what it is, which variant they hold, and how to reach you. Stand at its shelf and check the stock label against the physical count; any disagreement is a finding, not an embarrassment, because you found it before a customer did. Pack a test order of that product, apply the parcel label, and scan its barcode with whatever device you have. Then read your own bench guide as if you were new help: could you run this system from the paper alone. Write down the three weakest points you noticed, fix the worst one properly at template level, and note the other two for the next audit. Small shops rarely fail at labelling through one dramatic error; they drift through a dozen small ones, and an audit is simply drift, caught on purpose, while it is still cheap to correct.
Keep the audit findings with your master templates. Over a few audits, the list becomes the design history of your labels: why the variant moved to larger type, why the stock label gained a reorder line, why the parcel check became a spoken ritual. That history is what stops a future redesign from politely reintroducing a problem you already solved and forgot about.
One Last Principle: Labels Are Promises
Every label in your shop is a small promise. The product label promises the contents are what the words say. The stock label promises the shelf agrees with your records. The parcel label promises the carrier a true destination. Systems, templates and rituals exist to keep those promises cheap to honour. When a label decision feels complicated, ask which promise it affects and what would make that promise easier to keep next time, under pressure, by someone new. That question, applied consistently, produces the same answers this guide reaches the long way round: fewer label types, plainer words, one proof before every run, and a check at the moment of sealing. Shops are remembered by customers one parcel at a time, and a parcel speaks first through its labels. Make them tell the truth, clearly, every time, and much of the rest of the operation becomes easier to trust as well.
FAQ
Can one printer do all three jobs?
Often yes, if it supports the label sizes you need. Check the maker’s guide and the carrier’s current instructions.
Do I need barcodes?
Only if your process or platform uses them. Ask your platform what it expects.
What information must a product label carry?
That depends on the type of goods and where you sell them. Check your local rules and your selling platform’s current instructions, and ask a qualified adviser if you are unsure.
How can I avoid label mix-ups when busy?
Print in packing order, keep a single order on the bench at a time, and compare label, item and order before sealing. Those three checks catch most errors.
How often should I revisit my labels?
Whenever you add or retire a product, and on a regular schedule such as once a quarter. Also check after any change to carrier or platform instructions.
What size label should I use for small products?
Common choices run from about 1 by 2 inches to 2 by 3 inches for small items, while 4 by 6 inches is typical for shipping. Pick a size that fits the product’s flat area and leaves a margin around text and barcodes. Test on real packaging before buying a large roll.
Are direct thermal labels good for product packaging?
They work for short-lived uses such as shipping, but they can fade with heat, light and friction. For product labels that sit on shelves or travel with customers for months, thermal transfer with a ribbon or a durable sheet label usually holds up better.
What is a SKU and do I have to make one?
A SKU is your own internal product code used to track stock, such as a short combination of type, size and color. Marketplaces often ask for one. You create it yourself, it must be unique in your shop, and it does not have to follow any outside standard.
Why will my barcode not scan?
Common causes include low contrast, a barcode that is printed too small, missing blank margins, a dirty print head, or a code printed on a curved or glossy surface. Print a test, scan it with a phone app and a scanner, and adjust size and darkness until it reads reliably.
How do I stop labels peeling off packaging?
Clean and dry the surface, press the label firmly from the center outward, and choose an adhesive suited to the material. Dusty cardboard, oily plastic and textured bags often need a stronger adhesive. Avoid wrapping labels around sharp curves, and test a sample before ordering a large roll.
How do I decide what goes on the front of the label versus the back?
Put what identifies the item and what the buyer needs first on the front: the product name, the variant and the key quantity. Longer notes, care detail and background information can sit on a back label, an insert or the product page. If a buyer has to turn the package over to learn what the item is, the front label is not doing its first job.
Should my product label and my shipping label match in style?
They do different jobs, so they do not need to match exactly, but a shared shop name treatment and a similar level of tidiness help parcels look considered. Keep the shipping label strictly functional and scannable, and let the product label carry the brand feel. Never let decoration reduce the clarity of either one.
How do I handle a product whose details change often?
Print that product’s labels in smaller, more frequent runs, and keep variable details such as batch or date in a clearly separate area of the template so only that area changes. Record each version in your master note with the date it entered use, so older stock in the cupboard can be matched to the wording it was packed under.
The Short Version
Separate product, stock and parcel labels. Use templates, follow platform and carrier instructions, and match every label to its item before sealing the parcel. Keep your records in step with your shelves, and check outside rules whenever they change.

