Keep a label printer dust-free by placing it away from dust sources, covering it when idle, storing supplies closed and cleaning it on a routine that follows the maker’s guide. Dust on the print head or sensors is a common cause of faint lines and feed trouble. This guide covers where dust comes from, how to set up the space, a cleaning routine and what to do when symptoms appear.

Where Dust Comes From
- Cardboard cutting and unpacking, which release paper fibers.
- Open shelves above or beside the printer.
- Fans, vents and open windows that move air across the bench.
- Label stock itself, which can shed paper dust and adhesive fragments at cut edges.
Dust is not always gray and obvious. Fine paper fiber and adhesive residue are pale and sticky, so they hide against white labels and light housings. That is why a printer can look clean and still have debris around the sensor window or the roller.
In this guide
Choose a Better Location
- Move the printer away from the box-opening area.
- Place it on a stable, clean surface, not directly under a vent.
- Leave the gap around the printer that the manual recommends for air flow.
- Keep food and drink away, since spills and crumbs cause more damage than dust.
If the room has one corner where cartons are cut and another where orders are packed, put the printer closer to the packing side but not in the direct path of the cutting area. Even a short distance and a divider panel can reduce what lands on the unit.
Use a Cover
A simple fitted dust cover keeps debris off the housing and the paper path when the printer is idle. Make sure the printer is switched off and has cooled before covering it, and never block vents while it is running. A clean pillowcase-sized cloth is not a substitute for a fitted cover if it can slip off or hang over the vents, so choose something that stays in place.
Routine Cleaning
Follow the printer guide for the exact method, parts and products. In general, a routine looks like this:
- Switch off and unplug the printer. Let it cool.
- Open the cover and remove the label roll.
- Remove loose dust with a soft brush or a gentle puff of air, holding the printer so dust leaves the unit.
- Wipe the surfaces the guide names with a lint-free cloth, using only the cleaner the maker recommends.
- Let everything dry before you reload and power up.
Work in a spot where the dust you remove will not simply settle back onto the bench. A tray or a sheet of paper under the printer catches debris and makes it easy to see how much came out, which tells you whether your interval is right.
A Worked Weekly Walkthrough
This sample routine suits a small shop that prints labels most days. Adjust it to the maker’s guide.
- At the end of the last print run, close the cover and wipe the outside with a dry cloth.
- On the chosen day, switch off, unplug and wait for the unit to cool.
- Lift out the roll or fan-fold stack and put it in its bag or box.
- Brush along the paper path from the back toward the front, so debris moves out of the unit.
- Clean the parts the guide names, such as the roller and the print head, only with the products the maker allows.
- Look at the sensor window with good light, and clear any fluff from around it.
- Allow drying time, reload, and print one label to confirm the output is clean before the next batch.
Supply Storage
| Item | Storage habit |
|---|---|
| Label rolls | Keep in their bags or boxes until needed |
| Fan-fold stacks | Close the box lid after taking labels |
| Cleaning supplies | Keep apart from the printer, in a closed container |
Rolls left open on a shelf collect dust along their sides, and that dust is carried straight into the paper path as the label feeds. Keeping stock in the original packaging until it is loaded is the easiest way to avoid this.
Signs That Dust Is Building Up
- Thin white or blank lines running through printed labels.
- Labels that stop feeding, drift or jam more often than before.
- Visible fluff near the roll holder, rollers or sensor window.
- Error messages about missing labels when stock is loaded.
When you see these, run through the cleaning routine in the printer guide before changing any settings or blaming the stock. Also take a minute at the end of each day to close the cover, wipe the outside with a dry cloth and place the dust cover on. Small daily habits keep the build-up from reaching the parts that are hard to clean.
Common Scenarios
A busy packing bench
Where cartons are opened close to the printer, fibers settle constantly. Move carton opening to a separate table, and keep a lid or cover on the printer between batches.
A shared office printer
Several people load rolls and open the cover, so debris varies. Put a short note beside the printer with the cleaning interval and a place to record the date.
A workshop with sawdust
Fine wood dust is more abrasive than paper dust. Keep the printer in a separate room or inside a closed cabinet with the airflow gap the manual asks for, and do not run it while dust is in the air.
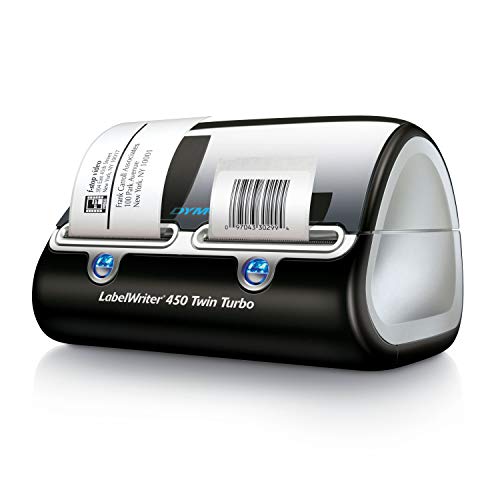
A printer that sits unused for weeks
Cover it, store the roll in its bag and give the unit a quick check before the next job so dust that settled during storage is removed first.
Mistakes to Avoid
- Using strong cleaners or household liquids. Some can damage the print head or the roller, so use only what the maker names.
- Blowing hard into the unit. It pushes debris deeper into places you cannot reach, so use gentle air or a soft brush and let dust leave the printer.
- Covering a warm printer. Trapped heat is not good for the unit, so let it cool first.
- Touching the print head with fingers. Skin oils can leave marks, so handle it only as the guide describes.
- Cleaning while powered on. Switch off and unplug, as the manual directs.
Quick Troubleshooting
| Symptom | Likely cause | What to try |
|---|---|---|
| White streaks on labels | Debris on the print head | Clean the head as the guide describes |
| Labels do not feed straight | Fluff on rollers or guides | Clean the paper path and reseat the roll |
| Missing label error | Dust over the sensor | Clear the sensor window gently |
| Frequent jams | Adhesive residue in the path | Wipe with the maker’s cleaner, and check the stock type |
| Faint print overall | Dirty head or worn parts | Clean first, then check the guide for other causes |
Glossary
- Print head: the part that forms the image on the label.
- Platen roller: the rubber roller that presses and moves the label past the head.
- Paper path: the route the label takes through the printer.
- Sensor window: the small opening that detects labels or gaps.
- Fan-fold: labels folded in a zigzag stack instead of a roll.
- Lint-free cloth: a wipe that does not leave fibers behind.
Thermal and Inkjet Printers: Different Dust Problems
Not every label printer suffers from dust in the same way, so it helps to know which kind you own. Check the manual or the maker’s support page for the printer’s exact method before cleaning anything.
Direct thermal and thermal transfer printers use a heated print head that presses against the label or ribbon. A fleck of dust or adhesive on that head blocks heat and leaves a thin white line along the print, running in the direction of the feed. Dust on the platen roller, the rubber roller under the head, can slip labels or cause crooked feeding. The sensors that detect label gaps or marks can also be fooled by a film of dust, which leads to labels that skip or feed blank.
Inkjet label printers have different weak points. Dust can settle on nozzles and the maintenance area, and paper fiber can build up near the feed path. Nozzle clogs are a more common cause of streaks, and they respond to the printer’s own cleaning cycle rather than wiping.
Laser-style label printers have toner, drums and fuser parts that need careful handling. These usually have maker-specified cleaning steps, and parts can be hot or sensitive, so follow the manual and avoid opening areas you are not meant to open.
In every case, power the printer off and unplug it where the manual says to before cleaning, and let hot parts cool. Never use sharp tools on a print head, because even tiny scratches can leave permanent lines.
Building a Low-Dust Work Area
Cleaning helps, but reducing dust at the source helps more. A few inexpensive changes make a noticeable difference over months.
- Put the printer on a low-traffic bench, away from doors and walkways where people stir up dust.
- Use a shelf or divider between the box-opening area and the printer. Even a simple sheet of card or acrylic can block loose fibers.
- Keep the floor around the bench swept or vacuumed regularly. Dust that rises from the floor ends up inside the machine.
- If the room has a window or door open often, check where the airflow goes and move the printer out of the stream.
- Choose a smooth, wipeable surface for the bench, such as laminate, rather than raw wood, which sheds fine particles.
In a very dusty workshop, consider a separate enclosure or a small cabinet with a lid and an opening for the label exit. Make sure the printer still has enough ventilation as the manual describes, because trapping heat can be as harmful as dust. If you add a cabinet, leave room to open the printer cover and to load stock.
Air purifiers can reduce airborne dust in a small room, though they do not replace cleaning the printer itself. If you work with sawdust, metal dust or other fine material, keep the printer in a separate room where practical.
Cleaning Supplies and Safe Technique
Keeping a small cleaning kit beside the printer makes it more likely that cleaning happens. Typical contents include lint-free wipes, cotton swabs, a soft brush, and the cleaning cards or cleaning pens the maker recommends. Many manuals call for isopropyl alcohol in a particular strength on the print head and roller. Use only what the manual approves, because some solvents damage rubber, plastic or coatings.
A sensible order of work follows the label path. Wipe the outside first, so dust does not fall inside while you clean. Open the cover, remove the stock and any ribbon, and brush loose dust away from the head and sensors. Then clean the print head gently along its length with a lightly dampened swab, moving in one direction. Clean the platen roller by turning it as you wipe. Let everything dry fully before reloading stock.
Compressed air can push dust deeper into mechanisms, so check what the maker says before using it. If you use a can, hold it upright and at a distance, and do not blow directly into sensors or fans. A small vacuum with a soft brush attachment, used gently and with the printer off, is often a safer choice. Avoid static buildup by not rubbing plastic surfaces with dry cloths.
Wash your hands or wipe them before touching the print head, because skin oils can leave marks. Write the date on a piece of tape near the printer after each cleaning, so you can see at a glance how long it has been.
Setting a Schedule That Matches Your Volume
The right cleaning frequency depends on how many labels you print and how much dust your space has. A light user in a clean room may only need a brief check every month or two. A busy packing bench that prints hundreds of labels per day may benefit from a quick wipe each week and a deeper clean at regular intervals. The maker’s guidance, usually based on the number of labels printed or a time period, is the best baseline.
Make the schedule easy to follow:
- Daily: cover the printer when idle and check that nothing is stuck near the label exit.
- Weekly: wipe the exterior and brush out the label path.
- Monthly or per the manual: clean the print head, roller and sensors.
- When changing a stock roll: take a moment to look for adhesive residue or loose paper bits.
Pay attention to early signs, such as faint print, streaks or feed hiccups, and clean before they become frequent. If cleaning does not fix a recurring white line or fading in one area, the print head may be worn or damaged, and the manual or maker’s support can advise on replacement. Keep a spare head or a service contact in mind if the printer is business-critical.
A Worked Example: Fixing Faint Print on a Packing Bench Printer
Suppose a printer on a busy bench starts to print faint lines down each label, and a few labels feed blank. Here is a general way to work through it. Always follow the manual for your own printer.
First, stop printing and switch the printer off. Open the cover and look inside with a good light. Check the path for scraps of label backing, adhesive strings or paper dust. Remove the stock and any ribbon, and set them aside on a clean surface.
Second, brush loose dust away from the sensors and the label path. Use a soft brush, not a damp cloth, for this first pass. Then wipe the print head with a swab dampened with the cleaner the maker recommends, moving from one end to the other. Clean the roller while turning it, and wipe any adhesive residue off nearby guides.
Third, let everything dry, reload the stock and run a test print or a feed test. If the faint lines are gone, note the date and consider what caused the dust, such as a box-cutting spot beside the printer. If blank labels persist, run the printer’s calibration routine as the manual describes, since the sensors may need to relearn the label gap.
If a white line remains after cleaning, the print head may be worn or damaged. At that point, contact the maker or an authorized service provider rather than scrubbing harder. Taking a few minutes to follow these steps usually saves a service call and keeps packing moving.
Ready to Buy? Start Here
If this guide helped you decide what to look for, these products are a place to start.

As an Amazon Associate we earn from qualifying purchases. Prices and availability are shown on Amazon.
Knowing Your Dust: Where It Comes From and Where It Settles
Dust control starts with knowing what your dust actually is, because different dust behaves differently inside a printer. In a packing area, the main ingredients are usually cardboard fibres from boxes being opened and broken down, paper dust from labels and documents, fibres from tape and packing materials, and ordinary room dust carried in on shoes, clothing, and deliveries. Cardboard fibre is the heavyweight: it is produced constantly wherever boxes are cut or flattened, it drifts well, and it settles on every horizontal surface, including the inside of a printer whose cover is opened many times a day. If your printer lives beside the box-breaking spot, it is living in the dustiest air in the room.
Watch where dust settles, not just where it is made. It gathers on top of the printer, around the label entry and exit slots, on the roll itself, and inside along the label path where the stock drags it in. Each time a roll is loaded, whatever settled on the roll’s outer layers is carried through the machine. This is why a printer can need cleaning even in a tidy room: the stock itself is a delivery system for dust, and a roll stored uncovered near cardboard work arrives pre-loaded. Tracing your own dust sources, even roughly, tells you which defences matter most in your space rather than someone else’s.
Air movement and timing
Dust travels on air. Doors opening, fans, heating or cooling vents, and people moving quickly past shelves all stir settled dust back into the air, where some of it will land in and on the printer. The timing of dusty jobs matters too. Breaking down a pile of boxes next to an uncovered printer fills the air at exactly the wrong place. Where you can, separate dusty work from the printer in time as well as space: do the box work, let the air settle, and keep the printer covered while it happens. These are humble measures, but they attack the problem at the point where dust is airborne, which is the only point where it can get inside the machine.
Covers, Placement, and Everyday Shielding
A cover is the simplest shield a label printer can have, and the most commonly skipped. When the printer is idle, a cover keeps settling dust off the case, the slots, and the loaded roll. The cover needs to be easy, because a shield that is fiddly to remove will be left off. A simple cover that lifts away in one motion, kept beside the printer rather than stored elsewhere, gets used. Take it off to print, since the machine needs its vents and its label path clear while working, and put it back as part of the same habit as switching off the bench light.
Placement is the second shield. A printer set back from the bench edge, away from the box-cutting zone, off the floor, and out of the direct line of vents and doorways collects noticeably less dust than one perched where the work is messiest. Height helps because much packing dust is generated low and settles downward through the air column; a shelf at working height, rather than a low cabinet or the floor, keeps the machine out of the worst of it. Keep the area immediately around the printer clear of the things that shed: no stack of flattened boxes leaning beside it, no open roll of labels waiting uncovered, no pile of packing paper sharing its shelf.
Shielding the stock as well as the machine
Spare rolls deserve the same thinking. Keep them in their wrapping or in a closed box or drawer, and open a roll only when it is going into the printer. Wipe or brush the outside of a roll that has been sitting out before loading it, and wash or wipe your hands if they are dusty from packing work, because hands transfer a surprising amount of grime to the label surface during loading. A roll that goes into the machine clean keeps the whole path cleaner for longer, which stretches the interval between proper cleans without any extra effort at the machine itself.
A Cleaning Rhythm That Keeps Dust From Becoming Damage
Dust left alone does not stay dust. In the label path it mixes with adhesive residue and heat and becomes a film that coats the print head, the roller, and the sensors. That film is what causes faint patches, lines, misreads, and feeding trouble. A rhythm of light, regular cleaning prevents the film forming; a single heroic clean after problems appear has to remove it. Match the rhythm to your dust reality: a printer in a workshop or busy packing area needs more frequent attention than one in a quiet office, and any printer needs a check after a particularly dusty job or a period sitting unused, when settled dust will be drawn in with the first labels.
Keep the routine gentle and consistent. Power the machine down as its maker directs before cleaning inside it. Use the cleaning materials the maker recommends, work along the label path in the order the stock travels, and let any cleaning fluid dry fully before printing. Avoid blowing dust deeper into the machine with strong air blasts; lifting dust away is the goal, not relocating it. Finish by printing test labels and actually looking at them, because the test print is how you confirm the clean worked and catch the early signs of wear that dust had been hiding.
Signs your rhythm needs adjusting
If print faults return soon after each clean, dust is reaching the machine faster than your rhythm removes it, and the answer is usually shielding and placement rather than harsher cleaning. If the machine is spotless at every scheduled clean, the interval can relax a little. Keep a brief note of cleans and faults together; the pattern over a few months tells you whether your dust problem is seasonal, tied to a particular job, or steady, and lets you set a schedule based on your own evidence instead of guesswork.
Room Habits That Starve Dust Before It Reaches the Printer
The cheapest dust control happens in the room, not in the machine. Floors and benches near the printer should be cleaned in ways that remove dust rather than move it: a damp wipe lifts fibres from a bench where a dry brush launches them into the air to settle elsewhere, including inside the printer. Schedule the dustiest room tasks, such as breaking down boxes, sweeping, or unpacking large deliveries, away from printing sessions where you can, and give the air a little time to settle afterwards before uncovering the machine. These are unglamorous habits, but a printer’s dust problem is mostly decided by what the room does all week, not by what happens during the five minutes of cleaning.
Look at the printer’s neighbourhood with fresh eyes. Are open rolls, packing paper, or shredded fill stored above it, ready to shed downwards? Does a shelf above hold items that are dragged across, raining dust each time? Is the printer the nearest flat surface to the door, collecting everything carried in? Moving stores, adding a simple shelf cover, or shifting the printer a short distance to a calmer corner can reduce its dust load more than any change to the cleaning routine. Photograph the area before and after if you want to convince others the change matters; the difference on the printer’s case after a week is usually visible.
People, clothing, and the dust they carry
Dust also arrives on people. Outdoor clothing, workshop aprons covered in fibres, and hands that have just handled a pile of cardboard all deliver dust to the printer at the moment of loading. A hook for outdoor wear away from the packing bench, a habit of wiping hands before loading stock, and keeping the printer’s cover closed during other bench work are small courtesies the machine repays in longer clean intervals. In shared spaces, say these habits out loud and write them into the printer’s posted routine, because what is obvious to the person who set the printer up is invisible to the colleague who uses it twice a month.
When Dust Has Already Done Damage: a Calm Recovery Order
If a printer has lived dusty for a long time, the first proper clean needs a sensible order so you can tell what helped. Begin with the outside and the stock: remove the roll, set it aside if its outer layers are grimy, and clean the case, the entry, and the exit so loose dust is not waiting to be drawn back in. Then clean the path in travel order, head, roller, and sensors, gently and with the maker’s recommended materials. Load fresh or cleaned stock, run the machine’s calibration if it offers one, and print a set of test labels. Judge the result honestly: many dust faults clear completely at this point, because dust is a coating problem, not a breakage.
If faults remain in exactly the same place on every label after a thorough clean, the problem may have moved beyond dust: a worn roller, a damaged head element, or a sensor that has failed rather than filmed over. The value of the calm order is that it lets you say this with confidence instead of guessing, and it gives a repairer a clear account of what was cleaned and what persisted. Record the recovery in your printer notes with the date and the outcome. A machine that needed one deep recovery and then stayed clean on a better routine is a success story; a machine that needs rescuing every month is telling you the room, the placement, or the machine’s condition needs a bigger decision.
Seasonal dust and the twice-a-year reset
Many spaces have a dust season: the busy shipping period when cardboard volume multiplies, the building-work month, the weeks when doors and windows stand open. Mark your calendar for a reset at the end of your space’s dusty season: a full clean, a review of covers and placement, fresh stock storage, and a look at whether the cleaning interval still matches reality. Pair it with the same reset before the busy season begins, so the printer enters its hardest weeks clean, correctly placed, and stocked with covered rolls. Two deliberate resets a year prevent the slow slide in which each month is slightly dustier than the last and nobody can say when the standard changed.
Dust and the Other Machines in the Room
A label printer rarely lives alone. It shares air with computers, scales, tape dispensers, and sometimes heat sealers or other printers, and the dust strategy that protects it usually protects them all. Covers, calm placement, and damp wiping are room-level goods: the bench that stops raining cardboard fibre onto the label printer also stops raining it onto the keyboard and the scale’s display. When you make the case for dust habits to colleagues or family members who share the space, make it on behalf of everything electronic in the room, because the shared benefit is real and the habits are identical.
Other machines can also be dust sources worth noticing. Equipment with fans moves air and whatever the air carries. Shredders, where they exist, are fibre factories. Even a frequently opened storage cupboard of packing materials sheds a little with every visit. Laying out the room so that dust makers are downwind, in the plain sense of air movement, from dust sufferers is a one-time decision with daily returns. You do not need to measure anything; you need to look at the room once with dust in mind, the way you would look at it with water in mind if leaks were the problem.
Teaching the dust routine to occasional users
Printers in shared spaces are often defeated by their most occasional user, the person who prints twice a month, leaves the cover off, loads a roll that has been sitting open, and walks away. The posted routine beside the machine should therefore include the dust basics in the plainest terms: cover on when finished, rolls stored in the closed box, wipe hands before loading, report faint print rather than printing the whole run anyway. Keep the tone helpful rather than scolding. Occasional users follow routines that are short, visible, and obviously sensible, and the regular users benefit from the same clarity when they are tired or rushed.
Accepting Some Dust and Planning Around It
No working space is dust-free, and chasing perfection wastes effort that cleaning could use better. The realistic goal is a managed level: dust arrives slowly, is kept out of the machine by covers and placement, is removed on a rhythm matched to its arrival, and is noticed early when it starts to affect print. Judge your system by outcomes rather than by white-glove tests: labels print cleanly, faults are rare and explainable, and cleans find light dust rather than baked film. If those hold, your dust control is working, whatever a fingertip across the shelf might say.
Revisit the balance when the space changes: a new product line that brings more cardboard, a busier season that becomes the new normal, a move to a different room. Dust control is not a project with an end date but a property of how the room is run, maintained by the same small reviews that keep the printer itself in good order. Treat it that way, and the printer fades into the background of your work, which is where reliable equipment belongs: unnoticed, because it simply prints, cleanly, every time you ask it to.
Choosing Cleaning Supplies Once, Properly
The cleaning routine works better when its supplies were chosen once, deliberately, and then simply kept in stock. Gather what the maker recommends for your machine: the approved cleaning cards, pens, or fluid, soft lint-free cloths or swabs for the path and sensors, and a gentle means of lifting loose dust from the case and surroundings. Keep them together in a labelled container at or near the printer, because a routine whose tools must be hunted for is a routine that gets postponed. Check the container when you check stock levels, and replace items before they run out, since the week the cleaning fluid is missing is usually the week the printer needed cleaning most.
Resist adding improvised extras to the container over time. Shared printers accumulate well-meant contributions: a bottle of something strong, a brush of doubtful softness, a cloth that leaves more lint than it removes. Audit the container during your seasonal resets and return it to the approved set. The discipline sounds fussy until you price a print head or a service visit; then it sounds like what it is, the cheapest insurance in the room. Good supplies, in the right place, used gently and on schedule, are most of what dust control ever requires of anyone.
A note on labels that look dirty before they are printed
Sometimes the print is clean and the label still looks grubby, because the stock itself carried dust and fibres on its surface from storage. If finished labels look dull or speckled despite a clean machine, inspect the roll before blaming the printer: hold it to the light, check its edges, and compare with a fresh roll kept in its wrapping. Stock that has lived uncovered near packing work can be pre-dirtied beyond what a wipe will rescue, and its outer layers at least may be better discarded than printed. The lesson loops back to storage: a roll kept covered from the day it arrives prints like it, and a roll kept open prints like that instead.
Keeping a spare cover and a second line of defence
Covers themselves get dusty, and a cover that is never cleaned becomes a dust source that showers the machine each time it is lifted. Shake or wipe the cover away from the printer as part of the regular routine, and replace it when it tears or stops fitting properly after a change of machine or bench layout. It is also worth having one simple second line of defence for the worst days: on the occasions when the room is unavoidably dusty, with building work, a delivery of broken-down boxes, or a deep clean stirring everything up, keep the printer covered for the whole period and print the day’s labels before the dust starts or after it settles. Planning print runs around the room’s dusty moments costs nothing and can save a full cleaning cycle.
FAQ
How often should I clean?
That depends on volume and conditions. Check the guide, and clean sooner if you see streaks or feed problems. A tray under the printer that shows how much debris appears each week helps you set the right interval.
Can I use any cleaner?
No. Use only what the maker names, since other liquids can harm the print head. If the guide lists no product, ask the maker’s support before trying anything.
Does a cover make a real difference?
It helps keep fibers off the housing and out of the open paper path between jobs. It is a low-effort habit, but it works best alongside good placement and closed supply storage.
Is compressed air a good idea?
Only if the maker allows it. If used, keep it gentle and direct dust out of the unit. Some guides prefer a soft brush because air can drive debris into places you cannot reach.
Should I clean the stock as well?
Not usually. Keep rolls and stacks in their packaging until they are loaded, and discard a few outer labels if the edge looks dusty or damaged.
Why is there a white line down my printed labels?
A thin white line along the feed direction often means dust, adhesive or debris on a thermal print head, or a damaged head element. Power off, let the head cool, clean it gently with the cleaner the maker approves, and test again. A line that stays may mean the head needs replacing.
Can dust make my printer skip labels or feed blanks?
Yes. A film of dust on the gap or mark sensors can confuse the printer about where each label starts, causing skipped or blank labels. Brush the sensor area gently, clean it as the manual describes, and recalibrate the printer if the manual calls for it.
Is a printer enclosure a good idea in a dusty shop?
An enclosure with a lid or a cabinet can cut dust a lot, but the printer still needs ventilation and room to load stock and open covers. Check the manual for clearances and heat limits, and keep sawdust and metal dust sources in a different area if possible.
Should I clean a thermal print head with my fingers or a pencil eraser?
No. Skin oils leave marks, and abrasive items like erasers can scratch the head. Use the swab, wipe or pen your printer’s maker recommends, move gently in one direction, and let everything dry before loading labels.
How should I store spare label rolls to keep them clean?
Keep spare rolls in their sealed bags or in closed boxes, off the floor and away from heat and sun. Open only the roll you are about to use. Wipe your hands and the shelf before handling, since dust and oils can transfer to the label surface.
What kind of dust causes the most trouble for label printers?
In packing areas it is usually cardboard and paper fibre, produced whenever boxes are opened, cut, or broken down near the printer. The fibres drift, settle on the machine and on stored rolls, and are then dragged through the label path by the stock itself. Knowing your main dust source tells you whether placement, covers, or stock storage will help you most.
Is a cover worth using if I print throughout the day?
Yes, for the idle hours, which are most of the day and all of the night. Dust settles whenever the air carries it, not only when you are printing. A cover that lifts off in one motion and lives beside the printer protects the case, slots, and loaded roll between jobs. Remove it while printing so vents and the label path stay clear.
Why do print faults come back soon after I clean the printer?
Usually because dust is reaching the machine faster than cleaning removes it. Review placement, covers, and stock storage before cleaning harder or more often. A roll stored uncovered near cardboard work carries dust into the machine with every label. Keeping brief notes on cleans and faults shows whether the pattern is seasonal, job-related, or steady.
How should I store label rolls in a dusty workspace?
Keep spare rolls in their wrapping or in a closed box or drawer, away from the box-breaking area and off the floor. Open a roll only when loading it, and brush or wipe its outside first if it has been sitting out. Clean hands during loading matter too, since dust and oils transfer from fingers to the label surface.
The Short Version
Move the printer from dust, cover it when idle, keep supplies closed and clean as the manual directs. Watch for streaks and feed trouble as early signs, and clean before changing settings. Small regular habits are easier than a large clean-up after a problem appears.

