Label tape and label rolls are not interchangeable: tape is usually a cassette designed for a label maker, and rolls are made for a label printer. The choice is mostly decided by which device you own or plan to buy, and by whether you print a few labels or many. The sections below compare the two, then add a worked example, common situations and a troubleshooting table.

What Each One Is
Label tape is a narrow strip, normally housed in a cassette that clicks into a label maker. It is made for short text on small items. Widths and finishes vary by maker, so look at the guide for your device.
Label rolls are wound labels on a backing sheet, sometimes with gaps between each label, sometimes continuous. They are loaded into a label printer and can be wider, longer and used for shipping, product and barcode labels.
In this guide
Comparing the Two
- Handling. Cassettes are quick to swap and tidy to store. Rolls need to be loaded onto a spindle or into a holder, which takes a moment longer.
- Label shapes. Tape produces strip-shaped labels. Rolls come in many shapes, so they suit more varied jobs.
- Volume. For high volume, rolls usually make more sense, since you change them less often. For a few labels a month, a cassette can last a long time.
- Flexibility. A label printer with rolls can handle address and barcode work. A label maker with tape is tuned for short text.
- Waste. Tape often leaves a small blank margin before and after each label. Roll labels pre-cut to size can waste less, depending on the design.
Match the Supply to the Job
| If you mostly label | Consider |
|---|---|
| Cables, shelves, folders | Tape in a label maker |
| Parcels and shipping | Rolls in a label printer, after checking the carrier’s current instructions |
| Products for sale | Rolls with a size that suits your packaging |
| A bit of everything | Both devices, or one label printer with two roll sizes |
Before You Buy Supplies
- Find the exact supply type in your device’s guide.
- Check width, finish and whether the label is meant for flat or curved surfaces.
- Buy a small amount first and try it on the real surface.
- Store spares as the maker advises.
Thinking About Effort and Upkeep
Instead of looking at money, look at effort. Ask how often you will change supplies, how simple the change is and how many spare items you must keep on a shelf. Tape cassettes are simple to swap but may need changing when you switch widths. Rolls last through many labels but need careful loading and sometimes a sensor setting. Whichever you choose, keep a note of the exact supply type in your device guide so reordering is quick and free of mistakes.
A Worked Example: Setting Up a Small Home-Business Corner
Imagine you sell handmade goods from home and also keep your workshop organized. You need address labels for parcels, small product labels and shelf labels.
- List the label jobs in a column: parcel addresses, product tags, shelf and bin labels, cable labels for the office.
- For each job, note the size, the amount of text, whether a barcode is needed and how many you print per week.
- Sort the jobs. Address and barcode jobs with larger sizes and higher volume go to a label printer using rolls. Short text on shelves and cables goes to a label maker using tape.
- Check the carrier’s current instructions for parcel label size and layout before choosing the roll size.
- Look in each device guide for the exact supply type, and buy one roll or cassette of each to begin with.
- Load the supplies following the guide, set the stock type in the printer if needed, and print one test label per job to check size, text and adhesion before ordering more.
Common Scenarios
- Home office with cables and folders: a label maker with tape, in a width that wraps neatly round leads.
- Online seller shipping several parcels a day: a label printer with rolls, which loads once and prints many.
- Workshop with bins and drawers: tape for short bin names, kept in a cassette that matches the device.
- Craft stall selling jars: rolls of a size that suits the jar band, with a finish matched to the container surface.
Mistakes to Avoid
- Buying supplies before checking the device. A cassette that does not fit your label maker is useless.
- Ordering in bulk for a first trial. You may find the finish or width is wrong for your job.
- Ignoring the surface. Curved, textured or oily surfaces call for suitable adhesive and facing.
- Forgetting the sensor setting. Roll printers need the right stock type or labels may feed wrongly.
- Using shipping labels without checking the carrier. Layout and size requirements change, so check the carrier’s current instructions.
Quick Troubleshooting
| Symptom | Likely cause | What to try |
|---|---|---|
| Blank labels come out | Wrong stock type or sensor setting | Check the supply type and printer settings |
| Cassette will not fit | Wrong supply for the device | Look up the exact type in the guide |
| Print is faint | Worn print head area or wrong stock | Clean as the maker advises and confirm the stock type |
| Labels skip or misalign | Roll loaded crookedly or sensor not set | Reload and run the label calibration in the guide |
Care and Storage of Supplies
Label stock stays usable longer when it is stored well. Keep cassettes and rolls in their original packaging until you need them, in a cool, dry place away from direct light. Heat can soften adhesive and make labels stick to the liner or to each other, and damp can curl paper facings. Stand rolls upright or lay them flat so the edges are not crushed, and avoid stacking heavy items on them.
Keep the print area clean as the device guide describes. Dust on the print head or sensors can cause faint print or misfeeds, whichever supply you use. If a device sits unused for a long time, take out the supply and store it flat. Write the loading date on the supply, and use older stock first. When you finish a roll or cassette, note the exact supply type from the box before throwing it away, so that the next order matches. Finally, keep a small card near the device with the width, finish and type you use for each job, so anyone who loads it follows the same routine.
Glossary
- Cassette: a plastic case holding a length of label tape.
- Label maker: a small device that prints on narrow tape.
- Label printer: a device that prints on rolls or stacks of labels.
- Die-cut: a label cut to a set size and shape on a backing.
- Continuous: stock without gaps, cut to the length you need.
- Sensor setting: the printer option that tells it how to find label edges.
Thinking About Cost Over Time
Sticker prices can mislead when you compare tape cartridges and label rolls. The upfront cost of the device is only part of the picture, and the cost of supplies often matters more in the long run. Rather than quote specific prices that change by brand and region, it is more useful to learn how to compare them yourself.
The simplest approach is cost per label. Divide the price of a cartridge or roll by the number of labels it gives you, then compare. For tape, estimate the length used per label. If a cartridge holds a stated length of tape and your typical label uses a couple of inches, you can calculate roughly how many you will get. Do not forget the blank leader or margin that some machines feed before and after each label, since that can waste a noticeable amount on short labels. For rolls, the count per roll is usually printed on the packaging, which makes it easier to compare.
Next, think about your volume. A person who prints a handful of labels per month may find that a cartridge lasts for months, so the per-label cost matters less than convenience. Someone who prints dozens of shipping labels each week will feel the cost of supplies quickly, and bulk rolls or multipacks may save money. Also consider whether you are tied to a single brand. Some devices accept only proprietary cartridges, while others work with third-party supplies, but check compatibility and warranty terms before buying any non-original supply.
A Rough Comparison Framework
| Question | Tape cartridge tends to suit | Label roll tends to suit |
|---|---|---|
| Label length | Variable, cut to the text | Fixed size per label |
| Typical use | Shelves, cables, bins, small items | Shipping, addresses, barcodes, file folders |
| Print volume | Low to moderate | Moderate to high |
| Ink needed | Often built into cartridge or thermal | Usually thermal, no ink |
| Storage | Small cartridges | Larger rolls, need a dry spot |
This table is a starting point, not a rule. Some tape machines print wide labels and some roll printers handle small ones. Always check the specifications for the model you are considering.
Sizes, Materials and Adhesives
The material beneath the print matters as much as the printer. Paper labels work well indoors for shipping, mail and filing. They are cheap and easy to read, but they absorb moisture and can curl at the corners in damp places. Plastic or laminated tapes resist water, oils and scuffing, and are a better fit for tools, outdoor storage, garages and kitchens. Some tapes are made for special uses such as cable flags, fabric tags or heat-resistant labeling, so read the package description before assuming a tape will work in a given environment.
Adhesive strength varies. A standard adhesive grips smooth, clean surfaces such as plastic bins and metal. Textured, powdery or oily surfaces call for a stronger adhesive. If you plan to remove the label later, a removable or low-tack option leaves less residue, which matters on rented shelves, borrowed containers and equipment you plan to resell. As a general rule, test a label on a small hidden area first, and give it a day to set.
Size and width follow the device. Tape machines accept a limited range of widths, and the right width is a balance between readability and the space available. A narrow tape suits cables and small bins, while wider tape is easier to read from a distance on shelves and storage boxes. Roll printers are normally built around a specific width, so match your roll width to the printer and your typical package or file size.
Environment and Durability
A label that looks perfect on day one can fail in a hot garage or a freezer. Think about where the label will live and which conditions it will face.
- Heat. Direct thermal paper darkens when exposed to heat or sunlight, so avoid putting it on a dashboard or near a heater.
- Moisture. Paper can soften and smear in humid places. Laminated or plastic tape resists it better.
- Cold. Some adhesives lose grip in a freezer. Look for products labeled for cold use if this matters.
- Chemicals. Solvents, cleaning sprays and oils can strip print or lift edges. Check the manufacturer notes for compatibility.
- Sunlight. Long exposure to UV can fade color. Keep important labels out of direct sun.
If a label must last for years, choose a durable material and apply it carefully. Clean the surface with isopropyl alcohol where appropriate, let it dry, press from the center outward and avoid touching the adhesive. Rounding the corners of a label with scissors also helps prevent peeling, because square corners catch on things and lift.
Organizing Your Own Labeling System
Owning a good labeler does little if the labels are inconsistent. Before you print, decide on a simple system and stick with it. Keep the wording short, use one style of capitalization and put the most important word first. For storage bins, a category word followed by a detail works well, such as “Cables – USB” or “Paint – Interior”. Place labels in the same spot on every container, like the upper right corner of the front face, so your eye learns where to look.
Color can help but should not carry the whole meaning, especially for people who have trouble telling colors apart. Pair color with text. If you share a household or office space, agree on the labeling rules with others, and keep a short list of conventions near the supplies. A tidy system means you spend less time making new labels and more time using what you have.
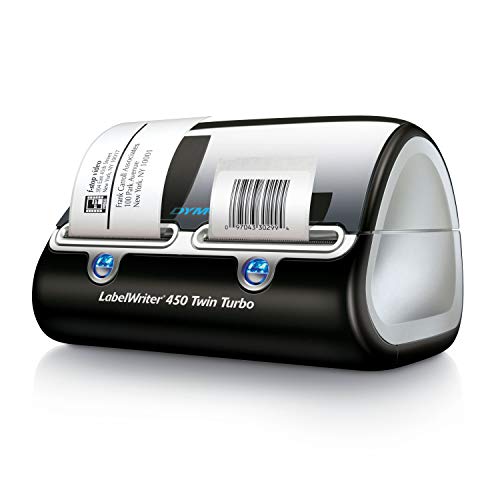
Planning Supplies
Keep one spare cartridge or roll on hand for devices you rely on, particularly if you ship orders or label equipment regularly. Running out in the middle of a job is frustrating, and buying in a hurry can lead to choosing the wrong size. Write the model number and supply type on a note near the device so that replacements are quick to order.
A Practical Buying Checklist
Before you commit to one format, run through a few quick questions. How many labels do you expect to print in a typical month? Will the labels be read up close, like on a cable, or from a distance, like on a shelf? Do they need to survive moisture, heat or cleaning? Will you need to peel them off later? Do you need barcodes, logos or only text? And is there one other person who will use the device, who may prefer a simpler setup?
If most answers point toward small, varied, durable labels, a tape-based labeler is probably the better match. If they point toward large numbers of same-size shipping or filing labels, a roll printer usually makes more sense. If your needs are mixed, it can be reasonable to own both, since each type is inexpensive compared with the time lost forcing one device to do every job. Whatever you choose, read the specifications on the supply packaging and keep the first purchase small until you are sure the system suits you.
Reducing Waste and Avoiding Compatibility Surprises
Waste adds up with small, frequent printing. To cut it down, preview labels before printing and check spelling. Use the cut or feed settings to avoid extra leader tape. For roll printers, make sure the sensor is set to the correct label type so the printer feeds the right length. Mismatched settings can cause blank labels or misaligned printing.
Compatibility is the other trap. Before you purchase supplies, check the exact model number of your device and compare it to the product listing. Some sizes look similar but fit differently. When the listing is vague, check the manufacturer website or contact the seller. Keep the original packaging or a photo of it, since the model code often appears there. If you buy third-party supplies, buy a small quantity first to confirm print quality and fit before committing to a larger pack.
Ready to Buy? Start Here
If this guide helped you decide what to look for, these products are a place to start.

As an Amazon Associate we earn from qualifying purchases. Prices and availability are shown on Amazon.
Think About How Often You Print
The decision between tape and rolls often comes down to your pace of work. People who print a handful of short labels now and then tend to prefer tape cassettes, while those who print many labels in a row lean toward rolls. Before you commit, look at your last month and count how many labels you actually made. That number shows whether a compact cassette or a bulk roll fits you.
- Count the labels you print in a typical week.
- Note whether you need one fixed width or several sizes.
- Check whether your printer accepts only one format; many do.
- Think about storage, since rolls take more room than cassettes.
- Consider how much waste you tolerate when printing short text.
Side by Side Comparison
| Point | Label tape | Label rolls |
|---|---|---|
| Typical use | Names, shelves, cables | Parcels, barcodes, bins |
| Loading | Drop in a cassette | Feed a roll and align it |
| Cut style | Strips cut to length | Pre-sized individual labels |
| Best for | Occasional, varied jobs | Repeated, uniform jobs |
Check the maker’s guide to see which media your printer supports before you stock up.
Mistakes to Avoid When Buying Supplies
Label supplies look simple, but buying the wrong kind wastes money and time. These are the slips that appear most often.
- Buying a bulk pack before you know your printer accepts it.
- Choosing a width that does not match the cassette or roll holder.
- Ignoring the adhesive type, which matters on cold, damp or rough surfaces.
- Storing media in sunlight or heat, which the maker may warn against.
- Forgetting a spare so a job stops halfway.
Framing the Decision for The choice between label tape and label rolls
This guide is about the choice between label tape and label rolls, and this extra section pulls the earlier advice into a single decision framework you can work through in one sitting. Picture two supply formats that look interchangeable from a distance but behave very differently in daily use, in storage, and in what they cost you in time and waste. That context matters more than any single feature, because the right printer or supply is simply the one that fits the way you already work, in the space you already have, with the devices you already own.
A useful picture to hold in mind is a home or small business that sometimes needs one quick label for a jar or cable, and sometimes needs a long run of identical labels for boxes or products. If your real week looks something like that, judge every option against that week. If your week looks different, write your own version of that picture first, in two or three plain sentences, and judge against yours instead. Decide by the shape of your typical job, a single label here and there or a batch of many, because that single distinction explains most of the difference between the two formats.
Work through the framework in order. First define the jobs, then the volume, then the label sizes and materials those jobs need, then the connection and software, and only then compare individual models or supply packs. Reversing that order, starting from a model and hoping your jobs will adapt to it, is the single most common reason a purchase that looked sensible on paper disappoints in the first month.
Keep notes as you go. A short list of your jobs, your typical daily volume, your largest and smallest labels, and the surfaces involved will answer most product-page questions for you, and it gives you something concrete to check during the return window if the first choice turns out to be wrong.
Reading the Specifications Without Guesswork
Resolution describes how finely the printer can draw, and it matters most when your labels carry small text, dense barcodes or fine detail that a scanner or a customer must read at a glance. For large, simple shipping text, modest resolution is usually plenty, because the characters are big and the contrast does the work. For tiny product labels or detailed codes, finer resolution earns its keep. Judge resolution against the smallest label you print, not the largest.
Speed describes how quickly labels come out once printing starts, and it matters in bursts rather than across a whole day. A printer that feels slow during a long dispatch run holds up packing, sealing and collection, while the same speed is invisible when you print a few labels at a time. Think about your longest typical run, how long you are willing to stand and wait during it, and whether the printer pauses, recalibrates or needs attention partway through a batch.
Duty guidance, where a maker gives it, describes the workload a machine is built to sustain comfortably. Treat it as a ceiling to stay comfortably under rather than a target to hit every day. A printer run near its limit day after day tends to show wear sooner, in the print head, the rollers and the feed path, while a printer with headroom treats your busiest day as an ordinary day. If your volume is growing, headroom is a form of insurance.
Finally, separate the numbers that describe the printer from the numbers that describe the supplies. Maximum label width, supported roll or sheet sizes, and how the printer senses gaps between labels all decide which supplies you can use at all. Those fit questions come before speed or resolution, because a fast, sharp printer that cannot take the label size your carrier or your jars require is simply the wrong printer, however good its other numbers look.
Matching the Choice to Volume, Scenario by Scenario
Light, occasional use rewards simplicity. If you print in short sessions with gaps between them, setup time and ease of loading matter more than raw throughput, and a machine that wakes, connects and prints without fuss will feel faster in real life than a quicker machine that needs coaxing. Supplies for light use should be bought in modest quantities, stored well, and chosen for availability, because old stock and dried or dusty labels cause more trouble at this level than any lack of speed.
Steady daily use rewards reliability and supply discipline. When labels are part of every working day, small frictions multiply: a roll that is awkward to change, a driver setting that resets, a label size that is hard to source. At this level, keep a spare supply ready, standardise on as few label sizes as your jobs allow, and favour the option whose everyday routine, loading, printing, tearing off or peeling, feels calm when repeated many times.
Batch and peak use rewards planning. If your work arrives in waves, a sale, a season, a weekly dispatch day, then judge the printer by the wave, not the average. Can it run your longest batch without constant intervention? Do you have enough of the right labels on hand before the wave starts? Does the software let you queue or repeat a job without rebuilding it? A choice that handles the peak gracefully will always feel adequate on quiet days, while the reverse is rarely true.
Shared use adds one more test. When several people print, the best choice is the one a new person can use correctly after a short explanation: clear loading, obvious label sizes, settings that stay where they were left, and supplies stored where everyone expects them. Write the short version of the routine down and keep it near the printer. Many problems blamed on hardware are really problems of an undocumented routine that only one person understood.
Connections, Systems and Platforms in Plain Terms
A wired connection is the simplest relationship between a computer and a printer: direct, predictable, and largely immune to what the rest of the network is doing. Its cost is placement, because the printer has to live within cable reach of the machine that drives it. A wireless connection frees the placement and lets several devices share the printer, at the cost of depending on signal strength, router behaviour and settings that can change when the network changes.
Operating system support is about drivers and software staying current, not about a logo on a box. Before buying, check the maker’s support pages for the system versions you actually run, and note how recently those pages and downloads were maintained. A maker who keeps support material current is telling you something about how the printer will behave after your next system update. Where support is vague, treat that vagueness itself as information and test thoroughly while you can still return the device.
Platforms add a second layer. Marketplaces, carrier tools, shop systems and label design apps each have their own way of producing a label file or sending a job to print. A printer can be perfectly compatible with your computer and still awkward with the one platform you use most. List the tools you print from, in order of how often you use them, and check the printer against the top of that list first, using the maker’s guidance and a real test job rather than a general promise of compatibility.
Phones and tablets deserve a mention because they change habits. Printing from a phone suits quick, one-off labels and checking a job while standing at the packing bench. It suits complex label design less well, because small screens make layout and proofreading harder. Decide which jobs genuinely belong on the phone and which belong on the computer, and make sure the printer supports the route you will actually take for each, instead of assuming every route works equally well.
Tape and Rolls Compared by Material, Handling and Environment
Tape systems usually present the label material as a protected cassette, often with the print surface and backing engineered together, which makes handling clean and storage tidy. The trade-off is that you are committed to that cassette family, in the widths and materials it offers. Roll systems expose you to a wider world of paper and synthetic stocks, in many sizes, but ask more of you: correct loading, correct sensing, and storage that keeps edges clean and surfaces dust-free.
Indoors, in dry and stable conditions, ordinary paper-based stock from either format performs well and keeps costs in proportion. The differences appear at the edges of use: cold, damp, sunlight, abrasion and long storage all punish weak materials and weak print. Synthetic stocks resist moisture and tearing better than plain paper in either format, while laminated or coated surfaces shrug off handling that would scuff an unprotected print.
Durability is a chain, not a single property. The face material, the print method and the adhesive each have to survive the environment. A tough face with fading print fails, as does permanent print on an adhesive that lets go in the cold. When a label really matters, test the whole chain in the real place for a realistic period, and judge the result by whether the label can still be read and is still firmly attached, not by how it looked when it was applied.
Effort is part of the comparison too. Tape is often quicker for a single label, because the device is small, ready and forgiving. Rolls come into their own across a batch, where the per-label routine is shorter and the stock goes further. Count your typical session honestly: if most sessions are one or two labels, convenience dominates; if most are runs, throughput and supply economy dominate, and your format choice should follow that count.
A Decision Matrix You Can Fill In
Score each candidate against the same short list, using your own notes rather than impressions. The list is: does it print every label size my jobs need; does it handle my longest typical batch comfortably; does it connect the way my workspace requires; is its support current for my system; are its supplies easy to obtain in the sizes I use; and can I test it properly inside the return window. A candidate that fails the first question is out, whatever it scores elsewhere.
For the remaining candidates, mark each question simply as strong, adequate or weak, and be suspicious of any choice that needs several generous judgements to win. In practice, the right choice usually wins plainly on the questions that matter most to your scenario, and is merely adequate on the rest. The wrong choice often wins on a feature you will rarely use while being weak on a question you face daily.
Add one line to the matrix for failure cost. Ask what happens when this choice goes wrong at your busiest moment: a missed collection, a batch to reprint, a team waiting. If the cost of failure is high, weight reliability, supply availability and a tested routine more heavily than small savings on the purchase itself. If the cost of failure is low and the job is occasional, simplicity and a modest outlay are perfectly rational priorities.
Keep the finished matrix. It becomes your test plan during the return window and your reorder note afterwards, recording which label sizes and materials you settled on and why. When supplies run low or a second printer is needed, that record saves you from reconstructing the whole decision from memory, and it helps anyone who shares the work understand the reasoning behind the setup.
Worked Examples From Ordinary Weeks
Example one: the gradual grower. A user begins with a home or small business that sometimes needs one quick label for a jar or cable, and sometimes needs a long run of identical labels for boxes or products. At first almost any sensible choice works, because volume is low and patience is high. The decision that matters is leaving room to grow: supported label sizes beyond today’s needs, supplies that are widely available, and support that is clearly maintained. Choosing that headroom early costs little and avoids replacing the whole setup when the work doubles.
Example two: the busy-day failure. A setup that performs beautifully in a quiet test fails on the busiest day, because the batch is longer, the workspace is crowded, the network is busier, or the one person who understood the routine is away. Prevent this by testing under realistic pressure before the return window closes: run your longest typical batch, from the device and place you will really use, and note every pause, prompt and workaround. Those notes, not the quiet test, describe the printer you are actually buying.
Example three: the supply surprise. A user settles happily on a printer, then discovers the label size they need most is oddly hard to source, or the stock they bought in bulk behaves badly on their containers. Prevent this by reversing the order: confirm the exact supplies for your top jobs first, buy them in a small quantity, test them on real items in real conditions, and only then commit to bulk. Supplies are the part of the system you will buy forever, so they deserve first place in the investigation.
Example four: the second-user test. Everything works for the person who set it up, then a partner, colleague or family member tries to print and produces waste, jams or misprints. The fix is rarely a different printer; it is a short written routine, supplies stored in a labelled place, and settings left in a known state. Include the second user in your testing, because a setup that only its installer can operate is a fragile setup, however well it prints.
Mistakes That Quietly Cost Time and Labels
Buying for the exception instead of the routine is the classic error. A rare oversized label, an unusual material, a one-off project: these tempt buyers toward machines and stocks chosen for a job that happens twice a year, at the expense of the job that happens twice a day. Cover the routine properly first, and handle true exceptions with a workaround, a service, or a small secondary method.
Skipping the surface test is another quiet cost. Labels are judged on screens and desks, then applied to curved, textured, cold or greasy real-world surfaces where they lift, wrinkle or slide. Test on the actual jars, bins, boxes or bottles, including the worst surface you regularly meet, and allow the test labels time to fail, because many adhesive failures appear after days, not minutes.
Overbuying supplies early locks in mistakes. A large stock of the wrong size or material is worse than a small stock of the right one, because it tempts you to use unsuitable labels rather than waste the money. Buy small until the routine is proven, then buy steadily. The same caution applies to accessories and extras bought in the excitement of setup day and never used again.
Neglecting the boring records finishes the list. Which label size suits which job, which settings produced the clean batch, which supplier’s stock behaved well: if none of this is written down, every reorder and every troubleshooting session starts from zero. A single page of notes near the printer, updated when something changes, quietly repays its effort every month the setup is in use.
Running Costs and Care, in Qualitative Terms
The purchase is the smallest part of what a labelling setup costs over its life. The recurring part is supplies: labels themselves, plus ribbons or toner or other consumables where your print method uses them, plus the waste from misprints, tests and labels that failed on real surfaces. You can keep that recurring cost proportionate by standardising sizes, testing before buying in quantity, and counting waste honestly for the first few weeks so the true pattern is visible.
Print heads and feed parts are the wear items on the hardware side. Heat-based printers depend on a clean, undamaged print head for sharp output; dust, adhesive residue and gritty stock all shorten its comfortable life. Office-style printers depend on rollers and feed paths staying clean and grippy. None of this demands expertise: it demands the maker’s cleaning routine, done occasionally, with the materials the maker specifies, and attention when print quality first begins to change rather than after it has become unreadable.
Storage is a cost control too. Labels stored in heat, damp or sunlight can curl, lose adhesion or fade before they are ever printed, which turns a bulk saving into bulk waste. Keep stock in its packaging, in a dry place at ordinary room conditions, rotated so older stock is used first. Tape cassettes, rolls and sheets each dislike different abuses, but all of them reward being treated as a supply with a shelf life rather than as inert stationery.
Basic care, done little and often, prevents most failures. Keep the feed path free of label fragments and dust, check that no label has peeled and stuck inside the machine, clean the print surfaces the maker tells you to clean, and run the calibration or alignment routine after changing to a different label size or type. When a problem appears, change one thing at a time and test, so you learn which change fixed it and the lesson is available next time.
Testing Properly Inside the Return Window
Treat the first days with a new printer or a new supply as a formal trial, not as ownership. On day one, set up exactly where the equipment will live, connect it the way it will stay connected, and print every label type in your job list, not only the easiest one. Apply labels to real items and put those items into real use: the fridge, the shelf, the parcel pile, the wash cycle, wherever they belong.
Across the following days, deliberately cover the awkward cases. Run your longest batch. Print from every device and platform you listed. Let another person follow your written routine without your help. Change a roll, cassette or sheet stack and confirm the machine recovers gracefully. Check the labelled items again after time has passed, looking for lifting edges, fading, smearing or residue, the failures that only time reveals.
Extra Questions Worth Settling Before You Buy
FAQ
Can I use rolls in a label maker?
Generally no. Each device is designed for particular supplies, so follow the maker’s guide.
Do all rolls fit all printers?
No. Roll width, core size and sensor type vary, so confirm compatibility first.
Which is easier for a beginner?
Tape in a label maker is simple, since the cassette clicks in. Rolls take a little more setup but handle more kinds of job.
Can one device do both jobs?
Some label printers accept narrow rolls that make strip labels. Check the guide for the range of widths and the supported stock types.
How should I store spare supplies?
Keep them in their packaging, away from heat, damp and direct light, and follow the maker’s storage notes.
Is it cheaper to use label tape or label rolls?
It depends on volume and size. Calculate cost per label by dividing the price of the cartridge or roll by the number of labels it yields. Tape often suits low volume and variable lengths, while rolls usually become more economical when you print many identical-size labels, such as shipping labels.
Will thermal labels fade over time?
Direct thermal labels can darken or fade with heat, sunlight and some chemicals, so they suit short-term uses like shipping better than long-term labeling. For lasting labels, look for thermal transfer or laminated tape products designed for durability, and check the manufacturer guidance for your conditions.
What label material is best for outdoor or garage use?
Laminated plastic or polyester tape generally resists moisture, scuffs and temperature swings better than paper. Choose an adhesive suited to the surface, clean the area before applying, and test a sample label for a few days before labeling everything.
Can I print different sized labels on the same roll printer?
Usually only if the labels share the same width and you adjust the size settings. Roll printers are built for specific widths, and mixed sizes can cause misalignment. If you need multiple sizes regularly, consider keeping separate rolls and switching them as needed.
How do I remove a label without leaving residue?
Warm the label gently with a hair dryer, peel slowly at a low angle, then wipe residue with a little isopropyl alcohol or a mild adhesive remover on a cloth. Test on a hidden spot first, especially on painted, finished or plastic surfaces.
The Short Version
Tape goes with label makers and small jobs. Rolls go with label printers, volume and shipping. Let your device and your main job decide.

