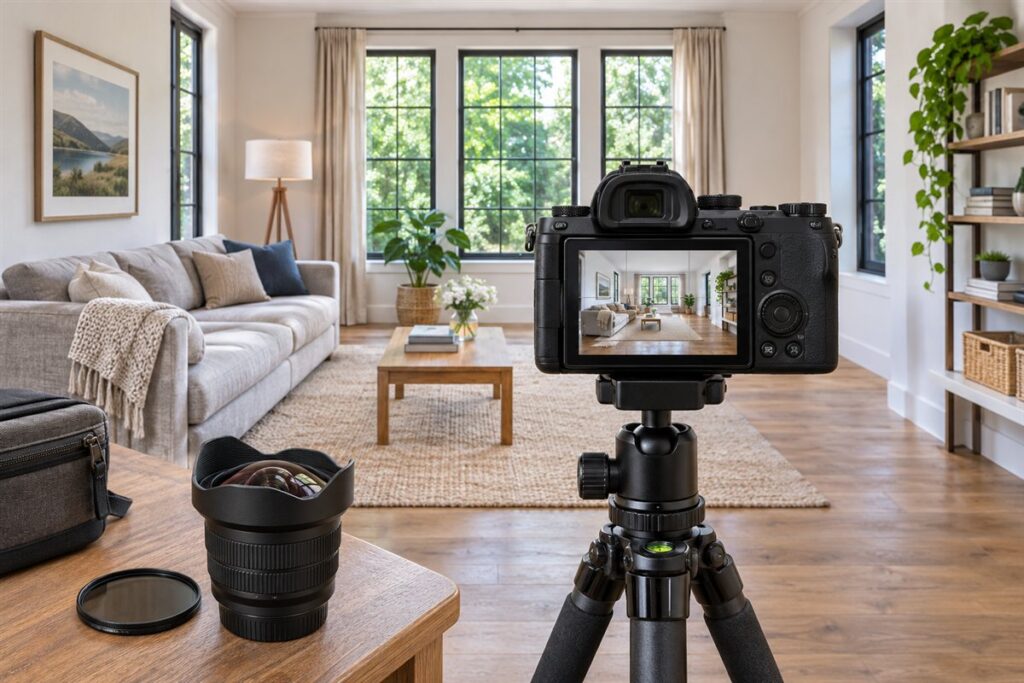
A wide angle lens captures a broad view, which suits landscapes, architecture and tight interiors. To choose one, think about how wide you really need to go, how much edge distortion you can accept, and whether you plan to use filters. Wider is not automatically better. The sections below also give a shooting walkthrough, common scenes and fixes for typical problems.
Understand How Wide Is Wide
Focal length tells you the angle of view. Lower numbers show more of the scene. On a full frame body, lenses in the mid twenties are mildly wide, while teens and below are very wide. Smaller sensors narrow the view, so you may need a lower number to get the same look.
Very wide lenses exaggerate size differences. Objects near the lens look large, and distant ones look small, which can be dramatic or awkward depending on the scene.
Distortion and Edge Quality
Straight lines near the frame edge can appear to lean or curve. Software can correct a lot of this, and many cameras apply the fix automatically, but strong correction may crop the image or soften corners. If you shoot buildings, look at sample images from the maker or from other photographers to see how lines are rendered.
Filters and Front Elements
Some wide lenses have a bulging front element that cannot take a normal screw-in filter. They may need a special holder instead. If you plan to use polarizers or graduated filters for landscapes, check what the lens supports before you commit.
Choosing Step by Step
- Decide the main subject: scenery, rooms, groups, or night skies.
- Estimate the widest view you need, keeping your sensor size in mind.
- Decide between a zoom for flexibility and a prime for lighter weight.
- Check filter support and front element design.
- Look at the maker’s notes on distortion correction.
Key Differences Table
| Type | Best for | Watch out for |
|---|---|---|
| Wide zoom | Travel and mixed scenes | Size and weight |
| Wide prime | Light kits and low light | Fixed framing |
| Ultra wide | Tight rooms, dramatic views | Stretching at the edges |
A practical way to judge a wide lens is to shoot the same scene at several focal lengths from one spot. Notice how the foreground grows and the background shrinks as you widen the view. Then walk closer with a longer lens and compare. This simple exercise shows you which look you prefer, and it often reveals that a moderate wide angle gives better pictures than the most extreme option. Keep this habit in mind when you compare lenses, and look at your own photos for the focal lengths you already use most.
A Landscape Walkthrough
Wide lenses reward a methodical approach, because everything in the frame competes for attention.
- Find a strong foreground such as a rock, a path or a fence line, and place it low in the frame so it leads the eye into the scene.
- Mount the camera on a tripod and level it with the built-in level or a small bubble level. A tilted horizon is very obvious in wide views.
- Set a mid-range aperture, often around f/8 to f/11, to keep foreground and background acceptably sharp, and use a low ISO.
- Focus about one third of the way into the scene, or use the lens’s hyperfocal guidance if the maker provides it, then confirm sharpness by magnifying the live view.
- Check the corners and edges for stray objects, such as your tripod leg, a shadow or a strap, which are easy to include by accident.
- Use a two second timer or a remote release to avoid shake at slow shutter speeds.
- Bracket exposures if the sky is far brighter than the ground, so that you can blend them later.
Common Scenarios
A small room for property photos
Stand in a corner, hold the camera level at about chest height, and keep vertical lines straight. Tilting up or down makes walls lean inward, so correct the camera angle first and software second.
A night or twilight sky
A wide lens with a wide aperture collects more light and covers more sky, but check corner quality at the aperture you plan to use.
Street scenes and travel
Moderate wide angles give context without heavy stretching. Include people toward the center of the frame and let buildings frame the edges.
Group in a cramped space
Wide lenses help when you cannot step back, but keep faces away from the edges, where stretching is strongest.
Quick Troubleshooting
| Symptom | Likely cause | What to try |
|---|---|---|
| Buildings lean inward | Camera tilted upward | Level the camera, step back, or correct in software |
| Soft corners | Wide open aperture or lens design | Close the aperture by a stop or two |
| Dark corners | Vignetting | Reduce it in software, or remove thick filters |
| Faces look stretched | Subject near the edge | Move people toward the center |
| Sun creates flare or ghosts | Light striking the front element | Use the hood, shade the lens with your hand, change angle |
Mistakes to Avoid
- Pointing at a vast scene with no subject. A wide view needs a focal point, or the picture feels empty.
- Placing the horizon in the exact middle by habit. Put it a third from the top or bottom to emphasize land or sky.
- Stacking several filters. Thick filter stacks can cause vignetting on very wide lenses.
- Ignoring the lens’s closest focus distance. Many wide lenses focus close, which allows dramatic foreground detail, but only if you use it.
Glossary
- Angle of view: how much of the scene the lens sees, measured in degrees.
- Vignetting: darkening toward the corners of the frame.
- Barrel distortion: straight lines bowing outward from the center.
- Hyperfocal distance: a focus point that gives the greatest depth of field for a chosen aperture.
- Perspective: the apparent size and spacing of objects based on camera position.
- Bracketing: taking several frames at different exposures.
Care note for wide lenses: the front elements are exposed and easy to smudge. Use a blower first to lift grit, then a soft brush, and only then a clean microfiber cloth with a drop of lens cleaner, so you never drag particles across the glass. Keep the rear cap on when the lens is off the camera, and store it in a dry place with a silica gel pack if your climate is humid. A lens hood doubles as bump protection, so leave it on while carrying the lens.
Prime, Zoom or Ultra Wide: Which Design Fits Your Habits
Once you know how wide you want to go, the next question is which kind of lens delivers that view in the way you like to work. Each design has strengths, and the best choice depends less on the specifications than on how you shoot.
Wide zoom lenses
A wide zoom covers a range of focal lengths, so you can adjust the framing without moving your feet. This is valuable in interiors where you cannot step back, at landscapes where you need to include or exclude edges, and while traveling when you want one lens to do many jobs. The trade-off is size and weight, and often a smaller maximum aperture than a prime of similar width. If you shoot handheld in dim places, check the maximum aperture and whether the lens or camera has stabilization.
Wide prime lenses
A prime has a single focal length. It is usually smaller, lighter and may open to a wider aperture, which helps in low light and for astrophotography. Because you cannot zoom, you learn to move your body to frame the scene, which many people find improves their composition. Primes suit street photography, documentary work and travel when you want a small kit.
Ultra-wide lenses
Ultra-wide lenses go beyond what the eye normally takes in. They are excellent for cramped rooms, dramatic foregrounds and sweeping skies, but they demand discipline. Distortion near the edges is stronger, and every unwanted object shows. Many people find they use the widest setting less often than they expected, so consider whether you really need that extra width before paying for it.
Choosing by your sensor size
The same focal length gives different angles of view on different sensors. A smaller sensor crops the scene, so to get a view equal to a given wide lens on a full frame body, you need a shorter focal length. Look for the maker’s equivalent field of view information and compare angle of view, not just the number printed on the barrel.
- Choose a zoom if you value flexibility and often work in places where you cannot move.
- Choose a prime if you value size, aperture and a fixed way of seeing.
- Choose an ultra-wide only if your scenes truly need it and you accept the handling demands.
Perspective: Why Where You Stand Matters More Than Focal Length
Many people believe that a wide angle lens creates distortion by itself, but much of what they see comes from perspective, which depends on the camera position. When you stand close to a subject, near objects look large compared to distant ones. A wide lens simply lets you stand close and still fit the whole scene in. A longer lens would show the same relationship if you stood in the same place and cropped the image.
This idea changes how you use the lens. If you want a dramatic foreground, move close to it, within a few feet, and keep it near the bottom of the frame. If you want a calmer, more natural look, step back and use a moderate focal length, letting the scene compress slightly. When photographing people, avoid placing a face close to the lens, since noses and hands appear exaggerated. For buildings, use a viewpoint at a height that keeps verticals parallel rather than tilting up.
Keep the camera level to avoid converging verticals. If you must tilt, accept some lean and fix it afterward, or consider a lens with shift movements for professional architecture work. Even modest tilts show in wide views, so a quick level check is worth the time. A simple trick is to put the horizon or a strong horizontal line on a gridline and check the vertical lines of walls and door frames against the edges of the screen.
Finally, remember that wide does not mean everything is sharp. Depth of field depends on aperture, focus distance and sensor size, and wide lenses merely give you a head start. Focus carefully, especially when a foreground element is close, and take a test frame with magnification to confirm.
Worked Example: Shooting a Small Kitchen Without Making It Look Odd
Property photos, rental listings and home projects often need pictures of tight rooms. Suppose you are photographing a narrow kitchen with a wide zoom. Here is a careful approach that avoids the stretched, tilted look that gives wide pictures a bad reputation.
Prepare the room
Clear the counters, close drawers and turn on all lights. Remove clutter that will be exaggerated near the lens. Open blinds so natural light fills the space, and consider switching off mixed colored bulbs that clash with daylight.
Choose the position
Stand in a corner or doorway at about chest height, which keeps the lens above the counters and lets you include both walls. Keep the camera level so vertical edges stay straight. Select a focal length that includes the room without pushing the edges of cabinets into extreme stretching.
Set the camera
Use a tripod if possible, aperture around f/8 and a low ISO. Use a timer or remote to prevent shake. Focus about a third of the way into the room and check sharpness at the far end.
Check the frame
Look at the corners for distracting items such as bins, cords or reflections in glass. Check that no one appears in a reflective surface. Take a few frames at slightly different heights and angles, and compare them. Choose the one where lines look natural and the room feels open rather than distorted.
Finish carefully
Correct lens distortion in software, then check vertical lines and straighten if necessary. Avoid heavy corrections that crop too much of the picture. Keep colors honest, since misleading photos create problems for the people who use them.
Testing and Comparing Lenses Before You Commit
Without a store full of lenses to try, you can still judge a lens carefully. The goal is to understand how it renders the kinds of scenes you shoot, not to chase test chart scores. Read the maker’s published specifications for minimum focus distance, filter size, weight and construction, and look at sample pictures from the maker and independent photographers.
When you see sample pictures, check the corners at the aperture you plan to use. Look for stretched shapes at the edges, color fringes on high-contrast edges and darkening in the corners. Ask whether the pictures show the kind of subject you care about, such as interiors, night skies or street scenes. If most sample images are shot at f/8 and you will be using f/2.8, that difference matters.
If you can borrow or rent a lens for a weekend, do it. Shoot your usual subjects, then review at normal viewing size and zoomed in. Note how the lens feels: is it balanced on your camera, are the rings smooth, can you reach the controls? Check the return policy of any seller before you buy, in case the lens does not suit you. Used lenses can be a good value, but inspect the glass for scratches, haze or fungus, and test the focus and aperture mechanisms.
Finally, consider the whole system. A great lens on a body without a good level or tripod mount may not deliver. Think about filter holders, hoods, cases and the support you already own, and budget for them. A modest lens used with care beats an expensive one used carelessly.
Handling Flare, Edges and Other Wide Angle Quirks
Wide lenses see a lot, including light sources you may not notice at the time of shooting. Flare shows up as bright streaks, hazy patches or small colored shapes when light strikes the front element at an angle. It can look beautiful when you plan for it and ruinous when you do not. A hood helps in most cases, and shading the lens with your hand or a hat just outside the frame can remove the rest. When the sun is in the picture, try small changes in position, because moving a few inches can shift ghosts out of the key areas.
Edges deserve a second look as well. Because the view is so wide, a stray hand, strap or tripod leg can sneak into a corner. Check all four edges before pressing the shutter, and look at the screen magnified rather than relying on a glance. Straight lines near the edges can bow, so avoid placing a horizon or a doorframe right at the border if it matters that it stays straight. Faces at the edge of a wide frame stretch outward, so move people toward the center of the frame.
Sensor dust and smudges are easier to see at small apertures on a bright sky. If you see dark spots in the same place in several pictures, check the lens and the sensor. Clean the front element gently, and follow the camera maker’s guidance for the sensor, or have it cleaned by a professional rather than risk damage.
Quick habits for wide lenses
- Scan the edges and corners before each shot.
- Keep the hood on and the front element clean.
- Level the camera, then check the verticals.
- Take extra frames when light is changing quickly.
With these habits, a wide lens becomes a dependable tool instead of a source of surprises.
Ready to Buy? Start Here
If this guide helped you decide what to look for, these links take you to the next step.
Compare specific products
- How to Choose the Best Wide Angle Camera Lenses: A Buyer's Guide
- How to Choose the Best Ultra Wide Angle Lenses: A Buyer's Guide
- 6 Best 14mm Ultra-Wide Lenses for Mirrorless (2026)
Gear for this guide
- Wide angle camera lenses on Amazon
- Camera tripods on Amazon
- Lens filter kits on Amazon
- Lens hoods on Amazon
As an Amazon Associate we earn from qualifying purchases. Prices and availability are shown on Amazon.
FAQ
Can I use a wide angle lens for portraits?
You can for environmental portraits, but faces near the edges may look stretched. Keep people toward the middle and avoid getting too close.
Do I need a tripod?
For landscapes at small apertures or in dim light, a steady support helps. For casual daylight shots, handheld is usually fine.
Is a zoom or a prime better for interiors?
A zoom lets you fine-tune framing from a corner you cannot leave. A prime is usually lighter and may offer a wider aperture. Both work well if you keep the camera level.
Will a smaller sensor change my choice?
Yes. A smaller sensor crops the view, so you need a shorter focal length for the same angle of view. Check the maker’s equivalent field of view and decide by the actual width you see.
Do I need a polarizer on a wide lens?
It can deepen skies, but over a very wide view the effect becomes uneven, with a darker band across the sky. Use it with care, or skip it when the sky takes up a large part of the frame.
What focal length is best for landscapes on a full frame camera?
Many photographers use somewhere between about 16 and 35 millimeters, depending on how much sky and foreground they want. Wider lenses suit dramatic foregrounds, while moderate wides keep distant mountains from looking tiny. Try several focal lengths at one spot and see which suits you.
Does a wide angle lens make rooms look bigger?
It makes them look more spacious by including more of the room, but extreme width can feel misleading and stretch corners. For honest results, use a moderate wide angle, keep the camera level and avoid distortion, especially for listings where accuracy matters.
How do I stop buildings from leaning in wide photos?
Keep the camera level so vertical lines stay parallel, stand farther back or higher up, and use a longer focal length if possible. If you must tilt, correct the verticals in editing software, accepting a small loss of image area around the edges.
Can I use filters on an ultra wide lens?
Sometimes. Many have a bulging front element that rejects normal screw-in filters and needs a special holder. Thick filter stacks can also darken the corners. Check the maker’s guide for compatible filter systems before buying one.
Are wide angle lenses good for night sky photography?
Yes, particularly fast lenses with wide apertures, because they gather more light and cover more sky. Check corner sharpness and shape of stars at the aperture you plan to use, and use a sturdy tripod. Follow the maker’s guidance and keep exposures short enough to avoid star trails.
The Short Version
Choose the width that matches your scenes, not the smallest focal length on offer. Check how the lens handles distortion and filters. A zoom gives flexibility, and a prime keeps things light. Keep the camera level, add a clear foreground, and look hard at the edges of the frame before you press the shutter.