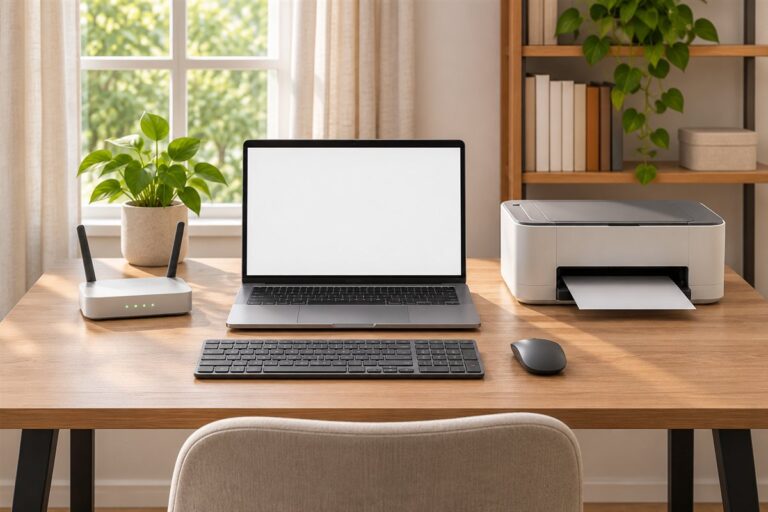
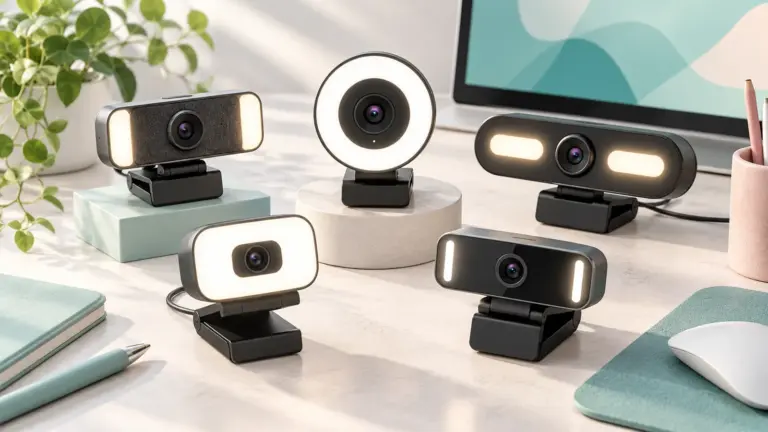
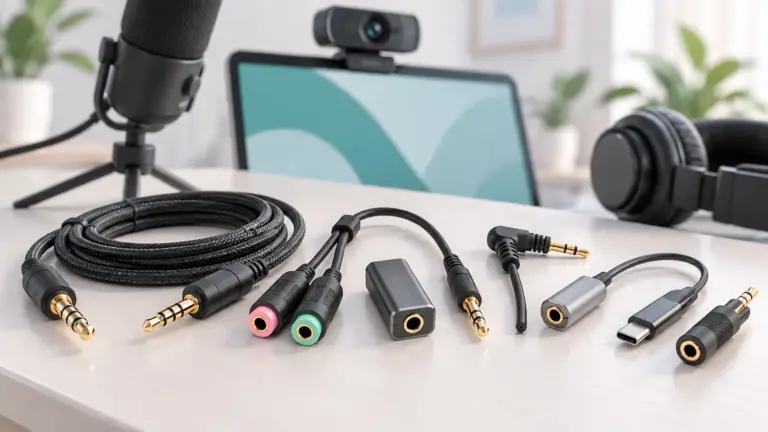
A webcam for video calls should give a clear, well-framed image in the light you actually have, and connect easily to your computer. Look at resolution, field of view, low-light handling, built-in microphone, mount and software, then match them to your room and the calls you make. Light and camera position usually matter more than any spec, so this guide also covers setup, scenarios and quick fixes.

What You Are Solving
Many laptop cameras are small and sit low, which gives an unflattering angle. An external webcam can sit on top of a monitor at eye level and often has better optics. Before you buy, think about whether you need better quality, a different angle, or both.
In this guide
Feature Table
| Feature | Why it matters | What to check |
|---|---|---|
| Resolution | Sets how sharp the picture can be | Common levels are listed by the maker; higher is not always needed for calls |
| Frame rate | Smoothness of movement | Stated frames per second |
| Field of view | Narrow for one person, wide for groups | Angle in degrees, with adjustable option if offered |
| Low-light handling | Rooms vary in brightness | Sensor size and maker’s notes |
| Focus | Sharp face and documents | Fixed or automatic focus |
| Microphone | Convenient but varies in quality | Noise handling, or plan a headset |
| Privacy cover | Blocks the lens when idle | Built-in shutter or slide |
Understanding Resolution, Frame Rate and Field of View
Resolution describes the number of pixels in the picture. Calls are usually compressed by the meeting software and shown in a small window, so a very high figure often goes unseen. Frame rate describes how many pictures are captured each second, and a higher figure looks smoother but needs more light and more bandwidth. Field of view is the width of the scene the lens sees, given in degrees. A narrow angle frames one person at a desk, while a wide angle fits a small group around a table but also shows more of the room behind you.
Your internet connection and the call software set the final quality. If a call stutters, lowering the video setting in the app often helps more than changing the camera.
Mounting and Connection
- Check that the clip fits your monitor’s thickness, or that a tripod thread is present.
- Look at the connection type and cable length. USB-A and USB-C are common.
- Confirm your computer supports it without extra drivers, or note which software is needed.
If the monitor is thin or curved, a small stand or tripod may hold the camera more steadily than a clip. A cable that is too short forces the camera to sit on the wrong side of the screen, so measure the distance to the port before you decide.
Set It Up for a Better Image
- Place the camera at or just above eye level.
- Face a light source, such as a window or a lamp behind the screen, not behind you.
- Keep the background simple and tidy.
- Open your call app settings and choose the new camera.
- Do a short trial call with a friend and adjust framing.
Worked Setup Example
The room below is invented to show the method. A desk faces a wall, with a window to the left and an overhead ceiling light.
- Mount the camera at the top center of the monitor and tilt it down slightly so the face sits in the upper half of the frame.
- Turn the desk or add a lamp so the main light reaches your face from the front or the side, not from behind.
- Close blinds partly if the window is behind you, since a bright window behind a person turns them into a silhouette.
- Choose a narrow field of view so the cluttered shelf to the right stays out of frame.
- Set exposure and focus to automatic first, then adjust only if the maker’s software offers controls and the result looks wrong.
- Record a short clip using the computer’s camera app to see how the frame looks before the next meeting.
Common Scenarios
- Working from home: a narrow view, a clip mount and good front lighting are usually enough for daily meetings.
- Teaching or presenting: a wider view and reliable focus help when you move around or show objects.
- Shared family computer: a privacy cover and simple software keep things easy for everyone.
- Small meeting room: a wide-angle camera on a stand at the end of the table fits the group, and an external microphone helps people farther back be heard.
Privacy, Software and Upkeep
Privacy and software are worth a look before you buy. Choose a model with a cover, or use a simple slide cover that does not leave residue. Check whether the maker offers a free app for adjusting brightness, zoom and framing, and make sure it runs on your system. Close apps you do not need, since several programs trying to use the camera can cause it to appear busy. Wipe the lens gently with a soft, clean cloth, since fingerprints cause a hazy picture, and keep firmware or software updated as the maker advises.
Quick Troubleshooting
| Symptom | Likely cause | What to try |
|---|---|---|
| Camera not found in the call app | Wrong camera selected or another app using it | Choose it in the app settings and close other programs that use video |
| Picture looks dark or grainy | Too little light | Add a lamp in front of you and open blinds |
| Face looks washed out | Light too strong or exposure set badly | Move the light to the side or reduce brightness |
| Picture blurry | Dirty lens or focus set wrong | Clean the lens and check the focus setting |
| Video freezes | Weak connection or busy port | Try a different port and lower the video quality in the app |
Mistakes to Avoid
- Placing the camera low. A low angle looks up at the chin and shows the ceiling, so raise the camera or the laptop to eye level.
- Sitting with a window behind you. The camera adjusts to the bright background and leaves your face dark.
- Relying on room light alone. Overhead lights cast shadows under the eyes, so add a soft light in front.
- Ignoring the background. A tidy, simple backdrop keeps attention on you and avoids sharing things you did not mean to show.
Glossary
- Field of view: how wide a scene the lens captures, in degrees.
- Frame rate: the number of pictures captured each second.
- Exposure: how bright the picture is.
- Autofocus: a lens that adjusts sharpness without help.
- White balance: the setting that makes whites look neutral under different lights.
- Bandwidth: the amount of data your connection can carry at once.
Lighting Matters More Than Megapixels
Most people who are unhappy with a webcam are really unhappy with their lighting. A sensor in a small camera collects very little light, so a dim room forces the camera to raise its gain, slow its shutter, or both. The result is grain, smeared motion, and washed-out color. Improving the light often does more for your image than moving up a price tier.
The simplest rule is to face your light source. A window in front of you, slightly off to one side, gives soft and flattering light on your face. A window behind you turns you into a silhouette, because the camera exposes for the bright background and leaves your face dark. If you cannot move your desk, close the blinds partway or add a lamp in front of you to even things out.
- Use a lamp with a diffused shade or a bulb that is not bare. Harsh bare bulbs create hard shadows under the eyes and nose.
- Pick one color temperature. Mixing a warm yellow lamp with cool daylight gives uneven skin tones that auto white balance struggles to fix.
- Keep the main light at roughly eye level or a little above. Light from below looks unnatural.
- Avoid overhead-only lighting if you can, since it casts shadows into the eye sockets.
A small desk light or a basic video light panel is often enough. Look for one with adjustable brightness and warmth so you can match the room. Check the manufacturer instructions for placement, and keep cables tidy so nobody trips over them.
Matching a Camera to the Type of Meeting
Different calls ask different things of a camera. Thinking about your typical meeting helps you avoid paying for features you will never use.
Daily team check-ins
For short stand-ups with a few colleagues, almost any decent 1080p camera is more than the call software will deliver anyway. Most conferencing apps compress video heavily, so the difference between a good and a great sensor shrinks. Reliability and a clean picture in ordinary office light matter most.
Client-facing calls and interviews
When first impressions count, a sharper picture, good low-light handling, and natural color are worth some extra spend. A camera with a slightly narrower field of view also keeps attention on you rather than on your bookshelf or a messy corner.
Teaching, training, and demonstrations
If you need to show a document, a whiteboard, or an object, a wider field of view or an adjustable one is useful. Some cameras let you tilt down or pair with a separate overhead mount. Autofocus speed matters here, because a camera that hunts back and forth while you hold up an item is distracting.

Shared meeting rooms
Rooms with several people need a wide angle, a microphone that can pick up voices across a table, and often a speaker. Single-person desk cameras usually struggle in this setting. Look at products designed for conference rooms and read what the maker says about the intended room size.
Pairing the Camera With Good Audio
People forgive a mediocre picture far more readily than bad sound. If your voice is thin, echoey, or full of keyboard noise, colleagues will tire quickly. A built-in webcam microphone sits a long way from your mouth and picks up the whole room, so it is usually a compromise.
A headset with a boom microphone, or a small USB microphone placed close to you, tends to sound clearer than any webcam microphone. Closer placement gives a stronger voice relative to background noise. If you do rely on the webcam microphone, reduce echo by adding soft surfaces to the room such as a rug, curtains, or a bookshelf with books.
Watch for these common audio problems:
- Echo, caused by hard walls and bare floors. Soft furnishings help.
- Feedback or doubled voices, caused by speakers playing into an open microphone. A headset solves this immediately.
- Keyboard clatter, since a webcam microphone sits near your hands. A separate microphone or noise suppression in the call app can help.
- Low volume, often a software input level that is set too low in the system sound settings.
How to Test a Camera Before an Important Call
Do not discover problems with a camera five minutes before a meeting. Run a short test the day before, and repeat it whenever you change something in the room.
First, open the camera preview in your operating system or in your call app, and sit in your normal position. Look at framing: your eyes should sit about a third of the way down from the top of the frame, with a little space above your head. Next, check the background for anything you would rather not share, like personal papers or a screen with sensitive information.
Then record a short clip, or use the app test-call feature if it has one, and play it back with the sound on. Listen for echo and background hum. Look at skin tone, which should look natural rather than orange or gray. Move your hand in front of the lens to see how fast the camera adjusts exposure, and see whether the picture flickers. Flicker under artificial light sometimes points to a refresh-rate setting that you can change in the camera software, usually between 50 Hz and 60 Hz depending on your region.
Finally, confirm that the correct camera and microphone are selected in the call app. Laptops with a built-in camera often default to it even when an external one is plugged in.
Budget Tiers and What They Usually Mean
Exact prices change often and vary by region, so treat these as general expectations rather than quotes. Always check current specifications on the product page before buying.
- Entry level cameras usually offer 720p or 1080p, a fixed focus or simple autofocus, and a basic microphone. They are fine for casual calls in a well lit room.
- Mid range cameras typically add better low-light behavior, faster autofocus, a wider range of software controls, and sometimes a privacy shutter. This is where most home office users find the best balance.
- Premium cameras may add larger sensors, higher resolution, optical features, built-in framing or tracking, and stronger build quality. They help most for people who are on camera many hours a week or who create content.
Spending more cannot fix a dark room, a poor network connection, or a noisy microphone, so address those first. A modest camera in good light with a clear headset often beats an expensive camera in a dim room.
Network and Computer Factors
Even a good camera looks bad if your connection or computer cannot keep up. If your picture is blocky or freezes, check your upload speed and consider a wired network connection instead of Wi-Fi. Close heavy applications and extra browser tabs, since video encoding uses processor power. Some cameras compress video themselves, which lowers the load on your computer but can limit quality, so check how the model handles this if you have an older machine.
Ready to Buy? Start Here
If this guide helped you decide what to look for, these products are a place to start.
As an Amazon Associate we earn from qualifying purchases. Prices and availability are shown on Amazon.
Your Room Matters As Much As the Camera
A good webcam in a poor setup still looks poor. Before spending more, improve the things around the lens, because lighting and position change the picture more than most specifications do.
- Place a light source in front of you, such as a window or lamp, instead of behind you.
- Raise the camera to eye level so you look straight at it.
- Keep the background tidy and free of bright spots.
- Clean the lens gently with a soft cloth.
- Check the call software settings, since they often cap the video quality.
Once the room is sorted, you will know whether you truly need a higher resolution camera or simply a better lamp.
A Quick Decision Guide
| Situation | Feature to favor |
|---|---|
| Dim home office | Good low light handling and a desk lamp |
| Shared desk or travel | Compact body and a privacy shutter |
| Wide group on camera | Wider field of view |
| Frequent presenting | Reliable focus and a stable mount |
| Laptop already adequate | Maybe no new camera is needed |
Check that the model works with your computer and call software, and read the maker’s notes about drivers and supported systems before you commit.
Privacy and Positioning Habits
A webcam sits in a personal space, so a few habits protect your privacy and make calls smoother.
- Use a physical cover or shutter when the camera is not in use.
- Check which app is allowed to use the camera in your system settings.
- Look at your own live view before joining a meeting to confirm what others will see.
- Tilt the camera slightly down or up until your face sits in the upper middle of the frame.
- Unplug or disable the camera if you do not need it for a while.
Audit Your Calls Before You Audit Cameras
A webcam is not really a camera purchase. It is a purchase about how you appear in a handful of recurring situations, and those situations differ far more than camera models do. Before comparing anything, spend a few days noticing your actual calls. Write down the types: quick team check-ins where nobody studies faces closely, client or interview calls where first impressions carry weight, teaching or demonstration sessions where the camera may need to show your hands or a desk, and family calls where the requirement is simply warmth and ease. Note also the time of day of your most important calls, because a camera that flatters you at noon may struggle in the lamplight of an evening call, and it is the important calls that should drive the choice.
Then look honestly at the room those calls happen in. Where is the window relative to your chair? What sits behind you? How far is the screen from your face, and is the laptop usually on the desk or raised? These unglamorous facts decide more of the final picture than any specification. Buyers who skip this audit tend to purchase resolution they cannot use and then discover that the real problems were a window behind them and a camera perched far too low. Buyers who do the audit often find that a modest camera, a moved chair and a lamp repositioned outperform a premium camera dropped into the same bad setup. The audit costs nothing and it tells you which problems a camera can solve and which ones only furniture can.
Write down your one hard requirement
From the audit, pick the single requirement that is not negotiable. For one person it is being clearly seen in a dim room for evening calls with family overseas. For another it is a wide enough view to demonstrate products on a desk. For a third it is a mount that fits an unusual screen or a shelf above it. Naming one hard requirement keeps the search short, because most cameras will fail or pass on that point alone, and everything else becomes a matter of preference rather than agonising comparison.
A Decision Checklist for the Shortlist Stage
With the audit done, judge any shortlist in a fixed order so that marketing order does not decide for you. First, fit: does the mount suit your screen, tripod or shelf, and does the cable reach the computer without strain? A camera that cannot sit at roughly eye level in your room is out, whatever its other virtues. Second, view: is the field of view right for your distance and your background, wide enough to feel natural but not so wide it broadcasts the whole room? Third, behaviour in your light: how does it handle your actual morning and evening conditions, including the mixed light most homes have? Fourth, the everyday extras: a privacy shutter you will actually use, a microphone that is acceptable for your call types, and controls simple enough that you are not adjusting settings mid-meeting.
- Test fit first: mount, cable reach and eye-level placement in your real room.
- Match the view to your seating distance, not to the largest number on the box.
- Judge the picture under your worst regular lighting, not your best.
- Decide whether audio is this camera’s job or a headset’s job, and do not pay twice.
- Prefer controls you can reach and understand over long feature lists.
Notice what is missing from the front of this list: headline resolution. It belongs in the decision, but after fit, view and light behaviour, because call software compresses the picture anyway and your callers see the compressed result. A camera that wins on the first four checks and is merely adequate on resolution will make you look better, in the calls that matter, than a resolution champion that sits too low, shows too much room and turns your face orange at dusk.
Three Worked Examples From Real Rooms
Example one: the dim spare room
A worker takes client calls from a spare room lit by one ceiling light, mostly in the late afternoon. The audit says the hard requirement is a clear, steady face in weak light. The winning changes are boring and effective: a modest camera known for calm low-light behaviour, a small lamp moved to beside the screen so light falls on the face rather than from above, and the chair turned slightly so the darkest corner is no longer the background. No setting inside the call app could have produced the same improvement, because the problem was never the app. It was photons and angles, and they are fixed with furniture and placement.
Example two: the bright window office
Another worker sits facing a large window and loves the daylight, but callers see a silhouette. Here the hard requirement is handling strong light from the front and changing light through the day. The fix begins with the camera’s exposure behaviour and a slight repositioning so the window is to the side rather than directly ahead, keeping the daylight benefit without the contrast problem. A blind half-drawn on the brightest mornings finishes the job. The lesson repeats: the camera choice matters, but it is chosen to suit a specific light problem identified in advance, not bought in hope.
Example three: the shared family desk
A parent and a teenager share one desk and one computer for calls, classes and family video chats. The hard requirement is flexibility: quick height adjustment, a view wide enough for two people on family calls, and a privacy shutter everyone remembers to close. Here the mount and the shutter outrank everything else, and the family agrees one simple rule: camera centred, shutter closed when done. A fancier camera with a fiddly mount would serve this household worse. Shared setups succeed on habits and hardware that several people can operate without thinking.
The First-Week Test Routine
When the camera arrives, test it before the call that matters. Begin with a practice call to a friend, a colleague or a second account of your own, and look at what the other side actually receives rather than only your preview window. Check three moments: your normal daytime light, your evening light, and the exact setup of your most important recurring call. Record short clips if your software allows, because reviewing calmly afterwards reveals framing and background issues that are easy to miss while talking. Note the distance and height that work, and mark the spot with a small piece of tape on the desk or shelf so the good setup is repeatable rather than rediscovered weekly.
During that first week, also test the unglamorous behaviours. Does the camera get selected automatically by each app you use, or does one program keep choosing the laptop camera? Does the picture stay steady when you gesture, lean or hold something up? Does the microphone, if you rely on it, pick up the keyboard more than your voice? Each of these is a five-minute check now and a five-alarm annoyance if first discovered live in front of a client. Keep the packaging until the week ends. A camera that passes your real rooms and real apps has earned its place; one that only impressed in the first five minutes has not.
A Simple Routine for Looking Consistently Good
Good video is mostly a routine, not a purchase. Build a two-minute pre-call habit: lens wiped with a soft cloth, because a fingerprint haze softens the picture more than modest resolution ever will; lamp on and positioned before the call starts; background given a quick glance for the laundry pile, the open cupboard or the family member who does not wish to appear; camera confirmed at the marked position; and a glance at your own preview to check framing before others join. None of this requires talent. It requires doing the same small things in the same order until they are automatic.
Extend the routine monthly. Clean the mount and check the cable for damage where it bends. Revisit your settings after any major software update, because updates occasionally reset camera choices or defaults. If your room changes with the seasons, and most do, repeat the evening test when the clocks change or the sun moves, since the window that was kind in spring can be brutal in autumn. People who look consistently professional on calls are rarely the people with the most expensive cameras. They are the people whose small routine absorbs the changes, so their callers see the same calm, clear picture in every month of the year.
Working Calmly With Call Software Settings
Every call program offers its own small cupboard of camera settings, and the cupboard is worth opening once, deliberately, rather than during a live meeting. On a quiet afternoon, go through your main program and find four things: where the camera is chosen, so you can rescue yourself when the program selects the laptop camera instead; where your own preview can be shown or hidden, since some people concentrate better without watching themselves; any option that mirrors your picture, remembering that mirroring affects only your view and not what others see; and any background or appearance features, which you should test privately before trusting publicly, because a background that swallows your ears or flickers at the edges looks worse than an honest bookshelf.
Then make the settings boring. Choose the configuration that flatters your real room with the least intervention, save a note of what you changed and where, and leave the cupboard closed. The professionals of video calls are not constantly adjusting; they adjusted once, in private, with time to judge, and their in-call attention goes to the conversation. If you use several programs, repeat the exercise in each, because they choose cameras and defaults independently, and the program you open once a month for a particular client is precisely the one that will choose the wrong camera if you let it improvise.
Calls in Shared and Sensitive Spaces
Many people take calls where life continues around them: shared flats, family kitchens, open offices. A webcam decision that ignores this reality fails socially even when it succeeds technically. Choose the camera position and view together with the people who share the space, agreeing which corner is the call corner and what the camera can see from it. A narrower view, aimed at a wall or a bookcase, protects housemates and family from becoming unwilling background performers, and a simple household signal, headphones on means a call is live, prevents most accidents. In shared offices, the same courtesy extends to colleagues: position the camera so its view is your desk and the wall behind you, not the walkway and everyone else’s screens.
Sensitive calls deserve one extra habit: a ten-second room check before joining. What is on the desk, what is on the wall behind you, who might enter, and is anything visible that belongs to someone else’s privacy rather than yours? Documents, post, other people’s photographs and screens are the usual culprits. The check costs nothing and becomes automatic within a fortnight. Combined with the privacy shutter habit from the wider guide, it gives you a setup that is not merely good-looking but trustworthy, and trustworthiness, for client work, teaching and interviews, is the quality callers remember long after they forget your resolution.
Accessibility and Confidence: Being Seen and Heard Comfortably
Video calls ask more of some people than others, and a thoughtful setup quietly levels that. If you wear glasses, the camera’s position and the light’s angle decide whether your eyes are visible or hidden behind reflections; a lamp placed to the side rather than in front of the screen, and a camera slightly above the screen angled down, usually restores your eyes to the conversation, which matters more to trust than any other detail of the picture. If you rely on seeing other people’s faces clearly, arrange the call window on the same screen as the camera, large enough to read expressions without leaning in, and say so to regular callers, who will happily keep their own cameras on when they know it helps. If speaking on camera makes you anxious, the routine in this guide is your ally: a tested position, a marked spot, a preview checked in private, and the knowledge that nothing about the setup will surprise you today.
Confidence also has a technical side worth stating plainly. Join important calls a few minutes early, alone, and use the waiting time as your ancestors used a mirror in the hall: one glance, one adjustment, then forget yourself entirely and attend to the other people. Turn off your own preview during the call if your software allows it and you find yourself performing for it. The camera’s job is to make you present to others, not to make you an audience of yourself. People who look natural on calls are rarely thinking about the camera at all, and reaching that state is a design goal for the whole setup: the right height, the kind light, the settled background, the shutter closed afterwards. Choose and arrange everything so that, during the call itself, there is nothing left to think about except the conversation. That is the real product a good webcam purchase buys, and it is available at almost every price when the room and the routine are chosen with the care this guide describes.
If You Only Remember Three Things
First, the room beats the camera. Light on your face, a camera near eye level and a background you have actually looked at will improve your calls more than any model upgrade, and they cost nothing but ten minutes of moving furniture. Test your worst regular lighting, not your best, because that is the picture your most important callers may well see. Second, fit beats specification. A camera that mounts where it should, reaches the computer without strain and shows a view matched to your seating distance will serve you daily, while a technically superior camera in the wrong place serves you never. Judge the shortlist in that order and the right choice usually becomes obvious without a spreadsheet.
Third, routine beats rescue. The marked position, the wiped lens, the lamp switched on before the call, the shutter closed after it: these small habits, repeated, are what other people experience as your professionalism. Set the software cupboard once, in private, and then leave it closed. Buy the camera that your audit asks for, install it with the first-week tests, and then think about it as little as possible. A webcam has done its job perfectly when you forget it exists and simply have conversations, looking like yourself on a good day, in every month and every light the year provides.
FAQ
Do I need the highest resolution?
Not usually. Call apps often compress video, so good lighting and framing have a bigger effect than extra pixels. A modest level used well looks better than a high one in a dim room.
Is the built-in microphone enough?
For casual calls it can be. For frequent meetings, a headset or separate microphone tends to sound clearer, because it sits closer to your voice and captures less room noise.
Should I use my laptop camera or an external one?
A laptop camera is fine if the angle and light are good. An external camera helps when you want eye-level framing or a different field of view.
Why does the picture look different in each call app?
Each app applies its own compression and settings. Check the video options inside the app and compare them with the maker’s software.
How do I handle privacy?
Use a cover when the camera is idle, unplug it when not needed, and check which apps have permission to use the camera in your system settings.
Why does my webcam look grainy in the evening?
Grain usually means the camera is raising its gain because the room is dim. Add a diffused lamp in front of you, avoid relying on overhead light alone, and close the screen brightness gap. More light on your face lowers noise far better than any software setting can.
What is the best height to place a webcam?
Place the lens at about eye level, or just slightly above. A camera that sits low looks up your chin and makes the picture unflattering. If your laptop is low, raise it on a stand or use an external camera on top of a monitor.
Can I use my phone as a webcam?
Many phones can work as webcams through apps or built-in features from the phone maker, and their cameras are often good. You will need a stable mount, power so the battery lasts, and a reliable connection. Check the instructions from the phone and app makers.
How do I stop my webcam from flickering?
Flicker often comes from a mismatch between the camera exposure and the frequency of artificial lights. Try switching the anti-flicker or power frequency setting between 50 Hz and 60 Hz in the camera software, or change to a different bulb type.
Do I need a privacy cover on my webcam?
A cover is a simple, low-cost way to be sure the lens is blocked when you are not on a call. It is optional, but many people like it. Some cameras include a built-in shutter, which avoids adding stickers or sliding covers later.
Should I choose a camera with a built-in shutter or add a cover later?
A built-in shutter is the tidier solution because it cannot fall off, get lost or leave adhesive residue, and closing it becomes a one-finger habit. A separate cover works too and lets you add privacy to a camera you already own. Either is fine; what matters is choosing the option you will genuinely use every day, because a privacy feature that stays open out of laziness protects nothing.
Why does my camera keep zooming or refocusing during calls?
Automatic focus and framing features react to movement, gestures and sometimes to other people or objects entering the view. If the behaviour distracts, check the camera or app settings for options to calm or disable the automatic framing, move busy backgrounds out of view, and sit at a steady distance. A fixed, well-chosen frame often looks more professional than a camera that is constantly making decisions on your behalf.
Where should the camera go if I use two monitors?
Place it on the monitor you face during calls, centred as close to eye level as you can manage, and make that screen the one showing the call window. Looking at a side monitor while the camera sits on the other makes you appear to gaze away from the conversation. If calls are frequent, dedicating one screen position for the call app is a small change that callers notice immediately as better eye contact.
Do I need a separate light for video calls?
Only if your room cannot give your face soft, front-facing light from what it already has. Many people solve the problem by moving an existing lamp or turning their chair toward a window. A dedicated light earns its place when calls happen in the evening, in interior rooms or on a schedule that daylight cannot serve. Decide after testing your actual call times, not before.
Can I use the same webcam with a laptop and a desktop?
Yes. An external camera connects by cable and can move between machines, which is one of its advantages over a built-in camera. The settings and app defaults may need choosing once on each computer, and a small tripod or a mount that transfers easily makes the swapping painless. Families and shared desks often keep one good camera for several machines in exactly this way.
How long should a webcam last?
A webcam has few moving parts and can serve for many years; mounts, cables and changing computer ports usually end its career before the camera itself does. Treat it gently, keep the lens clean, avoid straining the cable at its ends, and it will likely outlast the computer it was bought for. When you replace a machine, test the camera on the new one before assuming you need a new camera too, because most cameras move between computers without any ceremony at all.
The Short Version
Choose a webcam by field of view, low-light behavior, mount and connection, and keep expectations realistic about the microphone. Good light and a camera at eye level matter most, so set those up first.