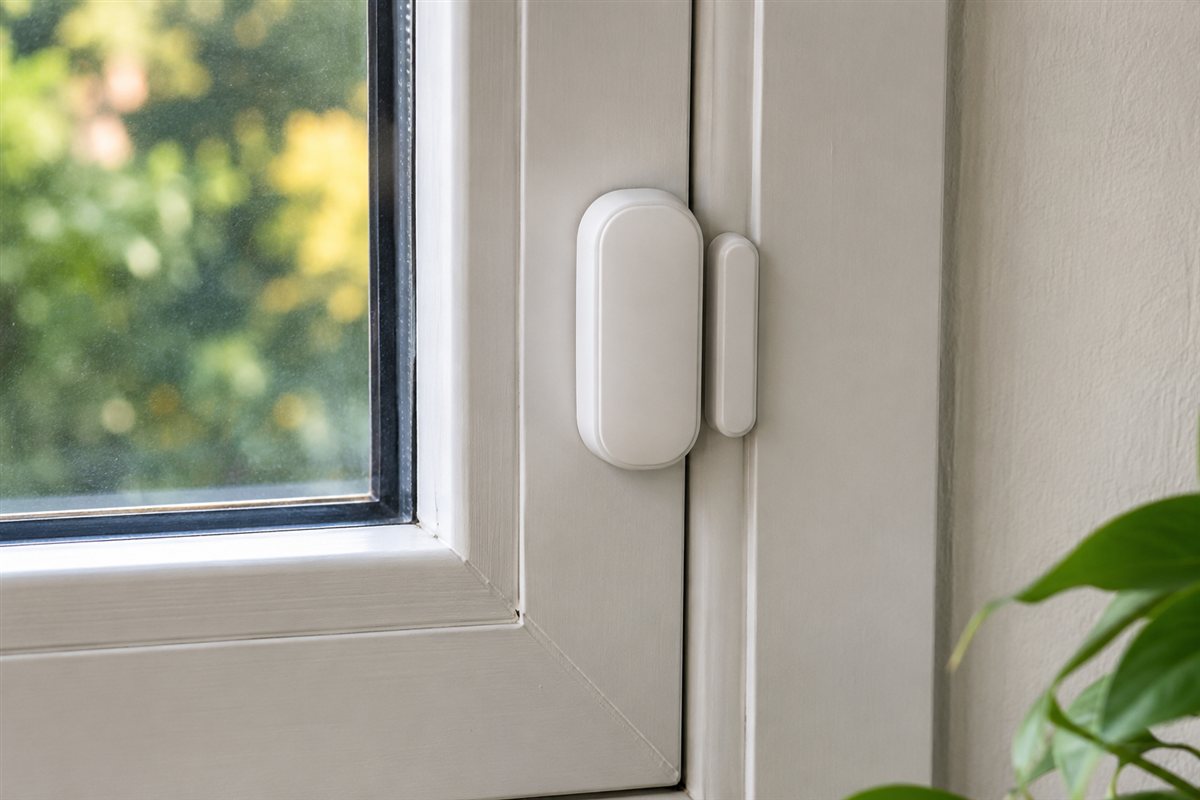
Window sensors are small devices that detect when a window opens, and some also react to vibration or glass movement. They usually pair with a hub, a panel, or a phone app. Because the designs vary so much, the best approach is to compare how each type detects, connects, and reports.
We have not used these products ourselves, so this guide makes no claims about results and describes features only. It shows how to read a listing: which sensor styles exist, what connectivity options mean, and which practical details, like adhesive and battery access, are worth confirming before you buy.
As an Amazon Associate we earn from qualifying purchases. Links on this site are affiliate links, and they do not change the information we give.
In this guide
Quick Picks
| Pick | Product | Best For |
|---|---|---|
| 1 | Ring Alarm Contact Sensor (2nd Gen) | Best for Ring Alarm owners |
| 2 | SimpliSafe Entry Sensor (Pack of 4) | Best for SimpliSafe systems |
| 3 | Aqara Door and Window Sensor (MCCGQ11LM) | Best for smart-home automation |
| 4 | YoLink LoRa Smart Door & Window Sensor (3-Pack) | Best for long range |
| 5 | GE Personal Security Window and Door Alarm (45115, 2-Pack) | Best standalone, no hub needed |
Our Picks

1. Ring Alarm Contact Sensor (2nd Gen) — Best for Ring Alarm owners
This two-part magnetic contact sensor is the standard add-on for Ring Alarm and Ring Alarm Pro kits. It connects to the Ring base station over Z-Wave, with a stated open-air range of 250 feet, so it suits homes where windows sit far from the panel. The sensor runs on two CR2032 coin cells, and Ring rates the battery life at approximately three years, which keeps upkeep low across a whole house of windows. The housing measures 1.56 by 2.09 by 0.55 inches, and the two parts can sit up to 1 inch apart, a forgiving gap for older frames that are not perfectly flush. Mounting is by adhesive or screws, and alerts arrive through the Ring app, although Ring notes that a subscription is required for in-app features and digital notifications. If you already own a Ring Alarm kit and want window coverage that reports into the same app and monitoring plan, this is the natural pick. Check that your base station is the Ring Alarm model before ordering spares.
View Ring Alarm Contact Sensor (2nd Gen) on Amazon
2. SimpliSafe Entry Sensor (Pack of 4) — Best for SimpliSafe systems
SimpliSafe sells its entry sensor in a pack of four (model ENS304), which makes it a practical way to cover the main windows of a flat or small house in one purchase. The sensor is a slim magnetic contact design made to blend into the background on doors, windows and even cabinets, and it works only with a SimpliSafe home security system, so it is an expansion part rather than a standalone alarm. SimpliSafe describes a feature called Secret Alerts, which lets a sensor notify you quietly when a private area, such as a medicine cabinet or a home office door, is opened without sounding the siren. Installation is adhesive-based and tool-free, and the sensor reports through the base station to the app like the rest of the system. For households already running SimpliSafe who want to add window coverage in bulk, this four-pack is the straightforward route; if you do not own the SimpliSafe base station, look at the standalone or hub-based options elsewhere in this list instead.
View SimpliSafe Entry Sensor (Pack of 4) on Amazon

3. Aqara Door and Window Sensor (MCCGQ11LM) — Best for smart-home automation
Aqara’s contact sensor (model MCCGQ11LM) is a very small Zigbee two-part sensor: the main body measures about 1.61 by 0.87 by 0.43 inches, with a magnet roughly 0.79 by 0.39 by 0.39 inches, so it nearly disappears on a white window frame. It detects a gap of up to 22 mm between the parts and runs on a single CR1632 lithium cell. The catch, stated clearly by Aqara, is that an Aqara Hub is required and hubs from other brands are not supported, so this pick is for people building on the Aqara ecosystem. Once paired, it works with Apple HomeKit, Alexa and IFTTT, which makes it useful for automations as well as security: a window opening can trigger lights, a fan shutdown or a phone notification. Adhesive mounting keeps installation simple on flat frames. If your goal is a window sensor that doubles as an automation trigger inside a HomeKit or Aqara setup, this compact sensor is the one to look at; if you have no hub at all, the GE standalone alarm below needs nothing extra.
View Aqara Door and Window Sensor on Amazon
4. YoLink LoRa Smart Door & Window Sensor (3-Pack) — Best for long range
YoLink takes a different approach from Wi-Fi and Zigbee sensors: its door and window sensor (model YS7704-UC) uses LoRa radio, which YoLink rates at up to a quarter mile of open-air range. That makes it a strong fit for windows in outbuildings, garages, sheds or long houses where a hub signal would struggle to reach. YoSmart rates the battery life at up to five years, and the sensor supports a door left-open reminder, so you get a nudge if a window is left ajar rather than only an open or close event. Alerts can reach you by app push, email or SMS, and the system works with Alexa, IFTTT and Home Assistant. A YoLink Hub is required and sold separately, and this listing is a three-pack, which covers several windows at once. The sensors arrive with mounting tape pre-applied, so fitting is a peel-and-press job on clean frames. Choose this one when distance between the window and the hub is the main problem you need to solve.
View YoLink LoRa Smart Door & Window Sensor (3-Pack) on Amazon
5. GE Personal Security Window and Door Alarm (45115, 2-Pack) — Best standalone, no hub needed
Not every window sensor needs an app. This GE alarm (model 45115, made by Jasco) is a self-contained magnetic contact alarm: when the two parts separate, the unit itself sounds, with no hub, panel, Wi-Fi or subscription involved. A mode switch on the unit selects Off, Chime or Alarm, so the same device can give a gentle entry chime on a back window during the day and a full alarm response at night. It is sold as a two-pack, runs on replaceable button-cell batteries, and mounts with adhesive, which makes it a quick fit for rented flats, dorm rooms and garages where a full security system is not an option. The trade-offs match the guide above: there are no phone alerts, and someone has to be within earshot for the alarm to help. Within those limits, it is the simplest and cheapest style of window protection in this list, and a sensible choice for a first layer of security or for windows you only need to hear about locally.
View GE Personal Security Window and Door Alarm on Amazon
What to Look For
| Factor | Why it matters | What to check |
|---|---|---|
| Sensor type | Contact and vibration styles react to different events. | Magnetic contact, vibration, or combined designs. |
| Connectivity | Decides what the sensor pairs with. | Wi-Fi, Zigbee, Z-Wave, or a proprietary hub requirement. |
| Battery | Frequent changes become a chore. | Battery type, maker’s stated life, and low-battery alerts. |
| Size and look | It sits on a visible frame. | Dimensions, color options, and gap tolerance between parts. |
| Mounting | A weak bond causes false alerts. | Adhesive strip or screws, and the surface type suited to it. |
| Alerts | Notifications should reach you reliably. | Push alerts, siren option, and whether a subscription is needed. |
Setup and Care Tips
- Clean the mounting surface with the wipe or cloth the maker recommends before applying adhesive.
- Line the two parts up within the gap range listed in the instructions.
- Name each sensor by room in the app so alerts are easy to read.
- Note the battery type and keep a few spares on hand.
- Check each sensor from time to time and replace any that lose their hold.
Mistakes to Avoid
- Buying sensors that need a hub you do not own.
- Overlooking subscription fees tied to alerts or video features.
- Placing parts across a gap that exceeds the maker’s limit.
- Mounting on a dusty or textured surface.
- Assuming a sensor on one window covers neighboring windows.
How do you choose window security sensors for your home?
Choose window security sensors by deciding first which system they must work with, then checking connectivity, power and mounting. A sensor that does not pair with your hub or panel is of no use, however well it is made.
Begin with what you already own. If you have a security system or a smart-home hub, the sensor must support its radio and its app. If you have nothing yet, you can pick a kit or a standalone alarm and build from there.
Then count the windows. Ground-floor windows, those facing the back or side of the house and any that are hidden from the street usually matter most. Think about whether upper windows reachable from a roof or balcony also need coverage.
Next, consider how you want to be told.
- Phone alerts: need a hub or Wi-Fi link and an app.
- Local siren or chime: works with a panel or a standalone unit.
- Automations: need a smart-home platform that supports the sensor.
Finally, check the practical details such as battery type, size, mounting method and any subscription tied to alerts. Write down the answers for each window before you compare products, and the right type will usually be clear.
Hub-based or standalone: which window sensor type suits you?
A hub-based window sensor suits people who want phone alerts and wider home control, and a standalone alarm suits people who want a simple, local sound with no setup. The right type depends on how much system you want to manage.
Hub-based sensors report to a base station or hub, which then connects to an app. They can trigger sirens, notifications and sometimes other devices. The trade-off is that you need compatible hardware, and some brands tie certain features to a subscription. Always confirm which hub or panel a sensor requires.
Standalone sensors make a noise at the window itself. They are quick to fit, need no network and are well suited to rentals, dorm rooms, sheds and garages. The limit is that nobody is alerted unless they are within earshot, so they are a weaker choice if you are away from home often.
Different radios also behave differently. Some are designed for long range, and others for low power or for tight integration with a particular ecosystem. Check the listing for the radio type and the maker’s range notes, and remember that walls and distance can affect range in any home.
- Pick hub-based if you want notifications while you are out.
- Pick standalone if you want a simple local alarm.
- Mix both if you want a basic layer at some windows and smart alerts at others.
Where should you place window security sensors?
Place the larger part of a contact sensor on the fixed frame and the magnet on the moving sash, with the two parts lined up and within the gap the maker allows. Correct placement is the difference between a reliable alert and false alarms.
Clean the surface first with the wipe or cloth the maker suggests, and let it dry. Adhesive struggles on dust, oil and rough textures. If the frame is textured, a screw mount, where offered, may hold better.
Think about which part of the window opens. On a sliding window, mount the sensor on the track side so the magnet moves with the sash. On a double-hung window, decide which sash is most likely to be opened and cover that one. If both can open, consider a sensor for each.
- Keep the parts aligned along the arrows or marks on the housing.
- Test by opening the window slightly, as the maker’s instructions describe.
- Name each sensor by room in the app so alerts make sense.
Avoid placing sensors where they are easy to reach and peel off from the outside, and avoid spots that get very hot or wet unless the maker says it is suitable. Check each one after fitting, and again after the first change of season.
How do you maintain window security sensors over time?
Maintain window security sensors by checking them on a regular schedule, replacing batteries when the system warns you and re-seating any part that loses its hold. A sensor that nobody checks can fail without a sign.
Start with batteries. Note the type of cell each sensor uses, since models differ, and keep a small stock of spares. Most systems send a low-battery alert, so make sure notifications are switched on. If the sensor has no app, open the window slightly on a set day each season and listen for the chime or alarm.
Next, look at the mounting. Adhesive can soften in heat or lose grip on a dusty frame. If a part feels loose, clean the surface, let it dry and fit a fresh strip as the maker advises. Windows that are opened and closed often put more strain on the bond.
- Wipe the housings with a dry or slightly damp cloth, not harsh cleaners.
- Check that the gap between the parts has not grown as the window or frame shifts.
- Test each sensor after painting, cleaning or replacing a window.
Finally, keep your records up to date. If you rename a room or move a sensor, change its name in the app so the alert still makes sense when it arrives. Replace any sensor that shows cracks, a failing battery door or repeated false alerts after you have checked placement.
Which window security sensor should you buy?
The right window security sensor is the one that fits the system you already use or the way you want to be alerted. Use these matches for the sensors covered above.
- If you own a Ring Alarm kit, choose the Ring Alarm Contact Sensor (2nd Gen). Check the listing for subscription notes on app features.
- If you run SimpliSafe and want to cover several windows in one purchase, go for the SimpliSafe Entry Sensor (Pack of 4).
- If you are building automations around an Aqara setup or HomeKit, look at the Aqara Door and Window Sensor and remember it needs an Aqara hub.
- If the windows are far from the hub, such as in a garage, shed or long house, consider the YoLink LoRa Smart Door & Window Sensor (3-Pack), which also needs its own hub.
- If you want a simple alarm with no hub, app or subscription, choose the GE Personal Security Window and Door Alarm.
If you are starting from scratch, the question is whether you want phone alerts. If yes, pick a system first and buy sensors that match it. If no, a standalone alarm is the lower-effort path.
Avoid mixing sensors that need different hubs unless you are happy to manage more than one app. One ecosystem is usually easier to live with.
What to check before you buy window sensors
Before you buy, confirm compatibility, hub requirements, battery type, gap range, mounting method and subscription terms. Most disappointments come from one of these being missed.
- Compatibility: does the sensor work with your hub, panel or smart-home platform, and which version?
- Hub included or not: some listings need a separate hub, sold apart.
- Pack size: count how many windows you need to cover, and see how many sensors are in the pack.
- Battery: check the type, the maker’s stated life and whether it is easy to replace.
- Gap tolerance: compare it with the gap between your sash and frame.
- Size and color: see how visible it will be on your frame.
- Mounting: adhesive, screws or both, and whether the surface suits it.
- Alerts and fees: check which features need a paid plan.
- Warranty and returns: read the terms on the listing, since they vary by seller.
It is also worth thinking about what happens if your internet goes down. Some systems keep a local siren working, and others rely on the network for alerts. Read the connectivity details to see how each behaves.
Keep a few spare batteries and mounting strips, so replacements are quick when the time comes.
Are window sensors enough, and who should skip them?
Window sensors are a useful early warning but not a complete security plan, and they are best used with door sensors, lighting and good locks. Be realistic about what a small contact device can and cannot do.
A contact sensor only knows when its two parts separate. It does not detect a pane being broken while the sash stays closed. If glass breakage worries you, look at vibration or glass-break detection and read how the maker describes sensitivity. Combined designs can cover more cases, though they may trigger extra alerts in wind or heavy traffic.
Paying more can be worth it for better range, longer battery life, a smaller look or tighter integration with the system you use. It is not worth it for features you will never switch on.
The downsides are modest but real: batteries need replacing, adhesive can fail, some systems charge for alerts, and each sensor covers only one opening.
You might skip window sensors if:
- You already have a system that covers windows in another way, such as glass-break detection.
- Your windows are fixed and do not open.
- You are unwilling to manage batteries or an app.
If those do not apply, compare the picks above, check the current listing for hub needs and what is included, then choose the sensor that fits your system and your windows.
A Practical Decision Workflow Before You Buy
Most disappointing purchases in this category do not happen because the product itself is poor. They happen because the buyer skipped a short round of honest homework and ordered on a single headline feature. A window security sensor has to fit a specific space, a specific routine and a specific set of habits, and those three things differ far more between households than any specification sheet suggests. The workflow below takes about fifteen minutes, needs nothing more than a tape measure, a notebook and your phone, and it will narrow the picks in this guide down to one or two clear candidates.
Start with the space, not the product. Measure the area where the window sensor will live or be used, and write down the fixed obstacles as well: doors that swing through the space, sockets that are already spoken for, furniture that cannot move, and anything that generates heat, moisture or dust nearby. Photograph the space from two angles. It sounds excessive, but a photograph taken now will answer questions later that memory will not, especially once you are comparing dimensions on a product page late in the evening.
Next, write down the job in one sentence. Not a wish list, just the main job: what should be different the week after this arrives? Keep that sentence visible while you shop. Every feature you consider after that has to earn its place by serving that sentence. Features that do not serve it are not bargains; they are future clutter, extra cleaning, or settings you will scroll past for years without touching.
Then list your constraints honestly. Budget is only one of them. Time is another: how many minutes a week will you genuinely give to cleaning, charging, adjusting or maintaining this purchase? Storage is a third: where does it, and everything that comes with it, go when it is not in use? Noise tolerance, the patience of other people in the household, and any physical limits such as lifting weight or reaching height all belong on the same short list.
Only now open the product pages, and read them in a fixed order. First the dimensions and requirements, because a mismatch there ends the discussion. Second the controls and the everyday operating steps, because those are what you will live with daily. Third the care requirements, because they decide whether the product still pleases you in month six. Marketing language comes last, if at all. When two picks look identical, the one whose everyday steps are simpler almost always wins in real life.
Finally, do a short reality check against the picks above. The option labelled as the best overall choice earns that label by balancing the most common needs, which makes it the sensible default if your written job sentence sounds ordinary. The more specialised picks earn their place when your constraints list contains something unusual: a very small space, a very heavy workload, a strict noise limit, or a user with specific physical needs. If none of your constraints are unusual, resist paying extra for specialisation you will never call on.
Use Cases in Detail: Matching the Pick to the Situation
Abstract advice only goes so far, so it helps to walk through the situations buyers describe most often and see how the decision changes in each one. Read the scenarios below and find the one closest to your own household; the right choice usually becomes obvious once the situation is stated plainly.
A ground-floor window you open often
In this situation the priority is reliability under daily repetition. The window sensor will be used when people are tired, rushed or distracted, so controls need to be forgiving and the basic setup needs to stay put without constant adjustment. Choose the pick whose everyday operation is described most simply in the reviews above, set it up once with care, and then leave the settings alone for the first week so you learn its normal behaviour before you start fine-tuning anything.
A child’s bedroom window
Here the deciding factor is usually comfort over long stretches rather than peak performance in short bursts. Think about posture, reach, noise and heat over hours, not minutes. A window security sensor that feels fine in a five-minute test can become irritating by the third hour, so weight the comments in this guide about sustained use more heavily than the headline features. It is also worth planning the surrounding details: lighting, seating, cable routes or storage within arm’s reach make as much difference as the product itself.
A holiday home checked from a distance
When several people share the same window sensor, the purchase has to survive handovers. Settings get changed, parts get moved, and nobody reads instructions twice. Favour the pick with the clearest controls and the fewest fragile accessories, agree one house rule for how it is left after use, and keep any small parts together in one labelled container. Shared use also raises the value of easy cleaning, because a product that is simple to wipe down or empty actually gets cleaned, while a fiddly one quietly gets worse.
A window hidden from the street by planting
This last situation rewards planning for the awkward moments rather than the average day. Think about the hottest, coldest, busiest or most tiring version of the routine, and choose the pick that still works then. Capacity, reach and durability matter more than refinements. It is also the situation where buying once, properly, beats buying cheaply twice: a window sensor that struggles at the edges of its range tends to be replaced within a year, which costs more than starting with the stronger option would have done.
Comparing the Picks Head to Head
Comparison tables compress a lot of judgement into a few rows, which makes them useful starting points and poor finishing points. The paragraphs below slow the comparison down and look at each pick in this guide on its own terms, using only what the reviews above already establish. Work through them with your constraints list open, and cross picks off rather than ranking them: the right purchase is usually the last one standing, not the one with the longest feature list.
Ring Alarm Contact Sensor (2nd Gen). Its role in this guide — best for ring alarm owners — tells you the job it was picked for, so judge it against that job rather than against every other pick at once. Re-read its section above with your written job sentence beside you, and note the one honest limitation mentioned there. If that limitation touches something you do every day, move on to the next pick; if it touches something you rarely do, it is a fair trade for the strengths the review describes.
SimpliSafe Entry Sensor (Pack of 4). Its role in this guide — best for simplisafe systems — tells you the job it was picked for, so judge it against that job rather than against every other pick at once. Re-read its section above with your written job sentence beside you, and note the one honest limitation mentioned there. If that limitation touches something you do every day, move on to the next pick; if it touches something you rarely do, it is a fair trade for the strengths the review describes.
Aqara Door and Window Sensor (MCCGQ11LM). Its role in this guide — best for smart-home automation — tells you the job it was picked for, so judge it against that job rather than against every other pick at once. Re-read its section above with your written job sentence beside you, and note the one honest limitation mentioned there. If that limitation touches something you do every day, move on to the next pick; if it touches something you rarely do, it is a fair trade for the strengths the review describes.
YoLink LoRa Smart Door & Window Sensor (3-Pack). Its role in this guide — best for long range — tells you the job it was picked for, so judge it against that job rather than against every other pick at once. Re-read its section above with your written job sentence beside you, and note the one honest limitation mentioned there. If that limitation touches something you do every day, move on to the next pick; if it touches something you rarely do, it is a fair trade for the strengths the review describes.
GE Personal Security Window and Door Alarm (45115, 2-Pack). Its role in this guide — best standalone, no hub needed — tells you the job it was picked for, so judge it against that job rather than against every other pick at once. Re-read its section above with your written job sentence beside you, and note the one honest limitation mentioned there. If that limitation touches something you do every day, move on to the next pick; if it touches something you rarely do, it is a fair trade for the strengths the review describes.
Two patterns are worth watching for as you compare. First, the gap between the best overall pick and the specialised picks is rarely about quality; it is about fit. A specialised pick is not a lesser product, it is a narrower one, brilliant inside its niche and merely adequate outside it. Second, accessories and extras sway decisions out of proportion to their value. Ask of every extra whether you would use it weekly. If the honest answer is monthly or never, let it go, and let the core performance, the controls and the care routine decide instead.
If you finish this comparison with two picks still standing, break the tie with ownership questions rather than performance questions. Which one will be easier to clean in your actual space? Which one’s controls will the other people in the household understand without asking you? Which one stores more neatly when it is not in use? Those unglamorous questions predict satisfaction six months from now far better than any single specification does.
Day-to-Day Use, Cleaning and a Simple Care Routine
The first week with a new window sensor sets habits that tend to stick, so spend a little of that week deliberately. Run through the full operating cycle slowly once, from start to finish, while you are not in a hurry. Notice the order things have to happen in, where your hands naturally go, and which step feels awkward. Awkward steps are where mistakes and breakages concentrate later, so rearrange the surrounding space now, while changing it is still easy.
Build cleaning into the routine the product already has, rather than treating it as a separate chore. A quick wipe, shake, rinse or empty at the natural end of each use takes seconds and prevents the slow build-up that eventually needs a deep clean. Keep whatever you use for that quick job within arm’s reach of where the window sensor lives; supplies stored in another room might as well be stored in another house, because the quick job simply stops happening.
A workable care schedule
After each use: return everything to its resting state, clear away residue, moisture or loose debris, and leave the window sensor somewhere air can reach it if it needs to dry. Weekly: give the surfaces and contact points a proper clean with a soft cloth and mild cleaner suited to the material, check moving parts and connections for looseness, and deal with small issues while they are still small. Monthly: do the deeper job — the full wash, descaling, sharpening, re-tightening or inspection the manual describes — and look honestly at wear. Seasonally: review storage, replace anything consumable that has quietly expired or worn out, and reconsider placement if the household’s routine has changed.
Storage deserves the same thought as use. Keep the window sensor dry, out of direct extremes of heat and cold, and away from the crush zone at the back of a cupboard or the bottom of a pile. Small parts belong in one container, labelled, stored with the main item rather than near it. If the original packaging includes shaped inserts that protect fragile parts, consider keeping it; flat-pack storage boxes look tidier but protect less.
When something goes wrong, troubleshoot in order of likelihood before assuming failure. Check power, connections and settings first, then positioning, then cleanliness, then wear. Most problems reported with products in this category trace back to one of those four, and most are fixed in minutes without tools or spare parts. Keep the manual, or a photo of its troubleshooting page, somewhere you can find it on a bad evening rather than at the bottom of a drawer.
More Mistakes That Shorten a Product’s Life
Beyond the mistakes covered earlier in this guide, a few quieter habits do most of the long-term damage. The first is running the window sensor at its maximum setting as a default. Maximum settings exist for occasional peaks; used constantly, they raise noise, heat and wear while often delivering little extra benefit. Find the lowest setting that does the job properly and treat anything above it as a reserve.
The second is ignoring the environment. Dust, steam, direct sun, cramped airflow and unstable surfaces all age a window security sensor faster than ordinary use does. You cannot always choose the environment, but you can usually improve it by a few centimetres: a small gap for air, a mat for stability, a move away from a heat source. Those tiny adjustments compound over years.
The third is postponing small maintenance until it becomes a repair. A loose fitting, a frayed edge, a filter or part that is past its best — each is cheap and quick to address when noticed, and expensive or impossible later. The weekly check in the care schedule above exists precisely to catch these while they are still trivial.
The fourth is buying replacement parts, refills or accessories on price alone without checking fit. Incompatible extras are a false economy: they perform poorly, can damage the main product, and usually cannot be returned once opened. Match the part to the model exactly as the manual specifies, and keep a note of the model details on your phone so the information is with you when you need it.
The last is letting the purchase drift away from its original job. Households change, and a window sensor bought for one routine gets pressed into another it was never suited to. When that happens, the honest options are to adapt the routine back, accept the compromise knowingly, or replace the product with one designed for the new job. Blaming the product for a job it never claimed to do helps nobody, and recognising the mismatch early saves both money and frustration.
FAQ
Do these work without Wi-Fi?
Some sensors link to a local panel or hub and can trigger a siren without a home network. Others rely on Wi-Fi for alerts. Read the connectivity details to see what works when the network is down.
What is the difference between contact and vibration sensors?
A contact sensor reacts when two parts separate, which happens when a sash opens. A vibration sensor reacts to movement in the glass or frame. Some products combine both in one housing. Combined designs can cover more situations, but they may cost more in battery use and can send extra alerts if the window rattles in the wind, so look at the sensitivity controls the maker describes.
How do window security sensors work?
Most use a magnet and a sensor body. When the window opens and the magnet moves away, the sensor sends a signal to a hub, panel or built-in alarm. Some use vibration detection to react to movement in the glass or frame.
Do window sensors need a hub?
Some do and some do not. Brand ecosystems usually require their own hub or base station, while standalone alarms work on their own. Check the listing to see whether a hub is needed and whether it is sold separately.
How long do window sensor batteries last?
Battery life varies by model and by how often the sensor triggers, so check the maker's stated figure on the listing. Many use small coin cells that are simple to replace. Keep spares and use the low-battery alerts if the system offers them.
Can window sensors be installed on any type of window?
Most can be fitted to common sash, casement and sliding windows, as long as the two parts can sit within the allowed gap. Textured, dusty or very uneven frames can cause trouble for adhesive. Check the mounting options and the surface advice in the manual.
Will a window sensor stop a break-in?
A window sensor does not physically prevent entry. It warns you, or sounds an alarm, when the window opens. That alert can discourage an intruder, and it helps you respond.
Do I need a sensor on every window?
You do not have to cover every window, but you should cover those that are easy to reach, such as ground-floor and hidden ones. Consider upper windows reachable from a roof. A single sensor covers only the window it is fitted to.
Can window sensors cause false alarms?
Yes, false alarms can happen if the parts are misaligned, the adhesive loosens or the window rattles in wind. Check the gap, clean the surface and adjust sensitivity if your sensor has that option. Following the maker's placement advice reduces the risk.
Are wireless window sensors secure?
Wireless sensors are designed to communicate with their paired hub or panel, and makers describe their own protections. Security depends on the system and how you set it up. Use strong account passwords and keep firmware and apps updated where the maker provides updates.
How long should a window security sensor realistically last?
Longevity depends far more on routine care and a suitable environment than on the badge on the front. A window sensor that is cleaned on the simple schedule described in this guide, stored dry and used within the job it was bought for will normally serve for years of regular household use. The earliest signs that replacement is approaching are usually a slow decline in performance, controls or fittings becoming loose or unreliable, and replacement parts getting hard to find. When two of those three appear together, start planning a replacement rather than spending on repairs.
Is it worth paying more for the top pick in this guide?
Only if the extra money buys something your own constraints list actually asks for. The top pick earns its place by balancing the needs most buyers share, which makes it the safest choice for an ordinary household. Paying more for a specialised model makes sense when your situation is genuinely specialised — an unusually large or small space, a much heavier workload than average, or a user with specific needs. If your written job sentence sounds like most people’s, the balanced pick will satisfy you, and the saving is better kept for the accessories or consumables you will genuinely use.
What should I check in the first week of ownership?
Check fit, controls and routine, in that order. Confirm the window sensor sits, fits or operates in your space exactly as you measured it, and that doors, sockets and neighbouring items still work as they should. Run every control once so nothing is a surprise later. Then watch your own routine: note anything you keep working around, because small rearrangements made in week one are easy, while workarounds left for a month become permanent habits. Keep packaging until the end of that first week in case an exchange is needed.
How do I know whether to repair or replace?
Compare three things: the cost of the repair against the remaining life you would get from it, the availability of the correct parts, and whether the fault is isolated or part of a general decline. A single failed part on an otherwise sound window sensor is usually worth repairing. Repeated faults, declining performance and worn fittings arriving together signal that the product is wearing out as a whole, and money spent on one repair tends to be followed by another. Safety always overrides the calculation: anything electrical, load-bearing or heat-related that behaves unpredictably should be taken out of use until it is checked.
Can I use a window sensor for jobs beyond what it was bought for?
Sometimes, cautiously, and only within the limits the manual describes. Products in this category are designed and tested around a particular job, load and environment. Occasional light use outside that pattern is unlikely to cause harm, but making an unsuitable job part of the regular routine accelerates wear and can create safety risks the design never anticipated. If a new job has become a regular part of your household’s life, that is a sign to look at a product designed for it, rather than asking the current one to stretch further every week.
What is the single most useful habit for getting value from this purchase?
The end-of-use reset. Returning the window sensor to a clean, dry, ready state every time you finish with it takes under a minute and does more for long-term satisfaction than any other habit. It prevents build-up, reveals small problems while they are still trivial, means the product is always ready when the next person reaches for it, and quietly extends its working life. Most products that disappoint early were not badly made; they were badly reset, day after day, until small neglects added up.
The Short Version
Choose the sensor type and connectivity that match the system you already use, and confirm the battery, mounting, and alert details. A little planning up front avoids missing hubs and unexpected fees later. Count the windows you want to cover, decide whether you prefer a local panel or a phone app, and compare what each kit includes. Spare batteries and a few extra mounting strips are small additions that keep the setup running smoothly over time.