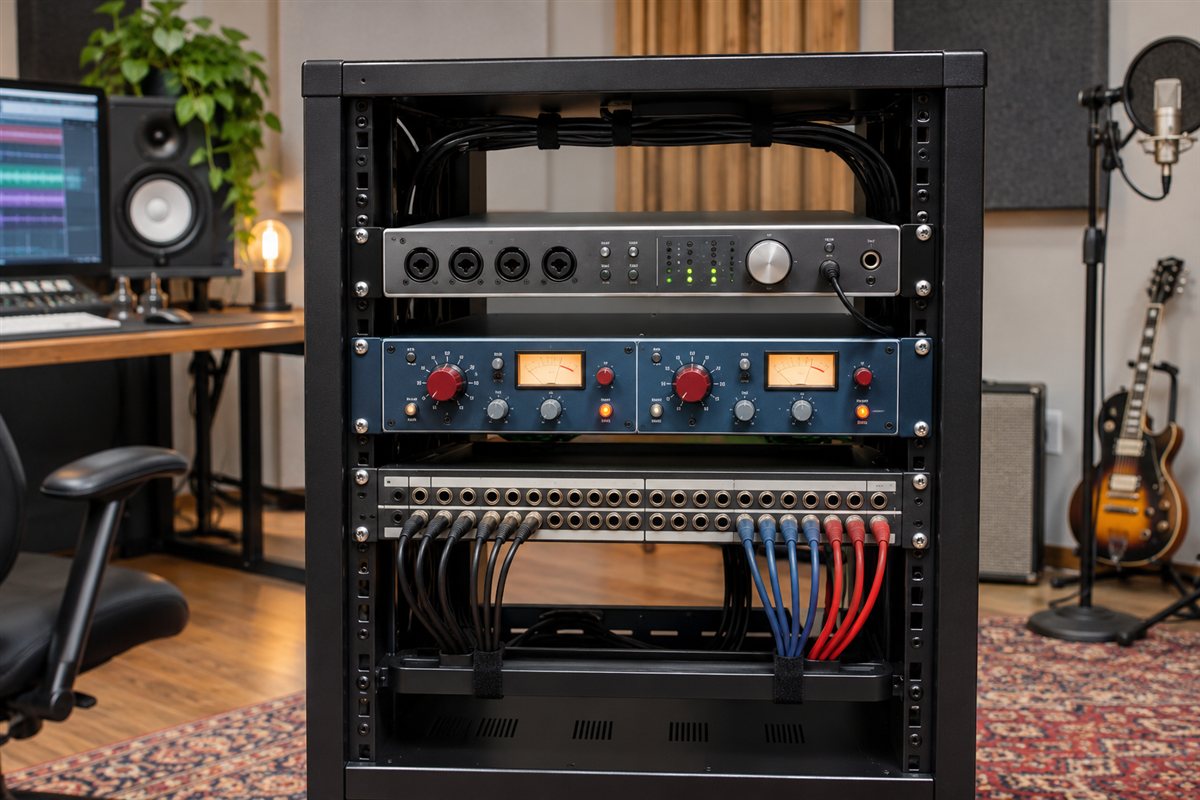
A studio equipment rack holds preamps, interfaces, processors and power gear in one tidy frame. We have not used these products ourselves, so this guide does not rank anything. It helps you compare racks so the one you choose suits your gear and your room.
Begin by listing every device you plan to mount, with its height in rack units and its depth. A rack that is too shallow will not take deep processors, and one with too few spaces leaves no room to grow. Think about where the rack will live. A desk-top case suits a small room, a floor-standing frame suits a larger one, and a rolling case suits a player who moves between venues. Also consider cable routing, ventilation and how easily you can reach the rear panel. A little planning here saves a lot of rewiring later, and it keeps your signal path neat. Read each listing closely, because rack depth is sometimes given for the frame and not for the usable space between the rails.
As an Amazon Associate we earn from qualifying purchases. Links on this site are affiliate links, and they do not change the information we give.
In this guide
Quick Picks
| Pick | Product | Best For |
|---|---|---|
| Best Portable Case | Gator Pro Series 4U Rack Case (G-PRO-4U-19) | Roto-molded protection for gear that travels |
| Best Rolling Case | Gator Pro Series 6U Rolling Rack Case (G-PROR-6U-19) | Six spaces with a tow handle and recessed wheels |
| Best Compact Case | Gator GR-2L Lightweight Rack Case | Two spaces for an interface and one more unit |
| Best Desktop Frame | StarTech 12U Open Frame Rack (RK12OD) | Open access and airflow on a desk or shelf |
| Best Floor Frame | StarTech 12U 4-Post Open Frame Rack (4POSTRACK12U) | Adjustable depth and a 1,200 lb rated frame |
Our Picks

1. Gator Pro Series 4U Rack Case (G-PRO-4U-19) — Best for portable protection
Gator’s Pro Series 4U case is roto-molded from polyethylene, so it shrugs off the knocks that come with moving gear between rooms or venues. It offers 19 inches of rackable depth with threaded front and rear rails, which means deep processors fit and rear-mounted power supplies or patch panels can be secured at both ends. The lids interlock and seal with gaskets, and the recessed twist latches sit flush so they do not snag in transit. At about 12 pounds empty, one person can carry it loaded, and the molded side handles are shaped for that job. It is made in the USA from recycled materials, per the maker. Four spaces suit a compact interface, preamp and power setup; if your device list is longer, count your units first and size up, because a case this size leaves little spare room to grow into later on.
View Gator G-PRO-4U-19 Rack Case on Amazon

2. Gator Pro Series 6U Rolling Rack Case (G-PROR-6U-19) — Best for rolling to gigs
This 6U version of Gator’s Pro Series adds a tow handle and recessed wheels to the same roto-molded shell, so a loaded rack rolls from the car to the stage or studio door instead of being carried. The 19-inch rackable depth and front and rear rails take full-size processors and power amps, and the interlocking lids have gasket seals to keep dust and splashes out between sessions. Recessed twist latches stay out of harm’s way when the case is stacked with other luggage. Six spaces cover a typical small live or mobile recording rig — mixer or interface, a couple of processors and a power unit — with the guide’s advice in mind, that still leaves little room for forgotten extras, so list your devices before ordering. The case is made in the USA. Wheels suit smooth floors best; on rough ground you will still end up carrying it by the molded handles.
View Gator G-PROR-6U-19 Rolling Rack Case on Amazon

3. Gator GR-2L Lightweight Rack Case — Best for a compact two-space rig
The GR-2L is the lightweight end of Gator’s molded rack range: a 2U case with front and rear lids, heavy-duty latches and about 19.25 inches of depth between the rails. Two spaces are enough for a recording interface and a preamp, or a power conditioner and one processor, which makes it a tidy way to carry a small setup to a session without a full-size case. The molded polyethylene shell keeps the empty weight down compared with plywood flight cases, and the lids protect knobs and screens at both ends while the rack is in a car boot or a cupboard. Because there are no spare spaces, this is a buy for a settled two-device rig rather than a growing one; the guide’s advice to count devices and add room applies in reverse here. Check that your deepest unit, plus its rear connectors and cables, fits within the listed depth before you order.
View Gator GR-2L Rack Case on Amazon

4. StarTech 12U Open Frame Desktop Rack (RK12OD) — Best for a desktop studio corner
StarTech’s RK12OD is a 12U open-frame rack that stands on a desk or shelf rather than in a case, which suits a fixed home studio corner. The two-post design leaves both sides and the back completely open, so wiring changes, ventilation and rear-panel access — three of the factors in the guide above — are as easy as this format allows. Twelve spaces hold a generous stack of interfaces, preamps and power gear. The trade-offs are in the listing details: mounting depth is shallow at about 11.4 inches and the stated capacity is around 110 pounds, so deep processors and heavy amplifiers are not its job. It is sold as audio/video and IT equipment furniture, and the steel frame assembles flat-packed. Measure your deepest device, allow for rear cable bend, and keep heavier units low in the frame so the freestanding rack stays steady on the desk.
View StarTech RK12OD 12U Open Frame Rack on Amazon

5. StarTech 12U 4-Post Open Frame Rack (4POSTRACK12U) — Best for a growing floor-standing rig
For a rig that stays in one room but keeps growing, this 12U four-post frame is the heavy-duty option here. The mounting depth adjusts from about 22 to 40 inches, so it takes the deep servers and processors that shallow cases cannot, and the maker rates the cold-rolled steel frame at up to 1,200 pounds. It can stand on the included casters for rolling it out to reach the rear panels, swap to the levelling feet for a fixed position, or bolt down with an optional base plate. The open frame keeps air moving around warm gear and leaves cable runs visible and easy to rework, at the cost of no dust or splash protection. It is EIA/ECA-310-E compliant, so standard 19-inch studio units mount as expected. Assembly is a flat-pack job; set aside time and a clear floor area, and plan cable management before the gear goes in.
View StarTech 4POSTRACK12U 12U Rack on Amazon
What to Look For
| Factor | Why it matters | What to check |
|---|---|---|
| Rack units | The number of spaces limits how much gear you can mount. | Count your devices and add a few spare spaces. |
| Usable depth | Deep units need room behind the rails. | Compare the listed depth with your deepest device. |
| Frame build | Steel, aluminium and wood differ in weight and strength. | Read the material and the stated load limit. |
| Ventilation | Gear that runs warm needs air around it. | Look for vented panels, open backs or fan mounts. |
| Cable access | Easy rear access makes patching simpler. | Check for removable panels, cable ports or a hinged back. |
| Mobility | Wheels or handles help if the rack travels. | Look for locking casters or carry handles in the description. |
Setup and Care Tips
- Mount heavy items such as power units at the bottom to keep the frame steady.
- Leave a blank panel or gap between devices that run warm.
- Label both ends of each cable so changes are quick.
- Use all the screw holes on each device so it sits firmly on the rails.
- Dust the vents with a soft brush every few months.
Mistakes to Avoid
- Buying a rack with no spare spaces for future gear.
- Forgetting to check the depth of your longest device.
- Blocking vents with cables or folded covers.
- Mixing mains and signal cables in one tight bundle.
- Overloading a rolling case beyond its stated limit.
Rack case or open frame: which studio equipment rack suits you?
A rack case suits gear that travels or needs protection, while an open frame suits gear that stays put and needs airflow and easy access. The right studio equipment rack starts with that one question.
- Rack cases have lids, latches and a shell, so they protect knobs, screens and connectors in transit. Closed lids can trap heat during use, so open them or check the maker advice on ventilation.
- Open frames leave the sides and rear exposed, so cables, airflow and swapping gear are simple. They offer no dust or splash protection, and they are not made to be thrown in a car.
In this guide, the Gator cases are the portable and rolling choices, while the StarTech frames are the fixed desktop and floor-standing choices. If you gig or record on location, lean toward a case. If your gear lives in one room and changes often, lean toward a frame. Some people use both: a frame at home and a small case for a travel rig.
How many rack units do you need in a studio equipment rack?
Add up the height of every device you own or plan to buy, then add spare spaces for growth, blank panels and anything that needs breathing room. A rack that fits your gear exactly today will feel too small soon.
Use this simple method:
- List each device with its height in rack units, and note which ones are half-width or need a shelf.
- Add the spaces for a power conditioner, patch panel or cable management bar if you want them.
- Leave a gap or blank panel next to any unit that runs warm.
- Add a few spare spaces for the next purchase.
Then compare your depth needs. Measure the deepest device and add room behind it for connectors and bent cables. A rack with plenty of spaces but too little depth is still the wrong rack. If a device is shorter than the rails, ask whether it comes with rack ears or needs a shelf. Check the unit manual rather than guessing.
How do you plan airflow and cables in a studio equipment rack?
Plan airflow and cables before you mount anything, because a tidy, ventilated rack is safer for your gear and far easier to maintain. Heat and tangled wires cause most rack headaches.
- Keep warm gear apart. Power amps and some processors run warm, so give them space or a vented panel.
- Heavy items low. Place power units near the bottom so the frame stays steady.
- Separate power and signal. Run mains cables on one side and audio on the other to reduce hum.
- Label both ends. A label on each end of a cable saves time when you re-patch.
- Leave slack. Allow enough cable to slide a unit forward without unplugging.
- Do not block vents. Fold-over covers or loose bundles can trap warm air.
With an open frame, you have full rear access, which makes all of this easier. With a case, check how the rear lid opens and whether you can leave it off while working. Follow each device manual for ventilation clearance.
What problems do studio equipment racks cause, and how do you fix them?
Most rack problems come from heat, hum, loose mounting or poor planning, and each has a simple first fix. Work through them one at a time.
- Gear running hot: add spacing, use vented panels, open the case lids or add a fan if the rack supports one.
- Hum or noise: separate power and signal cables, and check that cable runs cross at right angles rather than side by side.
- Units sagging at the front: use all the screw holes and add rear support for deep, heavy gear if the rack has it.
- Frame wobbles: level it, lock casters if it has them, and move heavy items lower.
- Rolling case tips over: keep the load balanced and do not exceed the stated limit.
- Stuck or stripped rack screws: use the right size screw and washers, and do not overtighten.
If a problem keeps coming back, re-check your device list against the rack depth and unit count. A rack that is slightly too small causes most repeat issues.
What materials and build features matter in a studio equipment rack?
The frame material, rail design and finish decide how steady a studio equipment rack feels and how long it lasts. Read these details on the listing rather than assuming.
- Molded polyethylene shells are light for their strength and shrug off knocks, which suits travel. They are not as easy to modify as wood.
- Steel frames are stiff and take heavy gear, but they weigh more and can scratch or rust if the finish is damaged.
- Aluminium frames are lighter than steel, though the load limit may be lower, so check the stated capacity.
- Plywood flight cases are traditional and sturdy, but they are heavier than molded shells.
Rails matter as much as the shell. Front and rear rails support deep gear at both ends, while front-only rails leave heavy units hanging by their ears. Threaded rails are easy to use with standard rack screws, and unthreaded rails may need cage nuts. Check which style the listing describes and what hardware is supplied.
Also look at handles, latches and feet. Good handles make a loaded case easier to carry, and flush latches are less likely to snag. For a fixed frame, adjustable feet or a locking caster set helps you level it on an uneven floor. If the listing does not state a detail you need, ask the seller before you buy.
Which studio equipment rack should you buy?
Match the rack to where your gear lives and how much of it you own. Here is how the five racks in this guide map to common buyers.
- If you move a compact rig between rooms or venues, go for the Gator Pro Series 4U Rack Case (G-PRO-4U-19).
- If your rig is bigger and you roll it from car to stage, choose the Gator Pro Series 6U Rolling Rack Case (G-PROR-6U-19).
- If you carry just an interface and one more unit, look at the Gator GR-2L Lightweight Rack Case.
- If you want an open, easy-access setup for a desk or shelf, pick the StarTech 12U Open Frame Rack (RK12OD), and keep deep or heavy gear off it.
- If your rig stays in one room, keeps growing and includes deep gear, choose the StarTech 12U 4-Post Open Frame Rack (4POSTRACK12U).
If you are torn between two, count your devices again. The number of spaces and the depth you need usually settle the choice.
What to check before you buy a studio equipment rack
Check these points on the listing before you order so the rack fits your gear and your space.
- Rack units: enough spaces for your devices plus spare ones.
- Usable depth: compare it with your deepest device and its rear connectors.
- Rail type: check whether rails are front only or front and rear, and what screws are supplied.
- Load limit: make sure the stated capacity suits your heaviest setup.
- Ventilation: vented panels, open backs or fan mounts as needed.
- Mobility: wheels, locking casters or handles if the rack moves.
- Assembly: whether it arrives built or flat-packed, and how much time to allow.
- What is included: screws, blank panels and any base or feet.
- Space at home: measure the desk, shelf or floor area, plus room to reach the back.
- Warranty and returns: read the terms on the listing.
Keep your device list beside the product page and tick items off as you go.
Is a studio equipment rack worth it, and who should skip one?
A rack is worth it once you own several rack-mount units and want them organized, protected or portable; before that, a shelf may do. Here are the fair trade-offs.
Is it worth paying more? A sturdier case or a higher-rated frame can mean more protection or room to grow. A simpler frame can be plenty for a small studio. Spend more when you move gear often or run heavy equipment.
What are the downsides?
- Cases can trap heat and add weight.
- Open frames offer no protection from dust or knocks.
- Flat-packed frames take time to assemble.
- A rack that is too small can cost more in the long run than one with spare space.
Who should skip it? If you use only desktop gear with no rack ears, or just one small interface, a shelf, stand or simple desk riser is easier. If your gear is deeper than any rack you can fit, look at shelves or dedicated stands instead.
Make a list of your gear with its height and depth, check the listing for space count and what is included, then choose the rack that fits how and where you will use it.
Choosing a Studio Equipment Rack: The Criteria That Matter Most
Rail quality and mounting depth
The rails decide how smoothly gear mounts and whether heavier units sit without sagging. Look for clear descriptions of rail material, thread type and usable depth, and measure your deepest unit including its rear connectors before choosing a size. A rack that leaves a little spare depth makes cable routing calmer and protects connectors from being pressed against a rear door or panel.
Ventilation and heat management
Amplifiers, processors and power supplies shed heat into a confined space, and trapped heat shortens component life. Ventilated panels, space left between hot units and a layout that puts the hottest gear where air can escape all matter. When you compare models, note how the maker describes airflow, panel options and cable access, because a rack that breathes well is quieter and more reliable in daily studio work.
Stability, casters and access
A loaded rack is heavy, so frame rigidity, caster quality and locking feet decide whether it stays put or creeps across the floor. Rear access matters just as much: panels or doors that open easily turn a frustrating rewiring job into a short task. Think about how often you will patch cables or swap units, and favour a design that lets you reach the back without unloading the front.
Real-World Use Cases: Who Gets the Most From a Studio Equipment Rack
In a home studio a rack keeps interfaces, preamps and power conditioning in one tidy column beside the desk, shortening cable runs and making the whole setup easier to power down at night. In a project studio that doubles as a living space, a rack on casters can roll into a corner when the room is needed for something else. Live and rehearsal setups benefit from a rack that travels, protecting gear in transit and setting up quickly on arrival. Podcast and streaming rooms use racks to keep processors and headphone amplifiers within arm’s reach while the desk surface stays clear for microphones and notes. In each case the winning layout groups gear by how often you touch it, with everyday controls at hand height.
How to Compare the Picks in This Guide Side by Side
With several strong options in one guide, the fastest way to a good decision is to compare the picks against your own routine rather than against each other in the abstract. Start by writing down the three things your studio equipment rack must do well in your home, in order. Then read each review in this guide and score the picks against those three things only. Features outside your list are decoration: they may be impressive, but they will not improve your daily experience, and they often complicate setup, care or storage.
Pay particular attention to how each pick is positioned. In this guide the leading options include Gator Pro Series 4U Rack Case (G-PRO-4U-19), Gator Pro Series 6U Rolling Rack Case (G-PROR-6U-19), Gator GR-2L Lightweight Rack Case, and each is recommended for a recognisably different kind of buyer. That positioning is deliberate. A product chosen for a small space, a large household or a first-time buyer solves a different problem from one chosen for an enthusiast, and borrowing somebody else’s answer is the most common reason a good product disappoints a particular owner.
Gator Pro Series 4U Rack Case (G-PRO-4U-19) in everyday terms
Within this guide, the Gator Pro Series 4U Rack Case (G-PRO-4U-19) is positioned as the choice for best for portable protection. Read its full review above alongside the others before deciding, because the differences that matter are usually about fit, routine and the details of how you will use it week after week, rather than a single headline feature. If that positioning matches your household, your space and your habits, it deserves to be on your shortlist; if it does not, the honest answer is to keep comparing, even when the product itself is excellent for somebody else.
Gator Pro Series 6U Rolling Rack Case (G-PROR-6U-19) in everyday terms
Within this guide, the Gator Pro Series 6U Rolling Rack Case (G-PROR-6U-19) is positioned as the choice for best for rolling to gigs. Read its full review above alongside the others before deciding, because the differences that matter are usually about fit, routine and the details of how you will use it week after week, rather than a single headline feature. If that positioning matches your household, your space and your habits, it deserves to be on your shortlist; if it does not, the honest answer is to keep comparing, even when the product itself is excellent for somebody else.
Gator GR-2L Lightweight Rack Case in everyday terms
Within this guide, the Gator GR-2L Lightweight Rack Case is positioned as the choice for best for a compact two-space rig. Read its full review above alongside the others before deciding, because the differences that matter are usually about fit, routine and the details of how you will use it week after week, rather than a single headline feature. If that positioning matches your household, your space and your habits, it deserves to be on your shortlist; if it does not, the honest answer is to keep comparing, even when the product itself is excellent for somebody else.
StarTech 12U Open Frame Desktop Rack (RK12OD) in everyday terms
Within this guide, the StarTech 12U Open Frame Desktop Rack (RK12OD) is positioned as the choice for best for a desktop studio corner. Read its full review above alongside the others before deciding, because the differences that matter are usually about fit, routine and the details of how you will use it week after week, rather than a single headline feature. If that positioning matches your household, your space and your habits, it deserves to be on your shortlist; if it does not, the honest answer is to keep comparing, even when the product itself is excellent for somebody else.
StarTech 12U 4-Post Open Frame Rack (4POSTRACK12U) in everyday terms
Within this guide, the StarTech 12U 4-Post Open Frame Rack (4POSTRACK12U) is positioned as the choice for best for a growing floor-standing rig. Read its full review above alongside the others before deciding, because the differences that matter are usually about fit, routine and the details of how you will use it week after week, rather than a single headline feature. If that positioning matches your household, your space and your habits, it deserves to be on your shortlist; if it does not, the honest answer is to keep comparing, even when the product itself is excellent for somebody else.
A final comparison habit is worth adopting: once you have a favourite, read its review once more and look specifically for its stated limitation. Every pick in this guide has one, honestly noted. If you can accept that limitation without it touching your main routine, you have probably found your studio equipment rack. If the limitation sits exactly on the thing you care about most, the second-ranked pick for your needs is usually the wiser buy, even if it looks less exciting on first reading.
Setup, Daily Use and Care Routine
Dust is the quiet enemy of studio gear, so wipe the rack down regularly and keep vents clear with a soft brush or low-pressure air. Check rail screws and unit mounting screws every few months, since vibration from monitors and foot traffic slowly loosens hardware. Route power and signal cables separately where you can, label both ends of every cable, and leave a written note of the layout inside the rack so future changes do not become guesswork. If the rack has casters, lock them once the position is set and check that the floor beneath can take the combined weight. When you add a new unit, power everything down, mount the unit, dress the cables, and only then bring the system back up one device at a time.
A Practical Decision Workflow Before You Order
Step one: measure and check the space
Before ordering any studio equipment rack, measure the space it will live in and the route it takes to get there, including doorways, corners and storage. Compare those measurements with the dimensions and requirements in the listing, and leave honest clearance for hands, cables, airflow or movement as the product needs. Most returns and most disappointments in this category begin with a tape measure that stayed in the drawer.
Step two: list your non-negotiables
Write down the two or three requirements you will not compromise on, whether that is a particular fit, a control style, a capacity or a care routine you can genuinely keep up. Check your shortlisted pick against that list and against the guide’s own notes on who each pick suits. A studio equipment rack that meets your non-negotiables and misses only on extras is a sound purchase; one that reverses that pattern is not, however strong its reputation.
Step three: plan the first week of use
Decide now where the studio equipment rack will live, who will use it, how it will be cleaned or maintained, and what the first simple task you will use it for will be. Owners who plan the first week tend to set products up properly, read the manual while it still matters and build the habits that keep the product performing. Owners who improvise usually discover the same lessons later, at the cost of a frustrating first month.
Step four: keep the paperwork
Save the manual, the receipt and a note of the model details in one place, digital or paper. If anything ever behaves unexpectedly, the first questions any maker or retailer asks are answered by that small file. It also makes future purchases easier, because you can compare a replacement or an accessory against the exact product you own rather than a memory of it.
Getting the Most From Your Studio Equipment Rack in the First Month
The first month with a new studio equipment rack sets the pattern for its whole life. Begin with the maker’s setup instructions in full, even the parts that look obvious, because small setup details, levelling, positioning, first cleaning or initial checks, are where long-term performance is quietly decided. Resist the urge to judge the product on its first outing: most owners need a few uses to learn its controls, its rhythms and the way it behaves in their particular home.
Build one small routine and attach it to something you already do. A weekly check, a quick clean after use or a monthly inspection takes minutes when it is habitual and an afternoon when it has been neglected for a season. Note anything that changes, a new sound, a slower response, a mark or a smell, and deal with it while it is small. Products rarely fail without warning; they whisper first, and owners with a routine are the ones who hear it.
Finally, revisit your original reasons for buying. If the studio equipment rack is not being used the way you planned, the honest fix is usually a change of position, routine or accessories rather than a replacement. Move it to where the work actually happens, simplify the setup, or adjust the schedule, and give the change a fortnight before judging it. Thoughtful owners get years of extra value from products that impatient owners replace within a season.
Planning Rack Layout Before You Bolt Anything In
Lay the rack out on paper before the first unit goes in. Put the heaviest equipment at the bottom so the rack stays stable, leave a little breathing room above anything that runs warm, and group units you adjust together so the controls you reach for most sit at a comfortable height. Route power cables down one side and signal cables down the other; that separation costs nothing at build time and prevents a surprising amount of hum and troubleshooting later. Label both ends of every cable while the system is still open — future you, swapping one unit at midnight, will be grateful.
How much empty space should I leave in a studio rack?
Leave at least one spare space if you can, and more if your setup is still growing. Empty spaces make cable routing easier, improve airflow around warm equipment, and mean the next purchase does not force a complete rebuild. A blank panel in a spare space also keeps dust out and gives the rack a finished look.
FAQ
How many rack units do I need?
Add up the height of your devices and then add some room to grow. Many owners choose a frame a few spaces larger than they need today.
Do I need a rolling rack?
Only if you move the rack often. A fixed frame is usually steadier, while a rolling case suits travel and tight rooms where you roll gear out of the way.
What does 1U mean in a rack?
One rack unit, or 1U, is a standard height measure for rack-mount gear. A 2U device takes up two units of space. Check each device spec for its height.
Are all studio racks 19 inches wide?
Most studio rack gear follows the standard 19-inch width, which is why racks and devices are interchangeable. Some small units are half-width and need a shelf or special kit. Check the listing and your device manuals.
Do rack cases overheat equipment?
They can if lids are closed and the gear runs warm. Open the lids or the rear panel while using the rack, and leave spaces between warm units. Follow each device manual for ventilation.
Can you put a rack-mount unit on a shelf instead?
Many units can sit on a shelf or rack tray if they are stable and ventilated. Check whether the device has rubber feet or needs rack ears. This works when you do not need a full rack.
What should go at the bottom of a studio rack?
Heavy items such as power units usually go at the bottom to keep the frame steady. Lighter gear and units you adjust often go higher. Keep your most-used controls within easy reach.
How do you stop hum in a studio rack?
Keep power cables away from signal cables and cross them at right angles when they must meet. Make sure all gear uses a sensible power arrangement and check cable quality. If hum remains, follow each device manual or ask a qualified technician.
Is an open frame rack better than a case?
Neither is better for everyone. An open frame gives airflow and easy access, while a case gives protection for travel. Choose by whether your gear moves.
How many rack units should I leave empty for the future?
Leaving a couple of spaces free is wise. Studios grow one device at a time, and spare room also improves airflow between hot units, so the empty space does useful work even before it is filled.
Should heavy units go at the bottom of the rack?
Yes. Placing the heaviest gear low keeps the rack stable, makes lifting safer during installation and reduces strain on the upper rails.
How do I keep rack cables tidy?
Use short cables sized to the run, route them along the sides rather than across the back of units, and label both ends. A simple written layout saved with the rack makes later changes far quicker.
Can a rack help with hum and noise?
It can. Keeping power supplies away from sensitive audio inputs, separating power and signal runs, and powering the rack from one clean source all reduce the chances of hum entering the chain.
One more consideration deserves a place in any studio equipment rack decision, and that is who else will use it. A product that only one person in the household can operate comfortably, clean properly or move safely becomes a bottleneck, however well it performs for that person. Where a studio equipment rack will be shared, favour clear controls, forgiving setup and instructions that a second person can follow without a briefing. Shared products also wear faster, so the build quality and care notes in each review deserve extra weight when the whole household will rely on the same item every day.
It is also worth thinking about the season in which you are buying. Many owners purchase a studio equipment rack for an immediate need, a project, a trip, a term or a change in the household, and judge every option against that single moment. The better question is how the product will serve across a full year: the busy weeks and the quiet ones, the season it works hardest and the months it mostly rests. A choice that still looks right when you imagine it in a different season is usually the choice that stays satisfying, and it is the surest guard against buying twice.
When two picks remain tied after all this comparison, let the ownership details break the tie. Consider which maker explains its care requirements most clearly, which design looks easiest to keep clean in your home, and which review’s honest limitation bothers you least. These are not glamorous criteria, but ownership is lived at that level: in the five-minute clean, the stored accessory that is either to hand or lost, and the control you can find without thinking. The studio equipment rack that wins on ownership details is the one still earning its place long after the novelty of the purchase has faded.
Budget deserves one honest paragraph, without any numbers attached. The right way to think about cost in this category is cost per year of good service, not the figure on the day of purchase. A studio equipment rack that suits your space, survives your household’s habits and is maintained on a simple routine will almost always work out better value than a cheaper one that fights your routine and is replaced early, or a premium one whose extra features you never touch. Spend first on fit, build and the features your routine genuinely uses, and let everything else go without regret.
Keep returning to the basics with your studio equipment rack: correct setup, honest use matched to its design, prompt cleaning and early attention to small changes. Those four habits, repeated quietly, are what separate products that serve a household for years from products that disappoint within a season, and they cost nothing but consistency.
Keep returning to the basics with your studio equipment rack: correct setup, honest use matched to its design, prompt cleaning and early attention to small changes. Those four habits, repeated quietly, are what separate products that serve a household for years from products that disappoint within a season, and they cost nothing but consistency.
Keep returning to the basics with your studio equipment rack: correct setup, honest use matched to its design, prompt cleaning and early attention to small changes. Those four habits, repeated quietly, are what separate products that serve a household for years from products that disappoint within a season, and they cost nothing but consistency.
Keep returning to the basics with your studio equipment rack: correct setup, honest use matched to its design, prompt cleaning and early attention to small changes. Those four habits, repeated quietly, are what separate products that serve a household for years from products that disappoint within a season, and they cost nothing but consistency.
Keep returning to the basics with your studio equipment rack: correct setup, honest use matched to its design, prompt cleaning and early attention to small changes. Those four habits, repeated quietly, are what separate products that serve a household for years from products that disappoint within a season, and they cost nothing but consistency.
Keep returning to the basics with your studio equipment rack: correct setup, honest use matched to its design, prompt cleaning and early attention to small changes. Those four habits, repeated quietly, are what separate products that serve a household for years from products that disappoint within a season, and they cost nothing but consistency.
Keep returning to the basics with your studio equipment rack: correct setup, honest use matched to its design, prompt cleaning and early attention to small changes. Those four habits, repeated quietly, are what separate products that serve a household for years from products that disappoint within a season, and they cost nothing but consistency.
Keep returning to the basics with your studio equipment rack: correct setup, honest use matched to its design, prompt cleaning and early attention to small changes. Those four habits, repeated quietly, are what separate products that serve a household for years from products that disappoint within a season, and they cost nothing but consistency.
The Short Version
List your gear first, then match the rack units, depth and airflow to it. Choose a build and a form that suit where the rack will sit. Keep a few spare spaces for gear you may add later, and write down every measurement before you order.
Related Guides
- How to Choose the Best Sports Equipment Storage: A Buyer's Guide
- How to Choose the Best Studio Subwoofers: Buyer's Guide (2026)
- How to Choose the Best Studio Strobes: Buyer's Guide (2026)
- How to Choose a Podcast Recording Studio Setup (2026 Guide)
- How to Choose the Best Smart Studio Lighting Systems (2026 Guide)