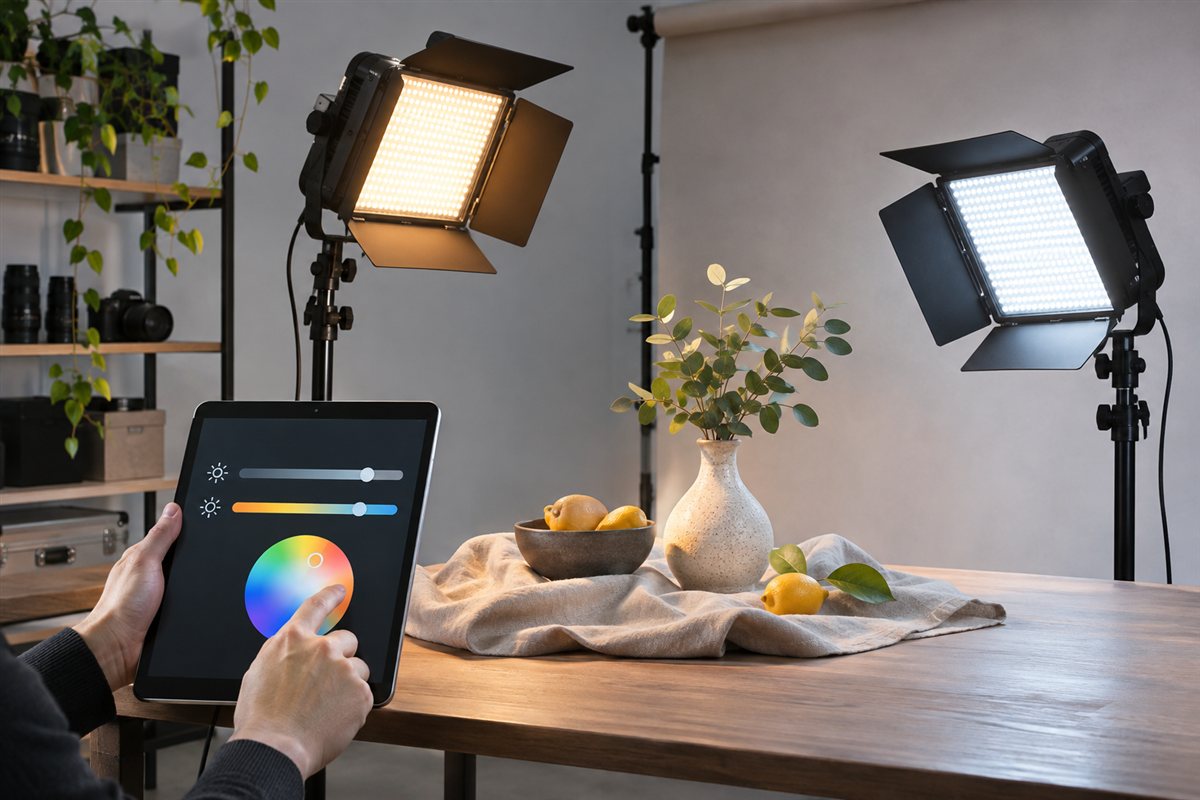
We have not used these products ourselves, so this guide does not claim any personal results. It describes how to choose a smart studio lighting system by looking at output, color control, wireless options, mounts and power, so you can match a setup to your video, photo or streaming space. Use the table below to compare features, then check the maker details against your own room and habits before you decide.
A smart studio lighting system uses panels, tubes or bulbs that you adjust from an app, a remote or a controller. Typical controls include brightness, white tone and sometimes full color or scene effects. Think about the size of the space, the distance to your subject and whether you need a soft look for faces or a bold look for backgrounds. Maker claims about brightness and color accuracy should be read as their own statements. Plan for stands, clamps and cable runs too, since they often decide how neat and flexible a small studio feels.
As an Amazon Associate we earn from qualifying purchases. Links on this site are affiliate links, and they do not change the information we give.
In this guide
Quick Picks
| Pick | Product | Best For |
|---|---|---|
| 1 | Elgato Key Light | Best Overall for Streaming Studios |
| 2 | Godox ML100Bi | Best High-Output Key Light |
| 3 | Godox ES45 Kit | Best Desk Kit with Remote Control |
| 4 | Amaran T4c RGBWW Tube Light | Best RGB Tube for Color Work |
| 5 | Nanlite PavoTube II 30C | Best Battery Tube for Flexible Placement |
Our Picks
1. Elgato Key Light — Best Overall for Streaming Studios
The Key Light is built around the exact workflow this guide describes: a soft panel you set once and then adjust from your desk. Elgato rates output at 2,800 lumens from an edge-lit panel that spreads light evenly without a separate softbox, and both brightness and color temperature — 2900 to 7000K in Elgato’s specification — are adjusted over Wi-Fi in the Control Center app on Mac, PC, iOS or Android, or from a Stream Deck. There is no fan, so it stays silent in a recording room, and the panel mounts on the included extendable desk clamp stand rather than a floor tripod, which keeps cables and floor space clear. Onboard controls cover the basics if the network drops. It is a single-purpose key light rather than a modular system, and it runs on wall power only. For streamers and video-call studios that want one dependable, app-driven key light, it is the most direct match.

2. Godox ML100Bi — Best High-Output Key Light
The ML100Bi is the pick when output is the limiting factor — a larger room, a subject farther from the light, or a softbox eating intensity. Godox rates it at 34,300 lux at one meter, with a bi-color range of 2800 to 6500K, a CRI of 97+ and TLCI of 98+ in the listing, plus 11 built-in lighting effects. It accepts Bowens-mount modifiers, so the domes and softboxes used across the Godox ecosystem fit, and brightness and temperature can be adjusted on the unit or remotely through the Godox Light app. The compact body suits small studios that cannot park a full-size monolight, and it runs from the included AC adapter. Fan cooling is part of the design, so check placement if your room is very quiet. For photo and video work that needs a real key light rather than a desk panel, this is the strongest option here.
3. Godox ES45 Kit — Best Desk Kit with Remote Control
The ES45 Kit is a complete desk setup in one box: an edge-lit LED panel, an extendable desk stand and a detachable magnetic remote. Godox specifies a color temperature range of 2800 to 6500K with stepless 0 to 100 percent dimming, a maximum output of 4,100 lumens in the manual, and CRI/TLCI ratings of 96/97, which suits faces on camera without extra diffusion. The remote works over a 2.4G wireless link and docks magnetically on the panel, and the Godox Light app gives a second control path from your phone — handy when the light sits out of arm’s reach during a call. The stand telescopes, so the panel can sit above monitor height without a floor stand crossing the room. It runs on wall power and is aimed at one-person streaming and video-call desks rather than multi-light sets. If your studio is a desk, this kit covers mounts, control and light in a single purchase.
4. Amaran T4c RGBWW Tube Light — Best RGB Tube for Color Work
The T4c is a four-foot RGBWW tube for the color side of studio work: backgrounds, practicals in frame and scene effects that a white-only panel cannot produce. Amaran specifies a white range of 2500 to 7500K on top of full RGB color, with 46 color gel presets and 15 built-in lighting effects. Control is the strong point — the Sidus Link app groups the tube with other Aputure and amaran lights, and DMX input covers wired studio control, so it can join a larger rig instead of living on its own app. An internal battery lets it run away from outlets for accent positions, and it can also run from AC power in a fixed setup. At 40 watts it is an accent and background tool rather than a key light for a big room. Choose it when you want one tube that speaks the same control language as a growing Aputure-based setup.
View Amaran T4c RGBWW Tube Light on Amazon

5. Nanlite PavoTube II 30C — Best Battery Tube for Flexible Placement
The PavoTube II 30C is another four-foot RGBWW tube, but its emphasis is portability. An internal battery frees it from cable runs, so it can sit behind a desk, inside a shelf or along a wall where a wired light would mean taping cables across the floor — a mistake the guide above calls out. Nanlite builds the tube for accurate color, and control options cover the fixture itself, the Nanlink app over Bluetooth and grouping with other Nanlite lights. The listing includes an AC charger, a mount and a carry case, which suits creators who rebuild their setup between rooms or locations. Its adjustable white output can be matched to room light, while RGB modes handle background color and effects. Output is modest next to a dedicated key light, so plan it as fill, accent or background. For a small studio that changes shape often, that flexibility is the point.
View Nanlite PavoTube II 30C on Amazon
What to Look For
| Factor | Why it matters | What to check |
|---|---|---|
| Light output | Larger rooms and farther subjects need more light. | Compare stated brightness with your room size and distance. |
| Color control | White tone range and full color suit different work. | Check the stated temperature range and any color modes. |
| Wireless control | App, remote and network options change how you adjust lights. | Match the link type to your phone or computer software. |
| Mounts and stands | Lights need stable positions for steady results. | Look for threaded mounts, clamp points and included hardware. |
| Power | Wall power and battery options affect where lights can go. | Read the adapter type, cord length and any battery notes. |
| Heat and noise | Fans and warm housings matter in quiet rooms. | Read maker notes on cooling and fan sound. |
Setup and Care Tips
- Place stands on a flat floor and weigh the base if a boom arm sticks out.
- Route cables along walls or under covers so nobody trips on them.
- Let lights cool before you move or pack them.
- Wipe diffusers with a soft dry cloth and follow the cleaning notes in the manual.
- Save favorite scenes in the app so you can repeat a look.
Mistakes to Avoid
- Buying more output than a small room needs.
- Mixing lights with different white tones in one shot.
- Skipping stands and relying on a wobbly desk.
- Letting cables cross walkways.
- Ignoring fan noise when you record sound.
Panel lights or tube lights: which smart studio lighting suits you?
Panel lights suit key lighting on faces, while tube lights suit accents, backgrounds and creative color. Many studios eventually use one of each.
A panel gives a broad, even wash from a single flat surface, which flatters faces at a desk and needs little modification. A tube is a slim, long light that you can place along a wall, behind a monitor or in frame as a design element.
- Panels: the Elgato Key Light and Godox ES45 Kit are desk-focused examples, built for one person on camera.
- Bi-color fixtures with modifiers: the Godox ML100Bi takes accessories, so you can shape the light with softboxes and domes.
- Tubes: the Amaran T4c RGBWW Tube Light and Nanlite PavoTube II 30C add color and background looks.
Output is the main difference. Tubes are generally accent tools, while a dedicated key light carries the exposure. If you can only buy one light, pick a key light first and add tubes later for depth. If your video already looks well lit and you want style, a tube is the more interesting addition.
How do you get flattering smart studio lighting on camera?
Place a soft, adjustable key light slightly above eye level and to one side, then add a gentle fill or background light for depth. This simple setup works for most streaming and video-call studios.
Start with the key light, and use the app to set a white tone that matches the room. Mixed tones in one shot look uneven, so match any window light or lamps to your lights where you can.
A few habits improve results quickly:
- Diffuse the light: a larger, softer source is kinder to skin than a small hard one.
- Add separation: a colored tube behind you lifts your subject off the wall.
- Control spill: keep light off screens and glossy surfaces to avoid glare and reflections in glasses.
- Save scenes: store your favorite settings in the app so you can repeat a look.
Check the stated color rendering information in the listing if skin tones matter to you, and remember that these are the maker’s own statements. Try small changes one at a time rather than moving everything at once.
Which smart studio lighting system should you buy?
Choose the smart studio light that fits your space and your control habits: the Elgato Key Light for a simple streaming desk, the Godox ML100Bi if you need stronger output, and tubes if color is the goal.
- If you stream or take video calls from a desk, go for the Elgato Key Light. It is app-driven, silent and mounts on its clamp stand.
- If you need more output or want to use modifiers, choose the Godox ML100Bi, and check fan noise against your recording setup.
- If you want a complete desk kit with a remote, the Godox ES45 Kit gives you light, stand and control together.
- If you want color for backgrounds and effects, pick the Amaran T4c RGBWW Tube Light, especially if you plan to build a larger rig around the same control app.
- If you move your setup between spots or rooms, the Nanlite PavoTube II 30C has the battery flexibility for it.
Many creators combine a key light with one tube. A common path is to buy the key light first, learn how you use it, then add color once you know what your shots need. Match the ecosystem to your plans, since apps and controllers are tied to each brand.
What should you check before you buy smart studio lights?
Check output, color range, control method, mounts and power against your room before you buy. These details decide how the lights work day to day.
- Room and distance: compare stated brightness with your room size and how far the light sits from you.
- White tone range: make sure it covers the tones you plan to match.
- Control: confirm the app supports your phone or computer, and whether a remote is included.
- Mounts: check threads, clamp points and whether a stand is in the box.
- Power: read the adapter, cord length and whether battery power is offered.
- Noise: read the maker’s notes on fans if you record audio nearby.
- Manual controls: see whether the light still works if the app or network fails.
- Warranty and returns: confirm the terms on the current listing, plus what accessories are included.
Measure your desk or stand space too. A bright light that cannot sit where you need it will not help.
How should you place and power smart studio lights?
Place smart studio lights on stable stands or clamps, keep cables off walkways and give every fixture a reliable power source. Good placement and tidy power make a small studio feel professional.
Start with stability. Weigh stand bases if a light sits on a boom, and use the clamp or desk mount only on a surface that can hold the weight. Always tighten locking knobs fully before letting go.
Think through power and signal together:
- Wall power: lights such as the Elgato Key Light and Godox ES45 Kit run from an outlet, so plan where cords will run.
- Battery power: tubes with internal batteries, like the Nanlite PavoTube II 30C, can sit away from outlets, but they need charging between sessions.
- Power strips: use one with enough capacity for your gear, and avoid daisy-chaining.
- Wireless signal: keep lights within reliable range of your router, phone or controller.
Cable management is easy to neglect. Run cords along walls or under covers, label them and leave a little slack so a light can move without pulling on a plug. Keep power cables apart from audio cables where you can, since that reduces the chance of interference in recordings.
Finally, test the whole setup before an important session. Turn every light on, run through your saved scenes and confirm the app connects. A quick check beforehand saves stress when the camera is rolling.
Is smart studio lighting worth paying more for, and who should skip it?
Smart studio lighting is worth it if you repeat the same looks often and like adjusting from an app. It is less worthwhile if you shoot in one fixed position and rarely change anything.
The honest trade-offs are these:
- App control adds convenience but also one more thing that can need updates or a signal.
- Full-color features cost more and may go unused if you only need white light.
- Higher output is useful in bigger rooms but can be excessive in a small one.
- Lights from different brands may not share one control app.
Is it worth paying more for a higher-output or full-color model? Only if you will use that capability. A white-only desk panel does the job for many streamers, while color tubes pay off for creators who change backgrounds and moods.
Skip smart lighting if you prefer physical dials, have weak wireless coverage, share a space where settings might be changed by accident, or travel often and do not want to depend on an app.
Compare the picks above, check the current listing for mounts, power and what is included, then choose the light that fits your room and how you will use it.
Matching Smart studio lights to Real Life: Four Situations Buyers Describe Most
Most disappointment with smart studio lights does not come from a bad product. It comes from a good product bought for the wrong job, the wrong room or the wrong routine. The picks above were chosen for different strengths, and the clearest way to choose between them is to start with the situation that sounds most like yours, then check the details of that pick against your own space, habits and expectations. Work through the four situations below honestly, because the best studio light for a neighbour, a colleague or an online reviewer may be a poor match for the way you actually live.
A streaming desk used every evening
In this situation, a key light you can adjust from your chair, on a schedule of regular sessions, rewards app control and a setup you leave in place. That starting point changes what you should look for first when you read the pick descriptions above. Instead of comparing every feature in order, begin with the one or two details that decide comfort and success here, and let the rest be secondary. It also helps to picture the second week, not just the first day: routines settle, novelty fades, and the studio light has to keep earning its place when you are tired, busy or in a hurry. If a pick still looks right under those conditions, it is very likely the right direction.
Product photography on a table
Here, two smaller lights at controlled angles often beat one powerful light, because reflections and shadow shape sell the product as much as brightness. Buyers in this position often focus on the wrong headline detail and only notice the mismatch once the studio light is in daily use. A calmer approach is to write down the one outcome you need, the one frustration you want to avoid, and the space or routine the studio light must fit, then score each pick above against those three lines. The pick that wins on your own list will serve you better than the pick that wins on a generic list, and it will usually be obvious once your priorities are written down.
Video calls that need to look professional
For this kind of use, a single soft light near the camera, set once and saved as a scene, lifts calls without turning a home office into a studio. Think about who else is involved, how often the studio light will be used each week, and what happens on the busiest or worst day rather than the best one. A choice that copes gracefully with the awkward day, the guest, the bad weather or the rushed morning is worth more than a choice that only shines in ideal conditions. Compare the picks above with that harder day in mind, and be wary of paying for strengths you will rarely call on while missing a basic that you will need constantly.
Colour and backdrop work for creative shoots
In this situation, tube lights and colour modes earn their place when the background is part of the picture, and battery power lets you place them anywhere. That starting point changes what you should look for first when you read the pick descriptions above. Instead of comparing every feature in order, begin with the one or two details that decide comfort and success here, and let the rest be secondary. It also helps to picture the second week, not just the first day: routines settle, novelty fades, and the studio light has to keep earning its place when you are tired, busy or in a hurry. If a pick still looks right under those conditions, it is very likely the right direction.
The Details Behind the Details: Reading Studio light Listings Like an Owner
The main buying guide above introduces the criteria that matter for smart studio lights. This section slows down and looks at how to judge each one from a listing, a box and a first week of ownership, without needing specialist knowledge. None of these checks requires special tools. They require attention, a tape measure where size is involved, and a willingness to believe your own measurements and routines over attractive presentation.
Light shape and softness for your subject
Put simply, panels, tubes and point sources each shape shadows differently, so think about faces, products or a whole backdrop before you rank brightness. A useful habit is to separate what the maker states from what the maker implies. Stated details can be compared between the picks above; implied promises cannot. Ask what evidence the listing gives, what it leaves vague, and whether the vague part happens to be the part you care about most. Owners who do this before ordering tend to keep their studio light for years, while buyers who skim this factor are the ones writing frustrated comments a month later.
Output at your real working distance
The short version: a light that looks strong on a desk test can feel weak across a room, so judge it at the distance your camera and subject actually sit. This factor also interacts with the others, so avoid judging it in isolation: a strong showing here can compensate for a modest showing elsewhere, and a weakness here can undermine an otherwise excellent studio light. As you read the individual pick reviews above, keep this criterion in mind and notice which picks the guide itself associates with it. That pattern is deliberate, and following it is the fastest route to a shortlist of one or two.
Colour control and consistency between lights
What this means in practice: matching white settings and colour modes across brands can be fiddly, so a family of lights that speak the same app language saves session time. When you read a listing, look for this point described in plain, specific language rather than in slogans, and compare how each pick above presents it. If two picks look similar overall, this is often the factor that should break the tie, because it is the one you will feel every single time you use the studio light. After purchase, it is also the first thing to check during any return window: if this detail is wrong for you, the rest of the product rarely makes up for it.
Power and mounting in your space
Put simply, battery freedom suits quick setups, while mains power suits long streams, and every light needs a stand or mount that holds it safely at the angle you want. A useful habit is to separate what the maker states from what the maker implies. Stated details can be compared between the picks above; implied promises cannot. Ask what evidence the listing gives, what it leaves vague, and whether the vague part happens to be the part you care about most. Owners who do this before ordering tend to keep their studio light for years, while buyers who skim this factor are the ones writing frustrated comments a month later.
Living With Your Studio light: Setup, Everyday Use and Care in Practice
A calm first setup
The best first session with any studio light is a slow one. Begin by mounting each light securely, setting the camera first and the lights second, and saving a known good scene in the app before you start experimenting. Resist the urge to judge the purchase in the first ten minutes, because most smart studio lights feel unfamiliar before they feel right, and many early complaints are really setup details that take minutes to correct. Keep the packaging and paperwork until you have lived with the result for a few days, and make notes on anything you adjust, so you can return to a setting or arrangement that worked instead of rediscovering it later.
The daily routine that makes it feel effortless
Ownership settles down once a small routine forms. For smart studio lights, that routine is checking exposure on a test recording rather than trusting your eyes, because monitors and room daylight both change how a setup really looks. None of this takes long, and that is the point: thirty seconds of attention at the right moment prevents most of the problems that owners later blame on the product. Households share these habits best when they are simple and visible, so agree the routine with anyone else who uses the studio light, and keep any needed accessories within reach of the place where the routine happens.
Cleaning without damaging anything
Cleaning is where good intentions most often cause harm, usually through water, sprays or force in the wrong place. The safe pattern here is dusting diffusers and housings with a dry cloth, keeping sprays off the emitters, and checking stands and mounts for loosening screws. Always follow the maker instructions for your specific model where they differ, because materials and constructions vary across the picks above. Little and often beats a rare, aggressive deep clean: grime, dust and residue are easy to shift when they are fresh and stubborn once they have been left through a season of use.
Storage and the quiet months
How a studio light is stored decides how it greets you next season or after a break. Good practice is keeping lights in their cases or on their stands with cables coiled loosely, and batteries charged part way if they will sit unused for a while. Before storing, give everything a final check for damage, looseness or wear that will be easier to sort now than later, and make a short note of anything that needs replacing. That note, kept with the studio light, turns the next setup from an inspection into a simple, confident start.
Accessories worth considering, and those to skip
Useful additions around smart studio lights include spare stands and grip heads, diffusion material suited to your lights, and labelled cables for each power supply. Buy accessories to solve a problem you have actually met, in the order you meet it, rather than collecting every add on at the point of purchase. Equally, skip accessories that duplicate what your chosen pick already includes, that only suit a different model, or that promise to fix a mismatch that should really be solved by choosing a different pick in the first place.
Head to Head: How the Picks in This Guide Differ in Practice
Readers often ask for a single winner, but the honest answer is that each pick above was included for a different reader. This comparison uses only the roles the guide itself gives each product, and translates those roles into the question you should ask before ordering. If your answer points at the same pick from several angles, you have found your match. If it points at two, use the criteria section above to break the tie.
Elgato Key Light is presented in this guide as best Overall for Streaming Studios. Choose this direction if that description matches the outcome you wrote down earlier, and if the details of the review above line up with your space, routine and expectations. Look elsewhere in the list if your priority is different, not because this pick falls short, but because another pick was included precisely for readers whose needs point the other way. That distinction, fit rather than rank, is the most reliable way to use a guide like this one.
Godox ML100Bi earns its place here as best High-Output Key Light. It will suit you best when that strength is the one your situation demands most, and when any trade offs described in its review are ones you can accept without thinking about them weekly. If you find yourself hoping the review said something different about a basic point, take that as useful information and move your attention to the pick whose stated role already matches what you were hoping for.
Consider Godox ES45 Kit, described above as best Desk Kit with Remote Control, when that role is your deciding factor. Before ordering, re-read its individual review with your measurements, your routine and your household in mind, and check the parts of the listing that confirm the details the guide highlights. If those checks pass, this is a confident choice; if they raise doubts, the guide gives you alternatives in the same category rather than leaving you to start the search again.
Amaran T4c RGBWW Tube Light is presented in this guide as best RGB Tube for Color Work. Choose this direction if that description matches the outcome you wrote down earlier, and if the details of the review above line up with your space, routine and expectations. Look elsewhere in the list if your priority is different, not because this pick falls short, but because another pick was included precisely for readers whose needs point the other way. That distinction, fit rather than rank, is the most reliable way to use a guide like this one.
Nanlite PavoTube II 30C earns its place here as best Battery Tube for Flexible Placement. It will suit you best when that strength is the one your situation demands most, and when any trade offs described in its review are ones you can accept without thinking about them weekly. If you find yourself hoping the review said something different about a basic point, take that as useful information and move your attention to the pick whose stated role already matches what you were hoping for.
Planning the Purchase: Timing, Checks and Total Cost of Ownership
The purchase itself is only the first commitment. Owning smart studio lights well involves consumables, wear parts, occasional accessories and, above all, your own time, so think about the whole period you expect to keep the studio light rather than the day it arrives. None of this needs a spreadsheet. It needs a realistic look at how often you will use it, what will need replacing or refilling, and whether those items are easy to find for the model you choose. A pick that is simple to maintain and easy to source parts for will usually cost you less effort over its life than a pick that is marginally more impressive on day one.
Timing deserves a thought as well. Measure and prepare before you order, not after a box is sitting in the hall, and avoid buying in a rush the night before the event, trip, season or project that depends on it, because rushed buyers skip exactly the checks that prevent returns. If you are buying as a gift, keep the receipt route simple, favour the pick whose stated role is the most versatile, and remember that fit, size and personal routine matter more with smart studio lights than with most purchases, so an easy exchange is part of a thoughtful gift.
Finally, do a last, deliberate pass before you confirm an order. Re-read the one pick review that matters, confirm the size, shape, fitting or compatibility detail that applies to your home, check what is included in the box against what you assumed, and confirm the delivery and returns arrangements while they are still easy to change. That five minute pass is unglamorous, and it is also the difference between the confident owners and the disappointed ones in almost every category, including this one.
When Something Feels Wrong: A Troubleshooting Mindset
Most problems with smart studio lights announce themselves small: a change in feel, sound, fit or result that was not there in the first weeks. Treat that change as information rather than as a verdict on the whole purchase. Work from the simplest explanations first, because setup drift, wear, dirt, batteries, connections and environment explain far more cases than genuine faults do. Change one thing at a time, test honestly, and give the change a fair chance before moving to the next possibility, otherwise you will never know what actually helped.
Keep a few notes as you go, even if they are only dates and a line each in your phone. A short record of when a problem started, what changed around the same time and what you tried turns a vague frustration into a pattern you, a maker support team or a repairer can act on. And know the point at which to stop troubleshooting: anything involving damaged electrics, structural parts, safety features or a problem that keeps returning after the maker guidance has been followed belongs with the maker, a qualified professional or a replacement, not with another evening of hopeful adjustment.
FAQ
Do I need a full color system?
Not always. Many setups rely on adjustable white tone alone. Full color adds scene effects and background looks, so choose it only if you will use them.
Can I control several lights together?
Many systems group lights in an app or controller. Check how many lights a single controller or link supports before you plan a larger rig.
How many lights do you need for a small studio?
One good key light is enough to start, and a second light for fill or background adds depth. More lights add complexity and cable runs. Add them only when your shots need them.
What color temperature is best for video?
There is no single best value, because it depends on the look and the other light in the room. Match your lights to any window or lamp light for consistency. Use the app to adjust until skin tones look natural.
Can smart lights be controlled without Wi-Fi?
Some can, through onboard controls, a remote or Bluetooth, depending on the model. Check the listing for the control methods it describes. Manual controls are a good fallback if the network drops.
Do LED studio lights get hot?
LED lights run cooler than traditional lamps but can still warm up, especially in compact housings. Let them cool before moving or packing them. Follow the maker's notes on ventilation.
Can you use studio lights for photography as well as video?
Many continuous lights work for both, though output and modifiers matter for photos. Higher-output lights with accessory mounts give more control. Check what the listing says about use cases.
Why does my smart light flicker on camera?
Flicker can come from the dimming method, the camera shutter setting or power supply. Try adjusting your camera settings or the light's brightness level. Check the manual for guidance on flicker.
Is RGB lighting useful for streaming?
It is useful if you want colored backgrounds or mood effects behind you. For plain face lighting, adjustable white is enough. Choose RGB only if you will actually use the color modes.
How high should a key light sit?
A common starting point is slightly above eye level, angled gently down. Adjust until shadows under the nose and chin look natural. Small changes in height and angle make a visible difference.
How many lights do I actually need to start?
One good key light, placed well, improves most setups more than several lights placed at random, so start there and add fill or backdrop light when you can name the problem it solves. This is one of the questions owners most often wish they had asked earlier, because the answer shapes daily satisfaction with a studio light far more than most headline features do. Read the relevant pick reviews above with this question in mind, and let the answer steer you between picks rather than trying to make one pick fit every situation.
Why do I look washed out or orange on camera?
Mixed light temperatures and auto camera settings are the usual cause, so set your lights and your camera white balance to agree, then adjust brightness. As with most questions about smart studio lights, the details of your own home and routine decide the final answer, so use this as the starting point and then check the specific guidance for the pick you are considering. If the question matters enough to affect the purchase, it is worth resolving before you order rather than discovering the answer afterwards.
Can I run studio lights from batteries all day?
Battery runtime depends on brightness, and long sessions at full output usually favour mains power, so keep batteries for flexibility and shorter or lower output work. This is one of the questions owners most often wish they had asked earlier, because the answer shapes daily satisfaction with a studio light far more than most headline features do. Read the relevant pick reviews above with this question in mind, and let the answer steer you between picks rather than trying to make one pick fit every situation.
What is the best height for a key light?
Slightly above eye level and angled down toward the subject is the common starting point, then adjust while watching the shadows under the nose and chin on a test shot. As with most questions about smart studio lights, the details of your own home and routine decide the final answer, so use this as the starting point and then check the specific guidance for the pick you are considering. If the question matters enough to affect the purchase, it is worth resolving before you order rather than discovering the answer afterwards.
Do I need the app, or are on light controls enough?
On light controls suit a fixed single light, while the app earns its place when lights are out of reach, grouped in scenes or matched to each other. This is one of the questions owners most often wish they had asked earlier, because the answer shapes daily satisfaction with a studio light far more than most headline features do. Read the relevant pick reviews above with this question in mind, and let the answer steer you between picks rather than trying to make one pick fit every situation.
Questions to Ask Before You Buy
Smart lighting adds a layer of software to a physical tool. These questions help you judge whether the extra layer will fit how you actually work.
- Which devices will control the lights: a phone, a tablet, a laptop, or a dedicated remote?
- Does the system need a hub or bridge, and where will that sit near your gear?
- Is there a plain manual control on each light in case the app is unavailable?
- How does the system connect, and does your room have a reliable signal in every corner?
- Will you need to mix these lights with ones you already own?
- Does the maker provide software updates, and how are they delivered?
Compatibility Checks
Before you build around one ecosystem, check how it works with the rest of your setup. Look at which software versions the app supports, since older phones and tablets may fall outside the list. Confirm whether lights from the same family can be grouped together, and whether different sizes or shapes share one control screen.
Camera and video tools matter, too. If you plan to trigger lights from a shooting app or a streaming program, read the maker’s manual and instructions to see what links are described. Also check mounting threads, power requirements, and cable lengths, because a smart light still needs a stand and an outlet.
Who Should Skip It
A connected system is not for everyone. You may be better off with a simpler setup if:
- You shoot in one fixed position and rarely change your lighting.
- Your workspace has weak wireless coverage that you cannot improve.
- You prefer physical dials you can adjust without looking at a screen.
- You share a workspace where other people might change settings by accident.
- You travel often and do not want to depend on an app or network at each location.
Plain lights with a dimmer and a few fixed positions can do plenty of good work. Smart features shine when you repeat the same scenes across many sessions, because saved presets let you recall a look in seconds rather than rebuilding it by eye each time.
Think about a backup plan too. Keep a spare cable, a power strip, and a simple fixed light nearby so a dead battery or a failed update never ends a session. Label cables and note your favorite scene settings on a card near the stand, which makes it easy to rebuild a look after a reset.
The Short Version
Pick a smart studio lighting system by output, color control, wireless options, mounts and power. Match it to your room, plan the cables and read the manual.
Related Guides
- How to Choose the Best LED Track Lighting Systems (2026 Guide)
- How to Choose the Best Studio Strobes: Buyer's Guide (2026)
- How to Choose a Podcast Recording Studio Setup (2026 Guide)
- How to Choose the Best Studio Equipment Racks: A Buyer's Guide
- How to Choose the Best Studio Subwoofers: Buyer's Guide (2026)