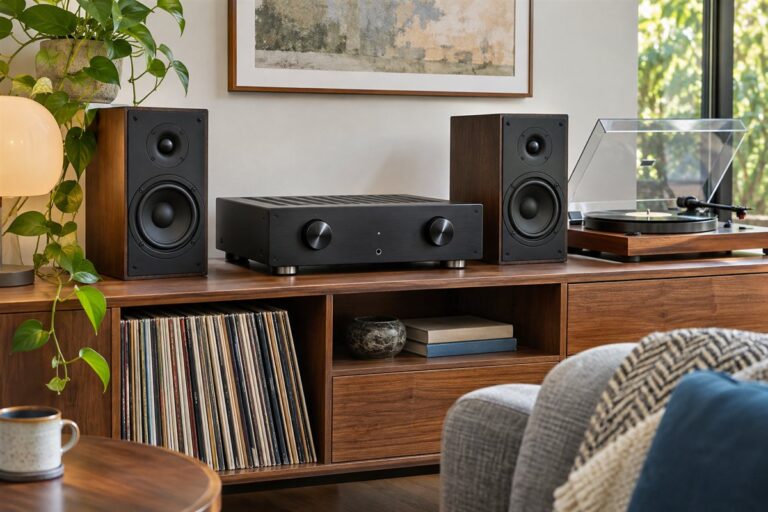
A home theater receiver is the hub of a surround sound setup, taking video and audio from your devices, powering the speakers and sending the picture to the screen. We have not used these products ourselves, so this page does not rank anything from personal experience. It describes the features that set one receiver apart from another, so you can read a listing with a clear checklist.
The main choices are the number of channels, the HDMI inputs, the power the maker states, the audio formats supported and any room setup tools. Your speakers, your screen and your room size shape each of these, so use this guide to compare features and not as a promise about any single receiver. Follow the maker’s setup directions.
As an Amazon Associate we earn from qualifying purchases. Links on this site are affiliate links, and they do not change the information we give.
In this guide
Quick Picks
| Pick | Product | Best For |
|---|---|---|
| 1 | Denon AVR-S770H 7.2 Channel AV Receiver | Best for a 7.2 Atmos setup with built-in streaming |
| 2 | Sony STR-AN1000 7.2 Channel AV Receiver | Best for 360 Spatial Sound Mapping and 8K HDMI |
| 3 | Denon AVR-S570BT 5.2 Channel AV Receiver | Best simple 5.2 with 8K HDMI inputs |
| 4 | Yamaha RX-V385 5.1 Channel AV Receiver | Best compact 5.1 with YPAO room calibration |
| 5 | Sony STR-DH590 5.2 Channel AV Receiver | Best budget 5.2 with virtual front surround |
Our Picks

1. Denon AVR-S770H 7.2 Channel AV Receiver — Best for a 7.2 Atmos setup with built-in streaming
Denon’s S770H covers the checklist in one step: seven amplified channels that can run a 7.2 layout or a 5.2.2 layout with height speakers, decoding for Dolby Atmos and DTS:X, and 75 watts per channel as Denon states it (8 ohms, 20Hz–20kHz, 0.08% THD, two channels driven). Six HDMI inputs include three that pass 8K/60 and 4K/120 signals, and the output supports eARC, so a modern TV and a games console are both covered. Audyssey MultEQ measures your speakers with the supplied microphone to set levels and EQ for the room, which is the room-setup tool this guide recommends checking for. Streaming is built in rather than bolted on: HEOS multi-room, Wi-Fi, Bluetooth and AirPlay 2, plus voice-assistant compatibility. It suits a mid-size room where you want object-based sound and music streaming without a separate streamer. Choose it if you plan to grow from 5.1 to height channels later.
View Denon AVR-S770H on Amazon

2. Sony STR-AN1000 7.2 Channel AV Receiver — Best for 360 Spatial Sound Mapping and 8K HDMI
Sony’s AN1000 is a 7.2-channel receiver built around its own spatial processing: 360 Spatial Sound Mapping uses the calibration results to place phantom speakers around the listening position, on top of standard Dolby Atmos and DTS:X decoding. Setup runs through Digital Cinema Auto Calibration IX, Sony’s microphone-based system that measures speaker distances and the room itself. Video support is current — six HDMI inputs and two outputs with HDMI 2.1 features, including 8K and 4K/120 passthrough and eARC — so consoles and streaming boxes all connect at full quality. Sony rates output at 165 watts per channel into 6 ohms under single-channel conditions, a figure to read with the guide’s warning about test conditions in mind. Streaming is built in with Wi-Fi, Chromecast, Spotify Connect, AirPlay and Bluetooth. Pick it if you want Sony’s room-mapping approach and a full set of modern HDMI sockets.
View Sony STR-AN1000 on Amazon
3. Denon AVR-S570BT 5.2 Channel AV Receiver — Best simple 5.2 with 8K HDMI inputs
The S570BT keeps the channel count at 5.2 — five speakers and up to two subwoofers — but keeps the video side fully current, which is the combination many smaller rooms actually need. Four HDMI 2.1 inputs pass 8K signals, with eARC on the output, support for HDR10+, Dolby Vision and Dynamic HDR, and gaming features such as VRR and QFT that the maker lists. Power is stated at 70 watts across each of the five channels, and decoding covers Dolby TrueHD and DTS-HD Master Audio, the lossless formats on most Blu-ray and streaming soundtracks. There is no network streaming here beyond Bluetooth, and no microphone calibration; instead Denon’s on-screen HD Setup Assistant walks through speaker connection and basic EQ settings step by step. Choose this one if your layout stops at 5.1 or 5.2 and you would rather have up-to-date HDMI than extra channels you will not wire up.
View Denon AVR-S570BT on Amazon
4. Yamaha RX-V385 5.1 Channel AV Receiver — Best compact 5.1 with YPAO room calibration
Yamaha’s RX-V385 is a straightforward 5.1 receiver: five channels rated by Yamaha at 70 watts per channel into 6 ohms, four HDMI inputs and one output, and 4K passthrough with Dolby Vision, HDR10 and Hybrid Log-Gamma support. Unlike the Denon above, it does include microphone-based setup — Yamaha’s YPAO system measures your speakers and adjusts for the room, which the guide lists as a feature worth having at any level. Decoding covers Dolby TrueHD and DTS-HD Master Audio, and Yamaha adds its CINEMA DSP modes for widening two-channel music and TV sound. Bluetooth is built in for phone streaming, with a Compressed Music Enhancer intended to tidy up streamed audio, and the front channels can be bi-amped if your speakers allow it. It predates 8K HDMI, so it fits a 4K screen rather than a future 8K one. Pick it if a 4K 5.1 system with proper auto calibration is the goal.
5. Sony STR-DH590 5.2 Channel AV Receiver — Best budget 5.2 with virtual front surround
The STR-DH590 is Sony’s entry-level surround receiver: 5.2 channels, four HDMI inputs and one output with HDCP 2.2, and 4K HDR passthrough including Dolby Vision, so a current TV and a 4K player connect without downgrading the picture. Sony’s headline figure is 145 watts per channel into 6 ohms measured at 1kHz with one channel driven — read it alongside the guide’s advice on power conditions rather than comparing it directly with full-bandwidth ratings. Two features stand out at this level: S-Force PRO Front Surround, which creates a virtual surround effect from just two front speakers if you are starting small, and D.C.A.C. automatic calibration with a plug-in microphone to set speaker sizes and distances. Bluetooth covers music from a phone, and a second subwoofer output is there when you add one. Choose it if the budget is tight but you still want 4K HDR switching and room to grow to a full 5.2 layout.
What to Look For
| Factor | Why it matters | What to check |
|---|---|---|
| Channel count | Sets the size of the speaker layout | 5.1, 7.1 or more, plus height channel and second zone support |
| HDMI inputs and outputs | Decide how many devices connect and which video formats pass through | Input count, version, eARC support and the video formats named by the maker |
| Power output | Shows how the maker describes amplifier strength | Stated watts per channel, the impedance and the conditions each figure refers to |
| Audio formats | Determine which sound tracks the receiver can decode | Surround and object based formats listed in the specifications |
| Room setup tools | Help match the sound to your speakers and room | Microphone based calibration, speaker setup menus and equalizer options |
| Streaming and control | Add music sources and easier operation | Built in network features, Bluetooth, app control and remote layout |
Setup and Care Tips
- Read the maker’s instructions in full before you connect speakers.
- Match speaker wire to the right terminals and keep bare strands from touching.
- Give the receiver open space around it so air can move past the vents.
- Run the room calibration tool if one is offered, then adjust by ear.
- Dust the vents on a regular schedule and keep the unit away from liquids.
Mistakes to Avoid
- Buying more channels than your room and speakers will use.
- Ignoring HDMI version and eARC when connecting a modern screen.
- Comparing watts per channel without reading the test conditions.
- Stacking other gear on top and blocking the vents.
- Skipping the speaker size and distance settings in the menu.
Planning the Room Before Choosing Any Hardware
A receiver is only one link in a chain that ends at your ears, so the room deserves attention first. Sketch the space on paper and mark where the screen, seating and each speaker could realistically sit. Note where power outlets, the network socket and the wall for the screen are located, because cable length and routing often decide what is practical.
Room size and shape influence how much power you need and how many speakers make sense. A small bedroom rarely benefits from a large speaker array, while a long living room may. Hard floors, bare walls and large windows reflect sound, whereas rugs, curtains and bookshelves soften it. These details shape the sound you hear as much as the electronics do.
Questions to answer first
- How many people usually sit and watch, and where?
- Can speakers be placed at the sides and rear, or only at the front?
- Is ceiling mounting or height speaker placement possible?
- Will the receiver live in an open shelf or a closed cabinet?
Speaker Layout Notation Decoded
Listings use number pairs such as 5.1, 5.2, 7.1 or 7.2, and sometimes add a third number for height speakers. The first number counts the regular speakers, and the number after the dot counts subwoofers. A third number, where present, counts overhead or height channels.
| Notation | Regular speakers | Subwoofer outputs | Typical room use |
|---|---|---|---|
| 5.1 | Five | One | Small to medium living rooms |
| 5.2 | Five | Two | Rooms where two subwoofers even out bass |
| 7.1 | Seven | One | Larger rooms with rear surround positions |
| 7.2 | Seven | Two | Larger rooms wanting extra bass control |
Having more channels is only helpful if you will place and connect the matching speakers. Many receivers can reassign extra amplifier channels to other jobs, such as height speakers, but the options vary by model. Check the manual to see what your chosen model supports.
What Immersive Audio Formats Ask of Your Setup
Object-based formats add height information so sounds can seem to move above you. To hear that effect, you need a receiver that decodes the format, speakers or modules that can reproduce height cues, and content that carries the format. A streaming device, disc player or game console can supply it.
Ways to add height
- Ceiling speakers, which offer the most direct overhead effect but need installation.
- Upward-firing modules placed on top of front speakers, which bounce sound off the ceiling.
- Speakers mounted high on the front wall in some layouts.
Ceiling height and surface materials influence upward-firing results, so check the speaker maker’s guidance. Without height speakers, you can still enjoy a good surround mix, and some receivers add virtual processing to simulate extra width. These effects vary in their appeal from person to person.
HDMI Inputs, Outputs and Version Notes
The receiver passes picture from your sources to the screen, so its HDMI connections need to match your gear. Count the devices you plan to attach, such as a console, a streaming box and a disc player, then compare with the number of inputs listed.
- Input count: Allow a spare input for future devices.
- Return channel: Look for an output that supports audio return, so television sound can reach the receiver over one cable.
- Resolution and refresh features: Higher resolutions and fast refresh features matter to gamers. Check precisely which inputs support them, since some models support the newest features on only certain ports.
- Pass-through: Confirm that picture signals flow from sources to the screen with the features you want.
Listings sometimes state support for features in broad terms, so confirm the detail in the product manual. Cable quality also matters for higher-bandwidth signals, so use cables labelled for the version you need.
Room Correction and Setup Microphones
Many receivers include an automatic setup routine. You place a small microphone at the listening seat, and the receiver plays test tones through each speaker. It then adjusts levels, distances and sometimes equalisation to better suit your room.
These systems vary in approach and depth, and the names differ between makers. Treat them as a useful first pass and not an absolute answer. After the routine finishes, listen to familiar material and see whether dialogue sounds clear and bass sounds balanced. Many receivers let you override the results manually if something sounds off.
Tips for better setup results
- Keep the room quiet during the test tones.
- Place the microphone at ear height in the main seat, as the instructions show.
- Run the routine again if you move furniture or speakers.
- Record the final settings in case you reset the receiver later.
Connecting Streaming, Wireless and Network Features
Modern receivers often include network features that let them play music over a home network or through a phone app. Typical options include built-in streaming services, wireless connections to phones and multi-room audio. These add convenience, but their exact list varies by model and region.
Check whether the receiver can join your home network by cable, wirelessly or both. A cable connection is often steadier for streaming. Make sure the receiver can accept firmware updates, because updates sometimes add or fix features. Voice control support, where offered, depends on the services you use, so confirm compatibility with your own devices.
Heat, Ventilation and Placement
Receivers contain amplifiers that produce heat. Give the unit space above and around it, and avoid stacking other equipment on top unless the manual permits. A closed cabinet can trap heat, so check the maker’s placement guidance and leave the clearance it asks for.
Place the receiver where you can reach the connections or at least see the labels. Tidy cable routing prevents tangled power cords near signal leads, and clear labelling on each cable helps if you later change a device. For anything involving mains wiring, in-wall cabling or ceiling work, follow the maker’s instructions and consult a qualified professional.
Troubleshooting Common Setup Problems
| Problem | Possible cause | Try this |
|---|---|---|
| No sound from the television | Audio return not enabled or wrong input | Check the television audio output setting and the receiver input |
| No picture on the screen | Wrong HDMI port or cable limit | Try another cable and confirm the correct output is used |
| Dialogue sounds quiet | Centre speaker level too low | Adjust the centre level in the setup menu |
| Bass sounds boomy | Subwoofer placement or level | Move the subwoofer and rerun the setup routine |
| Surround speakers silent | Wiring or mode setting | Check connections and the selected listening mode |
| Receiver shuts off | Heat or speaker wiring issue | Improve ventilation and inspect speaker cables |
Glossary and Checklist for Decision Day
- Channel: One path of audio to one speaker.
- Subwoofer output: A connection that sends low bass to a powered subwoofer.
- Audio return: A feature that sends television sound to the receiver over HDMI.
- Pass-through: Sending a video signal from a source to the screen.
- Impedance: An electrical figure for speakers that the receiver must be able to drive.
Before you buy, confirm the room plan, the speaker layout you can accommodate, the HDMI count and features you need, the setup system, the network features, and the ventilation space. Matching these points to your own room makes the final choice far easier.
Matching Receiver Power to Speaker Needs
Power figures on receivers are easy to misread. Makers may state output in different ways, such as with one channel driven or all channels driven, and the conditions behind the number change what it means. A bigger number does not automatically mean louder or better sound, because speaker sensitivity, room size and listening habits all play a part.
Speakers carry their own specifications, including impedance and a sensitivity figure. A sensitive speaker needs less power to reach a given volume. Check that the receiver supports the impedance of your speakers, and follow the maker’s guidance if you plan to connect more than one speaker to a single channel.
A practical way to think about it
- Note the size of the room and how loudly you usually listen.
- Look up the sensitivity and impedance stated for your speakers.
- Compare with the receiver’s stated power and the conditions given for the figure.
- Leave headroom, so the receiver is not working at its limit during loud scenes.
When the paperwork is unclear, ask the maker or a specialist retailer instead of guessing.
Cabling Basics That Prevent Headaches
Good cabling is rarely glamorous, but it prevents many faults. Use speaker wire of a sensible thickness, especially for long runs, and keep the lengths to each speaker as even as practical. Strip only the amount of wire the terminal needs, and make sure no stray strands touch the neighbouring terminal.
- Match positive and negative terminals consistently on every speaker.
- Use clearly labelled HDMI cables of the type that suits your devices.
- Run signal cables away from mains cords where you can.
- Label each cable end, so changes later are quick.
- Power off the receiver before connecting or moving speaker cables.
Subwoofer connection
A powered subwoofer connects with a single signal cable to the receiver’s subwoofer output. Set the subwoofer’s own level and crossover controls as its manual advises, then fine-tune using the receiver’s menu. A little patience here brings tighter bass and more natural dialogue.
Everyday Use: Modes, Levels and Late-Night Listening
Once the system is built, daily habits decide how much you enjoy it. Most receivers offer listening modes that reshape the sound for movies, music, games or sport. Try each on familiar material and keep the ones you like, rather than leaving a single mode on for every source.
Many models include a night or dynamic range setting that narrows the gap between quiet speech and loud effects. That is handy when others are sleeping, because explosions stay in check while dialogue remains clear. Some also offer dialogue lift or a separate level for the centre speaker.
Habits worth forming
- Save favourite settings as presets if the receiver allows it.
- Keep the remote or app within reach, and learn the direct buttons for volume and input.
- Check for firmware updates now and then, following the maker’s steps.
- Dust the vents gently with a dry cloth while the unit is off and unplugged.
If something stops working after an update or a settings change, the manual usually describes a reset procedure. Note your settings first so you can restore them quickly.
Finally, remember that a receiver can outlast several televisions and consoles. Choosing one with a few spare inputs and a clear upgrade path for the features you care about means you are less likely to need a replacement when your other devices change.
FAQ
How many channels do I need?
Begin from the speaker layout you plan to use. A 5.1 layout has five speakers and a subwoofer, while larger layouts add rear or height speakers. Pick a receiver with room to grow if you expect to add more.
Do I need a receiver if I own a soundbar?
Not always. A receiver suits separate speakers and many connected devices, while a soundbar is a simpler, all in one choice. Think about the space and the gear you own.
The Short Version
Use the table above as a checklist, and read each listing in full before you decide. Photos and titles tell you little, so lean on the written specifications, the size details and the maker’s own directions. Match the channel count to your speakers, check the HDMI features, and read the power wording with care. Follow the maker’s setup steps.
Choosing the right home theater receiver: a deeper look at the criteria
The short version of each review above tells you what a pick does well. This section slows down and looks at why those differences matter, so you can weigh the home theater receivers in this guide against your own rooms, routines and expectations rather than against a generic checklist.
Channels matched to your speaker plan
Count the speakers you own and realistically will add. Paying for channels you will never wire helps nothing; running out of channels mid-upgrade helps less.
In practice, the easiest way to judge this is to test it against your worst realistic day, not your average one. Think of the largest load, the longest session or the most difficult conditions the home theater receiver will honestly face in your home, and ask whether the option you are leaning towards handles that day calmly or merely survives it.
Power in context
Receiver power figures are measured in different ways, so treat them as rough guides. Speaker sensitivity and room size shape real volume more than small wattage differences.
Shoppers often treat this as a minor detail because it rarely appears in headline marketing, yet owners mention it constantly once the product is in daily use. If two picks in this guide look equal elsewhere, let this factor break the tie; it is usually the difference between a product that is admired and one that is simply used without thinking.
Room correction and setup
Built-in calibration with a microphone can tame real rooms. For most living rooms, good correction matters more than exotic features you will never open.
There is also a budget angle worth stating plainly: paying for quality here tends to show up as years of uneventful service, while saving money here tends to show up as small frustrations repeated every single week. Neither choice is automatically wrong, but you should make it deliberately, knowing which of the two you are buying.
HDMI and source compatibility
Check inputs for your console, streamer, player and TV, including support for the video formats and eARC connection your TV uses, so the receiver does not become the bottleneck.
If you are upgrading from an older home theater receiver, compare this point against the one you own now. Many people discover that what they disliked about their current product was not its age or its brand but exactly this characteristic, and they are about to buy it again in a newer box.
Music as well as movies
If the system doubles for music, judge stereo performance, streaming options and a clean direct mode, not just surround modes.
For households where more than one person will use the home theater receiver, weigh this from the least experienced user’s point of view as well. A choice that works beautifully for an expert but confuses a partner, a teenager or a grandparent will generate friction that no specification sheet predicts.
Ventilation and cabinet fit
Receivers run warm and need air. Measure your cabinet with clearance for heat and cable bends, not just the unit’s width.
Finally, remember that this factor interacts with the others rather than standing alone. A strong performer on this point can compensate for a weakness elsewhere, and a weak one can undermine an otherwise excellent product, which is why this guide weighs the picks as complete packages instead of crowning a winner on any single measure.
Home theater receivers in real life: common use cases
Most disappointment with home theater receivers comes from a mismatch between the product and the job it was bought for. These are the situations readers most often describe, and how the priorities shift in each one.
Living-room movie systems
Most homes need strong dialogue clarity, simple operation and surround that serves the sofa, all of which a well-matched mid-range receiver delivers.
Dedicated theater rooms
Larger rooms and bigger speaker layouts justify more channels, pre-outs and serious calibration.
Gaming setups
Gamers should prioritise the HDMI features their consoles and TV share, plus low-latency passthrough for responsive play.
Music-first mixed systems
Listeners who split time between records, streaming and films need a receiver that treats stereo seriously.
Step by step: setting up and using your home theater receiver
Whatever pick you choose from this guide, a careful first setup pays off every time you use it afterwards. Work through these steps in order the first time, and revisit them whenever results disappoint — the cause is usually one of the early steps, not the product itself. Always follow the maker’s own instructions where they differ, since they know the specific model in your hands.
- (‘Connect speakers with the power off, keeping polarity consistent and bare wire tidy so no strands bridge terminals.’, “Place the calibration microphone at the main seat’s ear height and run the full setup routine in a quiet room.”, ‘Set speaker sizes and crossovers based on your actual speakers and subwoofer, using the calibration results as a starting point rather than gospel.’, ‘Test dialogue-heavy scenes at normal volume and adjust the centre channel level if voices sit behind effects.’, ‘Save separate settings for movies and music if the receiver allows, since rooms and tastes differ by content.’, ‘Re-run calibration whenever you move speakers, furniture or the main seating.’)
Once the routine feels familiar, it becomes quick. Most owners find the second and third uses take half the attention of the first, which is exactly why investing effort in the first setup is worth it.
Cleaning, care and storage
Good home theater receivers rarely fail suddenly; they decline slowly through skipped cleaning, poor storage and small damage left alone. A light, regular care routine protects both performance and safety, and it keeps the product pleasant to use.
(‘Keep vents clear and dust the top panel regularly; heat is the slow enemy of receivers.’, ‘Check speaker connections yearly for looseness or corrosion, especially bare-wire joints.’, ‘Update firmware when the maker releases it, following their process with power kept stable.’, ‘Give the unit air after long loud sessions rather than closing a hot cabinet door immediately.’)
As a rhythm, give the home theater receiver a quick once-over after heavy use, a proper clean on a regular schedule that suits your household, and a deeper inspection at the change of seasons. Catching wear early — a fray, a drip, a new noise, a dull edge — is almost always cheaper and safer than reacting to a failure.
How the picks in this guide compare
With the criteria above in mind, here is how the picks already reviewed in this guide divide up. None of them is best at everything; each was chosen for a role, and the right question is which role matches your life.
Denon AVR-S770H 7.2 Channel AV Receiver is the pick this guide positions for for a 7.2 Atmos setup with built-in streaming. If that description sounds like your household, it deserves to be your starting point; if it clearly does not, the neighbouring picks exist precisely because priorities differ, and you will be happier following your own use case than chasing the top of the list.
Sony STR-AN1000 7.2 Channel AV Receiver is the pick this guide positions for for 360 Spatial Sound Mapping and 8K HDMI. If that description sounds like your household, it deserves to be your starting point; if it clearly does not, the neighbouring picks exist precisely because priorities differ, and you will be happier following your own use case than chasing the top of the list.
Denon AVR-S570BT 5.2 Channel AV Receiver is the pick this guide positions for simple 5.2 with 8K HDMI inputs. If that description sounds like your household, it deserves to be your starting point; if it clearly does not, the neighbouring picks exist precisely because priorities differ, and you will be happier following your own use case than chasing the top of the list.
Yamaha RX-V385 5.1 Channel AV Receiver is the pick this guide positions for compact 5.1 with YPAO room calibration. If that description sounds like your household, it deserves to be your starting point; if it clearly does not, the neighbouring picks exist precisely because priorities differ, and you will be happier following your own use case than chasing the top of the list.
Sony STR-DH590 5.2 Channel AV Receiver is the pick this guide positions for budget 5.2 with virtual front surround. If that description sounds like your household, it deserves to be your starting point; if it clearly does not, the neighbouring picks exist precisely because priorities differ, and you will be happier following your own use case than chasing the top of the list.
When two picks both seem to fit, decide on the secondary factors: the care routine you will actually keep, the space you actually have, and the accessories or consumables you would need to add. Those everyday details, rather than headline features, are what owners end up praising or cursing a year later.
More mistakes to avoid
The mistakes section earlier in this guide covers the headline errors. These are the quieter ones that show up weeks later, gathered from the problems owners most often describe with home theater receivers.
- (‘Buying maximum channels for a room that will only ever run a simple setup.’, ‘Burying the receiver in a sealed cabinet and cooking it slowly.’, ‘Skipping calibration and judging the receiver on unconfigured default settings.’, ‘Mixing speaker connections out of polarity so bass and imaging collapse.’)
- Chasing headline wattage while ignoring room correction and speaker match.
Notice the pattern: almost none of these are product defects. They are mismatches of size, setting, routine or expectation — which means they are all avoidable with the checks in this guide and ten honest minutes thinking about how you will really use the home theater receiver.
Your first week with a new home theater receiver
The first week with any new home theater receiver follows a predictable arc, and knowing it in advance stops small teething troubles turning into returns. The first session is about setup and the steps above: expect it to feel slow, expect to consult the manual, and do not judge performance until the basics are in place and you have completed one honest, normal job rather than a stress test.
By the second and third uses, the routine compresses. You will know which settings you actually touch, where the home theater receiver lives between jobs, and which of your early worries were unfounded. This is the right moment to make the small adjustments the manual allows — the seating, the tension, the placement, the schedule — because you now have real experience to adjust from.
By the end of the week, write down three things: the setting or arrangement you settled on, the one annoyance that remains, and the date of the first cleaning or maintenance task the manual asks for. That short note becomes your personal quick-reference, and it is worth more in month six than any review, including this one.
Accessories, consumables and the real cost of ownership
The purchase price of a home theater receiver is only the entry fee. Over its life you will spend time and money on the things that keep it working: the consumables it uses up, the accessories that make it suit your home, and the occasional replacement part. None of the picks in this guide hides an unusual burden here, but the burdens differ, and they are worth weighing before you choose.
Start with what the maker includes and what the manual lists as regular replacements, and check that those items are easy to obtain where you live. Then add the accessories your specific situation demands — storage, protection, fitting or cleaning items suited to your space — rather than a generic bundle. Buying only what your use case needs keeps both cost and clutter down.
Time is a cost too. A home theater receiver that needs ten calm minutes of care after each use may suit a hobbyist perfectly and frustrate a busy parent completely. Re-read the care section above with your own calendar in mind, and be honest: the cheapest product to own is the one whose upkeep you will actually do.
When to repair, when to replace, and when to upgrade
Every home theater receiver eventually reaches a crossroads. Repair makes sense when the fault is isolated, the rest of the product is sound, and the maker still supports it with parts and guidance. A single worn component, a tired accessory or a setting that has drifted out of adjustment are all repair territory, and the troubleshooting habits in this guide will identify them.
Replacement makes sense when wear is general rather than local: when several parts are tired at once, when performance has declined despite correct care, or when safety-related components are damaged. At that point money spent on repairs buys a product that is still old everywhere else, and the picks in this guide become the sensible comparison set.
Upgrade is a different decision again: your current home theater receiver may work perfectly while no longer matching your life. A bigger household, a new hobby level, a house move or a change in who uses it are all legitimate reasons to change. In that case, return to the criteria at the top of this section, note which priorities moved, and choose the pick that matches the life you have now.
More questions, answered
How many channels do I need?
As many as your speaker layout uses, plus any you are genuinely committed to adding. A quality setup matched to your room beats unused channels every time.
Why does dialogue sound quiet?
Usually centre placement, calibration or a soundtrack mixed for dynamics. Re-run setup, check the centre is unobstructed, and use dialogue enhancement if your receiver offers it.
Can I use my old speakers?
Often yes, if their impedance suits the receiver and they are in good condition. Check the receiver manual’s speaker guidance before connecting.
Do I need a subwoofer with a receiver?
For film effects and full-range sound in most rooms, a subwoofer adds what typical speakers cannot reproduce. Music-only small rooms may manage without.
What is eARC and do I need it?
It carries high-quality audio from the TV to the receiver over HDMI. If you use TV apps or a console through the TV, it is usually worth having on both devices.
How long do receivers last?
The amplifiers age slowly; formats and connections date them faster. Buying current HDMI compatibility extends useful life more than extra power.
One habit that separates satisfied owners from disappointed ones is writing down the job you bought the home theater receiver for, in plain terms, before comparing models. When a feature list starts to blur together, that short note — the rooms, loads, routes or people involved — usually makes the right choice obvious again, because it turns abstract specifications into your actual week.
It also pays to think about the second year, not just the first week. Consumables, replacement parts, cleaning effort and storage all repeat long after the purchase excitement fades. Among the picks in this guide, favour the option whose ongoing routine fits your household’s patience and space, since a product that is easy to live with gets used properly and lasts longer.
If you are choosing between two close finalists, decide by the failure you would regret more. Would you rather have capacity you rarely use, or discover on the busiest day of the year that you do not have enough? Would you rather maintain a simpler product, or manage a more capable one? There is no universal answer, but your answer points straight at the right pick.
Before you buy, do one final check of the basics in your own space: measure where the home theater receiver will live and be used, confirm any connections, fittings or accessories it depends on, and read the maker’s manual or listing for anything your setup must provide. Ten minutes of checking prevents the most common returns, which are rarely about quality and almost always about fit.
When the home theater receiver arrives, keep the manual somewhere findable and note the date you started using it. Small records — when you cleaned it, changed a part or adjusted a setting — make troubleshooting months later far easier, and they are exactly what a maker’s support team will ask about if you ever need help.
Finally, give any new home theater receiver a fair settling-in period before judging it. First uses involve unfamiliar settings, new routines and, often, the hardest job you own saved up for the occasion. Work through the guidance in this article, make the small adjustments suggested, and only then decide whether the product or the setup needs to change.
Season and timing play a quieter role than most buying guides admit. The home theater receiver you need in the busiest month of your year may be a different size, capacity or style from the one that suits a quiet month, so think about when yours will work hardest and choose for that peak, while checking it still behaves well in everyday, lighter use.
If the home theater receiver will be shared, agree the house rules early: where it is stored, who cleans it, and what settings nobody changes without saying so. Shared products fail socially before they fail mechanically, and five minutes of agreement when it arrives prevents the slow drift into misuse that shortens any product’s life.
Think, too, about the end of the product’s life before the beginning. A well-made home theater receiver should be repairable for its common faults, recyclable or disposable responsibly at the end, and durable enough that replacement is a rare event. Choosing the option you will keep longest is usually the most economical and the least wasteful decision available.
When you read owner comments about any home theater receiver, read them for patterns rather than verdicts. One complaint is an anecdote; the same observation repeated by people with different homes and habits is information. Match those patterns against your own situation, and discount both the angriest and the most glowing single account.
Photograph your setup once it works well: the arrangement, the settings and the accessories in place. If the home theater receiver is moved, serviced or borrowed and returned differently, that photograph restores your working setup in minutes instead of another round of trial and error.
Lastly, resist the urge to judge a considered purchase by its hardest imaginable test on day one. Work up to demanding jobs as your familiarity grows, the way the steps in this guide suggest. Products are returned every day for failing tests their owners had not yet learned to set up, and a fair first week gives both you and the home theater receiver a proper chance.
Gifting changes the calculation slightly. If the home theater receiver is for someone else, favour the forgiving option: the one that suits the widest range of homes and habits, includes what they need to start, and does not demand accessories or knowledge they may not have. A slightly less specialised product that gets used happily beats a perfect product that intimidates its new owner.
Related Guides
- How to Choose the Best Home Theater Seating: A Buyer's Guide
- How to Choose the Best Theater Recliners: Buyer's Guide (2026)
- 6 Best Countertop Popcorn Makers: Hot Air, Oil, Theater (2026)
- How to Choose the Best Leather Home Theater Seating (2026 Guide)
- How to Choose the Best Bluetooth Jukeboxes: Buyer's Guide (2026)