A 70-200mm f/2.8 zoom is the classic telephoto for portraits, events, sports and wildlife. The constant f/2.8 aperture keeps exposure steady across the zoom range and gives a shallow depth of field at the long end.
The six lenses below cover Canon RF, Canon EF, Sony E and Nikon Z mounts, from a 70-180mm compact option to full 70-200mm designs with built-in stabilization. Specs come from each product’s listing page and are the makers’ own. We have not used these lenses ourselves.
As an Amazon Associate we earn from qualifying purchases. Links below are affiliate links, and they do not change the product information we give.

What to Look For
| Feature | Why it matters |
|---|---|
| Mount | The lens must match your camera system, or need an adapter |
| Stabilization | Optical stabilization helps at slow shutter speeds |
| Autofocus motor | Fast, quiet motors suit sports and video |
| Size and zoom range | Shorter zooms can be lighter to carry |
In this guide
Specs at a Glance
| Lens | Mount | Focal range | Notes |
|---|---|---|---|
| Canon RF70-200mm F2.8 L IS USM | Canon RF | 70-200mm f/2.8 | Up to 5 stops of shake correction; dual Nano USM; focus as close as 0.7 m |
| Canon RF70-200mm F2.8 L IS USM Z | Canon RF | 70-200mm f/2.8 | Internal zoom and focus; iris ring; focus breathing control for video |
| Sony FE 70-200mm F2.8 GM OSS II | Sony E | 70-200mm f/2.8 | XD Linear Motors; 11-blade aperture; 17 elements in 14 groups |
| Nikon NIKKOR Z 70-200mm f/2.8 S | Nikon Z | 70-200mm f/2.8 | 77mm filter thread; control ring and function buttons; closest focus 0.5 m at 70mm |
| Tamron 70-180mm F/2.8 Di III VC VXD G2 | Sony E | 70-180mm f/2.8 | VC stabilization; VXD autofocus; 30.2 oz; zoom lock |
| Sigma 70-200mm F2.8 Sports DG OS HSM | Canon EF | 70-200mm f/2.8 | Magnesium alloy barrel; 11-blade diaphragm; Arca-type tripod foot |
The 6 Best 70-200mm f/2.8 Zoom Lenses

Top pickBest for canon RF shooters who want a compact zoom
1. Canon RF70-200mm F2.8 L IS USM
A full-frame mirrorless telephoto zoom for Canon RF with up to five stops of shake correction, dual Nano USM autofocus and a minimum focusing distance of 0.7 m, described by Canon as compact and lightweight.
Suits: Canon RF shooters who want a compact zoom. Strengths: stabilization and quiet focus. Weaknesses: the listing gives no weight figure. Skip it if you shoot another mount. The angle of view on the page looks inconsistent, so rely on the focal range.

Best for hybrid photo and video work
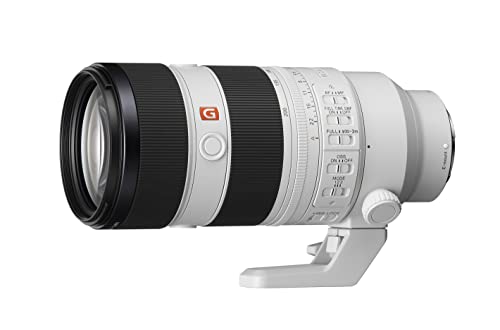
2. Canon RF70-200mm F2.8 L IS USM Z
A newer RF hybrid telephoto zoom with internal zooming and focusing, an iris ring for manual aperture control, two floating focus units driven by Nano USM motors and focus breathing control for video.
Suits: hybrid photo and video work. Strengths: the iris ring and breathing control. Weaknesses: some listing fields conflict, such as the angle of view. Skip it if you only shoot stills and prefer the standard version.
View Canon RF70-200mm F2.8 L IS USM Z Telephoto Zoom Lens on Amazon
Best for sony shooters after a flagship zoom
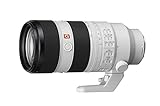
3. Sony FE 70-200mm F2.8 GM OSS II
A Sony E-mount full-frame zoom with 17 elements in 14 groups, Nano AR Coating II, an 11-blade aperture and four XD Linear Motors that Sony says raise autofocus speed over the first version. Teleconverters are sold separately.
Suits: Sony shooters after a flagship zoom. Strengths: a refined optical design and teleconverter support. Weaknesses: the listing mixes details from the earlier model. Skip it if you want the lightest option.
View Sony FE 70-200mm F2.8 GM OSS II Full-Frame Zoom Lens on Amazon

Best for nikon Z shooters
4. Nikon NIKKOR Z 70-200mm f/2.8 S
A Nikon Z zoom with a 77mm filter thread, closest focus of 0.5 m at 70mm, a customizable control ring and function buttons, and autofocus plus manual focus.
Suits: Nikon Z shooters. Strengths: close focus and handling controls. Weaknesses: the listing gives few other numbers. Skip it if you use Sony or Canon.

View Nikon NIKKOR Z 70-200mm f/2.8 S Telephoto Zoom Lens on Amazon

Best for travel and event work on Sony
5. Tamron 70-180mm F/2.8 Di III VC VXD G2
A Sony E-mount zoom that trades 20mm of reach for a smaller body: 6.2 by 3.3 inches and 30.2 oz, with VC stabilization, VXD autofocus, a zoom lock switch and a close focus of 0.3 m at 70mm.
Suits: travel and event work on Sony. Strengths: size and close focus. Weaknesses: stops at 180mm. Skip it if you need the full 200mm.

View Tamron 70-180mm F/2.8 Di III VC VXD G2 for Sony E-Mount Full Frame Mirrorless Cameras on Amazon

Best for canon SLR owners
6. Sigma 70-200mm F2.8 Sports DG OS HSM for Canon
A Canon EF-mount zoom with nine FLD and one SLD glass elements, an 11-blade rounded diaphragm, a magnesium alloy barrel and a tripod socket with 90 click stops and an Arca-type clamp.
Suits: Canon SLR owners. Strengths: a rugged barrel and a useful tripod foot. Weaknesses: an older EF design. Skip it if you shoot mirrorless without an adapter.

View Sigma 70-200mm F2.8 Sports DG OS HSM for Canon Mount on Amazon
Care and Setup
- Use a lens hood to cut flare and protect the front glass.
- Carry the camera by the lens collar or tripod foot on heavy zooms.
- Turn stabilization off when the camera is on a tripod, if the maker advises it.
- Wipe the front element with a blower and a microfiber cloth.
Mistakes to Avoid
- Buying the wrong mount for your body.
- Assuming 70-180mm and 70-200mm cover the same reach.
- Hand-holding at slow shutter speeds without checking stabilization.
- Relying on listing fields that conflict.
What the f/2.8 Aperture Does at Telephoto Lengths
At 200mm, an f/2.8 aperture produces a thin slice of sharp focus with a smooth, blurred background. That separation is why the lens is so popular for portraits, weddings and sports, where you want the subject to stand out from a busy scene. It also lets in more light than slower zooms, so you can use faster shutter speeds in dim gyms, churches and evening fields.
Be realistic about the thin focus zone. At close distances and wide apertures, a small shift in position can move an eye out of focus. For portraits, many photographers stop down a little to keep both eyes sharp, and use the camera’s eye-detection autofocus where it exists. For action, a fast shutter speed matters more than the widest aperture, so the lens’s real advantage is flexibility rather than a need to shoot wide open all day.
Consider the trade-offs. A constant f/2.8 design needs large glass, which means size and weight. If you rarely shoot in low light, a slower zoom may be easier to carry. If you shoot indoors or at night, f/2.8 buys a stop or more of light compared with many alternatives, which can mean a lower ISO setting. Think about your typical shooting conditions, and choose based on those rather than on the prestige of the aperture number alone. Teleconverters can extend reach but reduce light and sometimes autofocus performance, so check compatibility with the specific lens.
Stabilization, Camera Bodies and Slow Shutter Speeds
Stabilization reduces blur from hand movement, which becomes visible at long focal lengths. Lens-based stabilization works in the optics, while many camera bodies also stabilize the sensor. In some systems the two work together, and in others the camera chooses one. Check your camera’s manual and the lens maker’s notes to see whether the combination is supported and whether a mode switch exists for panning.
Stabilization helps with static subjects at slower shutter speeds, such as a speaker on a stage or a landscape at dusk. It does not freeze subject motion, so a running child or a bird in flight still needs a fast shutter speed. A good rule of thumb is to use a shutter speed at least as fast as the inverse of the focal length, then go faster for moving subjects. Stabilization may give extra margin beyond that, but do not rely on it for action.
Know when to switch it off. On a tripod, stabilization can sometimes introduce small shifts, so many makers advise turning it off unless the lens detects a tripod automatically. Check the manual. When panning with a moving subject, use the panning mode if offered, which limits correction to one axis. Also remember that stabilization uses battery power, and some systems make a faint noise that video microphones can pick up. If you shoot video, check how the stabilization behaves while recording.
Carrying, Supporting and Balancing a Heavy Zoom
A 70-200mm f/2.8 can weigh enough to tire your hands and neck during a long event. Plan your support. A tripod collar, also called a foot, lets you attach the lens to a tripod or monopod so that the lens carries the weight, not the camera mount. Check whether the collar is removable and whether the foot is compatible with your support system. Some feet are shaped to fit standard tripod clamps.
A monopod is a popular accessory for sports and events, because it carries the weight while still allowing quick movement. A neck strap puts stress on the camera body and lens mount if the lens hangs freely, so use a strap that attaches to the lens collar or use a harness. A sling-style strap that spreads weight across the shoulder can ease fatigue.
Think about balance and bag space. A heavy lens on a small mirrorless body can feel front-heavy, so a battery grip may help. Check the length of the lens when the hood is reversed for storage. Many zooms are designed with internal zoom and internal focus, which keeps the length constant and keeps dust out. If your lens extends when zooming, expect the balance to shift. Always hold the camera with your left hand under the lens, not by the camera body alone. If you travel, check airline carry-on rules and padded bag dimensions before you buy.
Autofocus Behavior for Sports, Wildlife and Portraits
Different subjects demand different autofocus habits. Sports and wildlife need fast, reliable tracking, so look for a lens with quick motors and compatible tracking modes on your camera. Learn the tracking settings on your body, such as how it follows a subject that changes speed or direction. Focus limiter switches, where the lens has them, restrict the focus range and can speed up acquisition when you know the subject distance.
Portraits benefit from accurate focus at wide apertures. Use single-point focus or eye detection, and check the result on the camera’s screen. If you notice consistent misses, compare with a second shot, check for movement and consider testing the lens against a target. Some cameras allow micro-adjustment of focus for lenses, which can fix a consistent front or back focus.
For video, smooth, quiet focus is the priority. Consider focus breathing, where the field of view shifts as you change focus, and check whether the lens or camera has a correction for it. A programmable ring or button can speed up workflows. Also check the minimum focus distance, since it determines how close you can get. A short minimum focus can allow tighter frames of details and small subjects. Keep in mind that the maker’s claims are their own, so test the lens in conditions similar to your own work.
Used Versus New and Adapter Considerations
Because these lenses are long-lived tools, many buyers consider older or used models. If you do, inspect carefully. Look at the front and rear elements for scratches, haze or fungus. Rotate the zoom and focus rings through their full range to check for grit, stiffness or looseness. Check for dents in the barrel and hood mount, which may indicate a drop. Test autofocus and stabilization if possible, and ask about the return policy.
Older lens designs can differ in autofocus speed, coatings and stabilization from newer ones. Mounting an older DSLR lens on a mirrorless camera requires an adapter, and adapters vary in how well they pass autofocus and stabilization. A good adapter can work well, but some features, such as the fastest tracking or video autofocus, may be reduced. Check the camera maker’s guidance and user reports for your specific combination.
Think about the long-term path. If you may move to a different camera system, a lens in a mount that is being phased out may lose value or flexibility. A compact zoom with slightly shorter reach can be better for travel, while a full-length zoom suits events and sports. Decide what you will shoot most often, and weigh reach against weight. Whichever you choose, keep the receipt and test the lens soon after purchase, covering the full zoom range and a variety of apertures, so any problem is caught within the return period.
Choosing a 70-200mm f/2.8 in More Depth
This is the lens class photographers keep for decades, so the deeper criteria are about living with it: how it balances on your body through a long event, how its controls fall under your fingers without looking, and how its character suits the subjects that pay or delight you. When comparing the picks in this guide, separate headline sharpness, which is strong across this class, from handling personality, which is where these lenses genuinely differ. A lens you can operate fluently at the end of a long day produces better photographs than a marginally sharper lens you are fighting.
Weight deserves an honest paragraph. These are substantial lenses, and the differences between models are measured in the hundreds of grams that your shoulder will audit by hour three. Consider your real shooting pattern: monopod-friendly sideline work forgives weight; all-day handheld weddings and travel do not. There is no shame in choosing the lighter option in the class; there is only the mistake of buying for the photographer you wish you were and leaving the lens at home for the photographer you are.
Stabilization, Autofocus and Working Habits
In-lens stabilization and body stabilization cooperate differently across systems, and the modes matter: one behaviour for static subjects, another for panning, and the discipline to choose deliberately. Practise your panning with the mode intended for it, at shutter speeds you can actually sustain, and learn the keeper rate you personally get at each setting. That personal data, not a brochure figure, tells you how to set up for the sports and wildlife you shoot.
Autofocus performance in this class is excellent, but it is a partnership: the lens supplies speed and the photographer supplies a sensible focus area and a subject the system can hold. Track with the smallest focus area that reliably stays on the subject, pre-focus where the action will be, and use the focus limiter when your subjects live at a distance; limiting the search range is free speed that many owners never switch on. Small disciplines, repeated, are what separate the class’s reputation from an individual owner’s results.
Mount Loyalty and the Third-Party Question
First-party lenses in this guide bring native integration: full feature support, weather sealing matched to the body, and resale strength. Third-party options, represented here by Tamron and Sigma designs, compete with lighter weight, different zoom ranges or friendlier cost while covering the same working brief for many photographers. Neither camp is a shortcut. The right question is which compromises your subjects notice: a sideline professional may prize native sealing and service networks; a traveller may prize the kilograms a lighter design saves across a continent.
Check the details that differ quietly: whether the zoom and focus rings turn in the direction your other lenses use, whether the tripod collar removes or rotates the way you like, and whether teleconverters you might add later are supported. These are the frictions of daily use, and daily use is where a decade-long lens earns or loses your affection. The per-pick notes in this guide flag these personalities; read them as a long-term roommate interview, not a specification contest.
The 70-200mm in Real Assignments
For indoor and field sports, this lens is the working standard for a reason: it covers the near action and the far play without a body change, and the wide aperture buys shutter speed under lights that punish slower glass. Work from positions where action comes toward you, keep backgrounds in mind as carefully as subjects, and shoot through plays rather than at their beginnings. The frames that sell and delight are usually the peak moment plus the reaction after it, and the zoom lets you reframe for both without moving your feet.
For weddings and portraits, the long end flatters and the aperture melts backgrounds, but the craft is discretion: shoot candids from a respectful distance during the ceremony, then use the same lens for compressed, glowing portraits at golden hour. Manage the lens’s presence; it is a conspicuous piece of glass, and guests behave differently in front of it. A photographer who knows when to lower it gets the unguarded moments that no specification can buy.
For travel and landscape, the telephoto zoom is the contrarian’s favourite: it isolates details, compresses mountain layers and finds order in busy scenes where a wide lens finds only chaos. Carry it when the itinerary includes viewpoints, wildlife possibilities or architecture across water and squares. Leave it when the trip is street-focused and weight-obsessed. The mature travel kit is chosen per journey, and this lens earns its place on more journeys than sceptics expect.
Care, Handling and Troubleshooting
Support the lens, not just the camera. With a lens of this size mounted, carry and rest the combination by the lens barrel or collar, mount it to tripods by its own foot where provided, and avoid letting the full weight hang from the camera mount on a strap for hours. These habits protect both the lens mount and your neck, and they take a week to become automatic. Use the hood; it is flare control and front-element insurance in one, and it costs nothing once fitted.
When images soften, audit in order: shutter speed against focal length and subject motion, stabilization mode, focus accuracy on a static test target, and only then the lens’s health. A large share of soft telephoto frames are motion wearing a disguise. If a genuine focus inconsistency appears, test methodically on a tripod with a flat, detailed target in good light, and record the results; that record is gold if the lens ever visits a service centre.
Store the lens dry, capped and preferably upright or on its side in a padded case, and exercise it occasionally if it sits unused for months: zoom and focus through their ranges gently. Lenses are mechanical instruments that like occasional movement and dislike damp cupboards. A silica packet in the storage case and a dry home are the whole of the religion; practise it and the lens will outlast several camera bodies.
How the Picks Differ in Practice
Canon’s two entries differ in control philosophy and video-friendly design as much as in optics, suiting different working styles within the same mount. Sony’s and Nikon’s flagships answer for their own systems with the full native package. Tamron’s slightly shorter range trades a little reach for a lighter carry, and Sigma’s DSLR-era design serves its mount’s loyalists with classic sports-lens character. The guide’s per-pick sections carry the detail; the strategic point is that in this class you are choosing an ecosystem personality, not hunting for a bad lens, because there isn’t one here.
Buy for the body you own and the assignments on your calendar, then stop comparing. The 70-200mm f/2.8 is a lens photographers grow into over years, and its value compounds with familiarity: your hands learn its rings, your eye learns its compression, and your keeper rate climbs quietly. That compounding is the real return on the investment, and it only accrues to owners who take the lens out.
One Lens, One Year: Mastering the 70-200mm
Give the lens a year of deliberate education and it will repay you for a decade. In the first season, shoot everything with it, sport, family, landscape, street detail, and keep notes on where it delighted and where it fought you. The notes will show a pattern: your subjects cluster, your favourite focal lengths emerge, and the lens’s abstract range resolves into your personal working range, which is the knowledge that makes every later decision about converters, supports and companions obvious.
In the second season, work on the lens’s partnerships: the monopod for the sideline, the tripod for the deliberate landscape, the converter for the occasional longer reach. Learn each partnership separately, with a full outing devoted to it, because juggling new variables simultaneously teaches nothing except confusion. By the season’s end the lens is no longer a single tool but a small system, and you are its fluent operator rather than its owner.
In the third season, pursue the photographs the lens makes possible that no other in your bag does: the compressed sunset layers, the candid from across the square, the isolate-the-athlete frame. Build a small portfolio of these signature images. They are the lens’s argument for its weight, made in your own hand, and they settle every future packing debate in seconds: you look at the portfolio and the lens goes in the bag.
In the fourth season, teach someone else. Show a newer photographer how you hold it, how you set the stabilization, how you choose position over zoom. Teaching exposes the gaps in your own understanding with embarrassing precision and then fills them. It also completes the lens’s transformation from purchase to craft, which is the journey every serious tool wants to take its owner on.
At the year’s end, audit honestly: keeper rate, favourite focal lengths, the state of your shoulder, the photographs that exist because this lens does. Most owners find the audit surprisingly affectionate. The 70-200mm class endures as photography’s workhorse not because of any specification but because, year after year, it keeps being the lens that was there, ready, when the moment arrived.
Teleconverters, Supports and the System Around the Lens
Think of the 70-200mm as the centre of a small system rather than a solitary purchase. The monopod that suits your sideline work, the tripod foot arrangement you prefer, the converter for occasional reach and the bag that swallows the combination are all part of what you actually bought. Budgeting and choosing them together, rather than as afterthoughts across a year, produces a kit that works as one instrument from the first assignment.
Practise with each companion separately before combining them under pressure. A converter changes focus behaviour and light; a monopod changes your stance and panning; together they change both at once. One dedicated outing per companion, with notes, and the system becomes fluent. Photographers who skip this step often blame the lens for what was really an unrehearsed partnership.
Keep the system’s small consumables in order: the rear caps, the case, the cloth, the foot’s locking knob checked before it matters. Large lenses fail their owners in small ways, a loose foot, a missing cap at the beach, far more often than in optical ones. The system view, lens plus companions plus habits, is the difference between owning a great lens and operating one.
More Notes for 70-200mm Owners
Spend one session shooting the same subject at every focal length in the range, from the same spot, and study how compression changes the story. That single exercise teaches the lens’s creative range faster than a month of casual use, and it permanently changes how you choose position and focal length in the field.
Keep a small notebook entry for each assignment: focal lengths used most, shutter speeds that worked, stabilization behaviour. Patterns emerge within a few outings, and they tell you whether your next purchase should be support, a converter or nothing at all, which is the most valuable answer a notebook can give.
Keep a small field notebook or a notes app entry for every outing: subject, light, settings that worked and settings that failed. Patterns appear quickly. The combination that nailed a sharp frame in flat morning light will not be the combination that works at dusk, and having your own record beats generic advice because it describes your hands, your support and your typical subjects. Review the notes monthly and turn repeats into defaults.
Clean gear on a schedule rather than on a panic basis. Dust and fingerprints accumulate gradually, so image quality slides gradually too, and it is easy to blame the equipment for what is really a dirty front element or a smudged screen. A blower, a soft brush and a microfibre cloth kept in the bag handle most of it. Anything beyond that, follow the maker guidance for your specific model.
Back up on the same day you shoot. Cards fail, bags get left in cars, and files that exist in exactly one place are files you are in the process of losing. A simple routine, card to computer to a second drive or cloud folder, takes minutes and protects hours of work. Format cards in the camera afterwards rather than deleting files one by one, which keeps the file system tidy.
Practise the boring fundamentals at home so they are automatic in the field: changing settings without looking, swapping cards and batteries by feel, and recovering from a missed shot without fussing. The moments worth capturing rarely wait while you scroll menus. Ten quiet minutes of drills each week does more for your hit rate than another accessory purchase.
Judge your results at the size you actually share or print. Pixel-level inspection has its place when you are diagnosing a problem, but most images live on screens and modest prints, where composition, timing and light matter far more than microscopic sharpness. Chasing perfection in the corners can talk you out of a tool that would serve you well for years.
Buy for the subjects you shoot most, not the subjects you imagine shooting once. A kit optimised for a rare trip and wrong for weekly use becomes shelf decoration. List your last stretch of real outings, count the subjects honestly, and let that tally steer the decision. The right tool is the one that disappears into the routine you already have.
Keep your expectations calibrated by the work, not the advertisements. Every camera system in this guide was designed around real compromises made by real engineers, and the photographers who thrive are the ones who learn their own system’s compromises so thoroughly that they stop experiencing them as limits. That fluency, knowing exactly what your gear will do before you press the shutter, is worth more than any single upgrade, and it is acquired free, one deliberate outing at a time.
70-200mm f/2.8 Zoom FAQ
Will an EF lens fit a mirrorless camera?
Only through a mount adapter made for your system.
Is 70-180mm enough?
For portraits and travel, often yes. For distant sports or wildlife, the extra reach helps.
Do I need a tripod collar?
It is useful with a heavy zoom on a tripod or monopod, because it supports the lens instead of the camera mount. Check whether your lens includes one.
Should I leave stabilization on all the time?
Often yes for handheld shooting. On a tripod, many makers advise turning it off unless the lens detects it automatically, so check the manual.
Can I use a teleconverter with these lenses?
Only with models the maker lists as compatible. A converter extends reach but reduces light and may affect autofocus.
What shutter speed should I use at 200mm?
A common guideline is at least the inverse of the focal length, and faster for moving subjects. Stabilization gives extra margin for still subjects.
Why are my portraits slightly out of focus?
The focus zone is thin at wide apertures. Use eye detection or single-point focus, stop down a little and check for subject movement.
Is a used 70-200mm a good idea?
It can be, if you inspect the glass, test the rings and autofocus, and confirm a return policy. Older designs may differ in speed and stabilization.
How do I carry such a heavy lens comfortably?
Use a strap or harness that attaches to the lens collar, and consider a monopod for long sessions.
Image Quality Beyond Sharpness Charts
A lens that looks sharp on a test chart can still disappoint in real shooting, because sharpness is only one part of image quality. Contrast, color rendering, flare resistance, distortion and the way out-of-focus areas look all contribute to the final picture. A telephoto zoom that holds contrast in backlit scenes, for instance, is more useful for outdoor portraits than one that is a little sharper in the center but washes out when the sun is in the frame.
Look at how a lens handles the edges of the frame at f/2.8, how much vignetting it shows wide open and whether it exhibits color fringing around bright edges. Most of these issues are reduced by stopping down or by in-camera corrections. Consider whether your editing and shooting style will correct them, and read multiple independent reviews rather than relying on one chart.
Real-world samples are more informative than lab-style results. Look for photographs taken in situations similar to yours, such as indoor sports under gym lighting, a wedding ceremony or a bird in flight, and see how the lens performs there. Pay attention to how images hold up when cropped, since telephoto shooters often crop heavily and need fine detail to survive it.
What to Check in Sample Images
- Backlit subjects for flare and loss of contrast.
- Out-of-focus highlights for smooth, round shapes rather than busy edges.
- Fine detail at 200mm wide open, where many zooms are weakest.
Close Focus, Magnification and Creative Use
A 70-200mm lens is a portrait, sports and wildlife tool, but it also has creative uses that depend on minimum focus distance and maximum magnification. A shorter close-focus distance lets you fill the frame with a detail, a flower or a small object without moving to a macro lens. Magnification figures of roughly one-quarter life size are common in this class, which is enough for tight details though not for true macro work.
At the longest focal length, background compression makes distant objects look closer to the subject and creates a strongly blurred backdrop. That is useful for isolating a face in a crowd. It can also flatten a scene in a way that does not suit every subject, so move around and vary your distance rather than always standing in the same spot.
Close focus also matters for working distance. If a lens focuses closely, you can step back from a shy subject such as an insect or a small animal and still fill the frame, which keeps your shadow off the subject and reduces the chance of startling it.
Weather Sealing and Working Outdoors
Many people buy a 70-200mm f/2.8 for outdoor work in conditions that are not kind to gear. Dust and moisture seals around the mount, switches and zoom ring help protect the lens. Check whether the lens uses internal zoom or an extending barrel, because an extending design can pull air and dust in as you zoom.
Sealing is not the same as waterproofing, and it works best when the camera body is also sealed. A rain cover is a cheap addition that adds protection when you shoot in a downpour. After a wet shoot, wipe the lens dry, let it air out and avoid sealing it in a bag while it is damp, since trapped moisture can encourage fungus over time. A front filter also guards against scratches and spray, though use a good one so it does not degrade contrast.
Third-Party and Compact Alternatives
Independent lens makers have narrowed the gap with first-party lenses, often at a lower price and sometimes with a lighter design. They are worth considering if cost or weight is an important concern. The trade-offs usually involve autofocus speed in demanding situations, how well features like stabilization match the camera body and how long the maker provides firmware updates.
Compact designs that trade a little focal range for lower weight can make sense for travel and events. If you often shoot handheld for hours, a lens that is a pound lighter can give steadier results by the end of the day because you are less fatigued. Check the actual weight, filter size and length before deciding, and weigh those against the focal range you really use.
Compatibility is the last check. Confirm that the lens mount matches your camera, and look at whether stabilization works together with in-body stabilization or fights it. If you plan to add teleconverters later, find out which converters the maker supports, because not every telephoto zoom accepts them. A few minutes with the spec sheet prevents a frustrating discovery after the lens arrives.
Finally, keep your expectations realistic about weight. These lenses are large, and many photographers find that they carry them less often than expected. A great lens that stays at home takes no pictures, so choose one you are willing to bring along.
Frequently Asked Questions
Do I need a lens hood on a 70-200mm?
Yes, it is a valuable accessory. A hood reduces flare and protects the front element from bumps and rain. It also helps keep contrast high when you shoot toward a bright sky. Keep it attached while shooting and reverse it on the lens for storage.
Is f/2.8 necessary or can I use f/4?
An f/4 version is lighter and cheaper, and it is fine in good light. The f/2.8 version gathers twice as much light, which helps in dim venues and gives a shallower depth of field. Choose f/2.8 if you shoot indoor sports, events or low light.
How do I avoid camera shake at 200mm?
Use a shutter speed of at least one over the focal length as a starting point, then add more for moving subjects. Turn on stabilization, brace your elbows, support the lens from underneath and use a monopod when possible to keep the image steady.
Can I use a 70-200mm lens for landscape photography?
Yes. A telephoto zoom isolates distant features, compresses layers of hills and picks out details that a wide lens misses. It is less suited to sweeping views, so many photographers carry it alongside a wide-angle lens and use each for different shots.
Is a 70-200mm f/2.8 worth it if I mostly shoot family and travel?
It can be, if you will actually carry it. For family sports, school events, travel details and portraits it is often the most satisfying lens a household owns. The honest test is weight tolerance on a real day out. If the size means it stays home, a slower, lighter telephoto zoom that travels with you will produce more good photographs than a flagship in a cupboard. Buy the lens your life will carry.
Should I use a tripod collar or mount by the camera body?
With a lens of this size, support it by its collar or foot whenever it goes on a tripod or monopod. The balance is better, the setup is steadier, and the camera’s mount is spared a levering load it was not meant to carry all day. Handheld, cradle the lens barrel with your supporting hand rather than holding the camera alone. Your wrists and your mount will both notice the difference.
How do I get sharper action shots with this lens?
Raise the shutter speed beyond what feels safe, choose the stabilization mode made for your situation, use the focus limiter when subjects are distant, and track smoothly rather than snatching at moments. Shoot short bursts at peak action and review your keeper rate honestly to learn your own limits. Most improvement comes from these habits, not from settings buried deep in menus.
Can I use teleconverters with a 70-200mm f/2.8?
Many combinations in this class accept their system’s teleconverters, trading light and a little autofocus speed for reach, which can be a smart way to cover occasional longer work without owning a bigger lens. Confirm compatibility for your specific lens and mount, and test the combination before an important shoot so the behaviour holds no surprises. It is an extender of a system you know, not a replacement for a true long lens you need weekly.
How should I clean and store a large telephoto zoom?
Blow dust off before wiping, clean the front element gently with a proper cloth and solution when needed, and keep the rear element capped whenever the lens is off the body. Store it dry in its case with caps on, away from heat and damp, and transport it in padding that supports the barrel. Treat the hood as permanent equipment; it prevents more damage than any other single habit.
The Short Version
For Canon RF, the RF70-200 L IS USM, or the Z version for hybrid work. For a Sony flagship, the GM OSS II. For Nikon Z, the NIKKOR Z. For a smaller Sony zoom, the Tamron. For Canon SLRs, the Sigma Sports.

