Disclosure: As an Amazon Associate, reviewstook.com earns from qualifying purchases. Links to Amazon on this page are affiliate links; they cost you nothing extra.
An audio interface and a sound card both handle audio, but they are designed for different jobs. A sound card focuses on playback and gaming, while an audio interface is built for recording microphones and instruments. Knowing which you need saves money and frustration.
This comparison draws on product information and general audio knowledge, not our own testing.
By the Reviewstook Editorial Team. Last updated: October 31, 2026.

What a Sound Card Does
A sound card plays audio to headphones and speakers and often includes surround processing. It may have a microphone input, but usually a basic one. It is built for listening, gaming and media.
In this guide
What an Audio Interface Does
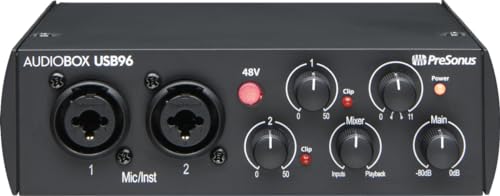
An audio interface converts microphone and instrument signals to digital with high-quality preamps and converters, and sends audio back to monitors and headphones. It usually has XLR inputs, phantom power and a direct monitoring knob.
Latency
Recording needs low latency so that you can hear yourself without delay. Audio interfaces usually offer dedicated drivers and direct monitoring. Sound cards may work for casual voice chat but not for serious recording.
Inputs and Outputs
Sound cards have 3.5 mm jacks and sometimes optical. Interfaces have XLR/TRS combo jacks, instrument inputs and balanced outputs. Choose the number of inputs by how many sources you record at once.
Price
Basic sound cards are inexpensive. Entry-level audio interfaces start higher but give you proper microphone preamps. See audio interfaces under $100.
Which One Do You Need?
- Gaming and music listening: a sound card or DAC. See sound cards for gaming.
- Recording vocals or instruments: an audio interface. See audio interfaces for recording.
- Podcasting or streaming with a good mic: an interface or a USB microphone.
Drivers and Latency
Latency is the delay between making a sound and hearing it back through your headphones. For recording it must be very low. Audio interfaces come with dedicated drivers (ASIO on Windows, Core Audio on Mac) built for low-latency operation. Standard sound cards use general drivers designed for playback and may add noticeable delay when you monitor yourself. Many interfaces also offer direct monitoring, which routes your input straight to the headphones with no computer delay.
Preamps and Phantom Power
A microphone produces a very quiet signal that needs amplification by a preamp. Audio interfaces have good preamps and XLR inputs, and most provide 48 V phantom power for condenser microphones. A typical sound card microphone input is a basic 3.5 mm jack with a weak preamp, which adds noise and cannot power a condenser microphone.
Instrument Inputs
If you record guitar or bass, you need a high-impedance instrument input (often a combination jack on an interface). Plugging a guitar into a standard line input gives a thin, noisy sound.
Outputs and Monitoring
Interfaces provide balanced outputs for studio monitors and a headphone output with a volume control. A sound card usually offers 3.5 mm outputs for headphones and speakers, plus optional surround or optical output for home theater.
Sample Rate and Bit Depth
Both devices handle sample rates such as 44.1 and 48 kHz and bit depths such as 16 and 24 bit. Higher figures such as 96 or 192 kHz matter little for everyday use. Check that the device supports the rate your software uses.
Connection and Compatibility
Most interfaces connect by USB, with Thunderbolt on higher-end models. Check that your computer has the right port and that the interface supports your operating system. Some interfaces are class-compliant, meaning they work without a driver.
Do You Need Both?
You usually need one or the other. An interface can handle playback, so you can use it for games and music too, though it lacks gaming surround features. A gaming sound card handles playback and a basic headset microphone. If you game and also record, an interface or a USB microphone plus the built-in audio is often enough. See our sound card buying guide, audio interfaces under $100 and USB microphones.
Podcasting and Streaming Setups Compared
Voice work is where many people first face this choice. A streamer or podcaster who only wants to talk can use a USB microphone, which has its own converter and plugs straight into the computer, so neither a sound card nor an interface is needed. A sound card with a basic microphone jack can run a headset, but the preamp is weak and the signal can pick up noise from the computer case.
An audio interface makes sense when you want an XLR microphone, since the interface supplies the preamp, phantom power for condenser models and a headphone output with direct monitoring. That setup grows with you: you can add a second microphone for a guest if the interface has two inputs. Check the number of inputs and whether each has its own gain control.
For streaming, think about how audio reaches your software. Some interfaces appear as one device with several channels, while others offer a loopback feature that lets you capture game or music audio alongside your voice. A sound card may offer similar mixing tools, aimed at gaming. Read the listing to see what routing options exist and whether the maker provides a control panel. If you use both a headset and a microphone, plan for how you will monitor yourself without echo.
DACs, Headphone Amps and Where They Fit
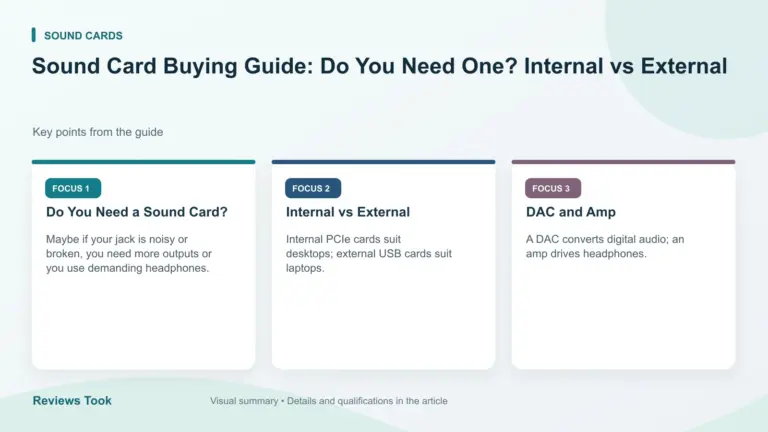
A DAC, or digital-to-analog converter, turns digital audio into the signal your headphones or speakers play. Every sound card and audio interface contains one, and so does your laptop, phone and monitor. A separate DAC is a listening upgrade, not a recording tool, and some include a headphone amplifier for demanding headphones.
If your only goal is better playback, you may not need an interface or a full sound card. A small USB DAC with a headphone output can replace a noisy onboard jack. Check the headphone impedance and the output power listed by the maker, because high-impedance headphones need more drive than a basic jack can provide. Low-impedance headphones often work well with simple outputs.
An interface offers a DAC and a headphone amp as part of a larger package, so it can serve both listening and recording. The headphone output on an interface is usually adequate for studio headphones. If you want the best playback and you also record, check the headphone output on the interface, not just the inputs. Do not spend more on features you will not use. Be skeptical of claims that a converter will transform your sound, and compare what each device offers in plain terms: outputs, power, connections and compatibility.
USB, PCIe and Thunderbolt Connection Types
How a device connects to your computer affects flexibility. Internal sound cards use a PCIe slot inside a desktop, which saves desk space but ties them to one machine and requires an open slot. External devices use USB or Thunderbolt and can move between computers. A laptop user will usually want an external device.
USB audio interfaces are widely supported. Check whether the device is class-compliant, which means it works with the computer’s standard drivers and may not need extra software, or whether it requires the maker’s driver. Class-compliant devices tend to be easy to set up, but they may not offer every feature without a control app. Look at which USB connector the device uses and whether the cable is included, as USB-C and older types are common.
Thunderbolt interfaces can offer more channels and low latency, but they cost more and need a compatible computer. If you use a tablet or a phone, check whether the interface supports it and whether it needs external power. Bus-powered devices draw power from the computer, which is convenient but can limit features with weak ports. A powered USB hub or a dedicated power supply may be needed. Always check operating system support, since drivers can lag behind new releases.
Software, Latency Settings and First Setup
After you buy, setup determines how the device performs. Install the maker’s driver and control software if the listing says so, then choose the device as the input and output in your recording software. On Windows, select the low-latency driver option the device supports. On a Mac, the system audio engine handles most devices, but you still choose the device in your software.
The buffer size controls the trade-off between latency and stability. A small buffer gives less delay, which is useful when recording, but it can cause clicks and dropouts on a busy computer. A larger buffer is more stable and is fine for mixing. Many people use a small buffer for tracking, then raise it when adding effects or mixing. Close extra programs while recording to reduce load.
Set levels carefully. Adjust the gain so that your loudest peaks stay below clipping, and leave some room. Use direct monitoring if you hear a delay in your headphones. Check the sample rate in both the device and the software, since a mismatch can lead to errors. Keep the cables short and the device away from sources of interference, and test with a short recording before the real session. A few minutes of setup saves a lot of trouble later.
Choosing for the Long Term and Budget Tiers
Think about where your use may grow. If you only play games and watch videos, a sound card or simply onboard audio may be enough. If you might record vocals, guitar or a podcast, an entry-level interface with one or two inputs leaves room to grow. If you plan to record a band or a drum kit, you need more inputs, and it is worth checking channel counts early.
Budget tiers can be understood in general terms. Entry-level devices cover the basics with simple preamps and a headphone output. Mid-range devices add better converters, more inputs and more flexible routing. Higher tiers offer premium preamps, many channels and sophisticated monitoring. Spend where it helps your use: for a single voice, a clean preamp and solid drivers matter more than a large channel count.
Ask before buying. How many microphones will I record at once? Do I need instrument inputs? Which operating systems do I use? Is the driver supported long-term? What does the warranty cover? Will I use it with a laptop or a desktop? Check compatibility with your software, and see whether the listing includes cables and software bundles. Signs it is time to upgrade include noisy preamps, missing inputs, drivers that no longer update or ports that are failing. A good choice today should fit your needs for years.

Ready to Buy? Start Here
If this guide helped you decide what to look for, these products are a place to start.

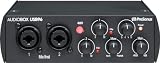
As an Amazon Associate we earn from qualifying purchases. Prices and availability are shown on Amazon.
Audio Terms Explained
Choosing between an audio interface and a sound card means swimming through acronyms. The glossary below explains the main terms, so you can read specifications for either option and understand what they mean for your recording or listening setup.
- Audio interface: an external device that connects microphones and instruments to a computer, usually by USB, and converts analog sound to digital.
- Sound card: a component, built into a computer or added as an internal card, that handles audio input and output.
- Preamp: a circuit that boosts a microphone’s quiet signal to a usable level.
- XLR and quarter-inch inputs: connectors for microphones and instruments.
- Phantom power: power sent through the cable to certain microphones. Check the maker’s guidance before connecting equipment.
- Latency: the delay between making a sound and hearing it back through the computer. Lower latency is helpful for monitoring while recording.
- Sample rate and bit depth: numbers that describe the detail of a digital recording.
- Driver: software that lets your computer talk to the device.
Choosing by What You Do
You record vocals or an instrument
An interface with a good preamp and the right inputs is the usual choice. Count the inputs you need, and make sure the connectors match your microphones and instruments.
You stream, podcast or take calls
A simple interface or a USB microphone may be enough. Think about whether you need one microphone or several, and whether you want a headphone output with a volume control.
You game and listen to music
A built-in sound card or a basic external device may suit you. Dedicated interfaces are designed for recording, so check whether the features match your needs.
You work with a desktop and want a clean upgrade
An internal sound card can improve on a basic motherboard output, but external devices are often easier to install and move between computers.
Audio Interface and Sound Card Compared
| Question | Audio interface | Sound card |
|---|---|---|
| Connection | External, often USB | Internal slot or built in |
| Microphone inputs | Common, with preamps | Often limited or none |
| Portability | Easy to move between computers | Fixed to one computer |
| Best for | Recording and streaming | Gaming, music and general audio |
Setup Steps and Common Troubleshooting
- Check your computer’s ports and the computer system requirements on the maker’s page.
- Install the driver or software from the maker’s own site, following the instructions.
- Connect the device, and select it as the input and output in your system settings and in your recording software.
- Set the input gain so the loudest sounds do not clip, but the signal is still strong.
- Use headphones for monitoring to avoid feedback.
- Adjust the buffer size in the driver to balance latency and stability.
If you hear crackles or dropouts, increase the buffer size, close other programs and try a different USB port. If a microphone is silent, check the cable, the gain and whether the microphone needs phantom power, which should only be switched on when the maker’s instructions allow it.
Room and Microphone Matter Too
No device can fix a noisy room. Record in a quiet space, away from fans and traffic, and add soft furnishings to reduce echo. Position the microphone a few inches from the sound source, and use a pop filter for voices. Good technique often improves results more than a more elaborate device. Spend time on the basics first, and upgrade equipment as your needs grow.
Reading a Listing Before You Order
Check the number and type of inputs and outputs, the supported sample rates and the connection type. Read which computer systems and software the maker supports. See whether the device is powered by the computer or needs its own adapter. Look at the headphone output and any monitoring controls. Note the dimensions and weight if you plan to move it. Read the warranty summary and the return terms.
Finally, think about the future. If you plan to add a second microphone or an instrument, choose a device with room to grow. A modest device that fits your plans is a better choice than an elaborate one with features you will never use.
Monitoring Without Echo or Delay
When you record, hearing yourself matters. Many interfaces offer direct monitoring, which sends your input to the headphones before it passes through the computer, so you hear yourself with no delay. If your device has a mix knob, set it to blend what you record with what the computer plays back. Without direct monitoring, keep the buffer size small while recording and larger while mixing, as the maker advises. Closed-back headphones help keep sound from leaking into the microphone.
Reading This Guide With Your Own Setup in Mind
This extended section grows out of the original guide on audio interface vs sound card, and it is written to be used rather than merely read. Keep your own equipment, your own room, and your most common listening or working situation in mind as you go through it, and test each suggestion against the picks and criteria already covered above. The most valuable outcome is not a longer list of things to buy; it is a clearer understanding of which problem you are solving, which of the options already discussed solves it, and which habits will make any of those options perform at their best in your home.
Going Deeper: Gain, Monitoring and Clean Takes
Cable and connection discipline quietly prevents noise and lost takes. Use balanced cables where your equipment supports them for microphone runs, keep audio cables away from power supplies where practical, and never force a connector that resists. Label both ends of cables in a permanent setup; future you, troubleshooting at midnight, will be grateful. Keep one known good spare cable, because swapping in a proven cable is the fastest test in all of home recording when a channel suddenly hums, crackles, or disappears.
Room treatment on a small budget outperforms equipment upgrades for most home recordists. Record in the room with the most soft furnishings, hang a duvet or heavy blankets behind you if echoes are obvious, and position yourself away from bare parallel walls where you can. Listen to a test recording for flutter echo by clapping once and hearing whether the sound rings. Your listeners will hear the room on every recording you make, so an hour spent improving the room improves every future session, while a new gadget improves only its own narrow part of the chain.
Backing up your recordings deserves the same seriousness as making them. Keep finished projects and irreplaceable takes in at least two places, such as the computer and an external drive or cloud storage, and test that a backup file actually opens before you need it. Label folders by date and project so a future search takes seconds. Musicians and podcasters lose far more work to disorganisation and single drive failures than to any recording quality issue, and a simple backup habit quietly removes that entire category of regret.
Monitoring choices shape how relaxed and accurate your performances feel. Direct monitoring sends your input straight back to your headphones without the round trip through the computer, which removes distracting delay. Software monitoring lets you hear effects while you record but adds latency that some performers find impossible to ignore. Many people record with direct monitoring and add effects afterwards during mixing. Experiment once with both approaches on a short test so you know which suits you, instead of fighting delay in the middle of an important session.
Your Room and Your Routine Matter More Than Gear
When friends ask what they should buy, the most helpful answer is a set of questions rather than a model name. Ask what they will use it for most, what they already own, what frustrates them about their current setup, and where the equipment will live. Those four answers narrow any category more honestly than any ranking, because the best choice for a quiet studio corner is rarely the best choice for a busy family room, and a recommendation that ignores context is a guess dressed as advice.
Keep a small notebook, physical or digital, for your setup decisions and what you heard after each change. Memory for sound and picture quality is unreliable after even a short gap, and written notes turn vague impressions into evidence. Record the date, the single change you made, the material you tested with, and your honest verdict. After a month you will own a personal reference that no review can give you, because it describes your equipment, your room, and your ears rather than a stranger’s laboratory.
Guitarists recording at home should spend time on the unglamorous details of their chain. Fresh strings, a checked cable, correct input selection, and a comfortable headphone mix change a recorded performance more than any plugin added afterwards. Record a short riff, listen critically for buzz, hiss, and clipping, and fix causes in the physical chain first. A clean, confident performance captured simply will always beat a hesitant one captured through an elaborate chain that nobody had time to set up properly.
Collaborating with others remotely exposes small technical differences that solo work hides. Agree on file formats, project settings, and naming habits before the first real session, and exchange a short test recording to confirm levels and tone match well enough to edit together. A vocal recorded very close and dry will not sit naturally beside one recorded across an untreated room, and discovering that after a full session is disheartening. Ten minutes of alignment at the start saves hours of repair work later.
Troubleshooting Recording Problems in Order
Sample rate and buffer settings involve a practical trade off you can set once and forget for most work. A smaller buffer reduces delay while recording but asks more of the computer, while a larger buffer is safer for mixing big projects. If you hear crackles while recording, raise the buffer a step and test again. Keep the project settings consistent from session to session so files combine cleanly. Most home recording problems blamed on hardware are actually a buffer set too low for the computer or a project setting changed by accident.
Resist the urge to judge new equipment during the first hour. Excitement, louder default levels, and a presentation that simply differs from what you are used to all masquerade as improvement. A fair judgement needs level matched comparisons with familiar material, a break to rest your ears or eyes, and a second session on another day. Many disappointing purchases would have been avoided by this patience, and many modest purchases turn out to be exactly right once the novelty fades and everyday quality is what remains.
Plan for the day something fails, because eventually something always does. Know which single cable, adapter, or setting your whole setup depends on, and keep a tested spare or a written workaround for it. Photograph your working connections before you move or clean the desk. These small preparations convert a potential evening of frustration into a five minute recovery, and they cost almost nothing compared with the equipment they protect. Reliability is often just preparation that happened earlier.
Accessibility and ease of use are real quality measures, not afterthoughts. Controls you can operate by touch, indicators you can actually see from your working position, cables that connect without a struggle, and software that remembers your settings all reduce daily friction. If you share equipment with someone who has different needs or abilities, test the setup together. The best technical choice is the one everyone in the household can use confidently without a manual open on the desk beside them.
Common Mistakes Home Recordists Make
A reliable session routine prevents most home recording disasters. Before performing, record thirty seconds, listen back on headphones, confirm the correct input is selected, confirm the level is healthy, and confirm the file is actually being saved where you expect. Name and back up takes as you go rather than in a batch at the end of a tiring day. More good performances are lost to wrong inputs and unsaved files than to any limitation of affordable recording hardware, and a boring checklist is the complete cure.
Headphone choice for recording and mixing deserves separate thought. Closed headphones keep sound from leaking into the microphone during recording, which makes them the right tool while you perform. For long mixing sessions, comfort and a presentation you have learned through reference tracks matter more than any claimed accuracy. Whatever you use, check your mixes on at least one other system, such as a car or a phone speaker, because every home setup has blind spots that a second listening environment reveals immediately.
Celebrate a setup that disappears into your work and play. The goal was never to think about equipment constantly; the goal is calls that start on time, recordings that sound like you, games that pull you in, and music that holds your attention. When your setup reaches that point, stop optimising and enjoy it. Future upgrades can wait until a genuine new need appears, and you will recognise that need clearly precisely because your current baseline is stable, documented, and understood.
Environmental factors quietly dominate real world performance. The same equipment behaves differently in a carpeted study and a tiled kitchen, in summer humidity and winter heating dryness, at a tidy desk and a cluttered one. Before spending on an upgrade, change the environment once: reposition, tidy cables, adjust lighting or furnishings, and test again with your reference material. A surprising share of supposed equipment problems are room problems wearing a disguise, and room fixes usually cost nothing but attention.
Extended Questions Worth Asking Before You Decide
Learning basic editing alongside recording multiplies the value of everything you capture. Trimming silences, balancing levels between sections, and removing the worst noises are skills that rescue ordinary takes and elevate good ones. Practise on copies so originals stay safe, and keep edits musical rather than surgical; the goal is a recording that sounds like a person performing, not a specimen under glass. An hour of editing practice improves your back catalogue as well as your future sessions, which no hardware purchase can claim.
Gain setting is the foundational skill of home recording, and it is simpler than it first appears. Set the input gain so your loudest intended performance stays comfortably below the point where the signal clips, and leave headroom rather than chasing the hottest possible level. Digital recording does not reward recording as loudly as possible the way older tape workflows did. A clean recording made with sensible headroom can always be raised later, while a clipped recording cannot be repaired. Record a loud test passage, check it honestly, and only then start the real take.
A sensible returns and testing window strategy protects every purchase in this category. Keep packaging, test the functions you actually bought the item for within the first days, and run your longest typical session early rather than after the window closes. Faults and fit problems reveal themselves quickly when you test deliberately. Discovering on day two that a control layout annoys you or a fit hurts after an hour is useful information; discovering it on day forty is an expensive lesson in procrastination.
Learning the vocabulary of a category pays for itself quickly. When you understand the handful of terms that describe connections, power, fit, and formats in plain language, product pages stop being intimidating and sales claims become easy to weigh. You do not need engineering depth; you need enough understanding to ask whether a feature serves your use. Every paragraph of this guide was written with that goal in mind, and the same approach will serve you in every future category you research.
Going Deeper: Gain, Monitoring and Clean Takes
Collaborative etiquette in shared recording spaces, from bedrooms to community studios, keeps sessions productive. Arrive with your parts practised, your files organised, and your levels roughly matched to previous sessions. Label takes as you record them and speak the take number aloud at the start when working with others. These habits sound administrative, yet they are the difference between a session that produces finished work and one that produces an archive nobody can face opening again.
Finally, protect your motivation by finishing small projects completely. A short song, a single polished episode, or a clean demo teaches more than a grand project abandoned at the arranging stage, because finishing exposes every step of the process including the unglamorous ones. Set the next project slightly larger than the last finished one. Steady completion builds the exact skills and confidence that equipment promises and rarely delivers, and your growing shelf of finished work will show you how far your ears have come.
Learning to hear your own recordings critically is a skill that grows with deliberate practice. Compare your takes against a reference recording you admire, note one specific difference, and address only that difference in the next session. Over months this produces steady, visible improvement in placement, gain, and performance. Randomly changing equipment interrupts this learning because every variable moves at once, which is why patient recordists with modest gear so often outproduce restless collectors with impressive shelves.
Second hand and previous generation equipment deserve a fair hearing from careful buyers. Mature designs often have well documented behaviour, plentiful spare parts, and honest community knowledge about their weaknesses. What matters is condition, completeness, and whether the item suits your actual use. Test thoroughly, check that cables and accessories are present, and value the saving against the shorter remaining life. A well chosen older item that fits your needs precisely beats a new item chosen by headline features you will never use.
Your Room and Your Routine Matter More Than Gear
Podcast and voice work reward a different set of priorities from music production. Consistency of position, a quiet room, and a level routine you can repeat without thinking matter more than exotic conversion or endless inputs. Record your introduction first as a level and tone check, keep your distance from the microphone identical between episodes, and save your project settings as a template. Listeners bond with a voice that sounds the same every week, and that sameness is a routine achievement rather than an equipment achievement.
Choosing inputs and outputs for your real instruments and microphones, rather than for an imagined future studio, keeps a first purchase honest. List what you will actually plug in during a typical week: perhaps one microphone and one guitar, perhaps a keyboard in stereo, perhaps two voices for a podcast. Count simultaneous inputs honestly, because recording one source at a time well is better than recording four sources badly. Extra inputs you never use add cost and complexity, while the one input you genuinely need and lack will frustrate you every single session.
Microphone and instrument inputs behave differently, and using the right one matters. A microphone input expects a very small signal and amplifies it a great deal, while an instrument input is designed for the stronger, different character of a guitar or bass pickup. A line input expects a stronger signal still, from keyboards or other equipment. Plugging a source into the wrong kind of input produces noise, distortion, or a disappointingly thin sound. Check which input type you have selected whenever a recording sounds wrong before changing anything else.
More Questions Answered in Depth
Why do my recordings sound thin or distant?
Distance from the microphone and room reflections are the usual causes. Move closer to the microphone, reduce the input gain to compensate, and record a test. Speaking closer with lower gain captures more direct voice and less room, which sounds fuller and clearer. If the problem persists, check that you are using the correct input type for your source and that no software effect is thinning the sound without your knowledge.
How do I know whether crackling comes from the interface or the computer?
Raise the buffer size a step and test again with the same material. If the crackling disappears, the computer was struggling to keep up at the previous setting. Also try a different cable and a different port, one change at a time. Faults that follow the cable or the port identify themselves quickly when you test methodically instead of changing everything at once.
Making the Distinction Work for You
Whichever side of this comparison your needs fall on, the practical path forward is the same. Name your sources, name your outputs, name the one job the device must do every day without drama, and let those three lists arbitrate. Devices in both families fail their owners most often not through poor quality but through a mismatch between the job imagined at purchase and the job that daily life actually assigns. An honest afternoon spent on those lists is worth more than any single feature either family can advertise.
A Final Practical Word
If you take only one action after reading this comparison, make it the test recording or test listen described above, on your current equipment, before any purchase is discussed. Evidence about your own chain, gathered calmly, outranks every general rule in this guide, including the sensible ones. Start from what your ears and your recordings tell you, and the choice between these two families stops being a debate and becomes a conclusion.
Frequently Asked Questions
Can an audio interface replace a sound card?
Yes for playback, though it may lack gaming features.
Can a sound card record a microphone?
Basic ones can, with lower quality and higher latency.
Do I need phantom power?
Only for condenser microphones.
Do I need an audio interface for a USB microphone?
No. A USB microphone has its own converter and plugs straight into the computer. An interface is for XLR microphones and instruments.
Is a DAC the same as an audio interface?
No. A DAC handles playback only, while an interface also records through inputs and preamps. Many interfaces contain a DAC.
Will an audio interface improve gaming audio?
It can improve headphone output quality, but it will not add gaming features like surround processing. Check what you want from it before buying.
What does class-compliant mean?
It means the device works with the computer's built-in drivers without extra installation. Some features may still need the maker's software.
Can I use two microphones with a sound card?
Most sound cards have a single basic microphone jack, so two microphones usually need an interface with multiple inputs or a mixer.
What sample rate should I use?
Common rates such as 44.1 or 48 kHz are enough for most work. Choose one and keep it the same across your device and software.
Do I need an interface for electric guitar?
You need a way to bring the guitar into the computer. An interface with an instrument input is the common choice, though some other devices can do this too.
Bottom Line
Choose a sound card for listening and gaming and an audio interface for recording. See our sound card buying guide for more.
Related Reading
More Sound Card Guides
- Best PC Sound Cards
- Best 5.1 and 7.1 Sound Cards
- Best USB Sound Cards
- Best External Sound Cards for Laptops
- Best Sound Cards for Gaming
- Best USB Sound Cards Under $30
- Best Audio Interfaces for Recording
- Best Audio Interfaces Under $100
- Best Audio Interfaces for Guitar
- Best USB DACs and Headphone Amps
- All sound card guides