A conference room display is the shared screen everyone looks at during a meeting, so size and connections matter as much as image quality. We have not used these products ourselves. This guide covers how to choose one by looking at room layout, inputs and mounting.
Begin with the room. Note how far the back row sits from the wall, what devices people bring, and whether the screen will hang on a wall or stand on a cart. Then compare each listing against the checklist below.
Take your time with the comparison. Write down the two or three features that matter most to you, and treat everything else as a bonus. A short, honest list makes it much easier to ignore marketing language and focus on construction, fit and the way you will really use the product day to day.
As an Amazon Associate we earn from qualifying purchases. Links on this site are affiliate links, and they do not change the information we give.
In this guide
Quick Picks
| Pick | Product | Best For |
|---|---|---|
| Best Overall | Samsung Flip Pro WM75B 75-Inch Interactive Display | A 75-inch 4K touch display with fast, pen-like writing |
| Best for Google Teams | LG CreateBoard 75TR3DK-B 75-Inch | Android 13 with Google services and 40-point touch |
| Best for Mid-Size Rooms | Promethean ActivPanel 10 Premium 65-Inch | A high-spec panel that works with your own devices |
| Best for Hybrid Meetings | Vibe Board S1 75-Inch Smart Board | ChromeOS whiteboarding built around video calls |
| Best Budget | JYXCN 75-Inch Interactive Smart Board | 4K touch and dual operating systems for less |
Our Picks
1. Samsung Flip Pro WM75B 75-Inch Interactive Display — Best Overall
The Flip Pro WM75B is the strongest all-round conference display here. The 75-inch 4K UHD panel is big enough for the back-row readability the guide puts first, and the touch layer is tuned for writing: Samsung quotes 26ms latency with 2,048 levels of pressure, so annotating a deck feels closer to a marker than a mouse. Connectivity covers the inputs checklist thoroughly — HDMI, DisplayPort, USB, and a 3-in-1 USB-C port that carries video, touch control, and up to 65W of charging for the laptop driving it. SmartView+ and AirPlay 2 handle wireless sharing for rooms that want fewer cables, and Wi-Fi and Bluetooth are built in rather than dongle-based. Built-in speakers cover meeting audio in small and mid-size rooms. Choose the WM75B, model LH75WMBWLGCXZA, if you want one established platform for presenting, whiteboarding, and video calls.
View Samsung Flip Pro WM75B on Amazon
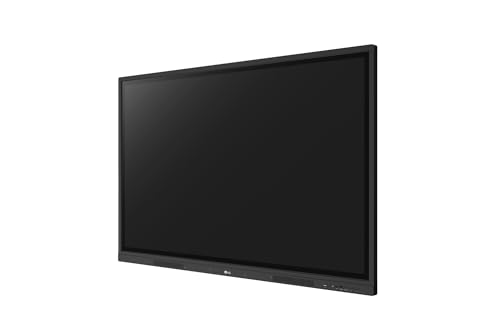
2. LG CreateBoard 75TR3DK-B 75-Inch — Best for Google Teams
The CreateBoard 75TR3DK-B is the pick for organizations that live in Google Workspace. It runs Android 13 with Google Mobile Services authorized, so the Play Store, Drive, and the rest of the Google suite work on the panel itself instead of through a connected laptop. The 75-inch 4K UHD screen supports up to 40 touch points, which lets several people write at once during a workshop, and LG’s ScreenShare mirrors up to nine devices for comparison discussions. Ports follow the guide’s inputs checklist: three HDMI inputs, USB-C with power delivery and DisplayPort Alt Mode, USB-A ports, and LAN. With 8GB of memory and 64GB of storage on board, it also runs whiteboard and signage apps without extra hardware, and LG ConnectedCare can manage several rooms’ displays remotely. Choose it when your meeting rooms standardize on Google accounts and Chromebooks.
View LG CreateBoard 75TR3DK-B on Amazon

3. Promethean ActivPanel 10 Premium 65-Inch — Best for Mid-Size Rooms
The ActivPanel 10 Premium takes the opposite approach to built-in software: the panel is designed to work with the devices and operating systems you already own, rather than locking the room to one embedded platform. That flexibility suits IT teams that standardize on Windows, Mac, or ChromeOS laptops and want the display to stay useful as those devices change. This 65-inch version resolves 4K UHD at 3840 x 2160, a sensible size for the mid-size rooms the guide’s sizing section describes, where a 75-inch panel would crowd the wall. The listing bundles the panel with 3-year onsite support, which matters for a screen the whole office depends on daily. Check the VESA pattern and the room’s mounting points before ordering, as the guide’s mounting section advises. Choose the ActivPanel 10 Premium if you prefer a display-first product backed by an education-and-meeting specialist.
View Promethean ActivPanel 10 Premium 65 on Amazon

4. Vibe Board S1 75-Inch Smart Board — Best for Hybrid Meetings
The Vibe Board S1 is built around hybrid meetings rather than around a PC. It runs ChromeOS, so the 75-inch 4K UHD touchscreen boots straight into a whiteboard and browser environment with access to hundreds of apps, and remote participants can join the canvas from their own devices while the room works on the board. That makes it a natural fit for the wireless-sharing check in the guide: instead of passing a cable, guests open a link. The 75-inch size covers medium and larger conference rooms where the back row needs to read shared documents, and the touchscreen supports the annotate-over-content workflow that slide-only displays cannot offer. This listing, model S75T02BUS, is the board on its own, so budget separately for a wall mount or a rolling stand if the room needs one. Choose the S1 if your meetings routinely mix in-room and remote collaborators.
View Vibe Board S1 75 on Amazon
5. JYXCN 75-Inch Interactive Smart Board — Best Budget
The JYXCN board is the budget route to a big interactive screen. It offers a 75-inch 4K UHD panel with 20-point multi-touch and an anti-glare surface rated at 500 nits of brightness, which helps in the bright rooms the guide warns about when it discusses glare. Unusually for this group, it runs two operating systems — Windows 10 and Android 11 — so the room can present from the built-in Android side or switch to a full Windows desktop for heavier applications. Wireless collaboration is built in, and four USB ports cover the keyboards, cameras, and drives that accumulate in a shared room. As with any value-tier panel, confirm the VESA pattern, the weight, and who handles warranty service before ordering, per the guide’s mounting and support checks. Model 0508-JYXCN-75HYA-O. Choose it when touch and size matter more than brand ecosystem.
View JYXCN 75 Inch Interactive Smart Board on Amazon
What to Look For
| Factor | Why it matters | What to check |
|---|---|---|
| Screen size | Text must stay readable from the farthest seat. | Diagonal size against the distance to the back row |
| Resolution | Sharper panels show small text and spreadsheets more clearly. | Native resolution and the sources you plan to connect |
| Inputs | Laptops and room systems connect in different ways. | HDMI, USB-C and network ports, plus how many are listed |
| Wireless sharing | Casting reduces cable clutter and speeds up changeovers. | Supported methods and whether a separate dongle is required |
| Mounting | Wall mounts, carts and stands differ in floor space use and flexibility. | VESA pattern, weight and the mount type the maker supports |
| Touch and audio | Interactive screens and built-in speakers change how a room is used. | Touch points, speaker claims and microphone or camera options |
Setup and Care Tips
- Mount the screen at a height where the lower edge is visible from the back of the room.
- Place power and network outlets near the display so cables stay short and tidy.
- Reduce glare by controlling window light and avoiding lamps that reflect on the panel.
- Clean the screen with a soft dry cloth and follow the maker’s guidance for cleaners.
- Label inputs and keep spare adapters in the room so meetings are not delayed.
Mistakes to Avoid
- Buying a screen that is too small for the number of seats.
- Forgetting adapters for the laptops and tablets your team actually brings.
- Choosing a mount that does not match the weight or the wall type.
- Placing the screen opposite a bright window.
- Paying for touch features that nobody in the room will use.
Working Out Viewing Distance and Legibility
Screen size is often chosen by guesswork, yet a simple measurement gives a better answer. Stand where the farthest person will sit and measure the distance to the wall where the display will hang. Then think about what will be shown on screen: slides with large headings are forgiving, while spreadsheets and small diagrams need more screen area or closer seating.
A practical approach
- Note the distance from screen to back row.
- Decide the smallest text you expect to show regularly.
- Ask someone to read that text from the back row on a test display or a projected sample.
- Adjust the size or layout until it reads without squinting.
Also consider viewing angle. Seats along the side wall see the picture from an angle, and panel technology affects how colors look from there. The maker’s specification sheet may mention viewing angles.
Resolution and Why It Matters on Large Screens
Larger panels stretch the same number of pixels over more area, so a sharper resolution helps maintain detail. Many large interactive displays use a 4K resolution, though you should confirm this on each listing. Text, thin lines and small icons benefit the most.
Check that your source devices can output the resolution the display accepts. An older laptop or a basic adapter might limit the picture to a lower setting. The cable and the port both matter here.
Ports and Connection Planning
Before you buy, list every device that will connect: laptops, a room PC, a video bar, a document camera, a game console for training demos. Then map them to the inputs on the display.
| Need | What to look for |
|---|---|
| Laptop with a single USB-C port | A display input that accepts USB-C video, or a suitable adapter |
| Older laptops | HDMI input and spare cables |
| Touch control from a connected PC | A USB touch-back port that links to the computer |
| Wired network | An Ethernet port if you prefer a cable over Wi-Fi |
| External speakers or a sound bar | An audio output or a digital connection |
Count the ports honestly. A display with fewer inputs than you need usually means buying a switch, and that is one more thing to configure.
Built-In Software Versus a Separate Computer
Some displays include their own operating system and apps for whiteboarding, screen sharing and video calling. Others work purely as a screen for a connected PC. Each approach has strengths.
Built-in system
It can reduce cables and make the room simpler to use, especially for ad hoc meetings. Check what apps are supported and how updates are delivered. Ask your IT team whether the platform fits company policy.
Connected computer
A dedicated PC offers flexibility, and the display remains a screen. This setup can be easier to manage if your organization already standardizes on a certain meeting platform.
Touch, Pen and Annotation Features
If you plan to write on the screen, look for details about the touch technology, the number of simultaneous touch points and whether a pen is included. The listing might also mention palm rejection, which stops a resting hand from drawing unwanted marks.
Think about who will use these features. A team that brainstorms with markers on a whiteboard may enjoy a digital equivalent. A group that mostly presents slides may rarely touch the screen at all, in which case the touch feature is secondary.
Audio, Camera and Microphone Considerations
Built-in speakers, cameras and microphones are convenient, but conference rooms differ. A small huddle room can often manage with built-in audio. A long boardroom usually benefits from dedicated ceiling or table microphones and a separate sound system. Check the listing for what is built in, and decide whether you need to add more equipment.
- Is the camera fixed or detachable?
- Does the display provide a privacy shutter or a way to switch the camera off?
- Can you connect an external video bar if the built-in camera is not enough?
Mounting, Stands and Cable Management
A large display is heavy. Check the weight and the mounting pattern, and make sure the wall or stand is approved by its maker for the load. Have a qualified installer confirm the wall can carry it, and follow the maker’s instructions for mounting hardware.
Rolling stands can make sense for rooms used for more than one purpose. Look for locking wheels and a height that suits the people using the display. Plan where cables will run, and keep power and signal cables tidy and out of the way of foot traffic.
Everyday Care and Cleaning
Screens collect fingerprints, dust and marks. Follow the maker’s cleaning instructions, which usually recommend a soft, dry or slightly damp microfiber cloth. Avoid harsh chemicals unless the manual allows them. Switch the display off and let it cool before cleaning.
Keep the vents clear so air can move around the unit. Check for firmware updates through the method the maker describes, since they can add features and fix bugs.
Common Buying Mistakes
- Choosing size without measuring the room. A screen too large for the space is uncomfortable to watch.
- Ignoring the cable path. Long runs may need special cables or extenders.
- Overlooking support. Check warranty terms and how the maker handles service.
- Assuming every feature is included. Pens, stands and wall mounts are sometimes sold separately.
Planning Checklist
- Measure the room and the farthest seat.
- List devices and match them to inputs.
- Decide whether you want built-in software or a separate PC.
- Check mounting and weight with an installer.
- Read the manual and the warranty terms.
Layout Styles and Where the Screen Should Go
Room shape changes where a display belongs. A long, narrow boardroom puts most people in a line facing one end, so the screen sits on the short wall. A square room offers more freedom, but side seats get an awkward angle, so centering the screen and keeping chairs within a reasonable arc helps.
Things to check on site
- Window position: glare from daylight can wash out a screen, so avoid placing it opposite a bright window if you can.
- Height: the middle of the picture should sit near seated eye level for people at the table, while a touch screen must also be reachable.
- Power and network outlets close to the mounting spot.
- Space beside the screen for a presenter to stand without blocking the view.
Sketching the room on paper, with seats, door and windows, takes ten minutes and prevents most placement regrets.
Worked Example: A Mid-Size Team Room
Picture a room with a table for ten and a mix of in-person and remote attendees. The team shares slides, edits documents together and joins video calls.
- Measure the distance to the back row and choose a screen size that keeps small text readable there.
- List devices: two or three laptops, a video bar and perhaps a room PC.
- Pick a display with enough inputs plus a USB-C connection for visitors.
- Decide on wall mounting, after an installer confirms the wall can carry the weight.
- Place the video bar so remote guests see faces, not the back of heads.
- Run a trial meeting before the first real one, and write a one-page guide for staff.
The one-page guide is a small tool that gets overlooked, because people use a room more when connecting is obvious.
Glossary for Buyers
- Touch points: the number of fingers or pens the screen can follow at once.
- Palm rejection: software that ignores a resting hand while you write.
- Casting: sending a screen wirelessly from a laptop or phone.
- Mounting pattern: the spacing of the screw holes on the back, which must match the bracket.
- Firmware: the built-in software that runs the display.
Questions for Your IT Team
A short conversation with whoever manages your network can prevent surprises after delivery.
- Does the display need to join the company network, and does it support the required security settings?
- Which meeting platforms does the organization use, and does the display run them natively?
- Who will install updates, and how often?
- Are guest laptops allowed to share wirelessly, or must they use a cable?
Having these answers before you order makes the choice between the picks above much faster, because the shortlist shrinks to models that fit your rules.
Finally, keep a record of the model code, serial number and purchase date somewhere your team can find it. When a support request comes up months later, that note saves a search through old emails, and it helps the maker confirm your warranty terms quickly. Pair it with a short list of the cables and adapters stored in the room, so nobody has to hunt for them before a meeting begins.
Meeting Types and the Display They Suggest
Not every room needs the same screen. Before choosing a model, list the kinds of meetings that will happen there most often, because each one stresses a different feature.
- Presentations: clear text at the back row and quick wired or wireless sharing.
- Brainstorming: responsive touch and pen input, plus a way to save the board.
- Video calls: a camera and microphone setup that sits well with the screen.
- Training sessions: easy switching between slides, video and a live demo.
A room used for all four will need a balance, and you may decide that one or two features can be handled by a separate device instead of the screen itself.
Comparing a Touch Display and a Standard Display
A touch panel adds interaction, while a standard display is simpler and often easier to manage. The table sets out the trade-offs in plain terms, so you can match them to your team.
| Point | Touch display | Standard display |
|---|---|---|
| Interaction | Write, draw and annotate on screen | View only, control from a laptop |
| Setup | May need software and drivers | Usually plug in and play |
| Cleaning | Needs frequent wiping of fingerprints | Needs less attention |
| Best fit | Workshops and teaching | Reports and shared slides |
Ask your team honestly whether people will use the touch features after the first week. A feature nobody uses adds cost and complexity without helping anyone.
Rolling Out a New Screen Without Confusion
Good hardware can still frustrate staff if nobody knows how to use it. Plan a simple rollout with a short guide taped near the display or saved on the shared drive. Name one person who handles questions, and note which cable or wireless method works for guests.
Check with your IT team about network access, security rules and software updates before the unit goes live. Follow the maker’s instructions for wall mounting, since a heavy panel needs the right fixings and often two people to lift. If the wall type is uncertain, ask a qualified installer.
Short Glossary for Room Planners
- Resolution: the count of pixels on the screen, which affects sharpness at close range.
- Refresh rate: how often the image redraws each second, which matters for smooth video.
- Casting: sending a laptop or phone screen to the display without a cable.
- HDMI: a common digital connection for video and sound.
- VESA mount: a standard hole pattern on the back that fits many wall brackets.
Share this list with colleagues who join the planning, so everyone speaks the same language when comparing models. It also makes it easier to ask your installer for exactly what the room needs.
Before signing off on any purchase, walk the room with a tape measure and a sample document on a laptop. Sit in the farthest seat and ask a colleague to read a line of small text from the screen position. This quick exercise reveals more about size and legibility than any specification list, and it costs nothing.
FAQ
How large should the screen be?
A common approach is to size the screen to the distance of the farthest viewer, so that text on a slide stays easy to read. Measure the room and compare it with the maker’s viewing guidance.
Do I need a touch screen?
Not always. Touch helps when people annotate or whiteboard on the screen. If most meetings are slide based, a standard display with good inputs and wireless sharing may fit better.
Choosing Conference room displays With Fresh Eyes: The Criteria That Matter Most
Begin by defining the job in plain words: who will use this, how often, where it will live, and what would make you say in a year that it was money well spent. That short brief filters a crowded field faster than any feature list, because it turns vague wants into tests you can apply to each pick in this guide. Next, separate the essentials from the nice extras, and be suspicious of headline claims that do not connect to your brief: capacity you will never use and features you will never switch on add cost, size and upkeep without adding value.
It also helps to think about the full cost of ownership in time and effort, not just the purchase itself. Some conference room displays ask for regular consumables, replacement parts or a weekly routine, while others mostly ask to be left alone. Neither style is automatically better. The right match is the one whose upkeep fits the time you genuinely have, in the meeting room you genuinely have, across a normal busy month rather than an idealised free weekend. When two picks in this guide look close, that upkeep difference is often the honest tie breaker.
Finally, read the reviews above in a particular order: start with the limitations, not the highlights. Every pick here involves a trade off, and the limitation sections tell you which compromise you would be living with. If a stated drawback touches something you care about daily, such as space, noise, cleaning effort or the size of the people using it, treat that as decisive even when everything else about the pick appeals. If the drawback concerns a situation you will rarely meet, the pick may still be the best fit on this page for you.
Real Situations: Matching Conference room displays to How You Live
For smaller spaces and tighter rooms
Compact homes expose weak choices quickly. A display that fits on paper can still dominate a room, block a door swing or leave nowhere sensible for the accessories it needs. Before ordering, mark the footprint on the floor with tape, walk the route it must travel from the front door, and check where you will stand, sit or reach while using it. Readers in apartments and older houses should also think about floors, neighbours and storage: where does it live between uses, and can you move it alone when cleaning day comes?
For families and shared households
Shared use changes the brief. More people means more wear, more varied heights and habits, and more opinions about what good looks like. Favour the pick whose routine is easiest to explain and repeat, because a system only works in a family home when everyone follows it the same way. Agree the basics early: who cleans what, where things are stored, and what happens when something is damaged or running low. The most successful purchases in busy households are rarely the most specialised; they are the ones that survive being used slightly imperfectly, every day, by everyone.
For occasional, seasonal or guest use
If your display will work hard for a few weeks and then rest, your priorities shift again. Storage, protection while idle and a simple restart routine matter more than peak performance. Before the busy period, run a full trial: set it up, use it properly once, clean it and put it away. That rehearsal finds missing parts and unclear steps while there is still time to fix them calmly, and it turns the real occasion into a repeat performance instead of a first attempt under pressure.
Setup, Daily Use and Care: A Practical Routine
Unbox and set up methodically: read the quick start and the safety pages, confirm every part is present, and do the first use in daylight and without time pressure. Small setup choices echo for years, from levelling and placement to the order in which parts are fitted, so adjust carefully at the start rather than living with a wobble, a strain or a workaround. Keep the manual, any spare parts and your proof of purchase together in one place from day one.
Most products fail early from neglect rather than defects: dust, damp, heat and hurried handling do slow damage that a simple routine prevents. Clean as the maker directs, with the mildest method that works, inspect moving parts and fixings on a regular rhythm, and store the item in the conditions it was designed for. When something changes, a new noise, a loose part, a weaker result, deal with it while it is still a small adjustment rather than a repair.
Build a light rhythm around the product rather than relying on memory. A brief check while you are already in the meeting room catches most issues early: a quick look, a quick wipe, a note of anything that has changed. Once a season, go slightly deeper: inspect the parts you normally ignore, clear dust or debris from hidden edges, confirm fixings are firm, and review whether your storage and supplies still make sense. Write the dates on a note kept nearby; a simple record turns guesswork into evidence when you later wonder how long something has lasted or when a part was last replaced.
How the Picks in This Guide Compare With Each Other
This guide covers Samsung Flip Pro WM75B 75-Inch Interactive Display, LG CreateBoard 75TR3DK-B 75-Inch, Promethean ActivPanel 10 Premium 65-Inch, Vibe Board S1 75-Inch Smart Board, JYXCN 75-Inch Interactive Smart Board and A practical approach. They are not ranked copies of one another; each earned its place by suiting a different reader, and the reviews above describe those differences in detail. The most useful comparison you can make is therefore not a hunt for a single winner, but a shortlisting exercise: remove any pick whose stated limitation clashes with your non negotiables, then compare what remains on the two or three criteria that matter most in your home.
Consider Samsung Flip Pro WM75B 75-Inch Interactive Display and LG CreateBoard 75TR3DK-B 75-Inch as a useful contrast. Rather than asking which is better in the abstract, ask which set of compromises described in their reviews you would rather live with, and which routine fits your week. Then set Promethean ActivPanel 10 Premium 65-Inch beside the survivor and repeat the question. This simple knockout method, using only the strengths and honest limitations already set out in this guide, usually leaves one clear choice, and it protects you from being swayed by a single headline feature that your household may never use.
If you are still torn between two finalists, decide by picturing the worst ordinary day, not the best one: the rushed morning, the tired evening, the week when nobody has spare time. The pick that still works on that day, with its cleaning, storage and handling demands included, is almost always the one owners remain happy with. Satisfaction over years comes less from peak performance than from the absence of daily friction.
Mistakes Readers Make Most Often
The first common mistake is buying for an imagined household instead of the real one: guests who rarely come, hobbies that might start next year, children at a different age. Buy for the life you are living this season, with one eye on the change you know is actually coming. The second mistake is skipping the measuring and checking step because a listing looked standard. Sizes, fittings and requirements vary quietly between models that appear identical in a photograph, and ten minutes with a tape measure and the manual prevents most returns and most disappointments.
The third mistake is neglecting the unglamorous supplies and accessories until the moment they are needed. Whatever your chosen display requires to work well and stay clean should be in the house before it is, not ordered in a hurry afterwards. And the final mistake is judging too early. Many products feel unfamiliar for the first week simply because they are new. Give the routine a fair trial, adjust the setup once with fresh eyes, and only then decide whether the product or the arrangement around it is the real problem.
More Questions About Conference room displays
How do I narrow this guide down to one choice?
Write down your three non negotiables first, such as the space available, who will use it and how much upkeep you accept. Cross out any pick whose review names a limitation that clashes with those three, then compare the survivors on daily convenience. Most readers find the decision makes itself once the honest limitations, rather than the highlights, do the filtering.
Should I prioritise size or features when choosing a display?
Size and fit come first, because a product that crowds the meeting room or does not suit the user will frustrate you every single day, while a missing extra feature is usually noticed only occasionally. Once fit is settled, choose features that serve your most frequent use, not the most impressive sounding one. Features earn their keep through repetition.
How long should a good display last?
Longevity depends far more on matching the product to its workload and caring for it as the maker directs than on any single material or brand claim. Correct setup, gentle routine cleaning, prompt attention to small wear and sensible storage are the habits that separate products retired early from products that serve quietly for years. Keep your proof of purchase and note the purchase date, so any later question starts from facts.
What should I check in the first week of ownership?
Check that everything in the box matches the listing, that all parts fit and move as described, and that the product performs its main job in your meeting room, not just in theory. Keep all packaging until that first week is over. If something is wrong, a missing part, damage or a function that does not match the description, contact the seller promptly while the details and photographs are fresh.
Is it worth buying accessories at the same time?
Only the accessories that the manual or the reviews above identify as necessary for safe, normal use are worth adding immediately. Everything else can wait until a few weeks of real use show you what your household actually reaches for. Buying add ons in advance often fills cupboards with solutions to problems you never turn out to have.
When is it time to replace rather than repair a display?
Replace when safety, hygiene or core function is compromised, when parts are no longer available, or when you find yourself working around the same fault every week. Repair or adjust when the issue is isolated, the rest of the product remains sound and the maker still supports it. A simple test helps: if the product vanished tomorrow, would you buy the same one again? The honest answer usually settles the question.
Living With Your Choice: The First Season and Beyond
The first week with a new display is about learning, not judging. Everything feels slightly unfamiliar, from where your hands naturally go to how long each step of the routine takes. Resist the urge to rearrange everything on day two. Instead, use the product as intended, notice where friction appears, and write those observations down while they are fresh. Most early complaints trace back to one adjustable detail, such as placement, storage or the order of a routine, rather than to the product itself, and a note made in week one is far more reliable than a memory reconstructed in month three.
By the end of the first month, patterns have usually settled. You know which features you reach for daily and which you have not touched since the unboxing, how long honest upkeep takes in your meeting room, and whether the product suits the people who actually use it. This is the right moment for one deliberate review: adjust the setup once, properly, based on evidence rather than first impressions. Move what needs moving, add the one accessory your notes keep asking for, and simplify any step that everyone in the household quietly skips. A single evidence based adjustment at this stage does more for long term satisfaction than weeks of tolerating a small daily annoyance.
Across a full season, the test becomes durability and consistency. Weather changes, routines change and households change, and a well chosen display absorbs those shifts without drama. Keep the light maintenance rhythm described earlier, deal promptly with the first signs of wear rather than the last, and re-read the maker’s guidance once a year, because details you skimmed before purchase often make new sense once you have real experience. Owners who treat ownership as a calm routine, rather than a series of emergencies, consistently get the longest and happiest service from the products in guides like this one.
A Short Planning Checklist Before You Order
Before you commit, run through this plain checklist in order. First, measurements: confirm the space, the access route and any fitting or connection the product depends on, using a tape and the listing details rather than estimates. Second, people: confirm the product suits everyone who will use it, at their real sizes, ages and abilities, not at an average. Third, routine: name who will clean, check and store it, and how often, and be honest about whether that rhythm survives a busy month. Fourth, supplies: list what must be in the house on day one for safe, normal use, and order those items alongside rather than afterwards.
Fifth, paperwork: decide where the manual, warranty details and proof of purchase will live, and put them there the day the product arrives. Sixth, the trial: plan the first proper use for a calm day, keep the packaging until that trial is complete, and photograph the setup before anything is covered, fixed or hidden. None of these steps is exciting, and together they prevent nearly every regret readers report with conference room displays: the wrong size, the missing part, the routine nobody kept and the fault discovered one day after the packaging went out. Ten quiet minutes of planning, done in this order, is the cheapest upgrade any purchase in this guide can receive.
One more habit separates satisfied owners from frustrated ones: they revisit their setup after the first month. By then the novelty has faded and the real patterns are visible, including where things actually get stored, which step in the routine everyone skips, and which small annoyance keeps recurring. A single deliberate adjustment at that point, moving an item, changing a storage spot or simplifying a step, often improves daily life more than the original choice between two close products did. Treat the first month as a trial you are allowed to learn from, not a verdict you must live with unchanged.
It is also worth thinking about who else will encounter this purchase: partners, children, parents, guests, cleaners and tradespeople all interact with household products differently. A choice that depends on one person remembering a special sequence or a delicate touch tends to fail in real homes. Favour arrangements that are obvious to a newcomer, label anything that is not obvious, and keep instructions where the product is used rather than filed away. The goal is a home that works kindly for everyone in it, including on the days when you are not there to explain it.
When you read any guide, including this one, keep a small sense of proportion about conflicting advice. Households differ in water, weather, space, budget and patience, so a method that delights one owner can annoy another without either of them being wrong. Use the reviews and criteria here to form a shortlist and a set of questions, then let your own measurements and a trial period have the final word. Your home is the test laboratory that matters, and its results outrank every general recommendation, ours included.
Planning for the end of a product’s life is part of buying well, even though it is rarely discussed. Keep major packaging only while a return is plausible, then recycle it rather than storing empty boxes for years. When the product eventually wears out, check whether parts, materials or the whole item can be recycled or passed on locally before sending it to landfill. And note what you learned from it in a sentence or two; that small record makes the next purchase in this category faster and wiser, because it is based on your experience rather than on memory alone.
Seasonal changes deserve a place in your thinking too. Heat, cold, humidity, daylight and household routines all shift across the year, and many products behave slightly differently in August than in January. The routine that works in one season may need a small adjustment in another, from ventilation and drying to storage and inspection frequency. A twice yearly review, timed with the clocks changing or another date you already remember, is an easy way to make those adjustments before small seasonal stresses become visible wear.
Another quiet advantage goes to readers who keep expectations anchored in their own brief rather than in marketing language. Words like premium, professional and heavy duty describe positioning, not performance in your home, and they appear on products at every quality level. Translate every claim into a question you can test: heavier in the hand, easier to clean, simpler to store, kinder to the people using it daily? If a claim cannot be turned into such a test, set it gently aside and return to the criteria and limitations set out in the reviews above, which were written to be tested in exactly that way.
Do not underestimate the value of asking one practical question of the seller or maker before you order, especially when a detail in the listing is ambiguous. Ask about the exact dimension, fitting, material or requirement that your home depends on, and keep the reply with your paperwork. Vague listings are common in crowded categories, and a single written answer prevents the most frustrating kind of return: the product that was almost right. If the answer never comes, treat that silence as information too, and favour the pick whose details are stated clearly enough that you did not need to ask.
The Short Version
Match screen size to the room, check that the inputs fit the devices your team uses, and confirm the mounting method before you order. Choose the display that suits how your meetings actually run rather than the one with the longest feature list.
Related Guides
- How to Choose the Best Digital Signage Displays: A Buyer's Guide
- 6 Best Dimmable Alarm Clocks: Adjustable Displays (2026)
- How to Choose the Best Media Room Seating: Buyer's Guide (2026)
- How to Choose the Best Outdoor Room Dividers: A Buyer's Guide
- 6 Best Accent Chairs: Living Room Armchairs Compared (2026)