Affiliate disclosure: As an Amazon Associate, DailyHomeDecorating.com earns from qualifying purchases. If you buy through links on this page, we may receive a commission at no extra cost to you.
Amazon content disclosure: Product titles, images, and ASINs in the example cards are supplied through Amazon’s Creators API. Listings, included mounting parts, availability, and revisions can change. Verify the exact model and mounting hardware before purchase.
Finding a water cooler for an AM3+ PC is mostly a compatibility problem, not a search for an exotic AM3+ radiator. The important detail is whether the exact AIO pump block includes mounting parts that attach to your AM3+ motherboard’s socket hardware. Radiator size is a separate case-fit question. Some manufacturers still list AM3+ on compatible models, while many new AIO listings mention only AM4 and AM5. A product that looks similar or has “AMD” on the box is not enough evidence that it fits.
This guide is specifically about all-in-one liquid CPU coolers for AMD AM3+ boards, often paired with FX-series processors. It explains how to check the block bracket, stock retention frame and backplate, radiator dimensions, fan headers, CPU heat load, and the risks of buying older or used kits. Product examples below were verified through Amazon’s Creators API; compatibility statements are tied to manufacturer documents. This is a specification-based comparison, not a side-by-side thermal test.
AM3+ is easy to confuse with AM4 because the names are similar, but a cooler’s installation hardware must match the motherboard. We have a separate guide to 280 mm AIO fit and compatibility for AM4; this page concentrates on the older AM3+ platform and the mounting parts that are easy to miss.
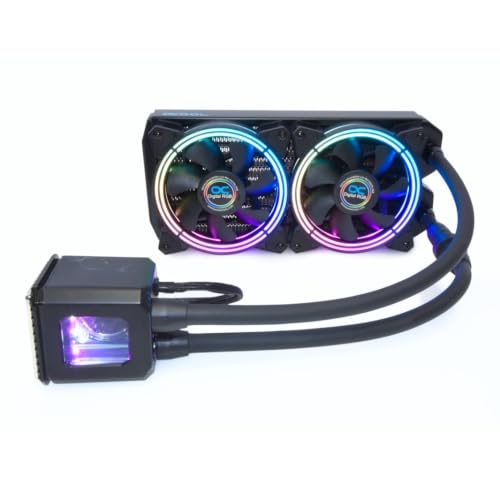
AM3+ AIO cooler examples

Alphacool Eisbaer Aurora 240 CPU – Digital RGB (11728) | Full-Copper Radiator, 2× G1/4 inch Ports, 3-Pin 5V aRGB, 120 mm PWM Fans, Refillable, Intel 1700/1200/2011-3/2066
ASIN: B084VHMDHZ
Alphacool’s current datasheet for article 11728 explicitly lists AM3+ among supported AMD sockets and describes a 240 mm radiator. The product documentation also describes a refillable, expandable loop. Confirm the exact package revision and that its AMD mounting parts are included before ordering.
Socket and product details: manufacturer documentation.

Alphacool Eisbaer Aurora LT360 CPU – Digital RGB (11679)
ASIN: B07K6TD717
Alphacool’s article 11679 datasheet explicitly includes AM3+ compatibility for the Eisbaer Aurora LT360. A 360 mm radiator needs three 120 mm fan positions and enough room for its full length, thickness, fittings, and hoses. Choose this class only when the case, motherboard, and CPU load justify it.
Socket and product details: manufacturer documentation.

CoolerMaster MasterLiquid ML240L RGB V2, Close-Loop AIO CPU Liquid Cooler, Gen3 Dual Chamber Pump, 240mm Radiator, SickleFlow 120 PWM ARGB, AMD Ryzen AM5/AM4, Intel LGA1700/1200 (MLW-D24M-A18PC-R2)
ASIN: B086BYYFG5
Cooler Master’s compatibility matrix lists the ML240L V2 RGB for AM3/+. The current Amazon title emphasizes AM4/AM5, so check the exact item code, packaging revision, and AMD bracket in the box or with the seller. Do not infer AM3+ fit from the product family name alone.
Socket and product details: manufacturer documentation.
In this guide
What AM3+ compatibility actually means
AM3+ is a motherboard CPU socket family used by AMD FX-series desktop processors and some backward-compatible AM3 processor configurations. When shopping for a cooler, “AM3+ compatible” should mean the block can be securely mounted on the board with the proper parts and instructions. The radiator, tubing, pump, and fans do not attach to the CPU socket; only the cold plate and bracket do. Still, every component matters for a successful installation because the radiator must fit inside the case and the pump and fans must connect to the motherboard or controller.
Older AMD sockets including AM2, AM2+, AM3, and AM3+ commonly share the traditional cooler mounting layout. Noctua documented that AM3+ uses the same cooler installation hole spacing as AM2/AM2+/AM3 for its compatible models. That fact is useful when evaluating older AMD brackets, but it is not a universal approval for every AIO. Manufacturers can use different block shapes, retention hooks, backplates, spacers, and standoff heights. You still need the exact cooler manual or compatibility list to approve the model.
Read the support claim at the model and revision level. A family may have multiple versions, such as V1, V2, RGB, ARGB, SE, or a refreshed suffix. A seller may reuse the same listing title across revisions or photograph a box that no longer matches the inventory. Search the manufacturer’s compatibility chart for the model code printed on the box, not just the brand and “240 mm.” If the chart omits AM3+, ask the manufacturer support team whether a mounting kit exists and whether it is still available.
When the cooler is already in your hands, compare its included AMD pieces to the manual’s diagrams. Look for hooks or clip bars that use the original plastic AMD retention rails, or for the proper mounting bracket and screws that attach to the motherboard’s original backplate. Missing hardware matters: do not substitute arbitrary screws or spacers, and do not overtighten a mount to force the cold plate down. Uneven pressure can harm contact or damage the board.
AM3+ versus AM4: do not treat them as the same bracket
AM4 uses different mounting-bar positions and spacers from older AMD socket setups in Noctua’s installation manual. Many older AM3+ mounting kits do not automatically fit an AM4 board, and AM4-only mounting kits are not proof of AM3+ support. Some universal brackets span several sockets, but the manufacturer must explicitly say so. A cooler that includes “AMD hardware” may ship with only the current AMD bracket and omit older AM3+ parts.
This distinction also runs in the other direction. The recent AM4/AM5 accessory pack supplied with a cooler may not attach to an AM3+ board if it expects different holes or a specific stock retention bracket. A few older coolers used the standard AMD clips and remain compatible across several older sockets, but that is a feature of the model’s mounting design, not a guarantee created by the socket names. Do not remove the board’s existing AMD retention parts until the cooler instructions tell you what to remove. Some cooler blocks reuse them; other designs replace one component but retain the factory backplate.
If a cooler’s current listing says AM4/AM5 and does not mention AM3+, look at the manufacturer’s official chart and the included-parts diagram. For example, Cooler Master lists the ML240L V2 RGB under AM3/+ on its compatibility chart even though current reseller titles may foreground newer AMD sockets. That is a useful lead, not a substitute for matching the exact SKU and revision to the actual package. An older box may include a bracket that is absent in a refreshed package, and a return listing may mix versions.
Our AM4 article covers radiator fit and socket checks for AM4 models. If your CPU is on AM4, use that guide instead of relying on this AM3+ mounting discussion. If you are upgrading an AM3+ platform to AM4, treat the new motherboard as a new socket-fit check even if you plan to reuse the same radiator and fans.
Check the AM3+ motherboard before choosing an AIO
Identify the motherboard model and revision, not only the processor. Look in the motherboard manual for the CPU socket and the stock cooler retention assembly, then check its manufacturer support list for the exact CPU. Some AM3+ boards supported only particular FX processors after a BIOS update; others had power-delivery limits that matter for higher-draw chips. A water cooler cannot fix an unsupported CPU, outdated BIOS, inadequate VRM cooling, or unstable overclock.
Take a clear photo of the area around the CPU socket before disassembly. Record whether the plastic retention brackets, metal backplate, and screws are present. A used motherboard may arrive without these parts, or a previous owner may have replaced them with an aftermarket backplate. If the AIO requires a backplate that is missing, find the correct replacement part before you open the loop or spread thermal paste. The motherboard manual and cooler manual take precedence over online photos of a different board.
Also check nearby heatsinks and memory. The pump block or its tubes can crowd tall VRM heatsinks, memory modules, or the top edge of the board. Tube routing should not put pressure on the socket or rub against fan blades. A 240 or 360 mm radiator can be physically compatible with the case but still create conflicts with motherboard heatsinks or power cables. A build sketch with the board, case, radiator, and tube direction helps catch those problems before buying.
Understand the CPU load, especially for FX chips
AM3+ covers processors with very different power and heat demands. AMD lists the FX-8350 with a 125 W default TDP. AMD’s historic product materials identify the FX-9590 as a 220 W part. Those labels are not direct cooler performance guarantees, and they do not account for every overclock or board setting. They do show why “AM3+ compatible” alone cannot answer how much cooling headroom a system needs.
Verify the exact processor’s manufacturer specification and your motherboard’s CPU support list. If you use a high-TDP FX chip, confirm that the board is designed to support it, that BIOS support is current, and that the socket-area VRM receives adequate airflow. A water block cools the CPU package; it does not automatically cool surrounding voltage regulators. Some AIO builds reduce the downwash that a stock top-down air cooler provides, so keep airflow across the VRM heatsink with case fans or another arrangement recommended by the board vendor.
Do not select a cooler using a marketing “TDP rating” in isolation. Different brands may calculate such ratings under different test assumptions. Prefer the CPU manufacturer’s processor requirements, the cooler maker’s compatibility and specification information, case airflow, and realistic workload. A 360 mm AIO is not a blanket fix for poor case ventilation or a weak motherboard. Nor does every standard 240 mm AIO automatically handle an overclocked 220 W CPU quietly.
If you are mainly gaming or doing short tasks, observe temperatures and clock behavior with the cooler installed at stock settings before making changes. Then test the workload you actually care about. If the machine throttles or shuts down, first verify pump operation, mounting pressure, thermal paste contact, fan direction, radiator airflow, and the motherboard’s power support. Raise CPU voltage or overclocking only after the system is stable at stock settings.
Choose radiator size by case fit, not socket
AM3+ does not require a particular radiator size. A 120 mm radiator uses one 120 mm fan position, a 240 mm model usually uses two 120 mm fans, and a 360 mm model usually uses three. The radiator itself is longer than the nominal fan span, and the assembled thickness includes the fans. Confirm the case’s radiator support in the location you plan to use, including maximum length, thickness, screw positions, and clearance from the motherboard, memory, GPU, and front-panel wiring.
A 120 mm AIO can be easier to fit in a compact case, but the smaller heat-exchange area may require its fan to run faster under heavy load. It is not automatically better or worse than a large air cooler. A 240 mm radiator is a common middle size, but it still needs two fan slots and adequate clearance. A 360 mm radiator takes more space and adds fans, cables, and mounting work. It can make sense when the case and processor workload justify it, but a larger radiator does not solve a mounting mismatch.
Use the case manual’s dimensions and radiator map. If the case supports a 360 only at the front, consider how that may affect GPU length and incoming air. If it supports a 240 at the top, check RAM height and motherboard heatsinks. If the radiator is mounted at the front, check hose reach, tubing bend radius, GPU clearance, and whether the pump block can sit lower than the radiator’s highest part according to the cooler maker’s guidance. The exact orientation must follow that AIO’s manual.
Do not assume every “240 mm” label means an actual 240 mm radiator length. The number refers to the fan-size class, not the full assembled dimensions. Use the drawing or specification sheet for the exact model and allow for fittings, fan frames, cables, and screw heads. A tape-measure check inside the case is a worthwhile step before ordering a cooler, especially in older or small-form-factor cases.
Radiator fans, pump headers, and motherboard connections
An AIO generally has one or more pump connections, radiator fans, and sometimes lighting or USB cables. The exact connectors differ by model. Read the cooler’s wiring diagram and your motherboard manual before plugging in the pump or fan leads. Some pumps connect to a dedicated AIO_PUMP header; others use CPU_FAN or a controller specified by the manufacturer. The BIOS may warn if CPU_FAN is empty, so use the manual’s recommended connection and monitoring setup.
Set a sensible fan curve after the system boots. The radiator fans should respond to CPU heat, and the pump should run at the speed recommended by the cooler maker. Avoid assuming a generic PWM curve is correct for every pump. Check that the pump reports or behaves normally if the board offers monitoring. If there is grinding, repeated gurgling, a leak, or a sudden temperature rise, shut the computer down and troubleshoot before continuing use.
Radiator airflow and case airflow work together. Front intake may bring cool external air through the radiator but warm the interior; top exhaust may remove heat from the case but uses warmer internal air through the radiator. The best arrangement depends on case layout, graphics card, dust filters, and available fan mounts. Keep cables clear of blades and filters unobstructed. A dust filter can reduce dust buildup but may restrict airflow if clogged, so clean it regularly.
Comparing the verified AM3+ examples
The Alphacool Eisbaer Aurora 240 datasheet has the clearest documentation among these examples for socket and model-specific details. Its article 11728 datasheet names AM3+ in the supported AMD sockets and describes a 240 mm radiator, copper construction, and a fillable, expandable system. The product is more specialized than a conventional sealed AIO, so check its maintenance and expansion instructions, fittings, included parts, and current availability. Do not add components or refill it casually; follow Alphacool’s process.
The Eisbaer Aurora LT360 (article 11679) datasheet documents a larger three-fan alternative and also lists AM3+. The extra radiator area may suit a case with ample room and a demanding CPU workload, but it adds installation space and fan connections. Its 360 mm class is not necessary just because a CPU uses AM3+. Confirm your case can fit the complete assembly and the cooler can be mounted without stressing the tubing.
The Cooler Master ML240L V2 RGB is another 240 mm example. The manufacturer compatibility matrix lists the model for AM3/+ as well as newer sockets. A marketplace listing may not clearly show AM3+ and can describe a recent revision. This means you should verify the exact item code and bracket contents instead of assuming the current product image proves compatibility. If the seller cannot confirm the AM3+ hardware for the exact SKU, choose a model whose manual or box explicitly lists the socket.
None of these examples has been tested side by side for this article. The labels describe product formats and documented socket support, not our measured temperatures or noise results. Read current seller terms and manufacturer manuals; discontinued or older models may have variable stock and package contents.
New, old-stock, or used: what can go wrong?
AM3+ systems are old enough that listings may include discontinued models, old stock, renewed units, and used parts. The biggest compatibility risk is a missing AMD mounting ring, bracket, standoff, stock backplate, or set of screws. Ask for a photo of the actual included hardware, not just the stock product box. Compare it with the specific manual and confirm that the pump block has the correct cold-plate bracket for the AM3+ retention frame.
Used AIOs carry additional uncertainty. A liquid cooler can lose fluid over time, accumulate deposits, develop pump noise, or suffer tubing wear. A seller’s statement that it “worked when removed” does not guarantee long-term pump life. Look for staining, residue, kinked or cracked hoses, corrosion around fittings, bent radiator fins, missing screws, and signs of leakage. Ask about purchase age and warranty transfer. If the cooler is a sealed design, do not open it to refill unless the manufacturer says the model is serviceable.
Warranty support is another deciding factor. Check the policy for the exact country and model, the original purchase proof requirement, transferability, and exclusions for used or modified parts. For expandable AIOs, follow the manufacturer’s fluid, fitting, refill, and expansion instructions. Warranty coverage may not extend to damage caused by incompatible parts or user modifications.
If a used cooler has no clear socket documentation or mounting parts, it may be less expensive to buy a simpler AM3+ compatible cooler with verified hardware than to hunt for a rare bracket. Search for an exact model manual and compare the parts diagram. Avoid marketplace kits that merely say “AMD backplate” without naming compatible cooler models.
Installation checklist for an AM3+ AIO
- Confirm the exact motherboard, processor, cooler model, and package revision.
- Download the motherboard and cooler manuals before removing the existing cooler.
- Verify that every required AMD bracket, backplate, standoff, screw, and washer is present.
- Check case radiator locations and measure the assembled radiator-and-fan clearance.
- Plan tube routing and make sure it will not pull on the pump block or touch fan blades.
- Clean old thermal paste from the CPU and cold plate using a safe method.
- Apply thermal compound only as the cooler maker instructs; many AIOs ship with paste pre-applied.
- Tighten the pump block evenly in the specified sequence and avoid excessive force.
- Connect pump, CPU fan, radiator fans, controller, and lighting exactly as the diagrams show.
- Inspect for leaks, verify the pump and fans run, and monitor temperatures at stock settings before stress testing.
Do not keep a pump dry or power the system with a loose block. Never open a sealed cooling loop. If the manual calls for retaining the original AMD frame or backplate, do not remove it. Keep the screws and brackets you removed in a labeled bag in case the system is moved or repaired. If you are unsure whether the mount is seated evenly, stop and ask the cooler or motherboard manufacturer rather than pressing harder.
Diagnosing high temperatures or pump noise
First establish a baseline at stock CPU settings and a known workload. Check that fans spin, pump power is connected, the radiator is not blocked with dust, and the case fans move air in the intended direction. Confirm that the system temperature sensor and monitoring software are reading the CPU correctly. Background processes can load the CPU even when the desktop appears idle, so inspect utilization before diagnosing cooler failure.
If temperatures climb quickly, inspect block contact and paste only after shutting down, unplugging power, and following the manual. Uneven mounting pressure, a forgotten protective film, or a loose pump connection can impair cooling. AIOs may make a small amount of fluid sound, but sudden loud grinding, persistent unusual noise, visible leakage, or a temperature spike warrants stopping use. Do not continue benchmark testing to “see if it settles.”
If the processor throttles only under sustained load, check CPU power settings, motherboard VRM cooling, case airflow, dust, pump speed, and cooler capacity relative to the chip. A high-power FX processor can stress a board’s power delivery independently of core temperature. If the pump fails or the cooler leaks, turn off the machine and contact the manufacturer. Liquid near energized parts is not a condition to test further.
When an air cooler may be simpler
AIO liquid cooling is not always the best answer for an AM3+ build. A quality air cooler with an explicitly supported older AMD bracket can have fewer failure points and be easier to inspect. It also avoids radiator placement, pump wiring, tubing, and liquid-loop aging. A stock-style top-down fan may provide airflow around the VRM area that a tower cooler or AIO does not, though the right arrangement depends on the motherboard and case.
Large air coolers have their own constraints: height clearance, memory interference, board weight, and access to the case. Compare them using the same model-specific socket compatibility and case-fit checks. If your AM3+ CPU runs at stock settings and the motherboard supports it, the right cooler is the one that fits safely, meets the processor’s thermal needs, and has available mounting parts and service. Liquid cooling adds value only if you need the radiator arrangement, noise profile, or expansion features.
Our compact 120 mm water cooler guide discusses the radiator-size class in general. The AM3+ socket check in this article still applies: a small radiator does not make an incompatible pump bracket fit.
Common questions
Will an AM4 water cooler fit an AM3+ motherboard? Sometimes, but never assume. The cooler must include a bracket that attaches to the AM3+ board’s retention system. Check the exact SKU’s manual and manufacturer compatibility list; AM4-only mounting hardware may not fit.
Do AM3 and AM3+ use the same cooler mounting pattern? Many older AMD cooler designs support both, and Noctua documented the same cooler-installation hole spacing for AM2 through AM3+ in its compatible models. That does not guarantee every cooler fits. Confirm the specific block bracket and hardware.
Does AM3+ require a 240 mm radiator? No. The socket determines the pump-block mount; radiator size is based on cooler design, case support, CPU load, and noise goals. A 120, 240, or 360 mm model may be suitable if its exact AM3+ hardware and case fit are documented.
Can I use an AM3+ AIO on an AM4 board later? Only if that exact cooler also includes AM4 hardware or has a supported upgrade kit. Socket compatibility is not automatically bidirectional. Check the manufacturer’s compatibility list for both sockets.
Can I install an AIO without the stock AM3+ backplate? Only if the cooler manual specifies an alternative backplate and it is included. Many mounting systems depend on the original motherboard backplate or retention frame. Do not improvise screws or use an unsupported plate.
Is a 360 mm AIO always cooler than a 240 mm AIO? A larger radiator offers more surface area, but actual temperatures depend on the model, fans, pump, case airflow, workload, mounting, and ambient temperature. It also needs more case space. Compare manufacturer specifications and independent tests for the same CPU when available.
Is the FX-9590 compatible with any AM3+ AIO? No. Socket fit alone does not establish the cooler or motherboard can handle the CPU’s heat and power requirements. AMD lists the FX-9590 at 220 W in historical materials; verify the motherboard’s exact CPU support and choose a cooling solution suited to the processor and actual operating conditions.
Are AIO liquid coolers maintenance free? No cooling system is maintenance free. Keep radiator filters and fans clear, monitor for unusual pump noise or leaks, and follow the model’s service instructions. Refillable or expandable models have additional maintenance steps; do not refill a sealed cooler.
Final buying checklist
For an AM3+ build, first write down the motherboard model, CPU model, cooler SKU and revision. Confirm AM3+ compatibility in the manufacturer’s manual or chart, then verify the correct AMD mounting parts are in the package. Keep the stock backplate and retention hardware until the instructions say otherwise. Measure the radiator-and-fan assembly against the case and account for memory, VRM heatsinks, graphics card, and tubing. Check pump and fan connectors, processor heat requirements, motherboard CPU support, and warranty or service availability.
The Alphacool Eisbaer Aurora 240 and Aurora LT360 examples have official documentation that explicitly lists AM3+; the Cooler Master ML240L V2 RGB appears on the manufacturer compatibility matrix, but you should verify the exact retail revision and hardware. None is a universal recommendation without knowing the CPU, motherboard, case, and package contents. If you cannot confirm those details, pause the purchase and contact the manufacturer with the model numbers and photographs.
That model-by-model check is more useful than a generic “AMD compatible” badge. It separates AM3+ mounting support from AM4 fit, radiator length, and CPU cooling capacity—the four questions that prevent most mismatched AIO purchases.
Reading an AM3+ AIO spec sheet without getting caught out
A spec sheet for a liquid cooler answers three separate questions, and AM3+ buyers get into trouble when they let one answer stand in for the others. The first question is mounting: does the box include a bracket and backplate arrangement that physically fits the AM3+ retention geometry around the socket? The second question is capacity: can the radiator and pump move enough heat for the specific FX or Phenom II processor under the block, sustained over a long session rather than for a short benchmark burst? The third question is fit: will the radiator, its fans, and the tubing runs actually live inside your case alongside the motherboard’s heatsinks, the memory slots, and the top of the power supply shroud? A cooler can pass the first question and fail the other two, which is why the checking order in this guide puts the motherboard and the case ahead of the product badge.
When you read a compatibility list, look for the socket named on its own line rather than buried in a combined AMD entry. Combined entries that merge several generations into one phrase are where older support quietly disappears when a manufacturer revises a mounting kit. If the listing shows a kit contents photo or a parts list, count the AMD-specific pieces: standoffs, a bracket, and any backplate the design needs. A kit that only shows an AM4-style clip arrangement is a warning sign for an AM3+ board, because the two sockets hold a cooler down in different ways even though the processors themselves share a family resemblance.
Why the FX-8350 and similar chips deserve extra headroom
The high-clocked FX processors that still anchor many AM3+ systems were never gentle loads. Under a sustained all-core workload they can hold a cooler at a level that a short gaming session never reaches, and they sit in motherboards whose voltage regulator sections also run warm. That combination means the air moving through the radiator matters twice: once for the coolant temperature, and once because the exhaust path often passes over or near the board’s power delivery area. If your board has small or no heatsinks on the regulator section, plan the radiator position so that some case airflow still crosses that part of the board after the AIO goes in. Owners who chase the lowest possible CPU number while starving the board of air sometimes trade a processor problem for a stability problem that is much harder to diagnose.
Practical headroom also means thinking about coolant temperature rather than only the CPU reading. A modest radiator that keeps an FX chip acceptable in a cool room may struggle in a warm office in summer, especially if the case sits under a desk with restricted intake. Choosing one radiator size up, where the case honestly fits it, is usually a calmer long-term decision than tuning fan curves aggressively to compensate for a radiator that is working at its limit all the time.
Tube routing and pump orientation details that matter on older boards
AM3+ motherboards place their socket in a position that can make tube routing tighter than on newer layouts, particularly in cases designed before large radiators were common. Before ordering, trace the route the tubes will take from the block to your planned radiator position. Tubes should leave the block without pressing against the first memory slot, should not force a sharp bend at the fittings, and should not rest against a fan blade guard or a sharp heatsink edge. Where the pump is built into the block, keep the block from becoming the highest point in the loop if the manufacturer advises against air collecting there; a radiator mounted with its ports in the recommended orientation helps air settle where it does the least harm.
Also check the header plan before the cooler arrives. Older boards may offer fewer fan headers than a modern board, and an AIO can want several: one for the pump, and one or more for radiator fans. A pump that should run at a constant speed belongs on a header you can set accordingly in the BIOS, not on a header you also use for a case fan you want to slow down. If headers are scarce, a simple splitter for the radiator fans is usually fine because those fans should follow the same curve, while the pump keeps its own connection. Write the plan down while the system is still assembled and working; it is much easier than re-deriving it with the old cooler already removed.
Living with an AM3+ AIO over the long term
An AIO fitted to an AM3+ system is often expected to serve for the remaining life of the platform, so maintenance habits matter more than first-week temperatures. Dust is the main enemy. Radiator fins clog gradually, and because the decline is slow, owners often blame the processor or the room when temperatures creep up over a year. Put the radiator on the same cleaning schedule as your case filters: a gentle brush or low-pressure air from the clean side, done with the fans held still, keeps the fin stack breathing. While you are there, look at the tube fittings for any sign of weeping, check that the block mounting screws are still evenly snug, and listen to the pump at idle in a quiet room. A pump that has developed a new rattle or a grinding note is telling you something a temperature chart may not show for months.
Fan curves deserve a second look after the first month. The curve that felt right on day one was set against a clean radiator and a new thermal interface. Revisit it once the system has settled: raise the low-speed floor slightly if the pump header shares control logic with the fans on your board, and make sure the curve’s response to a sudden load is gradual rather than a full-speed jump for every short task. On an older platform, a calm acoustic profile is often worth more than a degree or two, because these systems frequently live in shared rooms and run for long, ordinary days rather than short benchmark sessions.
When temperatures are fine but noise is not
Noise complaints on AM3+ AIO systems usually trace back to one of three sources. The first is air in the pump, which produces a trickling or buzzing sound that changes when you tilt the case gently; reorienting the radiator so air migrates away from the pump is the standard first step. The second is fan behaviour: radiator fans mounted against a restrictive grille can produce a tonal hum at certain speeds, and shifting the curve to avoid that narrow band, or adding the manufacturer’s included spacers where provided, often cures it. The third is vibration transmitted into an older steel case, which turns a modest pump hum into a panel resonance. Soft mounting where the design allows it, and checking that no tube is pressed hard against a side panel, addresses most of what remains. Work through the three in order before concluding the cooler itself is faulty.
Planning the eventual platform move
Many AM3+ systems are kept running because they still do their job, but it is worth buying the cooler with one eye on what happens next. If you expect to move to a newer platform later, keep every part of the mounting kit that you did not use, in a labelled bag, with the manual. Kits get revised, spare brackets get harder to find, and the difference between reusing a cooler and replacing it is often a small stamped-metal part that was thrown away during the first install. Keep the original box if you have space for it; it protects the radiator fins in storage far better than a shelf does. None of this changes which cooler fits your AM3+ board today, but it protects the value of the purchase if the rest of the system changes around it.
Worked examples: three typical AM3+ builds and what they need
Abstract rules land better with concrete systems, so consider three builds that cover most of the AM3+ machines still in service. The first is the classic mid-tower gaming system built around an FX-8350, a single graphics card, and a case with a top exhaust position. This machine’s cooling problem is sustained load in a warm box: the processor holds a high draw for hours, and the graphics card adds its own heat to the same air. For this build, the radiator belongs in the top or front position with the clearest intake path, sized as large as the case honestly fits, and the fan curve should be built around coolant behaviour over a long session rather than the first five minutes. The mounting check still comes first — the bracket in the box must be the AM3+ arrangement — but the deciding factor between two compatible coolers here is radiator capacity, because the load never really lets up.
The second build is the home-office survivor: an older Phenom II or a lower-clocked FX chip in a compact case, used for documents, browsing, and media, where the loudest complaint is not temperature but noise in a quiet room. This machine does not need the largest radiator that fits; it needs a cooler whose pump stays composed at low speed and whose fans can idle gently without a tonal whine. A smaller radiator, correctly mounted, with a calm curve, serves it better than an oversized unit tuned for a benchmark. The third build is the workstation that refuses to retire: a rendering or compiling workload that pins every core for extended periods, in a case that may predate liquid cooling entirely. Here the honest answer may be that the case, not the cooler, is the limiting part, and the money is better sequenced — a modern case with real radiator support first, then the AIO the new case can actually hold — rather than forcing a large radiator into a chassis that will strangle its intake.
What to do with the old air cooler
When the AIO goes in, the removed air cooler still has value as insurance. Clean it, keep its mounting hardware bagged and labelled, and store it somewhere dry. If the pump ever fails on a workday morning, that old cooler is the difference between a system restored in twenty minutes and a machine down for days waiting on a delivery. This is unfashionable advice in an era of tidy desks, but AM3+ ownership is a practical discipline: the platform is old enough that spares are a strategy, not a clutter problem. The same logic applies to the stock bracket parts you remove from the board — bag them with the cooler, because a future owner, or a future you rebuilding the board into a spare machine, will need exactly those unglamorous pieces of stamped metal.
A short pre-flight list for installation day
On the day itself, lay the job out in the order that prevents the classic mid-install stall. Photograph the current build before touching it, especially cable routing and header positions. Confirm the new mounting hardware against the board with the old cooler still fitted, so a mismatch is discovered while the system still works. Stage the thermal interface, a lint-free cloth, and the correct screwdriver before the board is bare. Plan the radiator’s position and trial-fit it with its fans before any paste is opened, because a radiator that does not clear the board’s heatsinks is a discovery you want to make with clean hands and a returnable product. Work through the install in one sitting rather than across a weekend; half-fitted cooling has a way of being forgotten in exactly the state that damages hardware. And keep the system’s first boot after fitting a supervised one: watch the temperatures climb and settle, listen to the pump through its first minutes, and only then close the case and call the job finished.
Questions AM3+ owners ask after the first month
Three questions arrive in almost every AM3+ owner’s first month with liquid cooling, and each has a calmer answer than the forums suggest. The first is whether temperatures that fluctuate by several degrees at idle mean something is wrong; on these processors, with their older sensor behaviour and aggressive power management, a wandering idle reading is normal, and the load temperature held steady over an hour is the figure that judges the installation. The second is whether the pump should be audible at all; a faint hum at close range in a silent room is ordinary, while a pump that can be heard across the room over the fans has something to say, usually about air or mounting, and deserves the diagnostic pass described earlier. The third is whether coolant ever needs replacing in a sealed unit; sealed AIOs are not serviced like custom loops, and the correct response to an ageing sealed cooler is monitoring — temperatures, sounds, tube condition — rather than opening a system that was never designed to be opened. Owners who internalise those three answers stop chasing ghosts and start noticing the signals that actually matter.
How long should an AM3+ AIO last, and how will you know when it is done?
Sealed liquid coolers age on a schedule set by permeation, pump wear, and fan bearings rather than by any single failure, and the AM3+ owner should know the signs in order. Coolant slowly migrates through the tube walls over the years, which is why an older loop can develop the air noises described earlier even when nothing has leaked. The pump’s bearing wears toward a rougher sound long before it stops. Fans announce their age first, with a tick or a wobble at low speed. None of these is an emergency on the day it is noticed; together, watched across a season, they form the case for planned replacement — done on your schedule, with the mounting compatibility for AM3+ checked calmly in advance, rather than on the cooler’s schedule in the middle of a working week. That, in the end, is the owner’s whole art on a legacy platform: nothing about an AM3+ system needs to become a crisis if its keeper watches the small signs and acts while acting is still easy.
Amazon disclaimer: As an Amazon Associate, DailyHomeDecorating.com earns from qualifying purchases. Product details and availability may change; Amazon and its sellers control current listing information.