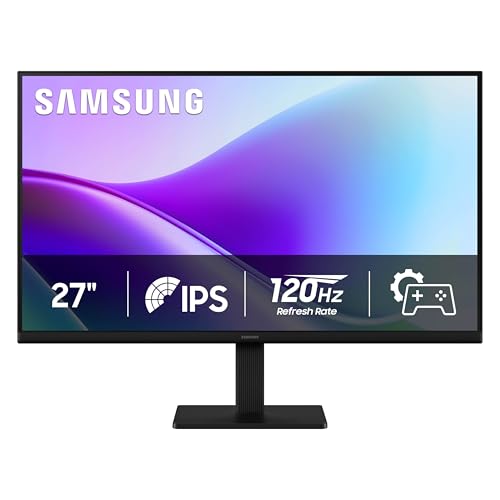
To add a second monitor, check which video ports your computer and screen share, connect them with a matching cable, power the monitor on, and then arrange the screens in your display settings. The whole job usually takes ten to twenty minutes. A little planning about ports saves most of the trouble. The sections below add a full walkthrough, common scenarios and a troubleshooting table.

Check the Ports First
Look at the back or sides of your computer and the monitor. Common video ports include HDMI, DisplayPort and USB-C with video support. Your computer’s guide shows which ones carry video. If the two devices do not share a port type, an adapter or a different cable may bridge the gap.
| Computer has | Monitor has | What you need |
|---|---|---|
| HDMI | HDMI | A straight HDMI cable |
| DisplayPort | DisplayPort | A DisplayPort cable |
| USB-C with video | HDMI or DisplayPort | A matching adapter or cable |
| Only older ports | Newer ports | An adapter, if the maker supports it |
In this guide
Connect and Arrange
- Place the monitor beside the main screen at the same height.
- Plug the monitor into power and connect the video cable.
- Switch the monitor on and select the matching input if it does not appear automatically.
- Open the display settings on your computer.
- Use the option to detect displays if the second screen is not shown.
- Drag the on-screen boxes so they match the real position of your monitors.
- Choose whether to extend the desktop or duplicate the same picture.
- Set the main display, resolution and text size for each screen.
Make the Desk Comfortable
- Set the top of the screens near eye level.
- Place the screen you use most directly in front of you.
- Keep both at a similar distance from your eyes.
- Take regular breaks to rest your eyes.
If Nothing Appears
Check that the input selection on the monitor is correct and that both cable ends are seated. Try a different port or cable, and consult the maker’s guide for your computer. Updating system software through the usual route can also help.
Choosing a layout that suits your work. Some people keep one monitor for the main task and the other for reference, such as a document, a chat window or a video call. Others stretch one window across both. Try a few arrangements for a week and adjust. Most systems let you move the taskbar or toolbar between screens.
If your monitor can rotate or tilt, a vertical screen can suit long documents. Check that the stand is stable and that cables are not pulled tight when you adjust it.
A Worked Walkthrough for a Desk Setup
Imagine a laptop on a desk with a spare monitor you want to place on its left. This sequence keeps surprises to a minimum.
- Look up the ports on the laptop and on the monitor in their guides. Write down the type of each, and note whether the laptop’s USB-C port is listed as supporting video.
- Match the cable to the ports. If you need an adapter, make sure the maker lists the connection as supported, and check any limits on resolution or refresh rate in the guides.
- Switch off nothing, but unplug other cables you do not need so you can see what you are connecting. Place the monitor on the desk and adjust its height to match the laptop screen or the main monitor.
- Connect power to the monitor first, then the video cable to the monitor and the computer. Press the monitor’s power button.
- If the screen shows no signal, use the monitor’s input button to choose the port you used. Many monitors search automatically but some do not.
- Open the display settings. The computer should show two numbered boxes. Click each to see which number appears on which screen.
- Drag the boxes so the second sits on the left, as it does on your desk. Move the pointer off the left edge of the main screen to test that it appears on the other one.
- Select the screen you want as the main one, which holds the taskbar or menu bar in most systems, and set scaling so text on both looks about the same size.
- Drag a window across, then close the lid or sleep and wake the computer to confirm the layout survives.
Common Scenarios
A laptop with a docking station
One cable may carry video, power and accessories. Follow the dock maker’s guide, and be aware that the number and size of screens is limited by the dock and the laptop.
Two monitors of different sizes or sharpness
Text looks different on each. Adjust the scaling for each display, and place the sharper or larger one where you do most reading.
Using the laptop lid closed
Some computers sleep when the lid closes unless you change a setting. Look for the lid-close option in power settings, and make sure the machine has airflow while closed.
A screen for video calls and notes
Put the call on the screen with the camera, so you look toward the camera while speaking, and keep notes on the other.
Layout Checklist
- Both screens are at similar height and distance.
- The bezels meet near the middle of your view if you use both equally.
- The monitor you use most sits in front of you rather than off to one side.
- Brightness and color look similar across screens.
- Cables have slack and do not pull on connectors.
- The stands are stable and the monitors cannot tip.
Mistakes to Avoid
- Assuming every USB-C port carries video. Some carry only data or power, so check the guide before buying a cable.
- Setting one screen much higher than the other. It makes you tilt your head each time you look across.
- Using a damaged cable. A bent or frayed cable can cause flicker or signal loss. Replace it.
- Ignoring scaling. Windows that jump in size between screens are tiring. Adjust the setting for each display.
- Leaving the monitor on the wrong input. A blank screen is often just the wrong source selected.
- Stacking monitors without a proper stand. Follow the stand maker’s weight guidance and mount arms as their instructions say.
Quick Troubleshooting
| Symptom | Likely cause | What to try |
|---|---|---|
| No signal message | Wrong input or loose cable | Select the right input and reseat both ends |
| Second screen not listed | Computer did not detect it | Use the detect option, try another port or cable |
| Flickering picture | Poor cable or unsupported setting | Replace the cable and lower resolution or refresh rate |
| Blurry text | Resolution not set to the screen’s native value | Choose the recommended resolution in settings |
| Pointer jumps in the wrong direction | Screen boxes arranged wrongly | Drag the boxes to match the real desk layout |
Care and Upkeep
Switch the monitor off and unplug it before cleaning, and wipe the screen with a soft, dry or slightly damp cloth as the maker describes. Do not spray liquid on the panel. Keep vents clear, avoid putting the monitor near heat, and check that the stand’s screws and any arm clamps are tight every few months. Update the computer’s system software when updates appear, since display fixes are often included.
Glossary
- Extend: use the second screen as extra desktop space.
- Duplicate: show the same picture on both screens.
- Resolution: the number of pixels on a screen.
- Refresh rate: how many times a second the picture updates.
- Scaling: a setting that makes text and icons larger or smaller.
- Bezel: the frame around the screen.
- Dock: an accessory that adds ports to a laptop.
Cables and Adapters Explained
Most second-monitor troubles trace back to the cable. The shape of the plug does not always tell you what the port can do, so it helps to know the main options and their limits.
HDMI
HDMI is found on most monitors, televisions, and many laptops. It carries video and audio over one cable. Different HDMI versions support different resolutions and refresh rates, so an older cable or port may limit you to a lower setting than the monitor can display. If the picture appears but the refresh rate or resolution options are limited, check the version of the port and cable in the manuals.
DisplayPort
DisplayPort is common on desktop graphics cards and business monitors. It supports high resolutions and refresh rates, and some computers can chain multiple monitors from one port using a feature called daisy-chaining, though the monitor and computer must both support it. A DisplayPort cable has a locking latch on some versions, so press the release button before pulling it out.
USB-C and Thunderbolt
Many modern laptops use a USB-C port for video, but not every USB-C port supports it. Look for a small display symbol, a DisplayPort logo, or a Thunderbolt lightning icon next to the port, or check the product specifications. A single USB-C cable can sometimes carry video, data, and charging at once, which keeps the desk tidy. Cables vary widely, so a cheap charging-only cable will not carry video.
VGA and DVI
These older connectors still turn up on used monitors and older computers. VGA is analog and tends to look softer, while DVI can carry a digital signal. If you have a modern computer and an older monitor, an adapter may work, but check which direction the adapter converts, since many are one-way.
| Computer port | Monitor port | What you usually need |
|---|---|---|
| HDMI | HDMI | A standard HDMI cable |
| DisplayPort | DisplayPort | A DisplayPort cable |
| USB-C with video | HDMI or DisplayPort | A USB-C to HDMI or DisplayPort cable or adapter |
| HDMI | DVI | An HDMI to DVI cable (digital only, no audio) |
| HDMI | VGA | An active converter, since the signal types differ |
Resolution, Scaling and Refresh Rate
After the picture shows, tune the settings so both screens look right. Open the display settings on your system and select each monitor in turn, since each one has its own options.
Set the native resolution
Every monitor has a native resolution, which is the pixel count it was built to display. Running at anything else usually looks blurry or stretched. Your operating system normally picks the recommended value, but a wrong cable or driver sometimes leaves it lower, so confirm it.
Scaling for mixed screens
If one monitor is a high-density display and the other a standard one, text may look much smaller on one. Use the scaling option, which enlarges text and interface elements without changing the resolution. Setting a percentage for each monitor separately usually evens things out. Dragging a window between mismatched screens can still cause a brief jump in size, and some older programs blur at certain scales. Signing out and back in sometimes helps a setting take effect.
Refresh rate
Refresh rate describes how many times per second the screen redraws. Sixty hertz is typical for office work, and higher rates are common on gaming monitors. In display settings, look for an advanced option and select the highest rate the monitor and cable support. If a monitor lists a higher rate but the option does not appear, the cable, port, or driver is the usual limiter. Matching rates on both screens can make window dragging feel more consistent, but it is not required.
Color and brightness
Two monitors rarely look the same out of the box. Adjust brightness and, if needed, color settings from each monitor’s on-screen menu until a white document looks alike on both. This is helpful if you edit photos or documents and move them between screens. For color-critical work, a hardware calibration tool is a better option than adjusting by eye, but that is beyond what most office setups need.
Windows and Mac Display Settings, Briefly
The exact menu names change between versions, but the general routes are the same.
- On Windows, right-click the desktop and choose display settings. You can pick whether to extend the screen, duplicate it, or show on only one display. The Windows key plus P opens a quick projection menu.
- On a Mac, open the system settings and find displays. Arrangement settings let you drag the screens into position and choose the main display, which holds the menu bar and dock by default.
- On both systems, the arrangement should match the physical layout. If the cursor jumps the wrong way, drag the screen icons to match your desk.
- To change which screen is primary, select the display you want in the settings and use the option to make it the main display.
Mounting and Positioning Choices
The stand that comes with a monitor is not always ideal for a pair. Think about what will go on your desk and how you use each screen.
Stand, arm, or wall mount
Monitor arms clamp to a desk edge or pass through a hole and free up desk space. Most attach with a VESA pattern on the back of the monitor, commonly 75 by 75 or 100 by 100 millimeters, so check that your monitor has the pattern and that the arm lists a supported weight and screen size range that covers it. Follow the maker’s instructions for the desk thickness it supports. A thin or weak desk surface may not hold a clamp, so check before tightening. Hang the arm only on a surface rated for the load.
Primary and secondary roles
Most people set up a main screen right in front of them and a secondary screen to one side, angled slightly inward. If you use both equally, center the gap between them in front of you and angle them in a gentle V. Put reference material, chat windows, and email on the side screen and keep your main work in front.
Neck and eye comfort
- Place the top of the screen at or slightly below eye level, with the screen about an arm’s length away.
- Tilt the screens back a little so you are not looking up.
- Keep the side screen at the same height as the main one to avoid a bobbing head.
- Take regular short breaks from the screens, and look at something far away from time to time.
- Reduce glare from windows by adjusting blinds or angling the screens.
Habits That Make Two Screens Productive
A second display helps only if you use it well. A few simple habits go a long way.
- Learn the window snap shortcuts on your system, so you can tile apps quickly on each screen.
- Keep a document or browser on one side and the app you work in on the other.
- Use virtual desktops if you have many windows, and leave frequently used tools on the second screen.
- For video calls, put the call window on the screen next to your camera, so you appear to look at the people you speak to.
- Avoid clutter. Fewer open windows make it easier to find things, even with more space.
If after all this the second screen still will not appear, go back to the cable and port checks, test the monitor with a different cable or computer, and update your graphics drivers from the manufacturer or through your operating system’s update tool. Isolating one variable at a time is the fastest way to find the fault.
Going Deeper: Living With Two Screens Day to Day
Connecting the second monitor is the easy part. The real gains come from the small decisions you make over the following week: which screen leads, where each kind of work lives, and how the physical desk supports long sessions without strain. A second screen that is technically working but badly arranged will quietly go unused, with everything important dragged back to the main display and the extra space wasted on a static email inbox. This section covers the deeper layer — judgement calls, comfort criteria, and fixes for the annoyances that only appear after the novelty wears off.
Give each screen a job, then keep the promise
Two screens work best when each has a default role. One practical split is an active screen and a reference screen: the document, design, or spreadsheet you are editing sits directly in front of you, while source material, notes, chat, and email live on the other. Another split suits people who write or code: the work in progress takes the main screen and a preview, output, or research tab takes the second. The exact split matters less than consistency. When a window type always lands in the same place, your hands learn the layout within days and you stop hunting. Most operating systems remember where an app was last closed, so spend one session deliberately placing your regular apps, closing them in position, and letting the system learn the map.
Decide what deserves the better screen
When the two monitors differ — and they usually do — put the sharper, more colour-accurate screen in the primary position if your work involves photos, design, or long reading. Put the larger screen in front if you live in spreadsheets or timelines. If one screen has a faster refresh rate and you play games, that one leads during play even if it is smaller. There is no single correct answer; the criterion is simply which quality your main task uses most. You can also swap roles by time of day on some systems by changing which display is marked as main, but most people settle on one arrangement and keep it, because consistency beats optimisation.
Troubleshooting by Symptom
The pointer keeps getting lost between screens
A wandering pointer usually means the on-screen arrangement does not match the physical desk. Open the display settings and drag the screen icons so their edges line up the way the monitors actually sit, including height differences: if one monitor stands taller, offset its icon so the pointer crosses at a natural point instead of jumping. If the screens have very different resolutions, the pointer may also change speed as it crosses, because it travels a different number of pixels per inch. Matching scaling values, or accepting the smaller screen as a reference display you visit less often, both help. A larger pointer and a subtle pointer trail, available in accessibility settings, are honest fixes rather than admissions of defeat.
One screen looks washed out or yellow next to the other
Start with the simple causes. Night-time colour modes sometimes apply to one display and not the other after a driver update, so check that both screens share the same colour mode setting. Then compare the monitors’ own menu settings: brightness, contrast, and colour temperature presets often differ out of the box, and setting both to a similar neutral preset closes most of the gap. A cable can matter too — an old or damaged cable, or an adapter chain, can limit colour depth on one screen. Swap cables between the screens; if the washed-out look follows the cable, replace the cable. Perfect matching between different panel types is unrealistic, and chasing it wastes hours; aim for close enough that moving a window across does not jar.
Windows open on the wrong screen, or off-screen entirely
An app that opens off-screen usually remembers a position from a previous layout — a laptop docked yesterday, undocked today. The reliable recovery is to select the app on the taskbar or app switcher, then use the keyboard move shortcut for your system to pull its window onto the active screen, rather than hunting with the pointer in empty space. To prevent repeats, before undocking or rearranging, drag key windows onto the screen that will stay connected. If one program misbehaves constantly while others behave, check whether it has its own display or workspace setting; media and design tools often do.
Flicker, sleep, and wake problems
A screen that flickers at certain brightness levels may be unhappy with its refresh rate or its cable. Set the refresh rate in the operating system’s advanced display settings rather than the monitor menu, confirm it matches what the monitor supports, and try a shorter, better-quality cable before suspecting the panel. A monitor that refuses to wake while its twin wakes instantly is often connected through a dock or adapter that sleeps more deeply than the computer expects; plugging that screen directly into the computer, where ports allow, is a useful test. Also check the monitor’s own input setting: a screen set to hunt automatically among inputs wakes slowly, while one locked to the correct input wakes promptly.
Criteria for a Comfortable Arrangement
Comfort is measurable enough to check rather than guess. The top of your main screen should sit roughly at or slightly below eye level, and the screen should be about an arm’s length away — close enough that you do not lean in, far enough that your eyes can rest. When two screens are used equally, angle both slightly inward and sit at the corner where they meet, so your neck turns a little each way instead of a lot one way. When one screen dominates, centre that one and angle the secondary screen toward you like a book on a stand. Your keyboard belongs in front of the main screen, not midway between two, or your shoulders will rotate all day. Finally, check the light: a window behind a screen forces your eyes to fight glare, and a window behind you reflects in the glass. Blinds, a small repositioning of the desk, or a matte screen surface solve more headaches than any setting buried in a menu.
Mistakes That Undermine a Two-Screen Desk
The classic mistake is buying the second screen before checking the ports, then building a tower of adapters that limits resolution or refresh rate. A close second is mismatching heights — stacking one monitor on books for months instead of adjusting its stand or adding a simple riser, and paying for it in neck strain. People also duplicate displays out of habit and never switch to extend mode, which throws away the entire benefit. Another quiet mistake is letting notifications live on both screens at full volume, so the second monitor becomes a distraction machine rather than a workspace. Turn off alerts on the reference screen and let it hold quiet, glanceable information instead. Lastly, many desks accumulate cables until nothing can move; a tray or a few ties, fitted once, keep the arrangement adjustable — and an arrangement you can adjust is one you will actually improve.
Planning the Layout Before You Buy Anything Else
If the two-screen setup earns its place, the next temptation is accessories: arms, risers, larger desks, a third screen. A calmer approach is to run the current arrangement for a fortnight and keep a short note of every friction you notice — reaching, squinting, a cable that pulls, a window that never fits. Buy only against that list. Most people find the list is short and unglamorous: one riser to lift the lower screen, one longer cable so the monitor arm can move freely, perhaps a small lamp repositioned to kill a reflection. Each fix maps to a named annoyance, which is a far better criterion than buying a matching set of everything at once.
One screen portrait, one landscape
Rotating the secondary screen to portrait orientation deserves a trial if your reference material is tall: long documents, message threads, code, web pages, and note lists all read naturally in portrait, and a page that needed constant scrolling in landscape often fits whole. The costs are real, though. Video and wide spreadsheets suffer in portrait, the pointer crosses a taller edge, and some stands cannot rotate at all. Treat it as a reversible experiment: if your stand allows it, run portrait for a week of ordinary work before buying a rotating mount. Judge it by how often you drag windows away from the portrait screen — frequent dragging is the honest signal that the experiment failed for your mix of work.

Sharing the desk with calls, paper, and other people
Two screens change how the rest of the desk behaves. Keep the area directly in front of the main screen clear for a notebook or documents; the moment paper migrates under the keyboard, posture follows it. If you take video calls, decide which screen holds the camera view and keep your notes on the other, so your eyes stay near the camera instead of dropping to a far corner — the difference in how attentive you appear is noticeable. On shared or household desks, agree on a default resting state: screens awake or asleep, desk lamp on or off, cables coiled. Small agreements prevent the daily low-grade friction of finding your second screen unplugged because someone needed the socket, and a labelled power strip quietly solves more arguments than any settings menu.
Seasonal and Yearly Upkeep for a Dual-Screen Desk
Once a season, spend fifteen minutes on the physical setup. Dust the vents and the backs of the monitors, where heat and dust gather. Check every cable for pinch points where the desk, arm, or chair presses on it, and confirm connectors still seat firmly — a cable that has crept half out causes exactly the intermittent flicker people blame on the panel. Re-run the comfort check from scratch: sit as you normally sit, confirm screen height and distance still suit you, and tighten any arm joints that have begun to droop. Software deserves the same rhythm: install graphics and system updates, glance at the display arrangement after big updates, since they occasionally reset scaling or swap the main display, and remove test profiles or duplicate display entries you no longer use. None of this is exciting, and that is the point — a two-screen desk should fade into the background of your work, and brief, regular attention is what keeps it there.
Working From a Laptop Sometimes, a Desk Sometimes
Many two-screen desks are really two-mode desks: docked and dual-screen for deep work, undocked and portable for meetings, travel, and the sofa. That rhythm creates its own small frictions worth designing for. Keep the cables that must move with the laptop to a minimum — ideally one dock connection — so leaving the desk is a single motion rather than an excavation. Tell your system which arrangement is the default so windows return to sensible places on reconnect, and accept that a couple of apps will always need a manual drag; note which ones, and simply expect it. When you return and one screen stays dark, resist the urge to reconfigure everything: reseat the single dock cable, wake the machine, and give the screens a few seconds to negotiate before opening settings. Most reconnection dramas are impatience wearing a technical costume. A desk that docks and undocks gracefully gets used in both modes; a desk that punishes leaving slowly becomes a trap, and the laptop’s portability — half its value — quietly goes to waste.
The One-Month Review of Your Two-Screen Desk
A month in, audit the arrangement against the work it actually hosted, not the work you imagined. Which screen hosted your most demanding task most often, and is it the one in the primary position? Which windows never left the main display, and what does that say about the second screen’s real job? Fix the mismatches the month revealed: swap a role, move a stand, reassign the main display, adjust one scaling value. Check your body too — a month is long enough for a small height error to announce itself as an end-of-day ache, and short enough that the fix is still a five-minute adjustment rather than a new chair. Desks, like the guides in this series, reward a scheduled second look far more than a perfect first guess. Make the small corrections the month earned, and the setup stops being a recent purchase and becomes simply how your desk is — which is when the second screen finally pays its full rent.
Ready to Buy? Start Here
If this guide helped you decide what to look for, these products are a place to start.
View Amazon Basics HDMI Cable on Amazon
As an Amazon Associate we earn from qualifying purchases. Prices and availability are shown on Amazon.
FAQ
Can a laptop run a second monitor?
Often yes, but the number of screens depends on its ports and the maker’s limits. Check the guide, and note whether the screens can run at your preferred resolution at once.
Why does text look different on each screen?
Screens can have different sizes and sharpness. Adjust the scaling setting for each display, and choose the recommended resolution for each one.
Do both monitors need to match?
No. Different models work together, though differences in size, color and sharpness will be noticeable. Matching them is convenient but not required.
Can I use a television as a second screen?
Often yes if it has a suitable input. Settings such as scaling and sharpness may need adjusting, and the maker’s guide will describe video modes that suit text.
How far apart should the screens be?
Close enough that you can turn your head slightly rather than your whole body. Many people angle the side screen inward. Adjust until switching between them feels natural.
What cable do I need for a second monitor?
It depends on the ports on your computer and monitor. HDMI and DisplayPort are the most common matches. If your laptop has USB-C with video support, a USB-C to HDMI or DisplayPort cable works. Check both devices’ manuals before buying.
Why is my second monitor not detected?
Common causes are a loose or wrong cable, the monitor set to the wrong input, a port that does not carry video, or outdated graphics drivers. Try another cable or port, select the right input on the monitor, and use the detect option in display settings.
How do I make my second monitor the main display?
On Windows, open display settings, select the monitor, and check the option to make it your main display. On a Mac, open display settings and drag the menu bar to the screen you want as main. The exact steps vary by version.
Should I extend or duplicate my display?
Extend gives you extra workspace, with different content on each screen, and suits most work. Duplicate shows the same image on both and is better for presentations or projectors. You can switch between them in display settings.
What is VESA mounting on a monitor?
VESA is a standard pattern of four screw holes on the back of a monitor, commonly 75 by 75 or 100 by 100 millimeters. It lets you attach arms or wall mounts. Check the monitor’s specifications and the mount’s weight limits before buying.
Should my two monitors be the same size?
Matching size and resolution is the most comfortable option, because the pointer crosses between screens predictably and text stays the same size. It is not required, though. A mixed pair works well when the better or larger screen takes the main role and the smaller one holds reference material. If you mix, expect a short adjustment period, set scaling per screen so text is readable on both, and arrange the on-screen layout to mirror the physical height difference.
Why does my laptop slow down with a second screen attached?
Driving an extra display asks more of the graphics hardware, and a high-resolution external screen asks for a lot more. The slowdown is usually mild, but it grows if the laptop is also charging through the same dock, running hot, or pushing a very high resolution at a high refresh rate. Help it by keeping vents clear, using the maker’s charger where possible, and lowering the external screen’s refresh rate if you do not need the highest setting for office work. If the fans run constantly, check which apps are using the graphics hardware in your system’s activity monitor.
Can I close my laptop and use only the external monitors?
Yes, most laptops support working with the lid closed when connected to external power and displays, though the setting lives in different places on different systems and some need the power adapter plugged in before the screens stay awake. Keep two things in mind: the laptop still needs airflow, so do not bury it in a drawer while it works, and you will need an external keyboard and pointing device. Test the arrangement before a day when you depend on it, since sleep and wake behaviour varies by dock and adapter.
What do I do if the second screen only mirrors at a low resolution?
That pattern usually means the cable or adapter is the limit, not the monitor. Older cables and cheap multi-way adapters often cap resolution or refresh rate. Connect the monitor directly with a single cable that matches the ports on both ends, check the resolution list again, and update the computer’s graphics drivers if the correct option still does not appear. Also confirm you have switched from duplicate to extend mode, since duplicate mode forces both screens to share the lower screen’s resolution.
Is a second monitor worth it for video calls and documents only?
For many people, yes — that combination is one of the strongest everyday cases. The call can stay visible on one screen at a natural size while notes, documents, or a shared file fill the other, so you stop shrinking the call to a thumbnail or flipping between windows. The gain is not raw speed so much as reduced friction: fewer lost places in documents, fewer apologies while you hunt for a tab. If your work is mostly calls plus reading and writing, a modest second screen arranged comfortably beats an expensive one arranged badly.
Can I use two monitors with different refresh rates?
Yes. Each screen runs at its own rate, and for office work the difference is barely noticeable. The faster screen should hold anything that moves — video, games, scrolling documents — while the slower one holds static reference material. Occasionally a system stumbles when a video plays on one screen while a game runs on the other; if you see stutter, move the moving content onto one screen and test again. Set each rate in the advanced display settings for that screen rather than expecting one global setting to cover both.
How do I stop my neck hurting with two screens?
Start with placement, not painkillers. If one screen dominates your day, centre it and angle the second; if both share the work, sit at the corner where they meet so turns are small and balanced. Bring both screens to a similar height, raise your chair or screens so the tops sit near eye level, and check that you are not twisting toward a keyboard placed between the screens. Then audit your habits: many people crane toward the smaller, dimmer screen because an important app lives there. Move the important app to the comfortable screen and let the awkward screen hold reference material you glance at, not study.
What is the cheapest meaningful upgrade to an existing two-screen setup?
Usually height, not electronics. A simple riser or a basic monitor arm that lifts the lower screen to match its partner improves comfort more than a new panel does, and it costs a fraction as much. After that, a single good cable of the right type and length removes the adapter chains that cause flicker and resolution caps. Spend on the panel itself only when the current one’s size, sharpness, or colour genuinely limits the work you do on it every day.
Is it better to run two screens from a dock or directly from the computer?
A dock earns its place when you regularly connect and disconnect, especially with a laptop: one cable carries displays, power, and peripherals, and the desk stays tidy. Direct connections are simpler and can be more reliable for a fixed desktop, and they avoid the dock as a possible limit on resolution or refresh rate. Check the dock’s stated display support against your monitors before buying, since docks vary widely in what they can drive. If your setup never moves, save the money and connect directly; if you dock daily, the dock is the quality-of-life purchase of the whole arrangement.
The Short Version
Match the ports, connect the cable, select the right input and arrange the screens in settings. Position both at eye level and consult the maker’s guide if a screen stays blank.