Label inventory bins with a short location code on the outside and a clear item name inside the label, placed in the same spot on every bin. A consistent scheme lets a new person find, count and return stock without asking anyone. This guide covers codes, label content, placement, a worked set-up, and the habits that keep the scheme accurate.

Give Every Bin a Location Code
A location code says where the bin lives. A simple pattern is rack, shelf and slot, for example a letter for the rack, a number for the shelf and a second number for the slot. Keep it short enough to read from a few steps away.
Write the scheme on one page and post it near the stock area. If the scheme needs a long explanation, it is too complex.
In this guide
Decide What Goes on Each Label
Keep the content to what people use:
- The location code in large type.
- The item name or number, as it appears on your order records.
- A barcode, if you scan stock, matching the location or item.
- An optional line for size or unit, such as a count per bag.
Leave out anything that changes often, such as quantities. Those belong in your records, not on a printed label.
Place Labels Consistently
- Choose one spot: the center of the front face, or the top left corner of the shelf edge.
- Wipe the surface and let it dry so the adhesive holds.
- Press the label from the middle outward, then check it sits level.
- For deep shelves, add a second label on the bin lid or the top edge so it can be read from above.
Bin Label Options at a Glance
| Position | Good for | Watch out for |
|---|---|---|
| Front face of bin | Shelves at eye level | Hidden when bins are stacked |
| Shelf edge | Fixed locations that rarely change | Must be moved if the bin moves |
| Lid or top edge | Low or high shelves | Lids can get swapped |
A Worked Walkthrough: Coding a Small Stockroom
Imagine a small stockroom with two racks, each with four shelves and six slots per shelf. These numbers are an invented example.
- Name the racks A and B. Number the shelves from the floor up, 1 to 4, and the slots from left to right, 1 to 6.
- That gives codes from A-1-1 to B-4-6. Write the scheme on a single sheet with a small sketch of each rack.
- Walk the room and list what is in every bin. Merge duplicates and move like with like.
- Assign each item to a bin. Put fast-moving items at waist height and heavy items low.
- Create a table with columns for location code, item name, item number and unit.
- Print one shelf-edge label and one bin label, and apply them to a test shelf. Check readability from the aisle.
- If both read well, print the rest and apply them in the same position everywhere.
- Walk the room again with the table and tick off each bin, correcting any mismatch on the spot.
Keep the Scheme Alive
A scheme only helps while it matches the shelves. When a bin moves, change its label the same day, and when a bin is retired, remove the label rather than leaving a ghost location. Ask the people who use the stock which codes confuse them, and rename those first. Before adding a new rack or shelf, extend the pattern you already use so that older labels never need to be redone.
Common Scenarios
Parts that come in several sizes
Give each size its own bin and its own item number. A single bin of mixed sizes leads to wrong items being taken and wrong counts.
Seasonal stock
Put it in a clearly marked area with its own codes, and note on the label that it is seasonal. This frees the main shelves for items used all year.
Small items in drawers or cabinets
Label each drawer with the code and the item name, and use dividers inside so each compartment has its own sub-code, such as a letter.
Several people counting stock
Agree on the unit written on the label. If a bin holds bags of ten, the label and the records should say so, to prevent counting bags in one place and pieces in another.
Mistakes to Avoid
- Printing quantities on the label. They change constantly, so the label is wrong within days.
- Using different codes for the same place. Two names for one shelf cause lost stock, so keep one source of truth.
- Mixing items in a bin. The label can only describe one thing, so keep one item per bin where you can.
- Leaving old labels on reused bins. Remove or cover them so nobody trusts the wrong information.
- Making codes too long. People will not read them, so keep them short.
Quick Troubleshooting
| Symptom | Likely cause | What to try |
|---|---|---|
| Barcodes will not scan | Faint print, glare or creased label | Reprint, check the label material and apply on a flat area |
| Stock counts do not match records | Items in the wrong bin or unit confusion | Check the label, bin and unit and correct whichever is wrong |
| Labels peel from dusty shelves | Dirty surface | Wipe, dry and reapply, and check the label maker’s guide for surface advice |
| New staff cannot find items | Scheme not posted or too complex | Put the scheme page by the entrance and simplify codes |
Glossary
- Location code: a short code naming where a bin sits.
- SKU: a stock-keeping unit, the code used to identify a product in your records.
- Unit of measure: how stock is counted, such as each, pack or box.
- Shelf-edge label: a label on the shelf, not the bin.
- Ghost location: a label for a place where nothing is stored any more.
Care and Upkeep Over Time
Labels wear out, and a scheme drifts as products come and go. Set a regular walk-through, perhaps monthly in a busy room, where one person carries the list and checks a rack at a time. Replace any label that is torn, faded or hard to scan, and correct the list when a bin has moved. Keep a small stock of blank labels near the racks so fixes happen at once and not weeks later. When the range of products changes a lot, such as at the turn of a season, plan an hour to rework the affected shelves together instead of patching them one at a time.
Choosing Label Materials and Holders
The best coding scheme fails if the labels fall off or fade. The material should match the environment where the bins live: a dry office closet, a dusty garage, a cold storeroom or a damp basement. Think about temperature, moisture, abrasion and how often bins are handled.
| Option | Strengths | Limits |
|---|---|---|
| Paper adhesive labels | Cheap and easy to print | May peel or smudge in damp or dusty spaces |
| Synthetic or vinyl labels | Resist moisture, grease and tearing | Cost more and may need a compatible printer |
| Label holders with paper inserts | Allow easy relabeling | Inserts can slip out if not secured |
| Magnetic labels | Reposition on metal shelves without adhesive | Can slide when shelves are bumped |
| Marker on bin plus label | Good backup if label fails | Writing may fade or smear |
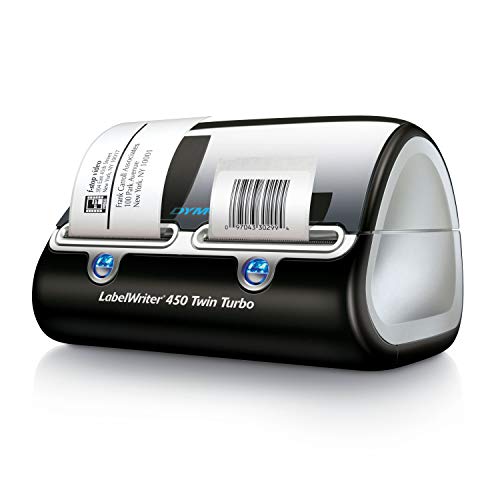
Label printers range from simple handheld models to desktop thermal units. Choose one that prints the label width and tape type you plan to use, and check the maker’s instructions for supply compatibility. Thermal labels can fade in heat or direct sunlight, so for storage near windows consider a different type. Test one label on a sample bin for a few weeks before printing hundreds.
Matching Bin Types to Stock
Labeling works hardest when the bins themselves are suited to what they hold. A bin that is too big hides small parts, and one that is too small forces overflow into other places. Take stock before choosing bins, and sort items by size, weight and how often they are used.
- Small parts such as screws, washers and connectors: shallow divided trays or small open-front bins make each item visible, and the label can sit on the front lip.
- Medium parts and supplies: standard stackable bins with lids, labeled on one end so they can be read when shelved side by side.
- Bulky or light items: large totes or bags on upper shelves, labeled on the side and top.
- Heavy items: sturdy bins or shelves on the lowest level, with a lifting limit marked on the label if multiple people share the space.
- Hazardous materials: keep in original, labeled containers following their instructions. Do not move chemicals, fuel or aerosols into unlabeled bins.
Leave a little free space in each bin so restocking is easy. A bin stuffed to the brim leads to stray items on top of the lid, which then end up in the wrong place.
Barcodes, Spreadsheets and Digital Records
You can run a small stockroom with a clipboard, but as the count rises, a simple digital record helps. A spreadsheet is a good starting point and does not need special software. Use one row per item and one column each for location code, item name, item number, unit, quantity and a reorder note. Sort by location code to produce a pick path, and sort by item name for a search list.
- Barcodes: a printed barcode on the label can encode the location or the item number. A handheld scanner or a phone app reads it, which cuts errors from typing or misreading.
- QR codes: similar to barcodes, they can link to a record or photo. Check that your scanner reads the format you print.
- Free-text search: even without codes, a clear naming standard, for example item type first, then size, then material, keeps searches reliable.
- Backups: store a copy of the spreadsheet off the device, and print the location list for emergencies or power cuts.
Avoid putting quantities on printed labels, since they change daily. Keep the quantity in the record, or use a handwritten tag or a dry-erase strip for a quick count that people can update.
Counting and Auditing Without Shutting Down
Labels tell you where stock should be. Counts tell you whether it is there. A full annual count disrupts work, so many small operations use cycle counting: they count a few bins every week, so that the whole stockroom is covered over a month or a quarter.
- Pick a handful of locations each week, such as one shelf or one rack.
- Count what is in the bins, compare to the record and note the difference.
- Investigate any gap bigger than a small margin. Common causes are mis-shelved items, unrecorded use, or a mislabeled bin.
- Correct the record and, if necessary, the label. Fix the cause and do not simply adjust the number.
- Track fast-moving or high-value items more often than slow-moving, low-cost ones.
Keep the process light. If the audit is hard, people will skip it. A short checklist, a clipboard on a hook and a regular time slot work better than an elaborate system nobody uses.
Safe Access to Shelves and Heavy Stock
Labels should help people reach items safely. Keep the most used and heaviest items between knee and shoulder height, and reserve high shelves for light or rarely needed items. Use a stable step stool or ladder rated for the load, and follow its instructions. Never climb on shelving or bins, and never overload a shelf beyond the maker’s rating. Anchor tall shelving to the wall according to the manufacturer’s instructions, particularly where children, earthquakes or heavy loads are a concern. Keep aisles clear and well lit, and ensure labels at the top of racks are large enough to read from the floor.
Ergonomics matter too. Place labels where they can be read without bending or stretching, and mark any bin that is awkward to lift with a warning or a team-lift note.
Naming Items So People Can Search for Them
A location code finds the bin, but the item name is what a person types or says when they look for something. Inconsistent names are the quiet reason many stockrooms feel disorganized: one person writes machine screw, another writes bolt, and a third writes fastener. Set a naming standard early and apply it to every label and every record.
- Start with the general type, then add the details that distinguish one item from another, such as size, material, finish or color.
- Use the same units everywhere. If you measure in inches in one record, do not use millimeters in another.
- Use the supplier’s part number when it exists, and include it in the record even if it is not on the label.
- Avoid abbreviations unless everyone knows them, and list those that you do use on the one-page key.
- Keep a short list of banned words, such as misc and stuff. If something truly has no name, give it one.
A short naming guide, a page long at most, keeps new people consistent. Review it once a year, and update the labels only where necessary so you do not reprint everything.
Planning Growth and Changing the Scheme
Stockrooms change. New products arrive, old ones disappear, and the room itself may be rearranged or moved. A good scheme survives these changes with little rework. Leave unused numbers in each sequence, such as spare slots on every shelf, and avoid codes that embed meaning that may change, like a supplier’s name or a project number. Codes that describe where a bin is, not what it holds, can stay put while the contents change.
- Add rather than renumber: new racks get new letters, and new shelves get the next number.
- When you must change a code, change the label and the record on the same day, and put a note at the old location for a few weeks.
- Test any larger change on one rack first before rolling it out to the whole room.
- Keep an archive of the old layout, such as a photo or a copy of the old list, in case you need to trace a past record.
Training People and Making the Scheme Stick
A labeling system works only if people use it, so the final step is human. Show new staff or helpers the one-page key, walk them to a few locations, and ask them to find three items using only the labels. Whatever slows them down reveals a weak spot in the scheme. Encourage anyone who finds an error to report it, and make correcting it easy by keeping spare labels, a marker and a printer nearby.
- Return items to the same bin every time, even when in a hurry.
- Report empty or nearly empty bins so they can be reordered.
- Never place an item in a bin with a different label to save time.
- If something does not fit anywhere, tag it and ask, and do not leave it on a random shelf.
Review the scheme with the team every few months. Ask what is hard to find, what often goes in the wrong place, and which labels are unclear. Small improvements made regularly are far better than a big overhaul once a year.
Ready to Buy? Start Here
If this guide helped you decide what to look for, these products are a place to start.

As an Amazon Associate we earn from qualifying purchases. Prices and availability are shown on Amazon.
FAQ
Should the label go on the bin or the shelf?
If the bin holds one item for good, label the bin. If bins are swapped around often, label the shelf location and the bin separately so each can be updated on its own.
How often should I check labels?
Walk the area on a regular schedule that suits your workload, and replace any label that is torn, faded or peeling.
Do I need barcodes?
Only if you scan stock. For a small room, readable text and a tidy list are often enough. If you add barcodes, check that your scanner can read a sample label before printing a full set.
What should I do with an empty bin?
Remove or cover its label and record the location as free. If you leave the label, someone will look for stock that is not there.
How can I train others on the scheme?
Walk a new person through one rack, showing how the code reads, then ask them to find three items on their own. Keep the one-page scheme beside the entrance.
What is the best type of label for storage bins in a garage?
Synthetic or vinyl labels usually hold up best against dust, damp and temperature swings. Paper labels are cheaper but can peel or smear. Clean the surface first, press the label on firmly, and consider a clear cover or holder for bins that are handled often.
How do I label small parts like screws and washers?
Use shallow divided trays or small bins and put a short label on the front lip with the item name and size. A consistent format, such as type, then size, then material, makes scanning faster. Keep quantities in your records, not on the label.
Do I need a label printer for inventory bins?
No, but printed labels are more consistent and easier to read than handwriting, especially across many bins. A simple handheld printer is enough for a small stockroom. If you only have a few bins, a marker and adhesive labels or tape can work.
What is cycle counting in a small stockroom?
It means counting a small portion of the stock on a regular schedule, such as one shelf a week, so the whole room is checked over a month or a quarter. It catches errors early without needing to stop work for a full yearly count.
How should I label hazardous materials in bins?
Keep them in their original labeled containers and follow the product label and safety data instructions. Do not decant them into unmarked bins. Store them in line with local rules, away from heat and incompatible products, and mark the shelf location in your records.
A Step-by-Step Workflow for Labeling a Whole Bin System
Labeling works best when you treat it as one short project with a clear order, rather than a bin here and a bin there whenever you happen to walk past the shelves. Set aside an uninterrupted block of time, bring every bin to a clear work surface if you can, and work through the same sequence for each one. A repeatable sequence matters because consistency is what makes a system readable later: every label in the same place, written the same way, with the same fields in the same order. When one bin is labeled differently from the rest, people stop trusting the labels and start opening lids instead, and the whole system quietly falls apart.
Step one: empty, clean and sort before you write anything
Tip each bin out onto the table and sort the contents into honest piles. This is the moment to remove items that no longer belong there: the broken fitting kept just in case, the leftover parts from a finished job, the duplicates nobody knew existed. Clean the bin and let it dry fully, because adhesive struggles on dusty or damp plastic and a label applied to a dirty surface often lifts at the corners within weeks. Group what remains by how it is actually used, not by how it arrived. Parts that are always picked together belong together, even if they came from different suppliers or different projects.
Step two: decide the label fields before making the first label
Write down the small set of fields every label will carry, and keep that set short. A useful bin label usually needs a plain-language contents name, a location code, and one extra detail such as a size, a variant or a low-stock note. Resist adding more. Every extra field is another thing someone has to maintain, and labels with too many fields tend to be filled in halfway. If an item needs detailed instructions, keep those in your record or manual and let the label simply point to the bin. Decide the wording rules too: singular or plural, full words or abbreviations, and which term wins when two names exist for the same part. Pick one term and use it everywhere, including in your spreadsheet or list, so a search for that term finds the bin.
Step three: make and apply labels in batches
Produce all the labels for one shelf or one zone in a single batch, then apply them in a single pass. Batching keeps handwriting, wording and placement consistent, and it is faster than switching between writing and sticking. Apply each label to the same face of every bin, at the same height, on a flat area away from ribs, curves and handles. Press from the center outward to push air out from underneath, and hold firm pressure for a few seconds rather than giving the label a quick pat. If you use label holders or sleeves instead of adhesive labels, load them in the same pass and check that each card sits flat and fully visible rather than curling inside the sleeve.
Step four: build the location record as you go
While the bins are in front of you, update your record immediately: bin code, contents, quantity if you track it, and anything unusual such as an expiry-sensitive or fragile item. Doing this during the labeling pass takes moments; doing it later from memory invites errors. Take a photo of each finished shelf as well. A shelf photo is a surprisingly powerful backup record, because it shows neighboring bins and relative positions that a list alone does not capture, and it helps a helper find a bin from a picture when a code alone is not clicking.
Step five: walk the system as a stranger would
Finish by testing your own work. Stand back, pick a few items at random from your record, and find each bin using only its label and code, without relying on memory of where you put things. Then reverse the test: pick a few bins and confirm the record matches what is inside. Any hesitation or mismatch is a flaw in the labeling, not in the tester, so fix it now while the supplies are still out. This short audit catches swapped labels, vague names and codes that look alike, which are exactly the problems that cause picking errors later.
Building a Simple Classification and Color System
Once individual bins are labeled, a light layer of classification helps people navigate the whole storage area faster. The idea is simple: group bins into a small number of families, and give each family a consistent visual signal. Color is the most common signal because it can be read from across the room, before any words are legible. Colored label stock, a colored stripe along the top of the label, or colored tape on the bin handle all work. Keep the number of families small enough to remember without a chart, and post the chart anyway near the entrance to the storage area so a new helper can learn the system in one glance.
Pair color with a short code rather than relying on color alone. Codes survive photocopies, photos taken in poor light, and the simple fact that not everyone perceives colors the same way. A practical pattern is a family letter plus a location element plus a bin number, kept short enough to write by hand without mistakes. Whatever pattern you choose, avoid characters that are easily confused when handwritten, and say the code the same way every time so spoken requests match written ones. If two codes look similar on paper, change one of them now; lookalike codes are a standing invitation to grab the wrong bin.
Classification also gives you a natural way to handle growth. When a family outgrows its shelf, the code tells you which bins move together, and the color tells everyone where that family now lives. Add a small note on the shelf edge itself, naming the family that belongs there. Shelf-edge labels are easy to overlook when planning, but they are what stop bins drifting back to the wrong shelf after someone tidies up in a hurry.
Choosing Label Materials for Different Environments
The right label material depends on where the bin lives. A dry, indoor stockroom is forgiving: ordinary paper labels with a clear protective overlay survive well, and removable adhesive is a bonus because bin contents change. A garage or workshop adds dust, temperature swings and the occasional splash, so a more durable synthetic label or a card in a sealed holder tends to outlast plain paper, which can fade, smudge or soften. Cold spaces are harder on adhesives, since many adhesives grip less well when applied to a cold surface; applying labels at room temperature and letting them set before returning bins to the cold helps considerably.
Damp or wash-down areas call for labels that shrug off water rather than absorbing it, and for inks that do not run when wet. Outdoor or sunlit storage adds fading to the list of problems, so a label that looks bold on day one may be pale by the end of a season; holders with replaceable cards make renewal cheap when that happens. In every environment, the surface matters as much as the label: smooth, clean, dry plastic takes adhesive best, while textured, flexible or silicone-like surfaces defeat many labels. For stubborn surfaces, a tied tag, a clipped card or a label applied to a smooth plate fixed to the bin is often more reliable than fighting the texture.
Troubleshooting Labels That Fail
Labels peeling or curling at the edges
Peeling usually traces back to one of three causes: the surface was dusty, greasy or damp at application; the label was applied in the cold and never bonded properly; or the bin flexes at that spot every time it is lifted, working the edge loose. Clean and dry the area, choose a flatter and stiffer spot, round the label corners if you cut your own, and consider a clear overlay strip over the whole label for bins that are handled roughly. If a particular bin material defeats every adhesive you try, switch that bin to a holder or tag instead of repeating a method that has already failed twice.
Handwriting that fades or smudges
Many pens sit on top of glossy label stock instead of soaking in, so the writing smears at the first touch. Test your pen on a spare label, rub it after a minute, and run it under a drip of water if the bins live anywhere damp. A marker made for labeling, or a pencil on matte paper stock, often outlasts a fancy pen. Printed labels avoid the smudge problem but can fade in strong light, so keep a few critical bins double-marked: printed label outside, and a card inside the lid repeating the code and contents as a backup.
Labels that no longer match the contents
This is the most common failure of all, and it is a habit problem rather than a materials problem. It starts when someone swaps bin contents in a hurry and means to update the label later. Build the fix into the routine: keep a small pad and marker at the shelves so a temporary note can be attached on the spot, and make a rule that a bin does not go back on the shelf until its label is truthful. During periodic counts, treat every mismatch as a prompt to correct both the label and the record at the same time, so the two never drift apart again.
Common Mistakes and How to Avoid Them
The first classic mistake is labeling the lid instead of the bin. Lids get swapped, stacked and borrowed, and a labeled lid on the wrong bin is worse than no label at all because it is confidently wrong. Label the body of the bin, and if you also mark the lid, treat that as a bonus rather than the main label. The second mistake is writing descriptions only the writer understands, such as a project nickname or a supplier abbreviation that means nothing to anyone else. Write the name a new helper would search for. The third mistake is mixing units and variants in one bin while the label names only one of them; either split the bin or write the label to admit everything inside, because a label that tells a partial truth sends people hunting elsewhere for stock that was in front of them all along.
A fourth mistake is letting the record and the shelves evolve separately: bins move, families grow, codes get reused informally. Reused codes are especially corrosive, because old paperwork now points at the wrong bin. Retire codes instead of recycling them, and keep a short retired list in your record so nobody resurrects one by accident. Finally, avoid the perfection trap of relabeling everything whenever a small improvement occurs to you. A stable, slightly imperfect system that everyone knows beats a frequently redesigned one that nobody trusts. Change labels when contents, locations or families genuinely change, and leave them alone otherwise.
Final Check Before You Call the Job Done
Run through this short mental checklist at the end of a labeling session. Every bin body carries a label in the standard position, with the agreed fields and wording. Every code on a shelf matches the record, and no code is used twice. Colors and family names match the posted chart. Shelf edges are marked so bins return to the right home. Spares, a marker and temporary tags are stored at the shelves for on-the-spot corrections. One shelf photo per zone is saved with your record. If each of those points holds, the system will survive its first real test, which is a busy day when someone other than you needs to find something quickly.
More Questions About Labeling Inventory Bins
How often should I review and refresh bin labels?
Review labels whenever you do a stock count, and refresh any that are damaged, faded or out of date at that moment rather than scheduling a separate labeling day. A quick visual pass each time you tidy the shelves catches most problems early. In harsh environments, expect to renew labels more often and keep spare stock of the same material so replacements match.
Should every bin have a unique code, even small ones?
Yes, if the bin is part of the system. Unique codes are what let your record, your shelf photos and spoken requests all point at exactly one bin. Small bins of fasteners and fittings are actually where codes help most, because their contents look alike at a glance. The code can be short; it simply has to be one of a kind and written identically everywhere it appears.
What should I do when a bin holds a changing mix of leftovers?
Give it an honest label that says it is a mixed or project-leftovers bin, add the date, and list the main contents on a card inside. Mixed bins are fine as a deliberate, visible category; they cause trouble only when they pretend to be something specific. Review them during counts and empty them into proper homes or out of the system entirely once the project they came from is finished.
Can I label bins I cannot reach easily?
Yes, and those bins need labels most, because nobody wants to climb twice. Put the label on the face that is visible from the floor or the ladder position you actually use, make the code and family color larger than usual, and note the high location in your record. If a bin is both high and rarely used, say so on the shelf-edge label below it so helpers check the record before climbing.
Labeling Bins When More Than One Person Uses the Storage Area
Shared storage adds a social layer to labeling. The system has to make sense to the person who built it, to a colleague who uses it weekly, and to a helper who walks in twice a year. That range of readers is why plain language beats clever shorthand every time. If a label needs a legend to decode it, the label is only half finished; either expand the wording on the label itself or post the legend where the bins are, not in a drawer somewhere else. When you train a new person, walk the shelves with them once and watch where they hesitate. Hesitation points are labeling gaps, and they are far cheaper to fix in that first week than after months of everyone developing private workarounds.
Agree on a small set of house rules and keep them visible. Rules that earn their place include: label goes back on the shelf only when it is truthful; nobody invents a new code on the spot without adding it to the record; damaged labels get flagged the day they are noticed, not at some later date. Keep the supplies for those rules within reach of the shelves themselves, because a rule that requires a trip to another room will be skipped on busy days. A small caddy with spare labels, cards, a marker and tape turns good intentions into a thirty-second task.
Handovers deserve a mention too. When responsibility for a stockroom passes to someone new, the labels and the record are the handover. A system that only works because one person remembers everything is not a system yet. Before a handover, do one full walk-through together, bin by bin, correcting mismatches as you find them, and hand over the shelf photos and the retired-code list along with the record itself. The new keeper should be able to find any item using only the labels on their first solo day; if they cannot, the walk-through found its purpose.
Adapting the system as stock changes
Stockrooms breathe: product lines change, projects end, seasonal items arrive and leave. Build the labeling system so change is cheap. Removable labels or card holders make re-labeling a moment’s work rather than a scraping job, and a modest stock of blank labels in the same format keeps replacements looking identical to originals. When a whole family is discontinued, remove its bins and retire its codes in the same session, and update the posted chart so the colors people see still match the colors that exist. When a new family arrives, give it the next free color and code range rather than squeezing it into a retired one, and add its shelf-edge labels before the first bin is filled, not after. Systems that absorb change gracefully get maintained; systems that punish change get quietly abandoned, and the labels become archaeology instead of information.
Keeping Bin Labels Accurate During Counts and Audits
Labels earn their keep during counts, so treat every count as a labeling audit too. Work shelf by shelf, reading each label against the bin in front of you rather than against your expectations, and correct mismatches in the moment with the supplies you brought for that purpose. Bring spares and a marker on the count itself; a mismatch noted for later is a mismatch that survives. When a count reveals a bin whose contents have quietly changed character, perhaps a parts bin that has become a general overflow, relabel it honestly for what it now is and update the record, rather than forcing the old name to stretch. Systems stay truthful when the label follows the contents, never the other way round.
Finish an audit by checking the small things that predict future confusion: labels applied in a different position by a well-meaning helper, a color used for two families, a handwritten amendment squeezed onto a printed label. Standardize what you find, note any pattern in your record, and the next audit gets shorter. Accuracy compounds in both directions, and the whole point of the system is to keep it compounding the right way.
The Short Version
Use a short location code, put only stable details on the label, and place it in the same spot on every bin. Keep quantities in your records and replace worn labels promptly. Check the scheme against the shelves often, so the labels stay true.

