Disclosure: As an Amazon Associate, reviewstook.com earns from qualifying purchases. Links to Amazon on this page are affiliate links; they cost you nothing extra.
Thermal paste is the least glamorous part of a PC and one of the most argued about. Forums debate the best spreading method, the best brand and the perfect amount, while the tube itself is a small, cheap item that most people only touch once or twice in the life of a computer. Understanding what it does makes the debates easier to ignore, because the truth is simple: the paste fills microscopic gaps, and a thin, even layer works better than a thick one.
This guide explains what thermal paste does, the different types and their trade-offs, how much to use, how to apply it, how to remove old paste, when to replace it, and when you should leave it alone. It also covers thermal pads and liquid metal. It is based on general PC cooling knowledge rather than testing of specific products, so follow the instructions for your own cooler and check the warranty terms for any part you open.
Last updated: November 1, 2026.
What Thermal Paste Does
A processor produces heat, and a cooler removes it. The metal lid on top of the processor and the metal base of the cooler look flat, but at a microscopic level both surfaces have tiny bumps and valleys. If you press them together with nothing between them, small pockets of air stay trapped, and air is a poor conductor of heat.
Thermal paste fills those gaps with a material that conducts heat much better than air. It does not carry heat on its own as well as bare metal, which is why the layer must be thin. Its job is to make contact between two imperfect surfaces. The cooler’s pressure, flatness and contact quality still matter as much as the paste.
Because paste fills gaps rather than adding cooling, the difference between a decent paste and an expensive one is usually small, often a few degrees Celsius. A wrong amount or a badly mounted cooler can cost far more than a cheap paste.
In this guide
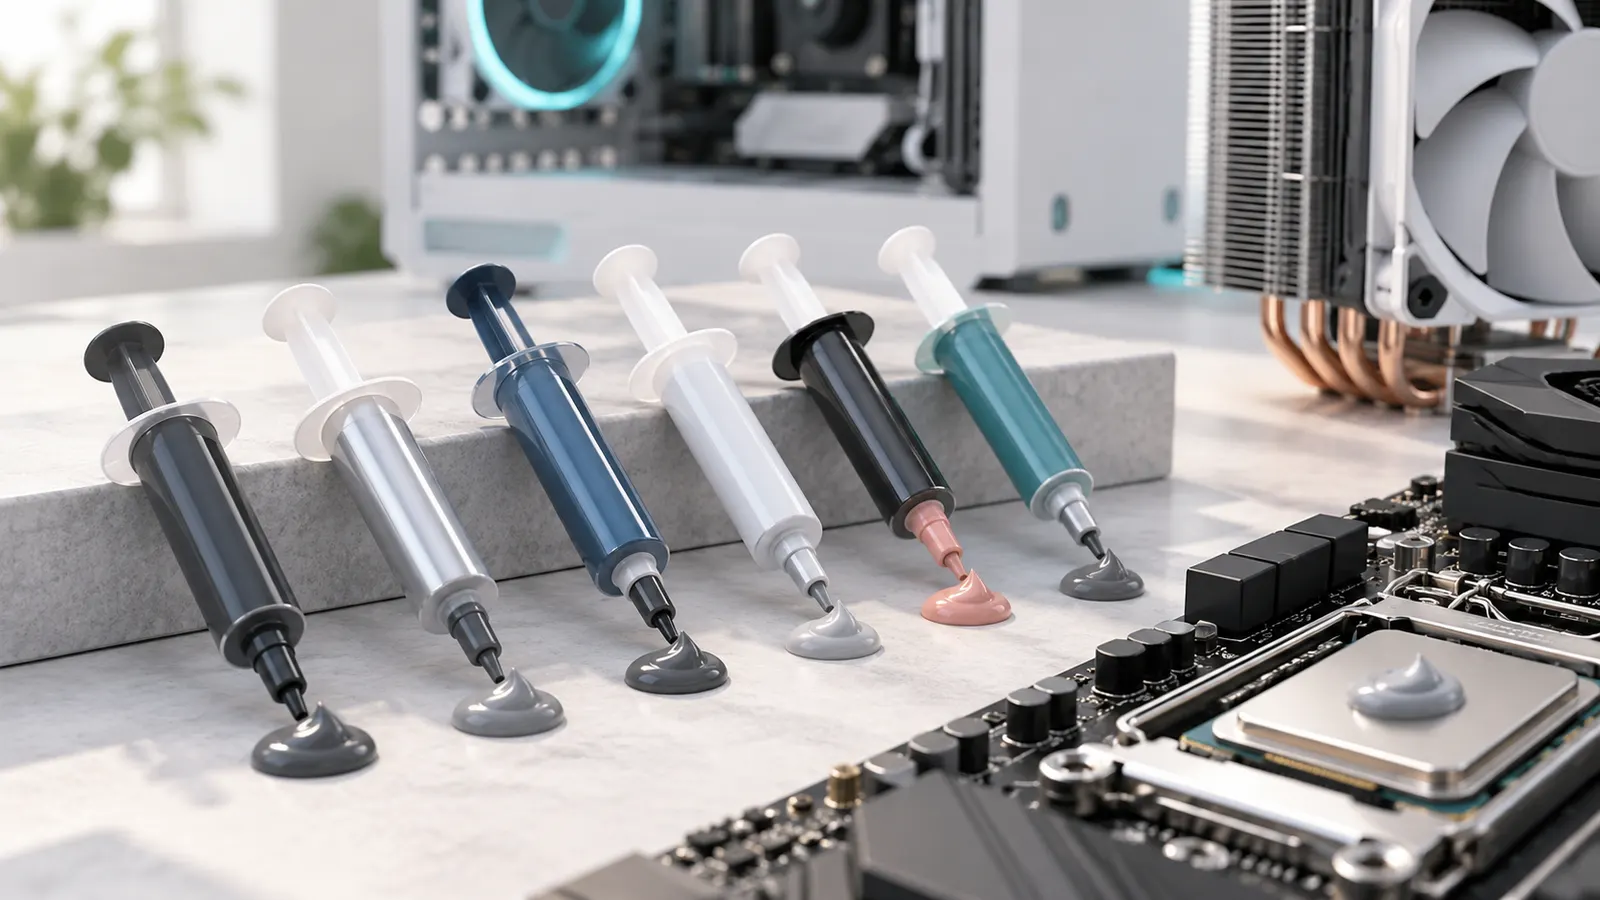
Types of Thermal Compound
| Type | Conductivity | Electrical risk | Ease of use | Best for |
|---|---|---|---|---|
| Silicone-based (basic) | Lower | Low | Easy | Budget builds, stock coolers |
| Ceramic or metal-oxide paste | Moderate to good | Low (non-conductive) | Easy | Most gaming PCs |
| Carbon or diamond-based paste | Good | Low to moderate; check the label | Easy to moderate | Enthusiast air or liquid coolers |
| Metal-based paste (silver, etc.) | Good | Can be slightly conductive | Moderate | Experienced users |
| Liquid metal | Very high | Electrically conductive | Difficult | Advanced users only |
Non-conductive pastes
For most people, a non-conductive paste is the safest choice. If a tiny amount spills onto the motherboard, it will not short the circuits. It is forgiving and works well with every cooler type.
Metal-containing pastes
Some pastes include metal particles to improve conductivity. They can be slightly electrically conductive, so you need to avoid getting them on the contacts around the processor. Read the label.
Liquid metal
Liquid metal has very high thermal conductivity, but it is electrically conductive and can damage components if it spills. It also reacts with aluminum, which can ruin an aluminum cooler base or heat spreader. It is an advanced option and not recommended for beginners. Many laptop and processor makers use it in specific designs, with special protection. Do not use it unless you understand the risks and your cooler is compatible.
Thermal Paste vs Thermal Pads
Pads are soft, solid sheets that fill larger gaps than paste can. They are used on graphics card memory chips, voltage regulators and M.2 SSD heatsinks.
- Paste: for thin gaps between flat metal surfaces, such as a processor and cooler.
- Pads: for larger or uneven gaps, with a specific thickness for the job.
Pad thickness matters. A pad that is too thick can lift the cooler and hurt contact, and one that is too thin leaves gaps. Replace pads with the same thickness the maker specified. Do not use paste where a pad belongs.
Do You Need to Apply Thermal Paste?
Often you do not.
- New CPU coolers. Many coolers come with paste already applied to the base, or a small tube. If pre-applied, you can usually install it as it is.
- Stock coolers. The cooler that comes with a processor often has a patch of thermal compound on it.
- Existing PCs. If your PC temperatures are fine, there is no need to replace the paste.
You need to apply paste when you install a cooler that has none, when you remove and reinstall a cooler, or when replacing old paste.
When to Replace Thermal Paste
Paste does not last forever. It can dry out or pump out from between the surfaces after many heat cycles. How long it lasts depends on the paste and the usage.
- Typical guidance suggests checking after about three to five years, or sooner for hot-running PCs.
- Replace it if temperatures have risen over time even after cleaning dust and checking fans.
- Replace it when you take the cooler off for any reason.
- Replace it if the original application was clearly uneven, for example if you can see bare metal when the cooler comes off.
Before you replace the paste, check the easier causes first: dust, airflow and fan curves. Our overheating guide shows you the order of checks, and our CPU cooler buying guide explains how coolers differ.
How Much Thermal Paste to Use
The goal is the thinnest layer that fully covers the processor’s heat spreader after the cooler is pressed on. Too little leaves gaps. Too much acts as insulation and can squeeze out the sides.
- Pea-sized dot. About the size of a grain of rice or small pea in the center. A very common method that works well on most processors.
- Line. A thin line down the middle. Common for rectangular processors with long dimensions.
- X or five dots. Used on larger processors to help coverage.
- Spread method. Spreading a thin layer with a spatula or card. This can give full coverage, but risks trapping air bubbles if done carelessly.
For most gaming processors, a pea-sized dot in the center is enough. Large server-style processors with big surfaces need more careful coverage. If you apply too much, wipe it off and start again.
Step-by-Step: Replacing Thermal Paste on a CPU
What you need
- New thermal paste.
- Isopropyl alcohol (90 percent or higher).
- Lint-free cloths or coffee filters.
- Cotton swabs.
- A screwdriver.
- Your cooler’s manual.
Steps
- Shut down and unplug the PC. Switch off the power supply, unplug the cable and discharge static by touching bare metal on the case.
- Remove the cooler. Unplug its fan or pump cable, unscrew or release the mounts evenly, and lift the cooler straight off. If it feels stuck, twist gently to break the seal. Do not yank it, because some processors can come out of the socket with the cooler.
- Clean the processor. Wipe the old paste off the heat spreader with a cloth lightly dampened with isopropyl alcohol. Use cotton swabs for edges. Let it dry.
- Clean the cooler base. Wipe the cooler’s contact surface the same way. Avoid touching it afterward.
- Apply new paste. Place a pea-sized dot on the center of the processor.
- Reinstall the cooler. Lower it straight down, align the mounts, and tighten the screws gradually and evenly in a cross pattern. Do not tilt the cooler or slide it, which smears the paste.
- Plug the fan or pump back in. Make sure it goes to the correct header, because a pump that does not run causes very fast overheating.
- Check and test. Boot the PC, enter the BIOS to check temperatures, then run a game or stress test and compare with earlier readings.
If temperatures are worse than before, remove the cooler and check for even contact. An uneven paste print, or a cooler not tightened evenly, are the usual causes.
Reading the Paste Spread
If you want to check your work, remove the cooler and look at the paste print on the processor and cooler base. You are looking for:
- Even coverage of the heat spreader.
- No bare patches.
- No large air bubbles or voids.
- Only a little overflow at the edges.
A slightly uneven print is not a disaster. The goal is acceptable temperatures. Do not repeat the installation too many times, because each attempt risks damage or a messy result.
Graphics Cards and Laptops
Replacing paste on a graphics card or a laptop is more involved than on a desktop processor.
- Warranty. Opening the cooler on a graphics card may void the warranty on some brands. Check the manufacturer’s policy.
- Pads. Graphics cards also use thermal pads on memory chips. These must be replaced or kept intact when you open the cooler, and replacements need to match the original thickness.
- Screws and cables. Cards have several screws of different lengths and delicate fan and lighting cables. Take photos as you go.
- Laptops. Many laptops need full disassembly. Follow a guide for your model and weigh the benefits. A laptop that is hot because its vents are clogged needs cleaning first. See our laptop cooling pad list for airflow help.
Unless you are experienced, treat graphics card and laptop repasting as an optional project to try after warranty expires, or hand to a technician. If you are fitting a new card, see our graphics card installation guide.
Common Myths
- “More paste means better cooling.” Wrong. A thick layer insulates. Use the minimum that fully covers.
- “You must spread the paste by hand.” Not needed on most processors. Cooler pressure spreads a central dot.
- “The most expensive paste is far better.” The difference between good pastes is often a few degrees, and cooler mounting matters more.
- “Paste needs replacing every year.” Usually not. Several years is more typical.
- “Thermal paste is a fix for any overheating.” It is one possible cause among others, including dust, airflow and fan settings.
- “Conductive pastes are always dangerous.” They need care, but non-conductive types are widely available and safe for beginners.
Common Mistakes
- Leaving the protective plastic film on the cooler base.
- Using too much paste, then wiping out the sides.
- Touching the cooler base or processor surface with fingers.
- Tightening one screw fully before the others, which tilts the cooler.
- Forgetting to plug in the pump or fan.
- Using liquid metal on an aluminum base.
- Using cleaning products that leave residue.
- Reusing old, dried paste.
- Skipping dust cleaning and expecting paste to fix everything.
- Applying paste where a pad is specified.
Ready to Buy? Start Here
If this guide helped you decide what to look for, these products are a place to start.

As an Amazon Associate we earn from qualifying purchases. Prices and availability are shown on Amazon.
A Preparation Checklist Before You Open the Case
Working on a processor cooler is straightforward when you prepare properly. Gather what you need and make a plan before you touch any component, because interrupting the job halfway often leads to mistakes.
- Power the computer off, shut it down fully and unplug it from the wall.
- Press and hold the power button briefly to discharge leftover charge, as the PC maker’s guide suggests.
- Find your cooler’s manual or the maker’s page, which describes the correct way to remove and refit it.
- Have isopropyl alcohol at a high concentration, lint-free wipes or coffee filters, and a clean workspace.
- Have the new compound ready, and check it has not dried out.
- Wear an anti-static strap or touch a grounded metal part of the case before handling parts.
- Take photos of cable positions and screws as you go.
If your computer is a laptop or a prebuilt system with a warranty, check whether opening it affects your coverage. When unsure, contact the maker or a qualified technician.
Application Methods Compared
| Method | How it is done | Notes |
|---|---|---|
| Pea-sized dot | A small dot in the center of the processor | Popular and simple, works for most processors |
| Line or cross | A thin line or an X across the heat spreader | Useful for rectangular or large processors |
| Spread layer | Spread thinly with a clean tool | Takes more care; risk of air bubbles |
| Manufacturer’s pattern | A pattern shown in the cooler manual | Follow it if provided |
The aim is a thin, even layer once the cooler is tightened down. Too much compound can spill over the edges and make a mess, while too little leaves air gaps that hurt cooling. If the cooler maker supplies pre-applied compound, follow their guidance on removal and reuse.
Cleaning Old Compound Properly
Old compound must be removed before applying new. Dampen a lint-free wipe with high-concentration isopropyl alcohol and gently wipe the processor surface and the cooler base. Use a fresh wipe for each pass until the surfaces look clean and bright. Take care not to push compound into the socket or onto surrounding components. Allow the alcohol to evaporate fully before applying new compound.
- Remove the cooler gently, twisting slightly if it sticks.
- Wipe the old compound from the cooler plate.
- Wipe the processor surface, working from one side to the other.
- Check for stray compound in the corners.
- Let everything dry before proceeding.
Keep alcohol away from open flames and from plastic parts that may be damaged by it. Work in a ventilated space.
Mounting the Cooler and Checking Contact
When you refit the cooler, align it carefully and lower it straight down, without sliding it across the surface, which can spread compound unevenly. Tighten screws in a diagonal pattern, a little at a time, as the cooler maker describes, until the cooler is snug. Do not overtighten. Reconnect the fan cable to the correct header on the motherboard, and check that it is not touching the fan blades.
After assembly, power on the system and check temperatures with a monitoring tool. Idle temperatures depend on the room and the cooler, so compare them with your earlier readings. If temperatures are unusually high or the system shuts down, power off and check that the cooler is seated correctly and the fan is spinning.
Common Mistakes to Avoid
- Using too much compound, which can spill and, with some types, cause electrical problems if it contacts components.
- Touching the surfaces with fingers, which leaves oils.
- Forgetting to remove a protective plastic film on a new cooler plate.
- Reusing old compound instead of cleaning and applying fresh.
- Tightening one screw fully before the others, leading to uneven pressure.
- Forgetting to reconnect the fan cable.
When to Reapply and When to Leave It Alone
Compound does not need frequent replacement in most systems. Reapply when you remove the cooler, when temperatures climb for no clear reason after you have checked dust and fans, or after many years of use. If temperatures are fine, there is no need to open the system. Dust is a more common cause of heat problems, so clean fans and heatsinks with compressed air, holding the fan blades still. When unsure, consult the cooler or PC maker’s guidance.
Paste Types Compared
Thermal pastes differ in material and handling. Knowing the main families helps you choose one that fits your skill and your build.
| Type | General character |
|---|---|
| Ceramic or silicone based | Easy to apply and generally non-conductive |
| Metal based | Often better thermal transfer, but may conduct electricity |
| Liquid metal | Aimed at enthusiasts, needs great care and compatible surfaces |
| Pre-applied pad | Comes on some coolers, convenient but single use |
Read the manual from the cooler and the processor maker for what they advise.
Reapplication Checklist
- Power down the PC, unplug it and ground yourself before touching parts.
- Remove the cooler gently, twisting slightly if the paste has set.
- Wipe old paste from the chip and cooler with a lint-free cloth and isopropyl alcohol.
- Apply a small amount in the pattern the paste maker suggests.
- Reseat the cooler evenly, tightening screws in the order described in the manual.
- Check temperatures in your monitoring software after the first boot.
Avoid getting paste on the motherboard pins or sockets. If you are uncomfortable opening your PC, a qualified technician can help.
Common Mistakes With Thermal Paste
- Using far too much paste so it squeezes out the sides.
- Touching the paste or the chip surface with bare fingers.
- Leaving plastic film on the cooler base.
- Tightening one screw fully before the others.
- Reusing old paste instead of cleaning and applying fresh.
Read the guidance from the processor and cooler makers, and keep a few lint-free wipes on hand.
Write down the date and the paste type you used, and keep the note near the PC, so the next time you open the case you know what to expect and what to clean.
Application Judgement: Reading Your Own Situation
The step-by-step in this guide tells you how to replace paste. This section is about the judgement calls around those steps: deciding whether your machine needs the job at all, choosing between the methods already compared, and reading the evidence your own cooler leaves behind. Thermal paste work rewards restraint. It is inexpensive and satisfying, but it is also a job where opening a healthy system out of curiosity can create the very problem you were hoping to prevent.
Deciding whether temperatures are actually a paste problem
Before blaming paste, rule out the simpler citizens of the overheating world. Dust-choked filters and heatsink fins, a fan curve that has been set to near-silence, a case that has migrated into a cupboard, a room that is simply hotter than it was in winter, and a workload that changed, all raise temperatures with perfectly good paste underneath. Clean the dust, check that every fan spins, and observe temperatures under a repeatable load before scheduling surgery. Paste becomes the prime suspect when temperatures have crept upward over a long period on an older installation, when a cooler has been removed and refitted, which breaks the original bond and always calls for fresh compound, or when the paste’s age and history are simply unknown on a second-hand machine.
Record a baseline before you begin: idle and load temperatures, the workload you used, and the room conditions as best you can describe them. Without a baseline, the after temperatures are just numbers with no story, and you will never know whether your careful work bought a real improvement or merely a different afternoon. Repeat the identical workload afterwards, in similar conditions, and compare like with like.
Choosing an application method for your cooler
The guide compares application methods; the practical choice depends on the shape of what you are cooling and the mounting pressure of your cooler. A single central amount suits most ordinary desktop processors because the cooler’s pressure spreads it, and the virtue of the method is its forgiveness for beginners. Larger heat spreaders and direct-contact surfaces reward a little more thought about coverage, and the spread evidence you read afterwards, covered in the guide’s section on reading the paste spread, is your feedback loop. Whatever method you choose, choose it deliberately, apply a modest amount as the guide directs, and resist the urge to help the cooler by smearing compound everywhere with a card unless the compound maker instructs it; uneven manual spreading traps air and defeats its own purpose.
If you lift the cooler to peek at the spread, the experiment is over: that compound is spent, and the correct move is to clean and start again with fresh paste rather than pressing disturbed compound back into service. Build this into your planning. Have enough compound, cleaning material and time for a second attempt before you make the first one, so that curiosity never pressures you into reusing a broken bond.
Cleaning and Mounting: Where Good Jobs Are Won
Cleaning old compound properly, as the guide’s dedicated section explains, is slow, gentle work. Use the materials the guide recommends, work patiently at softened residue, and keep liquid away from sockets, pins and board components. The goal is a clean, dry surface, not a polished one, and certainly not a scratched one; never scrape with metal tools. Inspect both surfaces once clean. Old paste hiding in the texture around the edges will contaminate your reading of the new spread, and a fibre left behind by a cheap cloth becomes part of the interface you were trying to perfect.
Mounting the cooler is the other half of the interface. Follow the guide’s mounting guidance: engage fasteners gradually and evenly, in the alternating pattern the cooler maker specifies, so pressure builds symmetrically. A cooler tightened fully on one side first can tilt, squeezing compound away from one edge and leaving the opposite edge starved, a fault that hides under a tidy-looking installation and shows itself only as a stubborn hot spot. If your cooler uses a backplate or retention frame, confirm it is seated flat before the final tightening, and never continue turning a screw that suddenly resists in a way its siblings did not.
Reconnect everything you disconnected with the same checklist discipline you used to remove it: fan headers above all, because a perfect paste job under a cooler whose fan never spins is an elegant failure. Before closing the case, power the system briefly and confirm fan behaviour and a sane idle temperature. It is far better to discover a forgotten header now than after cable management has been perfected.
Graphics Cards, Laptops and the Virtue of Restraint
The guide’s section on graphics cards and laptops deserves emphasis because enthusiasm travels badly between machine types. A graphics card can benefit from fresh compound when it is older and its temperatures have genuinely deteriorated, but opening one is a more involved job than a CPU cooler swap, with thermal pads of specific thicknesses that must be preserved or replaced like-for-like, and warranty implications that vary by maker and region. Photograph every stage, keep every pad and screw organised by location, and do not begin unless the temperature evidence justifies it and you accept the risk as the owner of the card.
Laptops raise the stakes further. They are compact, their cooling assemblies are shared and fiddly, and many use compounds and pads chosen for that exact chassis. The common myths section of this guide exists partly for this audience: most laptops do not need routine repasting, and a laptop running warm under load is often behaving as its designers expected. Clean its vents and fans first, elevate it, check its workload, and treat repasting as a considered last step for an older machine with clearly deteriorated temperatures, ideally performed or supervised by someone who has opened that model before.
Liquid metal belongs in this restraint conversation too. The guide’s FAQ gives the balanced answer: lower temperatures are possible, the risks are real, including electrical conductivity and incompatibility with aluminium, and it is for experienced users only. For the overwhelming majority of owners, a quality conventional compound, applied modestly to clean surfaces under an evenly mounted cooler, captures nearly all of the benefit with almost none of the jeopardy. Chasing the last degree is a hobby; a cool, stable, quiet machine is the goal.
A Sensible Reapplication Rhythm and Final Checklist
Replace paste on evidence, not on a calendar. The guide’s guidance on when to replace points the way: after any cooler removal, when load temperatures have crept up over time despite clean fans and clear airflow, or when an ageing installation of unknown history comes into your care. A well-applied quality compound under an undisturbed cooler commonly serves for years, and every unnecessary removal is a fresh chance to bend, drop, contaminate or mis-mount something. Let your recorded baselines make this decision; a small temperature log, even a few dated notes after demanding sessions, turns a vague feeling that the PC seems hotter into a decision you can defend.
Store your compound capped, in a cool place, as the guide directs, and discard tubes that have hardened or separated rather than gambling an afternoon’s work on tired material. Keep your cleaning supplies with the compound, so the kit is complete when the day comes. Note the date of each application somewhere durable, in the PC’s own records or on a label inside the case, because future troubleshooting always asks when the paste was last done and memory always lies about it.
Run the final checklist before you call the job finished. Surfaces were cleaned fully and dried. The amount was modest and appropriate to the method chosen. The cooler was mounted evenly and its fan reconnected. Nothing was left inside the case that does not belong there. Idle temperatures are sane, load temperatures were tested with the same workload as the baseline, and the results were written down. If all of that is true, close the case and leave the machine alone to do its work. Thermal paste is the quietest component in a computer; when you stop thinking about it entirely, you have applied it correctly.
Seasons, Workloads and Reading Temperature Changes Honestly
Temperatures are a conversation between your computer and its environment, and owners who forget the environment misread the conversation. A machine that runs warmer in a summer heatwave than it did during a winter benchmark has not necessarily developed a fault; the room changed, so the numbers changed. Equally, a new game, a rendering hobby, a second monitor’s worth of background tasks or a move from a desk to a carpeted floor can raise load or strangle airflow without the paste changing at all. This is why the guide insists on comparable baselines: same workload, similar room conditions, honest notes. Compare your machine with its own past, not with a stranger’s numbers from a colder room and a different cooler.
Workload shape matters too. Short bursts that spike and fall are normal behaviour for modern processors, which boost eagerly and settle quickly; sustained loads, long gaming sessions, extended renders or compiles, are the true test of an interface and a cooler working together. Judge your paste job by sustained behaviour and by whether temperatures level off, as the guide’s testing guidance describes, rather than by the highest fleeting number a monitoring tool flashes at you during a menu screen.
Myths Revisited: What Experienced Builders Actually Believe
The guide’s myths section covers the classics; experience adds a few more. More paste is safer. It is not; excess compound squeezes out, makes a mess, and adds nothing, because the interface wants the thinnest complete film, not a reservoir. A premium compound rescues a bad mount. It cannot; mounting pressure and surface contact dominate, and an expensive paste under a tilted cooler loses to a modest paste under a square one. Every machine needs repasting on a schedule. Evidence-based replacement, after cooler removals or genuine long-term deterioration, serves machines better than calendar-based surgery. Spreading by hand guarantees coverage. Pressure spreads compound more evenly than a nervous hand with a plastic card, which usually introduces air and lint. If some cooling is good, exotic cooling is better. The restraint discussion earlier gives the answer: conventional compound, correctly applied, is the sweet spot for almost everyone.
Hold those beliefs and the rest of this guide becomes simple to apply: clean surfaces, modest amount, even mount, honest testing, written records. Thermal paste rewards the methodical and quietly punishes the theatrical, which is why the best paste jobs are the ones nobody ever talks about again.
Share your baseline notes with anyone else who maintains the machine, and keep them with the compound and cleaning supplies so the next application starts from evidence rather than folklore. Temperatures drift for many reasons across a computer’s life, and a household that records what normal looked like, on a known workload, in a known season, will never waste an afternoon repasting a healthy machine or ignoring a genuinely tired one.
Tools, Materials and Workspace: Setting Up Like You Mean It
The guide lists what the job needs; this section is about arranging it so the work stays calm. Lay out everything before the first screw turns: the compound, the cleaning materials the guide recommends, lint-free cloths, good light, and a small container for screws that will otherwise migrate across the desk. Work on a clean, dry surface with room to set the cooler down safely, because a cooler balanced on a cable while you reach for a cloth is how fins get bent and compound gets everywhere except the processor. Keep drinks away from the open machine, keep pets and small children out of the room for the duration, and give yourself an unhurried block of time. Paste work is measured in minutes, but the minutes punish interruption.
Photograph before you disconnect. The fan headers, the cooler orientation, the cable routes: a phone photograph taken now is a free manual written specifically for your machine, and it resolves the one moment of doubt that visits every reassembly. Note which screws came from which holes if your cooler uses different lengths, because retention hardware that looks identical at a glance often is not. These are humble habits, and they are the entire difference between a tidy twenty-minute job and an afternoon of archaeology.
A Final Self-Check You Can Teach Someone Else
If you can explain your paste job, you probably did it well. The explanation runs like this. I confirmed the machine actually needed the work, with a recorded baseline and the simpler causes ruled out. I cleaned both surfaces fully and gently, and inspected them. I chose a method deliberately, used a modest amount, and did not disturb the bond to peek. I mounted the cooler evenly, in the maker’s pattern, and reconnected its fan before anything else. I tested idle and sustained load against the same workload as the baseline, wrote the results down with the date, and stored the compound properly for next time, which, if the evidence stays kind, will not be soon.
Teach that sequence to anyone in the household who maintains a machine, and the family’s computers acquire something more valuable than fresh compound: a shared standard of care. Machines looked after this way run cooler, quieter and longer, and their owners stop fearing the inside of the case. That confidence, earned one careful job at a time, is the real subject of this guide.
The Second Machine: Laptops, Family PCs and Hand-Me-Downs
Most households maintain more than one computer, and paste judgement should travel between them with adjustments. The family desktop that browses and prints may run for a decade without its temperatures ever justifying an opening, and the correct maintenance for it is dust, airflow and indifference. The hand-me-down gaming PC passed to a younger relative is the opposite case: unknown history, an ageing installation, fans that have earned their dust, and a new owner who will push it harder than it has been pushed in years. There, a careful inspection, a recorded baseline and, if the evidence supports it, fresh compound applied by the method in this guide is a genuinely kind piece of preventive care, best done together so the new owner learns the machine as it is serviced.
Shared machines also teach the documentation habit better than any lecture. A note inside the case or in the household records, giving the date of the last application, the compound used in general terms, and the baseline temperatures observed, turns the next maintainer’s guesswork into reading. Machines outlive memories and sometimes owners; the note is how a well-kept computer stays well kept.
Knowing When to Stop: The Last Skill in the Guide
Every practical guide should teach its reader when not to act, and this one is no exception. Do not repaste a machine under a warranty arrangement you have not read. Do not repaste on the strength of one alarming number from one hot afternoon. Do not repaste because a forum thread made it sound like a rite of passage, and do not open a graphics card or a laptop for the first time on the only machine you depend on for work tomorrow. Each of those is a case where the skilled move is restraint, observation and, where needed, professional help.
Act instead when the evidence lines up: a cooler coming off anyway, temperatures that have crept across seasons on comparable workloads, an old installation of unknown history, and a calm hour with the right materials laid out. Judged that way, thermal paste stops being a source of anxiety or folklore and becomes what it should be, a small, well-understood maintenance task that you perform rarely, perform properly, and then forget about for years at a time.
Pass the habit on in miniature: the next time someone in the house complains that a computer sounds louder or feels hotter than it used to, walk them through the order this guide teaches, environment first, dust second, workload third, evidence last, and compound only when the evidence earns it. A household that diagnoses in that order will open fewer machines, fix more problems, and understand the ones it does open. That understanding, repeated calmly across years and machines, is worth more than any single tube of compound, however carefully it was applied.
There is a quiet satisfaction available at the end of a job like this that has nothing to do with a temperature graph. It is the knowledge that a machine you depend on has been opened carefully, understood a little better, serviced on evidence and closed up cleanly by your own hands. Computers reward that kind of ownership for years, in stability, in quiet and in the absence of small mysteries. Aim for that feeling every time, and the numbers will usually follow it.
Keep this guide bookmarked for the day the evidence finally does line up, because that day tends to arrive without warning, mid-upgrade, with a cooler already in your hand. Having the sequence, the checklists and the cautions in one place, written for your kind of machine, turns an interruption into a procedure. That is all good maintenance ever is.
Frequently Asked Questions
How often should I replace thermal paste?
Typically every few years or when temperatures rise despite a clean PC. If your temperatures are fine, there is no need to replace it.
How much thermal paste should I use?
A pea-sized dot in the center of most gaming processors is enough. The cooler’s pressure spreads it.
Is expensive thermal paste worth it?
Often only slightly. Good mid-range pastes perform close to premium ones. A correct amount and a properly mounted cooler matter more.
Can I use toothpaste or other household products?
No. Use paste made for processors. Household products are not designed for heat transfer or long-term stability.
Do I need to apply paste on a new cooler?
Not if it comes with paste pre-applied. Read the cooler’s manual. If the base has a patch of compound, do not add more.
What if I used too much paste?
Remove the cooler, wipe the old paste off with alcohol and cloth, and apply a smaller amount.
Is liquid metal worth it?
It gives lower temperatures but carries risks, including electrical conductivity and incompatibility with aluminum. It is for experienced users only.
Can thermal paste go bad?
It can dry out in the tube over time. Store tubes capped and in a cool place, and discard paste that looks hard or separated.
Bottom Line
Thermal paste fills tiny gaps between the processor and cooler, and the key is a thin, even layer. Use a non-conductive paste if you are unsure, apply a pea-sized dot in the center, mount the cooler flat with even pressure and make sure its fan or pump is plugged in. Replace paste every few years or when you remove the cooler, but check dust, airflow and fan curves first. Leave graphics card and laptop repasting for experienced hands, and avoid liquid metal unless you know the risks.
Related Reading
- Gaming PC Overheating: Causes and Step-by-Step Fix
- CPU Cooler Buying Guide: Air vs Liquid, Size and Noise
- Best CPU Air Coolers
- Best PC Case Fans
- How to Install a Graphics Card
- Best Laptop Cooling Pads
- All PC Components guides